
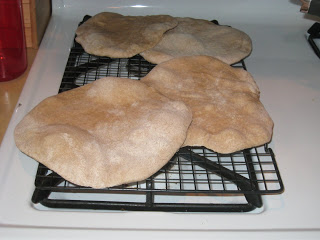
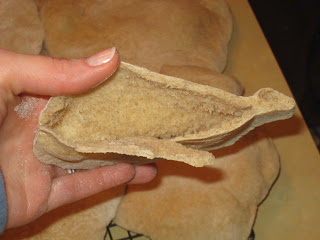
I can now cross one more bread experiment off my list…pita bread! I’ve wanted to make it for a while. But it seemed like such a tough thing to make. Would it really work? How does that pocket get in there? And what recipe to try? I’ve looked at so many. I did one more search yesterday morning and found a recipe on The Fresh Loaf that looked fairly simple. And I decided to just go for it. And you know what? It worked!!! It really worked! I can’t believe that I made good pita bread…on the first try! I am super excited. I made the dough right before Rebecca went down for her nap so it could rise while she was sleeping and then we could finish it after she got up. So my dough rose for quite a while…probably close to 3 hours. The longer the better 🙂 This was actually really simple to make. And it tastes awesome! When they were done I broke one open…and it had a nice big pocket! I tore off a couple chunks for us to try. Then Rebecca grabbed an entire half and proceeded to eat the whole thing 🙂 She LOVES fresh bread. She actually loves it before it’s even baked 😛 She likes to eat the dough or even the flour while we’re baking. She’s a baker in the making for sure. No complaints from her with our baking projects so far this month 🙂 Anyway, this was really easy and so good. I had planned to use the pita bread for our dinner tonight, but I just couldn’t pass up fresh pita bread. So I swapped meal plans for Sun. and Mon. (see update in my weekly menu). I had also cooked dried chickpeas just in time to make fresh hummus…literally…I drained the water and put the chickpeas right in the processor to make the hummus about 20 min. before dinner. I served it with avocado, cucumber and spinach.
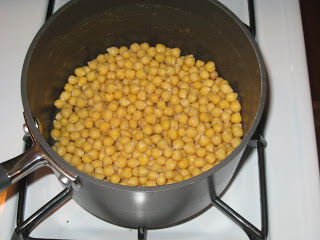
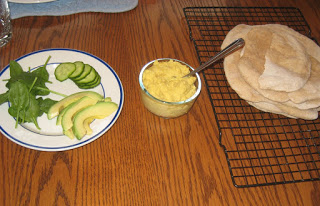
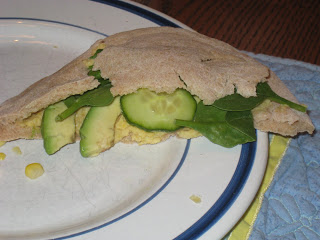
It doesn’t get more fresh and homemade than that. Pita right out of the oven and fresh hummus made with organic chickpeas right out of the pan. It was soooo good. Rebecca ate a huge pile of the chickpeas (she could eat beans at every meal:) and even more pita. She almost ate a whole one herself!
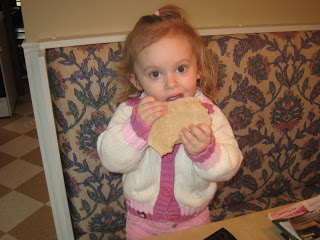

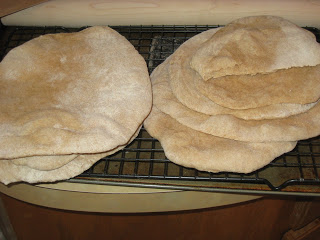
I will definitely be making our pita from scratch now. This made 8, so I have 5 in the freezer for future use. Yea pita bread!!! And I think I’m starting to get the hang of bread making. The real trick for me has been figuring out the correct dough consistency. I’m learning that in the past my dough was way too dry. I know now to err on the side of being too moist. I’m getting excited to keep trying more bread now that I’m getting better at it 🙂 And this experiment and meal was a great way to wind down my 30th birthday 🙂 I felt pretty good about what I accomplished.
Homemade Whole Wheat Pita Bread
3 cups flour (you can use any combo of white and whole wheat…I used 2 cups bread flour and 1 cup whole wheat flour)
1 1/2 tsp. salt
1 Tbsp. sugar or honey
1 packet instant (bread machine) yeast (or, if from bulk, 2 tsp. yeast) (you can use active dry yeast but then you have to activate it first with water/sugar…then adjust the water amount you add later in the recipe)
1 1/4 to 1 1/2 cups water, roughly at room temperature
2 Tbsp. olive oil, vegetable oil, butter, or shortening (I used EVOO)
Mix the yeast in with the flour, salt, and sugar. Add the olive oil and 1 1/4 cup water and stir together with a wooden spoon. All of the ingredients should form a ball. If some of the flour will not stick to the ball, add more water (I mixed all of this in my stand mixer bowl).
Once all of the ingredients form a ball, place the ball on a work surface, such as a cutting board, and knead the dough for approximately 10 minutes (or until your hands get tired). If you are using an electric mixer, mix it at low speed for 10 minutes (I used my mixer).
(The purpose of kneading is to thoroughly combine the ingredients and to break down the flour so that the dough will become stretchy and elastic and rise well in the oven. A simple hand kneading technique is to firmly press down on the dough with the palm of your hand, fold the dough in half toward you like you are closing an envelope, rotate the dough 90 degrees and then repeat these steps, but whatever technique you are comfortable using should work.)
When you are done kneading the dough, place it in a bowl that has been lightly coated with oil. Form a ball out of the dough and place it into the bowl, rolling the ball of dough around in the bowl so that it has a light coat of oil on all sides. Cover the bowl with plastic wrap or a damp kitchen towel and set aside to rise until it has doubled in size, approximately 90 minutes.
When it has doubled in size, punch the dough down to release some of the trapped gases and divide it into 8 pieces. Roll each piece into a ball, place on a baking sheet, cover the balls with a damp kitchen towel, and let them rest for 20 minutes. This step allows the dough to relax so that it’ll be easier to shape.
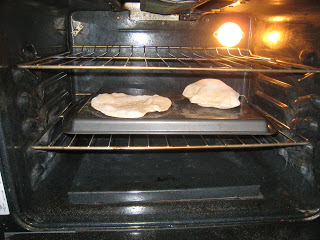
While the dough is resting, preheat the oven to 400 degrees. If you have a baking stone, put it in the oven to preheat as well. If you do not have a baking stone, turn a cookie sheet upside down and place it on the middle rack of the oven while you are preheating the oven (I used a baking sheet). This will be the surface on which you bake your pitas.
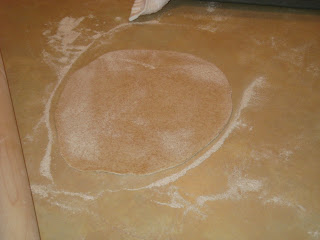
After the dough has relaxed for 20 minutes, spread a light coating of flour on a work surface and place one of the balls of dough there. Sprinkle a little bit of flour on top of the dough and use a rolling pin or your hands to stretch and flatten the dough. You should be able to roll it out to between 1/8 and 1/4 inch thick (I think they puff better if they are thinner). If the dough does not stretch sufficiently you can cover it with the damp towel and let it rest 5 to 10 minutes before trying again.
If you have a spray bottle in the kitchen, spray a light mist of water onto your baking surface and close the oven for 30 seconds. Supposedly this step reduces the blistering on the outside of your pitas. I’ve skipped it many times in the past and still been pleased with my breads, so if you don’t have a bottle handy it isn’t a big deal (I did not do this, and it still worked fine). Open the oven and place as many pitas as you can fit on the hot baking surface (I did 2 at a time). They should be baked through and puffy after 3 minutes (mine took about 4 min.). If you want your pitas to be crispy and brown you can bake them for an additional 3 to 5 minutes, but it isn’t necessary. Enjoy your fresh pita! Store in the refrigerator or freezer.
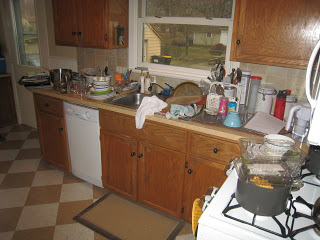
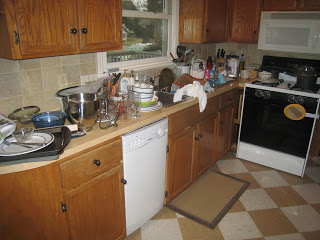
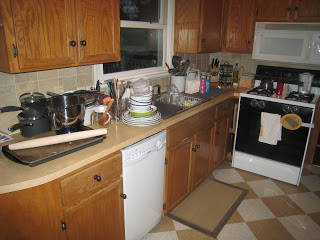
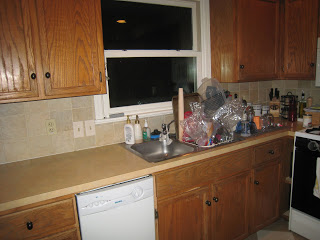
And on a side note. Just wanted to show what a disaster my kitchen is when I’m doing lots of baking without a dishwasher 😛 Not a pretty sight. I can’t wait until we either get ours fixed or get a new one! I hardly have a spot to cook in my kitchen!
Yeah for pita bread!! A friend of mine at work makes homemade pita bread almost weekly and has always said how easy it was. I love pita bread sandwiches, just have never taken the time to make it myself. Maybe I’ll give this recipe a go one of these days.