Home » Kid-friendly Recipes » egg free » Page 2

Category: egg free

Easy Gluten-Free Sourdough Bread | Allergen-Free and Kid-Friendly!

Easy Gluten-Free Sourdough Bread | Great for Kids!

Looking for gluten-free sourdough bread that is allergy-friendly, kid-friendly and easy to make? This is it! Just a few minutes of hands-on time gives you delicious gluten-free sourdough without gums.

Easy Gluten-Free Sourdough Bread | Allergen-Free and Kid-Friendly!

One of my first kitchen experiments when I had just entered the world of real food was sourdough bread. I had some experience with bread-baking. But the idea of sourdough seemed daunting.

Flour and water come to life? You have to feed your food?

That sounded like something to either totally mess up or poison my family with!

But I love a good challenge. So I decided to try it anyway.

What is Sourdough?

The first step of the process was to understand what sourdough is. Sourdough is made by the fermentation of dough using naturally occurring lactobacilli and yeast.

In simpler terms, mixing flour and water creates bacteria and natural yeast that breaks down glucose and phytates in the grains, while providing natural leavening.

Sourdough contains lots of good bacteria that produce enzymes to break down phytic acid and help digestion.

Sourdough bread can also be helpful for anyone with blood sugar issues as the resistant starch helps slow absorption of the carbohydrates.

Does Sourdough Bread Contain Yeast?

Most bread contains a cultivated yeast – baker’s yeast. Sourdough bread, on the other hand, uses a natural yeast. There is no need to add yeast to sourdough bread. The fermentation of the grains provide sufficient leavening.

That being said, when it comes to gluten-free sourdough bread, the natural leavening is often not sufficient. I have baked far too many loaves that rose beautifully, only to sink down while baking.

So I add just a bit of baking powder to maintain the rise.

Easy Gluten-Free Sourdough Bread | Allergen-Free and Kid-Friendly!

How to Make A Gluten-Free Sourdough Starter

Sourdough bread requires a starter. You can buy a starter or find a friend that is willing to share. But it’s actually really easy to make one! As long as you don’t expect to make a loaf of bread the same day.

A lot of gluten-free baking is quite different from baking with wheat. Thankfully making a gluten-free sourdough starter uses the exact same process as it would if you were using wheat or rye. Sometimes you may want to feed a gluten-free starter more frequently to get it bubbling well.Easy Gluten-Free Sourdough Bread | Allergen-Free and Kid-Friendly!

The basic process is combining flour and water until it starts to bubble. This can take anywhere from two days to a week, depending on what grains you use.

  1. Start by mixing equal amounts of water and flour (1/4 – 1/2 cup is good to start). Cover and let sit 12 hours.
  2. Add equal amounts of water and flour again (1/4 cup works well). Cover and let sit 12 hours.
  3. Add equal amounts of water and flour again (1/4 cup). Cover and let sit 24 hours.
  4. Repeat this process until the mixture starts to bubble. That is your starter.
  5. Use some of the starter in a recipe or store it, covered in the fridge.
  6. Any time you use your starter be sure to feed it again.
  7. If you are going to be using your starter, feed it 2-12 hours beforehand to get it good and bubbly and to be sure you have enough for your recipe.

Easy Gluten-Free Sourdough Bread | Allergen-Free and Kid-Friendly!Which Grains Work Best for Gluten-Free Sourdough?

Just about any grain can be used for gluten-free sourdough. Some common grains that are easy to work with are:

  • brown rice
  • teff
  • sorghum
  • buckwheat

Most sourdough starters use only a single grain. You can have multiple starters to utilize a variety of grains.

I use mostly sorghum and brown rice. I use them interchangeably in my one starter.

Easy Gluten-Free Sourdough Bread | Allergen-Free and Kid-Friendly!

Easy Gluten-Free Sourdough Bread

A gluten-free sourdough starter works the same way as the wheat version, but the bread does not. I tried numerous gluten-free sourdough bread recipes that utilized different techniques and grains.

One was a brick. One was goopy. Some just sunk down. We ate a lot of sub-par bread along the way!

In the end I went back to my usual mantra that simple is the best. No gums. No need to combine five different flours.

This simple gluten-free sourdough bread takes about five minutes to mix up. Then it can rise anywhere from 8 – 24 hours.

The dough will not feel like regular bread. It will be sort of fluffy. And you will likely think you totally messed it up. But don’t worry. It will rise up nicely in the oven.

Adding psyllium husk powder to gluten-free sourdough keeps the bread soft (and is why you see a bit of marbling in the bread).

Easy Gluten-Free Sourdough Bread | Allergen-Free and Kid-Friendly!

5 from 1 vote
Print

Easy Gluten-Free Sourdough Bread

Prep Time 10 minutes
Cook Time 1 hour
Servings 12 slices
Author Mary | Just Take A Bite

Ingredients

  • 1 1/2 cups brown rice or sorghum sourdough starter
  • 1 1/2 cups water
  • 2 1/2 Tbsp. psyllium husk powder
  • 1 1/4 cups sorghum flour
  • 1/4 cup white rice flour
  • 2 Tbsp. honey
  • 3 Tbsp. olive oil
  • 1 tsp. salt
  • 1/2 tsp. baking soda
  • 1/2 tsp. baking powder

Instructions

  1. 2-12 hours before making the bread, feed your starter so you have at least 2 cups.

  2. In a large bowl combine the starter and water.

  3. Very gradually whisk in the psyllium husk powder so that it doesn't clump.

  4. Whisk in the honey and oil.

  5. Add the sorghum flour, rice flour, and salt. Mix well. The mixture should be sort of fluffy/clumpy.

  6. Cover and let rise 8-24 hours (the longer it rises, the more sour the bread will be)

  7. When ready to bake, heat the oven to 350 degrees F.

  8. Grease a medium-size loaf pan (4.5 x 8.5 in. / 1.5 qt)

  9. Sprinkle the baking soda and baking powder on top of the risen dough.

  10. Quickly mix in thoroughly (hands work well for this), distributing the soda/powder throughout.

  11. Place the dough in the prepared pan and gently press in.

  12. Bake for 1 hour.

  13. Immediately remove the bread from the pan and allow to cool completely before slicing.

  14. Store in a bag or sealed container at room temp for up to a week or in the freezer for up to a year.

What Does Gluten-Free Sourdough Bread Taste Like?

This version of gluten-free sourdough bread does have a different texture than traditional wheat sourdough. It’s sort of in-between a yeast bread and a sweet bread.

The bread is very soft and can easily be used for sandwiches, grilled cheese, french toast, or whatever else you like to make with bread.

Gluten-free sourdough bread can have a mild flavor or a very sour flavor depending on the rise time. I typically let it rise for about 12 hours, and my kids tell me it’s a bit on the sour side for them. You can add a little more honey or some molasses to keep the flavor mild while still getting a good ferment.

Easy Gluten-Free Sourdough Bread | Allergen-Free and Kid-Friendly!Does Gluten-Free Sourdough Bread Toast Well?

Initially I was disappointed with my gluten-free sourdough bread because it is so soft. As an Analytical Eater, I need crunch in my food. I love very toasted bread.

But I found a solution!

This gluten-free sourdough bread has more moisture than a traditional loaf. So it requires a longer toast time to compensate. I actually prefer to bake an individual slice instead of toasting it. Ten minutes in the toaster oven at 400 degrees F gives that perfect, crispy crust. You know it’s good when you can hear it while you spread butter.

My kids love it toasted with either butter or sunbutter and a little drizzle of raw honey. I like it toasted with butter, sunbutter and some zucchini cheese slices that start to get melty from the heat.

How Long Does Sourdough Bread Last?

Since gluten-free sourdough bread is already fermented, it stays fresh at room temperature for quite a while. It will stay good on the counter (in a bag or container) for about a week.

I don’t think a loaf ever lasts that long for us. Sometimes it’s gone in two days! But if you don’t think you’ll use it all in a week you can freeze it for long-term storage. If you slice the bread before freezing you can take it out one slice at a time as needed.

Is Sourdough Bread High Histamine?

Anything fermented contains histamine. So if you have histamine intolerance, you should use caution with sourdough bread – even if it is gluten-free.

That being said, everyone is different. You need to experiment and see what your body tolerates. I’ve dealt with histamine intolerance for quite some time, but I do fine with gluten-free sourdough bread.

Easy Gluten-Free Sourdough Bread | Allergen-Free and Kid-Friendly!Does Sourdough Bread Contain Gluten?

This might seem like a silly question in a post about gluten-free sourdough bread. But I do want to clarify some misconceptions.

Traditional wheat or rye sourdough does contain gluten. The fermentation process does not remove the gluten.

That being said, many individuals that are sensitive to gluten can tolerate traditional wheat or rye sourdough. Why is that? 

The bacteria in sourdough break down some of the carbohydrates and protein in the grains. This includes breaking down fructan, a carbohydrate found in wheat. Many individuals that are sensitive to gluten are actually sensitive to specific carbohydrates, such as fructan.

My daughters are gluten-free but tolerate wheat sourdough just fine. My sons, on the other hand, have to stick to strict gluten-free. It’s worth experimenting to see what your body tolerates. Making sourdough bread with an ancient wheat variety like Einkorn is another option for many that are sensitive to gluten.

Gluten-Free Sourdough for Kids

Most kids like bread. They like toast, sandwiches, grilled cheese – all of it. So why not make it the healthiest bread possible?

Gluten-free sourdough bread contains healthy bacteria and is easy on those that have digestive complaints. Plus it helps absorb key vitamins and minerals!

Gluten-free sourdough bread is a great addition to a healthy diet for kids!

Are you gluten-free? Have you ever tried gluten-free sourdough?

Looking for an easy, egg-free snack or breakfast? These naturally sweetened gluten-free orange raisin muffins are the perfect hand-held treat that both kid and adults love!

Gluten-Free Egg-Free Orange Raisin Muffins

Looking for an easy, egg-free snack or breakfast? These naturally sweetened gluten-free orange raisin muffins are the perfect hand-held treat that both kid and adults love! Free of eggs, dairy, gluten, and nuts, these muffins are very allergy friendly! Looking for an easy, egg-free snack or breakfast? These naturally sweetened gluten-free orange raisin muffins are the perfect hand-held treat that both kid and adults love!

Not sure if it’s just my kids or a kid thing in general, but my kids LOVE muffins. Really any hand-held, round bread. If I make sourdough bread, they enjoy it. If I make sourdough rolls you’d think I hadn’t fed them in three days the way they eat them.

I guess kids just like to eat with their hands. Which explains why my kids refuse to use utensils no matter what kind of food they are eating.

But muffins are definitely a favorite around here.

Which is why I find myself baking muffins a LOT!

Egg Sensitivity in Babies

A few months ago I had to cut eggs back out of my diet and my toddler’s diet. We were off eggs for about a year (almost since birth) and then reintroduced them. I think eggs are one of the most nutrient-dense foods on the planet. But as much as I love eating the eggs fresh from our hens, they were giving my son a diaper rash. They were also giving me phlegm in my throat on a daily basis.

Eggs seem to be a common sensitivity in babies these days. It’s unfortunate since eggs provide many essential vitamins and minerals.Looking for an easy, egg-free snack or breakfast? These naturally sweetened gluten-free orange raisin muffins are the perfect hand-held treat that both kid and adults love!

Some people can tolerate eggs in baked goods even if they can’t eat plain eggs. But we are generally not that fortunate. If a food is bothersome at all…it has to be cut completely. For some reason it seems to be worse when my kids are very young too.

My five-year-old was egg-free for at least the first two years of life. Now she can eat them every day!Looking for an easy, egg-free snack or breakfast? These naturally sweetened gluten-free orange raisin muffins are the perfect hand-held treat that both kid and adults love!

Egg-Free Muffins

Eliminating eggs from your diet definitely eliminates some food options. This includes not only egg dishes, but many baked goods. Yes, our beloved muffins had eggs!

Thankfully there are some great egg substitutes for baking. My favorite way to bake egg-free is with gelatin.

That is exactly what I do in these allergen-free orange raisin muffins.

Mix the juice of a couple oranges with gelatin. Then add hot water to dissolve. It’s the perfect binder to make egg-free muffins.


Make sure you use high quality gelatin in your baking. We always use Perfect Supplements gelatin. It is the only gelatin that is certified glyphosate free. You can stock up on Perfect Supplements gelatin HERE with the code TAKE10 for 10% off your order.


Baking Without Refined Sugar

An added bonus of these orange muffins is that they contain no refined sweeteners. Maple syrup or honey combined with orange juice provides plenty of flavor and sweetness.

The raisins add a little extra natural sugar as well. Dried cranberries or even mini chocolate chips would work too.

We prefer to top gluten-free orange muffins with a generous pat of butter to help metabolize the carbohydrates. The flavor contrast with the salty butter and sweet orange is another plus.

Looking for an easy, egg-free snack or breakfast? These naturally sweetened gluten-free orange raisin muffins are the perfect hand-held treat that both kid and adults love!Easy Allergen-Free Snack for Kids

Gluten-free orange raisin muffins make a great addition to a quick weekday breakfast, a mid-morning snack, or packed up in a lunch box.

Combine it with a nourishing drink, a bowl of soup made with bone broth, or another form of protein and fat like bacon, sunbutter, or sausage. You really can’t go wrong!

Grab a couple organic oranges, some Perfect Supplements gelatin, and your favorite gluten-free flour blend and whip up a batch of egg-free orange raisin muffins today!

It also helps to have a very cute assistant for quality control. My toddler gave these muffins his seal of approval!Looking for an easy, egg-free snack or breakfast? These naturally sweetened gluten-free orange raisin muffins are the perfect hand-held treat that both kid and adults love!

Gluten-Free Egg-Free Orange Raisin Muffins

A quick allergen-free muffin with no refined sweeteners and a bright orange flavor.

Course Breakfast, Snack
Prep Time 10 minutes
Cook Time 40 minutes
Servings 12
Author Mary | Just Take A Bite

Ingredients

  • 1 cup white rice flour
  • 1/2 cup sorghum flour
  • 1/2 cup amaranth flour
  • 1 tsp. psyllium husk
  • 1/2 tsp. unrefined sea salt
  • 1 tsp. baking soda
  • 1 tsp. baking powder
  • 3/4 cups unsweetened applesauce
  • 2 organic oranges juice (about 1/2 cup) and zest
  • 1/3 cup avocado oil or olive oil
  • 6 Tbsp. maple syrup or honey
  • 3 tsp. gelatin
  • 1/4 cup hot water
  • 1/4 cup raisins, cranberries, or chocolate chips optional

Instructions

  1. Heat oven to 350 degrees F.

  2. Line or grease a 12-cup muffin tin.

  3. In a large bowl combine the flours, psyllium husk, salt, baking soda, baking powder, and orange zest.

  4. Add the applesauce, oil, and maple syrup. Mix well.

  5. In a small bowl combine the gelatin and orange juice (about 1/2 cup). Let sit 1 minute.

  6. Add the hot water to the gelatin mixture and stir until dissolved.

  7. Immediately add to the batter and mix well.

  8. Stir in raisins.

  9. Fill muffin cups 3/4 full.

  10. Bake 35-40 minutes, until golden.

Recipe Notes

This makes 12 large muffins, 16 medium-size muffins, or 24 mini muffins.

Working around egg allergies can be tricky. In this tutorial I'll show you how to bake without eggs by using a simple gelatin egg substitute. Convert your favorite baked good recipes into egg-free versions with a couple little tweaks.

How to Bake Without Eggs | A Simple Gelatin Egg Substitute

Working around egg allergies can be tricky. In this tutorial I’ll show you how to bake without eggs by using a simple gelatin egg substitute. Convert your favorite baked good recipes into egg-free versions with a couple little tweaks. Working around egg allergies can be tricky. In this tutorial I'll show you how to bake without eggs by using a simple gelatin egg substitute.

Gluten-free baking can be tricky. You have to learn what flours go well together. You need to learn the correct ratios of starch to fiber. But once you get the hang of it, you can make some pretty amazing baked goods.

Until you have to eliminate eggs.

Eggs can make or break allergen-free baked goods.

Have you ever seen a recipe that uses coconut flour? It’s usually loaded with eggs.

Many wheat alternatives simply don’t have the ability to bind. And that is where eggs come in. They are the glue that holds gluten and grain-free baked goods together.

What Can Be Used Instead of Eggs in Baking

As a mom of kids with allergies, I’m thankful there are quite a few options for egg replacements in baking. These include:

  • chia seeds
  • flax seeds
  • JUST egg
  • applesauce
  • banana
  • yogurt
  • nut or seed butter
  • psyllium husk
  • gelatin

They all have their place in certain recipes. But commercial egg replacers are usually loaded with unhealthy processed vegetable oils. And sometimes you either don’t have another substitute on hand or your kids are allergic to those as well!

That’s why my go-to egg substitute is gelatin.Working around egg allergies can be tricky. In this tutorial I'll show you how to bake without eggs by using a simple gelatin egg substitute. Convert your favorite baked good recipes into egg-free versions with a couple little tweaks.

How to Replace Eggs with Gelatin

Gelatin is protein. So it is very similar to real eggs in that sense. Gelatin is also easy to have on hand at all times as it doesn’t go bad. No refrigeration needed. No fear of it going rancid.

My general rule of thumb is one to two teaspoons of gelatin replaces one egg.

Simply mix the gelatin with a small amount of cold liquid (water, milk, etc.). Then dissolve it completely with hot water and add to your batter.

It’s really that simple!Working around egg allergies can be tricky. In this tutorial I'll show you how to bake without eggs by using a simple gelatin egg substitute.

Gelatin Egg Substitute

Gelatin isn’t a straight substitute for eggs since eggs contain more than just protein. So I always compensate by adding a little extra fat (oil, butter, etc.) to my recipe when baking egg-free.

That combination of protein and fat works really well in most baked goods.

Sometimes I also add a little psyllium husk for binding. Gelatin, fat, and psyllium husk mimic the properties of an egg very well.

Working around egg allergies can be tricky. In this tutorial I'll show you how to bake without eggs by using a simple gelatin egg substitute. Convert your favorite baked good recipes into egg-free versions with a couple little tweaks.Egg-Free Baked Goods

Most baked goods require you to add the eggs at the beginning of the recipe.

The opposite is true when using a gelatin egg substitute. Adding the gelatin mixture at the end is preferred. This keeps the gelatin from gelling before baking.

Since it can be tricky to get the hang of egg-free baking, it’s best to start with a tested recipe that you can follow. Over time you’ll be able to confidently replace eggs in any of your favorite baked goods.

How to Bake Without Eggs

Here is the breakdown of baking with a gelatin egg substitute.

Gelatin Egg Substitute

Prep Time 2 minutes
Servings 1 egg

Ingredients

  • 1 1/2 tsp. grass-fed gelatin
  • 1/4 cup cold liquid (water, milk, juice, applesauce)
  • 1/4 cup boiling water
  • 1/2 tsp. psyllium husk optional
  • 2 tsp. avocado oil, olive oil, butter, or coconut oil optional

Instructions

  1. Add the psyllium husk and oil into the batter of whatever you're making.

  2. After all other ingredients have been combined, mix the gelatin and cold water/milk/juice.

  3. Let sit 1 minute.

  4. Add the hot water to the gelatin mixture and stir to dissolve.

  5. Immediately add the gelatin mixture to the batter and mix well.

  6. Proceed with the baking instructions of your recipe.

Recipe Notes

The cold water/milk/juice should be some of the liquid already called for in the recipe to avoid too much liquid.

This replaces 1 egg.

Working around egg allergies can be tricky. In this tutorial I'll show you how to bake without eggs by using a simple gelatin egg substitute.
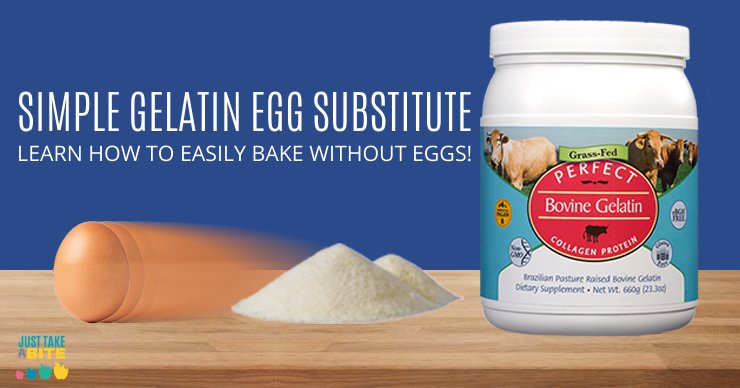
How to Bake Egg-Free Cake

One of the most common needs for egg-free baking is cake. Yes, even kids with egg allergies want cake for their birthdays!

Thankfully gelatin eggs work really well in egg-free cake.

Some of my favorite egg-free cake and muffin recipes include:

And many others are easily adaptable using this gelatin egg substitute!

What Desserts Do Not Contain Eggs?

If you are intimidated by any kind of egg substitute, rest assured there are plenty of delicious desserts that are naturally egg-free.

What is the Best Gelatin?

When it comes to gelatin, there is really only one option in my mind. We always use Perfect Supplements gelatin.

This is the only gelatin in the world that is certified glyphosate free! That is pretty amazing.

Want to know what else is amazing? You can get 10% off Perfect Supplements gelatin or any of their other great products using the code TAKE10.

Stock up on gelatin for egg-free baking HERE.

Ready to start some delicious egg-free baking? Stay tuned! Tomorrow I have an amazing egg-free orange muffin recipe for you. My kids (and I!) devoured them.

Do you struggle with egg-free baking? What is your go-to egg replacement?

How To Turn A Pork Roast Into Ham | Just Take A Bite

How To Turn A Pork Roast Into Ham

Are you looking for a way to serve ham without worrying about nitrates, nitrites and fillers? Make your own! You can easily turn a pork roast into ham in your crockpot.

How To Turn A Pork Roast Into Ham | Just Take A Bite

I love ham. I mean love it.

You can imagine my sadness when my daughter had a reaction to ham while she was still breastfeeding. That meant no ham for her…or me.

How To Turn A Pork Roast Into Ham | Just Take A Bite

Why You Should Avoid Ham

Pork was not the problem.

The problem is whatever is used for smoking/curing. Even something simple like beet sugar caused a reaction.

But aside from allergens, there are the added nitrates and nitrites. This is not a cut and dry issue either. Some say avoid it all. Some say just be careful of quantities, whether naturally-derived or not.

Whatever your reason, sometimes it’s a good idea to avoid cured meats, including ham.

How to Turn Pork into Ham

I avoided my beloved ham for a long time – until I decided to make my own! You can turn a pork roast into ham right in your crockpot (this is my favorite one).

No fancy tools. No strange ingredients.

Really all you need is pork, salt and a sweetener.

I used a rolled pork roast. But any cut will work.

Homemade Ham in the Crockpot

Cut some slits in the pork, put it in the crockpot and add the salt and sugar. Turn the crockpot on and you’re pretty much done.

How To Turn A Pork Roast Into Ham | Just Take A Bite

Your holiday ham really can be that simple. And you don’t have to worry about nitrates or nitrites or whether or not celery powder is better or worse.

To turn a pork roast into ham the important step is using lots of quality unrefined sea salt. Then adjust the sweetness to your liking.

If you want your ham really smokey you can also add a little liquid smoke (be sure to find one without coloring added).

Pork Loin Ham Recipe

As I write this I’m thinking about how tasty our homemade ham was. I might have eaten all of the leftovers myself. Though now I wish some had made it to the freezer so I could enjoy it again.

I guess that means I just need to make another!

Are you thinking about making a Christmas ham?

Save time and money by making it yourself this year! Just put it in the crockpot in the morning and spend your time focusing on delicious side dishes and desserts.

No crockpot? Or you’ve already filled it with something else? You can make ham in the oven too.

How To Turn A Pork Roast Into Ham | Just Take A Bite

Homemade Ham
Turn a pork roast into a delicious ham with a few simple ingredients and a crockpot.
Write a review
Print
Ingredients
  1. 1 pork roast (cut and size of choice)
  2. 2 - 4 tsp. unrefined sea salt (adjust based on size of roast)
  3. 2 Tbsp. - 1/2 cup any combination of sweeteners (honey, maple syrup, organic cane sugar, organic brown cane sugar, molasses; adjust to taste)
Instructions
  1. Using a sharp knife cut slits in the pork roast all over.
  2. Place the pork in the crockpot.
  3. Add salt and flip the roast to make sure there is salt on all sides.
  4. Add the sweetener (start with a smaller amount and add more later if you want it sweeter).
  5. Cover and cook on HIGH for 4 hours, then turn to LOW for 5+ hours.
  6. Flip the roast 2 or 3 times during cooking to make sure all sides get coated with flavoring. You can also baste the roast with the juice in the crockpot, trying to get it into the slits in the meat.
  7. An hour before serving cut the roast into large chunks and coat with the juice in the crockpot.
Notes
  1. You can use a single sweetener like honey or cane sugar. Using a combination of liquid and dry sweeteners gives a good balance of flavor and creates a good "sauce."
  2. To make ham in the oven follow the same directions, baking the pork in a covered dish at 375*F for 2 hours, then turning the heat down to 325*F for 2 hours.
Just Take A Bite https://justtakeabite.com/
This post is linked to Savoring Saturdays.

When it comes to replacing store-bought snacks with homemade it doesn't get much easier than granola bars. These chewy granola bars come together in minutes. The hardest part is waiting for them to bake!

Baked Chewy Granola Bars | Gluten-Free | Nut-Free

When it comes to replacing store-bought snacks with homemade it doesn’t get much easier than granola bars. These baked chewy granola bars come together in minutes. The hardest part is waiting for them to bake!When it comes to replacing store-bought snacks with homemade it doesn't get much easier than granola bars. These chewy granola bars come together in minutes. The hardest part is waiting for them to bake! I always have homemade granola bars on hand in the freezer. They are easy to make and taste great. The only problem is that they don’t hold up well unless they are refrigerated. So they are good at home…but not so good for packing in a diaper bag, putting in a lunch, etc.

Allergen-Free Granola Bars

I decided to experiment a bit and make a new version of chewy granola bars. They are baked, they use sunbutter instead of nut butter, and they have eggs to help hold them together.

These granola bars turned out quite well. They are still chewy, but not as gooey as the no-bake bars. They would hold up well sitting out all day. I wish I had made these before our vacation.When it comes to replacing store-bought snacks with homemade it doesn't get much easier than granola bars. These chewy granola bars come together in minutes. The hardest part is waiting for them to bake!

Homemade Chewy Granola Bars

I have seen recipes for other baked granola bars that don’t use eggs, so if you can’t have eggs you could definitely try these without. Just increase the honey and/or oil.

I’m usually a fan of rolled oats. But when it comes to granola bars quick oats actually hold up much better. Not to mention they are easier to eat for Intuitive Eaters. You can also another flour combined with oats (wheat, rice, etc.)

The other nice thing about these bars is that I was able to use chocolate chips in them…without the chips melting! A very versatile granola bar that holds up well and can be adapted to many special diets. I love them. My kids do too!!

When it comes to replacing store-bought snacks with homemade it doesn't get much easier than granola bars. These chewy granola bars come together in minutes. The hardest part is waiting for them to bake!

Are Granola Bars Healthy?

As much as we like to think that granola bars are a healthy snack option – they usually are not. Especially when it comes to store-bought versions!

Even organic granola bars have some questionable ingredients, like agave, xanthan gum, palm oil, and natural flavors.

Besides the quality of ingredients, store-bought granola bars typically have a lot of sugar and very little protein or healthy fat. Which can lead to blood sugar issues (anybody else have a kid that gets HANGRY very easily?…blood sugar problems).

That’s why I prefer to stick with homemade as often as I can. And since they are so easy to make and freeze so well it’s not too hard! Homemade granola bars have eggs and sunbutter for protein and butter or coconut oil for healthy fat.

Then there is the added bonus that they taste better. My husband is always upset when we are out of homemade granola bars. He likes them so much better than store-bought.

Fun little fact – granola bars a product of the Chemical Revolution. They are derived from military inventions of the 1940’s due to food rationing. Not exactly the place I’d look for a healthy snack.

Gluten-Free Granola Bars

By using gluten-free oats these granola bars are totally gluten-free. Although we don’t have any wheat allergies, we choose to eat gluten-free for other reasons.

You’d be surprised how many packaged granola bars have wheat flour added. Making homemade granola bars is a great way to be sure you are avoiding allergens or reactive foods.

Are granola bars a go-to snack for your kids? Try switching to homemade!

5 from 1 vote
Print

Baked Chewy Granola Bars

Servings 16

Ingredients

  • 4 cups quick oats
  • 1/2 cup honey
  • 1/2 cup butter or coconut oil melted
  • 1/4 cup sunbutter
  • 2 eggs (can be replaced with an extra 1/4 cup of honey and oil)
  • 1 tsp. cinnamon optional
  • 1 cup mix-ins dried coconut, raisins, dried fruit, chopped nuts, chocolate chips, seeds

Instructions

  1. Melt coconut oil and/or butter. Let cool slightly.

  2. Mix oats/flour, honey, oil, nut butter, eggs and cinnamon. The mixture should be quite moist. If it is not add more honey/oil. This is what binds the granola bars, so be sure all of the oats/flour are wet.

  3. Stir in mix-ins.

  4. Pour mixture into a greased or parchment lined 9x13-in. pan.

  5. Bake at 350 for about 20 minutes, until the edges just start to become golden.

  6. Let cool for about 20 minutes.

  7. Cut into bars (they will still be quite soft at this point) in the pan (do not remove).

  8. Allow to cool/solidify completely in the pan for 1-2 hours.

  9. Remove bars from pan and wrap individually. Store in the refrigerator for up to a week or in the freezer for up to a year.

Recipe Notes

You can replace some or all of the quick oats with rolled oats, ground oats, wheat flour, rice flour, buckwheat flour.

When it comes to replacing store-bought snacks with homemade it doesn't get much easier than granola bars. These chewy granola bars come together in minutes. The hardest part is waiting for them to bake!

Soaked Teff Crackers | Just Take A Bite

Soaked Teff Crackers | Healthy Gluten-Free Snacks

Tired of the same old crackers? Try something new with soaked teff crackers. Allergy-friendly, crunchy and salty these crackers are easy to eat for toddlers or strong enough to use for dipping.

Soaked Teff Crackers | Just Take A Bite

Normally when I do any gluten-free baking I use at least two different flours, usually three. I really like this combination.

Gluten-Free Baking with Teff

But when you are on a very limited diet and are trying to rotate starches, that gets tricky. You sometimes have to limit yourself to one grain/starch a day. Most gluten-free flours don’t work well alone (have you ever tried baking with just tapioca…it doesn’t work so well). But there is one that does.

Teff!

Soaked Teff Crackers | Just Take A Bite

What is Teff?

Teff is a very hearty grain that reminds me of wheat or rye. It gives great depth of flavor to baked goods. Sometimes I use it for about a quarter of the flour in my baking.

But other times I use it alone. Like in these soaked teff crackers.

Kid-Friendly Teff Crackers

I started making these crackers for my little one and I so we had something safe to snack on. But soon the whole family wanted them. My son even requested these in place of the crackers I had already made for him.

I like to keep a batch on hand at all times for dipping (hummus is my favorite), eating with soup or for an easy snack on the go.

These teff crackers have a hint of sweetness, so they are like Wheat Thins®. But they don’t have any vegetable oils, gums or fillers. Plus the flour is soaked for better digestion. Teff crackers are the perfect solution to delicious gluten-free snacking. I love to add extra salt on top to really satisfy my craving for a crunchy, salty snack.

Soaked Teff Crackers | Just Take A Bite

Easy Gluten-Free Snack for Kids

What’s even better is how easy they are to make! It takes about one minute to get the flour soaking. Then the next day you’ll have crackers in the oven with about ten minutes of hands-on time.

This is a great project for little hands. Invite your kids into the kitchen (check out this course for help!) and show them how fun and easy it is to make food from scratch.

Double the recipe and store half in the freezer. Snack on some and save some for easy lunch packing. Teff crackers, cheese slices and homemade lunch meat make the perfect homemade Lunchable®.

The next time  you are in the mood for something crunchy make a batch of teff crackers. Just be sure to make it a big batch! They’ll go quickly.

Teff Recipes

One of my other favorite ways to use teff is to make teff porridge. It’s a great alternative to oatmeal!

Some great breakfasts or snacks are my teff and sorghum cherry bars or my teff and rice granola bars. They are both loaded with flavor.

Have you ever baked with teff?

Give it a try with these foolproof soaked teff crackers. The whole family will love them.

Soaked Teff Crackers | Just Take A Bite

Soaked Teff Crackers
Yields 50
A gluten free Wheat Thin style cracker made with teff flour.
Write a review
Print
Ingredients
  1. 2 cups teff flour
  2. 4 Tbsp. extra virgin olive oil (or melted lard, tallow or butter)
  3. 6 Tbsp. warm water
  4. 1 tsp. lemon juice
  5. 1 1/2 tsp. unrefined sea salt
  6. 6 tsp. organic cane sugar
  7. 1/2 tsp. baking soda
  8. 3-6 Tbsp. water
Instructions
  1. Combine the flour, fat, warm water and lemon juice.
  2. Cover and let sit 7-24 hours.
  3. Heat oven to 350*F.
  4. Add the salt, sugar, baking soda and 3 Tbsp. water to the soaked mixture.
  5. Mix and knead dough by hand until a ball forms. Add more water if needed.
  6. Split the dough into three equal parts.
  7. Cut four pieces of parchment paper (the size of a baking sheet).
  8. Place one piece of dough on one piece of parchment paper. Top with another sheet of parchment paper.
  9. Roll the dough between the paper until it is about 1/8" thick.
  10. Remove the top layer of paper.
  11. Cut into desired shapes with a pizza cutter or cookie cutters.
  12. Sprinkle extra salt on top of the dough.
  13. Transfer the parchment paper to a baking sheet.
  14. Repeat with the remaining portions of dough.
  15. Bake the crackers for about 20 minutes, until golden.
  16. Turn off oven. Leave the crackers in the oven for 7-10 minutes, until crisp.
  17. Remove from oven and let cool completely.
  18. Store crackers in an airtight container at room temperature for up to a month or in the freezer for up to a year.
Just Take A Bite https://justtakeabite.com/
 This post is linked to Savoring Saturdays.

Easy Allergen-Free Sweet and Sour Meatballs | GAPS, Grain-free

Easy, Allergen-Free Sweet and Sour Meatballs | GAPS-Legal

Looking for a quick, nutrient-dense meal that your kids will actually eat? These sweet and sour meatballs are free of all major allergens and GAPS-legal. Not to mention they are loaded with broth! They are sure to be a family favorite to add to your weekly meal plans.
 
Easy Allergen-Free Sweet and Sour Meatballs | GAPS, Grain-free
 

When I embarked on the GAPS diet years ago there weren’t that many resources available. Which meant I had to come up with most of my own recipes.

Although I came off the GAPS diet a long time ago, it taught me how to be really creative in the kitchen.

That is how I came up with this easy sweet and sour meatball recipe that has been both a family favorite and reader favorite for years!

Allergen-Free Meatballs

Most meatball recipes include egg. Sometimes they also have bread or breadcrumbs and some type of milk.

Those ingredients do make a delicious meatball. But when you are dealing with allergies, it’s hard to substitute.

So I created meatballs that are not only allergen-free, but can also be nightshade free!Easy Allergen-Free Sweet and Sour Meatballs | GAPS, Grain-free

Easy Gluten-Free Sweet and Sour Sauce 

The real secret about these meatballs is not actually the meatball at all. Instead it’s the sauce!

A combination of broth and honey cook down to a rich and gooey sauce that kids love.

Depending on dietary needs I add ketchup, dijon mustard, and/or a bit of pumpkin to bring it all together.

Healthy Dinner in Less Than 30 Minutes

Taste aside, I love that I can make these meatballs in under 30 minutes. Simply brown, add the sauce ingredients, and simmer until thick.

My kids love sweet and sour meatballs served with buttered gluten-free noodles. Any time I ask my five-year-old what she wants for dinner I get the same answer – meatballs and noodles! Sweet and sour meatballs are also great with rice, mashed potatoes, mashed sweet potatoes, or squash.

If you are in need of an easy, nourishing weeknight dinner that the kids will gobble up, this is it! They’ll get lots of broth without even knowing it. Plus grassfed beef for loads of protein and vitamins. A win all around!

Do you have a go-to easy button dinner? Give these allergen-free sweet and sour meatballs a try.

This post is linked to Fat Tuesday at Real Food Forager.

Easy Allergen-Free Sweet and Sour Meatballs | GAPS, Grain-free

Easy Allergen-Free Sweet and Sour Meatballs

A quick and easy meatball recipe kids will love.

Prep Time 5 minutes
Cook Time 18 minutes
Servings 4

Ingredients

  • 1 lb. grassfed ground beef, pastured ground chicken, or ground pork
  • 1 tsp. salt
  • 1 tsp. onion powder
  • 1/2 tsp. garlic powder
  • 1/2 tsp. turmeric
  • 1 Tbsp. avocado oil, tallow, lard, or coconut oil
  • 1-2 cups chicken or beef broth
  • 1/4 cup ketchup optional
  • 1/4 cup honey
  • 1/2 tsp. salt

Instructions

  1. Combine the meat, salt, garlic powder, onion powder, and turmeric. Mix well.

  2. Form into meatballs.

  3. Heat a large skillet over medium-high heat. When hot add 1 Tbsp. fat.

  4. Brown the meatballs on all sides.

  5. Add the broth, ketchup, honey, and salt. Simmer until thick, about 10 minutes, stirring periodically to coat the meatballs.

  6. Add extra broth and continue to simmer for more sauce.

Recipe Notes

For a nightshade-free version, replace the ketchup with 1/4 cup dijon mustard or 1/4 cup pureed pumpkin.


Homemade Fruit Snacks

How to Make Homemade Fruit Snacks | Dye-Free & Allergy-Friendly!

Impress your kids and avoid strange ingredients by making homemade fruit snacks! Just a few simple and nourishing ingredients create a fun and healthy snack.

Homemade Fruit Snacks - Dye-free healthy snacks

One of the best decisions I made as a parent was to stop buying packaged fruit snacks. Let’s face it – they are sort of weird, food-like morsels that really are more like candy than anything.

Even the “natural” or organic versions still have some questionable ingredients. And basically zero nutrition.

Why You Should Make Your Own Fruit Snacks

My solution to this problem is always homemade.

I’ve been making homemade fruit snacks (also known as gummies) from scratch for my kids for quite some time. I get lots of requests for the recipe.

Most people are amazed at how simple it is. But beyond that, it’s amazing how healthy they are!

We used to buy organic fruit snacks once in a while as a special treat. But not anymore.Homemade Fruit Snacks - Dye-free healthy snacks

Homemade Fruit Snacks with Grass-fed Gelatin

These fruit snacks are filled with nourishing gelatin (use code TAKE10 for 10% off) which is great for gut healing. They are also very safe for almost any allergy. I love that I can even make a variety of flavors for my little guy that is allergic to multiple fruits (have you ever tried finding something fruit flavored at the store that does not contain banana, grape or pear? Impossible).

My kids will easily eat a whole batch in a week if I let them. So I often have to make a new batch almost weekly! I try to make different flavors like blueberry lemon, lemon lime, lemonade and cherry. I love having very healthy snacks on hand that my kids truly love. And they don’t have to feel like they are missing out.

Healthy Snacks for Toddlers

One of the things that surprised me is how much my toddler loves homemade fruit snacks. I just make them in a pan and cut them into small squares. It’s a great finger food! Bonus that I can pack them up for when we are out and about. No little puffs or melts with strange ingredients. Just fruit and gelatin.

Do your kids like fruit snacks?

Try replacing the store-bought version with a homemade version. You can make them in any shape and flavor. Let your kids choose which ones. They’ll think it’s great! And you can know they are eating something that is healthy and healing.

This post is linked to Allergy Free Wednesday.

Homemade Fruit Snacks - Dye-free healthy snacks

Homemade Fruit Snacks
A fun, fruity snack that is full of nourishing gelatin and free of allergens and artificial ingredients.
Write a review
Print
Ingredients
  1. 1 cup pure juice (i.e. blueberry, cherry, lemon, lime)
  2. 3/4 cups sweetener (cane sugar, coconut sugar, honey, maple syrup)
  3. 3 -6 Tbsp. grass-fed gelatin
  4. 1/4 tsp. sea salt (optional)
Instructions
  1. Combine the juice, salt and sweetener in a small saucepan. Heat slightly and mix until the sugar/honey dissolves.
  2. Taste the juice and add more sweetener if necessary.
  3. Allow the juice to cool for 10 - 30 minutes.
  4. Add the gelatin to the juice while gently whisking.
  5. Let sit for one minute.
  6. Heat the juice/gelatin mixture over low heat, whisking gently until the gelatin completely dissolves.
  7. Pour the mixture into molds or a glass pan.
  8. Refrigerate until solid (about 20 minutes).
  9. Remove fruit snacks from molds or cut into squares/desired shape from a pan.
  10. Store in a container in the refrigerator.
Notes
  1. Do not use juice from concentrate/juice that you would drink plain. Use pure juice.
  2. You may need extra sweetener for some flavors like lemon and lime.
  3. You can use one type of juice or a combination - blueberry lemon, cherry lime, lemon lime, etc.
  4. Using less gelatin will make a softer gummy and they will need more time to set. More gelatin will make it firmer.
Just Take A Bite https://justtakeabite.com/
This healing hot cocoa will warm you up, keep you hydrated and nourish your body. Plus it tastes great! The perfect cold weather drink.

How to Make Homemade Hot Cocoa That Heals

This healing hot cocoa will warm you up, keep you hydrated and nourish your body. Plus it tastes great! The perfect cold weather drink.This healing hot cocoa will warm you up, keep you hydrated and nourish your body. Plus it tastes great! The perfect cold weather drink. #realfood #glutenfree #homemade

Ever since I got pregnant with baby number two (in 2010) I have been hooked on hot chocolate. While I had morning sickness, it was about the only way I could get fluids down. For some reason even when I’m sick chocolate still sounds good.

Even after giving birth I still enjoyed hot chocolate, but didn’t need it daily any more. I should say I’d try not to drink it daily…I was trying to be “good.”

Being good didn’t work.

Why Water Doesn’t Hydrate

I’d go for stretches where I only drank lots of plain water or water with a little lemon juice (that’s supposed to be healthy, right?). But I started to notice that I always felt so full after drinking plain water. It felt like I never absorbed it unless I just took tiny sips at a time. And I would always have to go to the bathroom frequently. Plus I would get very cold.
 
But give me a big mug of hot chocolate – completely different! I can go through the whole thing in a few minutes and not feel like I have a belly full of liquid. I feel like my body absorbs it and uses it. It helps me get warm and stay warm.

So whenever I’m feeling dehydrated, like I’m not absorbing fluids, or like I need something to help warm up I reach for a big mug of homemade hot cocoa.

This healing hot cocoa will warm you up, keep you hydrated and nourish your body. Plus it tastes great! The perfect cold weather drink. #realfood #glutenfree #homemade

Why Hot Cocoa Heals

I’ve tried other drinks, but they never do the same thing. Why would this be?

Turns out my body really does know what it needs.

First, cocoa is actually quite high in magnesium. And that’s something I am lacking.


You can also increase your magnesium levels with this two-ingredient DIY magnesium lotion OR buy a high quality magnesium lotion HERE. We love both!


Cocoa is also high in iron. And I just found out this week that I’m anemic. So I better keep drinking my hot chocolate!

Finally, as a tired mom with adrenal fatigue, plain water just makes me sluggish. This healthy hot cocoa gives my adrenals the boost they need to get through the day.

Healthy Hot Cocoa

After reading Eat For Heat I know that some fluids like plain water, tea, coffee and soda just flush the minerals out of your body. But cocoa is is a very warming food. And so is salt…which I add to my hot chocolate to make it even more warming!

Finally I saw this article recently about the health benefits of honey and cinnamon.

I combine all of these benefits into a cup of delicious, healing, hydrating, warming hot cocoa. It only takes a few seconds to make (once you have hot water). And it is very allergy-friendly (dairy, eggs, wheat, gluten, soy, etc.). If you can handle cocoa powder it is even GAPS legal.

You can also use cacao or carob in place of the cocoa. Whichever you choose make sure it’s organic.

With the salt/sweet/mineral content this could even replace your sports drink.

Make Your Homemade Hot Cocoa Even Better

If you really want a nutrient boost you can add collagen, butter and/or coconut oil!

Want to take a step towards good health? Instead of drowning in ounce after ounce of plain water try a delicious mug of healing hot cocoa. Your body and your taste buds will thank you.

A little disclaimer – I’m not a doctor. I don’t have scientific data to back this up. I just know how my body responds. I always feel warm and hydrated when I drink my homemade hot cocoa. But I feel full and cold when I drink most other fluids.

How about you? Does your body respond well to hot cocoa?

Want to learn more about hydration, thyroid, and adrenals? Read why I cut way down on drinking plain water.

This healing hot cocoa will warm you up, keep you hydrated and nourish your body. Plus it tastes great! The perfect cold weather drink. #realfood #glutenfree #homemade

5 from 2 votes
Print

Homemade Hot Cocoa That Heals

Prep Time 2 minutes
Servings 1

Ingredients

  • 1 - 2 tsp. organic cocoa powder it is important to use organic to avoid GMOs (you can also use carob powder if you can't tolerate cocoa)
  • 2 tsp. raw honey, organic cane sugar or maple syrup
  • 1/4 tsp. cinnamon optional
  • 1/8 tsp. unrefined sea salt
  • 1/4 cup milk or milk substitute optional
  • 2 tsp. collagen  optional
  • 2 tsp. butter optional
  • 2 tsp. coconut oil optional
  • hot water

Instructions

  1. Place cocoa powder, honey, cinnamon, collagen and salt in a mug.

  2.  Fill the mug with hot water and stir to dissolve.

  3. Add a splash of milk if desired for creaminess/to cool the hot chocolate.

Kettle corn granola is a little salty and little sweet. You get the flavor of kettle corn in your breakfast bowl!

Kid-Friendly Kettle Corn Granola Recipe

Kettle corn granola is a little salty and little sweet. You get the flavor of kettle corn in your breakfast bowl!Kettle corn granola is a little salty and little sweet. You get the flavor of kettle corn in your breakfast bowl!

Granola is one of my absolute favorite foods. I got hooked on it in college…and ate it every day. I wish I had known back then just how easy it is to make your own granola.

Now I make it all the time. I always have some on hand for an easy snack or quick breakfast.  It’s great mixed in yogurt or eaten plain with milk. I even love putting some in my daughter’s lunch for a filling finger food.

A super easy breakfast that my kids love is a granola bar bowl – you get the taste of granola bars without the work. Grab the recipe here.

Sweet and Salty Homemade Granola

I’ve been making granola for many years now. I have several granola recipes already on the blog.  I don’t usually follow a recipe anymore. I just use what we have on hand and create something new every time.

But this version of granola is hands down my favorite!

It’s salty and sweet and very addictive!! I call it kettle corn granola because it really tastes like kettle corn.Kettle Corn Granola || Homemade Dutch Apple Pie

Easy Finger Food Snack

My kids love to munch on this stuff. As you can see my son had no problems helping me make the granola and being my taste tester.

One of the great things about granola is that you can make a huge batch (I usually do about 10 cups of oats at a time – a double batch of this recipe) and freeze it.  Then when you want granola you are set.

You don’t even have to thaw it! Granola is ready straight from the freezer. I usually keep a small jar in the cupboard and refill it from the freezer stash as we use it up.Kettle corn granola is a little salty and little sweet. You get the flavor of kettle corn in your breakfast bowl!

Budget-Friendly Breakfast

 The other thing I love about granola is how much money it saves.  Have you looked at the price of granola made with quality ingredients? I was recently at a small meat market. They had locally made granola…$4 for about 6 oz.!!! That is insane. My kids would eat that much in one sitting.

When you make granola at home you control the ingredients AND you save a ton of money. Always good.

You also make a very allergy-friendly breakfast treat. This one is gluten, dairy, nut and egg free.Kettle corn granola is a little salty and little sweet. You get the flavor of kettle corn in your breakfast bowl!

Quick-Prep Homemade Granola

Granola only takes about five minutes to prepare. The end result is a huge batch of homemade cereal that will last a long time. It is also the perfect project to do with kids. When I make granola each kids gets his or her own bowl to create their own batch. They can add whatever they like. My kids love being creative with granola. Sometimes we end up baking theirs, but usually they eat it before it gets to the oven.

This would make a great Christmas gift. Make a couple batches, package it and pass it around to family and friends. Throw a few mini chocolate chips in after the granola has cooled and you’ll really be giving a delicious treat.

Soaked Granola Recipe

If you want to be sure you’re really getting all of the nutrients out of your granola you can make this into a soaked version. You’ll have to plan ahead, but it’s still oh, so delicious!

Do you like the salty sweet combination of kettle corn? Now you can enjoy it for breakfast with kettle corn granola.

Kettle corn granola is a little salty and little sweet. You get the flavor of kettle corn in your breakfast bowl!

Kettle Corn Granola
A delicious granola cereal that has the sweet and salty flavor of kettle corn.
Write a review
Print
Unsoaked
  1. 5 cups old fashioned oats
  2. 1/2 cup water
  3. 3/4 cup coconut oil and/or butter
  4. 1/2 cup coconut sugar
  5. 1/4 cup honey
  6. 1/4 cup maple syrup
  7. 1 tsp. unrefined sea salt
Soaked
  1. 5 cups old fashioned oats
  2. 2 1/2 cups warm water + 2 Tbsp. yogurt, kefir or lemon juice
  3. 1/3 cup coconut oil and/or butter
  4. 1/2 cup coconut sugar
  5. 1/4 cup honey and/or maple syrup
  6. 1 tsp. unrefined sea salt
Unsoaked
  1. Heat the oven to 350*F.
  2. In a large bowl combine the oats, water and salt.
  3. In a saucepan heat the sugar, honey, syrup and oil until the oil is melted and the sugars and oil combine.
  4. Pour the sugar/oil mixture over the oats. Mix until well combined.
  5. Spread the oat mixture onto a large parchment lined baking sheet.
  6. Bake for about one hour, stirring every 20 minutes, until golden brown.
  7. Remove from the oven and allow to cool completely.
  8. Store in an air tight container in the cupboard or in the freezer for long term storage.
Soaked
  1. Combine the oats, warm water and soaking agent.
  2. Cover and let sit 24 hours.
  3. Spread the oat mixture onto dehydrator trays and dry until crisp, about 8 hours.
  4. Crumble dried oats into a large bowl.
  5. Heat oven to 350*F.
  6. In a small saucepan combine the salt, butter, sugar and honey.
  7. Cook until melted and combined.
  8. Pour the butter mixture over the oats. Mix well.
  9. Spread onto a parchment lined baking sheet (it may fit on one large sheet or you may need to spread it on two sheets).
  10. Bake for 30 minutes.
  11. Allow to cool completely.
  12. Crumble the granola and store in an air tight container or in the freezer.
Notes
  1. This recipe easily doubles or triples and freezes well.
  2. Granola is ready straight from the freezer.
Just Take A Bite https://justtakeabite.com/
This post is linked to From The Archives Friday.