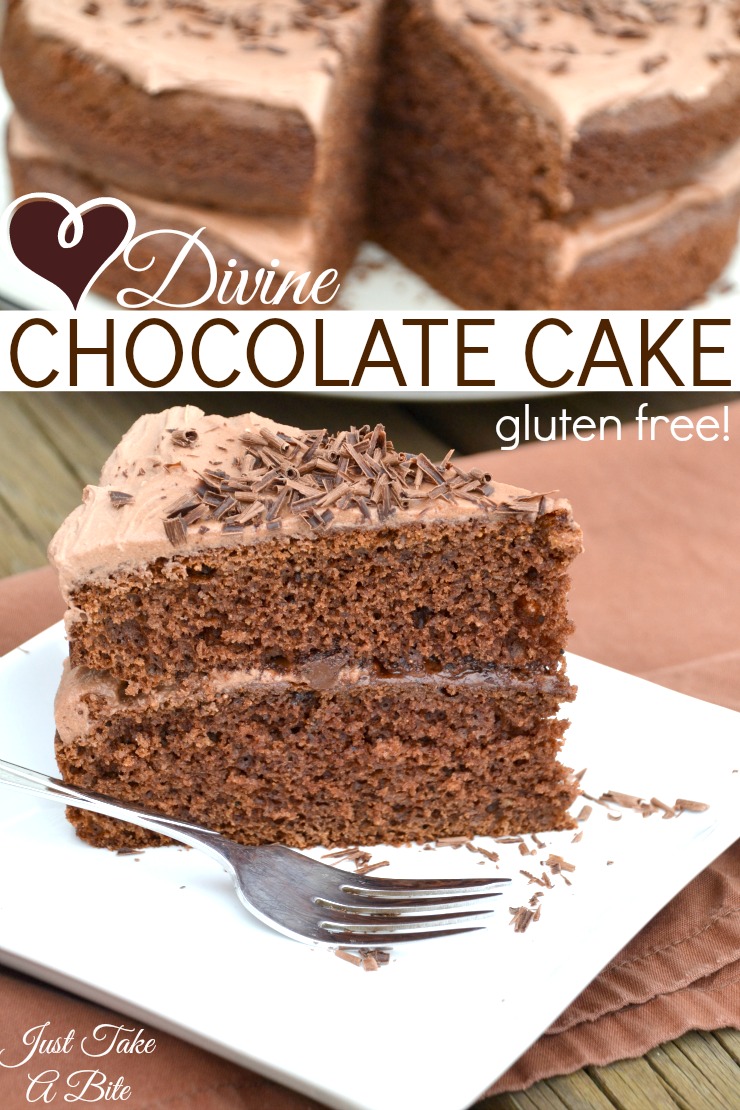
When it comes to Valentine’s Day nothing beats chocolate. Get your fix with this divine chocolate cake that can be mixed by hand and made gluten free!
I am working with Stonyfield and Divine Chocolate for this post. I have been compensated for my time commitment. But the opinions and ideas are my own. I have not been paid to post positive reviews.
Stop what you’re doing and run to the kitchen.
Wait, read this post first. Then run to the kitchen to make this divine chocolate cake. Trust me, your family will be singing your praises.
Chocolate is the Best!
When it comes to sweets I always pick chocolate anything. Especially for Valentine’s Day. So naturally I like to make chocolate treats for my family.
When challenged to create something with Stonyfield yogurt and Divine Chocolate, my first thought was to simply eat a dish of yogurt with big chunks of chocolate in it. That’s my idea of great treat!!
But that isn’t much of a recipe.
Divine Chocolate Cake
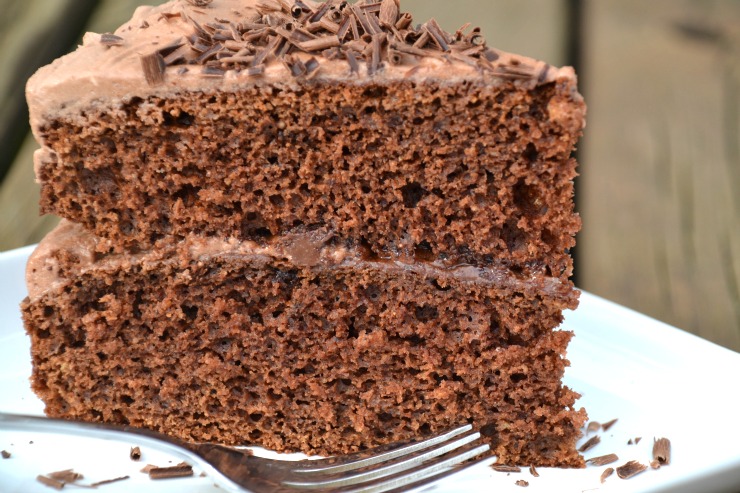
Instead I created a chocolate cake that uses melted chocolate for flavor and whole milk yogurt for moisture. I don’t go overboard with sugar either. The end result is a light chocolate cake that you’ll go crazy for.
I made two versions. One gluten-free for my kids and one with wheat for my husband. Both cakes were so delicious! If my husband approves of a gluten-free cake you know it has to be good.
My daughter even shared some with a friend at school (who is not gluten-free) who raved about it.
For the gluten-free divine chocolate cake I used my favorite gluten-free flour mix. It worked perfectly! No gums or binders required.
If you are dairy-free, you can use coconut milk yogurt in place of the dairy yogurt.
Reduced Sugar Chocolate Cake
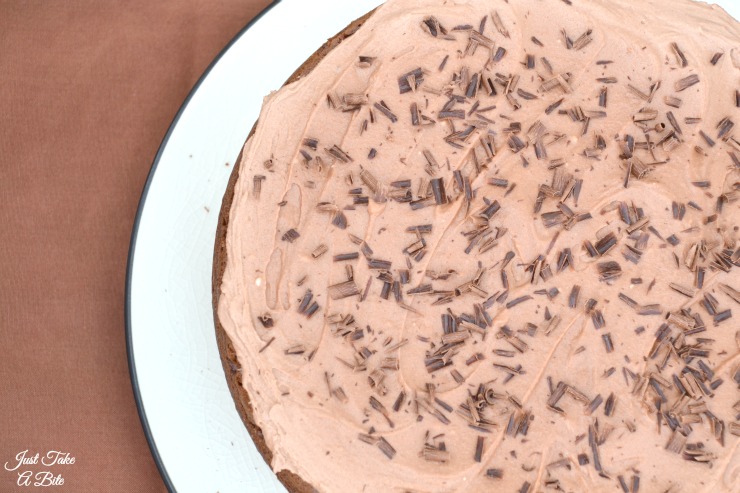
But you can’t have cake without frosting! So I added a light chocolate buttercream and shavings of dark chocolate. Yep, I had some pretty happy kids.
The great thing about Divine Chocolates is that there are quite a few flavors. So you could change up the flavor of the cake. Simply shave flavored chocolate on top or add it right to the cake batter. The mint or raspberry would be amazing!
Are you looking for an easy and delicious dessert for your family?
This Valentine’s Day give your loved ones a special treat by creating your own divine chocolate cake using Stonyfield yogurt and Divine Chocolate. Everyone will feel the love!
Divine Chocolate Cake
2016-02-08 05:16:42
Serves 12
A light, moist chocolate cake made with dark chocolate and yogurt.
In order for me to support my blogging activities, I may receive monetary compensation or other types of remuneration for my endorsement, recommendation, testimonial and/or link to any products or services from this blog. It will not change the cost of any products or services for you.
I once heard a chef on tv (I won’t mention names) say you should NEVER cook avocado. Boy was she wrong!!! I cook avocados all the time. They are delicious!
Although smashed avocado with a generous helping of Real Salt scooped with organic corn chips or raw veggies is pretty amazing, there is another version of avocado that tops my list.
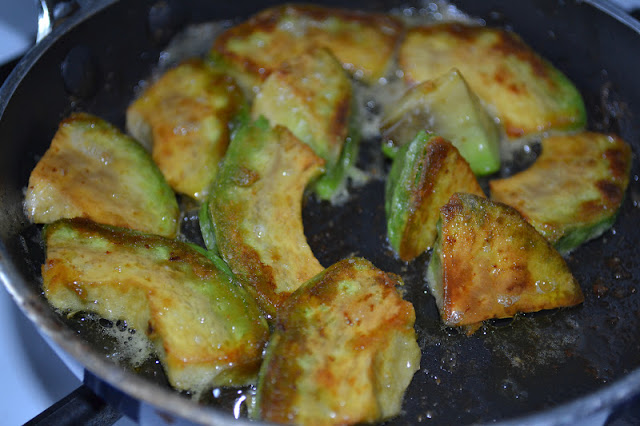
My favorite way to serve avocado is to fry it in a pan to create avocado fries!
I use either butter or coconut oil and plenty of unrefined sea salt.
The result? Golden, crispy, salty outsides with rich, creamy insides. This is like heaven for an Analytical Eater (find out if that’s you HERE).
Avocado Fries
Avocado fries are like french fries…but much healthier.
They contain tons of good fat, vitamins, and minerals (did you know avocado is high in potassium?). You can eat the avocado fries plain or dip them in ketchup, pesto, hummus, or honey mustard. Really they are good dipped in pretty much anything.
Eat them like fries or use them to top a salad (like croutons).
How to Increase Healthy Fat in Your Child’s Diet
I like avocado fries as part of an easy to prep lunch. I just toss them in the pan and let them cook while I get the other food prep done.
Avocado fries make great finger food for toddlers. And they are a fun way to get healthy fat into any child’s diet.
There isn’t much to cooking avocado. Simple, delicious, nutritious. My favorite food trifecta!
Give avocado fries a try. You’ll be glad you did. If someone ever tells you not to cook avocados…ask them if they’ve tried avocado fries.
Heat a small skillet over medium heat. When hot add the butter/coconut oil.
Add sliced avocado (the thickness just depends on your taste). Sprinkle with salt. Let cook on the first side until golden and crispy, about 5-7 minutes.
Flip and repeat with the other side. Add extra salt if necessary.
Recipe Notes
Don't waste the salty butter in the pan. Use it on bread or to cook some greens.
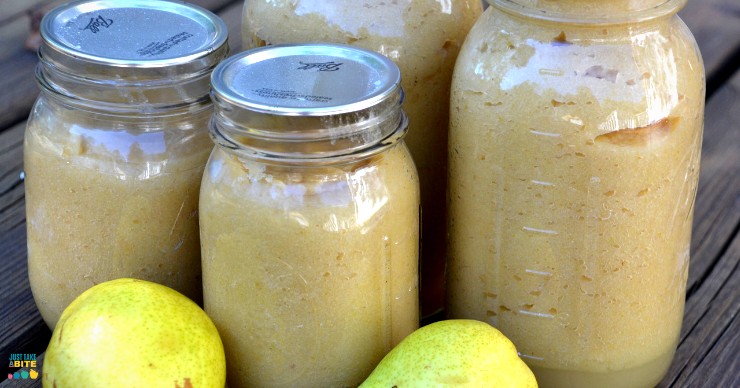
Fall is a busy time of canning applesauce and freezing pumpkin. But don’t forget about preserving pears! With a short season and a busy schedule use this guide to stock your pantry with pear sauce before the pears are gone.
I’m a big fan of hardy produce. You know, the kind that can sit on the counter or in the fridge for weeks and still be OK? Like carrots, potatoes, apples, rutabaga, parsnips, cauliflower, and cabbage.
I love all kinds of fruits and veggies. But some of them are a bit demanding.
One day an avocado is not quite ripe. The next day it’s mushy.
The same goes for pears. You check and check for ripeness. Then all of a sudden you’ve missed the window and they over ripe.
Personally, I like to be in control instead of my produce. But it just doesn’t work that way for everything.
So I always get anxious when it’s pear season. I want to preserve them. But I just don’t have time any old day. Will I time it just right? Will I be stuck peeling hard pears? Or will I let them go too far because we were busy with soccer and band?
It’s a gamble.
I try to do a fair amount of canning each fall. How much I do depends on my kids’ ages and how I’m feeling.
Regardless, I don’t like to spend hours on end in the kitchen each day to keep up with produce preservation.
How to Can Pears
I already take the easy route when it comes to canning peaches. That is a life saver!
Then I get to pears. There is really no way around it.
Canning pears takes a lot of time.
Lots of peeling and slicing (especially if the pears are small). It can take up to sixty pears just to do one round of canning! That is a lot of peeling.
So I stopped doing it years ago. Much to my husband’s disappointment. I just don’t have time.
But I still want to preserve this amazing fruit to enjoy it all winter.
How to Can Pears Without Sugar
Enter pear sauce.
It is just like applesauce but with pears. Honestly, I would take pear sauce any day over applesauce. It is that good.
There is no need to add any sweetener as pears are plenty sweet on their own.
The other thing you don’t have to do – peel them!
Preserving pears is quite easy when you can just wash, quarter, cook and puree. Then either can or freeze the pear sauce.
Pear Sauce for Baby
One of the reasons I love having pearsauce on hand is that it makes a super easy first food for little ones six months and up. You can serve it plain or turn it into a nutrient dense baby porridge. Warm the pear sauce slightly and mix in coconut oil and an egg yolk. Stir and serve!
My big kids love pear sauce too! Sometimes I even make it extra special by adding strawberries, raspberries or blueberries from our freezer stash. As they melt and let off juice it colors the pearsauce and adds an extra burst of flavor.
Serve it cold. Serve it warm with a pinch of cinnamon. Add it to oatmeal. Mix it in yogurt.
You really can’t go wrong. You also don’t need to spend days on end making pear sauce.
Pear Sauce Canning
Here is my busy mom’s solution to preserving pears. I am able to work through a half bushel in one day (with four young kids, including a nursing little one) and still manage to do our school work, go to activities, and get healthy meals on the table.
It only takes about twenty minutes to wash and slice one batch of pears. Then you can let it cook for a bit while you tend to something else. Being able to make pear sauce in steps is so handy!
A full batch (seven quarts) takes about 30 – 35 medium to large pears. So figure out how many jars you’d like to can and then figure out how many pears you need. I usually get one bushel of pears. It makes three rounds of pear sauce with some pears left over for eating fresh.
Pear sauce makes a great alternative to applesauce. Variety is key to any diet, especially if you are implementing a rotation diet for food allergies. So this is a nice change of pace! My kids actually prefer it over applesauce.
Have you ever tried preserving pears? I encourage you to try pearsauce!
Depending on the size of the pears and the quantity you buy, sometimes you end up with a pile of extra pears. And like I said before, they can go from almost ripe to mush pretty quickly. So what do you do with those extra pears?
Of course you can eat them fresh! Pears are a sweet treat on their own. But you can only eat so many. Here are a few other options for using up extra ripe pears.
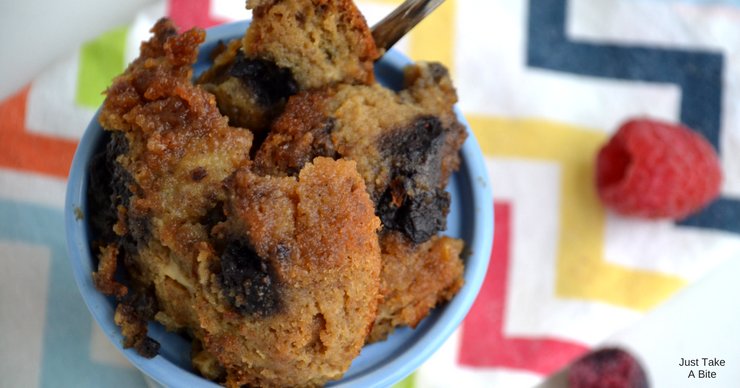
Don’t let those extra muffins go to waste! Whether they are getting stale or are starting to crumble, leftover muffins make amazing bread pudding.
Growing up there was a great debate in my house – should bread pudding have raisins or not?
The debate was between my big sister and me. As an Analytical Eater, I L-O-V-E chunks in my food. Bread pudding without a contrasting texture was too boring.
But my sister wanted nothing to do with raisins!
My poor mother. She never knew who to please. I’m sure we had it both ways many times.
In the end the bigger conundrum in my mind was why we didn’t get bread pudding more often!
What is Bread Pudding?
Bread pudding is sort of a misleading name. It’s not really pudding like we know it. No creamy chocolate dessert here. It’s more of a custard made with chunks of bread…or muffins!
You mix bread or muffins with eggs, milk, and some type of sweetener. When baked it creates a cake-like breakfast or dessert with a custard feel to it. The more eggs and milk you add, the more custard you get.
Why do Muffins Fall Apart?
How many ways can you mess up a batch of muffins? Far too many!
Muffins mishaps can be caused by too much or too little of a lot of things:
too little moisture (milk, water, or fruit/veggie purees) (crumble)
too few eggs (fall apart)
too many eggs (won’t fully bake)
not enough baking powder (stay flat)
no binder (gluten, psyllium husk, flax seeds, gelatin) (fall apart)
overbeating (chewy)
Who knew something as simple as a muffin could cause such trouble?! But it happens to the best of us.
Sometimes it’s not even a bad batch of muffins that causes problems, but a lack of paying attention to them.
Normally when I bake muffins I use them for a couple breakfasts and freeze the rest to have later. But sometimes I get busy. And the muffins just sit there, staring at me for a week.
Or once in a while there is that batch of muffins that didn’t turn out quite right. That happens more than I care to admit with gluten-free baking! They are crumbly and messy and you just want to toss them. Don’t!
Use them to make muffin bread pudding!
Leftover Muffin Bread Pudding
Traditional bread pudding is made with chunks of bread. But it’s just as easy to make it with leftover muffins.
Bread pudding with muffins is simple to prepare. Just crumble the muffins (if they aren’t a big mess already!), mix them with eggs, milk, and sweetener, and bake! You can assemble a delicious dessert or breakfast in minutes.
The next time you have a few leftover muffins turn them into something new.
It’s fun because you get a variety of flavors depending on the muffins. I have tried flavors like orange raisin and blueberry. These double raspberry chocolate chip muffins would make amazing bread pudding! If your muffins are kind of bland you can add extra fruit or dried fruit to the bread pudding to boost the flavor without adding refined sugar.
Easy Bread Pudding for One or For a Crowd
You can make leftover muffin bread pudding with a whole batch or just a few muffins. Enjoy it as a breakfast or dessert. I like to pour milk on top, like baked oatmeal.
I have fond memories of my mom serving bread pudding when I was a child. It was one of my favorite treats. But I don’t take the time to make it often these days. When I do, though, it’s usually using leftover muffins (these allergen-free blueberry muffins are perfect for making bread pudding!)
Kid-Friendly Bread Pudding with Muffins
My kids are very proficient in the kitchen thanks to the Kids Cook Real Food eCourse. My oldest is actually the muffin maker around here. Most of the time they turn out well. But once in a while we have a muffin flop. It’s part of the learning process.
Then all the kids can chip in to make leftover muffin bread pudding. The little one can have fun breaking or cutting muffins into chunks. While the older kids can practice cracking eggs, measuring ingredients and oven safety. Plus they get a delicious reward at the end. Muffin mistakes never tasted so good.
Not sure what to do with leftover muffins? Turn them into bread pudding – a delicious breakfast or dessert the whole family will love.
Leftover Muffin Bread Pudding
2017-12-24 05:40:41
A simple breakfast or dessert using leftover muffins.
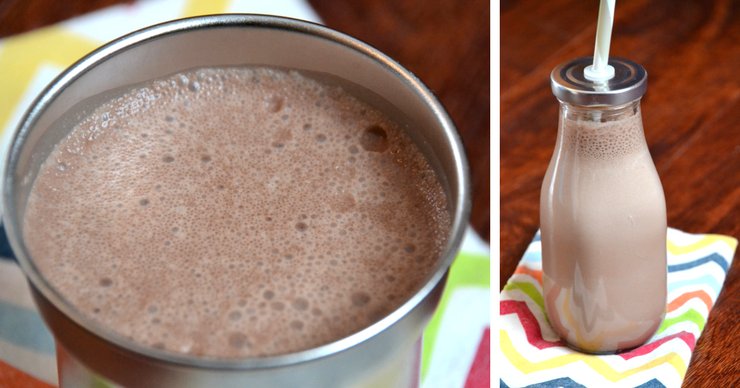
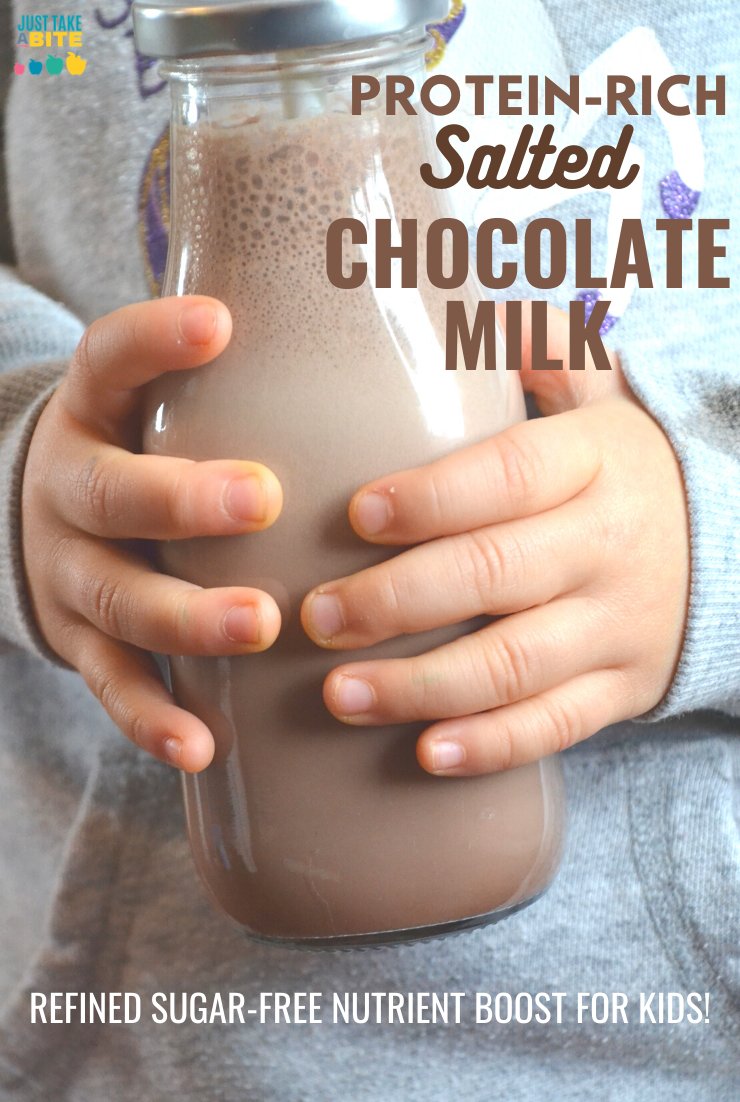
Have a kid that won’t eat meat or isn’t getting enough protein? Chocolate milk to the rescue! This refined sugar-free protein-rich salted chocolate milk is perfect!
When it comes to drinks in our house we basically have two options: milk or water.
It may seem boring. But really, we don’t need much else. Once in a while my kids get a little pure grape juice (if they are fighting a cold or if we are making our “smart water.”). And of course we do love our smoothies for added nourishment (check out my book full of recipes here!).
But if my kids are thirsty it’s generally water or milk.
Kid-Friendly Drink Without Refined Sugar
Then there are those days where we just want something a little extra. Or maybe my Intuitve Eater is in one of her “I don’t want to eat much” slumps. And I have to be sneaky.
That’s when I bust out the chocolate milk! Who doesn’t love chocolate milk? I know I sure do!
Protein-Rich Drink for Kids
My version of chocolate milk is taken to a new level with extra protein from grassfed collagen (THIS is the brand we use – use TAKE10 to get 10% off). It blends right in with no added taste. Plus it’s loaded with a whole array of essential amino acids.
The kids and I have been studying human anatomy and physiology for science this year. Our unit on nutrition introduced us to amino acids and how they are the building blocks of protein. And they are so important! So when I showed the collagen container to my oldest she was fascinated to look at the amino acid profile. Science lesson built in to making chocolate milk!
The good stuff doesn’t stop there. We are big fans of adding salt to chocolate. When I say salt I mean real, unrefined sea salt (like this). Not only does it contain a broad spectrum of minerals, it is also hydrating/good for balancing electrolytes and delicious! We even use it to make salted dark chocolate ice cream, healing hot cocoa and salted honey chocolates . Salt and chocolate go so well together.
To really boost nutrition we like to add probiotics and raw egg yolks (from our own free-range chickens). So you are getting extra protein, essential minerals, probiotics, and vitamins! All in a glass of chocolate milk. It’s a mom win!
If you like your chocolate milk a bit thicker, like a shake, you can add a little banana and/or avocado.
Healthy Chocolate Milk
When I gave this protein-rich salted chocolate milk to my daughter she had two comments:
Does this have salt?! Yum! When can we make salted chocolate ice cream?
You have to make this every single day!
How to get Kids to Eat Enough Protein
My youngest can be really picky when it comes to meat. Veggies? She’ll out eat anyone. Meat? Turns up her nose. We have to bribe her to take bites of meat…then she can have thirds of veggies! For real. So I’m always glad when I can sneak in extra protein for her in something so delicious like chocolate milk. Collagen is a great way to do this. A scoops gives her the protein boost her little body needs. Added to the raw milk and egg yolks it makes a complete protein.
Her ideal meal is a huge pile of vegetables with a glass of salted chocolate milk. And I love to give it to her.
Quick & Easy Nutrition for Kids
It only takes about three minutes to make salted chocolate milk (mostly just the time required to gather ingredients). Older kids can make it themselves. My six and nine-year-olds know how to separate egg yolks thanks to the Kids Cook Real Food eCourse. My three year-old loves to help with the blender. It’s a family event! And we all enjoy the reward at the end.
The next time you’re in a beverage rut or your kids need a little protein boost, make a batch of salted chocolate milk. Use your favorite milk and some grassfed collagen to blend a nourishing drink the whole family will love.
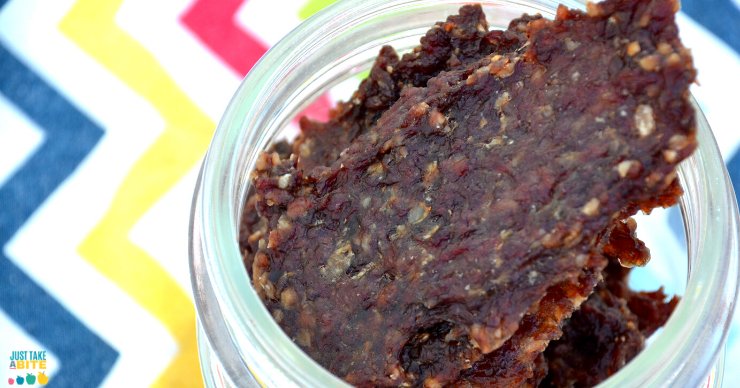
When you’re working around allergies, it can be hard to find easy and nutritious snacks, especially with protein. This homemade ground beef jerky is simple and safe for the whole family.
One of the biggest struggles of having children with allergies is finding easy sources of protein.
Our allergies include nuts, dairy, beans and eggs. So basically it’s meat or nothing. And I don’t know about you, but I just don’t feel like cooking meat for every meal of the day!
When it comes to lunches and snacks I stick to easy. And the usual easy protein sources aren’t options. Most days there is enough leftover from the previous night’s dinner that it’s not a problem.
But sometimes there’s not.
The solution?
Homemade Ground Beef Jerky
I did some research to find a recipe…and couldn’t find one. Most of them use either soy sauce or coconut aminos. When you can’t use soy or coconut that just doesn’t work. Plus I really had no desire to go to the store or buy specialty items.
So I came up with my own recipe using just a few simple and nourishing ingredients. To my great delight this ground beef jerky turned out great!
Soy-Free Beef Jerky
My biggest surprise…my one year old was the child that liked it the best! She ate almost the whole batch (don’t worry, not in one day). My husband and I love it too!
It is so easy to stick in the diaper bag when running errands. No mess. No refrigeration. Just a simple, healthy snack that is free of allergens and easy enough for a one year old to eat. Perfect!
You can adjust the salt and sugar to your liking. I like a lot of salt. You can also add liquid smoke for a smokey flavor. If you really want to bump up the nutrition you can even add desiccated liver! (Use the code TAKE10 for 10% off)
What is the Best Meat for Beef Jerky?
Ground beef is the easiest meat to work with and makes the easiest to eat beef jerky (trust me, I tried other meat first…and I could barely chew that batch).
Not a fan of beef? Swap it for ground pork, chicken or turkey!
This ground beef jerky is perfect for school lunches or summer picnics. Make a big batch and store it in the freezer. Grab as much as you need any time. It thaws in about sixty seconds.
Is it Cheaper to Make Your Own Beef Jerky?
The other thing I love is how affordable this beef jerky is. I use grassfed ground beef. No fancy steaks. So a whole batch only costs about $6.00 (including the other ingredients)…and makes at least 30 good size pieces of jerky!
We recently bought some locally-made beef jerky. It came in a tiny package and cost about $8.00. Plus my kids thought it was too spicy. I don’t think I’ll be doing that again.
Can You Make Beef Jerky Without a Dehydrator?
Most homemade beef jerky recipes use a dehydrator. But it is possible to make beef jerky in the oven. Simply spread the meat in small strips on a baking sheet and bake it at a very low temperature (around 200 degrees F). Check it every hour for doneness.
What are your go-to allergen-free snacks?
If you’re like me and always trying to figure out an easy snack that is healthy, satisfying and free of allergens you’ve found it. Ground beef jerky is perfect for the whole family. Put it at the top of your allergy-friendly snack list! Homemade lunch meat is a great option too.
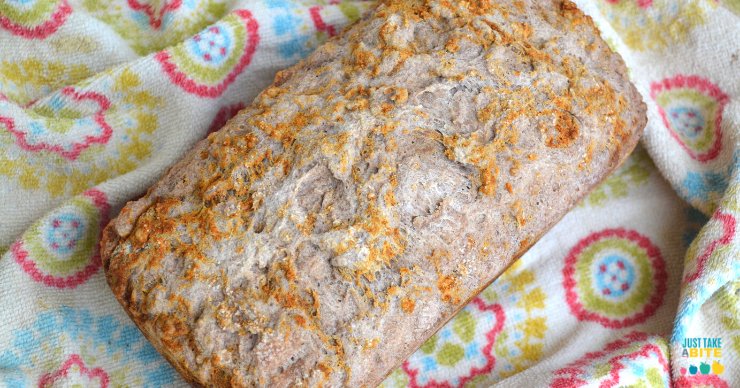
Looking for gluten-free sourdough bread that is allergy-friendly, kid-friendly and easy to make? This is it! Just a few minutes of hands-on time gives you delicious gluten-free sourdough without gums.
One of my first kitchen experiments when I had just entered the world of real food was sourdough bread. I had some experience with bread-baking. But the idea of sourdough seemed daunting.
Flour and water come to life? You have to feed your food?
That sounded like something to either totally mess up or poison my family with!
But I love a good challenge. So I decided to try it anyway.
What is Sourdough?
The first step of the process was to understand what sourdough is. Sourdough is made by the fermentation of dough using naturally occurring lactobacilli and yeast.
In simpler terms, mixing flour and water creates bacteria and natural yeast that breaks down glucose and phytates in the grains, while providing natural leavening.
Sourdough contains lots of good bacteria that produce enzymes to break down phytic acid and help digestion.
Sourdough bread can also be helpful for anyone with blood sugar issues as the resistant starch helps slow absorption of the carbohydrates.
Does Sourdough Bread Contain Yeast?
Most bread contains a cultivated yeast – baker’s yeast. Sourdough bread, on the other hand, uses a natural yeast. There is no need to add yeast to sourdough bread. The fermentation of the grains provide sufficient leavening.
That being said, when it comes to gluten-free sourdough bread, the natural leavening is often not sufficient. I have baked far too many loaves that rose beautifully, only to sink down while baking.
So I add just a bit of baking powder to maintain the rise.
How to Make A Gluten-Free Sourdough Starter
Sourdough bread requires a starter. You can buy a starter or find a friend that is willing to share. But it’s actually really easy to make one! As long as you don’t expect to make a loaf of bread the same day.
A lot of gluten-free baking is quite different from baking with wheat. Thankfully making a gluten-free sourdough starter uses the exact same process as it would if you were using wheat or rye. Sometimes you may want to feed a gluten-free starter more frequently to get it bubbling well.
The basic process is combining flour and water until it starts to bubble. This can take anywhere from two days to a week, depending on what grains you use.
Start by mixing equal amounts of water and flour (1/4 – 1/2 cup is good to start). Cover and let sit 12 hours.
Add equal amounts of water and flour again (1/4 cup works well). Cover and let sit 12 hours.
Add equal amounts of water and flour again (1/4 cup). Cover and let sit 24 hours.
Repeat this process until the mixture starts to bubble. That is your starter.
Use some of the starter in a recipe or store it, covered in the fridge.
Any time you use your starter be sure to feed it again.
If you are going to be using your starter, feed it 2-12 hours beforehand to get it good and bubbly and to be sure you have enough for your recipe.
Which Grains Work Best for Gluten-Free Sourdough?
Just about any grain can be used for gluten-free sourdough. Some common grains that are easy to work with are:
brown rice
teff
sorghum
buckwheat
Most sourdough starters use only a single grain. You can have multiple starters to utilize a variety of grains.
I use mostly sorghum and brown rice. I use them interchangeably in my one starter.
Easy Gluten-Free Sourdough Bread
A gluten-free sourdough starter works the same way as the wheat version, but the bread does not. I tried numerous gluten-free sourdough bread recipes that utilized different techniques and grains.
One was a brick. One was goopy. Some just sunk down. We ate a lot of sub-par bread along the way!
In the end I went back to my usual mantra that simple is the best. No gums. No need to combine five different flours.
This simple gluten-free sourdough bread takes about five minutes to mix up. Then it can rise anywhere from 8 – 24 hours.
The dough will not feel like regular bread. It will be sort of fluffy. And you will likely think you totally messed it up. But don’t worry. It will rise up nicely in the oven.
Adding psyllium husk powder to gluten-free sourdough keeps the bread soft (and is why you see a bit of marbling in the bread).
2-12 hours before making the bread, feed your starter so you have at least 2 cups.
In a large bowl combine the starter and water.
Very gradually whisk in the psyllium husk powder so that it doesn't clump.
Whisk in the honey and oil.
Add the sorghum flour, rice flour, and salt. Mix well. The mixture should be sort of fluffy/clumpy.
Cover and let rise 8-24 hours (the longer it rises, the more sour the bread will be)
When ready to bake, heat the oven to 350 degrees F.
Grease a medium-size loaf pan (4.5 x 8.5 in. / 1.5 qt)
Sprinkle the baking soda and baking powder on top of the risen dough.
Quickly mix in thoroughly (hands work well for this), distributing the soda/powder throughout.
Place the dough in the prepared pan and gently press in.
Bake for 1 hour.
Immediately remove the bread from the pan and allow to cool completely before slicing.
Store in a bag or sealed container at room temp for up to a week or in the freezer for up to a year.
What Does Gluten-Free Sourdough Bread Taste Like?
This version of gluten-free sourdough bread does have a different texture than traditional wheat sourdough. It’s sort of in-between a yeast bread and a sweet bread.
The bread is very soft and can easily be used for sandwiches, grilled cheese, french toast, or whatever else you like to make with bread.
Gluten-free sourdough bread can have a mild flavor or a very sour flavor depending on the rise time. I typically let it rise for about 12 hours, and my kids tell me it’s a bit on the sour side for them. You can add a little more honey or some molasses to keep the flavor mild while still getting a good ferment.
Does Gluten-Free Sourdough Bread Toast Well?
Initially I was disappointed with my gluten-free sourdough bread because it is so soft. As an Analytical Eater, I need crunch in my food. I love very toasted bread.
But I found a solution!
This gluten-free sourdough bread has more moisture than a traditional loaf. So it requires a longer toast time to compensate. I actually prefer to bake an individual slice instead of toasting it. Ten minutes in the toaster oven at 400 degrees F gives that perfect, crispy crust. You know it’s good when you can hear it while you spread butter.
My kids love it toasted with either butter or sunbutter and a little drizzle of raw honey. I like it toasted with butter, sunbutter and some zucchini cheese slices that start to get melty from the heat.
How Long Does Sourdough Bread Last?
Since gluten-free sourdough bread is already fermented, it stays fresh at room temperature for quite a while. It will stay good on the counter (in a bag or container) for about a week.
I don’t think a loaf ever lasts that long for us. Sometimes it’s gone in two days! But if you don’t think you’ll use it all in a week you can freeze it for long-term storage. If you slice the bread before freezing you can take it out one slice at a time as needed.
Is Sourdough Bread High Histamine?
Anything fermented contains histamine. So if you have histamine intolerance, you should use caution with sourdough bread – even if it is gluten-free.
That being said, everyone is different. You need to experiment and see what your body tolerates. I’ve dealt with histamine intolerance for quite some time, but I do fine with gluten-free sourdough bread.
Does Sourdough Bread Contain Gluten?
This might seem like a silly question in a post about gluten-free sourdough bread. But I do want to clarify some misconceptions.
Traditional wheat or rye sourdough does contain gluten. The fermentation process does not remove the gluten.
That being said, many individuals that are sensitive to gluten can tolerate traditional wheat or rye sourdough. Why is that?
The bacteria in sourdough break down some of the carbohydrates and protein in the grains. This includes breaking down fructan, a carbohydrate found in wheat. Many individuals that are sensitive to gluten are actually sensitive to specific carbohydrates, such as fructan.
My daughters are gluten-free but tolerate wheat sourdough just fine. My sons, on the other hand, have to stick to strict gluten-free. It’s worth experimenting to see what your body tolerates. Making sourdough bread with an ancient wheat variety like Einkorn is another option for many that are sensitive to gluten.
Gluten-Free Sourdough for Kids
Most kids like bread. They like toast, sandwiches, grilled cheese – all of it. So why not make it the healthiest bread possible?
Gluten-free sourdough bread contains healthy bacteria and is easy on those that have digestive complaints. Plus it helps absorb key vitamins and minerals!
Gluten-free sourdough bread is a great addition to a healthy diet for kids!
Are you gluten-free? Have you ever tried gluten-free sourdough?
Looking for an easy, egg-free snack or breakfast? These naturally sweetened gluten-free orange raisin muffins are the perfect hand-held treat that both kid and adults love! Free of eggs, dairy, gluten, and nuts, these muffins are very allergy friendly!
Not sure if it’s just my kids or a kid thing in general, but my kids LOVE muffins. Really any hand-held, round bread. If I make sourdough bread, they enjoy it. If I make sourdough rolls you’d think I hadn’t fed them in three days the way they eat them.
I guess kids just like to eat with their hands. Which explains why my kids refuse to use utensils no matter what kind of food they are eating.
But muffins are definitely a favorite around here.
Which is why I find myself baking muffins a LOT!
Egg Sensitivity in Babies
A few months ago I had to cut eggs back out of my diet and my toddler’s diet. We were off eggs for about a year (almost since birth) and then reintroduced them. I think eggs are one of the most nutrient-dense foods on the planet. But as much as I love eating the eggs fresh from our hens, they were giving my son a diaper rash. They were also giving me phlegm in my throat on a daily basis.
Eggs seem to be a common sensitivity in babies these days. It’s unfortunate since eggs provide many essential vitamins and minerals.
Some people can tolerate eggs in baked goods even if they can’t eat plain eggs. But we are generally not that fortunate. If a food is bothersome at all…it has to be cut completely. For some reason it seems to be worse when my kids are very young too.
My five-year-old was egg-free for at least the first two years of life. Now she can eat them every day!
Egg-Free Muffins
Eliminating eggs from your diet definitely eliminates some food options. This includes not only egg dishes, but many baked goods. Yes, our beloved muffins had eggs!
Thankfully there are some great egg substitutes for baking. My favorite way to bake egg-free is with gelatin.
That is exactly what I do in these allergen-free orange raisin muffins.
Mix the juice of a couple oranges with gelatin. Then add hot water to dissolve. It’s the perfect binder to make egg-free muffins.
Make sure you use high quality gelatin in your baking. We always use Perfect Supplements gelatin. It is the only gelatin that is certified glyphosate free. You can stock up on Perfect Supplements gelatin HERE with the code TAKE10 for 10% off your order.
Baking Without Refined Sugar
An added bonus of these orange muffins is that they contain no refined sweeteners. Maple syrup or honey combined with orange juice provides plenty of flavor and sweetness.
The raisins add a little extra natural sugar as well. Dried cranberries or even mini chocolate chips would work too.
We prefer to top gluten-free orange muffins with a generous pat of butter to help metabolize the carbohydrates. The flavor contrast with the salty butter and sweet orange is another plus.
Easy Allergen-Free Snack for Kids
Gluten-free orange raisin muffins make a great addition to a quick weekday breakfast, a mid-morning snack, or packed up in a lunch box.
Combine it with a nourishing drink, a bowl of soup made with bone broth, or another form of protein and fat like bacon, sunbutter, or sausage. You really can’t go wrong!
Not a fan of adding dyes and artificial flavors to your kids’ diet? This real food version of “Kool-Aid” is easy to make and fun for kids. No chemicals required.
Lately I see a lot of commercials for convenience foods that just seem plain silly. Like to-go containers of peanut butter? Because you don’t have enough time to scoop a little peanut butter into a container at home?
Then there are the “foods” that are just plain junk. Like “Kool-Aid” squeeze packs. Because it’s such a great idea to fill your child with high fructose corn syrup and food coloring that they had to make it even easier for you to do. And you can even do it on the go. Give your child a bottle of water…and then fill it with nasty stuff that contributes to ADHD and other health issues.
I say just give them the water and be done. There really is no need for anything extra.
How to Make “Kool-Aid” Without Food Coloring
Sometimes it is nice to have a treat. And there are also times when your child needs a beverage that is a bit more hydrating than plain water, like this Smart Water.
So I created a real food version of “Kool-Aid” syrup to add to water. It’s made with quality ingredients. Plus it has unrefined sea salt with minerals for hydration.
I send my daughter to school with a water bottle every day. But once in a while I add a couple tablespoons of our homemade fruit syrup. She gets a treat. And she’s more likely to drink more that way and stay hydrated. A little flavor goes a long way.
How to Avoid High Fructose Corn Syrup
You don’t need the corn syrup and food dyes to make water fun. Simply make your own syrup (it only takes 10 minutes!). Then your child can still focus at school while having a delicious treat. And if your child is like mine, they’ll tell their friends all about it and start teaching others about good health at a young age. Everyone wins.
What do your kids like to drink?
How about some “Kool-Aid” real food style? The pictures show cherry “Kool-Aid.” You can also make blueberry or lemon lime or any combination. There is something delicious for everyone.
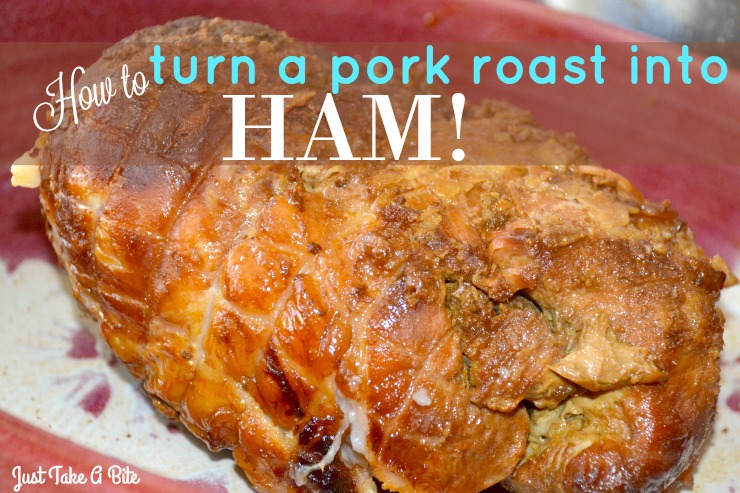
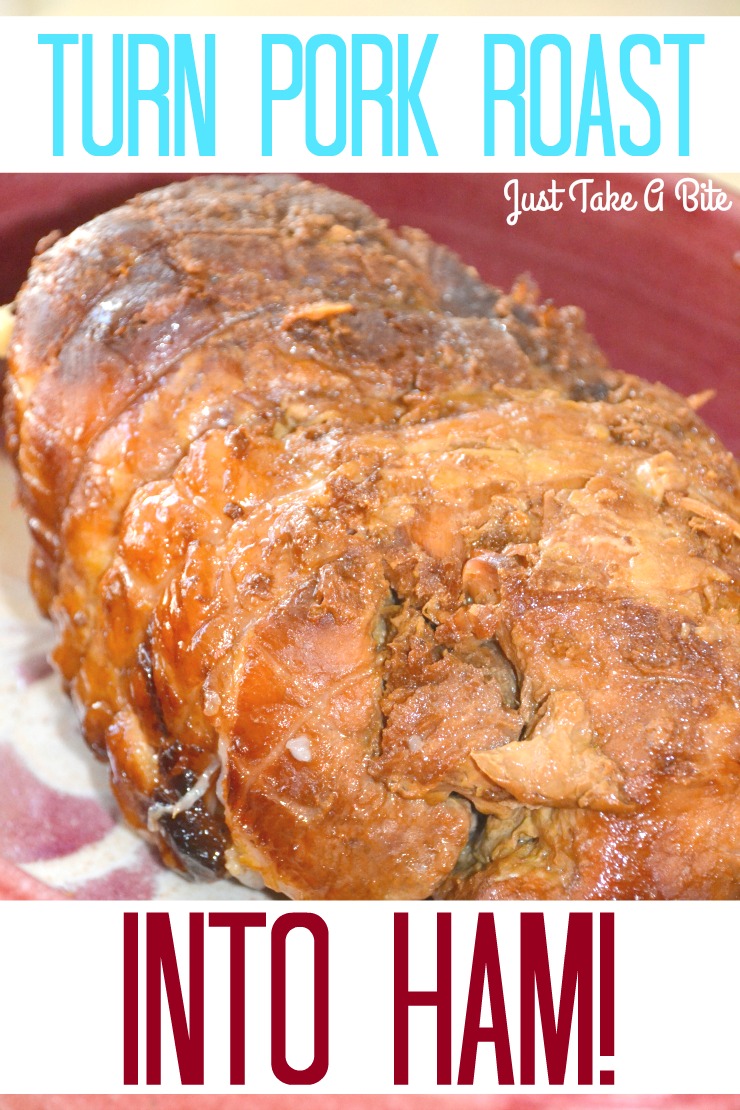
Are you looking for a way to serve ham without worrying about nitrates, nitrites and fillers? Make your own! You can easily turn a pork roast into ham in your crockpot.
I love ham. I mean love it.
You can imagine my sadness when my daughter had a reaction to ham while she was still breastfeeding. That meant no ham for her…or me.
Why You Should Avoid Ham
Pork was not the problem.
The problem is whatever is used for smoking/curing. Even something simple like beet sugar caused a reaction.
But aside from allergens, there are the added nitrates and nitrites. This is not a cut and dry issue either. Some say avoid it all. Some say just be careful of quantities, whether naturally-derived or not.
Whatever your reason, sometimes it’s a good idea to avoid cured meats, including ham.
How to Turn Pork into Ham
I avoided my beloved ham for a long time – until I decided to make my own! You can turn a pork roast into ham right in your crockpot (this is my favorite one).
No fancy tools. No strange ingredients.
Really all you need is pork, salt and a sweetener.
I used a rolled pork roast. But any cut will work.
Homemade Ham in the Crockpot
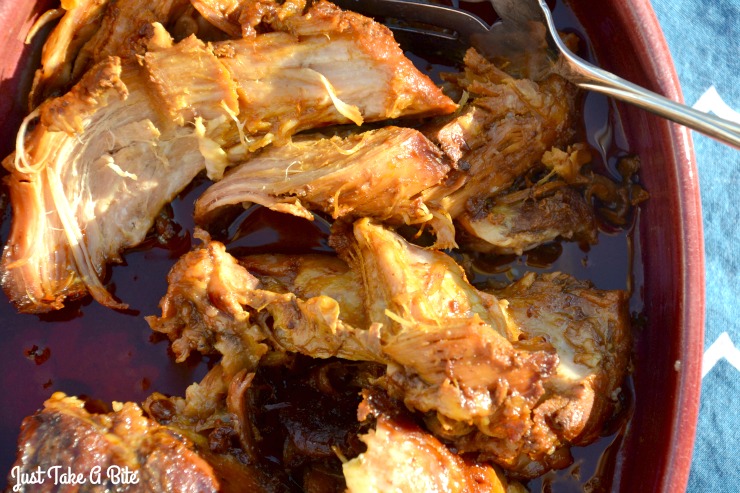
Cut some slits in the pork, put it in the crockpot and add the salt and sugar. Turn the crockpot on and you’re pretty much done.
Your holiday ham really can be that simple. And you don’t have to worry about nitrates or nitrites or whether or not celery powder is better or worse.
To turn a pork roast into ham the important step is using lots of quality unrefined sea salt. Then adjust the sweetness to your liking.
If you want your ham really smokey you can also add a little liquid smoke (be sure to find one without coloring added).
Pork Loin Ham Recipe
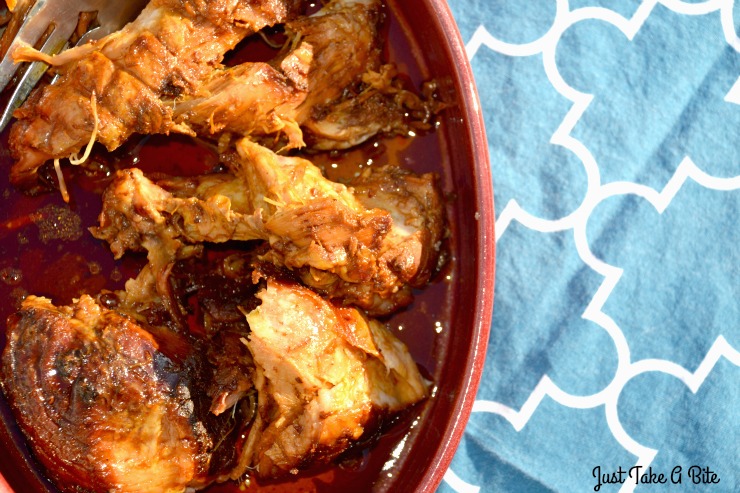
As I write this I’m thinking about how tasty our homemade ham was. I might have eaten all of the leftovers myself. Though now I wish some had made it to the freezer so I could enjoy it again.
I guess that means I just need to make another!
Are you thinking about making a Christmas ham?
Save time and money by making it yourself this year! Just put it in the crockpot in the morning and spend your time focusing on delicious side dishes and desserts.
No crockpot? Or you’ve already filled it with something else? You can make ham in the oven too.
Homemade Ham
2015-11-25 05:16:45
Turn a pork roast into a delicious ham with a few simple ingredients and a crockpot.
2 - 4 tsp. unrefined sea salt (adjust based on size of roast)
2 Tbsp. - 1/2 cup any combination of sweeteners (honey, maple syrup, organic cane sugar, organic brown cane sugar, molasses; adjust to taste)
Instructions
Using a sharp knife cut slits in the pork roast all over.
Place the pork in the crockpot.
Add salt and flip the roast to make sure there is salt on all sides.
Add the sweetener (start with a smaller amount and add more later if you want it sweeter).
Cover and cook on HIGH for 4 hours, then turn to LOW for 5+ hours.
Flip the roast 2 or 3 times during cooking to make sure all sides get coated with flavoring. You can also baste the roast with the juice in the crockpot, trying to get it into the slits in the meat.
An hour before serving cut the roast into large chunks and coat with the juice in the crockpot.
Notes
You can use a single sweetener like honey or cane sugar. Using a combination of liquid and dry sweeteners gives a good balance of flavor and creates a good "sauce."
To make ham in the oven follow the same directions, baking the pork in a covered dish at 375*F for 2 hours, then turning the heat down to 325*F for 2 hours.


 Which Grains Work Best for Gluten-Free Sourdough?

 Does Gluten-Free Sourdough Bread Toast Well?
 Does Sourdough Bread Contain Gluten?


 Easy Allergen-Free Snack for Kids