Home » Kid-friendly Recipes » side dish » Page 2

Category: side dish

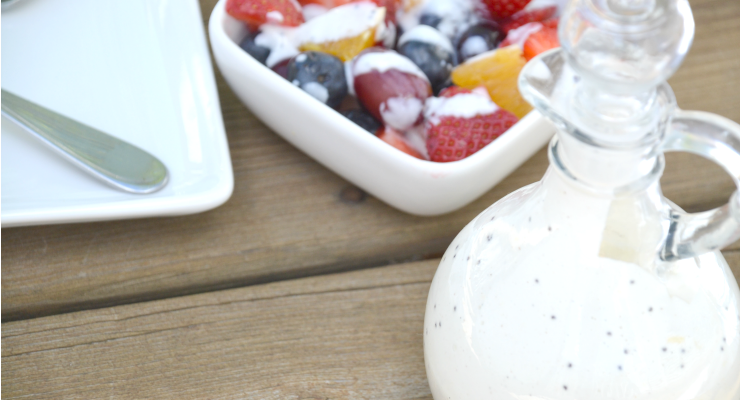
No more boring fruit. This simple creamy orange poppy seed salad dressing transforms any combination of fruit into a special side dish.

Creamy Orange Poppy Seed Salad Dressing

Nothing says spring like a fresh fruit salad. Top it with this creamy orange poppy seed salad dressing for a treat the whole family will love.
No more boring fruit. This simple creamy orange poppy seed salad dressing transforms any combination of fruit into a special side dish.

It’s no secret. I LOVE salad. I could (and sometimes do) eat it every day (I’ll be sharing my secret super food dressing soon!).

But my family…not so much. For my husband a “big” salad is about ten pieces of lettuce. So when I was challenged by Stonyfield and The Cookful to create a new salad dressing it took some real thinking. What could I make that my family would actually like?
No more boring fruit. This simple creamy orange poppy seed salad dressing transforms any combination of fruit into a special side dish.

Skip the lettuce.

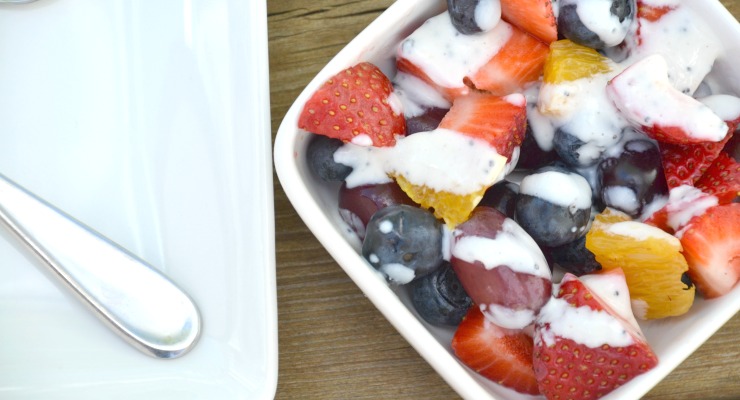
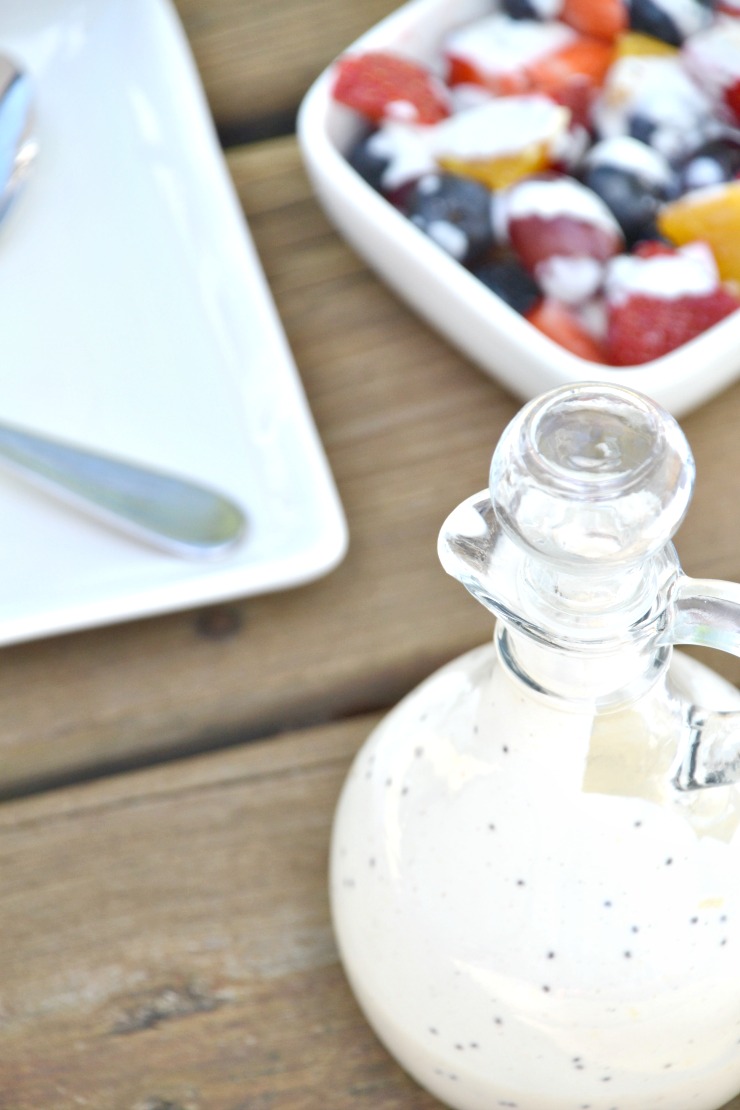
Instead of going the traditional lettuce salad route I opted to create a fun fruit salad! Use any fresh fruit you have on hand (especially what’s in season!). Add a burst of flavor with Stonyfield vanilla Greek yogurt (now available in full fat!!), freshly squeezed orange juice and poppy seeds.

I used what we had on hand in the house – Fat Free Vanilla Greek Yogurt. You could also use whole milk yogurt combined with a little maple syrup. But the Greek yogurt really adds a nice thickness.

This creamy orange poppy seed salad dressing is so easy to make. My big kids can make it by themselves (they are learning to do so much from The Kids Cook Real Food eCourse!!).
No more boring fruit. This simple creamy orange poppy seed salad dressing transforms any combination of fruit into a special side dish.

Great for oral sensitivities.

My oldest has a very sensitive mouth. Any hint of tartness or tough skin in her fruit and she won’t eat it. One fruit she usually does not like is grapes. She makes some pretty good pucker faces when she tries them.

But the other day all I had in the house was a bowl of grapes. I gave her a dish topped with creamy orange poppy seed salad dressing. Not a single complaint! She licked the bowl clean. It’s that good.
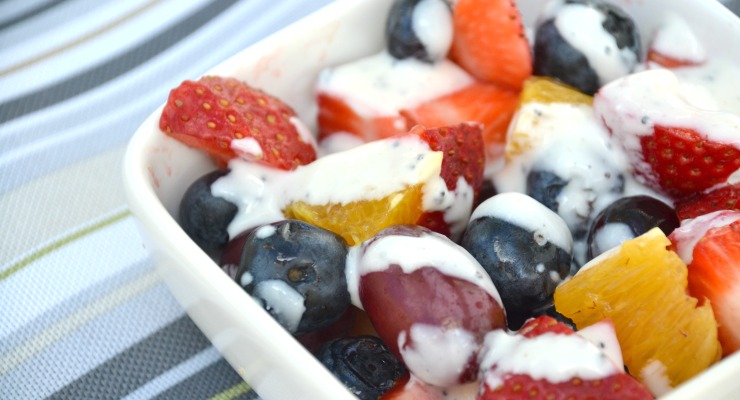
No more boring fruit. This simple creamy orange poppy seed salad dressing transforms any combination of fruit into a special side dish.

Spruce up your salad.

If you like sweet salad dressings (like me!) you could even use this on a lettuce salad. Add some crispy pecans, dried cherries and feta cheese. Delicious!

Looking for some other great salad dressing recipes? The Cookful has plenty to choose from . I think the No Egg Caesar Dressing would be great.

Ready to add some extra flavor to your fruit salad?

Try this super easy creamy orange poppy seed salad dressing. No more boring fruit.
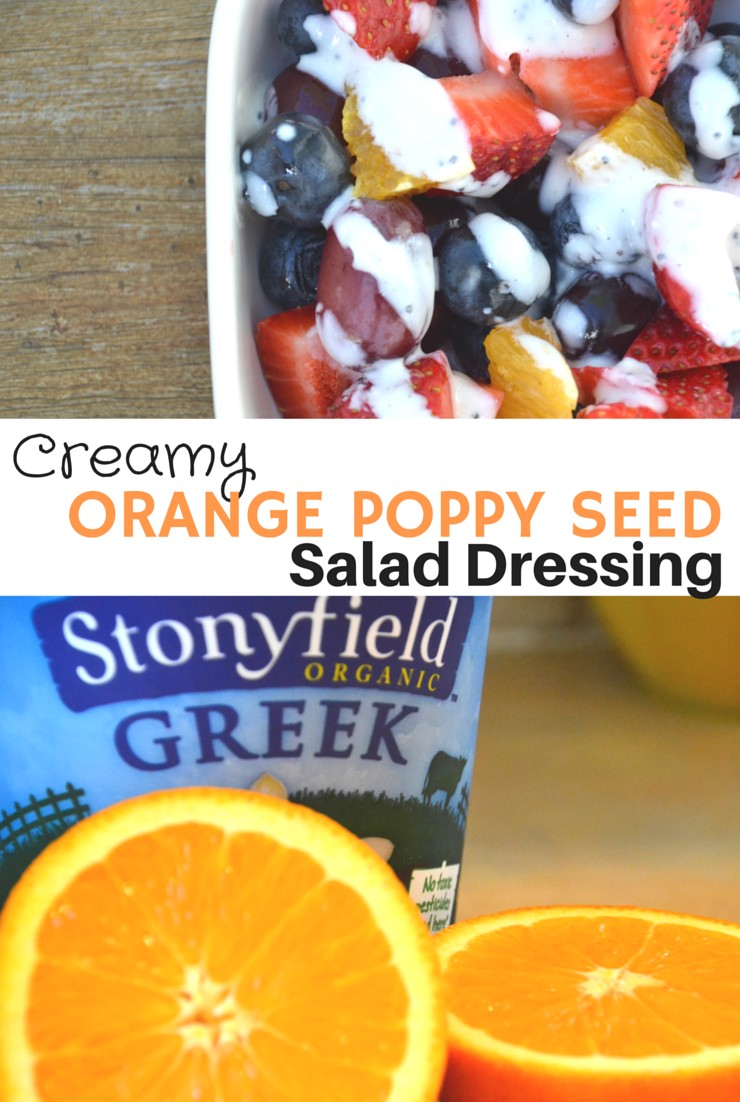
No more boring fruit. This simple creamy orange poppy seed salad dressing transforms any combination of fruit into a special side dish.

Creamy Orange Poppy Seed Salad Dressing
A creamy fruit salad dressing with a pop of orange flavor.
Write a review
Print
Ingredients
  1. 1/2 cup Stonyfield vanilla Greek yogurt (fat free or full fat)
  2. juice of 1/2 - 1 orange (depends how strong you want the orange flavor)
  3. 1/2 tsp. poppy seeds
  4. pinch unrefined sea salt
Instructions
  1. Mix all of the ingredients.
  2. Chill for 10 minutes.
  3. Serve over fruit as a salad, on the side as a dip or on a lettuce salad.
  4. Store in the refrigerator for up to 10 days.
Notes
  1. This makes enough for a large fruit salad.
  2. You can replace the vanilla yogurt with plain yogurt and 1 Tbsp. honey or maple syrup.
Just Take A Bite https://justtakeabite.com/

Have you heard of The Cookful?

It’s a great new site that really digs deep into specific food topics. They came up with some great salad dressing recipes!

I am working with Stonyfield and The Cookful on this post. I have been compensated for my time commitment, but I have not been paid to post positive reviews. Opinions are my own.

Pistachio Pea Pesto | Just Take A Bite

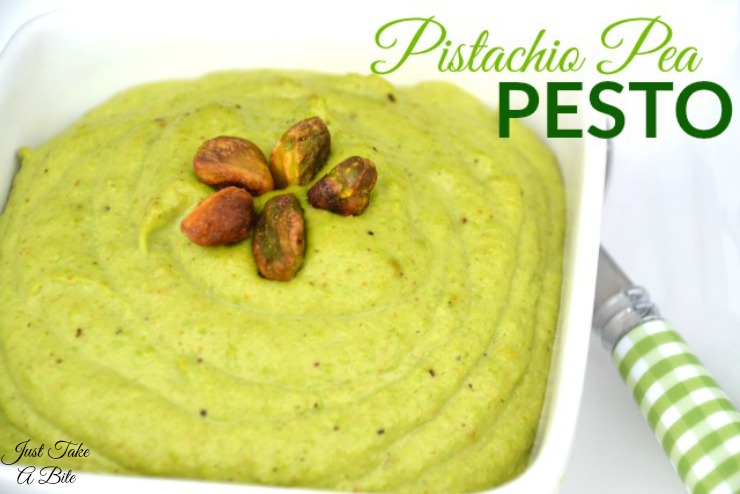
Pistachio Pea Pesto

With the return of spring comes color and new life. Add some of both to your meal with this bright and flavorful pistachio pea pesto.

Pistachio Pea Pesto | Just Take A Bite

If there is an easy way to get your kids to eat vegetables it is in a sauce. Put the sauce on pasta or pizza. Instant hit!

This pistachio pea pesto is no exception. Parents love the loads of vegetables and healthy fat from nuts. Kids love the taste and color.

Easy “peasy.”

The really great thing about this pesto is how easy it is to make. Only six ingredients (and the cheese is even optional). Toss them all in the blender and it’s done. No cooking. Just puree and serve. It is easy enough for kids to make themselves!

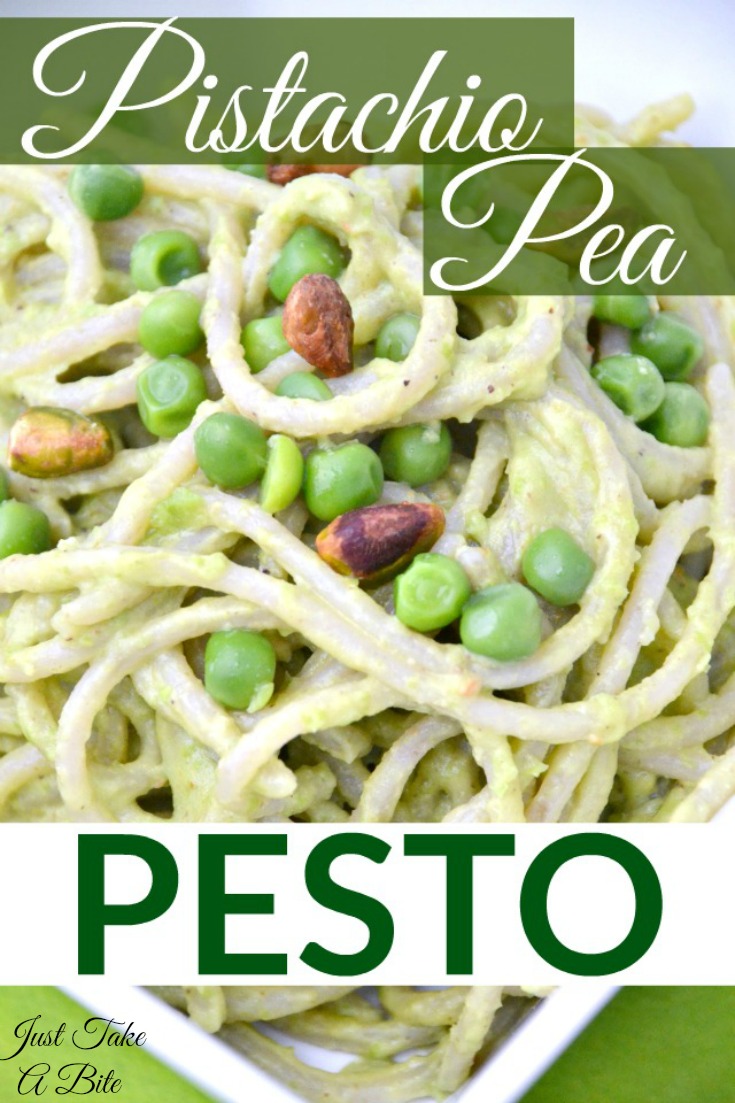
Mix pistachio pea pesto with your favorite variety of noodles for an easy weeknight meal that can even be made gluten or grain free. Add some extra peas and nuts into the pasta for texture and nutrition. Leftover cooked chicken also makes a great addition for a complete meal.

But the possibilities don’t end there. Make pizza night a little more special with pesto pizza. Make or buy your favorite pizza crust. Top it with pistachio pea pesto and some fresh mozzarella. Bake and serve.

Pistachio Pea Pesto | Just Take A Bite

Whether you are vegetarian or just looking to save a little money on your grocery bill either of these would make a great meatless meal.

The possibilities are endless! Head over to Super Healthy Kids where I’m sharing this easy pistachio pea pesto recipe and more fun ways to use it.

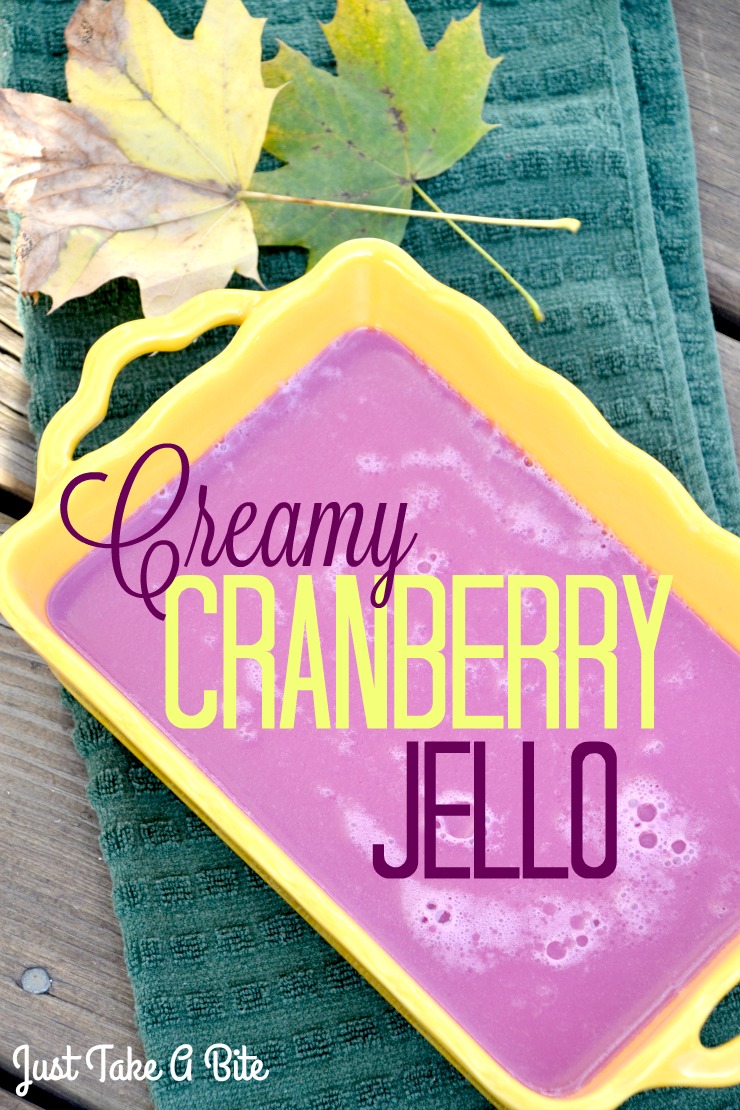
Creamy Cranberry Jello | Just Take A Bite

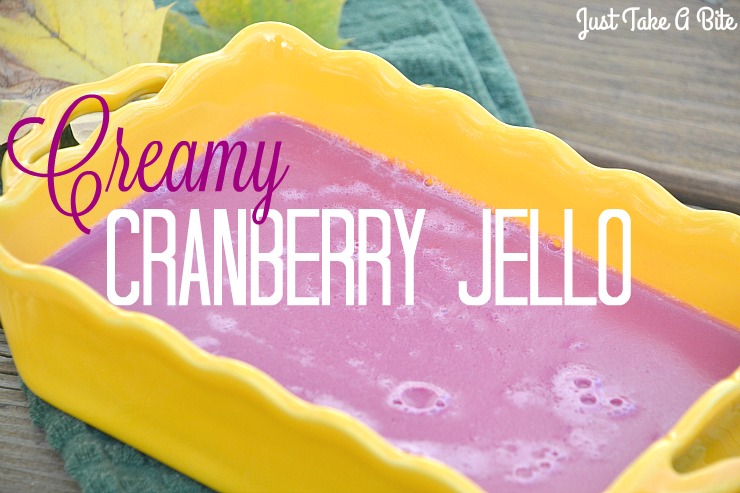
Creamy Cranberry Jello

Looking for a kid-friendly spin on cranberry sauce? Try some creamy cranberry jello! It is packed with nutrients and kids will love the taste.

Creamy Cranberry Jello | Just Take A Bite

I am working with Stonyfield for this post. I have been compensated for my time commitment. But the opinions and ideas are my own. I have not been paid to post positive reviews.
I’ll be honest. I always skipped the cranberry sauce growing up.

Tart, gelatinous red stuff shaped like a can…not really my thing. I’m not even sure I ever actually tasted it!

It looked that bad to me.

Not much has changed.

Fast forward thirty years. I’m still not entirely sure I’ve ever tasted cranberry sauce. I honestly couldn’t tell you what it tastes like. Even though it sounds really good…assuming it’s not out of a can.

I’ve never made it or served it to my family (though this homemade version from Raising Generation Nourished sure looks good!)

So when challenged by Stonyfield to recreate a holiday dish using yogurt I figured I should try to improve on the one Thanksgiving dish I never even bother making.

Creamy Cranberry Jello | Just Take A Bite

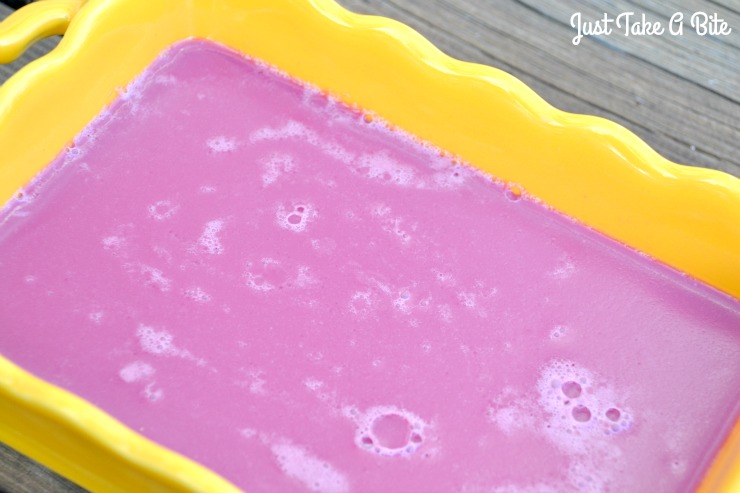
I turned cranberry sauce into creamy cranberry jello!

Sweet success.

My kids love it.

A little sweet. A little tart. A little creamy. Perfect.

Creamy cranberry jello really couldn’t be any easier to make either.

Five ingredients. Five minutes of hands on time.

The cranberry comes from pure cranberry juice. The creaminess comes from Stonyfield Plain Greek yogurt or strained whole milk yogurt. And the jello comes from quality grass-fed gelatin.

I love the simplicity of this dish and that it is very kid-friendly. I also love that you can make it up to a couple days in advance. One less thing to think about the day of Thanksgiving or Christmas!

If your kids tend to be hesitant to try new foods and flavors like cranberry try using these fun Thanksgiving printables.

Thanksgiving-stickers

They can be printed out on a self-adhesive paper and placed on soup bowls, paper plates, napkins and glasses. Cute illustrations can sometimes motivate children to eat, but if that’s not enough, writing out funny rhymes or riddles about food can really do the trick.

They can also be used for labeling each dish so those with allergies know what’s safe.

Are you still finalizing your holiday meal plans?

Be sure to keep cranberries ON the menu this year. Nobody will pass them up in the form of creamy cranberry jello. Not even the kids!

Creamy Cranberry Jello | Just Take A Bite

Creamy Cranberry Jello
Serves 8
A creamy, kid friendly twist on cranberry sauce.
Write a review
Print
Ingredients
  1. 2 cups pure cranberry juice (NOT cranberry juice cocktail)
  2. 1 cup organic cane sugar
  3. 1/4 tsp. unrefined sea salt
  4. 1/2 cup Greek yogurt or 1 cup whole milk yogurt, strained
  5. 1 1/2 - 2 Tbsp. grass-fed gelatin
Instructions
  1. In a medium saucepan combine the juice, sugar, salt and yogurt. Whisk until combined.
  2. Add the gelatin while whisking to prevent clumping. Let sit one minute.
  3. Heat over medium heat, whisking frequently, until the sugar and gelatin are dissolved (about 3 minutes, mixture will be warm).
  4. Pour into a heat-safe serving dish.
  5. Refrigerate until firm.
  6. Serve cold.
Notes
  1. If you like your jello on the softer side use 1 1/2 Tbsp. of gelatin. If you like it firmer use 2 Tbsp. of gelatin.
  2. You can turn this into finger jello by using 2 1/2 - 3 Tbsp. of gelatin.
  3. You can add whole cranberries to the jello before refrigerating.
  4. You can replace half of the sugar with honey. You may need to increase the gelatin slightly.
  5. You can substitute coconut yogurt to make this dairy free.
Just Take A Bite https://justtakeabite.com/

Looking for more delicious jello recipes for the holidays? Give these a try!

Candy Corn Finger Jello

Pear Lime Jello Salad

Strawberry Lemon Jello Salad

Cherry Rhubarb Jello

In order for me to support my blogging activities, I may receive monetary compensation or other types of remuneration for my endorsement, recommendation, testimonial and/or link to any products or services from this blog. It will not change the cost of any products or services for you.

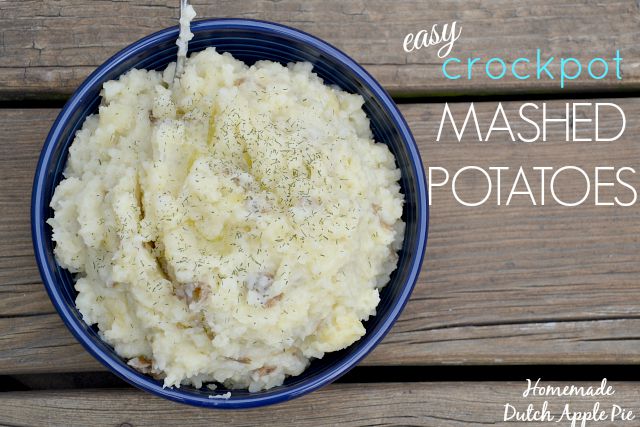
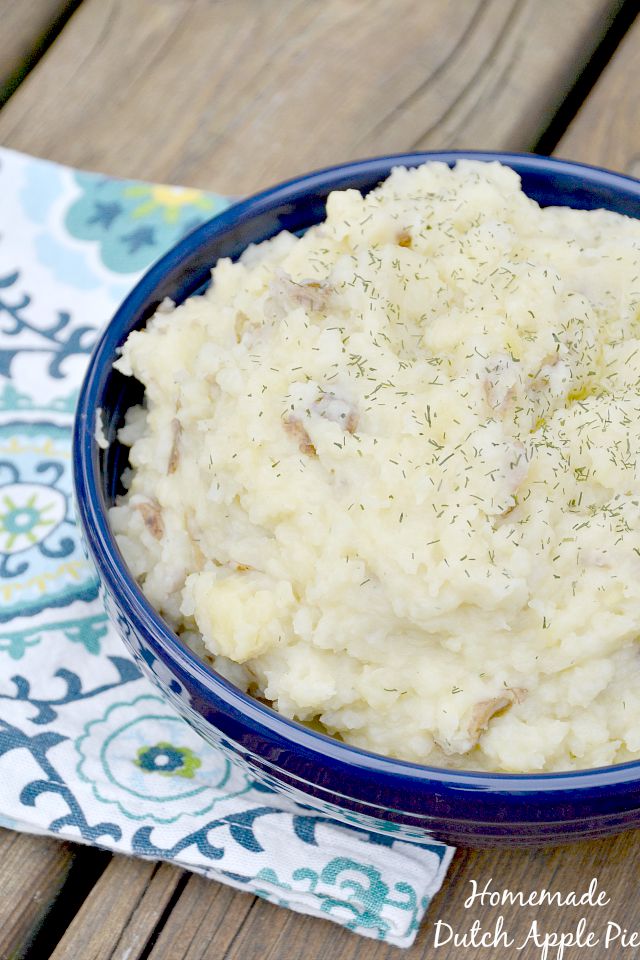
Easy Crockpot Mashed Potatoes | Just Take A Bite

Easy Crockpot Mashed Potatoes

No need to stand at the stove making mashed potatoes at the last minute when hosting a holiday gathering. Let your crockpot do all the work! Crockpot mashed potatoes are easy to prepare and can stay warm and ready to serve whenever you need them.

Easy Crockpot Mashed Potatoes | Just Take A Bite

We are quickly approaching the holiday season. That means big meals and lots of great food.

If you’re like me you prefer to host rather than travel.

But that is a lot of work!

Now you can take one thing off of your last minute to-do list. Crockpot mashed potatoes let you prepare a staple side dish in advance and forget about it until dinner is served.

It really doesn’t get any easier.

Easy Crockpot Mashed Potatoes | Just Take A Bite

Head over to Super Healthy Kids to find out just how easy these crockpot mashed potatoes really are. Then add them to your Thanksgiving menu.

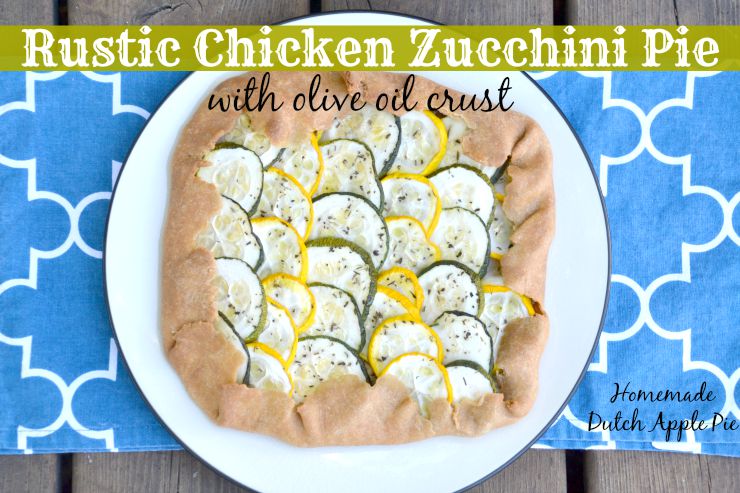
Rustic Chicken Zucchini Pie With Olive Oil Crust | Homemade Dutch Apple Pie

Rustic Chicken Zucchini Pie with Olive Oil Crust

Looking for a new way to use up your abundance of zucchini? Rustic chicken zucchini pie with olive oil crust makes the perfect breakfast, lunch or dinner! Serve it warm or cold any time of day for a filling and nutritious meal.

Rustic Chicken Zucchini Pie With Olive Oil Crust | Homemade Dutch Apple Pie

Summer is about having fun, getting outside and being active. That includes riding bikes, picnics at the park and pool parties.

But summer is also about slowing down, taking it easy and enjoying the simple pleasures. Think lounging on the beach, sitting by the fire watching the stars and snuggling with your kids on a quiet rainy day.

When it comes to soaking up the summer I think of simple, comfort food that utilizes fresh produce.

Rustic Chicken Zucchini Pie With Olive Oil Crust | Homemade Dutch Apple Pie

Summer food.

Rustic chicken zucchini pie is comfort and summer all wrapped up in a pie crust.

It is a cross between pie and pizza.

The crust is a simple soaked dough made with flour, water, olive oil and salt. The filling is chicken and a bit of squash simmered in bone broth until a thick sauce forms. Finally a layer of zucchini tops the pie for a beautiful and delicious dish.

Simple and versatile.

Rustic chicken zucchini pie is fancy enough for dinner guests. Though you might want to make two! It will go quickly.

It is also simple enough for a weeknight meal that the kids will devour.

Eat it with a fork and knife or your hands. Serve it at the dinner table or pack it in a picnic.

Breakfast, lunch or dinner. Warm or cold.

A full meal all wrapped up in a delicious package, rustic chicken zucchini pie is really that good and that versatile.

Rustic Chicken Zucchini Pie With Olive Oil Crust | Homemade Dutch Apple Pie

Allergen friendly.

The thing I love about it is that it is naturally dairy, egg, nut, corn and coconut free. I did use a wheat crust, but gluten free flour can replace the wheat. So it is safe for just about everyone!

If you can tolerate cheese some fresh mozzarella mixed into the sauce or grated parmesan on top would taste great.

No chicken on hand? Swap it for another meat like sausage. Or simply make it a veggie pie. The sauce underneath can be made without the meat. Simply add a little extra squash to the broth for a creamy base.

Lunch time!

For all of the busy moms out there chicken zucchini pie is perfect for a grab and go lunch. It’s hard enough to feed the kids let alone find time to make your own lunch. Make a pie at the beginning of the week and grab a slice or two each day for lunch.

If you want to get a head start on school lunches you could make a few chicken zucchini pies, cut them into slices and freeze individual pieces. Simply pull out a piece when you need it for adding to a lunch box or even for an easy breakfast.

I don’t know about you but any time I can get my kids to eat broth while at school is great. Vegetables on top of it is a bonus.


Check out the Lunch Box ebook for more fun recipes (35% off through 9/7/15!)


Don’t let that pile of zucchini go to waste! Create a simple summer dish the family will love. Rustic chicken zucchini pie with olive oil crust is perfect for any occasion.

How do you like to use zucchini – in sweets like zucchini bread, cake and scones or in a savory dish?

Rustic Chicken Zucchini Pie With Olive Oil Crust | Homemade Dutch Apple Pie

Rustic Chicken Zucchini Pie with Olive Oil Crust
Serves 4
Creamy chicken, fresh zucchini and a simple olive oil crust - the perfect breakfast, lunch or dinner!
Write a review
Print
Crust
  1. 1 cup whole wheat, all purpose or gluten free flour
  2. 1/2 tsp. unrefined sea salt
  3. 3 Tbsp. extra virgin olive oil
  4. 2-3 Tbsp. cold water
  5. 1 Tbsp. lemon juice
Filling
  1. 2 Tbsp. pureed squash
  2. 2 medium zucchini
  3. 1 cup cooked, shredded or diced chicken
  4. 3/4 cup chicken broth
  5. 1/4 tsp. unrefined sea salt
  6. 1 tsp. of a combination of basil, rosemary and thyme
Crust
  1. In a food processor combine the flour, salt and olive oil. Pulse until crumbly.
  2. Add the water and lemon juice.
  3. Process until a ball of dough forms.
  4. Wrap in plastic wrap and refrigerate 7-24 hours.
Filling
  1. Slice the zucchini and lay it on a cooling rack.
  2. Sprinkle with salt and let sit 20 minutes. Flip and repeat. (This will remove a lot of the water.)
  3. Pat the zucchini dry with paper towel when done draining.
  4. While the zucchini is draining, cook the chicken, squash and salt in broth. Simmer until it is thick and the liquid is evaporated, 5-10 minutes.
  5. Heat oven to 350*F.
  6. Roll the dough into a 12" round on parchment paper.
  7. Spread the chicken filling on the dough, leaving a 2" border.
  8. Layer the zucchini on top of the chicken.
  9. Season with herbs.
  10. Fold edges of dough onto zucchini.
  11. Drizzle the top with olive oil.
  12. Bake for 70 minutes.
  13. Allow to cool for 10 minutes before slicing.
Notes
  1. This can be served warm, room temp or cold.
  2. This can be frozen whole or in slices.
  3. You can add 1/2 cup shredded cheese to the filling and/or the top.
  4. To make a meatless pie omit the chicken and increase the squash to 1/2 cup.
Just Take A Bite https://justtakeabite.com/
Rustic Chicken Zucchini Pie With Olive Oil Crust | Homemade Dutch Apple Pie

In order for me to support my blogging activities, I may receive monetary compensation or other types of remuneration for my endorsement, recommendation, testimonial and/or link to any products or services from this blog.

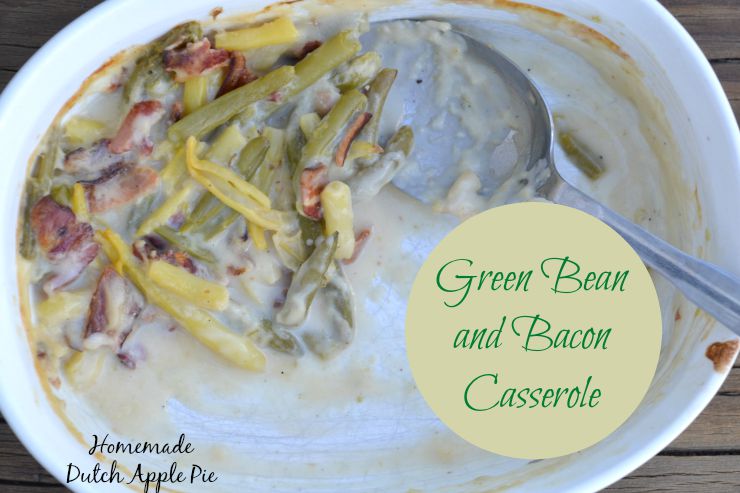
Green Bean and Bacon Casserole | Homemade Dutch Apple Pie

Green Bean and Bacon Casserole

Green bean and bacon casserole is a real food version of the classic side dish. With nourishing ingredients like bacon, raw milk and fresh beans it is healthy and filling enough to be a main dish.

Green Bean and Bacon Casserole | Homemade Dutch Apple Pie

Every summer we have a garden with a variety of vegetables. We change up what we grow each year.

But one thing we always have is beans!

I am in the kitchen freezing beans a couple times a week all through July and into August so we can enjoy them all year.

Our favorite way to enjoy beans is cooked fresh. My son always has to have second and sometimes third helpings. He knows what’s good!

Green Bean and Bacon Casserole | Homemade Dutch Apple Pie

A new twist on an old favorite.

This year I decided to use some of our abundance to recreate the classic green bean casserole.

The original includes canned beans, canned cream soups and fried “onions” on top. To me that means MSG, thickeners and all sorts of strange ingredients I don’t care to consume.

My homemade green bean and bacon casserole is made with fresh beans, homemade bone broth, raw milk and pastured bacon. It really doesn’t get any better than that!

Green bean and bacon casserole can be served traditionally as a side dish. But my version is so filling that I served it as the main course! Give me a big pile of green bean and bacon casserole and a slice of sourdough bread and I am a happy mama.

The kid seal of approval.

This was the first time eating a green bean casserole for my kids. They couldn’t get enough! My husband thoroughly enjoyed it as well.

Green bean and bacon casserole is great when beans are fresh. It also works with frozen beans. So you can enjoy it year round.

Green Bean and Bacon Casserole | Homemade Dutch Apple Pie

Make it work for your schedule.

It is perfect for potlucks, family gatherings and holidays. You can even make it for an easy week night meal. Green bean and bacon casserole can be prepared in advance and baked at dinner time.

As a busy mom I love meals like this. I prepare it during the day while the kids are napping or at school. Then when dinner time rolls around and everyone needs my attention I just pop it in the oven.

No time to bake it? No problem. Green bean and bacon casserole is great straight from the pan. Serve it on a bed of rice and you’ve got a complete meal.

If you enjoy the crispy onions on top of green bean casserole simply fry up some onion slices until crispy. Add them to the top after it is done baking.

If you don’t have bacon on hand you can substitute cooked chicken. Then use whatever fat you have on hand in place of the bacon grease (lard, tallow, butter, etc.).

Whether you’ve got fresh summer beans or you’re working through your freezer stash green bean and bacon casserole is sure to please the whole family.

My only regret when making this was that I didn’t have time to take better photos before my kids devoured it!

Did you grow up on green bean casserole? You’ll love this updated, nutrient dense version.

Green Bean and Bacon Casserole | Homemade Dutch Apple Pie

Green Bean and Bacon Casserole
Serves 6
An updated version of the classic green bean casserole. This one is filled with nourishing ingredients and can be served as a main dish.
Write a review
Print
Ingredients
  1. 1 lb. green/yellow beans, snipped, cut
  2. 1 cup chicken broth
  3. 1 cup milk (can be replaced with broth to make it dairy free)
  4. 2 Tbsp. all purpose flour, tapioca flour or cornstarch
  5. 1 tsp. salt
  6. 1/2 tsp. pepper (optional)
  7. 1/2 tsp. garlic powder
  8. 1/2 lb. pastured, nitrite/nitrate free bacon, cooked, crumbled, grease reserved
  9. 2 Tbsp. bacon grease
  10. 1/2 small onion. sliced (optional)
Instructions
  1. Cook the beans in water until tender, 30 - 40 minutes. Drain.
  2. Heat the bacon grease in a large skillet.
  3. Stir in all purpose flour OR mix tapioca or cornstarch with 1/4 cup of the broth and add to grease.
  4. Cook 1 minute.
  5. Slowly stir in the broth and milk.
  6. Season and simmer until it thickens.
  7. Add the cooked beans and simmer on low 5 minutes.
  8. Add the bacon.
  9. Transfer to a 1 1/2 qt. casserole dish.
  10. Bake at 350*F for 20 minutes.
  11. Cook onion slices in bacon grease until crispy.
  12. Top casserole with onion slices when serving.
Notes
  1. This can be served straight from the pan without baking.
  2. This can be prepared in advance and baked when ready to eat.
Just Take A Bite https://justtakeabite.com/
In order for me to support my blogging activities, I may receive monetary compensation or other types of remuneration for my endorsement, recommendation, testimonial and/or link to any products or services from this blog.

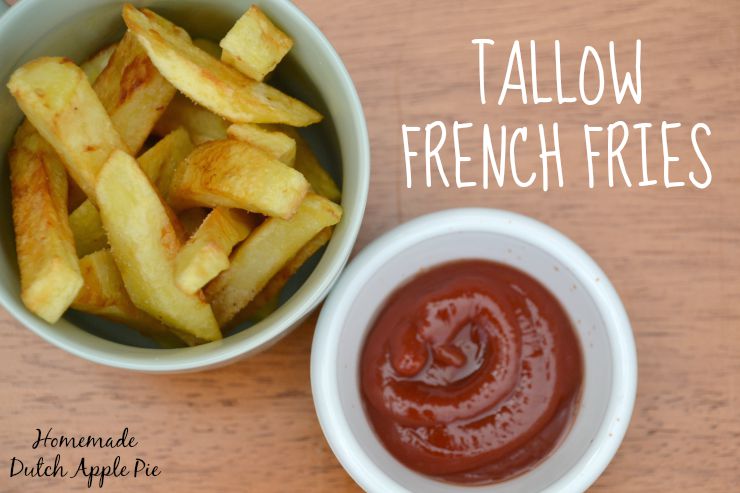
Homemade Tallow French Fries | Homemade Dutch Apple Pie

Homemade Tallow French Fries

Nothing goes better with your grilled burger than fresh-out-of-the-pan tallow french fries! No vegetable oil. No fillers. Just pure potato and real fat.

Homemade Tallow French Fries | Homemade Dutch Apple Pie

You’ve got the grill fired up. The burgers are under way. There is a pile of fresh vegetables from the garden to create a salad.

But something is missing.

What is the perfect side with a grilled burger and garden vegetables? French fries, of course!

Convenience Food for Real Foodies

There is very little convenience food that I buy. But I confess that french fries are almost always in my freezer. They are easy when you don’t have time to cut up potatoes.

Plus with a kid that is allergic to wheat, rice and corn but refuses to eat potatoes in any form except french fries or chips…you serve french fries a little more than you would like.

Since I don’t really care for the vegetable oils in the frozen variety I do sometimes make my own tallow french fries.

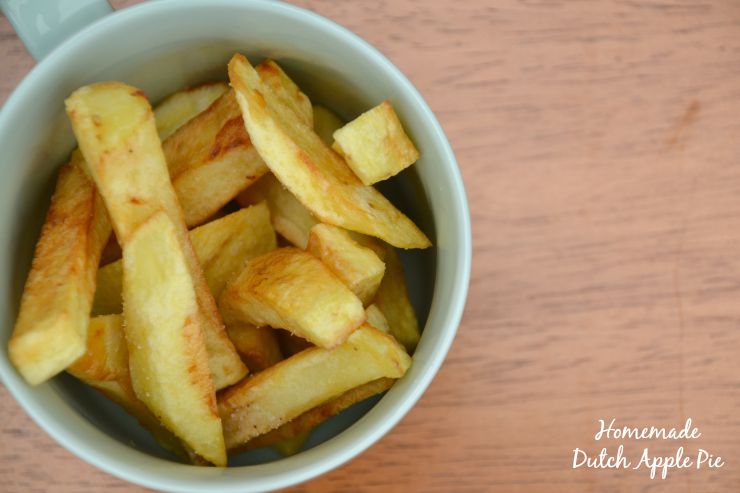
If you have never had homemade french fries you are really missing out! They are better than anything you’ll get from a bag or even from a restaurant.

My whole family goes crazy for these tallow french fries. I go crazy for them too…because they are made with healthy fat and have no fillers, gums or acids. Some frozen french fries even have corn! A big no-no with a corn allergy.

Homemade Tallow French Fries | Homemade Dutch Apple Pie

The Secret to Crispy Homemade French Fries

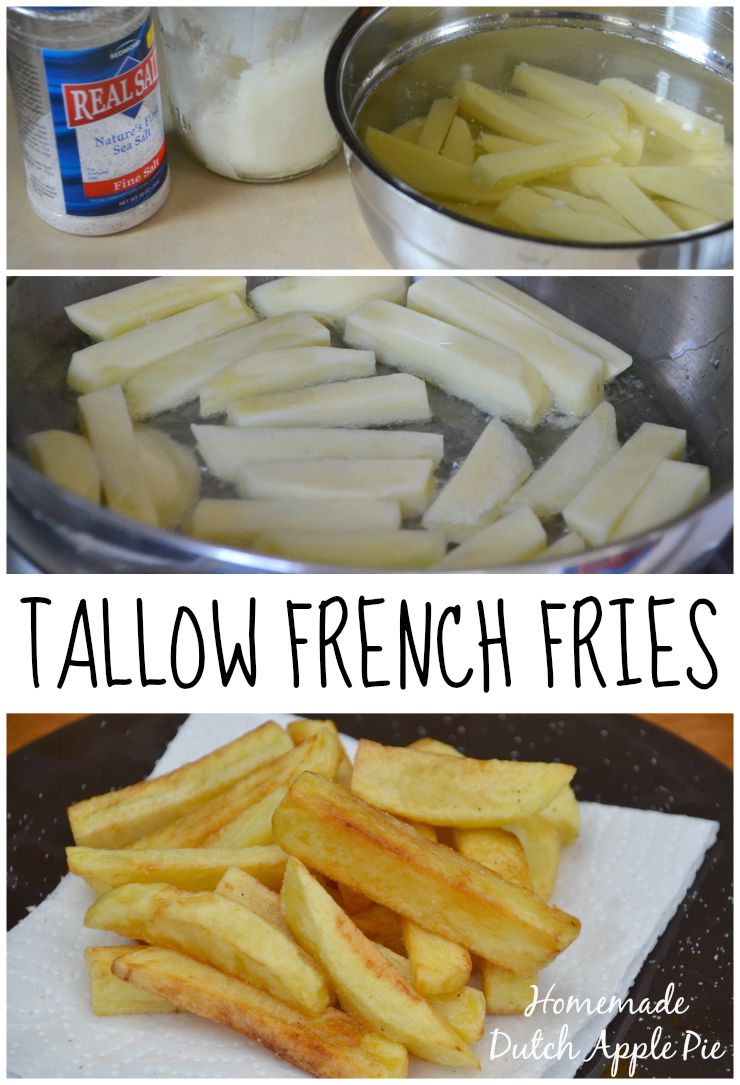
When making homemade tallow french fries there is an important step you can’t forget. Soak and dry the potatoes! This is critical so they will fry up nicely. The soaking removes some of the starch. And oil and water really don’t mix.

Another key to great french fries is using enough fat. I don’t have a fryer. I don’t like to use up all of my tallow at one time either. But I do make sure that there is a plenty of fat in the pan. When I’m done making the french fries I pour the leftover tallow back into a jar to use later.

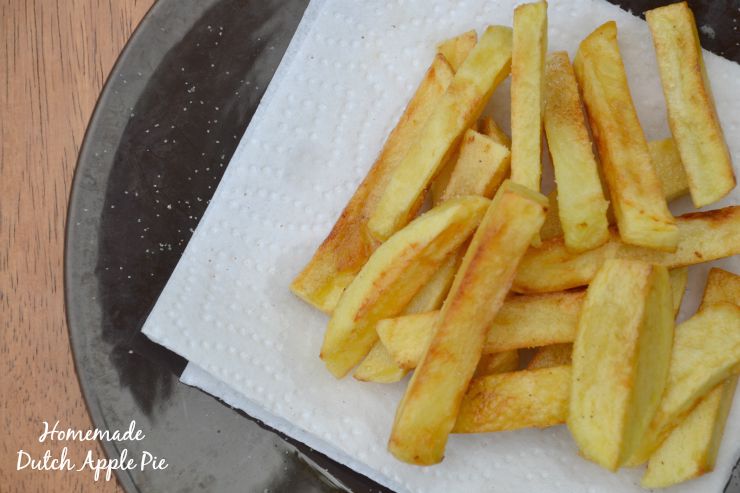
Of course the final step is to sprinkle the tallow french fries with lots of quality unrefined sea salt. The saltier the better in my opinion.

Then pair them with quality ketchup or make your own!

Homemade Tallow French Fries | Homemade Dutch Apple Pie

Freshly Cooked French Fries

Homemade tallow french fries are best eaten fresh out of the pan. There really is nothing like it.

But if you have leftovers (something that pretty much never happens here with homemade fries) you can reheat them in the oven.

You could make a big batch when you have some time in the kitchen and freeze them so you have homemade french fries on hand for quick meals.

French Fries Without Potatoes

Maybe you don’t like potatoes? Or maybe you’re like me and don’t tolerate them?

Try another vegetable! You can use the same cooking method with carrots, parsnips, sweet potatoes and rutabagas. Pretty much any root vegetable will work.

Is your mouth watering yet? I know mine is. Grab some potatoes, tallow and salt. Fry up the best french fries you’ve ever tasted.  Just a warning…your family will want them all the time once they’ve tried tallow french fries.

Have you ever made your own french fries?

Homemade Tallow French Fries | Homemade Dutch Apple Pie

Homemade Tallow French Fries
Serves 4
Homemade french fries with real fat and real salt.
Write a review
Print
Ingredients
  1. 3 medium russet potatoes
  2. sea salt to taste
  3. tallow (enough to fill pan)
Instructions
  1. Peel the potatoes. Cut into 1/2" sticks.
  2. Soak the potatoes in cold water for 30 minutes.
  3. Dry the potatoes completely.
  4. Heat tallow in a large skillet over medium heat (use enough to fill the pan about 1/4" deep).
  5. Cook the potatoes in the tallow until golden, turning once in a while to make sure all sides are browned, about 10 - 15 minutes.
  6. Place the finished fries on a paper towel and sprinkle liberally with sea salt.
  7. Serve immediately.
Notes
  1. Lard or palm shortening will work in place of the tallow.
  2. Any root vegetable will work in place of the potato.
  3. Store leftover fries in a sealed container in the refrigerator. Heat in the oven to warm.
Just Take A Bite https://justtakeabite.com/
 In order for me to support my blogging activities, I may receive monetary compensation or other types of remuneration for my endorsement, recommendation, testimonial and/or link to any products or services from this blog.

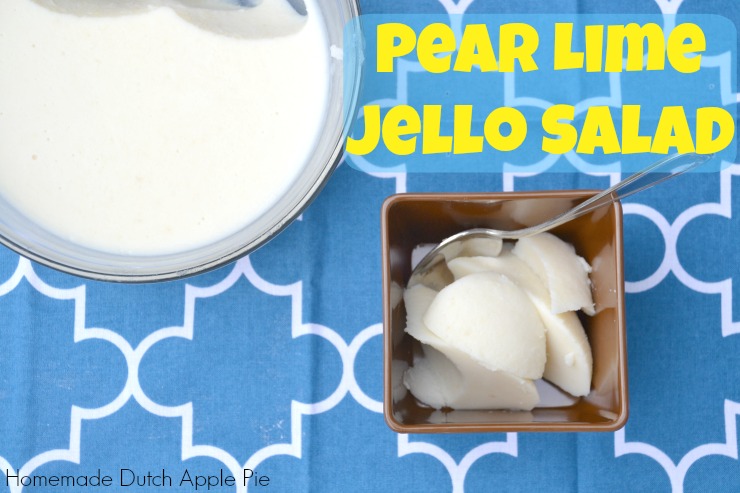
Pear Lime Jello Salad | Homemade Dutch Apple Pie

Pear Lime Jello Salad

This pear lime jello salad is a simple recreation of the classic seafoam without the food coloring and boxed mix.

Pear Lime Jello Salad | Homemade Dutch Apple Pie

The first time I visited my (now) in-laws was for Thanksgiving. We had a feast (prepared by my talented mother-in-law)! It included the usual turkey, stuffing, potatoes, gravy, vegetables…and seafoam salad.

I had never heard of or tasted seafoam salad. But it was good!

  • Pears in juice.
  • Lime Jello.
  • Cream cheese.

It is an assortment of sweet and creamy goodness.

Fast forward about 15 years and I realize just how unhealthy it is.

  • Boxed jello mix.
  • Green food coloring.
  • Canned pears.
  • Cream cheese with thickeners.

It is an assortment of artificial colors, artificial sweeteners and thickeners.

Pear Lime Jello Salad | Homemade Dutch Apple Pie

Of course that means one thing. Time to get creative.

Homemade Jello Salad

My pear lime jello salad has the bright flavor and creamy texture without the food coloring and refined sweeteners.

Instead, I combine lime juice, fresh pears, grass-fed gelatin, homemade cream cheese and unrefined sweeteners to create a special treat. Homemade powdered sugar really helps thicken the salad.

My kids and my husband really love this pear lime jello salad.

There is one noticeable difference from the original salad – it is white!  Have you ever looked at the inside of a pear? It is white, not green.

If you really want some green in your salad you could add lime zest or maybe even a touch of spinach or peas.

Pear Lime Jello Salad | Homemade Dutch Apple Pie

On top of the sweet flavor, pear lime jello salad is packed with nutrients.

The combination of homemade cream cheese and grass-fed gelatin provides healthy fat and complete protein. The pears add a bit of carbohydrates and fiber.

Pear Lime Jello Salad

Pear lime jello salad makes a great side dish for any week night meal. But it is also great for easy lunches, snacks, picnics and potlucks.

I usually make this salad in a bowl and scoop it with a spoon. But you could also make it in a 9×13 pan and cut it into squares.

Dye-Free Jello

Pear lime jello salad makes great finger food for kids!

But without a green mess.

Are you looking for a new side dish for your summer barbecues or family picnics? Pear lime jello salad is just what you need.

Pear Lime Jello Salad | Homemade Dutch Apple Pie

Pear Lime Jello Salad
Serves 6
A real food version of the classic seafoam salad.
Write a review
Print
Ingredients
  1. 3 large or 4 medium ripe pears, peeled, cored and roughly chopped
  2. 2 Tbsp. cane sugar
  3. 1/4 cup lime juice
  4. 1 1/2 Tbsp. grass-fed gelatin
  5. 1/4 cup cold water
  6. 3/4 cups whole milk plain yogurt OR 1/3 cup whole milk greek yogurt OR 1/3 cup plain cream cheese
  7. 1/4 cup sour cream
  8. 3 Tbsp. homemade powdered sugar OR 2 Tbsp. cane sugar + 1 Tbsp. tapioca flour
Instructions
  1. Strain the yogurt in cheesecloth about 1 hour. Squeeze as much liquid out as possible. Set aside.
  2. Combine the sour cream and powdered sugar. Place in the refrigerator.
  3. Place the pears, lime juice and sugar in a small saucepan. Bring to a boil, reduce heat and simmer 15 minutes.
  4. Puree the pear mixture (leave it in the pan and puree with an immersion blender or puree in a blender and return to pan).
  5. Dissolve the gelatin in 1/4 cup cold water for 30 seconds.
  6. Add the gelatin mixture to the pear mixture and stir to dissolve.
  7. Add the strained yogurt to the pear mixture. Stir to combine.
  8. Pour the pear mixture into a glass bowl or 8" pan. Chill in the refrigerator 15 minutes.
  9. Stir the sour cream mixture into the pear mixture. Return to the refrigerator to chill until fully set, about 4 hours.
  10. Serve cold.
Notes
  1. You can replace the lime juice with water or a different flavor of juice.
Just Take A Bite https://justtakeabite.com/
In order for me to support my blogging activities, I may receive monetary compensation or other types of remuneration for my endorsement, recommendation, testimonial and/or link to any products or services from this blog.

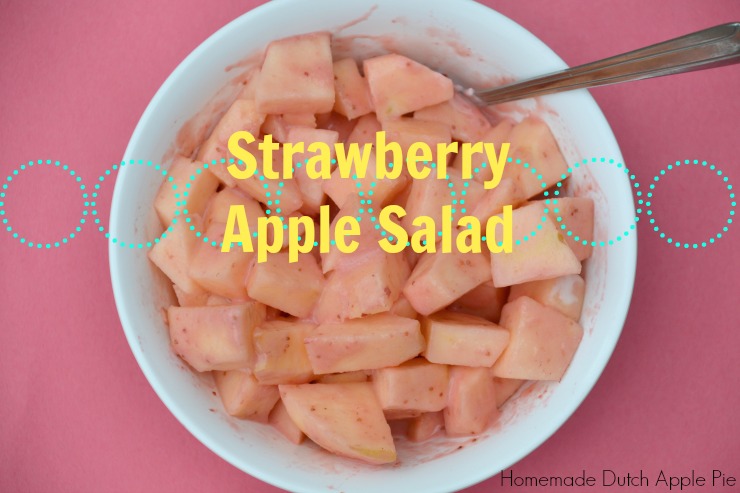
Strawberry Apple Salad | Homemade Dutch Apple Pie

Strawberry Apple Salad

Strawberry apple salad is a simple way to add a burst of strawberry flavor to your summer meal.Strawberry Apple Salad | Homemade Dutch Apple Pie

I am a planner.  I always make meal plans for the week (I’ve been posting them for several years if you need inspiration!). It’s usually not too difficult to come up with main dishes.

But side dishes…

I struggle there. It usually ends up being the same boring sides week after week. Broccoli, beans, applesauce…

If you’re tired of boring sides you’re in luck.  Today I’ve got a bright, fun, easy side dish that is perfect for any week night meal. It can also be doubled or tripled and served at your next picnic or potluck.

There is no cooking or baking required. Just some chopping and mixing.

Strawberry apple salad features one of summer’s gems – fresh strawberries.  It is naturally very allergen friendly and low in sugar. It puts a fun summer spin on the year round staple of apples.

If you’re like me and don’t need much sweetness to feel like you’re having a treat, strawberry apple salad could even be used as dessert. Top it with a sprinkle of granola or crispy walnuts. Dessert is ready!Strawberry Apple Salad | Homemade Dutch Apple Pie

One of the things I love about this salad is that you can prepare it in advance.  The longer you let it sit the better! The apples will just absorb more and more of the strawberry flavor.

I like to let my kids help make this strawberry apple salad.  Even the young ones can get involved. I peel and core the apples. Then they use a dull knife to cut the apples into chunks. After I blend the strawberry dressing they can pour it on the apples and mix.

Of course if your child helps make the salad you have to let them be a taste tester.  That is the most important job! My kids sure loved sampling strawberry apple salad.

Strawberry apple salad is the perfect park snack.

Fill half pint mason jars with the salad and put a lid on. Grab a spoon and you’re all set. No need to worry about messy hands since you eat it with a spoon.

Whether it is strawberry season or not you can make strawberry apple salad. Frozen strawberries work too!  No apples on hand? No problem. Swap pears, peaches or plums. It’ll still taste great.

Put strawberry apple salad on your menu this week. I bet your kids will love it as much as mine do!Strawberry Apple Salad | Homemade Dutch Apple Pie

Strawberry Apple Salad
Serves 4
A simple summer salad that turns ordinary apples into a fun strawberry treat.
Write a review
Print
Ingredients
  1. 1/4 plain whole milk yogurt
  2. 1 cup strawberries (fresh or frozen, thawed)
  3. 2 Tbsp. honey
  4. 5-6 medium apples, peeled, cored and cut into bite size pieces
  5. optional - 1 tsp. poppy seeds
Instructions
  1. Puree the yogurt, strawberries and honey in a blender.
  2. Pour the mixture into a medium size bowl. Add poppy seeds if desired.
  3. Add the apples to the bowl and toss to coat.
  4. Chill for at least 2 hours before serving.
Notes
  1. This can be made a day ahead.
  2. Top the salad with granola or crispy nuts if desired.
  3. Fill half pint mason jars with the salad to take it on the go.
Just Take A Bite https://justtakeabite.com/


In order for me to support my blogging activities, I may receive monetary compensation or other types of remuneration for my endorsement, recommendation, testimonial and/or link to any products or services from this blog.

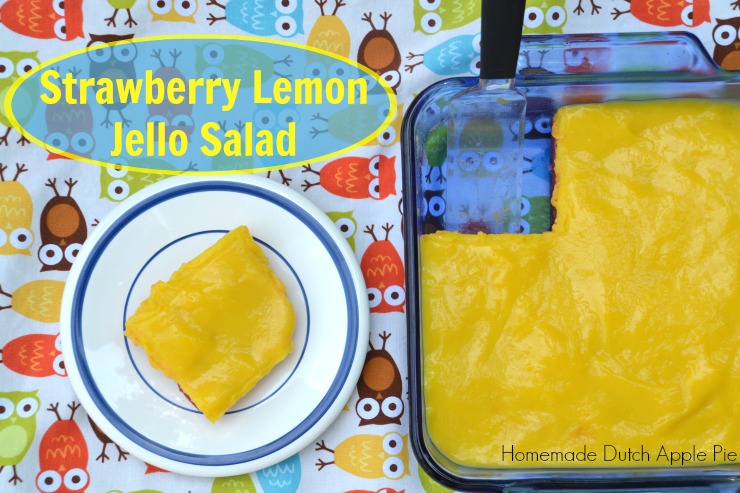
Strawberry Lemon Jello Salad | Homemade Dutch Apple Pie

Strawberry Lemon Jello Salad

When you see strawberries at the farmer’s market you know summer is here! Use that fresh fruit to kick off the season with this fun strawberry lemon jello salad the whole family will love.

Strawberry Lemon Jello Salad | Homemade Dutch Apple Pie

I recall eating a lot of jello growing up.  Of course we had it plain. But we also ate a lot of jello salads.

Church potlucks are notorious for a variety of jello dishes. Some have chunks of fruit. Some are layered. Some are meant to be eaten with your hands. I know I got my fill as a kid!

Jello salads are fruity and fun. Of course kids love them. Who wouldn’t with the bright colors and sweet flavor?

Is Jello Harmful?

It’s been a couple years now since we adopted a strict no food coloring policy in our house.

My children just react way too strongly to artificial colors and flavors.

Plus after researching I realize just how bad all of that artificial stuff is for everyone’s health (think ADHD, hyperactivity, etc.).  I still cringe every time I see a child eating a brightly colored cupcake, cookie or candy. Especially knowing that it is most likely a daily occurrence for them.

So jello out of a box is not something my children ever eat. But I do like to make real jello with nourishing grass-fed gelatin (use code TAKE10 for 10% off).  It is especially fun in the summer.

Strawberry Lemon Jello Salad | Homemade Dutch Apple Pie

Real Food Strawberry Lemon Jello Salad

Recently I decided I wanted to recreate some of my childhood favorite jello recipes.

I started with this strawberry lemon jello salad. It is actually a combination of two jello salads my mom made.

But this one is made with real fruit, grass-fed gelatin, natural sweeteners, pastured eggs and raw milk!

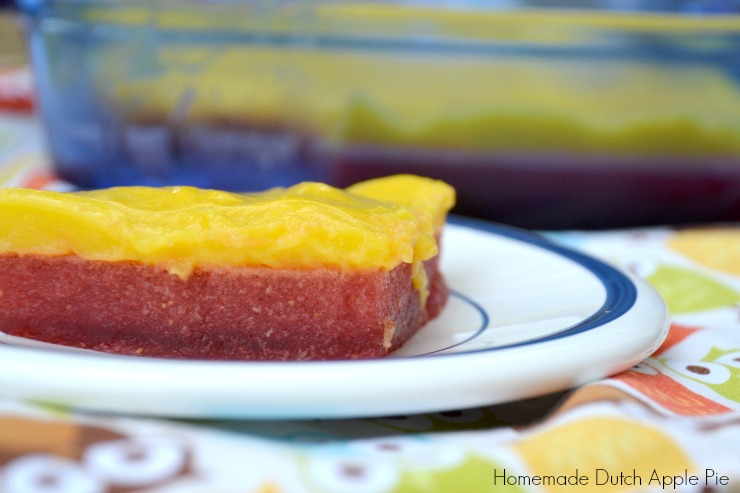
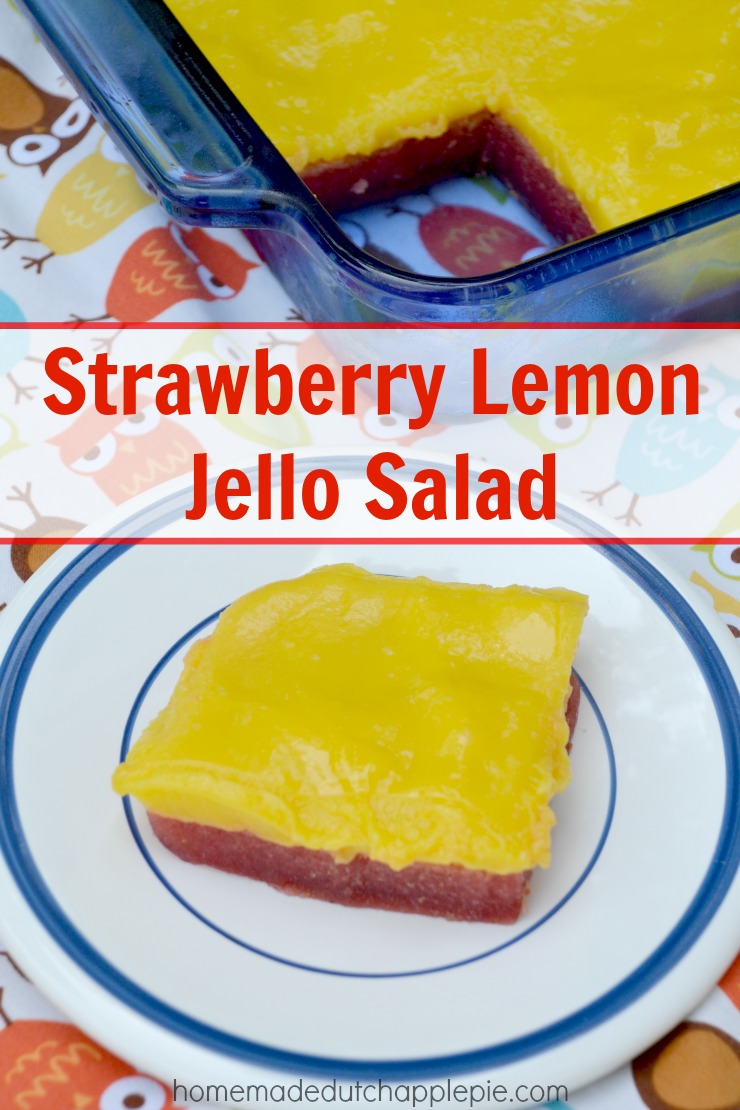
The first layer is a simple strawberry jello made with fresh berries. The top layer is a bright, lemon pudding.

Together they make an irresistible combination. And check out that color!!! No need for anything artificial when you’ve got quality ingredients with vibrant hues.

The final test is the flavor. My whole family gave it two thumbs up! The strawberry and lemon pair well. The jello is not overly sweet. It is a great combination.

Strawberry lemon jello salad would make a great addition to any summer picnic or potluck!

Are you a jello fan? Treat  yourself and your family to this amazing real food version of a classic. Strawberry lemon jello salad is sure to be a hit.

Strawberry Lemon Jello Salad | Homemade Dutch Apple Pie

Strawberry Lemon Jello Salad
Serves 12
Real strawberry jello topped with homemade lemon pudding.
Write a review
Print
Strawberry Layer
  1. 2 cups strawberries (fresh or frozen, thawed)
  2. 1/2 cup organic cane sugar
  3. 2 Tbsp. grass-fed gelatin
  4. 1 cup water
Lemon Layer
  1. 2 egg yolks
  2. 1/3 cup lemon juice
  3. 1/2 cup organic cane sugar
  4. 3 Tbsp. arrowroot, tapioca flour or corn starch
  5. 1 cup cream or whole milk
Strawberry Layer
  1. Puree the strawberries, sugar and water in a blender. Pour into a sauce pan.
  2. Stir the gelatin into the mixture. Let set 1 minute.
  3. Heat the strawberry mixture over low-medium heat, stirring, until the gelatin is dissolved, about 4 minutes.
  4. Pour into an 8" glass pan.
  5. Put in the refrigerator until set, about 1 hour.
Lemon Layer
  1. In a medium saucepan combine the egg yolks, lemon juice, sugar, arrowroot and milk. Whisk to combine.
  2. Heat over medium heat, whisking frequently, until the pudding begins to thicken (will take around 5-10 minutes).
  3. Continue whisking for 30 seconds. Turn off heat. Whisk until fully thickened.
  4. Pour the pudding into a bowl to cool for 20 minutes.
  5. Pour the pudding over the strawberry layer.
  6. Chill until fully set, about 2 hours.
  7. Serve cold.
Just Take A Bite https://justtakeabite.com/