Home » beverage » Page 2

Tag: beverage

In order for me to support my blogging activities, I may receive monetary compensation or other types of remuneration for my endorsement, recommendation, testimonial and/or link to any products or services from this blog. It will not change the cost of any products or services for you.

Homemade Grape Juice: From The Vine to Your Cup

When it comes to juice fresh is always best. Learn how to make  your own homemade grape juice starting with picking grapes and ending with sweet juice.

In order for me to support my blogging activities, I may receive monetary compensation or other types of remuneration for my endorsement, recommendation, testimonial and/or link to any products or services from this blog. It will not change the cost of any products or services for you.


Confession. I love grape juice. Love it.

I don’t drink it very often these days because I know most juice is just empty calories with no nutrition. Otherwise I would.

Once in a while I buy pure organic concord grape juice for making jello or gummies. But I can’t afford to buy that just to drink plain.

Homemade Grape Juice | Homemade Dutch Apple Pie

Free grapes.

A few weeks ago my mom called to tell me my grandpa said I could have his grapes. My grandma passed away earlier this year and my grandpa is now in hospice. So the grapes on their farm are just sitting there.

He thought I might be able to put them to good use.

He knows me well.

Homemade Grape Juice | Homemade Dutch Apple Pie

I made a trip to the farm with my two youngest, hoping to pick a bunch of grapes. Then I realized that picking grapes when everything is soaking wet and you have a toddler with grabby hands strapped to your chest is next to impossible.

At least I had a great helper! We did pick a few to get us started. But I had to send my husband and big kids back a few days later to finish the job.

My suggestions for picking grapes:

  1. Have two free hands.
  2. Use clippers.
  3. Be prepared to get messy.

Making juice.

Once we had the grapes at home I had to figure out what to do with them.

It turns out that making homemade grape juice is quite simple. You basically just wash, cook and strain. You may need to add sweetener if you want to drink the juice plain. It just depends how tart the grapes are.

Homemade Grape Juice | Homemade Dutch Apple Pie

It also turns out that the “hardest” part is just separating the good grapes from the bad ones.

It was fun to make my own grape juice for the first time. As I did it I couldn’t help but smile and think of my grandparents standing in the kitchen on their farm making juice together every year for decades.

I felt honored to carry on the tradition, and I think of them every time I drink our homemade grape juice. They are some of the most amazing people I know. And their farm has always been one of my favorite places.

Now we have some grape juice in the freezer for later (that I will try really hard to share with my family). Plus I used some to make grape jelly! I’ll be sharing that recipe tomorrow.

Have you ever tried making homemade grape juice? If you have access to fresh, concord grapes start picking! There is nothing quite like it.

Homemade Grape Juice | Homemade Dutch Apple Pie


Homemade Grape Juice: From the Vine to Your Cup
Fresh, homemade grape juice from concord grapes.
Write a review
Print
Ingredients
  1. Freshly picked concord grapes
  2. Organic cane sugar or honey
Tools
  1. Large stockpot
  2. Large fine mesh strainer
  3. Cheesecloth
Instructions
  1. Wash the grapes. Get rid of any bad or unripe grapes.
  2. Place the grapes in a large stockpot.
  3. Mash the grapes with a potato masher to get the juices flowing.
  4. Turn the heat on to high. Bring to a boil.
  5. Reduce heat and simmer the grapes for 10 - 15 minutes, mashing periodically while they cook.
  6. Turn off the heat.
  7. Strain the grapes/juice through a fine mesh strainer lined with cheesecloth over a large bowl.
  8. Allow the grapes to strain for a few hours or over night.
  9. Discard the grapes/skin/seeds.
  10. Strain the juice a second time through clean cheesecloth.
  11. If using the juice for drinking add sugar if the grapes are too sour. Stir and let the sugar dissolve.
  12. Store in the refrigerator for up to two weeks or in the freezer for up to a year.
Notes
  1. I used about 1/4 cup cane sugar per quart of juice for drinking.
Just Take A Bite https://justtakeabite.com/

In order for me to support my blogging activities, I may receive monetary compensation or other types of remuneration for my endorsement, recommendation, testimonial and/or link to any products or services from this blog. It will not change the cost of any products or services for you.

This post is linked to Savoring Saturdays.

Brain Booster Milkshake | Homemade Dutch Apple Pie

Brain Booster Milkshake

Get the school morning started right with a brain booster milkshake. Full of protein, vitamins and minerals it will keep your kids going all day.

Brain Booster Milkshake - Nutrient-dense drink kids love!

School mornings can be hard. Get breakfast on the table. Feed the baby. Brush everyone’s teeth. Find shoes and backpacks.

You do your best to prepare and have things go smoothly. But even with good planning it is tough to always give your kids the nourishment they need before heading out the door.

Especially if you have a child like mine that eats very slowly and ends up often only managing a few bites of breakfast.

To make sure she starts her day the right way I created my brain booster milkshake.

Brain Booster Milkshake - Nutrient-dense drink kids love!

Are Milkshakes Healthy?

This milkshake is packed with some nutritional powerhouses.

  • raw milk – easy to digest protein, calcium and vitamins
  • raw pastured egg yolks – B vitamins that are critical for brain function and concentration
  • probiotics – for gut health and boosting the immune system
  • grass-fed collagen – easy to digest protein and important amino acids
  • maple syrup – carbohydrates for energy and trace minerals
  • unrefined sea salt – trace minerals

I usually serve the milkshake with something else like a homemade granola bar or even dinner leftovers! But even if she doesn’t take a single bite of her breakfast I know she’s going to be fueled for the morning as long as she drinks her brain booster milkshake.

This is a really good option for kids with oral SPD and chewing problems. A milkshake goes down pretty quickly. It is also easy on the digestive system. The nutrients are very easy to absorb and utilize.

Brain Booster Milkshake - Nutrient-dense drink kids love!

One of the key components is the raw, pastured egg yolk. Have you ever read about them? Though often deemed as unhealthy or bad for your heart the opposite is actually true. And eaten raw (as long as they are pastured) the nutrients are not damaged and are easy to absorb.

Egg yolks are amazing little packages of nutrients, specifically B vitamins that are essential for your child’s brain development and ability to focus. They contain other nutrients such as choline (necessary for methylation), selenium (great for the thyroid) and biotin (helps with blood sugar regulation – perfect for breakfast!).

Milkshake for Breakfast or Lunch

I sometimes put milkshakes in my daughter’s lunch too. She struggles to eat much lunch at school. There just isn’t enough time for her, and she’s busy talking. But she usually comes home with an empty cup!

This is also great for kids going through orthodontic work. The day after adjustments their mouth can be very sore and chewing can be a challenge. A milkshake is always in my daughter’s lunch the day after her expander gets adjusted. I tell her that even if she can’t eat anything she should be sure to drink her brain booster milkshake.

Brain Booster Milkshake - Nutrient-dense drink kids love!

Healthy Chocolate Milkshake

The base milkshake recipe is vanilla. But you can create other flavors too. My kids love when I add a bit of cocoa powder or carob powder for a chocolate shake.

Add some strawberries from your freezer stash for a strawberry shake. Any berry or even cherries will work.

Sometimes we really get creative and add mint extract. It tastes like mint ice cream (my kids’ favorite!).

If you can’t have dairy, coconut milk is a great substitute! Any milk alternative will work.

Serve it in a fun cup with a straw or in a sealed cup to pack in a lunch box.

Whether you serve it for breakfast, lunch or both you’ll know your child is getting essential nutrients with a brain booster milkshake. All they have to know is they get something delicious to drink!

Get your kids excited about breakfast. What flavor do you think they’ll like best?

Brain Booster Milkshake - Nutrient-dense drink kids love!

Brain Booster Milkshake
Serves 1
A delicious shake perfect for breakfast or lunch that will give your kids the nutrients they need to perform their best.
Write a review
Print
Ingredients
  1. 1 cup raw milk or coconut milk
  2. 1 - 2 raw pastured egg yolks
  3. 1 Tbsp. grade B maple syrup
  4. 1/4 tsp. unrefined sea salt
  5. 2 tsp. grass-fed collagen
  6. 1/2 capsule preferred probiotics
  7. 1/2 capsule preferred multi-vitamin
  8. optional: 2 tsp. carob powder or cocoa powder OR 1/4 cup berries or cherries
  9. optional: 1/2 tsp. organic vanilla OR 1/4 tsp. organic mint extract
Instructions
  1. Combine all of the ingredients in a blender or a cup with a lid.
  2. Blend or shake until well combined.
  3. Serve immediately or refrigerate until ready to serve.
Just Take A Bite https://justtakeabite.com/
In order for me to support my blogging activities, I may receive monetary compensation or other types of remuneration for my endorsement, recommendation, testimonial and/or link to any products or services from this blog.

This post is linked to Savoring Saturdays.

Bedtime Beverage

Bedtime Beverage | Homemade Dutch Apple PieDo you have trouble falling asleep at night? Or maybe your kids have a hard time winding down at the end of the day? Mine sure do!

Except for one…the baby. How does she go to sleep? She nurses and falls fast asleep. Mother’s milk is warm and has the perfect balance of nutrients to help a little one nod off to sleep. It is comforting and nourishing.

So how does that translate to everyone else? Surprisingly ice cream (the kind made with real, whole ingredients) is about the closest thing we have to breast milk in terms of its nutrient profile.  It has a good balance of carbohydrates, protein and fat.

You could definitely indulge in a dish of ice cream to see if it helps you get sleepy. But I have a drink that might work better. It’s like warm ice cream!

Raw cream or whole milk is the ideal base for this drink. If you can’t have dairy you can use full fat coconut milk and add a little extra gelatin for the protein balance.Bedtime Beverage | Homemade Dutch Apple Pie

Egg yolks are added because they are packed with vitamins (especially B) and a little bit of protein. The cream or milk has lots of healthy fat. Gelatin gives more amino acids and protein. Plus the gelatin makes it all easier to digest. The sea salt helps you absorb everything and adds trace minerals. The syrup also helps digestion (sugar is easily absorbed) and gives balance to the drink by adding carbohydrates.

At bedtime you need your adrenals to settle down for the night. Having a balance of sugar, salt and fat will help your body accomplish that.   You can also add a small starchy snack along side the bedtime beverage to really balance out the components. A couple soaked graham crackers or even a slice of sourdough bread are perfect.

This bedtime beverage is like a nutritionally boosted version of the warm milk you grew up drinking at bedtime (yes, there was some truth behind that). It’s almost as comforting and calming as mother’s milk. It tastes great too!

This drink can also be very helpful during the first trimester of pregnancy. Even if you can’t get much else down this will give you a nutrient boost and may be soothing to an unsettled stomach.

There is no fancy equipment required for this drink. Just a small pan and a whisk.  It only takes a few minutes to make. Don’t forget to save your egg whites for baking. They store well in the refrigerator or freezer for a long time. I like to use them for making gluten free bread!

You won’t have to convince your kids to drink this before bed. Offer a soothing bedtime beverage that tastes like ice cream and I’m sure they will gladly oblige. Then watch them settle down and drift off to sleep.  Mother’s milk is wonderful for helping little ones get to sleep. Now everyone else can do the same.Bedtime Beverage | Homemade Dutch Apple Pie

Bedtime Beverage
Serves 1
A warm drink to help you sleep at night.
Write a review
Print
Ingredients
  1. 1 cup heavy cream, coconut milk or whole milk
  2. 2 Tbsp. maple syrup (or honey)
  3. 1/4 - 1/2 tsp. unrefined sea salt
  4. 1 - 2 tsp. collagen or gelatin
  5. 1 - 2 egg yolks
  6. optional: 1 - 2 tsp. cocoa or carob powder
Instructions
  1. Combine all of the ingredients in a small saucepan.
  2. Whisk to combine.
  3. If using gelatin let the mixture set for 1 minute.
  4. Gently warm the mixture over low heat. Do not let it boil or you could curdle the milk or cook the egg yolks.
  5. Pour into a mug and enjoy before bed.
Notes
  1. This can be made with just the cream, syrup and salt.
Just Take A Bite https://justtakeabite.com/

Homemade Quinoa Milk {Nursing Mother’s Drink}

Homemade quinoa milk is a delicious alternative to dairy that is also great for nursing mothers boost milk supply.

Quinoa Milk Nursing Mother's Drink | Homemade Dutch Apple Pie
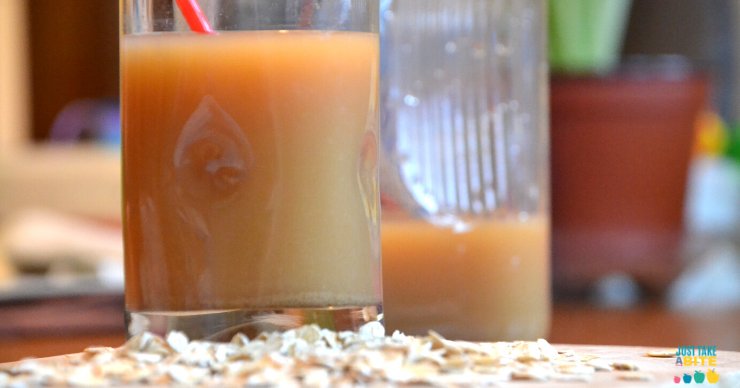
Have you ever tried quinoa milk?  Despite the growing variety of alternative milks available, it is not something I’ve ever seen at the store (though I have seen one brand of it online).

As I mentioned in my oat milk post I’m not a huge fan of nut milks. Especially for young kids and nursing moms.

My first choice is always fresh, raw milk from cows or goats. Unfortunately a dairy intolerance is very common for small babies. Which  means mom needs an alternative.

Coconut milk is a great choice for cooking, baking and adding a splash to tea. But it’s not something most people will drink plain in large quantities. Plus it can also be hard on babies since it can be gassy and even cause reflux.

Enter quinoa milk! It has a very mild flavor – similar to rice milk. It is also very easy to make and very cost effective. One quarter cup of quinoa can make up to six cups of milk!

The best thing about quinoa milk is that it is great for boosting milk supply.   If you tolerate quinoa and are a nursing mother I encourage you to include quinoa in your diet. Even if you can have dairy this is a great alternative milk to have in your diet for variety and nutrition.

Unlike other alternative milks quinoa milk has quite a bit of protein.  You can add both calcium and vitamin D when you make it to boost nutrition even more.

Quinoa milk is not heavy like nut milks. It has a very neutral flavor. It works well for cooking and baking. Plus it is great for boosting milk supply!

Need some variety in your diet? Or are you just looking for an alternative to dairy? Give quinoa milk a try. Quinoa Milk Nursing Mother's Drink | Homemade Dutch Apple Pie

Homemade Quinoa Milk: Nursing Mother's Drink {fermented option}
A delicious alternative drink that helps boost milk supply.
Write a review
Print
Ingredients
  1. 1/4 cup quinoa
  2. 2 tsp. lemon juice
  3. warm water
  4. 5 cups water
  5. 2 Tbsp. coconut sugar, cane sugar, honey or maple syrup OR 3 dates (optional)
  6. 1/2 tsp. sea salt (optional)
  7. Vitamin D drops (optional)
  8. calcium powder (optional)
  9. 2 Tbsp. whey (optional)
Instructions
  1. Place the quinoa and lemon juice in a bowl. Cover with warm water (quantity does not matter, as long as it's covered)
  2. Let soak for 24 hours.
  3. Drain and rinse the quinoa.
  4. Combine the quinoa and 5 cups water in a medium saucepan.
  5. Bring to a boil, reduce heat and simmer, covered, for 2 hours.
  6. If using dates as a sweetener add them to the pan during the last 30 minutes of cooking.
  7. Pour the quinoa and water into a blender.
  8. Blend until smooth.
Non-fermented method
  1. Add sweetener (if desired/if not using dates) and sea salt. Blend.
  2. Pour into a serving container.
  3. Add vitamin D and calcium if desired.
  4. Refrigerate.
  5. Shake before serving.
Fermented Method
  1. Pour the blended mixture into a container.
  2. Add salt and whey.
  3. Cover and let sit at room temperature for 3 days.
  4. Add sweetener and vitamin D/calcium and refrigerate.
  5. Shake before serving.
Notes
  1. You can add 1 tsp. of pure vanilla to the pureed mixture for vanilla quinoa milk.
  2. If the milk is too thick for your taste it can be diluted with extra water or it can be strained.
  3. This should not be used for children under one year of age.
  4. This makes a great dairy alternative for both kids and adults.
  5. This recipe can easily be doubled.
  6. This recipe makes about 5 cups of milk. It can be increased by adding extra water.
Just Take A Bite https://justtakeabite.com/
This post is linked to Savoring Saturdays.

Looking for a unique dairy alternative that does not contain coconut or nuts? This homemade oat mlk is cheap, easy to make, and delicious.

Homemade Oat Milk {fermented option}

Looking for a unique dairy alternative that does not contain coconut or nuts? This homemade oat milk is cheap, easy to make, and delicious.

Looking for a unique dairy alternative that does not contain coconut or nuts? This homemade oat milk is cheap, easy to make, and delicious.

I am a huge fan of raw milk. I’d drink it by the glass full if I could right now.  But my little one would be in a lot of pain if I did.

Being dairy-free is a big adjustment. But it’s nothing new to us. We entered the world of no dairy and alternative milks years ago.

At that time my son was also allergic to nuts and rice. So that eliminates a lot of options.

Homemade Oat Milk Dairy Alternative

We tried different versions of coconut milk. That was a big no. I can’t blame him – coconut milk tastes nothing like dairy milk. Even I can’t drink that plain.

Finally I found oat milk – something he didn’t mind drinking. Something I could use in cooking and baking that would be safe for him.

But oat milk is definitely not cheap. We usually pay about $3.50 for each small box.

Recently I was reading through Nourishing Traditions and saw a recipe for rice milk with an option to use oats. I had to try it immediately!

Looking for a unique dairy alternative that does not contain coconut or nuts? This homemade oat milk is cheap, easy to make, and delicious.

How to Make Oat Milk

First I made a fermented version. I figured it would be the healthiest option if my son would drink it. But it didn’t go over very well.

So I modified it a bit and made an unfermented version. Success!

Let me tell you this is SO much cheaper than buying oat milk. A quarter cup of oats makes over four cups of milk!  Not only that I like that I can make sure the oats are properly prepared since oats are very high in phytic acid.

Nut-Free Milk Alternative

I may be in the minority, but I am not a big fan of nut milks.  I don’t think anyone needs to consume that kind of quantity of nuts on a regular basis. They do contain quite a bit of omega-6’s, which we get more than enough of.

So I’m happy to have a safe alternative to dairy that my kids enjoy and doesn’t cost a ton. It is also extremely easy to make (just cook oats and puree).

The other benefit of having alternative milks is to make sure you get variety in your diet. This is very important when dealing with allergies. Rotating milk sources can help prevent future allergies or sensitivities.

How to Use Oat Milk

Oat milk works very well for baking. I even use it in cream soups and stews. It has a very neutral flavor.

You can also drink it plain or use it on oatmeal or homemade cereal.

As I mentioned you can make it into a fermented drink to boost nutrition. If you are used to ferments you can give that a try. If you are making it for kids that might have a more sensitive palate try it without fermenting.

Are you dairy-free? Are you looking for a unique milk substitute? Try homemade oat milk. It’s a mildly sweet, satisfying drink.

Need more options?

Try homemade rice milk or homemade quinoa milk

Homemade Oat Milk {fermented option}
A simple beverage made from oats.
Write a review
Print
Ingredients
  1. 1/4 cup old fashioned oats
  2. 1 cup warm water
  3. 4 cups water, divided
  4. 4 Tbsp. coconut sugar, honey or maple syrup (optional)
  5. 1/4 tsp. sea salt (optional)
  6. vitamin D drops (optional)
  7. 2 Tbsp. whey (optional)
Instructions
  1. Soak the oats in 1 cup warm water for 24 hours.
  2. Combine the soaked oats and 3 cups water in a medium saucepan.
  3. Bring to a boil and simmer, covered, 2 hours.
  4. Pour the oats and water into a blender.
  5. Proceed with the non-fermented or fermented version from this point.
Non-fermented method
  1. Add the salt and sugar.
  2. Blend well.
  3. Pour into a jar and add another 1 cup water.
  4. Refrigerate.
  5. Add a few drops of Vitamin D (optional).
  6. Shake before pouring.
  7. Add extra water if milk is too thick for your taste.
Fermented method
  1. Blend the oats and water.
  2. Pour into a jar.
  3. Add the whey and 1/2 tsp. sea salt.
  4. Cover and let sit at room temperature for 3 days.
  5. Stir in sweetener and 1 cup extra water.
  6. Add vitamin D if desired.
  7. Store in the refrigerator.
  8. Shake well before serving.
Notes
  1. This recipe easily doubles to make a half gallon of oat milk.
  2. This milk should not be used for children under the age of one since they don't have the enzymes to digest grains.
  3. This makes about 5 cups of milk.
  4. You can add extra water to the milk to thin it out.
Just Take A Bite https://justtakeabite.com/

“More Peas Please!” Green Smoothie

More Peas Please Green Smoothie | Homemade Dutch Apple PieThis month I had the challenge from Stonyfield to come up with a green smoothie. I’ve made plenty of smoothies with green stuff in them. But I wanted to try something new.

As I was pureeing peas for my six month old it dawned on me that peas are quite sweet. They would be the perfect green component to a smoothie!

It also just so happens that my oldest just got an expander…and could hardly chew while she adjusted to it. I was feeding her soft food like yogurt and applesauce.

But she wasn’t eating many vegetables. I could have pureed some for her, but she’s not a big fan of that. So I gave them to her in a smoothie!

This is my “More peas please!” green smoothie. It will have your kids begging for peas.  The peas give it a nice bright color (my daughter said it looks like a mint shake). Then I add some pear and honey for extra sweetness. This is perfect for spring and St. Patrick’s Day!More Peas Please Green Smoothie | Homemade Dutch Apple Pie

If you need an extra boost of fruit flavor you can add a few strawberries, blueberries or cherries. It will change the color a bit, though.

As with all of my smoothies I like to use them to boost nutrition. That is especially true when I have a child not able to eat their normal diet.

I use full fat yogurt. I like the Stonyfield whole milk plain yogurt. Then I add egg yolk, gelatin and sea salt to the mix.

You can make the smoothie fresh or prepare it the night before. Then just grab it out of the fridge for an easy breakfast. You can also pour it into popsicle molds for a fun frozen treat (this really works well to give nutritious food to sick or picky kids).

My daughter can be very picky when it comes to smoothies. But she drank this whole thing without complaint.

Are you struggling to get your kids to eat something green? Give this smoothie a try. Your kids will be begging for more peas please!

If you don’t tolerate or are allergic to peas (like my son) you can use another mild green vegetable like green beans. If you want to use greens like spinach be sure to cook them first to eliminate oxalates.

More Peas Please Green Smoothie | Homemade Dutch Apple Pie

"More Peas Please!" Green Smoothie
Serves 1
A sweet and fruity green smoothie with peas.
Write a review
Print
Ingredients
  1. 1/4 cup frozen peas (thawed/rinsed under hot water)
  2. 1/2 cup full fat plain yogurt
  3. 3/4 - 1 medium pear
  4. 2 Tbsp. honey (or maple syrup)
  5. 1 egg yolk (optional)
  6. 1/8 tsp. sea salt
  7. 1 - 2 tsp. collagen (optional)
  8. 2 Tbsp. strawberries, blueberries, cherries or raspberries (optional - for extra flavor)
Instructions
  1. Combine all of the ingredients in a blender.
  2. Blend until well combined and smooth.
  3. Serve immediately or store in the refrigerator or in popsicle molds in the freezer.
Notes
  1. This can be made with coconut milk or coconut milk yogurt if you are dairy free.
  2. This recipe can easily be doubled or tripled.
Just Take A Bite https://justtakeabite.com/


I am working with Stonyfield to blog about the yogurt. I have been compensated for my time commitment to use this product. However, my opinions are entirely my own and I have not been paid to publish positive comments.

In order for me to support my blogging activities, I may receive monetary compensation or other types of remuneration for my endorsement, recommendation, testimonial and/or link to any products or services from this blog.

Dairy Free Egg Free Egg Nog

Dairy Free Egg Free Egg Nog || Homemade Dutch Apple PieChristmas will be here before we know it. That means time for presents, family gatherings and of course egg nog!

I’ll be honest – I hated egg nog when I was younger.  It wasn’t until just a few years ago that I could even handle more than a sip or two.

But in the last few years it has really grown on me once we started buying good quality, locally made egg nog.  It figures that now that I really enjoy egg nog I can’t have it.  My little one is sensitive to both dairy and eggs.

Instead of resigning myself to the fact that I’ll have to skip the egg nog this year I decided to create a dairy and egg free version.  It’s not easy to recreate that thick, rich texture and flavor without the eggs.

But I have come up with a version that even those that can have dairy will enjoy.Dairy Free Egg Free Egg Nog || Homemade Dutch Apple Pie

I’m not going to lie – this stuff is rich!  There is lot of sweetener to overpower the coconut flavor and to mimic the richness of the eggs. The combination of cane sugar and honey really works well.

You only need a small glass of this egg nog at a time. But it is a wonderful treat for the holiday season that everyone can enjoy. Even my three year old loves it.

The other key component to this egg nog is sea salt.  It creates the perfect balance with the sweet and the spice.

If you’re not a fan of drinking your dessert you can simply double the recipe and turn it into delicious egg nog ice cream.

Are you not totally convinced that a white egg nog can taste good? Add a couple tablespoons of pureed pumpkin or squash for color. You’ll have your yellow egg nog without the eggs.

No dairy? No egg? No problem. Now you can enjoy egg nog this Christmas too.Dairy Free Egg Free Egg Nog || Homemade Dutch Apple Pie

Dairy Free Egg Free Egg Nog
Serves 5
A rich holiday drink that is both dairy and egg free.
Write a review
Print
Ingredients
  1. 1 can full fat coconut milk
  2. 1/2 cup organic cane sugar
  3. 1/4 cup honey
  4. 3/4 tsp. nutmeg (or to taste)
  5. 1 Tbsp. tapioca flour
  6. 2 tsp. organic vanilla
  7. 1/2 tsp. unrefined sea salt
Instructions
  1. Combine all of the ingredients in a blender.
  2. Blend until smooth.
  3. Adjust spice to taste.
  4. Serve immediately or chill.
Notes
  1. The egg nog will thicken as it chills.
  2. To make egg nog ice cream simply double the recipe and process in an ice cream maker.
  3. Add 2 Tbsp. pureed pumpkin or squash to create the yellow color of egg nog.
Just Take A Bite https://justtakeabite.com/
If you are not dairy/egg free please check out Raising Generation Nourished’s amazing egg nog recipe!

In order for me to support my blogging activities, I may receive monetary compensation or other types of remuneration for my endorsement, recommendation, testimonial and/or link to any products or services from this blog.

Simple Strawberry Slush (egg free, dairy free, nut free, gluten free)

This simple strawberry slush is a fun, fruity, allergen-friendly drink for kids and adults. It contains no eggs, dairy, nuts, grains, soy or coconut.Simple Strawberry SlushDo you want to treat your kids to a really fun drink? Try a simple strawberry slush!  It is a perfect way to cool down in the summer and consume fresh, nutritious produce.

I grew up drinking Slushies® all the time. We would bike to the local drug store all summer to get them. Of course they were made of food coloring, high fructose corn syrup and artificial flavor.

This simple strawberry slush is a much-improved version. It only uses a few simple ingredients. It is also very allergen-friendly.

My kids LOVE these. I’ll be honest – my husband and I do too!

As always, the best part for me is that it only takes about 60 seconds to make a simple strawberry slush. Plus I can add collagen for a nutrition boost.

Strawberries work very well in this drink – even frozen! But if you don’t have any or want a different flavor you can try blueberries, raspberries or even cherries. You really can’t go wrong.

This summer the whole family can cool down with a nourishing simple strawberry slush.

Simple Strawberry Slush 2

Simple Strawberry Slush
Serves 2
A fun, refreshing and healthy summer drink that is free of allergens.
Write a review
Print
Ingredients
  1. 6 ice cubes
  2. 3/4 cups strawberries (fresh or frozen) (or other fruit)
  3. 1 - 2 Tbsp. sweetener (honey, syrup, sucanat) (depending on the sweetness of the fruit)
  4. 1/4 tsp. sea salt (optional)
  5. 1/2 tsp. collagen (optional)
Instructions
  1. Combine all of the ingredients in a high powered blender.
  2. Blend until desired consistency.
  3. Serve immediately.
Notes
  1. This makes enough for two children or one adult.
  2. You can blend it completely smooth (for small children) or leave a bit of slushiness from the ice.
  3. Blueberries, raspberries and cherries can be combined with or substituted for the strawberries.
Just Take A Bite https://justtakeabite.com/
 
In order for me to support my blogging activities, I may receive monetary compensation or other types of remuneration for my endorsement, recommendation, testimonial and/or link to any products or services from this blog.

Easy Pink Lemonade | Just Take A Bite

Easy Pink Lemonade

Refreshing and hydrating, this easy pink lemonade is made with only real ingredients. No artificial flavors or colors. It’s the perfect summer drink!

Easy Pink Lemonade | Just Take A Bite

Whether it’s the middle of summer or you’re just looking forward to the start of spring, pink lemonade is the perfect drink.

Dye-free Pink Lemonade

This easy pink lemonade only takes minutes to make. It is free of anything artificial (i.e. no food coloring!). And a simple addition of sea salt turns it into a hydrating homemade sports drink.
 
Sometimes I even go a step further and add grass-fed collagen and powdered probiotic to really bump up the nutrition factor.
 
You can make a single cup or a big pitcher. I usually make a half gallon at a time. It doesn’t last long in my house.

Allergen-Free Drinks

Having kids with all sorts of allergies means they don’t get much to drink besides water (they don’t even have any milk alternatives they tolerate). So I like to treat them to hydrating pink lemonade once in a while, especially when they are playing hard or after illness.

This is also a fun surprise in my daughter’s lunch once in a while. She tends to forget to drink while she’s at school. But if I give her pink lemonade she comes home with an empty cup.

Keep everyone hydrated and satisfied with pink lemonade. All the great flavor. Nothing artificial.

Easy Pink Lemonade | Just Take A Bite

Easy Pink Lemonade

makes 1/2 gallon

6 1/2 cups water
1/3 – 1/2 cup lemon juice
1/4 – 1/3 cup pure grape juice or pure blueberry juice
1/2 cup organic cane sugar (you can also use honey or maple syrup, but it will change the flavor a bit)
1 tsp. unrefined sea salt (optional…makes it very hydrating)
2 Tbsp. grass-fed collagen (optional)
1 capsule powdered probiotic (optional)
ice

Combine all of the ingredients in a 1/2 gallon container. Mix well, allowing the sugar to dissolve. Adjust the lemon juice and grape juice to taste if needed. Refrigerate.

Soaked Gluten Free Oatmeal Muffins

Soaked gluten free oatmeal muffins make a simple, nutritious and delicious breakfast or compliment to a warm bowl of soup. Soak the flour one day. Bake the muffins the next. Easy.

Almost every single morning the first word out of my son’s mouth is “munin.” He is on a muffin kick! So I try to keep muffins on hand.

Today I made a gluten free version of some oatmeal muffins I’ve made many times before.

This is a great base recipe. You can add any kind of fruit, nut, etc. to change the flavor. Today’s recipe included cranberries and chocolate chips. Cinnamon raisin is always good too.

These muffins are gluten free and soaked to make them easier to digest. They can also be dairy free if you use lemon juice + water for soaking.
If you’re looking for a new breakfast treat try these muffins.

Soaked Gluten Free Oatmeal Muffins | Just Take A Bite
Soaked Gluten Free Oatmeal Muffins
makes 12 muffins

1 cup rolled oats
1 cup buttermilk OR yogurt OR kefir OR 2 Tbsp. lemon juice + water to equal 1 cup
2/3 cup white rice flour
1/3 cup amaranth flour
1 egg
4 Tbsp. coconut oil (melted butter would work too)
1/3 – 1/2 cup brown cane sugar, sucanat or coconut sugar
1 tsp. baking powder
1/2 tsp. baking soda
1/2 tsp. salt
1 tsp. cinnamon (optional)
1/2 – 1 cup add-ins (raisins, nuts, seeds, fresh fruit, dried fruit, chocolate chips)

Mix oats, flour and soaking liquid. Cover and let sit 7 -24 hours.

Heat oven to 400. Mix the remaining ingredients into the oat mixture (I use a hand mixer for this to work out any lumps).

Fill muffin cups 3/4 full. Bake for 18-20 min.