Home » lunch box » Page 2

Tag: lunch box

Easy Gluten Free Crackers with Liver! {dairy free, nut free, egg free}

Looking for a crunchy snack that isn’t loaded with junk? These gluten free crackers with liver are made with healthy fat and lots of vitamins and minerals! Snack away.Looking for a crunchy snack that isn't loaded with junk? These gluten free crackers with liver are made with healthy fat and lots of vitamins and minerals! Snack away.

It’s no secret. I LOVE my desiccated liver! I add it to just about anything, including meatballs, soups, tacos, smoothies and even caramel! I consider liver to be one of the world’s healthiest foods. It is loaded with vitamins and minerals.

But that doesn’t mean everyone loves to eat it. I personally can’t stand cooked liver. I try to choke a little down every once in a while. Just because I should.

How We Eat Liver.

Rather than rely on the rare mouthful, I use Perfect Supplements desiccated liver on a daily basis. I usually start my day with it in capsule form (perfect if you don’t even like the taste of desiccated liver). Then I add the powder to my food later in the day.

My kids call it our “secret ingredient” when we cook together. They like to surprise Daddy, telling him there is liver in his food.

Even if my kids don’t mind me adding liver to our food, I’m always on the hunt for new ways to get it down.Looking for a crunchy snack that isn't loaded with junk? These gluten free crackers with liver are made with healthy fat and lots of vitamins and minerals! Snack away.

Gluten Free Crackers with Liver!

I recently decided to boost the nutrition of a kid favorite – crackers! These gluten free crackers with liver are super easy to make and taste delicious. But they are also loaded with nutrition.

In addition to the liver I used fermented kale and aquatic greens. Now if that’s not a healthy cracker, I don’t know what is!Looking for a crunchy snack that isn't loaded with junk? These gluten free crackers with liver are made with healthy fat and lots of vitamins and minerals! Snack away.

Liver for Less!

You can always stock up on Perfect Supplement desiccated liver (or any of their other awesome products) at a 10% discount with my code TAKE10. Stock up on all your favorite supplements HERE. Then head to the kitchen to make a batch of gluten free crackers with liver.
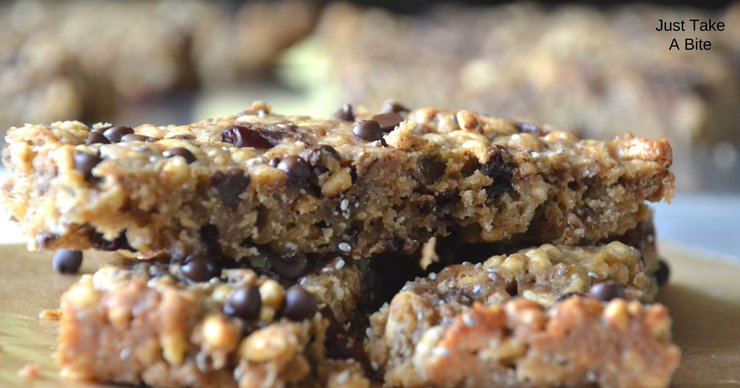
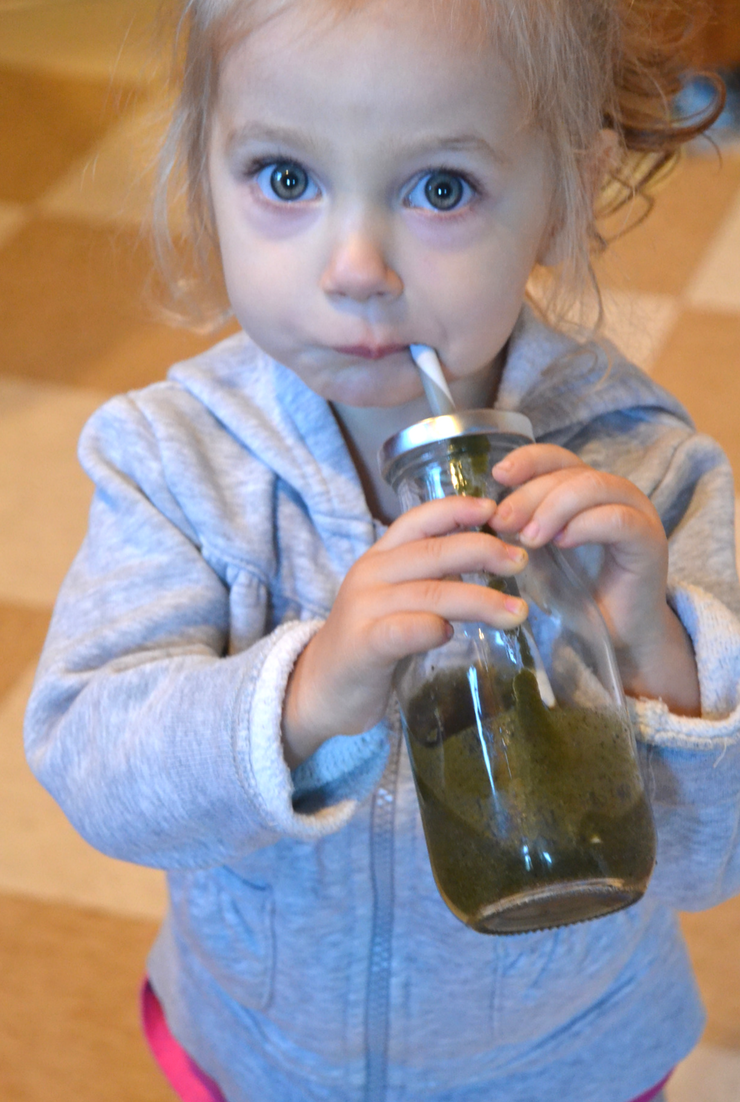
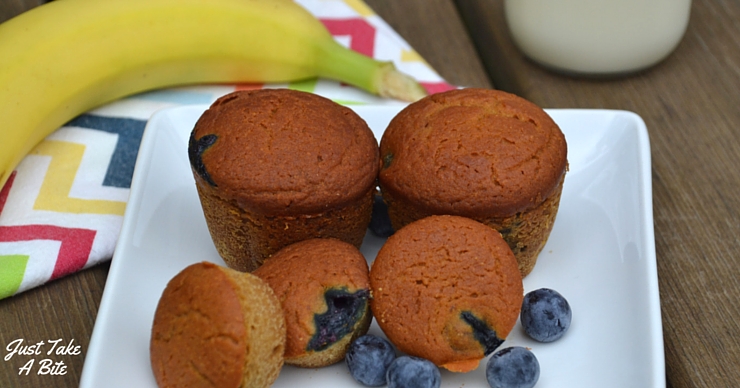
Looking for a crunchy snack that isn't loaded with junk? These gluten free crackers with liver are made with healthy fat and lots of vitamins and minerals! Snack away.Kid-Approved Snacks

Speaking of the crackers, my kids love them! I bet yours will too. We like to use them for easy lunches. Dip crackers in nut butter or sunbutter. Or my favorite – homemade Lunchables®. Freshly baked crackers with homemade lunch meat (that also has liver!) and cheese slices. Add some fruits and veggies and you’ve got the perfect packable lunch.
 
One batch makes about 150 crackers. So they will last a while.
 
The next time you see a box of “veggie crackers” at the store, don’t be fooled. It is still just a processed food with made with vegetable oil. Make your own nutrient loaded crackers. And let your kids help!Looking for a crunchy snack that isn't loaded with junk? These gluten free crackers with liver are made with healthy fat and lots of vitamins and minerals! Snack away.

Do you regularly consume liver? What is your favorite way to eat it?

Gluten Free Crackers with Liver {dairy free, nut free, egg free}
Yields 150
A simple, allergen free cracker loaded with vitamins and minerals.
Write a review
Print
Ingredients
  1. 1 cup white rice flour
  2. 1 cup sorghum flour
  3. 1 tsp. Perfect Supplements gelatin
  4. 1 1/2 tsp. unrefined sea salt
  5. 4 tsp. organic cane sugar
  6. 1 1/2 tsp. Perfect Supplements desiccated liver
  7. 1/4 tsp. Perfect Supplements fermented kale
  8. 1/8 tsp. Perfect Supplements aquatic greens
  9. 1/2 - 1 tsp. herbs of choice (optional)
  10. 6 Tbsp. avocado oil (or extra virgin olive oil)
  11. 1/2 - 3/4 cups water
Instructions
  1. Heat oven to 350 degrees F.
  2. In a large bowl combine the flour, gelatin, salt, sugar, liver, kale, greens, herbs and olive oil. Mix well.
  3. Add 1/2 cup water. Mix well.
  4. Gradually add more water, 1 Tbsp. at a time, until a ball of dough forms when squeezed with your hands.
  5. Split the dough in half.
  6. Lay one half on a piece of parchment paper or silpat. Place another piece of paper on top. Roll until 1/8 - 1/4 inch thin.
  7. Cut with a pizza cutter or knife into desired size squares. Sprinkle with extra salt if desired. Place parchment paper with cracker dough on a baking pan.
  8. Repeat process for the second ball of dough.
  9. Bake at 350 degrees F for 12 minutes. Turn off oven and leave crackers in to crisp for an additional 7 minutes.
  10. Remove from oven and allow to cool completely.
  11. Store in a sealed container for up to 3 weeks or in the freezer for up to 6 months.
Just Take A Bite https://justtakeabite.com/

Looking for a crunchy snack that isn't loaded with junk? These gluten free crackers with liver are made with healthy fat and lots of vitamins and minerals! Snack away.

Grain and nut free mineral rich hummus makes the perfect snack or lunch box addition. This is will soon become a kid favorite for dipping veggies!

Grain and Nut Free Mineral Rich Hummus

Grain and nut free mineral rich hummus makes the perfect snack or lunch box addition. This is will soon become a kid favorite for dipping veggies!Grain and nut free mineral rich hummus makes the perfect snack or lunch box addition. This is will soon become a kid favorite for dipping veggies!

It’s time to get back to routines, back to school, back to nourishing lunches! If you haven’t set any goals, a good one is to make sure your kids are being nourished every single day at every meal.

It may sound daunting, but it’s not. Real food is actually quite simple. Want a snack? Have a pear. Have some pepper slices. Simple.

Want to know what else is simple?

My grain and nut free mineral rich hummus!

It’s so simple my kids can make it themselves. Just a few ingredients tossed in the blender. Done in less than five minutes.Grain and nut free mineral rich hummus makes the perfect snack or lunch box addition. This is will soon become a kid favorite for dipping veggies!

If you want to avoid using canned beans, the easiest way to cook chickpeas is in your Instant Pot!

But what makes it mineral rich?

In addition to the usual chickpeas and oil, I like to add pumpkin seeds. They are loaded with zinc, potassium, magnesium, iron, manganese, phosphorus and vitamin E!

The seeds are ground right into the hummus, so you’d never know they’re there. But they really boost the nutrition. You could also use sunflower seeds and/or hemp seeds to vary the minerals.Grain and nut free mineral rich hummus makes the perfect snack or lunch box addition. This is will soon become a kid favorite for dipping veggies!

Allergy Friendly Hummus

I like to keep my hummus very allergy friendly. No grains, nuts, dairy, eggs, soy or corn. Veggies with hummus is my go-to dish to bring to a family gathering. I have kids with allergies and a niece and nephew with allergies. So I try to make sure I bring something everyone can (and will!) eat.

My kids will eat hummus by the spoonful. I like to keep some on hand for easy snacks and lunch additions. If I have pepper and cucumber slices prepared, my three year old will grab a pile with the whole container of hummus and start dipping away.

This year make nourishing food a priority. But don’t stress yourself. Keep it simple with easy foods like fruits, veggies and my five minute grain and nut free mineral rich hummus. You never know, it might just be the trick to turn your kids into raw veggie lovers!

Are your kids adventurous eaters? They might like my pesto hummus!Grain and nut free mineral rich hummus makes the perfect snack or lunch box addition. This is will soon become a kid favorite for dipping veggies!

Grain and Nut Free Mineral Rich Hummus
Serves 10
A simple, mineral rich dip for veggies or crackers.
Write a review
Print
Ingredients
  1. 1 1/2 cups chickpeas (cooked, boxed or canned), drained, liquid reserved
  2. 4 Tbsp. extra virgin olive oil or avocado oil
  3. 6 Tbsp. bean liquid or water
  4. 2 Tbsp. pumpkin seeds (or sunflower or hemp)
  5. 1/4 tsp. unrefined sea salt
  6. 1/4 tsp. garlic powder
  7. 1/2 tsp. onion powder
  8. 1/4 tsp. dillweed (optional)
  9. 1/4 tsp. desiccated liver (optional)
Instructions
  1. Combine all of the ingredients in a blender.
  2. Blend on high until smooth. Add extra liquid/water if needed.
  3. Adjust seasoning to taste.
  4. Serve immediately or refrigerate (up to one week) until ready to serve.
Just Take A Bite https://justtakeabite.com/
Looking for that perfect Christmas breakfast or dessert? This adorable and easy candy cane mason jar fruit salad is great for both kids and adults!

Candy Cane Mason Jar Fruit Salad

Looking for that perfect Christmas breakfast or dessert? This adorable and easy candy cane mason jar fruit salad is great for both kids and adults!

Looking for that perfect Christmas breakfast or dessert? This adorable and easy candy cane mason jar fruit salad is great for both kids and adults!

I am working with Stonyfield Yogurt for this post. I have been compensated for my time commitment. All opinions expressed are my own. I have not been paid to post positive reviews.

When it comes to holiday entertaining (for a crowd or just for my own family) I have two requirements:

  1. Nutritious
  2. Simple

I’ve learned how to host a crowd without stress and still serve real food. The big stuff is easy – meat, potatoes, veggies, etc. But I tend to neglect the little things like breakfast, dessert and fruit sides.Looking for that perfect Christmas breakfast or dessert? This adorable and easy candy cane mason jar fruit salad is great for both kids and adults!

Three-in-One Recipe

Today I’m sharing my solution for all three!

Candy cane mason jar fruit salads work for breakfast, dessert or a simple side dish.

Start with whole milk Stonyfield yogurt that you strain to make it really thick. We like to use the vanilla, but you could use plain to make it without any added sugar. The strained vanilla yogurt is a simple alternative to whipped cream that has probiotics! My kids could not get enough of it! And I always have quarts of Stonyfield yogurt on hand. Actually I usually have about four or five in my fridge because we eat it so often.

I add our own fruit, sweeteners and other add-ins (like kettle corn granola and chia seeds) to the plain, whole milk organic yogurt for an easy breakfasts a couple times a week. That way I know we’re eating good quality food! I love that Stonyfield is all organic and is committed to using quality ingredients.

And if you’re concerned about sugar content, Stonyfield has less sugar than other brands.Looking for that perfect Christmas breakfast or dessert? This adorable and easy candy cane mason jar fruit salad is great for both kids and adults!

If you like your yogurt/cream really thick (like I do!) you can even use strained Greek yogurt for the fruit salads. But it would be a bit on the tart side. The strained yogurt works perfectly for these fruit salads so the fruit does not sink into the yogurt. You can really see those layers!Looking for that perfect Christmas breakfast or dessert? This adorable and easy candy cane mason jar fruit salad is great for both kids and adults!

Fruit Stripes

Once strained, simply layer the yogurt with your favorite festive fruits. We use pomegranate seeds, kiwi, raspberries and grapes. Taylor it to your tastes and the look you like. Little kids might not be keen on pomegranate seeds. While adults might like a mix with everything. My toddler enjoyed a combination of raspberries and green grapes. But my big kids loved the pomegranate seeds and kiwi.Looking for that perfect Christmas breakfast or dessert? This adorable and easy candy cane mason jar fruit salad is great for both kids and adults!

I make a variety and let everyone choose what they like. I keep some all green and some all red and some I mix. They look so festive! Like a candy cane in a jar.

How to Save Time

Best of all? You can make them ahead of time for a super easy breakfast or dessert. Don’t want to interrupt opening Christmas presents to make breakfast? Make these fruit salads the night before and munch while you unwrap. Or prep them before your guests arrive for a super easy dessert.Looking for that perfect Christmas breakfast or dessert? This adorable and easy candy cane mason jar fruit salad is great for both kids and adults!

If you’re really busy you can skip the last step and simply turn breakfast into a candy cane parfait buffet. Set out all the ingredients and let everyone assemble their own! Add granola, chia seeds and nuts for a complete meal. This works very well for a big crowd.

Kids Can Cook Too!

I really love that my kids can actually make these on their own. They’ve been learning to cook for two years now through the Kids Cook Real Food eCourse. So they are proficient with knives and many other kitchen tools. I could give them all the supplies and let them prepare the fruit salads as a fun project. Then I’m free to work on the main meals.

Interested in teaching your kids how to cook? Check out the Kids Cook Real Food eCourse HERE!

Looking for that perfect Christmas breakfast or dessert? This adorable and easy candy cane mason jar fruit salad is great for both kids and adults!

Coffee with Dessert?

Whether serving mason jar fruit salads for breakfast or dessert, a cup of coffee is an excellent accompaniment for the adults. If you like coffee that is. Me? I’ve never been a coffee drinker. But my husband and in-laws are! Whenever my in-laws come visit I have no drink to offer them with dessert. My brother and sister-in-law actually bring their own! They know I never serve any.Looking for that perfect Christmas breakfast or dessert? This adorable and easy candy cane mason jar fruit salad is great for both kids and adults!

Thanks to Krups I now have a great coffee maker! And I can finally learn how to make some decent coffee. No more embarrassed hostess here.Looking for that perfect Christmas breakfast or dessert? This adorable and easy candy cane mason jar fruit salad is great for both kids and adults!

Cutest Candy Canes

Now let’s be honest, the real reason we all want to make these mason jar fruit salads is simply because they are so stinkin’ cute! Seriously. Who wouldn’t want one? My kids were sad I hadn’t made two for each of them. I guess next time I know to make a huge batch. They could be easy grab ‘n’ go snacks or great additions to school lunches. Use seasonal fruit to change it up throughout the year.

Festive and nutritious holiday dishes don’t have to be complicated. Keep it simple and fun with these fresh, fruity candy cane mason jar fruit salads. They are sure to be a family favorite.Looking for that perfect Christmas breakfast or dessert? This adorable and easy candy cane mason jar fruit salad is great for both kids and adults!

Candy Cane Mason Jar Fruit Salad
Yields 6
A simple, holiday fruit salad that works for breakfast, dessert or a side dish.
Write a review
Print
Ingredients
  1. 4 cups Stonyfield whole milk vanilla yogurt (or plain or Greek)
  2. Seeds of 1 pomegranate
  3. 2 kiwis
  4. Medium bunch of red and/or green grapes
  5. 2 cups raspberries or strawberries
  6. (Optional) 2 Tbsp. chia seeds
Instructions
  1. Strain the yogurt in cheesecloth for one hour. Hang it over a bowl to get as much whey out as you can.
  2. While the yogurt is straining chop/seed the fruit into bite-size pieces.
  3. Layer the fruit and yogurt in 1/2-pint mason jars, small glass bowls or festive dishes.
  4. Top with chia seeds or more fruit.
Notes
  1. The fruit salads can be made with all red fruit, all green fruit or a combination.
  2. Older kids can help prepare the fruit and layer the salads.
  3. This makes 6 - 8 1/2-pint mason jars, depending on the ratio of fruit to yogurt you like.
Just Take A Bite https://justtakeabite.com/
Give your little cowboy a power-packed treat with these fun, gluten free cowboy cookies. They are loaded with real, nourishing food.

Abram’s Cowboy Cookies {gluten free, nut free, dairy free option}

Give your little cowboy a power-packed treat with these fun, gluten free cowboy cookies. They are loaded with real, nourishing food.

Give your little cowboy a power-packed treat with these fun, gluten free cowboy cookies. They are loaded with real, nourishing food.

Last year my daughter got her own cookbook for Christmas. Of course she immediately wanted to try some recipes. We found a few good ones that the whole family enjoyed. Her favorite was the molasses cookie.

Naturally if big sister gets to choose some recipes little brother wants to as well. My son saw a recipe for cowboy cookies. But when we went to make them, we realized they were loaded with things he is allergic to like wheat, nuts and oats. He was quite disappointed.

Time to Recipe Create

No worries. Allergy-friendly mom to the rescue!

We came up with our own cowboy cookie recipe that does not contain gluten, nuts or oats. They can also be made dairy free.

My son and I had a blast making these together (he is quite skilled in the kitchen thanks to the Kids Cook Real Food eCourse!). And he loved being able to share them at a family gathering. Everybody else loved them too!Give your little cowboy a power-packed treat with these fun, gluten free cowboy cookies. They are loaded with real, nourishing food.

A Colorful Cookie

We use sunbutter in this recipe to help bind and add fat. You must note that when you use sunbutter and baking soda together it can turn green! So if the inside of your cookie starts to look green there is no need to throw them out. And no, you didn’t do anything wrong. My kids now think it’s a fun surprise to have a green cookie when you take a bite.

Save Some for Later

This recipe makes a big batch (about 30 cookies). They freeze really well. So you can enjoy some now and save some for later. Or if you need them for a party or event you can make them well in advance. They thaw very quickly (10 – 20 minutes). Though my kids love to eat them frozen!

Cookies with a Punch

My little cowboy (and cowgirls!) is very active. He loves to spend all day outside on the farm taking care of animals and helping with any jobs he can. He really works up an appetite (and is by far my fastest, biggest eater). These cowboy cookies are great as part of a snack or the perfect ending to a hearty meal.

Loaded with protein, vitamins and minerals from eggs, sunbutter, pumpkin seeds and raisins, Abram’s cowboy cookies are nourishing and sweet. As you can see my little one sure loves them!

Give your little cowboy a power-packed treat with these fun, gluten free cowboy cookies. They are loaded with real, nourishing food.

Get your little cowboy or cowgirl into the kitchen to whip up a batch of cowboy cookies. You’ll all enjoy the time together and delicious treat you make.

Looking for more fun cookie recipes? Try these!

Grain Free Pumpkin Spice Breakfast Cookies

Everything Free Chocolate Cranberry Cookies

Gluten Free Peppermint Twist Cookies

Einkorn Chocolate Chip Cookies

Gluten Free Squash Cookies

Give your little cowboy a power-packed treat with these fun, gluten free cowboy cookies. They are loaded with real, nourishing food.

Abram's Cowboy Cookies {gluten free, nut free, dairy free option}
Yields 30
A hearty and allergy friendly cookie.
Write a review
Print
Ingredients
  1. 1/2 cup softened butter, palm shortening, lard or tallow
  2. 1 cup organic cane sugar or coconut sugar
  3. 2 eggs
  4. 1 tsp. organic vanilla
  5. 1/4 cup sunbutter
  6. 2 cups white rice flour or brown rice flour
  7. 1/2 tsp. unrefined sea salt
  8. 1 tsp. baking soda
  9. 1/2 cup chocolate chunks (we use Enjoy Life)
  10. 1/4 cup raisins and/or dried cranberries
  11. 2 Tbsp. pumpkin seeds
Instructions
  1. Heat the oven to 350 degrees F.
  2. Cream the butter and sugar until fluffy.
  3. Add the sunbutter, egg and vanilla. Beat until well mixed.
  4. Add the flour, salt and soda. Mix well.
  5. Stir in the chocolate, dried fruit and seeds.
  6. Scoop large mounds (2 - 3 Tbsp.) about 2 inches apart on a parchment or silpat lined baking sheet.
  7. Bake at 350 degrees F for 20 minutes, until golden brown.
  8. Allow to cool for 5 minutes and transfer to a cooling rack.
Notes
  1. The cookies freeze well. Allow 10 - 20 minutes for them to thaw.
  2. The cookies may turn green inside due to the sunbutter reacting with the baking soda. It is not harmful.
Just Take A Bite https://justtakeabite.com/
Ready to dress up your summer salad? In less than five minutes this creamy spinach pesto salad dressing goes from the blender to your bowl!

Creamy Spinach Pesto Salad Dressing

Ready to dress up your summer salad? In less than five minutes this creamy spinach pesto salad dressing goes from the blender to your bowl!

Ready to dress up your summer salad? In less than five minutes this creamy spinach pesto salad dressing goes from the blender to your bowl!

I don’t know about about you but when June rolls around I am so ready to get my salad on! I actually love eating salads year round. But something about the warm, summer weather makes me crave salad.

And when it comes to dressing I am not a traditional girl. Ranch? No thanks. Italian? Blech. I used to always eat honey mustard (I even have over four versions of it on the blog!!), but when I had to give up mustard for two years I lost that taste too.

Ready to dress up your summer salad? In less than five minutes this creamy spinach pesto salad dressing goes from the blender to your bowl!

My New Favorite

These days my salad dressing usually contains desiccated liver, fermented kale or aquatic greens…or all three if I’m really feeling the need to boost nutrients.

But there is one thing I always love on my salads – pesto! I usually make a really mild and simple version of pesto with peas (super kid friendly!!!).

Ready to dress up your summer salad? In less than five minutes this creamy spinach pesto salad dressing goes from the blender to your bowl!

Recently I had the opportunity to try some Taylor Farms organic salad mixes. I went right for the baby spinach and popped it in the blender with olive oil, Stonyfield whole milk yogurt and seasoning. Amazing!

I served it with dinner on a bed of Taylor Farms mixed spring greens. The family loved it! My six-year old still isn’t a fan of lettuce salads. So he had cucumber, avocado and parmesan cheese topped with the creamy spinach pesto.  He sure was happy with his salad – and even asked for it again the next day!

Ready to dress up your summer salad? In less than five minutes this creamy spinach pesto salad dressing goes from the blender to your bowl!

Kid-Friendly Greens

Creamy spinach pesto is a great way to get your kids to eat their greens. It does not taste like eating spinach (my son will vouch for that!). Plus it is combined with healthy fats like whole milk yogurt and extra virgin olive oil to help utilize the vitamins and minerals in the spinach.

Ready to dress up your summer salad? In less than five minutes this creamy spinach pesto salad dressing goes from the blender to your bowl!

Even if your kids aren’t big salad eaters yet this creamy spinach pesto works well for dipping veggies or even chicken nuggets. We also like to eat it on noodles (pesto pasta!).

Ready to dress up your summer salad? In less than five minutes this creamy spinach pesto salad dressing goes from the blender to your bowl!

Sometimes I’m sneaky and add a little desiccated liver. My kids don’t mind the taste since I add it to everything. It really boosts the Vitamin A content!

If you’re like me and craving a good summer salad this dressing is for you! Grab a big bowl, some Taylor Farms organic salad mix, your favorite salad toppers and a big helping of creamy spinach pesto! Summer has officially begun.

What is your favorite salad dressing? Do you make your own dressing creations?

Ready to dress up your summer salad? In less than five minutes this creamy spinach pesto salad dressing goes from the blender to your bowl!

Creamy Spinach Pesto Salad Dressing
Serves 6
A creamy green dressing the whole family will love!
Write a review
Print
Ingredients
  1. 2 cups tightly packed spinach
  2. 1/2 cup frozen peas, thawed
  3. 2 Tbsp. plain, whole milk yogurt
  4. 2 Tbsp. extra virgin olive oil
  5. 1/4 - 1/2 tsp. unrefined sea salt
  6. 1/8 tsp. garlic powder
  7. 1/8 tsp. onion powder
  8. optional: 1/8 tsp. desiccated liver, 1/8 tsp. fermented kale powder, 1 Tbsp. pumpkin seeds, 1/4 cup grated Parmesan cheese
Instructions
  1. Run warm water over the peas to thaw or let sit on the counter to thaw.
  2. In a blender combine the spinach, peas, yogurt, oil, salt, garlic, onion and optional ingredients if desired.
  3. Blend on high until smooth, scraping sides as necessary.
  4. Adjust seasoning to taste.
  5. Serve immediately or store in the refrigerator up to one week.
Notes
  1. This dressing works well on salads, as a veggie dip, on pasta or for chicken nuggets.
  2. This recipe makes one cup of dressing and is easily doubled or tripled to serve at a picnic.
Just Take A Bite https://justtakeabite.com/
I am working with Stonyfield Yogurt and Taylor Farms for this post. I have been compensated for my time but all opinions expressed are my own.

Missing your beloved granola bars because you can't have oats? Problem solved! These oat and nut free chewy granola bars have the taste and texture of oats. You'll never miss them!!

Oat and Nut Free Chewy Granola Bars

Missing your beloved granola bars because you can’t have oats? Problem solved! These oat and nut free chewy granola bars have the taste and texture of oats. You’ll never miss them!!

Missing your beloved granola bars because you can't have oats? Problem solved! These oat and nut free chewy granola bars have the taste and texture of oats. You'll never miss them!!

My son can’t eat oats.

We’ve been working through a myriad of food allergies with him for the last four years. And amazingly he has been able to get rid of almost all of them.

Except a few oddballs. Like oats.

We have added back dairy, corn, rice, seeds, bananas, apples, avocado – a whole assortment of foods – too many to list! But the oats are still a big no-go.

So every time I make a batch of granola bars he feels a bit left out. I’ve made rice bars before. Which are delicious! But they are more like a cookie than a granola bar.

Missing your beloved granola bars because you can't have oats? Problem solved! These oat and nut free chewy granola bars have the taste and texture of oats. You'll never miss them!!

Oat Free Bars!

We put our heads together and my son and I came up with a new version of oat and nut free chewy granola bars. They have some texture and lots of flavor. Plus they hold together well. Which is always a trick with homemade granola bars.

The secret ingredient is brown rice puffs. Cereal is a rare treat in our house. If we do have cereal, it’s often plain rice puffs. We eat them with milk or add them to yogurt for a little crunch. They work perfectly in this granola bar recipe to add texture.

Missing your beloved granola bars because you can't have oats? Problem solved! These oat and nut free chewy granola bars have the taste and texture of oats. You'll never miss them!!

Make it Double

I like to make a big batch (or two!), wrap them individually and stick them in the freezer. Then I’ve got an easy snack or breakfast component ready to go at any time. These chewy granola bars are ready to eat right from the freezer.

One batch makes about fourteen bars. But if you’ve got toddlers and preschoolers you can cut them even smaller to make a batch of twenty to twenty eight.

Probably the best part of these oat and nut free chewy granola bars is how easy they are to make. I can get a batch in the oven in less than ten minutes.

So what are you waiting for? Got ten minutes? Get into the kitchen and whip up a delicious snack that has no corn syrup, glycerin, thickeners or binders.

Don’t need to avoid oats? Both my chewy and crunchy granola bar recipes are great!!

Missing your beloved granola bars because you can't have oats? Problem solved! These oat and nut free chewy granola bars have the taste and texture of oats. You'll never miss them!!

Gluten, Oat and Nut Free Chewy Granola Bars
Yields 14
Write a review
Print
Ingredients
  1. 3 cups rice puffs, roughly chopped in a blender
  2. 1 1/4 cups white or brown rice flour
  3. 2 Tbsp. chia seeds
  4. 1 tsp. cinnamon
  5. 1/2 cup honey
  6. 1 Tbsp. organic cane sugar
  7. 1/4 tsp. unrefined sea salt
  8. 1/2 cup butter
  9. 2 eggs
  10. 1/4 cup unsweetened sunbutter
  11. 1/2 cup add-ins (raisins, chocolate chips, pumpkin seeds, cranberries, etc.)
Instructions
  1. Heat oven to 350F.
  2. Melt the butter, sunbutter and honey in s a small saucepan. Set aside.
  3. Combine rice puffs, flour, chia seeds, cinnamon, salt and sugar in a large bowl.
  4. Add the butter mixture and mix well.
  5. Add the eggs and mix well.
  6. Stir in opt-ins.
  7. Spread the batter in a greased or parchment lined 9x13 baking pan.
  8. Bake for 25 min.
  9. Let cool 15 minutes. Cut into bars (but do not remove from pan).
  10. Let cool 1 hour. Remove bars from pan.
  11. Wrap individually or store in a large container in the refrigerator or freezer.
Notes
  1. Bars are ready to eat straight from the freezer.
Just Take A Bite https://justtakeabite.com/
Want to make science fun? Spend a day at the zoo learning about your favorite animals. Top it off with a delicious penguin parfait!

Penguin Parfait and a Trip to the Zoo!

Want to make science fun? Spend a day at the zoo learning about your favorite animals. Top it off with a delicious penguin parfait!Want to make science fun? Spend a day at the zoo learning about your favorite animals. Top it off with a delicious penguin parfait!

My kids are true animal lovers. Just one more reason we moved to the country to start our own farm a few months ago!! But it’s not just farm animals. They are fascinated by just about any animal.

Science In Action

This is our first year homeschooling…and we chose to study land animals for science. They really, truly love animals! So when I heard that Stonyfield Yogurt was promoting World Penguin Day and Association of Zoos and Aquariums (AZA) Saving Animals from Extinction (SAFE) program I knew we had to see what it was all about.Want to make science fun? Spend a day at the zoo learning about your favorite animals. Top it off with a delicious penguin parfait!

We took a trip to our local zoo (John Ball Zoo) to see the penguins up close. I’ve been going to JBZ ever since I was little. Whenever I visited my grandparents they took us to the zoo, and we each got a balloon. It is one of the best (and only) memories I have of my grandparents (I was very little). But I cherish those memories. And I love that I get to take my own kids to John Ball now!Want to make science fun? Spend a day at the zoo learning about your favorite animals. Top it off with a delicious penguin parfait!

As luck would have it when we walked into the zoo they were just about to feed the penguins. So we hurried right over and got to see penguins swimming all over and enjoying fish. My kids thought it was great.

The fun didn’t end there. We spent the rest of the morning exploring tigers, bongos, spider monkeys, goats, chickens, chimpanzees and more. My animal-loving kids could have stayed all day. They really had fun on the new funicular. And, of course, we took a snack break and enjoyed some Stonyfield yogurt!Want to make science fun? Spend a day at the zoo learning about your favorite animals. Top it off with a delicious penguin parfait!

Penguin Fun

We can’t wait to go back to the zoo again this summer when we have more time to explore and more animals are active. But leaving the zoo didn’t put an end to our celebration of World Penguin Day.

At home we went on a waddle walk to see just how hard it would be to walk miles and miles like penguins do. The kids were out of breath after waddling across the yard. I don’t know how the penguins do it!

Later that day we watched some videos about penguins and learned about Emperor Penguins by watching Planet Earth. The kids were glued to the tv, fascinated by how the male penguins care for the eggs and wait for the females to return with food.Want to make science fun? Spend a day at the zoo learning about your favorite animals. Top it off with a delicious penguin parfait!

A Special Yogurt Treat

In honor of all of our Penguin Day fun we decided to make a special snack – a penguin parfait! This fun treat is easy to make and reminds us to do our part in keeping wildlife safe. I combined Stonyfield yogurt with tummy calming activated charcoal to create a black and white parfait you can enjoy for breakfast, lunch or a snack.

Yogurt has a great balance of sodium to potassium which is great for your heart! This parfait also contains a nice mix of protein, fat and carbohydrates. Activated charcoal is my go-to supplement for settling tummies after an illness or an allergic reaction. I sometimes give it to my kids to help with gentle detox as well. It’s great for tummy maintenance once in a while. So this parfait is more than just a delicious treat. It’s filled with nutrition too.

I encourage you to help your kids explore and discover God’s beautiful creation. Take a trip to your local zoo and learn about the animals and how you can help protect them (don’t forget you can earn FREE zoo tickets when you buy Stonyfield yogurt!). Then enjoy a penguin parfait!Want to make science fun? Spend a day at the zoo learning about your favorite animals. Top it off with a delicious penguin parfait!

Penguin Parfait
Serves 2
A simple yogurt parfait to celebrate World Penguin Day.
Write a review
Print
Ingredients
  1. 1 cup full fat plain creamy or greek-style yogurt
  2. 2 Tbsp. honey or maple syrup
  3. 1 capsule activated charcoal (260 mg)
  4. 1 medium-size ripe banana, halved and sliced
  5. 2 Tbsp. mini chocolate chips
Instructions
  1. In a bowl combine the yogurt, honey and charcoal. Mix until charcoal is fully distributed.
  2. Divide the yogurt between two cups.
  3. Top the yogurt with a layer of banana slices and 1 Tbsp. chocolate chips per cup.
Notes
  1. You can replace the yogurt + honey with two YoKids yogurt in your favorite flavor.
Just Take A Bite https://justtakeabite.com/
I am working with Stonyfield Yogurt on this post. I was compensated for my time but all opinions expressed are my own.

No need to sacrifice nutrition on busy mornings. In less than the time it takes to pour a bowl of cereal you can have this nutrient packed blueberry spinach smoothie on the table!

Blueberry Spinach Smoothie: Jam Packed With Nutrients!

No need to sacrifice nutrition on busy mornings. In less than the time it takes to pour a bowl of cereal you can have this nutrient packed blueberry spinach smoothie on the table!

No need to sacrifice nutrition on busy mornings. In less than the time it takes to pour a bowl of cereal you can have this nutrient packed blueberry spinach smoothie on the table!

School is under way. That means two things.

  1. Mornings are busy.
  2. The germs are spreading.

That doesn’t mean throw in the towel, buy boxes of cereal and say a prayer your child stays healthy.

No way! Now is the perfect time to get smart and start the day with a nutrient boost that supports the immune system. It also provides critical vitamins and minerals for focus and energy.

No need to sacrifice nutrition on busy mornings. In less than the time it takes to pour a bowl of cereal you can have this nutrient packed blueberry spinach smoothie on the table!

The Ultimate Energy Drink

Kids need fuel for both their minds and bodies. Get it all in this nutrient packed blueberry spinach smoothie. Fruits, vegetables and loads of vitamins and minerals.

I serve smoothies for breakfast several times a week. They are easy. And you’d be amazed how much good stuff I pack in there. This blueberry spinach smoothie is no exception.

Don’t worry – even with all that good stuff it still tastes great! All of my kids approve.

No need to sacrifice nutrition on busy mornings. In less than the time it takes to pour a bowl of cereal you can have this nutrient packed blueberry spinach smoothie on the table!

What makes it so nutritious?

I’m over at Kitchen Stewardship sharing this fool-proof way to get your child’s day started right. Bonus – it’s great mama fuel too! I make a blenderful in the morning and have some for my breakfast. Then when the kids get up I just puree for a few seconds again and their breakfast is ready. It really doesn’t get any easier.

Check out the full recipe here!

No need to sacrifice nutrition on busy mornings. In less than the time it takes to pour a bowl of cereal you can have this nutrient packed blueberry spinach smoothie on the table!

Don't let the thought of packing allergen free school lunches give you anxiety. I'm sharing my top picks, including enough choices to create at least three weeks of completely different lunches!

Over Three Weeks Of Real Food Allergen Free School Lunches

Don’t let the thought of packing allergen free school lunches give you anxiety. I’m sharing my top picks, including enough choices to create at least three weeks of completely different lunches!

Don't let the thought of packing allergen free school lunches give you anxiety. I'm sharing my top picks, including enough choices to create at least three weeks of completely different lunches!

School is right around the corner (I said it…don’t throw tomatoes). Depending on where you live it could be a month, a couple weeks or even days away!

Along with school comes the dreaded lunch packing.

When you have to work around allergies your choices are limited. No crackers and cheese. No more pb&j. Scrap half of the cute Pinterest ideas.

There are even plenty of posts claiming to have allergen free ideas…that really aren’t allergen free at all except for maybe one or two options from a long  list. Or you have to do a bunch of substituting on your own to make them allergen free. No thanks.

But allergy friendly lunches don’t need to be boring, bland or void of nutrition. They don’t need to be complicated either. In fact they can be downright fun! Just ask my kids.

I’ve been packing school lunches for two years now. I tend to get in a rut sometimes. So I like to have a list on hand of safe, healthy and delicious lunch ideas. Today I’m sharing them with you!

These are the best real food allergy friendly lunch ideas around. And they are all staples in our lunches.

Don't let the thought of packing allergen free school lunches give you anxiety. I'm sharing my top picks, including enough choices to create at least three weeks of completely different lunches!

Pick your favorites, make some weekly lunch menus and rotate through them. I’ve got enough ideas to create three full weeks of unique lunches. Problem solved.

To start I’ll share one of our favorites. Then head over to Kitchen Stewardship where you’ll find the rest of my allergen free school lunches.

Allergen free bread or pancakes with sunbutter [this brand is 100% nut free – I like to use the green lid since there are no extra ingredients] and pectin free strawberry jam, cherry jam, peach jam, grape jelly or red plum raspberry jellyThis is not your traditional pb&j. But trust me, your kids will love it!

—>>> Check out the rest of my allergen free school lunches!

These Allergy Friendly Blueberry Muffins are free of gluten, dairy, eggs, nuts, corn, rice, coconut and soy. They are safe for just about anyone! But that doesn't mean they lack in flavor. Moist, slightly sweet and perfect for breakfast or a snack.

Allergen-Free Blueberry Muffins

Easy to make and fun to eat, these allergy-friendly blueberry muffins are naturally free of gluten, dairy, eggs, nuts, corn, coconut, rice and soy. Breakfast just got a whole lot tastier.These allergy friendly blueberry muffins are free gluten, dairy, eggs, nuts, corn, soy, rice and coconut. They are safe for just about anyone! But that doesn't mean they are lacking in flavor. Most, slightly sweet and so delicious! They make the perfect breakfast or snack.

Let’s get real. Allergen-free baking is tricky.

Sometimes it works. Sometimes it doesn’t. You make numerous batches and spend a lot of money on specialty ingredients.

When my son was little and had gotten a new round of allergy testing…and restrictions, I had to do more baking experimentation. I was very experienced with gluten-free, dairy-free and nut-free baking. But adding eggs to the list too made it a bit harder. I started my experimenting with muffins.

Kid-Friendly Gluten-Free Muffins

He has always loved muffins. When he was two he’d get out of bed, hurry downstairs and declare he needed a muffin instantly. There was (and still is) no waiting for breakfast (he’s just like his mama). And muffins top his list for breakfast fare.

These Allergy Friendly Blueberry Muffins are free of gluten, dairy, eggs, nuts, corn, rice, coconut and soy. They are safe for just about anyone! But that doesn't mean they lack in flavor. Moist, slightly sweet and perfect for breakfast or a snack.

I went through a few batches that were either crumbly or too dense. But I finally perfected a truly allergen-free muffin.

You can add whatever you like to it. My son’s favorite variety is blueberry. Me? I like chocolate chips (this is the brand we love). That’s about as close as I get to dessert these days.

Easy, Egg-Free Muffins

These muffins are super easy to make. Just mix all of the ingredients in one bowl, pour into muffin tins and bake.

Every time I make muffins my son devours them and tells me I NEED to post the recipe. So today I’m finally sharing it.

These Allergy Friendly Blueberry Muffins are free of gluten, dairy, eggs, nuts, corn, rice, coconut and soy. They are safe for just about anyone! But that doesn't mean they lack in flavor. Moist, slightly sweet and perfect for breakfast or a snack.

There are no eggs, dairy, coconut, nuts, corn, rice, gluten or soy in these allergy-friendly blueberry muffins. They are also pretty low in sweetener.

I use a combination of grass-fed gelatin (I use this brand – use the code TAKE10 for 10% off), olive oil and honey for an egg replacement. It works perfectly!

Muffins Kids Can Make

If you’re looking for a way to get your kids in the kitchen to practice their cooking skills, allergen-free blueberry muffins are perfect. They can perfect their measuring and pouring skills. And of course sample the batter to make sure it’s ok.


Not sure how to teach your kids to cook? Check out this cooking course! We’ve been using it for years!


I like to make a big batch and stock the freezer. Though with  my son’s appetite very few actually make it there. I love having an easy breakfast or perfect pairing with a bowl of nourishing soup ready whenever I need it.

Are you in need of a truly allergy-friendly muffin?

This is it! Choose your favorite additions and whip up a special breakfast treat.

These Allergy Friendly Blueberry Muffins are free of gluten, dairy, eggs, nuts, corn, rice, coconut and soy. They are safe for just about anyone! But that doesn't mean they lack in flavor. Moist, slightly sweet and perfect for breakfast or a snack.

Allergy Friendly Blueberry Muffins
Yields 12
Moist, slightly sweetened blueberry muffins free of gluten, dairy, eggs, corn, soy, rice and coconut.
Write a review
Print
Ingredients
  1. 1 1/2 cups sorghum flour
  2. 1/2 cup tapioca flour
  3. 3/4 cups water
  4. 3 Tbsp. cane sugar
  5. 1 1/2 tsp. baking soda
  6. 1/2 tsp. unrefined sea salt
  7. 1/4 cup honey
  8. 6 Tbsp. olive oil
  9. 1/4 cup cold water
  10. 3 tsp. grass-fed gelatin
  11. 1/4 cup hot water
  12. 1/2 cup blueberries (or any other fresh fruit, dried fruit or chocolate chips)
Instructions
  1. Heat the oven to 350*F. Line muffin pan with muffin cups (paper or silicone).
  2. In a large bowl combine the sorghum, tapioca and water. Mix well, removing any lumps.
  3. Combine the 1/4 cup cold water and gelatin. Set aside.
  4. Add the sugar, baking soda, salt, honey and olive oil to the flour mixture. Mix well.
  5. Add the 1/4 cup hot water to the gelatin mixture and stir to dissolve.
  6. Pour the gelatin water into the muffin batter. Mix by hand or with a hand mixer until well mixed.
  7. Stir in fruit.
  8. Fill muffin cups 3/4 full.
  9. Bake for 30 - 40 minutes (30 minutes for mini muffins, 40 minutes for full size muffins).
Notes
  1. To make pumpkin muffins reduce the 3/4 cups of water to 1/2 cup of water and add 1/2 cup of pumpkin to the batter.
  2. One recipe makes about 12 full size muffins or 24 mini muffins.
  3. Add 3 Tbsp. maple syrup and omit the blueberries to make vanilla cupcakes.
Just Take A Bite https://justtakeabite.com/