Home » Kid-friendly Recipes » dairy free » Page 13

Category: dairy free

Simple Soaked Series: Sweet Bread

Simple Soaked Series: Sweet Bread | Homemade Dutch Apple Pie

Now that we’ve learned why it’s important to properly prepare grains and how to use some common whole grains it’s time to share some simple soaked recipes. I’m starting out with sweet bread.

One of things I bake most often is sweet bread. It is perfect for breakfast, a snack or along side a big bowl of soup. Plus we all love it.

Sweet bread is a great medium for adding lots of healthy fat like butter and coconut oil to your diet. We like to really pile it on! I love a bit sea salt on top as well for a great salty sweet combination. 

A basic sweet bread recipe is the perfect starting point for many varieties of bread. You can keep it simple. Or you can create various flavor combinations by adding dried fruit, fresh fruit, nuts, seeds, spices and chocolate chips.

The great thing about this sweet bread is that it is soaked for easier digestion and nutrient absorption.  So you can feel good about serving it to your family.

Simple Soaked Series: Sweet Bread | Homemade Dutch Apple Pie

My kids LOVE sweet bread. I need to start making double batches so some of it can actually make it to the freezer.  We go through these two loaves in a couple days. It makes a great addition to lunch boxes for school…again piled high with butter.

If you manage to get some of your bread in the freezer it makes an easy no-prep breakfast on busy mornings. Just grab it out of the freezer, top it with butter or coconut oil and pair it with some eggs, bacon, yogurt or raw milk. Breakfast is served in no time.

This bread can also be used to make amazing french toast.  Dip slices in a dish of beaten eggs and milk and fry it in butter. Then top it with maple syrup or honey and you have a special Saturday morning breakfast.

This recipe is for gluten, dairy, nut and corn free bread. If you tolerate gluten you can make it with whole wheat, spelt or kamut flour.

No matter how you serve it or what you add to it sweet bread is delicious.  Try this base recipe and then get creative making flavors your family loves. 

Simple Soaked Series: Sweet Bread | Homemade Dutch Apple Pie

Simple Soaked Series: Sweet Bread
Yields 2
A basic sweet bread recipe that is soaked and gluten/dairy/nut/corn free.
Write a review
Print
Ingredients
  1. 2 cups any combination of gluten free flour, stirred together to remove any clumps
  2. 3/4 cups total soaking liquid (2 Tbsp. lemon juice, whey, yogurt or kefir + enough water or milk to equal 3/4 cups)
  3. 1/2 cup melted coconut oil, butter or organic palm shortening
  4. 3/4 cups coconut sugar or cane sugar
  5. 1/2 tsp. baking soda
  6. 1 tsp. cream or tartar (or baking powder)
  7. 1 tsp. tapioca flour or arrowroot (omit if using baking powder)
  8. 1/2 tsp. unrefined sea salt
  9. 2 eggs
  10. optional: 1/2 cup add-ins: spices, nuts, fruit, dried fruit, chocolate chips
Instructions
  1. Combine the flour and the soaking liquid.
  2. Cover and let sit 7-24 hours.
  3. Grease a large and a medium loaf pan. Heat oven to 350*F.
  4. Add the melted fat and the dry ingredients to the soaked flour. Mix.
  5. Add the eggs. Mix.
  6. Stir in any add-ins.
  7. Pour the batter into the prepared pans.
  8. Bake for 50 minutes.
Notes
  1. This bread freezes well.
  2. This bread can be made with whole wheat/splet/kamut/einkorn flour in place of the gluten free flour.
Just Take A Bite https://justtakeabite.com/


In order for me to support my blogging activities, I may receive monetary compensation or other types of remuneration for my endorsement, recommendation, testimonial and/or link to any products or services from this blog.

Basic Grains: Oatmeal

Basic Grains: Oatmeal | Homemade Dutch Apple PieWhen it comes to grains it doesn’t get more basic than oatmeal. It is a breakfast staple for so many.

But oatmeal may be one of the things causing digestive distress and vitamin and mineral deficiencies for many.  This is especially true if your oatmeal comes from a packet with flavorings or if you eat granola out of a box. They don’t have any nutrients to begin with.

But even if you cook plain oats you’re likely to have problems. Ever feel gassy, bloated or really full after eating oatmeal? There’s a reason.

Oats are one of the highest phytic acid containing grains. So if you are not preparing them properly oats are really hard on your body and do more harm than good.

I learned this the hard way. I used to eat store-bought granola every single day…for years. As you can  imagine I also had years of digestive problems. Now I don’t tolerate oats at all, even properly prepared.

That being said, oats are a very budget-friendly and healthy breakfast if you take the time to soak them. Honestly, oatmeal is one of the easiest breakfasts to make. You soak the oats one morning. Then the next morning they cook in five minutes!Basic Grains: Oatmeal | Homemade Dutch Apple Pie 3

I love that you can add so many things to a bowl of oatmeal to bump up the nutrition:

  • butter
  • coconut oil
  • raw milk or cream
  • coconut milk
  • yogurt
  • gelatin
  • cinnamon
  • fresh fruit
  • dried fruit
  • nuts
  • flax seeds
  • nut butter

You can even add probiotics and cod liver oil!

You can make a big pot of oatmeal one morning that will last all week. Then all you have to do is warm it and add new flavors. You can create all sorts of fun combinations like peanut butter banana, cinnamon raisin, strawberries and cream and chocolate chip!

My three year old loves oatmeal. It’s a special treat for him when I make it. He always claims any leftovers. My six year old, on the other hand, can’t do oatmeal. The texture is too much for her oral sensory issues. She does love granola and granola bars, though. Experiment and see what your kids think. You can adjust the liquid content to give it a different texture. Adding extra milk or water makes it more like cereal and not so thick.

Oatmeal for breakfast is great for filling bellies and giving a healthy dose of carbohydrates for energy at the start of the day. Add the nutrient dense components and pair it with some eggs or bacon and you’ve got a powerhouse breakfast.  It’s even gluten free.

If you’re like me and don’t tolerate oats you can replace oats with teff, rice or quiona.

Have you been eating your oatmeal without soaking it for years? Now’s the time to get started preparing it the right way and get the most out of your oats.Basic Grains: Oatmeal | Homemade Dutch Apple Pie 2


Basic Grains: Oatmeal
Serves 2
Basic soaked oatmeal.
Write a review
Print
Ingredients
  1. 1 cup oats (old fashioned/rolled oats)
  2. 1 cup warm water + 2 Tbsp. lemon juice, kefir, yogurt or whey
  3. 1 cup water
  4. 1/2 tsp. sea salt
  5. 2-4 Tbsp. coconut sugar, maple syrup or honey (optional)
  6. gelatin, cinnamon, dried fruit, fresh fruit, nuts, seeds, butter, coconut oil, yogurt, milk to taste
Instructions
  1. Combine the oats and warm water plus lemon juice in a bowl. Cover and let sit for 24 hours (or longer).
  2. Put soaked oats in a medium saucepan.
  3. Add the water, salt and sweetener.
  4. Cook over medium heat about five minutes, until liquid is absorbed and oats are cooked through.
  5. Add optional ingredients to pot or to individual bowls.
  6. Store leftovers in a sealed container in the refrigerator.
Notes
  1. To reheat leftover oatmeal place it in a saucepan with a small amount of milk or water and heat until warm.
Just Take A Bite https://justtakeabite.com/


In order for me to support my blogging activities, I may receive monetary compensation or other types of remuneration for my endorsement, recommendation, testimonial and/or link to any products or services from this blog.

Maple Candy {grain free, dairy free, nut free, corn free, egg free}

Maple Candy | Homemade Dutch Apple PieMy kids getting candy is a very rare occasion. We are 100% artificial flavor and dye free. That excludes almost every kind of candy.

My oldest does get an organic sucker once in a while. It’s a good substitute if she’s in a situation where other kids are getting treats. Though I still try to limit them. I’m not a fan of the unknown “natural flavor.”

With my son’s allergies to corn and rice he has not had candy in over a year.  And before that I think he had maybe tried a sucker a few times. Even the organic suckers have rice. I feel bad for him sometimes. He feels left out. Plus he sees his big sister having suckers. He should get a treat too.Maple Candy | Homemade Dutch Apple Pie

So I’ve been wanting to try making homemade candy for some time. I finally did it! This Valentine’s Day you can surprise your kids with homemade candy!! Even if they have allergies.

Let me tell you…my son was so excited about this! He loves this maple candy.

I love that it is made with all real ingredients. So there is no junk hiding in there.

Keep in mind that it is still a sweet and should be limited to special occasions.

This candy can be sucked or chewed. You can make it as a plain candy or on a sucker stick.  It would be perfect for cake decorations. Just find a candy mold with the shape you like.Maple Candy | Homemade Dutch Apple Pie

Maple candy has a mild maple flavor and just enough sweetness. It’s what I imagine the maple candy tasted like in the Little House books.

This Valentine’s Day surprise your kids or any loved ones with homemade candy. It’s a very loving thing to provide a special treat that is hand made and keeps them away from the artificial stuff.

If you want something chocolate to go along with the suckers these chocolate covered toffee candies are perfect.

Do you like the flavor of maple syrup? You’ll love maple candy.  If you don’t care for maple you can replace the maple syrup with extra cane or coconut sugar.Maple Candy | Homemade Dutch Apple Pie

Maple Candy {artificial flavor and dye free}
Serves 5
Homemade candy with the flavor of maple syrup.
Write a review
Print
Ingredients
  1. 1/2 cup organic cane sugar
  2. 1/4 cup water
  3. 2 Tbsp. maple syrup
Instructions
  1. Mix the ingredients in a saucepan.
  2. Bring to a boil over medium heat, stirring.
  3. Simmer until the temperature reaches 300*F (this will take about ten minutes, the mixture will start to get thick/syrupy)
  4. Remove from heat.
  5. Stir for one minute.
  6. Pour into candy molds and let set until firm.
Notes
  1. You can add a few drops of essential oils for flavoring after removing the syrup from the heat.
  2. To make "plain" suckers simply use 1/2 cup sugar and 3 Tbsp. water.
  3. You can easily double or triple this recipe to make a larger batch. Be sure to pour the hot mixture into molds quickly as it hardens very quickly.
Just Take A Bite https://justtakeabite.com/

In order for me to support my blogging activities, I may receive monetary compensation or other types of remuneration for my endorsement, recommendation, testimonial and/or link to any products or services from this blog.

Lemon Cupcakes with Strawberry Buttercream {soaked, gluten free, dairy free, nut free, corn free}

Lemon Cupcakes with Strawberry Buttercream soaked gluten free dairy free nut free corn free | Homemade Dutch Apple PieValentine’s Day is right around the corner. It’s a day to really show your loved ones how much you care.

What better way to show you care than by making a special treat that is not loaded with high fructose corn syrup, artificial colors and chemicals?Lemon Cupcakes with Strawberry Buttercream soaked gluten free dairy free nut free corn free | Homemade Dutch Apple Pie

These lemon cupcakes are the perfect confection for your Valentine. They are soaked, gluten free, dairy free, nut free and corn free. Free of most allergens, free of chemicals and soaked for easier digestion – that is a {real} treat.

The idea for these cupcakes actually came from my daughter. She loves Valentine’s Day. So she wanted me to create a unique dessert. She also helped me make them! She’s my little traditional food baker in training.Lemon Cupcakes with Strawberry Buttercream soaked gluten free dairy free nut free corn free | Homemade Dutch Apple Pie

The strawberry frosting was a requirement since she wanted them pink. It is light and fluffy. I think I could eat a bowlful plain!  I make it with homemade powdered sugar to avoid corn and processed sugar. We also made chocolate hearts for decorations. They are just melted dairy free chocolate chips poured into candy molds.

Both of my kids were crazy about these cupcakes. My son declared them “the best cupcakes I’ve ever had.”

I really loved them too. Which surprised me since I’m not a big lemon fan. But these are really good. They are a bit moister than a typical cupcake because of the lemon. The flavor reminds me of lemon bars.Lemon Cupcakes with Strawberry Buttercream soaked gluten free dairy free nut free corn free | Homemade Dutch Apple Pie

If you don’t like a moist cupcake you can cut back on the lemon juice and use a few drops of lemon essential oil or a natural lemon flavoring.

If you are going to be busy on Valentine’s Day with school parties or errands you can bake the cupcakes in advance.  Simply store them in the freezer. Then give them about an hour to thaw while you make the frosting. They also keep well for about a week in a sealed container at room temperature even with the frosting on.

Lemon cupcakes with strawberry buttercream are the perfect Valentine’s Day treats for your loved ones. Skip the artificial sweets. Take the time to make something that is both delicious and healthy.Lemon Cupcakes with Strawberry Buttercream soaked gluten free dairy free nut free corn free | Homemade Dutch Apple Pie

Lemon Cupcakes with Strawberry Buttercream {soaked, gluten free, dairy free, nut free, corn free}
Yields 20
A fresh lemon cupcake with sweet strawberry buttercream.
Write a review
Print
Cupcakes
  1. 2 cups any combination of gluten free flour
  2. 1/2 cup lemon juice
  3. 1/2 cup warm water
  4. 1/4 cup melted coconut oil, palm shortening or butter
  5. 1 egg
  6. 1 1/4 cups organic cane sugar or coconut sugar
  7. 1/4 tsp. sea salt
  8. 1/2 tsp. baking soda
  9. 1 tsp. cream of tartar
  10. 1 tsp. tapioca flour or arrowroot
Buttercream
  1. 1 cup strawberries(fresh or frozen, thawed), pureed
  2. 2/3 cup palm shortening or butter at room temperature
  3. 1 1/2 cups homemade powdered sugar (see recipe for link)
Cupcakes
  1. Combine the flour, lemon juice and water.
  2. Cover and let sit 7-24 hours.
  3. Heat oven to 350*F. Fill muffin pan with paper liners.
  4. Add the melted fat. Beat just until mixed.
  5. Add the egg. Beat just until mixed.
  6. Add the sugar, salt, soda, cream of tartar and tapioca.
  7. Beat until just mixed.
  8. Fill the muffin cups with batter, about 3/4 full.
  9. Bake for 40 minutes.
  10. Allow to cool completely.
  11. Frost or freeze until ready to use.
Buttercream
  1. Combine the strawberries, shortening and sugar in a medium bowl.
  2. Beat until combined and fluffy, about 4 minutes.
  3. Pipe or spread onto cupcakes.
Notes
  1. For a cupcake it works best to use at least 1/2 "white" flour like tapioca or white rice.
  2. You can substitute whole wheat or all purpose flour if you are not gluten free. Reduce the amount of flour by 1/4 cup.
  3. You can use 1 tsp. baking powder in place of the cream of tartar and tapioca flour if you tolerate corn.
Just Take A Bite https://justtakeabite.com/


In order for me to support my blogging activities, I may receive monetary compensation or other types of remuneration for my endorsement, recommendation, testimonial and/or link to any products or services from this blog.

Simple Smoothie Series: The Health Nut

Simple Smoothie Series: The Health Nut || Homemade Dutch Apple PieThe final smoothie in this series is packed with nutrients and has no added sugar. So I call it the health nut.

Dates and fruit add a touch of sweetness while flax seeds, avocado, egg yolks and vegetables provide critical fats, vitamins, minerals and omega-3’s.

The health nut is a very mild smoothie. There are no strong flavors that overpower. It is perfect for kids.

I used yogurt for probiotics, but this smoothie works just as well without any dairy products. You can use coconut milk or water to get the correct consistency. Then add a powdered probiotic.Simple Smoothie Series: The Health Nut | Homemade Dutch Apple Pie

This smoothie does require a little bit of forethought. You should soak the dates in warm water for a bit before using them. The dates plus the soaking liquid will help sweeten the smoothie better that way. I just put the dates and water in the blender the night before and add the rest of the ingredients in the morning.

You can adjust the amount of dates and fruit to your liking to make the smoothie sweeter if desired.

This smoothie is great as part of your breakfast or lunch or even for a mid-day snack. Pour some in a travel mug with a straw and sip on it throughout the day when you need a little pick-me-up.

A smoothie is a great way to add nutrients to your diet with little effort. This health nut smoothie is a delicious way to do it.Simple Smoothie Series: The Health Nut | Homemade Dutch Apple Pie


Simple Smoothie Series: The Health Nut
Serves 1
A simple, nutritious smoothie with no added sweeteners.
Write a review
Print
Ingredients
  1. 3-4 dates, pitted, soaked in 4 Tbsp. warm water
  2. 1 small or 1/2 medium apple
  3. 10 -15 grapes (red or green)
  4. 1 medium stalk celery
  5. 1/2 medium carrot, peeled, cut in chunks
  6. 1/4 cup whole milk yogurt, kefir, coconut milk yogurt, milk or coconut milk
  7. 1 egg yolk
  8. 1/4 avocado
  9. 1 Tbsp. flax seeds
  10. 1/4 tsp. sea salt
Instructions
  1. Soak dates in warm water over night or at least 3 hours.
  2. Combine the soaked dates (with liquid) and the remaining ingredients in a high powered blender.
  3. Blend until smooth.
  4. Serve immediately or store in the refrigerator or freezer.
Notes
  1. You can soak the dates in the blender.
  2. The egg yolk, flax seeds and avocado are all optional, depending on your tolerance.
  3. You can substitute cucumber for the celery.
  4. You can substitute cooked squash or pumpkin for the carrot.
  5. You can add 2 Tbsp. soaked nuts if you tolerate nuts.
Just Take A Bite https://justtakeabite.com/


In order for me to support my blogging activities, I may receive monetary compensation or other types of remuneration for my endorsement, recommendation, testimonial and/or link to any products or services from this blog.

Simple Smoothie Series: True Blue-Berry

Simple Smoothie Series: True Blue-Berry || Homemade Dutch Apple PieToday I’ve got a smoothie that is sure to please everyone.  Who doesn’t love blueberries?!

This true blue-berry smoothie gives a double shot of flavor with both whole blueberries and blueberry juice.

A blueberry smoothie is great for really little ones because you can leave out the sweetener and it still has a lot of flavor. Just be careful how you serve it so it doesn’t get on everything!

If you or your kids are adventurous you can also add a few pieces of roasted beets. A little goes a long way in terms of changing the flavor. But it also adds a lot of nutrition. If you don’t tell your kids it’s in there they might not know. It won’t change the color.

You can also easily add elderberry syrup to a blueberry smoothie for extra immune system support.

If you are dairy free you can leave out the yogurt and add a bit of powdered probiotics instead. The smoothie will taste great without the yogurt. Or you can add some coconut milk for texture.

Every summer we load up on fresh Michigan blueberries while they are in season and freeze them. Then all winter long we can have delicious smoothies like this, knowing we’re using fruit from the peak of freshness.

If you do not have a blueberry stash in your freezer you can get frozen organic blueberries at the store. They are a better option than any fresh berries you find in the winter since it is not blueberry season.

Blueberries are my favorite fruit…and a blueberry smoothie is my favorite flavor. What’s yours?Simple Smoothie Series: True Blue-Berry || Homemade Dutch Apple Pie

Simple Smoothie Series: True Blue-Berry
Serves 2
A healthy smoothie bursting with blueberry flavor.
Write a review
Print
Ingredients
  1. 1/2 cup blueberries (fresh or frozen)
  2. 1/4 cup pure blueberry juice
  3. 1/2 cup plain whole milk yogurt or coconut milk yogurt
  4. 2 egg yolks
  5. 2 Tbsp. honey
  6. 1/4 tsp. sea salt
  7. 1 Tbsp. roasted beet (optional)
  8. 2 Tbsp. elderberry syrup (optional)
Instructions
  1. Combine all of the ingredients in a blender.
  2. Blend until smooth.
  3. Serve immediately or store in the refrigerator or freezer.
Notes
  1. To make this into popsicles simply pour the smoothie into popsicle molds and freeze until solid.
  2. If you serving the smoothie to a child under one year of age leave out the honey.
  3. You can omit the egg yolks if you are allergic to eggs.
  4. The yogurt can be left out or replaced with coconut milk yogurt or coconut milk to make this dairy free.
Just Take A Bite https://justtakeabite.com/


In order for me to support my blogging activities, I may receive monetary compensation or other types of remuneration for my endorsement, recommendation, testimonial and/or link to any products or services from this blog.

Simple Smoothie Series: Sunrise Smoothie

Simple Smoothie Series Sunrise Smoothie || Homemade Dutch Apple PieThe next simple smoothie in this series is called the sunrise smoothie. It’s the perfect morning drink.

The combination of orange, banana and strawberry gives a burst of flavor and also great color. It almost looks like a sunrise. Though you don’t need to take warning for this red sky.

By adding yogurt and egg yolks to these fruits you create a vitamin powerhouse.

My oldest really loves this smoothie. And she can be picky about smoothies. It is bright and fresh and a great thing to boost your energy for the day. She renamed it the morning milkshake.Simple Smoothie Series Sunrise Smoothie || Homemade Dutch Apple Pie

If you want to add some healthy fat to the smoothie avocado, coconut oil and flax seed all work well.

Don’t forget to pair it with some properly prepared starch (quinoa, rice, sourdough bread, fried potatoes, etc.) for better absorption and digestion. Then you’ll have a good balance of protein, fat and carbohydrates.

Even if it’s cold and the sun isn’t shining during the winter you can start your day with a nutritious sunrise – in a smoothie! Take your fermented cod liver oil with it to boost your vitamin D, just like the sun does.Simple Smoothie Series Sunrise Smoothie || Homemade Dutch Apple Pie

Simple Smoothie Series: Sunrise Smoothie
Serves 1
A fruity smoothie that looks like a sunrise in a glass.
Write a review
Print
Ingredients
  1. 1/2 medium banana
  2. 1 clementine (or half an orange)
  3. 1/3 cup strawberries (fresh or frozen)
  4. 1/2 cup yogurt (or kefir, coconut milk or coconut milk yogurt)
  5. 1 egg yolk
  6. 2 Tbsp. honey (or maple syrup), if desired
  7. 1/4 tsp. sea salt
Instructions
  1. Combine all of the ingredients in a blender.
  2. Blend until smoothie.
  3. Serve immediately or store in the refrigerator.
Notes
  1. You can add 1/2 small avocado, 1 Tbsp. melted coconut oil or 2 tsp. flax seeds for extra fat.
  2. Leave out the honey if serving this smoothie to a child under one year of age.
Just Take A Bite https://justtakeabite.com/

In order for me to support my blogging activities, I may receive monetary compensation or other types of remuneration for my endorsement, recommendation, testimonial and/or link to any products or services from this blog.

*If you order by clicking on any of my Tropical Traditions links and have never ordered from Tropical Traditions in the past, you will receive a free book on Virgin Coconut Oil, and I will receive a discount coupon for referring you.

Simple Smoothie Series: Kiwi Strawberry

Simple Smoothie Series: Kiwi Strawberry || Homemade Dutch Apple PieIt’s that time of year – time to get back on track with nourishing foods.

So this month I’m doing a simple smoothie series. Smoothies are a great way to pack in nutrition, and they can be tailored to meet any dietary restrictions. Plus kids love them!

The other great thing about smoothies is that they can be prepared in advance and are great for on the go breakfasts or lunches. They can even be frozen to make a breakfast popsicle your kids will love.

If you have a little one just starting solids you can spoon feed a thick smoothie. It’s an easy way to give them things like probiotics and cod liver oil.  Be sure to leave out the honey if giving it to a child under one year of age.

A smoothie can be a meal on its own. I personally need to have a salty/starchy component to my meal or else I will feel cold. So if I drink a smoothie (which has lots of fat and protein) I like to pair it with a muffin or slice of bread or bowl of rice with salt. That gives a good fat/protein/carbohydrate balance and a good sugar/salt/saturated fat/starch balance – both of which are ideal for good health. It is especially important for adrenal health.

My first simple smoothie is kiwi strawberry. It’s perfect for the winter months. Kiwi is readily available in the store. Then add some strawberries from your summer freezer stash. It’s a delicious combination that is rich in vitamin C.

An added bonus of using strawberries is that they are the best source of ellagic acid. According to Nourishing Traditions, “strawberries contain a compound called ellagic acid, which is an antioxidant that helps detoxify carcinogens.”Simple Smoothie Series: Kiwi Strawberry || Homemade Dutch Apple Pie

The yogurt or kefir in the smoothie provides probiotics and enzymes to help digest lactose. The egg yolks provide so many nutrients – fat soluble vitamins A, D, E and K plus calcium, iron, phosphorus, zinc, thiamin, folate, vitamin B6 and vitamin B12.

I add a pinch of sea salt to smoothies for trace minerals. You can also add gelatin (use the non-gel form) and coconut oil.

Probiotic powder and liquid fermented cod liver oil can also be added in small amounts. You can also add avocado for thickness and dates for sweetness.

The end result is a refreshing kiwi strawberry drink. But when you look a bit deeper you see it is a nutrition powerhouse and a great way to start your day.

I sometimes make a large batch of smoothie on Sunday and pour it into individual cups. Then I can use them as needed throughout the week.  If you are going to make the smoothies in advance leave out the coconut oil and gelatin. They will change texture as they sit in the refrigerator.

This recipe makes enough for two adults (average size smoothies) or three to four children.

A few words of caution. Do not add raw greens to your smoothies. Most of them contain oxalates in their raw forms. If you want to add greens be sure to cook them first.

Also, I don’t advise drinking smoothies every day. It’s a good addition a couple times a week. Change it up with other breakfasts throughout the week.

A strawberry kiwi smoothie is the perfect breakfast treat for the whole family. Stay tuned for more delicious flavors.Simple Smoothie Series: Kiwi Strawberry || Homemade Dutch Apple Pie

Simple Smoothie Series: Kiwi Strawberry
Serves 2
A power packed smoothie to start the day.
Write a review
Print
Ingredients
  1. 1 cup total yogurt, kefir, sour cream, milk, coconut milk and/or coconut milk yogurt
  2. 2 egg yolks
  3. 1 cup strawberries (fresh or frozen)
  4. 1 kiwi, peeled and cut up
  5. 1/4 tsp. sea salt
  6. 2-4 Tbsp. honey and/or maple syrup (to taste)
  7. 2 tsp. gelatin (optional)
  8. 1 Tbsp. melted coconut oil (optional)
  9. 1/2 small avocado (optional)
  10. 2 dates (optional - leave out some or all of the honey if adding dates)
Instructions
  1. In a blender combine the yogurt/milk, egg yolks, strawberries, kiwi, salt and sweetener. Blend until smooth.
  2. Adjust sweetness to taste.
  3. Add gelatin and blend.
  4. While the blender is running slowly pour in the melted coconut oil.
  5. Pour into glasses and serve immediately or store in the refrigerator.
Notes
  1. If making the smoothie for a child under one year of age leave out the honey. It is not safe for a small child. They should not need extra sweetener besides the fruit. Or you can add a bit of banana for extra sweetness.
  2. If making the smoothies in advance leave out the gelatin and coconut oil.
  3. If you do not tolerate eggs you can make the smoothie without egg yolks. The taste will not change.
  4. You can substitute a different kind of berry if you do not tolerate strawberries.
Just Take A Bite https://justtakeabite.com/


In order for me to support my blogging activities, I may receive monetary compensation or other types of remuneration for my endorsement, recommendation, testimonial and/or link to any products or services from this blog.

Soaked Donuts with Chocolate, Vanilla and Lemon Glaze

Soaked donuts make the perfect Saturday morning breakfast. Top them with chocolate, vanilla or lemon glaze for an extra special treat.Soaked Donuts With Chocolate Vanilla and Lemon Glaze: Gluten Free Dairy Free Nut Free Corn Free || Homemade Dutch Apple Pie
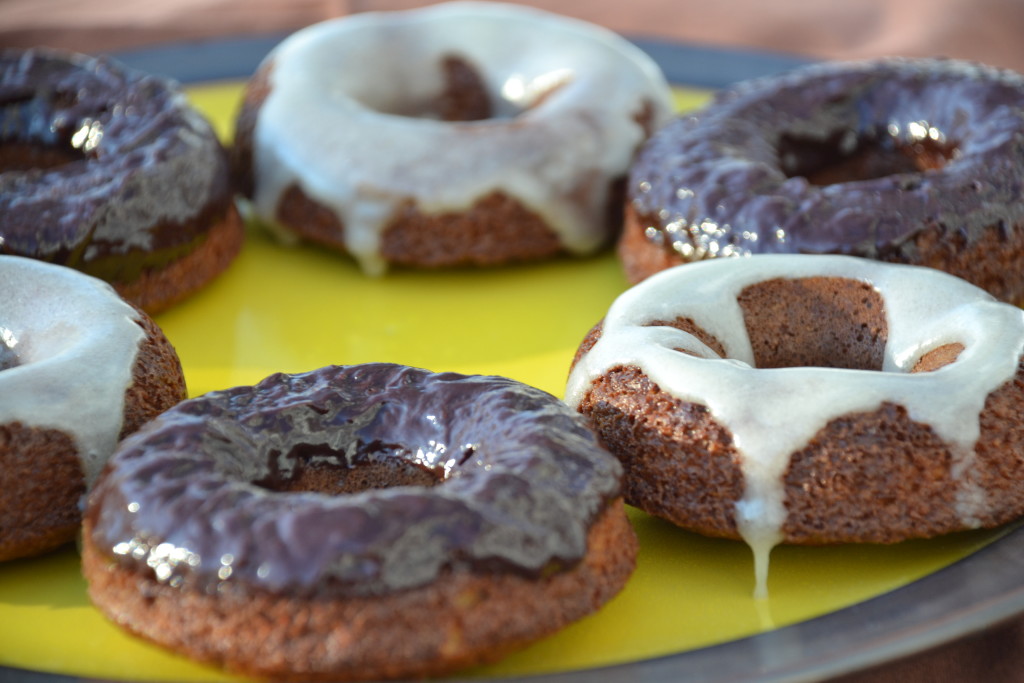
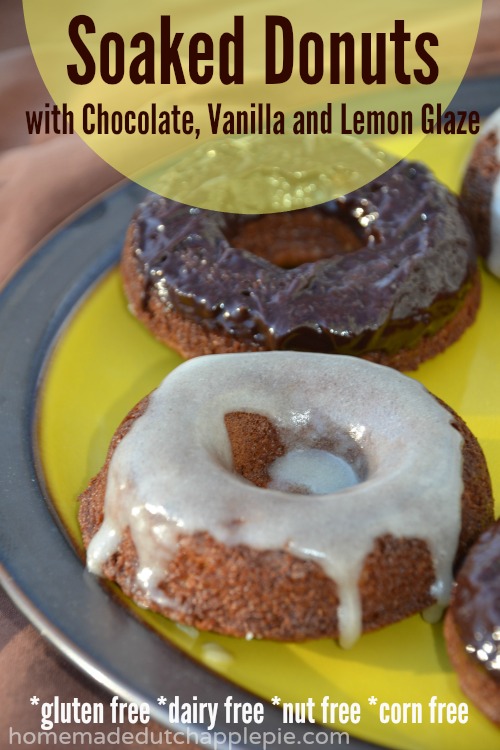
For Christmas my three year old got me a donut pan. Such a subtle way of telling Mommy he wants more donuts!  We experimented with donuts a bit ago without a donut pan. Now we can make the real deal.

My son is my baking buddy these days. So of course we had to get to work right away to try out the new pan.

Soaked Gluten-Free Donuts

I came up with a delicious soaked donut that is also gluten free, dairy free, nut free and corn free.

 It’s not overly sweet either.
Soaked Donuts With Chocolate Vanilla and Lemon Glaze: Gluten Free Dairy Free Nut Free Corn Free || Homemade Dutch Apple Pie 3 
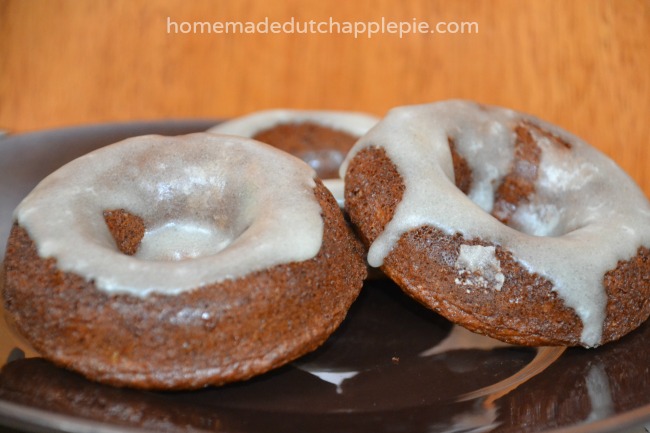
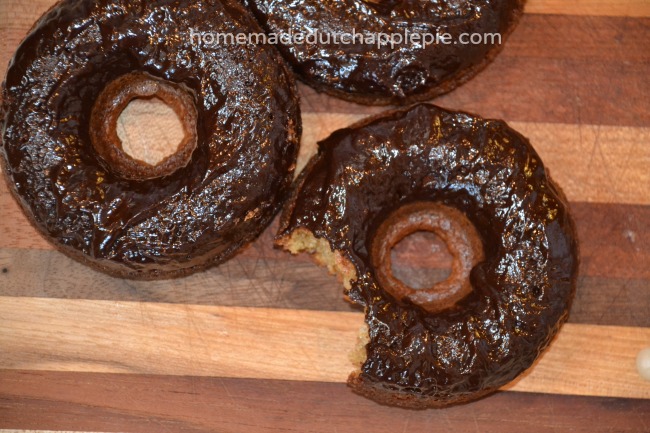
This is a cake-style donut that can be topped with chocolate, vanilla and lemon glaze. You could also dip them in a cinnamon sugar mixture.

Gluten-Free Chocolate Covered Donuts

The chocolate covered donuts reminded me of my childhood.  Whenever we got donuts (which was a rare treat) we always picked chocolate covered (…until we got older and ventured out to glazed, long johns, etc.). It’s like vanilla cake with chocolate frosting. What kid doesn’t love that?

My kids certainly enjoyed the ones with chocolate that we made!Soaked Donuts With Chocolate Vanilla and Lemon Glaze {Gluten Free Dairy Free Nut Free Corn Free} || Homemade Dutch Apple Pie

Easy Homemade Donuts

These soaked donuts are very easy to make. Soak the flour one day. Bake the donuts the next. Even the glazes only take a few minutes to prepare. The chocolate glaze is cooked. The lemon and vanilla glazes just require stirring. But you do need some homemade powdered sugar for them. It only takes a minute to make!

Soaked donuts are a fun treat to have once in a while. They are good for a special Saturday morning breakfast or a birthday treat.

If you don’t have a donut pan you can simply bake the batter in a muffin pan. Only fill the muffin cups about half full to keep them smaller/more like a donut. You can use an apple corer to remove the center if you like.Soaked Donuts With Chocolate Vanilla and Lemon Glaze: Gluten Free Dairy Free Nut Free Corn Free || Homemade Dutch Apple Pie 4

What Can You Make With a Donut Pan?

Now we can experiment with more flavors and maybe even create some savory soaked donuts.

I also use my donut pans to make gluten-free bagels!

What is your favorite donut flavor?Soaked Donuts With Chocolate Vanilla and Lemon Glaze: Gluten Free Dairy Free Nut Free Corn Free || Homemade Dutch Apple Pie 5

Soaked Donuts with Chocolate, Vanilla and Lemon Glaze {gluten free, dairy free, nut free, corn free}
Yields 20
A healthy, real food version of chocolate covered donuts.
Write a review
Print
Donuts
  1. 2 cups any combination of gluten free flours
  2. 2/3 cup warm soaking liquid (2 Tbsp. lemon juice + water, kefir, yogurt, sour cream or 2 Tbsp. vinegar + milk)
  3. 6 Tbsp. melted fat (butter, coconut oil, lard, palm shortening)
  4. 2 eggs (preferably at room temperature)
  5. 3/4 cups sugar (coconut and/or cane) (increase to 1 or 1 1/4 cups if you like a sweeter donut)
  6. 1 tsp. baking soda
  7. 2 tsp. cream of tartar
  8. 2 tsp. tapioca flour or arrowroot
  9. 1/2 tsp. sea salt
Chocolate Glaze
  1. 1 cup chocolate chips
  2. 2 Tbsp. milk or coconut milk
  3. 2 Tbsp. arrowroot
Vanilla Glaze
  1. 1 cup powdered sugar (see recipe for link)
  2. 2 Tbsp. + 2 tsp. milk or coconut milk
  3. 1/4 tsp. vanilla
Lemon Glaze
  1. 1 cup powdered sugar (see recipe for link)
  2. 2 Tbsp. + 2 tsp. lemon juice
Donuts
  1. Combine the flour and the warm soaking liquid.
  2. Cover and let sit for 7-24 hours (24 hours or longer is preferred)
  3. Heat the oven to 400*F. Grease a donut pan or muffin pan.
  4. Add the melted fat to the soaked flour. Beat until combined.
  5. Add the eggs. Beat until combined.
  6. Add the dry ingredients. Beat well.
  7. Pour the batter into the prepare pans, filling the donut pan about 2/3 full or muffin cups 1/2 full.
  8. Bake for 20 minutes.
  9. Remove donuts from the pan and allow to cool completely before dipping in glaze.
Chocolate Glaze
  1. Place the chocolate chips, milk and arrowroot in a double boiler.
  2. Heat until the chocolate is melted and the ingredients are combined, stirring frequently.
  3. Dip the donuts into the warm glaze and place on a baking sheet or wire rack to let the glaze cool and harden.
Vanilla Glaze
  1. Combine the sugar, milk and vanilla in a bowl. Stir until combined.
  2. Dip the donuts in the glaze.
  3. Allow to set and harden.
Lemon Glaze
  1. Combine the sugar and lemon juice.
  2. Stir until combined.
  3. Dip the donuts in the glaze.
  4. Allow to set and harden.
Notes
  1. It is best to use the batter as soon as it is mixed. It will rise better. If allowed to set it will still work, but there won't be as much rise.
  2. It is best to use at least 1/4 white/starchy flour in the flour mixture, like tapioca or white rice.
Just Take A Bite https://justtakeabite.com/


In order for me to support my blogging activities, I may receive monetary compensation or other types of remuneration for my endorsement, recommendation, testimonial and/or link to any products or services from this blog.

Winter Spice Bread With Nutmeg Icing {soaked, gluten free, dairy free, nut free, corn free}

Winter spice bread is a gluten free sweet bread filled with spice and topped with a delicious nutmeg icing.Winter Spice Bread With Nutmeg Icing Soaked Gluten Free Dairy Free Nut Free Corn Free || Homemade Dutch Apple Pie
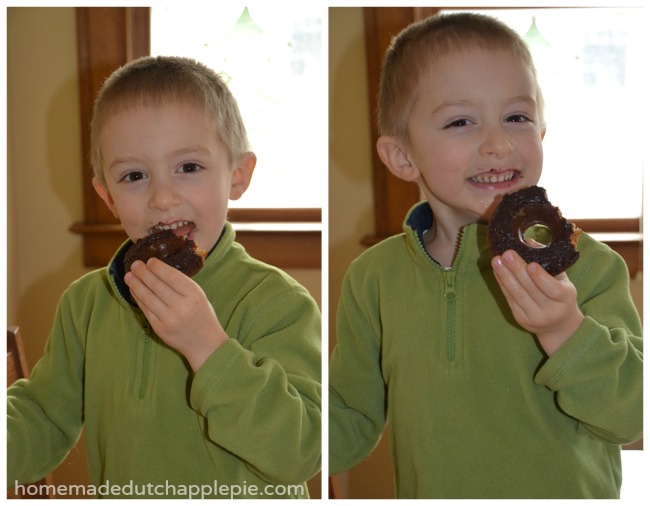
I love having sweet breads on hand. They make great snacks or breakfasts. I also love them with a big bowl of nourishing soup.

In the winter I don’t do as many fruity breads. I gravitate towards warming foods with a hint of spice.

So I created this winter spice bread. It has a bit of nutmeg and cinnamon for flavor.  You could also add mini chocolate chips for extra sweetness.

I love that this winter spice bread is soaked for easier digestion. It also makes two loaves. So it lasts us a few days. One of them could go to the freezer…but our second loaf usually doesn’t make it.Winter Spice Bread With Nutmeg Icing Soaked Gluten Free Dairy Free Nut Free Corn Free || Homemade Dutch Apple Pie

Just for an extra bit of flavor I created a nutmeg icing. You can top the whole loaf of winter spice bread with the icing or drizzle it on individual pieces. The icing soaks in and creates a rich, gooey treat. It’s almost like eating cake!

My kids really enjoyed this bread. The whole family did!

Whether you want a special breakfast or the perfect side for your soup, winter spice bread is just what you need.

If you like a little more rise in your bread you can use baking powder. But if you are corn free the baking soda/cream of tartar combination works well. Beating the egg whites separately and folding them into the batter will also make the bread less dense.Winter Spice Bread With Nutmeg Icing Soaked Gluten Free Dairy Free Nut Free Corn Free || Homemade Dutch Apple Pie

The great thing about a soaked bread is that you can prepare half of it one day and finish it the next. Breaking it up into shorter steps really makes baking bread easy! I soak my flour one day and then get the bread in the oven quickly the next morning.

Winter spice bread is a perfect treat all winter long. Make a big batch so you can stock your freezer.Winter Spice Bread With Nutmeg Icing Soaked Gluten Free Dairy Free Nut Free Corn Free || Homemade Dutch Apple Pie

Winter Spice Bread With Nutmeg Icing {soaked, gluten free, dairy free, nut free, corn free}
Yields 2
A sweet bread with the flavors of cinnamon and nutmeg.
Write a review
Print
Bread
  1. 2 cups any combination gluten free flour
  2. 1 cup total soaking liquid (at least 2 Tbsp. lemon juice, water kefir, kefir or yogurt + enough water, milk or coconut milk to equal one cup)
  3. 1/2 - 3/4 cups organic cane sugar or coconut sugar (depends on your taste)
  4. 1/4 cup honey
  5. 1 tsp. baking soda
  6. 2 tsp. cream of tartar
  7. 2 tsp. tapioca flour or arrowroot
  8. 1/4 cup coconut oil (or butter), melted
  9. 1 tsp. sea salt
  10. 1 tsp. nutmeg
  11. 1/4 tsp. cinnamon
  12. 1 tsp. vanilla
  13. 2 eggs
Icing
  1. 6 Tbsp. tapioca flour (or arrowroot)
  2. 2 Tbsp. honey
  3. 2 tsp. coconut milk
  4. 1/2 tsp. vanilla
  5. 1/2 tsp. nutmeg
  6. 2 Tbsp. cane sugar
  7. pinch of salt
Bread
  1. In a large bowl combine the flour and soaking liquid.
  2. Cover and let set 7-24 hours.
  3. Heat the oven to 350*F. Grease two bread pans (one large, one medium)
  4. Add the sugar, honey, soda, cream of tartar, tapioca, oil, salt, nutmeg, cinnamon and vanilla. Beat.
  5. Add the eggs. Beat until well combined.
  6. Pour the batter into the prepared pans.
  7. Bake for 50 - 55 minutes.
  8. Allow to cool before serving.
Icing
  1. Combine all of the ingredients in a medium bowl.
  2. Mix until well combined.
  3. Pour over bread or serve with individual pieces.
Notes
  1. Use at least 1/3 cup starchy flour in the flour mix (tapioca flour, white rice flour).
  2. This bread freezes well.
  3. 1/2 cup mini chocolate chips can be added to the batter.
Just Take A Bite https://justtakeabite.com/