Protein Oat Parfaits – your busy morning solution!
Life with kids is busy. That’s a given. Young children need your attention non-stop. It’s such a full season of life.
But what you may not realize is that as your kids get older the busyness doesn’t decrease. It actually increases! Sorry to burst your bubble if you’re a mom of littles.
True, you won’t be changing diapers, getting up multiple times a night, and reading the same book thirty times in a row. Instead, you’ll be driving your kids here, there, and everywhere. I miss those days of being home with toddlers.
Busy Morning Breakfast Ideas
As a homeschooling mom of four I know just how hectic life can feel. I have one child about to head off to college, one just starting high school, one in the tween stage, and one in full-on elementary mode.
My kids participate in co-ops three days a week plus plenty of other activities. Which means we are coming and going often and have a lot of early mornings.
And while I’m a morning person, I don’t have time (or the desire) to cook breakfast most mornings.
Healthy Breakfast for Busy Mornings
But I always make nutrient-dense food that includes protein, fiber, and healthy fat a priority for my family. That’s why I’ve become the queen of prep-ahead breakfast.
It’s also why I was so excited to try the Naked Nutrition Protein Oats! They are so easy to make the night before. Just add the oats to milk, stir, and stick it in the fridge. The flavor, protein, and fiber are already in there! One serving of Naked Protein Oats contains 20 grams of protein and 6 grams of fiber! Plus no added sugar.
In the morning just grab and go for a nourishing breakfast.
Naked Nutrition Protein Oats
There are many great flavors of Naked Nutrition Protein Oats to choose from. They include:
My first thought is that they are so easy. My kids enjoy overnight oats, but I honestly hate making them. So this is a super quick way to make delicious oat cups.
My second thought – both flavors are great, but they have a bitter aftertaste. I was disappointed, but not done experimenting.
How to Make Protein Oat Parfaits
Instead of throwing in the towel, I got creative and turned the Naked Protein Oats into delicious parfaits! We all enjoyed the flavor much better when mixing the oats into Greek yogurt. Plus, it bumps up the protein content! And I can add some extra fat for the kids by using MCT oil or melted coconut oil.
1 - 2Tbsp.peanut butter, almond butter, or sunbutter
Instructions
Combine all ingredients (except nut butter). Mix well.
Refrigerate at least one hour or up to overnight.
Top with favorite nut or seed butter if desired.
Recipe Notes
Dairy-free alterantives can be used for the yogurt.
How to Use Protein Oats
I’m completely sold on our delicious protein oat parfaits using Naked Protein Oats. I’m adding these parfaits to our regular breakfast rotation.
My protein oat experimentation didn’t stop there. I also tried adding the Naked Protein Oats to a quick bread. I made freshly milled wheat blueberry cinnamon bread. The protein oats gave great texture and a burst of flavor to the bread (in addition to the protein and fiber)! All four kids devoured it. So I made a second loaf. We almost finished off the whole loaf in one meal!
I simply replaced about one half cup of the flour with two scoops of protein oats.
Next on the agenda is chocolate peanut butter muffins! Topped with a simple, nourishing peanut butter frosting they’ll be a real breakfast treat.
Protein oats can simply be mixed with milk for a quick grab-and-go breakfast. Or you can get creative with parfaits, breads, or muffins. The possibilities are endless. My oldest and I are already brainstorming other ways to enjoy Naked Protein Oats. Maybe we’ll try adding some to smoothies or stir them into a warm bowl of oatmeal.
Which flavor of Naked Nutrition Protein Oats would you try first?
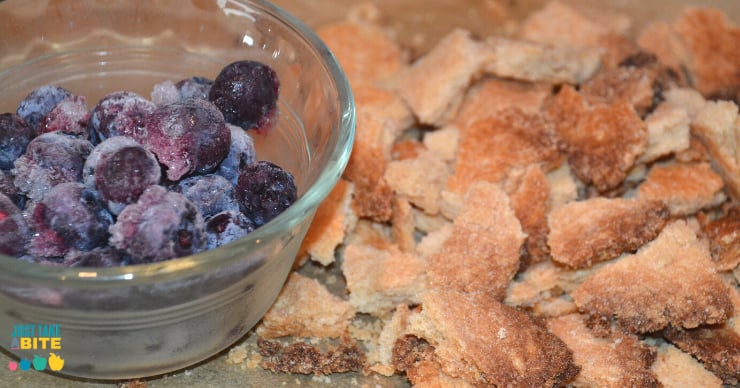
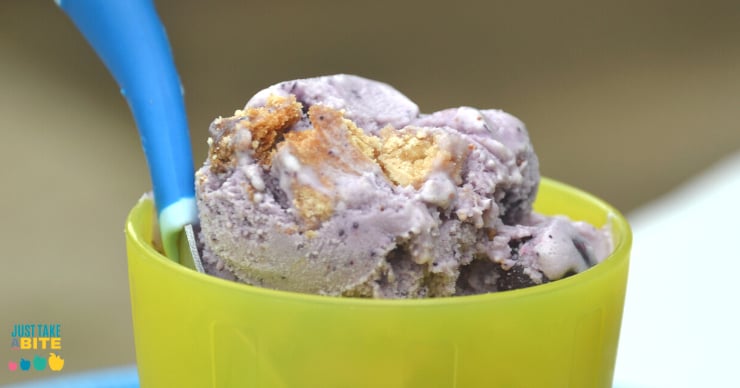
Blueberry pie ice cream is rich and creamy, using fresh, raw cream. Packed with blueberries and pieces of gluten free pie crust, it makes a real treat.One of my absolute favorite things about summer in Michigan is the abundance of fresh blueberries. It has been my favorite fruit since I was little.
Blueberry pie has always been my favorite kind of pie as well (I’m normally not really a pie person). I used to request it for my birthday instead of cake.
While blueberry pie is quite perfect on its own, it can get better. There is only one way I can think of to improve blueberry pie…by making it into blueberry pie ice cream!
Gluten-Free Blueberry Dessert
When my oldest was little she requested blueberry pie ice cream. Being an Adventurous Eater she loves to come up with new recipe ideas.
Together we created a rich, creamy ice cream that is packed with blueberry flavor and has bits of real pie crust mixed in. An added bonus is the brilliant purple color of the ice cream. Nothing artificial here. Just pure blueberry goodness.
What to Make With Blueberries
When fresh blueberries are in season, this blueberry pie ice cream is a must! As different fruits are in season you can swap them for the blueberries – strawberry, cherry, raspberry, blackberry, or even peach! You can also make this dairy-free using coconut milk.
But there are plenty of other amazing blueberry desserts and treats to try as well. Which is why you’ll want to freeze plenty of blueberries so you can make them all year long!
Fresh or frozen blueberries work interchangeably for just about any blueberry dessert.
Gluten-Free Blueberry Pie Ice Cream
Blueberry pie ice cream is a super simple dessert. Kids will want to help with this one!
The pie crust can be made in advance. And since it’s going to be crumbled anyway there is no need for perfection. Let the little ones have a blast rolling dough.
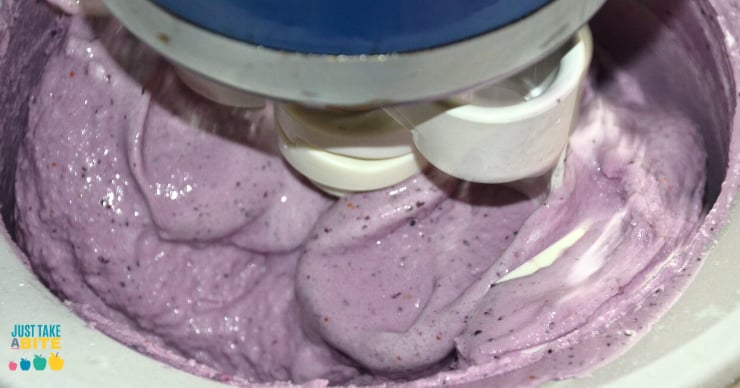
The ice cream batter is ready in minutes. Simply add the ingredients and blend.
It’s fun to watch it all come together. So be sure you have your kids in the kitchen for this project.
Are you ready for the perfect summer treat? Blueberry season just got a little sweeter with blueberry pie ice cream.
Blueberry Pie Ice Cream
Blueberry Pie Ice Cream
2014-06-22 12:31:01
A rich, creamy ice cream packed with blueberries and pieces of pie crust. It is gluten free and can be made both egg and dairy free.
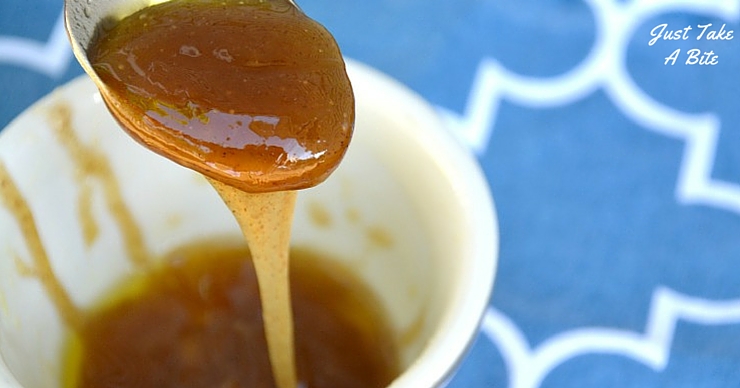
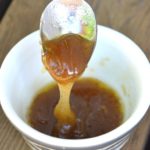
Looking for an easy way to get some liver down the hatch? This metabolism boosting salted caramel is easy to make, tastes great and is loaded with Vitamin A!
This recipe was an accident.
For about a year now I’ve had so many things I can’t eat while breastfeeding that I stopped making salad dressing. I can’t do tomatoes, dairy, nuts, peas, coconut, mustard, garlic, eggs, vinegar. Seriously.
Getting creative.
But I LOVE salad. And I was not about to eat plain lettuce. So I would just put some olive oil, honey and salt on my salad and call it good.
I’m not one to mix up a bottle of dressing. I always just add the ingredients directly to my lettuce and mix it all together. But one day I tried mixing up the dressing first to see if it was easier.
Accidental Caramel
Imagine my surprise when instead of a dressing I ended up with a thick, gooey salted caramel! And my kids gathered around like baby birds begging for bites.
That is how my nutrient dense salted caramel came about.
It tastes great, is easy to make and my kids love it. Want to know something else? It’s great for boosting your metabolism too!
Metabolism Boosting Combination
If I am low on energy or haven’t gotten enough sleep this is the perfect pick-me-up. A little salt, a little sugar, a little fat and some vitamins.
My girls and I all have slow metabolisms and are in need of some serious rest and recovery. So this salted caramel makes a great snack for all of us.
Easy Toddler Treat
In fact, my toddler eats half of the lettuce and cucumbers out of my salad just because of this dressing. She’ll suck it off and then eat the vegetables. It’s that good!
You can eat the salted caramel with a spoon. I like to dip banana in it. Then you even get some starch with your sugar, salt and fat. It’s the perfect combination for a metabolic boost. Any fruit you like will work.
I’ve probably read it five or six times myself. And I learn something new every time. I’m so glad I have a hard copy now! It’s a great reference.
I think just about everyone could benefit from Elizabeth’s advice. Especially all of my sleep-deprived mama friends. Even children and teens these days that are over scheduled, over stressed and under nourished need some help with their metabolism (have you checked your child’s body temperature lately? You might be surprised how low it is…it’s supposed to be 98.6!).
Whip up a batch of salted caramel (with liver!). Grab a spoon, your favorite fruit or even a homemade graham cracker for dipping. Then dive into The Nourished Metabolism. Trust me, you won’t be able to put it down. I read it almost cover-to-cover the first time through.
Have you assessed your metabolism lately? What are you doing to keep it running at full speed?
Try some salted caramel and all of Elizabeth’s tips in The Nourished Metabolism. You’ll be amazed at how great you feel.
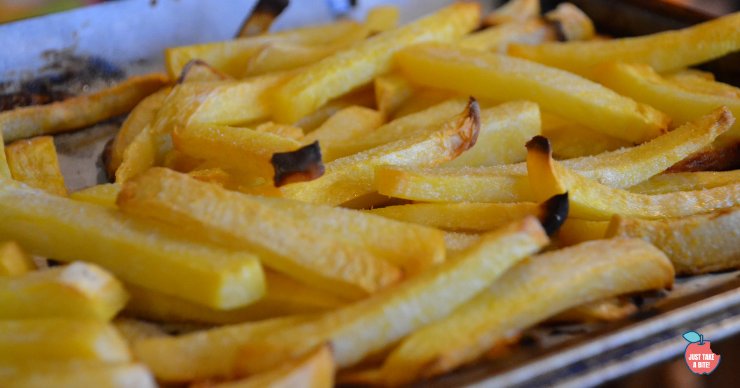
Wondering how to get your kids to eat vegetables? Or just looking to add something new to your menu? These rutabaga fries are easy to make and kid approved!
One of the most common struggles amongst my clients is getting kids to eat vegetables. For some they only have a few they are willing to eat. For others they are even to scared to touch a vegetable. Feeding kids is simple…but not easy!
Vegetables Kids Love
While some situations require deep healing, sometimes a little creativity is all it takes to get kids on board with veggies.
Don’t be afriaid to experiment! Over the years, even I have had to try lots of new veggies. Some were hits (who knew parsnips and parsley root are so delicious?!). Some were big misses (none of us is a fan of turnips). And we still enjoy some of our old staples like cauliflower and cabbage.
One of our new favorites is rutabaga. I’m not sure why I had never tried them before. Maybe because they are so big and ugly. If you buy one at the store it comes with a waxy coating to keep it from drying out.
But once you peel it you see a pretty pale orange flesh (don’t worry, it’s not high in Vitamin A!). Rutabagas are a bit tough to cut. But not too bad.
As a little side note here, I’m coming to realize that we’ve way over-complicated our food these days. With the ability to get any kind of food all year long we have seriously strayed far away from the way people used to eat. A simple diet of meat, potatoes, grains, beans and a few basic fruits and veggies is probably more accurate. And totally healthy.
Our vegetable selection alone has gotten very extensive, unlike the choices of our ancestors.
Rutabaga Fries
I’ve tried cooking rutabaga a few ways and eating it raw. The raw is a bit strong for my taste buds. Hands down our favorite way to prepare rutabaga is by making rutabaga fries!
Rutabaga fries are the closest to regular french fries (potatoes) that I’ve tried. They hold their shape well, but are tender on the inside.
My kids love to use the new crinkle cutters they got for Christmas to make crinkle cut rutabaga fries. And anything in a fun shape is going to be a bonus for introducing a new food to kids. Getting them in the kitchen to help make the food will too! We use Kids Cook Real Food to teach knife skills.
I’d be lying if I said they were an instant hit for the whole family. My girls can’t get enough. My oldest son…he can tolerate them right now, but isn’t crazy about them. And that’s ok. I told him we’ll keep trying. Sometimes it takes a while to adjust to a new flavor. Hey, I forced myself to like liver by eating it over and over. So a child can learn to like rutabaga fries too, right? My husband doesn’t mind them. But he’s not big on trying new foods either.
If your child needs a little convincing he can dip them in honey, honey mustard, ketchup, or hummus. My girls and I devour them plain.
Rutabaga for the Whole Family
Even my 8 month old enjoys well-cooked rutabaga chunks. He’ll grow up with a unique palate, having an NTP for a mom!
Rutabaga fries are so easy to make. Just peel, slice and roast with avocado oil, olive oil, or your favorite healthy fat. And lots of unrefined sea salt, of course. Don’t forget the mandatory “assistant” to pull open drawers and untie your slippers while you use a sharp knife!
We are actually going to try growing rutabagas in our garden this year! Another fun experiment. I hope they turn out. It’ll be interesting to see if the flavor is any different when they are home-grown. Maybe that alone will encourage the boys to eat them.
Have you ever tried rutabaga? What is your favorite way to eat them?
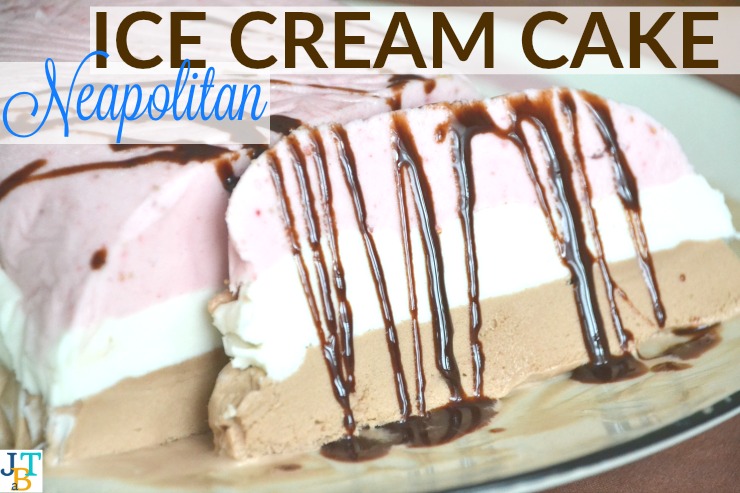
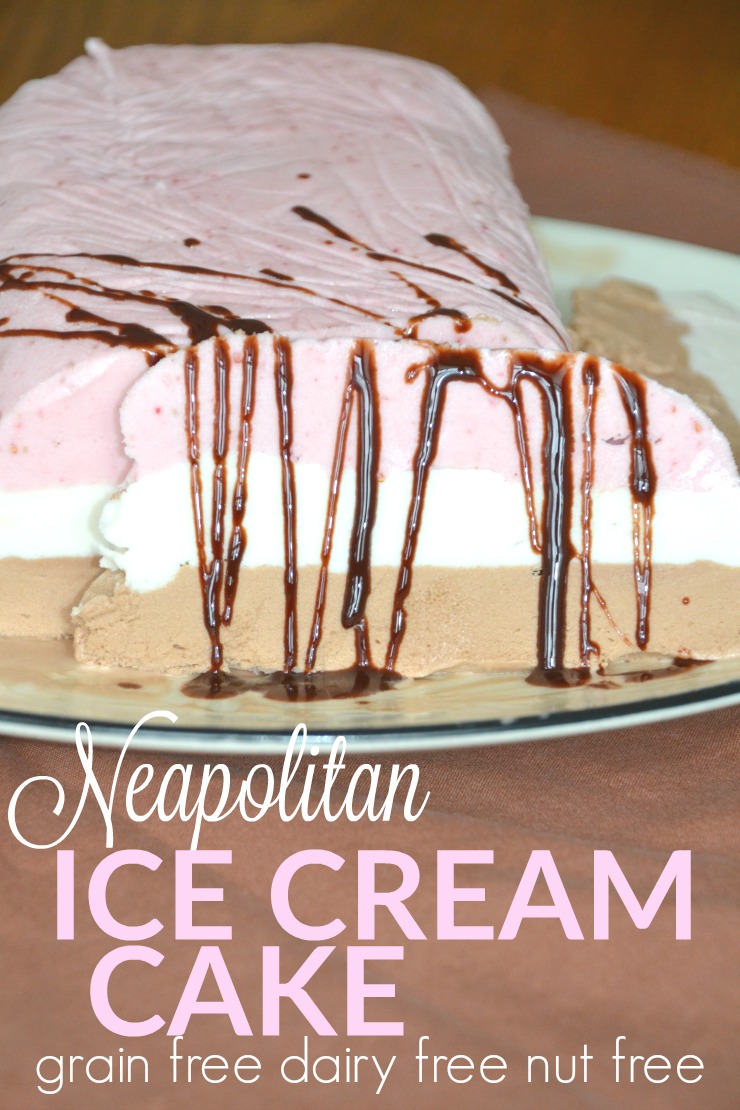
Ice cream isn’t just for summer. Enjoy this allergen friendly treat all winter long. Neapolitan ice cream cake is perfect for any holiday or birthday.
When I think of ice cream in the winter the first thing that comes to mind is Neapolitan. I’m not really sure why. Maybe my family always ate it in the winter. Or maybe that’s when it’s available in the store. I’ve never really paid that much attention.
So while brainstorming ice cream flavors recently Neapolitan came to mind. But it’s not that easy to make a three flavored ice cream at home…unless you have three ice cream mixers! Which I do not (though with as much as I make ice cream it’s not a bad idea…).
After some thinking I decided to do the ice cream in bottom to top layers instead of side by side.
The end result is an amazingly delicious dessert that is totally dairy-free and fancy enough for guests.
Homemade Neapolitan Ice Cream
Neapolitan ice cream cake is not something you can whip up in a few minutes. Although it does not take a lot of work it does take several days. So you need to plan ahead.
You can make the dessert layers in any order you like. I did strawberry first so it was the smallest layer. We like vanilla and chocolate best (anyone else remember just eating the chocolate ice cream and leaving the strawberry and vanilla for your parents?).
Dairy-Free Dessert
This is a fun treat for Valentine’s Day or Christmas. I love that it’s so satisfying you don’t need a big piece. Just a little slice is plenty. Drizzle some dairy-free chocolate sauce on top for something really special.
If you don’t like or don’t tolerate strawberries you can replace them with blueberries, cherries or raspberries. Not a fan of fruity ice cream? Just add an extra layer of vanilla or chocolate!
If you don’t want to serve the dessert as a whole you can simply layer the ice cream in a freezer container without the plastic wrap and just scoop it out with an ice cream scooper. You’ll just have to be sure to scoop down deep to get all three flavors.
Treat your whole family to a special ice cream dessert or wow your guests. This “cake” is delicious and allergy-friendly. If you are not dairy-free you can replace the coconut milk with cream. Either way you’ll love it.
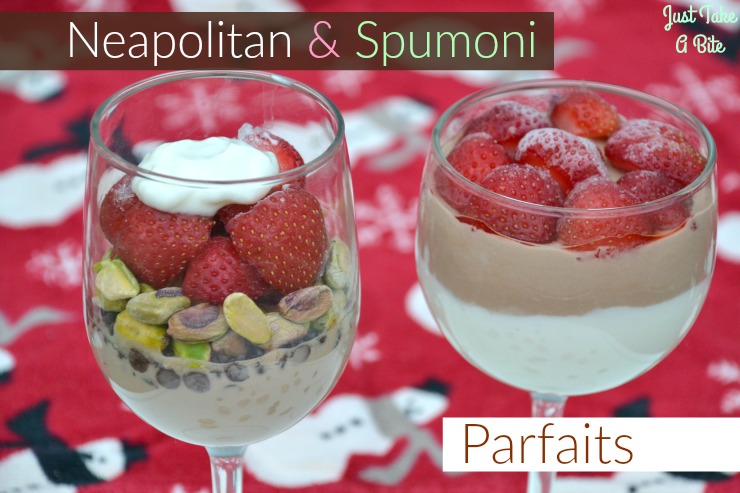
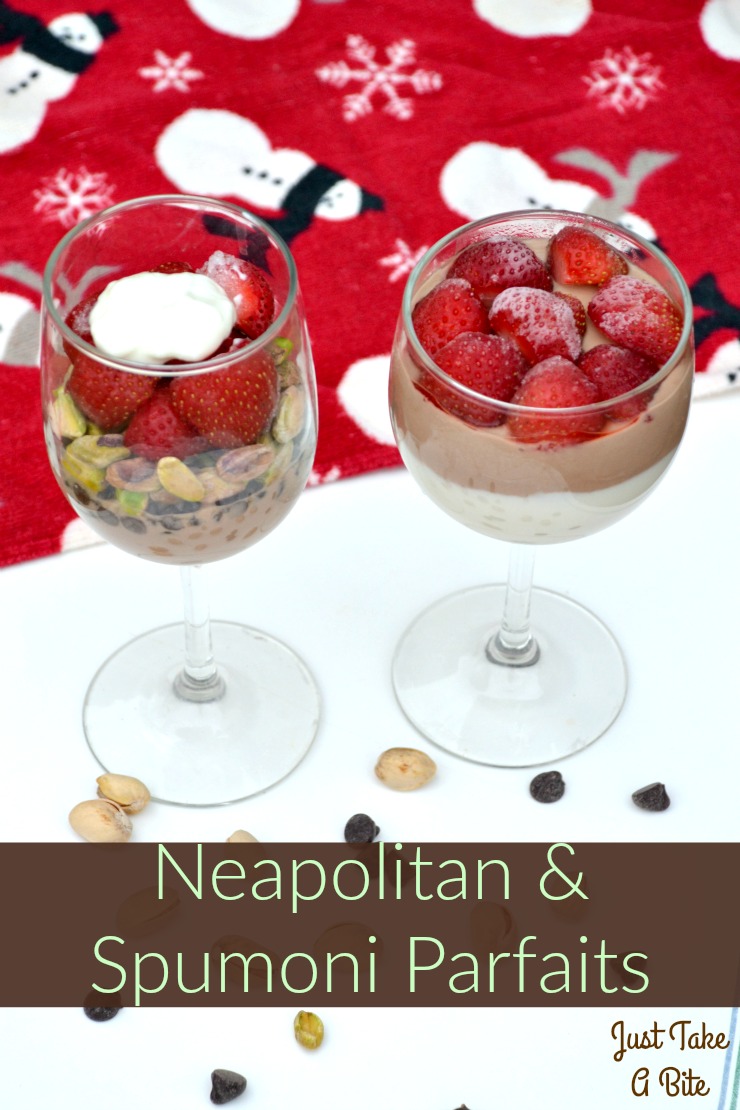
Looking for a way to get your winter dessert fix without reaching for ice cream? Turn breakfast into a special treat with these Neapolitan and spumoni parfaits!
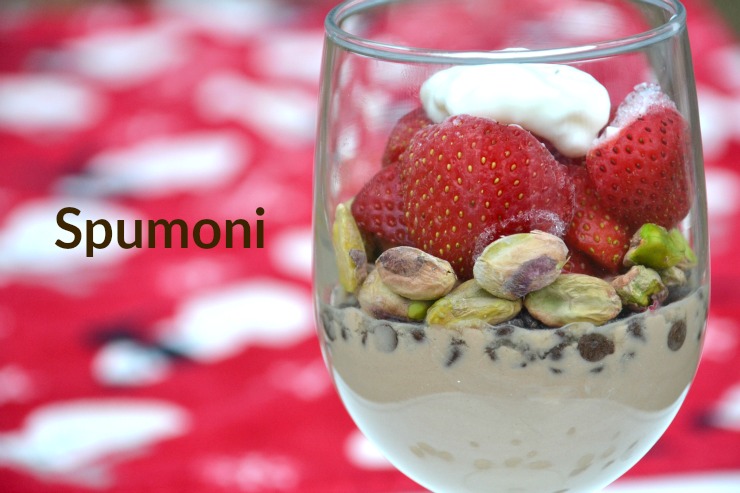
I have fond memories of eating lots of Neapolitan ice cream and spumoni ice cream growing up.
Of course I was like most kids and really just wanted the chocolate! Who doesn’t want chocolate?
Updated Neapolitan and Spumoni
I have recreated these classic flavor combinations in a healthy breakfast treat. Did I mention they are super easy to make too?
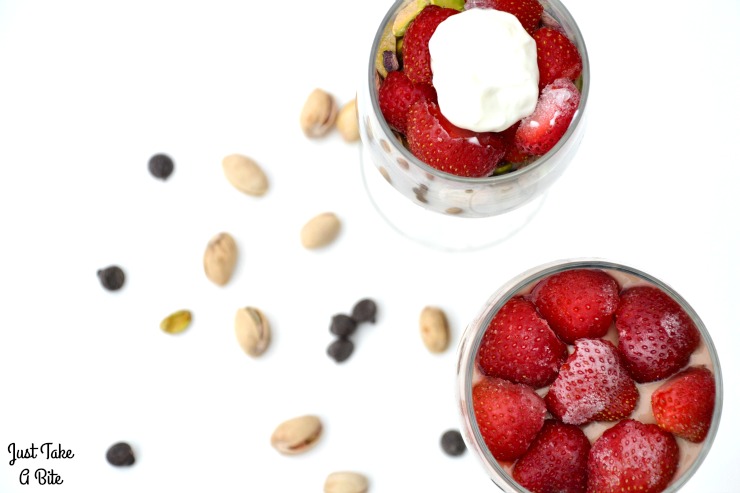
Neapolitan and spumoni parfaits use plain, whole milk yogurt, fresh or frozen fruit, organic cocoa powder and pistachio nuts. You get the flavors you love without any high fructose corn syrup, artificial flavors, or food dyes.
Unique, Kid-Friendly Breakfast
My kids went crazy over these parfaits! I’m not sure I’ve ever seen them eat yogurt that quickly. I can’t blame them. What’s not to love about vanilla and chocolate yogurt combined with sweet strawberries?
Kids can help prepare Neapolitan and spumoni parfaits. It only requires pouring and mixing. They love the assembly part too.
Holiday Breakfast Parfait
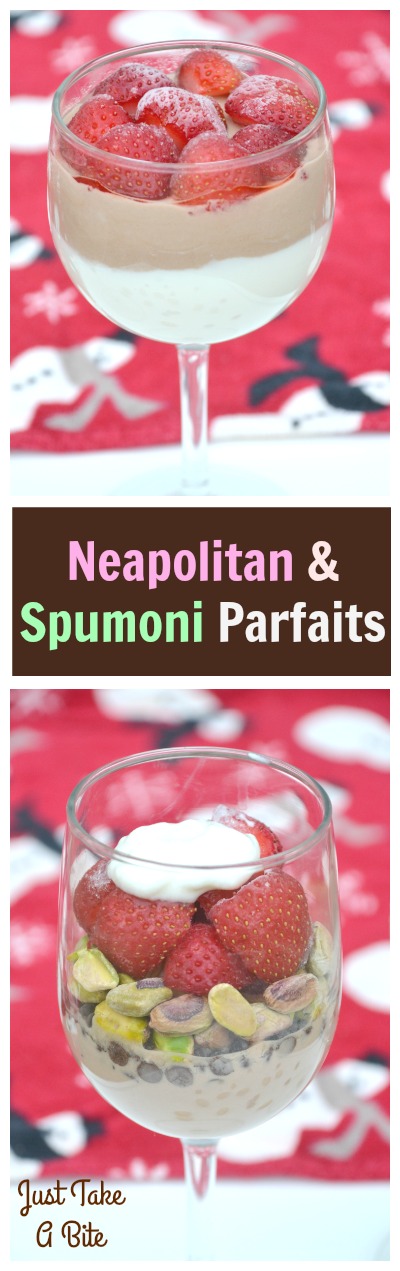
I love how festive these parfaits look. Hosting guests for the holidays? Prepare the parfaits the night before. Then wow your guests with a special treat in the morning. Wine glasses make fancy serving dishes.
You could even use these as a special Valentine’s Day dessert.
This winter spruce up Saturday morning breakfast with a classic dessert flavor. Try both parfaits and see which one you like best. Or combine them to make a four layer parfait that includes chocolate, vanilla, strawberry and pistachio.
Are you ready to try something new for breakfast (or dessert!)?
Neapolitan and spumoni parfaits are simple and nutritious. Plus they are packed with flavor.
Looking for an actual dessert that captures the Neapolitan flavor? Try my grain and dairy free Neapolitan ice cream cake.
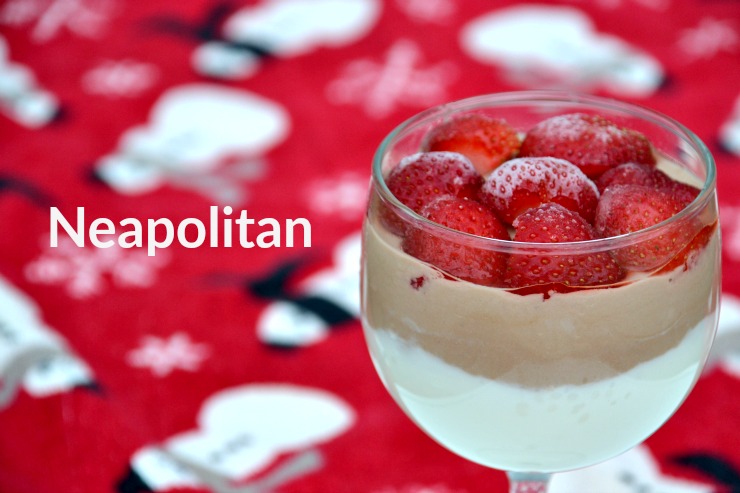
Neapolitan Parfait
2015-12-17 05:28:57
Serves 1
A yogurt parfait with the classic Neapolitan flavor of vanilla, chocolate and strawberry.
Holidays aren’t just about the sweets. Candy corn potatoes and carrots is festive and healthy! You won’t have any problem getting your kids to eat vegetables when they look like dessert.
I love fall.
I wish it could last longer. Mild temperatures. Beautiful colors. All things pumpkin.
Fun, Fall Food
I recently shared my candy corn finger jello recipe as a nod to fall and a tribute to my grandparents. In that same spirit I have another fun play on candy corn today. But this time it is savory!
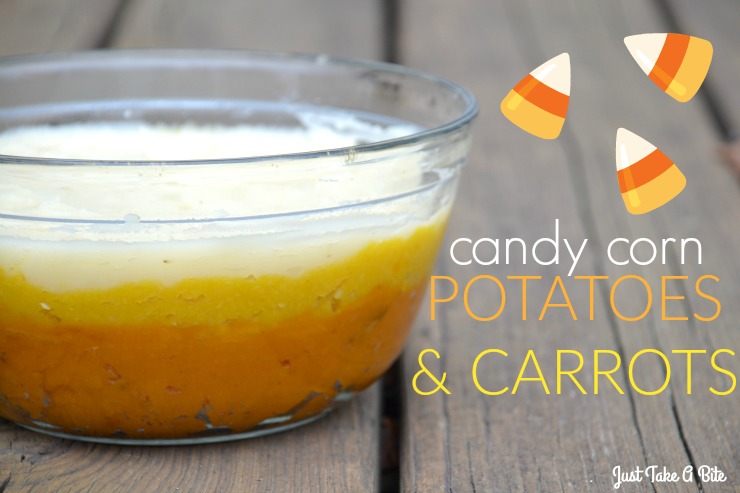
Candy corn potatoes and carrots is a fun and healthy side dish. You can modify it to meet your dietary needs too.
Fall Vegetables
The base recipe uses white potatoes, sweet potatoes and carrots. But if you don’t want to use roots or don’t like quite that much starch (or have a crazy sensitivity/allergy to them like my daughter) then you can use pumpkin or squash (yellow/orange) and cauliflower (white)!
Quick Crockpot Side Dish
The preparation for candy corn potatoes and carrots is so simple because the crockpot does most of the work for you. Toss all of the veggies in the crockpot. Once they are cooked you simply puree and layer them.
The entire dish can be prepared in advance and just warmed before you eat. The warming can even be done in the crockpot!
Sweet and Savory Fall Vegetables
I love how versatile candy corn potatoes are. You can add any seasoning, spices or even sweeteners you like.
My kids love a little sweetnes on their carrots and sweet potatoes. So I add just a touch of maple syrup or honey to the bottom layersy . But if you like things really savory adding salt, pepper and herbs would be just as delicious. Or you can find a happy medium by adding a pinch of cinnamon.
Go ahead and choose which color to put in which layer. I like the dark to light effect. But you can go with the traditional candy corn yellow, orange, and white scheme too.
Kid-Friendly Holiday Side Dish
Are you wondering what to serve for a holiday dinner that kids will actually eat? How about roast beef paired with candy corn vegetables and candy corn finger jello?! Your kids will love it. Plus they’ll fill up on nourishing foods and won’t crave a bunch of sweets later (can I get an Amen?!).
You could even turn this into a one pot meal by adding seasoned ground beef, lamb, chicken, or turkey between each layer. Candy corn casserole!
Surprise the kids with this delicious treat. Candy corn potatoes and carrots (or squash and cauliflower) is a healthy way to enjoy the holiday.
Do you have any creative holiday traditions or treats?
If not, start one with a festive dinner your kids will request year after year that includes candy corn potatoes and carrots.
Yellow layer: 6-8 large yellow carrots OR 1 yellow flesh squash (acorn, spaghetti)
White layer: 3-4 white potatoes OR 1 head cauliflower
unrefined sea salt to taste
water, broth or milk (enough to puree)
optional: brown cane sugar, maple syrup, honey, herbs, cinnamon, spices
Instructions
Peel and cut vegetables into large chunks.
Place the vegetables in glass containers with a small amount of water or broth. Place the containers directly into the crockpot.
Add about 1/2 inch of water to the bottom of the crockpot.
Cook on high about 3 hours, until vegetables are tender.
Remove containers from the crockpot.
Add salt and any sweetener, herbs or spices and puree with an immersion blender (or in a blender). Add water, broth or milk if needed.
Layer the vegetables in desired order in a see-through oven safe dish.
Serve immediately or place in the crockpot on warm or cover and store in the refrigerator until ready to heat (in a 350*F oven for about 20 minutes).
Notes
If using squash it can be roasted whole in the crockpot or oven, then cut open and the flesh scooped out. You can keep it as is or puree it at this point.
By Mary - justtakeabite.com
Just Take A Bite https://justtakeabite.com/
In order for me to support my blogging activities, I may receive monetary compensation or other types of remuneration for my endorsement, recommendation, testimonial and/or link to any products or services from this blog. It will not change the cost of any products or services for you.
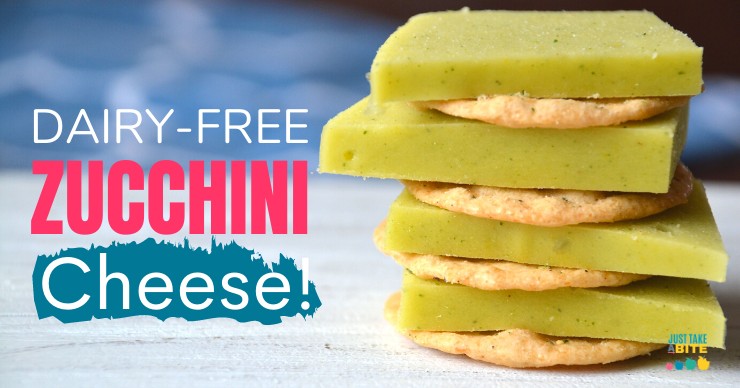
Dairy-free and missing cheese? Try this simple, healthy zucchini cheese loaded with healthy protein, fat, and complex carbohydrates to keep your kids happy and nourished.
Within one week of my youngest being born I was 100% dairy-free.
I had been through this with my previous two babies. So I knew the signs of a dairy reaction right away. There was no easing into it. I went from eating ice cream pretty much every evening while pregnant to strict no speck of dairy almost overnight.
It’s not fun to have to cut out dairy. But I knew how to do it. I have another son that is still dairy-free, so I just added two more family members to the mix.
Unfortunately our food reactions did not end there.
I cut out so many foods, trying to help my son’s silent reflux. We had his tongue and lip tie clipped.
What finally made a significant difference in his ability to nurse and eat was learning about histamine intolerance. I switched to a low-histamine diet and it was like magic.
What wasn’t magical was the amount of effort it took to keep the two of us nourished, and our lack of food options.
During the summer we basically lived on zucchini and ground beef as I tried to calm our bodies. Our garden was overflowing with zucchini, so I sliced and roasted some pretty much every day.
The ground beef was nourishment that I could actually digest. Plus I could cook up some burgers for us and freeze extras for another meal (an essential part of a low-histamine diet – not letting meat sit in the fridge).
I’m thankful I am an Analytical Eater that truly does not mind eating the same foods over and over. In fact, that is what I love. But I was really lacking in texture with all that soggy zucchini. My mouth needed more!
My solution? Zucchini cheese!
What are the Health Benefits of Zucchini?
Although often overlooked, zucchini really does pack a punch in terms of nutrition. This fruit, used as a vegetable, contains:
potassium
phosphorus
magnesium
calcium
fiber
Vitamin C
Vitamin B2
Vitamin B6
Vitamin A
Vitamin E
Vitamin K
Zinc
Zucchini also has a really high water content in addition to its minerals so it is great for hydration!
What Can I Do With Too Much Zucchini?
I often joke with my husband that there is no such thing as too much zucchini.
Every summer we grow an absurd amount of zucchini. And every summer I use it all up! Sure, we give away a few here and there. But I truly do my best to not let any go to waste (though the chickens get the baseball bat zucchinis that we inevitably miss).
It’s easy to use up quite a bit of zucchini by roasting it for a family dinner. My kids will devour roasted zucchini covered in herbs and garlic.
Of course we can’t eat all of our zucchini fresh. Somtimes we pick 20 in one day! So I love to freeze all of my extra zucchini.
Simply slice into rounds and place on a baking sheet. Freeze and bag. Peeling is optional. You can also freeze grated zucchini to use in bread and muffins.
Last year I froze at least five gallons of zucchini. I lost count. It’s been such a blessing to be able to enjoy it all year.
What Can Be Made With Frozen Zucchini?
Frozen zucchini works well in soups, stews, and stir fry. Frozen grated zucchini is great for zucchini bread, muffins, or scones.
But mostly I use my frozen zucchini to make zucchini cheese. I have some in the fridge at all times.
I love that I don’t have to do any peeling or slicing when I use frozen zucchini. Just put a big pile in a saucepan to cook for a few minutes and it’s ready to go!
Though you can make zucchini cheese with fresh zucchini too. That is how I do it all summer.
Dairy-Free Zucchini Cheese
Back to our low-histamine diet. I was really getting bored with roasted or sauteed zucchini. I had heard you could make “cheese” with zucchini. So I found some recipes and started experimenting.
The first one I tried used lemon juice. That was a big disaster. I think it all went in the trash. Even the kids couldn’t stomach the flavor.
Over time I figured out my own version of zucchini cheese that has been a staple in my diet ever since.
Zucchini cheese gets it’s texture from a combination of healthy fat (like butter or coonut oil) and grassfed gelatin. Now that my son tolerates butter I tend to use it for zucchini cheese. But coconut oil works just as well!
I use a small loaf pan to create a taller block of cheese that I can slice.
We use zucchini cheese on salads and sandwiches. It’s delicoius on crackers. Or I often just eat it plain.
One of our favorites is squash cheese. It has such a beautiful orange color! Not to mention it has a bit of sweetness to it. So kids really love it. It has a taste reminiscent of American cheese, so it’s often a great transition for kids that are used to a Standard American Diet (SAD).
Cauliflower is another great option if you want a white cheese with a kid-friendly flavor.
You can go a little more bold with peas and create green cheese!
What to Feed a Child Who Doesn’t Like Meat
One of my favorite things about zucchini cheese is the nutrition factor. It has a combination of protein (gelatin), healthy fat, and carbohydrates with fiber (zucchini). Lots of Real Salt adds essential trace minerals.
Sometimes I really boost the nutrient content by adding non-fortified nutritional yeast and turmeric.
So many selective eater kids struggle with eating meat. Whether it’s the texture, the chewing, or the inability to digest it, getting adequate protein is a struggle for many.
Gelatin is a great solution! And zucchini cheese is an easy way to get a big dose of easy-to-digest gelatin down.
Perfect Supplements is the only brand of gelatin I trust. It is grassfed and certified 100% glyphosate free!
Stock up now. Take 10% off with the code TAKE10 HERE!
Zucchini cheese is also great for the kids that only want to eat cheese and starch all day. You can get a great dose of both macro and micronutrients in while they still enjoy their favorite food.
Easy Toddler Snack
When I first started making zucchini cheese it was really for myeslf. Did I let my kids try it? Of course! But I was the one needing something creamy and salty.
But soon it turned into one of my favorite toddler snacks. My almost-three-year-old has been enjoying zucchini cheese with me since he could eat solid food!
I cut it into thick slices and then into sticks. Easy to hold. Easy to chew. Easy nourishment. That equals an easy toddler snack! And a great way to get little kids interested in veggies.
Is your toddler like mine and only wants to snack all day? Zucchini cheese is the way to go. Snack away!
What is the Best Diet for Picky Eaters?
Each child has unique, bio-individual needs. Which is why I am so passionate about Nutrional Therapy for Kids! That being said, all kids need a balanced diet. This is especially important for those “picky” or “selective” eaters.
A balanced diet includes whole food sources of protein, fat, and carbohydrates with fiber. An easy way to think of this is meat, oil, fruits, and veggies.
Zucchini cheese meets all of the criteria! So it is a great addition to a picky eater’s diet. And getting that balance will help alleviate those picky eating symptoms.
Need more dairy-free substitutes? Grab your copy of 10 Simple Dairy Substitutes with recipes for everything from milk to yogurt to ice cream!
Allergen-Free Food on a Budget
One of the hardest aspects of having a child with dietary restrictions is the cost of the food. Have you ever compared the price of regular cheese to dairy-free cheese? Or the cost of wheat bread to gluten-free bread?
If you have, you know that allergen-free food can add up very quickly!
Which is why I love making zucchini cheese. Zucchini is a very affordable vegetable that you can buy in bulk in the summer and store enough for the whole winter. Visit any farmer’s market in the summer and you’ll see piles of zucchini. Or just ask a neighbor with a garden. They probably have extra.
Stock up on gelatin with a bulk discount or when it’s on sale HERE.
You can also watch for good deals on coconut oil.
Now you have all of the ingredients for healthy, dairy-free cheese on a budget!
Is Dairy-Free Cheese Healthy?
I’ll be the first to admit that we do buy some dairy-free cheese. It’s nice to have something that melts like real cheese when making a pizza or grilled cheese.
But I can’t say I’m thrilled about the ingredients. While not horrible, it is still a processed food with some gums and fillers.
That is why I love making zucchini cheese. I control the ingredients. And they are all whole foods that I serve my family regularly.
Is dairy-free cheese healthy? It is if it’s homemade zucchini cheese!
Is your family dairy-free? Do you miss chees? Give zucchini cheese a try!
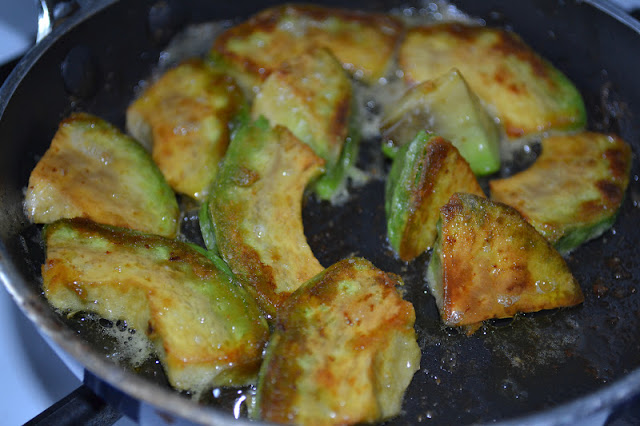
I once heard a chef on tv (I won’t mention names) say you should NEVER cook avocado. Boy was she wrong!!! I cook avocados all the time. They are delicious!
Although smashed avocado with a generous helping of Real Salt scooped with organic corn chips or raw veggies is pretty amazing, there is another version of avocado that tops my list.
My favorite way to serve avocado is to fry it in a pan to create avocado fries!
I use either butter or coconut oil and plenty of unrefined sea salt.
The result? Golden, crispy, salty outsides with rich, creamy insides. This is like heaven for an Analytical Eater (find out if that’s you HERE).
Avocado Fries
Avocado fries are like french fries…but much healthier.
They contain tons of good fat, vitamins, and minerals (did you know avocado is high in potassium?). You can eat the avocado fries plain or dip them in ketchup, pesto, hummus, or honey mustard. Really they are good dipped in pretty much anything.
Eat them like fries or use them to top a salad (like croutons).
How to Increase Healthy Fat in Your Child’s Diet
I like avocado fries as part of an easy to prep lunch. I just toss them in the pan and let them cook while I get the other food prep done.
Avocado fries make great finger food for toddlers. And they are a fun way to get healthy fat into any child’s diet.
There isn’t much to cooking avocado. Simple, delicious, nutritious. My favorite food trifecta!
Give avocado fries a try. You’ll be glad you did. If someone ever tells you not to cook avocados…ask them if they’ve tried avocado fries.
Heat a small skillet over medium heat. When hot add the butter/coconut oil.
Add sliced avocado (the thickness just depends on your taste). Sprinkle with salt. Let cook on the first side until golden and crispy, about 5-7 minutes.
Flip and repeat with the other side. Add extra salt if necessary.
Recipe Notes
Don't waste the salty butter in the pan. Use it on bread or to cook some greens.
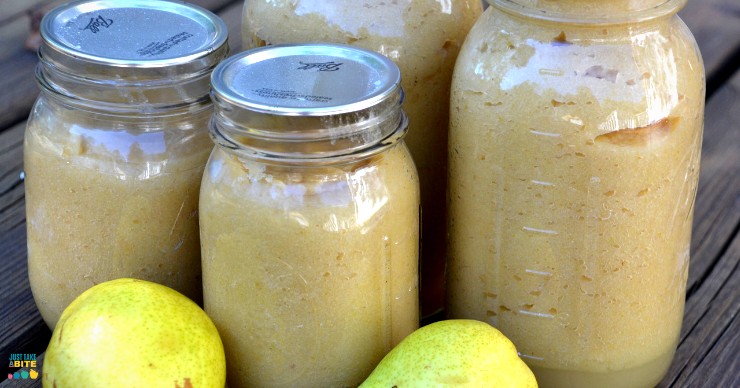
Fall is a busy time of canning applesauce and freezing pumpkin. But don’t forget about preserving pears! With a short season and a busy schedule use this guide to stock your pantry with pear sauce before the pears are gone.
I’m a big fan of hardy produce. You know, the kind that can sit on the counter or in the fridge for weeks and still be OK? Like carrots, potatoes, apples, rutabaga, parsnips, cauliflower, and cabbage.
I love all kinds of fruits and veggies. But some of them are a bit demanding.
One day an avocado is not quite ripe. The next day it’s mushy.
The same goes for pears. You check and check for ripeness. Then all of a sudden you’ve missed the window and they over ripe.
Personally, I like to be in control instead of my produce. But it just doesn’t work that way for everything.
So I always get anxious when it’s pear season. I want to preserve them. But I just don’t have time any old day. Will I time it just right? Will I be stuck peeling hard pears? Or will I let them go too far because we were busy with soccer and band?
It’s a gamble.
I try to do a fair amount of canning each fall. How much I do depends on my kids’ ages and how I’m feeling.
Regardless, I don’t like to spend hours on end in the kitchen each day to keep up with produce preservation.
How to Can Pears
I already take the easy route when it comes to canning peaches. That is a life saver!
Then I get to pears. There is really no way around it.
Canning pears takes a lot of time.
Lots of peeling and slicing (especially if the pears are small). It can take up to sixty pears just to do one round of canning! That is a lot of peeling.
So I stopped doing it years ago. Much to my husband’s disappointment. I just don’t have time.
But I still want to preserve this amazing fruit to enjoy it all winter.
How to Can Pears Without Sugar
Enter pear sauce.
It is just like applesauce but with pears. Honestly, I would take pear sauce any day over applesauce. It is that good.
There is no need to add any sweetener as pears are plenty sweet on their own.
The other thing you don’t have to do – peel them!
Preserving pears is quite easy when you can just wash, quarter, cook and puree. Then either can or freeze the pear sauce.
Pear Sauce for Baby
One of the reasons I love having pearsauce on hand is that it makes a super easy first food for little ones six months and up. You can serve it plain or turn it into a nutrient dense baby porridge. Warm the pear sauce slightly and mix in coconut oil and an egg yolk. Stir and serve!
My big kids love pear sauce too! Sometimes I even make it extra special by adding strawberries, raspberries or blueberries from our freezer stash. As they melt and let off juice it colors the pearsauce and adds an extra burst of flavor.
Serve it cold. Serve it warm with a pinch of cinnamon. Add it to oatmeal. Mix it in yogurt.
You really can’t go wrong. You also don’t need to spend days on end making pear sauce.
Pear Sauce Canning
Here is my busy mom’s solution to preserving pears. I am able to work through a half bushel in one day (with four young kids, including a nursing little one) and still manage to do our school work, go to activities, and get healthy meals on the table.
It only takes about twenty minutes to wash and slice one batch of pears. Then you can let it cook for a bit while you tend to something else. Being able to make pear sauce in steps is so handy!
A full batch (seven quarts) takes about 30 – 35 medium to large pears. So figure out how many jars you’d like to can and then figure out how many pears you need. I usually get one bushel of pears. It makes three rounds of pear sauce with some pears left over for eating fresh.
Pear sauce makes a great alternative to applesauce. Variety is key to any diet, especially if you are implementing a rotation diet for food allergies. So this is a nice change of pace! My kids actually prefer it over applesauce.
Have you ever tried preserving pears? I encourage you to try pearsauce!
Depending on the size of the pears and the quantity you buy, sometimes you end up with a pile of extra pears. And like I said before, they can go from almost ripe to mush pretty quickly. So what do you do with those extra pears?
Of course you can eat them fresh! Pears are a sweet treat on their own. But you can only eat so many. Here are a few other options for using up extra ripe pears.


