Home » Kid-friendly Recipes » VAD Diet

Category: VAD Diet

Kid-Friendly Rutabaga Fries Recipe

Wondering how to get your kids to eat vegetables? Or just looking to add something new to your menu? These rutabaga fries are easy to make and kid approved!Wondering what vegetables to feed your child on the VAD Diet? Or just looking to add something new to your menu? These rutabaga fries are easy to make and kid approved!

One of the most common struggles amongst my clients is getting kids to eat vegetables. For some they only have a few they are willing to eat. For others they are even to scared to touch a vegetable. Feeding kids is simple…but not easy!

Vegetables Kids Love

While some situations require deep healing, sometimes a little creativity is all it takes to get kids on board with veggies.

Don’t be afriaid to experiment! Over the years, even I have had to try lots of new veggies. Some were hits (who knew parsnips and parsley root are so delicious?!). Some were big misses (none of us is a fan of turnips). And we still enjoy some of our old staples like cauliflower and cabbage.

One of our new favorites is rutabaga. I’m not sure why I had never tried them before. Maybe because they are so big and ugly. If you buy one at the store it comes with a waxy coating to keep it from drying out.

But once you peel it you see a pretty pale orange flesh (don’t worry, it’s not high in Vitamin A!). Rutabagas are a bit tough to cut. But not too bad.


As a little side note here, I’m coming to realize that we’ve way over-complicated our food these days. With the ability to get any kind of food all year long we have seriously strayed far away from the way people used to eat. A simple diet of meat, potatoes, grains, beans and a few basic fruits and veggies is probably more accurate. And totally healthy.

Our vegetable selection alone has gotten very extensive, unlike the choices of our ancestors.


Wondering what vegetables to feed your child on the VAD Diet? Or just looking to add something new to your menu? These rutabaga fries are easy to make and kid approved!

Rutabaga Fries

I’ve tried cooking rutabaga a few ways and eating it raw. The raw is a bit strong for my taste buds. Hands down our favorite way to prepare rutabaga is by making rutabaga fries!

Rutabaga fries are the closest to regular french fries (potatoes) that I’ve tried. They hold their shape well, but are tender on the inside.

My kids love to use the new crinkle cutters they got for Christmas to make crinkle cut rutabaga fries. And anything in a fun shape is going to be a bonus for introducing a new food to kids. Getting them in the kitchen to help make the food will too! We use Kids Cook Real Food to teach knife skills.Wondering what vegetables to feed your child on the VAD Diet? Or just looking to add something new to your menu? These rutabaga fries are easy to make and kid approved!

I’d be lying if I said they were an instant hit for the whole family. My girls can’t get enough. My oldest son…he can tolerate them right now, but isn’t crazy about them. And that’s ok. I told him we’ll keep trying. Sometimes it takes a while to adjust to a new flavor. Hey, I forced myself to like liver by eating it over and over. So a child can learn to like rutabaga fries too, right? My husband doesn’t mind them. But he’s not big on trying new foods either.

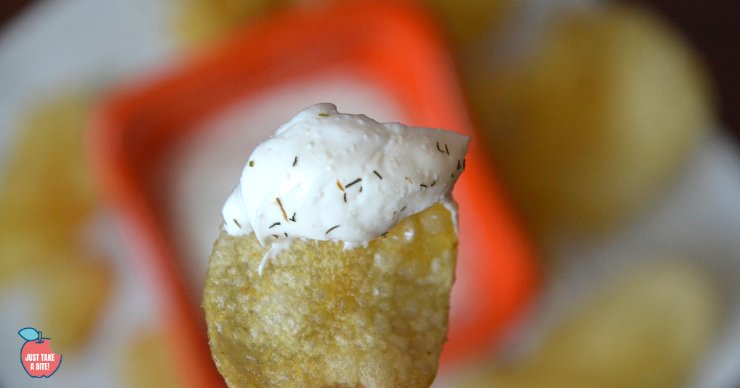
If your child needs a little convincing he can dip them in honey, honey mustard, ketchup, or hummus. My girls and I devour them plain.

Rutabaga for the Whole Family

Even my 8 month old enjoys well-cooked rutabaga chunks. He’ll grow up with a unique palate, having an NTP for a mom!

Rutabaga fries are so easy to make. Just peel, slice and roast with avocado oil, olive oil, or your favorite healthy fat. And lots of unrefined sea salt, of course. Don’t forget the mandatory “assistant” to pull open drawers and untie your slippers while you use a sharp knife!Wondering what vegetables to feed your child on the VAD Diet? Or just looking to add something new to your menu? These rutabaga fries are easy to make and kid approved!

We are actually going to try growing rutabagas in our garden this year! Another fun experiment. I hope they turn out. It’ll be interesting to see if the flavor is any different when they are home-grown. Maybe that alone will encourage the boys to eat them.

Have you ever tried rutabaga? What is your favorite way to eat them?

Rutabaga Fries

Prep Time 10 minutes
Cook Time 1 hour
Total Time 1 hour 10 minutes
Servings 5
Author Mary | Just Take A Bite

Ingredients

  • 2 rutabagas
  • 2 Tbsp avocado oil
  • 1 tsp salt

Instructions

  1. Heat oven to 400 degrees F. Line a baking sheet with parchment paper.

  2. Peel rutabaga. Cut into thin strips.

  3. Mix rutabaga, oil and salt on baking sheet.

  4. Bake for one hour, until browning and cooked through.

Missing tacos due to dietary restrictions? Bring back taco night with this simple night-shade free cucumber salsa. Free of allergens and nightshades, and low in Vitamin A, it's sure to be a hit!

Nightshade-Free Cucumber Salsa

Missing tacos due to dietary restrictions? Bring back taco night with this simple night-shade free cucumber salsa. Free of allergens and nightshades, and low in Vitamin A, it’s sure to be a hit!Missing tacos due to dietary restrictions? Bring back taco night with this simple night-shade free cucumber salsa. Free of allergens and nightshades, and low in Vitamin A, it's sure to be a hit!

Sometimes when I’m trying to meal plan and just can’t think of anything to put on the menu, I crowd source. In other words, I ask my kids.

It’s inevitable that at least one of them suggests tacos (though I try not to bore my husband and actually serve them every week).

It’s usually my son making the suggestion. He has been my taco meat chef since he was six, and jumps at the chance to cook his “famous” taco meat (you can get his taco seasoning recipe here).

Taco night has always been one of my favorites too, from childhood until now. I mean, who doesn’t love a good taco?

Vitamin A Detox Diet Tacos

Our tacos have certainly evolved over the years, through all sorts of food allergies and dietary restrictions. These days taco night is a bit more challenging on the Vitamin A Detox Diet. No tomatoes, peppers, avocado, or cheese.

I know that may not sound like much is left.

But we still have delicious tacos regularly!Missing tacos due to dietary restrictions? Bring back taco night with this simple night-shade free cucumber salsa. Free of allergens and nightshades, and low in Vitamin A, it's sure to be a hit!

One key component is this nightshade-free cucumber salsa.

Not only is it easy to make, it’s totally delicious! Even my pickiest eater loves it.

Nightshade-Free Cucumber Salsa

There is no cooking involved to make cucumber salsa. The most work you’ll have to do is peel and chop a cucumber. Or better yet, delegate it to your kids. My oldest loves to make cucumber salsa for the family when we’re having tacos.


Teach your kids to cook with the Kids Cook Real Food eCourse!

Check it out HERE!


Once the veggies are prepped you just mix all of the ingredients in a jar and let it chill for a few minutes. So, you can still have delicious salsa even if you don’t remember to make it until fifteen minutes before dinner!Missing tacos due to dietary restrictions? Bring back taco night with this simple night-shade free cucumber salsa. Free of allergens and nightshades, and low in Vitamin A, it's sure to be a hit!

This nightshade-free cucumber salsa tastes amazing as a dip with organic tortilla chips.

Most of the time we use it on tacos, taco bowls, or nachos (topped with this gooey dairy-free cheese sauce!).

What is on VAD Diet Tacos?

For VAD Diet-safe tacos we use either organic blue corn hard shells (I like this brand) or homemade white corn soft shells, and fill them with seasoned ground beef or chicken.

Toppings include:

  • Cucumber salsa
  • Grated zucchini cheese (grab the recipe here)
  • Sour cream (my kids can have a small amount of cream)
  • Black beans or refried pinto beans (I cook them in the Instant Pot)

Our tacos are simple, but so, so delicious!Missing tacos due to dietary restrictions? Bring back taco night with this simple night-shade free cucumber salsa. Free of allergens and nightshades, and low in Vitamin A, it's sure to be a hit!

What Are Nightshades?

Most healing diets eliminate nightshades. These include tomatoes, peppers, eggplants, and potatoes, plus a few other less-common foods like goji berries, ashwagandha, Cape gooseberries, ground cherries, and garden huckleberries.

For many people nightshades are a pain – literally. Nightshades cause calcinosis, a calcification of soft tissues, due to calcitriol. Calcitriol is a very potent hormone, possibly the most powerful hormone in your body!

Calcitriol tells your intestines to absorb calcium. Too much can quickly lead to hypercalcemia. This is the cause of calcium deposits in your soft tissue, also known as joint pain, muscle stiffness, arthritis, coronary artery disease, and more.

If you struggle with any type of chronic pain or weakness, consider cutting nightshades out of your diet. Or if you have issues with osteoporosis you might want to consider eliminating nightshades as well.

Here is a a great article on nightshades if you want to read more!

We do still eat some potatoes (though not if they are green or sprouting!). But we avoid all of the other nightshades.Missing tacos due to dietary restrictions? Bring back taco night with this simple night-shade free cucumber salsa. Free of allergens and nightshades, and low in Vitamin A, it's sure to be a hit!

Salsa Without Tomatoes

Now even if you are nightshade-free you can enjoy chips and salsa or everyone’s favorite taco night with this super simple cucumber salsa. Having salsa without tomatoes is totally doable and delicious.

What is taco night like at your house? What are your favorite toppings?

5 from 1 vote
Print

Nightshade-Free Cucumber Salsa (VAD Diet)

A quick and easy salsa free of nightshades.

Prep Time 10 minutes
Cook Time 0 minutes
Servings 4
Author Mary | Just Take A Bite

Ingredients

  • 2 cups cucumber peeled and diced
  • 1 1/2 tsp. apple cider vinegar or white vinegar
  • 3/4 tsp. salt
  • 1/4 tsp. garlic powder of 1 clove fresh garlic, minced
  • 1 1/2 tsp. organic cane sugar
  • 1/4 cup white onion, diced optional

Instructions

  1. Combine all of the ingredients in a jar.

  2. Mix and chill for at least 10 minutes.

  3. Store in the refrigerator for up to a week.

In need of an easy, allergen-free breakfast? These sunbutter breakfast cookies only take a few minutes of prep time and are free of gluten, dairy, eggs, nuts, rice, corn, soy and coconut.

Gluten-Free Sunbutter Breakfast Cookies

In need of an easy, allergen-free breakfast? These sunbutter breakfast cookies only take a few minutes of prep time and are free of gluten, dairy, eggs, nuts, rice, corn, soy and coconut.In need of an easy, allergen-free breakfast? These sunbutter breakfast cookies only take a few minutes of prep time and are free of gluten, dairy, eggs, nuts, rice, corn, soy and coconut.

When I ask my kids what they want for breakfast nine times out of ten they say breakfast cookies.

I don’t blame them. Who doesn’t want a cookie for breakfast?!

Easy Gluten-Free Breakfast Cookies

I’ve been making a variety of breakfast cookies for years. But recently we experimented with an egg free diet for my oldest. So I had to come up with yet another version.

Sunbutter makes a great allergy-friendly substitute for eggs. Not to mention it is delicious! It also replaces the fat. So there is no need to use dairy or coconut.

I also add some ground flax seeds to make sure the cookies hold together.In need of an easy, allergen-free breakfast? These sunbutter breakfast cookies only take a few minutes of prep time and are free of gluten, dairy, eggs, nuts, rice, corn, soy and coconut.

Soak Grains for Better Digestion

Sunbutter breakfast cookies start with a long soak to reduce the phytic acid content. This is especially important when using oats as they are very high in phytic acid.

If you’ve never soaked your grains before, rest assured it’s a very simple thing to do. Mix the grains with water and lemon juice. Done.

When you are ready to bake all you have to do is add the remaining ingredients, mix, scoop and bake.In need of an easy, allergen-free breakfast? These sunbutter breakfast cookies only take a few minutes of prep time and are free of gluten, dairy, eggs, nuts, rice, corn, soy and coconut.

Kids in the Kitchen

This is a great recipe to let little ones help with. No chopping. No egg cracking. No butter melting. Just measure, pour and mix.


You can teach even your youngest children all the necessary skills for making these delicious breakfast cookies with the Kids Cook Real Food eCourse! Check it out HERE.


Kids can even sample the ingredients as you go. Somebody has to make sure the honey tastes good, right?!

You can add whatever extras you like to sunbutter breakfast cookies. My kids always ask for mini chocolate chips. Dried fruit, nuts, seeds and coconut all work, depending on your dietary needs.In need of an easy, allergen-free breakfast? These sunbutter breakfast cookies only take a few minutes of prep time and are free of gluten, dairy, eggs, nuts, rice, corn, soy and coconut.

Seasonally-Inspired Breakfast Cookies

Change up the flavor of your sunbutter breakfast cookies by adding seasonal ingredients.

In the summer add diced strawberries, blueberries, or peaches.

For fall you could add some diced apples and cinnamon. Be sure to chop the apples finely enough to make them bite sized for kids.

Dried cranberries make a very festive cookie during the holidays.

Are you looking for an allergen friendly breakfast treat for your family? Sunbutter breakfast cookies will be a family favorite.

Easy Prep-Ahead Breakfast Cookies

Be sure to make a big batch so you can stock the freezer for effortless breakfasts on busy school mornings. Paired with a big glass of homemade rice milk you’ll have breakfast on the table in under a minute!

You can also add them to lunch boxes for a delicious and healthy treat.

I have to share a fun fact that I learned while making these.

When you mix a lot of baking soda with sunbutter it turns green!

Don’t worry. I adjusted the recipe so you won’t have green cookies like we did. But it is perfectly safe to eat them even if they are green.

In need of an easy, allergen-free breakfast? These sunbutter breakfast cookies only take a few minutes of prep time and are free of gluten, dairy, eggs, nuts, rice, corn, soy and coconut.

In need of an easy, allergen-free breakfast? These sunbutter breakfast cookies only take a few minutes of prep time and are free of gluten, dairy, eggs, nuts, rice, corn, soy and coconut.
5 from 1 vote
Print

Allergen Free Sunbutter Breakfast Cookies

A simple breakfast cookies that is free of gluten, eggs, dairy, nuts, rice, corn and coconut.

Prep Time 10 minutes
Cook Time 20 minutes
Servings 20

Ingredients

  • 2 1/2 cups gluten-free oats
  • 1/2 cup sorghum flour or brown rice or amaranth
  • 3/4 cups warm water
  • 2 Tbsp. lemon juice
  • 1/2 cup sunbutter unsweetened
  • 2/3 cup honey
  • 1/2 tsp. salt
  • 1/2 tsp. baking soda
  • 1/4 cup ground flax seeds
  • 1/2 cup add-ins: chocolate chips dried fruit, coconut, seeds, nuts

Instructions

  1. Combine the oats, sorghum, water and lemon juice in a bowl. Cover and let sit 24 hours.

  2. Heat the oven to 350 degrees F. Line two baking sheets with parchment paper.

  3. Add the sunbutter, honey, salt, soda, and flax seeds to the oat mixture. Mix well.

  4. Stir in the add-ins.
  5. Scoop mounds of dough onto the prepared baking sheet (as large or as small as you like).

  6. Bake for 15 - 20 minutes (less time for smaller cookies, more time for larger cookies).
  7. Let cool.
  8. Store in sealed container in the refrigerator for up to a week or in the freezer for up to a year.

This post is linked to Savoring Saturdays.

Looking for an easy weeknight dinner that the kids will love and can meet any dietary needs? My nourishing sloppy joes are very kid-friendly and can be on the table in less than 20 minutes!

Easy Nutrient Dense Sloppy Joes: Ready in Less Than 20 Minutes!

Looking for an easy weeknight dinner that the kids will love and can meet any dietary needs? My nourishing sloppy joes are very kid-friendly and can be on the table in less than 20 minutes! Serve it on homemade gluten-free bread for a truly tasty meal.Looking for an easy weeknight dinner that the kids will love and can meet any dietary needs? My nourishing sloppy joes are very kid-friendly and can be on the table in less than 20 minutes! We all need a few go-to meals that take very little time to make, include nourishing ingredients, and the whole family enjoys. This is one of our family favorites that fits the bill perfectly!

We call it sloppy joes. Others call it barbecue. What do you call it?

Easy Gluten-Free Sloppy Joes Recipe

This sloppy joes recipe really could not be any easier. Brown the meat. Add a few  ingredients. Simmer 5 minutes and you’re done. That’s it.

I love that you can serve it in many ways to meet a lot of dietary needs.  For those that can have bread I serve it on gluten-free buns or open face on homemade gluten-free bread. For those that can’t I serve it with tortilla chips or potato chips. My kids also like to eat it plain. My personal favorite way to eat sloppy joe meat is on top of pureed veggies (like parsnips).Looking for an easy weeknight dinner that the kids will love and can meet any dietary needs? My nourishing sloppy joes are very kid-friendly and can be on the table in less than 20 minutes!

Sloppy Joes with Nutrition

Want to know the best part about my version of sloppy joes? It includes both broth and vegetables! Yes, my kids still love it! Dinner win!

I actually make this recipe FOUR different ways depending on our current dietary needs. You can choose which one works best for your family.

  1. Original recipe – beef, ketchup, mustard, broth
  2. Added nutrition – beef, ketchup, mustard, broth, squash or pumpkin
  3. Nightshade free – beef, mustard, broth, squash or pumpkin, honey
  4. Vitamin A Detox Diet – beef, mustard, broth, honey, rice flour

Easy Prep Ahead Dinner and Lunch

Sloppy Joes work very well for a freezer meal. Make a big batch and freeze it in dinner size portions. Then all you have to do is heat and serve.

Not sure what to put in your kids’ lunch box? Sloppy joes to the rescue! You can heat the meat in the morning or leave it cold. Whether it’s on a bun or plain with something to dip kids love it, and it’s easy to eat. 

Growing up I did NOT like sloppy joes at all. I never tasted any I liked until I made my own. Honestly, now it is one of my favorite meals!! I could eat it every week.

Now I’m sharing this simple version with you. I hope you enjoy it too.

Easy Nourishing Sloppy Joes

My nourishing sloppy joes are very kid-friendly and can be on the table in less than 20 minutes!

Cook Time 20 minutes
Servings 6 people

Ingredients

  • 1 Tbsp. refined coconut oil or tallow or avocado oil
  • 2 lbs. grass-fed ground beef
  • 3/4 cup ketchup
  • 5 Tbsp. mustard
  • 1 tsp. salt
  • 1/2 tsp. garlic powder
  • 1/2 cup pureed squash or pumpkin optional
  • 1 cup chicken or beef broth

Instructions

  1. Heat a large skillet over medium high heat with the coconut oil.

  2. Add the ground beef and cook until browned.

  3. Add the ketchup, mustard, salt, garlic powder, squash, and broth. Stir.

  4. Simmer until thickened, about 5 minutes.

  5. Serve on a bun, over a bed of pureed vegetables or with tortilla chips

Recipe Notes

  • You can substitute ground turkey, pork or chicken for the beef.
  • You can make a double or triple batch and freeze some for a future meal. It reheats very well.
  • To make this nightshade free replace the ketchup with 1/2 cup squash/pumpkin and 2 Tbsp. honey.

Easy Nutrient Dense Sloppy Joes (VAD Diet)

These nourishing sloppy joes are very kid-friendly and can be on the table in less than 20 minutes!

Cook Time 20 minutes
Total Time 20 minutes
Servings 6 people
Author Mary | Just Take A Bite

Ingredients

  • 1 Tbsp. refined coconut oil or avocado oil or tallow
  • 2 lb. grass-fed ground beef
  • 4 Tbsp. mustard
  • 1 tsp. sea salt
  • 1 cup chicken or beef broth
  • 1/4 cup honey
  • 3 Tbsp. white rice flour

Instructions

  1. Heat a large skillet over medium high heat with the coconut oil.

  2. Add the ground beef and cook until browned.
  3. Add the mustard, salt, honey, rice flour, and broth. Stir.

  4. Simmer until thickened, about 5 minutes.
  5. Serve on a bun, over a bed of pureed parsnips or with tortilla chips.

Recipe Notes

  • You can substitute ground turkey or chicken for the beef.
  • You can make a double or triple batch and freeze some for a future meal. It reheats very well.


Summer preservation just got a little easier. This pectin-free easy strawberry freezer jam is the perfect way to use fresh strawberries. Just FOUR real food ingredients!

Pectin-Free Easy Strawberry Freezer Jam

Summer preservation just got a little easier. This pectin-free easy strawberry freezer jam is the perfect way to use fresh strawberries. Just FOUR real food ingredients!Summer preservation just got a little easier. This pectin-free easy strawberry freezer jam is the perfect way to use fresh strawberries. Just FOUR real food ingredients!

You know summer has arrived in Michigan when strawberries are in season. It’s an exciting time of year! But at the same time it means preservation season has also begun.

For me this lasts from June to November. Literally half of the year I am preserving food for the other half of the year! It’s a lot of work, but so worth all of the effort.

How to Preserve Strawberries

I’m always so thankful that we kick off preservation with fruit like strawberries. I can ease into it instead of jumping right into the labor intensive canning. Fresh strawberries are so easy to work with. Simply wash, hull and freeze. We usually freeze at least four gallons of strawberries to use all winter in yogurt, smoothies, and muffins.

While the strawberries are still fresh I like to make a lot of strawberry jam. It has recently become my preschooler’s favorite food. Our homemade gluten free bread toasted with butter and strawberry jam. No other flavor. Only strawberry.

Summer preservation just got a little easier. This pectin-free easy strawberry freezer jam is the perfect way to use fresh strawberries. Just FOUR real food ingredients!

How to Make Pectin-Free Strawberry Freezer Jam

There are so many ways to use strawberries when they are fresh. There are even plenty of ways to use them once they are frozen. But one of the best ways to use them, fresh or frozen, is by making strawberry jam!

I’ll confess. I’ve never been that great at making jam.

I followed recipes exactly. I bought various types of pectin. It just never seemed to turn out well. I think my husband was starting to wonder if I would ever make jam that wasn’t like liquid or totally solid.

So I created my own recipe for pectin-free easy strawberry freezer jam. And it is amazing!

I love this recipe because you don’t need pectin (the debate is still out on whether or not pectin is really that great for you). Instead it uses grass-fed gelatin (Use the code TAKE10 to get 10% off gelatin HERE).Summer preservation just got a little easier. This pectin-free easy strawberry freezer jam is the perfect way to use fresh strawberries. Just FOUR real food ingredients!

How to Stock Your Freezer with Jam

This pectin-free strawberry freezer jam recipe makes about five half-pints of jam.  Since it only takes about fifteen minutes to make you can easily cook several batches in one day while you have fresh strawberries.

Pectin-free easy strawberry freezer jam is great on toast. But  you can also spread it on pancakes, mix it into yogurt, or even use it as an ice cream topping! My kids like to eat it by the spoonful.  It’s that good.

Since creating this strawberry jam recipe I have upped my game in jam and jelly making! We now enjoy homemade pectin-free concord grape jelly, 5 minute peach jam, and red plum raspberry jelly! They are all pectin free!

Whether you still have fresh strawberries available or you already have your stash in the freezer, try making pectin-free easy strawberry freezer jam.

You’ll have a little taste of summer ready in your freezer all year long.Summer preservation just got a little easier. This pectin-free easy strawberry freezer jam is the perfect way to use fresh strawberries. Just FOUR real food ingredients!

Summer preservation just got a little easier. This pectin-free easy strawberry freezer jam is the perfect way to use fresh strawberries. Just FOUR real food ingredients!
5 from 2 votes
Print

Pectin-Free Easy Strawberry Freezer Jam

Simple strawberry freezer jam with only four ingredients and no pectin.

Prep Time 5 minutes
Cook Time 10 minutes
Total Time 15 minutes
Author Mary | Just Take A Bite

Ingredients

  • 1/4 cup organic lemon juice
  • 3 1/2 tsp. grass-fed gelatin
  • 3/4 cups organic cane sugar or coconut sugar or honey
  • 5 cups strawberries, washed, hulled and roughly chopped fresh or frozen

Instructions

  1. In a medium sauce pan combine the lemon juice and gelatin. Let sit 2 minutes

  2. Add the sweetener and strawberries.

  3. Cook over medium heat, stirring and mashing berries with a potato masher, for about 10 minutes.

  4. Pour the jam into half-pint jars.

  5. Chill jam in the refrigerator until set.

  6. Use the jam fresh or freeze until ready to use.

Recipe Notes

  • This makes about five half-pints.
  • If using frozen berries, thaw them at least partially before making the jam


Living dairy free isn't always easy. But it can certainly be delicious! This simple dairy free cheese sauce is perfect on nachos, pizza or mac 'n' cheese!

Simple Dairy-Free Cheese Sauce Recipe

Living dairy free isn’t always easy. But it can certainly be delicious! This simple dairy free cheese sauce is perfect on nachos, pizza or mac ‘n’ cheese!Living dairy free isn't always easy. But it can certainly be delicious! This simple dairy free cheese sauce is perfect on nachos, pizza or mac 'n' cheese!

Although we’ve been on a trial and error food journey for many years I think we have come to a first. For the first time all four kids and myself are dairy-free at the same time.

In some ways it’s a pain. I mean, how easy is it to grab some yogurt for breakfast or a slice of cheese for a snack?

But at the same time it’s been nice to have us all eating the same food! No making multiple versions of everything.

Dairy-Free Alternatives

With five out of six family members dairy-free I knew I’d have to get creative in the kitchen again. Eliminating all dairy impacts a lot of your meal options. And I’m not a fan of most store-bought dairy alternatives. They are loaded with synthetic vitamins (especially A and D!). Not to mention they often contain unhealthy oils, gums and stabilizers. No thanks.Living dairy free isn't always easy. But it can certainly be delicious! This simple dairy free cheese sauce is perfect on nachos, pizza or mac 'n' cheese! #dairyfree #glutenfree #allergenfree

Being someone that never shies away from a kitchen challenge I set to work recreating the basics. I started with rice milk since my oldest son has been drinking it for years. But until this point I had been buying it.

That led to experimenting with rice milk yogurt. And before I knew it I was making dairy-free cheese sauce!

Dairy-Free Substitute for Cheese

This recipe was sort of accidental. But that seems to be how the best ones are created! We were having a baked potato bar for dinner. I wanted to have broccoli and cheese sauce with it.

The sauce turned out so well that we tried it again with nachos. And again on pizza. And again in mac ‘n’ cheese. And again in omelettes.

In other words, my kids have gone crazy for it! I love it too. I think we’ve made it multiple times a week ever since I created the recipe!

The best part is that it’s so easy to make. My ten-year-old made it by herself the other day when the kids made me nachos for my birthday. You can see how hard they worked HERE.


My kid have been learning to cook for a few years now through the Kids Cook Real Food online cooking class. It’s one of the best investments I’ve made, both of my time and my money. Check it out here.


Living dairy free isn't always easy. But it can certainly be delicious! This simple dairy free cheese sauce is perfect on nachos, pizza or mac 'n' cheese! #dairyfree #glutenfree #allergenfreeEasy Protein on a Dairy-Free Diet

This dairy-free cheese sauce only has a few simple ingredients. Which always makes me happy. They include:

  • Organic rice flour
  • Water
  • Avocado oil or MCT oil
  • Salt
  • Organic cane sugar
  • Turmeric
  • Grassfed collagen

One of the star ingredients is grassfed collagen.

Collagen adds a bit of healthy protein to the cheese sauce. Not to mention collagen may improve your skin, hair and bone health (learn more here).

I always buy my collagen from Perfect Supplements. It is non-GMO and glyphosate free! Not to mention Perfect Supplements has the best deals.


Use the code TAKE10 to get 10% off your entire Perfect Supplements order.

Here’s a little secret. I always stock up when I buy collagen because I use it in SO MANY things every day.

If you buy three Perfect Supplements products you can get 25% off PLUS the extra 10%. That’s 35% off. And if you really want to stock up, you can get 30% off when you buy six…PLUS the 10% off. That’s 40% off!!

Perfect Supplements Sale


Living dairy free isn't always easy. But it can certainly be delicious! This simple dairy free cheese sauce is perfect on nachos, pizza or mac 'n' cheese! #dairyfree #glutenfree #allergenfreeSimple Dairy Substitutes

I’ve had readers asking me for weeks about the dairy-free cheese sauce recipe. And I’ve got it for you today! But I went a step farther and actually have TEN dairy-free recipes for you! An entire dairy substitute recipe book. For free.

The book includes recipes for a variety of dairy-free milks, yogurt, cheese (both sauce and sliced), ice cream and pudding. All of the recipes are kid approved.Living dairy free isn't always easy. But it can certainly be delicious! This simple dairy free cheese sauce is perfect on nachos, pizza or mac 'n' cheese! #dairyfree #glutenfree #allergenfree

The recipes are easy to make, gluten, egg and dairy-free, and don’t contain strange ingredients. Quite a few of the recipes include either collagen or gelatin, so make sure you grab yours HERE (use the code TAKE10).

Are you ready for some dairy-free goodness? Download your copy of 10 Simple Dairy Substitutes below.

Have you been missing some of your favorite foods on a dairy-free diet? You don’t have to suffer any longer! Grab my 10 Simple Dairy Substitutes ebook today and get cooking! Then come back and let me know how you like the cheese sauce!!

What form of dairy do you miss the most on a dairy-free diet?Living dairy free isn't always easy. But it can certainly be delicious! This simple dairy free cheese sauce is perfect on nachos, pizza or mac 'n' cheese! #dairyfree #glutenfree #allergenfree

Whether you need a simple snack or a nourishing side dish, this simple hummus is VAD Diet approved and very kid friendly. Plus it's ready in less than five minutes!

The Easiest Hummus Recipe Ever

Whether you need a simple snack or a nourishing side dish, this simple hummus is very kid friendly. Plus it’s ready in less than five minutes!Whether you need a simple snack or a nourishing side dish, this simple hummus is VAD Diet approved and very kid friendly. Plus it's ready in less than five minutes!

Hummus is a staple in our house. Being dairy free we use this as our go-to veggie dip. It also works well as a pasta sauce or even a cheese replacement for pizza (we love this gluten free crust).

I think I’ve only ever made traditional hummus once. Then the jar of tahini sat in my pantry.

Over the years I’ve simplified my hummus so much. It literally takes three minutes to make. And my kids go crazy for it!

Kid-Approved Hummus

My kids will eat this hummus by the spoonful. This is seriously the easiest hummus recipe ever. Three ingredients. Three minutes. Done.

There are so many things to dip in hummus:

You can even use hummus as a simple salad dressing!

Whether you need a simple snack or a nourishing side dish, this simple hummus is VAD Diet approved and very kid friendly. Plus it's ready in less than five minutes!

How to Make Easy Hummus

Canned or boxed chickpeas will work just fine for a super quick hummus. I do this when I don’t plan ahead. Take note that it will increase your resistant starch intake. If you want a healthier and more frugal option simply cook your own! Dried beans are so cheap. If you have an Instant Pot, cooking beans is a snap too. That’s my favorite method. Check out this guide for cooking beans in an Instant Pot.

Aside from beans all you need is oil and salt.

Sometimes I add organic garlic powder and onion powder for a little more flavor. But my kids love it either way.Whether you need a simple snack or a nourishing side dish, this simple hummus is VAD Diet approved and very kid friendly. Plus it's ready in less than five minutes!

Hummus Adds Protein

Since adequate protein is such an important part of a healthy diet, hummus makes a great addition to any snack or meal. Beans have a lot of protein. Not to mention they are loaded with fiber to help fill those little bellies and feed the good bacteria.

I try my best to give my kids a balance of protein, carbohydrates and fat at both meals and snacks. Veggies or crackers with hummus meets all three requirements! And it is easy to pack in a school lunch. That is my definition of a winning food.

Ready for some delicious snacking or need an easy lunch addition? This super simple hummus is kid-friendly and loaded with nutrition.Whether you need a simple snack or a nourishing side dish, this simple hummus is VAD Diet approved and very kid friendly. Plus it's ready in less than five minutes!

Three Ingredient Hummus

Prep Time 3 minutes
Servings 8
Author Mary | Just Take A Bite

Ingredients

  • 1 1/2 cups canned, boxed or cooked garbanzo beans (chickpeas), drained, liquid reserved
  • 4 Tbsp. avocado oil
  • 4 Tbsp. bean liquid
  • 1/4 tsp. salt
  • 1/4 tsp. organic garlic powder optional
  • 1/4 tsp. organic onion powder optional

Instructions

  1. Combine all of the ingredients in a blender.

  2. Blend on high until smooth, adding extra oil or bean liquid if necessary.

  3. Adjust seasoning to taste.

  4. Serve immediately or refrigerate for up to a week.

Chips and dip make a great side dish for any party or picnic. Make it real food style with this easy homemade chip dip. Just ONE ingredient plus seasoning.

Easy Homemade Chip Dip

Chips and dip make a great side dish for any party or picnic. Make it real food style with this easy homemade chip dip. Just ONE ingredient plus seasoning.Chips and dip make a great side dish for any party or picnic. Make it real food style with this easy homemade chip dip. Just ONE ingredient plus seasoning.

One of the easiest side dishes any time of year is chips with dip. I know, you may be thinking that doesn’t sound very healthy. But it can be!

Buy your favorite kind of chip (we like the potato chips made with avocado oil or olive oil) or make a batch of homemade chips. Better yet swap the chips for some homemade teff crackers or gluten-free Wheat Thin® style crackers. You still get the crunch without eating chips. Then all you have to do is take one minute to mix up a quick dip.

What is in Homemade Chip Dip?

This chip dip reminds me of my favorite childhood dip – french onion. What’s great about this homemade version is what it’s missing…namely MSG (read about the dangers of MSG here) or anything artificial. Just a few simple ingredients.

This is also not a dip full of spice. We keep it simple for the oral sensory issues in our family. But that doesn’t mean it’s low on flavor. This simple chip dip tastes great and packs a punch of flavor.Chips and dip make a great side dish for any party or picnic. Make it real food style with this easy homemade chip dip. Just ONE ingredient plus seasoning.

What Can you Dip in Chip Dip Besides Chips?

If you don’t eat chips, this dip works very well for fresh vegetables. Our favorite is cucumbers. We even enjoy it on a burger whether it’s with a bun or simply as a dip when going bun-less. That’s what my kids do most of the time since gluten-free buns are expensive. Plus it’s just easy for kids to dip!

Homemade chip dip is very versatile.

Easy Dip for Kids

Chip dip works well for packing school lunches. A tasty dip is a great way to get kids to eat fresh vegetables. Serve a combination of chips or crackers and veggies. Even if you have reluctant veggie eaters you might be surprised that they eat it all when served together.

Making chip dip is also a great activity for kids. Even the little ones. You really can’t mess it up (the recipe is very forgiving…and you can always add extra sour cream if they go a little overboard with seasoning).

My four-year-old LOVES to help in the kitchen. I like to put her on dip duty. It keeps her hands busy, and she feels so proud that she is helping.Chips and dip make a great side dish for any party or picnic. Make it real food style with this easy homemade chip dip. Just ONE ingredient plus seasoning.


All of my kids know their way around the kitchen thanks to the Kids Cook Real Food eCourse. We’ve been doing it since 2016! Check it out HERE if you’re interested in getting your kids cooking.


Is Chip Dip Dairy-Free?

This version of chip dip is made with dairy. While my kids are mostly dairy-free, they do tolerate butter and a small amount of cream. So we still use a little sour cream.

But if you can’t have any dairy you could make this with coconut sour cream or almond milk sour cream. Both sound delicious!

The next time you are in the mood for chips and dip try this simple homemade version of chip dip. It takes less than one minute to make and will be a family favorite.Chips and dip make a great side dish for any party or picnic. Make it real food style with this easy homemade chip dip. Just ONE ingredient plus seasoning.

Easy Homemade Chip Dip

A simple chip dip made with real ingredients that only takes a minute to prepare.

Prep Time 1 minute
Servings 8
Author Mary | Just Take A Bite

Ingredients

  • 2/3 cup organic sour cream
  • 1/2 tsp. salt
  • 1/2 tsp. organic garlic powder
  • 1/2 tsp. organic onion powder
  • 1 tsp. organic dried dill weed (optional - not allowed on VAD Diet)

Instructions

  1. Combine all of the ingredients in a glass jar.

  2. Mix until well combined. Adjust seasoning to taste.

  3. Serve with chips, crackers or vegetables.

  4. Store, covered, in the refrigerator for up to 2 weeks.

No need to forgo your favorite cereal to eat healthier. Gluten free Golden Grahams® is easy to make, allergy friendly and contains quality ingredients.

Gluten-Free Golden Grahams® Cereal {egg free, nut free, dairy free option}

No need to forgo your favorite cereal to eat healthier. Gluten-free Golden Grahams® is easy to make, allergy-friendly and contains quality ingredients.No need to forgo your favorite cereal to eat healthier. Gluten free Golden Grahams® is easy to make, allergy friendly and contains quality ingredients.

Whether it’s hot outside and you want a cold breakfast or you are just too busy to cook, it’s very convenient to have cereal on hand.

For those mornings where the kids are up early and need to make their own breakfast. Or when Mom has been up all night with the baby and needs some quick energy. And you don’t happen to have leftover muffin bread pudding on hand. Gluten-free Golden Grahams® really come in handy. Not to mention they taste great!

Why Cereal is Unhealthy

Even though I was a cereal junky for many, many years (HAD to have it every morning), I stopped buying it regularly when we switched to real food. It really is not healthy, even organic.
 
Cereal typically gives you lots of processed sugar, synthetic vitamins/fortification (like Vitamin A!), artificial or “natural” flavors and artificial colors, GMO’s and glyphosate. Not to mention they are made with an extrusion process that makes the grains toxic.No need to forgo your favorite cereal to eat healthier. Gluten free Golden Grahams® is easy to make, allergy friendly and contains quality ingredients.
 
We do still like cereal. And I’ll be honest – we do have some organic gluten-free cereal in the cupboard for a once-in-a-while snack. But my preferred choice if we are craving cereal is homemade. Over the years I’ve made:
 

Did I mention I used to be a cereal addict? I had to make lots of homemade varieties while I transitioned away from processed food. They were delicious experiments.
No need to forgo your favorite cereal to eat healthier. Gluten free Golden Grahams® is easy to make, allergy friendly and contains quality ingredients.

Allergy-Friendly Homemade Cereal

Once we started down the road of food allergies (like going gluten-free) I decided to make my own allergy-friendly versions of our favorite foods. Yes, even cereal!

My kids love them.

Are Golden Grahams® Gluten-Free?

The processed, store-bought version of Golden Grahams® are NOT gluten-free. But this simple homemade version is!

Gluten-free Golden Grahams® are crunchy and sweet. They make a perfect breakfast treat or a fun snack any time of day. My kids love them plain or even mixed into yogurt.
 
Fair warning – they are addictive. And it’s easy to eat a lot since they are so small. Just keep popping a few in your mouth here and there and you’ve eaten quite a few before you know it. No idea how I know that…No need to forgo your favorite cereal to eat healthier. Gluten free Golden Grahams® is easy to make, allergy friendly and contains quality ingredients.

Easy Gluten-Free Snack

Gluten-free Golden Grahams® make a great finger food for on the go. It’s tough to figure out what real food to stash in the diaper bag sometimes. Homemade cereal works very well.

We also love to have a bowl with homemade rice milk for an afternoon snack. It satisfies both your sweet and crunchy cravings – without the extruded grains!

Do you still enjoy cereal? Do you need a healthier, allergen-free version?

Try these homemade Golden Grahams®. You won’t be disappointed.No need to forgo your favorite cereal to eat healthier. Gluten free Golden Grahams® is easy to make, allergy friendly and contains quality ingredients.

Gluten-Free Golden Grahams®

Prep Time 10 minutes
Cook Time 20 minutes
Total Time 30 minutes

Ingredients

  • 1 1/4 cups white rice flour
  • 1/2 cup amaranth flour
  • 1/4 cup teff flour can be replaced with white rice or amaranth
  • 1/2 cup organic cane sugar or sucanat or coconut sugar
  • 1/2 tsp. sea salt
  • 1/2 tsp. vanilla
  • 4 Tbsp. honey
  • 2 Tbsp. maple syrup
  • 1/2 cup butter or coconut oil

Instructions

  1. Heat oven to 350 degrees F. Cut 4 pieces of parchment paper the size of a baking sheet.
  2. Melt the butter/oil. Set aside.
  3. Mix the flours, sugar and salt in a large bowl.

  4. Add the vanilla, sweetener and the butter and mix until well combined. The dough should hold together when squeezed. If it is crumbly add more honey or butter.

  5. Split the dough into 3 equal parts. Lay one piece of parchment paper on a table. Put 1/3 of dough on the paper. Lay a 2nd piece of parchment on top of dough. Squish the dough down a little with your hand. Use a rolling pin to roll the dough between the parchment paper. Roll the dough until it is very thin (1/16th" or so). Remove the top piece of parchment paper.
  6. Cut into small squares with a pizza cutter or knife. Place on a baking sheet (on the parchment paper...just move the whole thing onto the baking sheet). Repeat for rest of dough.

  7. Bake for 8-10 minutes. Turn the oven off, but leave the cereal in to get crisp. Remove after 5 min.

  8. Let cool completely. Store in airtight container for up to 2 weeks or in the freezer for up to a year.

Recipe Notes

Makes about 2 quarts.

Any 2 cup combination of gluten free flour will work - this combination gives a very neutral flavor.

This post is shared on Allergen Free Wednesday.

This easy allergen free bread is great for sandwiches or toast. Let the kids help make it!

Easy Allergen-Free Bread

Looking for a great gluten-free bread that holds together without allergens or gums? This allergen-free bread is easy to make and tastes great!This easy allergen free bread is great for sandwiches or toast. Let the kids help make it!

A couple years ago I spent at least six months trying to come up with a decent gluten free bread. I probably made at least fifty experimental loaves.

What did I come up with?

My “not-quite-perfect” gluten free bread. It tastes good. But it’s not quite as sturdy as I’d like. And it seems to turn out differently every time I make it!

Easy Allergen-Free Bread

Then when two of my kids added a bunch of new allergies I just stopped making bread. I really didn’t know how to bake anything safe for them. Back to experimenting.

This easy allergen free bread is great for sandwiches or toast. Let the kids help make it!

Eventually I got the hang of making decent muffins (my poor husband with texture issues had to suffer through some over-moist and dry, crumbly experiments).

Can You Bake Gluten-Free Bread Without Xanthan Gum?

One day I decided to try making a loaf of bread. Just to see what would happen.

Imagine my surprise when it turned out great! Actually way better than the gluten-free bread I had tried to create for so long.

Who knew you could cut out the eggs, dairy and binders and get something better?!

My allergen-free bread has no gluten, eggs, dairy, nuts, coconut, rice, corn, seeds or soy. And as with all of my baking it has no gums. As an added bonus, it is soaked so it’s gentler on the tummy.This easy allergen free bread is great for sandwiches or toast. Let the kids help make it!

Kid-approved Gluten-Free Bread

Want to know what my kids think about this allergen-free bread?

First kid: “This is AWESOME!”

Second kid: “This is only for me! Nobody else can have it.”

What Can You Make with Allergen-Free Bread?

Life sure is easier when you have bread. My son can enjoy sloppy joes, sandwiches with homemade lunch meat or toast with sunbutter (we love this brand because it is made in a peanut and tree nut facility). We even use it to make mini pizzas with our nutrient dense pizza sauce (no cheese necessary)!

Sometimes we use leftover pancakes or tortillas as “bread.” But this allergen free bread is definitely our first choice. I try to keep some in the freezer at all times for quick snacks, breakfasts and lunches. I even pre-slice it so I can just grab one slice at a time.

This easy allergen free bread is great for sandwiches or toast. Let the kids help make it!

Just a few simple ingredients, mixed by hand gives you a delicious and versatile bread. Soak the flour the day before (or skip that step if you didn’t plan ahead). Then it takes about five minutes to get the bread into the oven.

Just because you have allergies doesn’t mean you have to miss out on freshly baked bread. It also doesn’t mean  you have to resort to strange ingredients and binders (that actually often contain allergens!), like most store-bought versions have.

Looking for Homemade Allergen-Free Bread?

Give this allergen free bread a try. Your kids will be begging for more.

Better yet, get your kids in the kitchen to help make it! They can practice, measuring, pouring and mixing. This will definitely be on our list of things to bake as we go through the Kids Cook Real Food eCourse. Click here to learn more about it!

This easy allergen free bread is great for sandwiches or toast. Let the kids help make it!

5 from 1 vote
Print

Easy Allergen Free Bread

Prep Time 10 minutes
Cook Time 55 minutes
Total Time 1 hour 5 minutes
Author Mary | Just Take A Bite

Ingredients

  • 1 1/2 cups organic sorghum flour
  • 1/2 cup organic tapioca or white rice flour
  • 1/4 cup psyllium husk
  • 2/3 cup warm water
  • 1 Tbsp. lemon juice
  • 1 tsp. baking soda
  • 1 tsp. cream of tartar
  • 1/2 tsp. salt
  • 3 Tbsp. honey
  • 5 Tbsp. olive oil or avocado oil
  • 3 tsp. grassfed gelatin
  • 1/4 cup cold water
  • 3/4 cup hot water

Instructions

  1. Combine the flour, psyllium husk, warm water and lemon juice. Mix to remove any lumps. Cover and let sit 7 - 24 hours.

  2. Heat the oven to 350*F. Grease or line with parchment paper one medium bread pan.

  3. Combine the gelatin and cold water. Set aside.

  4. Add the baking soda, cream of tartar, salt, honey and oil to the flour mixture. Stir well.

  5. Add the hot water to the gelatin water and mix until dissolved.

  6. Add the gelatin water to the flour mixture. Blend well with a hand mixer to remove any lumps.

  7. Pour the dough in the prepared pans.

  8. Bake for 55 - 60 minutes, until golden.

  9. Allow to cool for 30 minutes before removing from the pan.

  10. Allow to cool for at least an additional 60 minutes before slicing.

  11. Store in a sealed container at room temperature for up to 5 days, in the fridge for up to a week or in the freezer for up to a year.

Recipe Notes

You can slice the bread before freezing.
You can replace any of the water with yogurt, whole milk, coconut yogurt, coconut milk, almond milk or rice milk for a moister bread.