Home ยป Food allergies

Category: Food allergies

Does one (or all!) of your children have food allergies? Sadly this is no longer a rare thing. More and more kids struggle with food allergies now than ever before.

I’ve been there too. Skin testing, blood work, epi-pens…the works. It can be challenging or down right scary.

But you don’t have to live in fear. And you don’t have to just accept food allergies as a life sentence. There is help!

My son went from over twenty food allergies and an epi-pen to being able to eat just about anything. Even nuts!

There are ways to heal the gut and nourish the body so your child can get back to a normal life. Food allergies have so many underlying causes. Once you figure out the root problem and treat it the body will begin to heal.

Don’t let food allergies define your life. I’m here to help you and your child heal.

Blueberry Pie Ice Cream

Gluten-Free Blueberry Pie Ice Cream | Dye-Free & Naturally Sweetened!

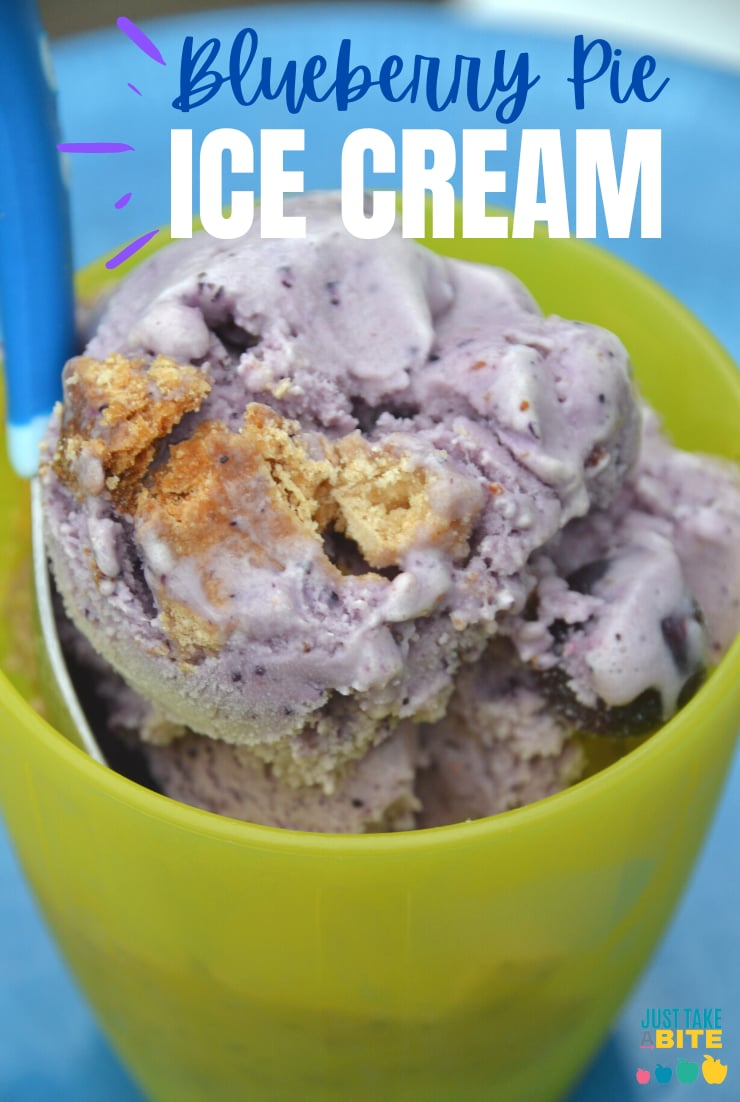
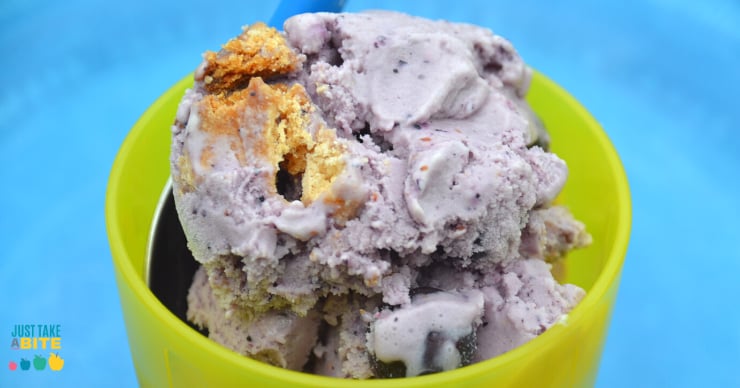
Blueberry pie ice cream is rich and creamy, using fresh, raw cream. Packed with  blueberries and pieces of gluten free pie crust, it makes a real treat.Blueberry Pie Ice CreamOne of my absolute favorite things about summer in Michigan is the abundance of fresh blueberries.  It has been my favorite fruit since I was little.

Blueberry pie has always been my favorite kind of pie as well (I’m normally not really a pie person). I used to request it for my birthday instead of cake.

While blueberry pie is quite perfect on its own, it can get better. There is only one way I can think of to improve blueberry pie…by making it into blueberry pie ice cream!

Gluten-Free Blueberry Dessert

When my oldest was little she requested blueberry pie ice cream. Being an Adventurous Eater she loves to come up with new recipe ideas.

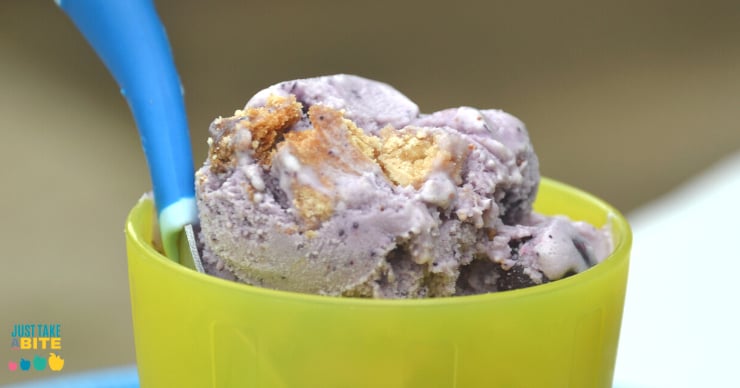
Together we created a rich, creamy ice cream that is packed with blueberry flavor and has bits of real pie crust mixed in. An added bonus is the brilliant purple color of the ice cream. Nothing artificial here. Just pure blueberry goodness.Blueberry Pie Ice Cream

What to Make With Blueberries

When fresh blueberries are in season, this blueberry pie ice cream is a must! As different fruits are in season you can swap them for the blueberries – strawberry, cherry, raspberry, blackberry, or even peach! You can also make this dairy-free using coconut milk.

But there are plenty of other amazing blueberry desserts and treats to try as well. Which is why you’ll want to freeze plenty of blueberries so you can make them all year long!

Fresh or frozen blueberries work interchangeably for just about any blueberry dessert.

Blueberry Pie Ice Cream

Gluten-Free Blueberry Pie Ice Cream

Blueberry pie ice cream is a super simple dessert. Kids will want to help with this one!

The pie crust can be made in advance. And since it’s going to be crumbled anyway there is no need for perfection. Let the little ones have a blast rolling dough.

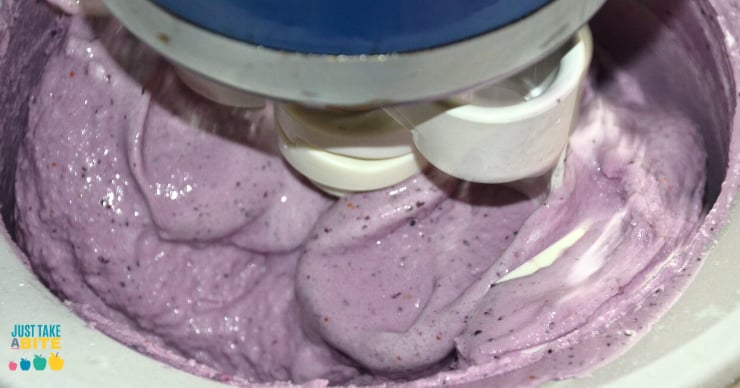
The ice cream batter is ready in minutes. Simply add the ingredients and blend.

It’s fun to watch it all come together. So be sure you have your kids in the kitchen for this project.

Are you ready for the perfect summer treat? Blueberry season just got a little sweeter with blueberry pie ice cream.

Blueberry Pie Ice Cream

Blueberry Pie Ice Cream
A rich, creamy ice cream packed with blueberries and pieces of pie crust. It is gluten free and can be made both egg and dairy free.
Write a review
Print
Pie Crust
  1. 1/2 cup any combination of gluten free flours (i.e. tapioca, rice, amaranth)
  2. 2 Tbsp. organic palm shortening or butter
  3. 2 Tbsp. cold water
  4. 2 Tbsp. organic cane sugar
Ice Cream
  1. 2 1/2 cups cream (preferably raw) (can be replaced with coconut milk)
  2. 1/2 cup whole milk (preferably raw) (can be replaced with coconut milk)
  3. 1 - 3 egg yolks (optional)
  4. 1 Tbsp. tapioca flour (optional)
  5. 3 tsp. organic vanilla
  6. 1/4 tsp. sea salt
  7. 1/2 cup any combination of sweeteners (honey, maple syrup, cane sugar, coconut sugar)
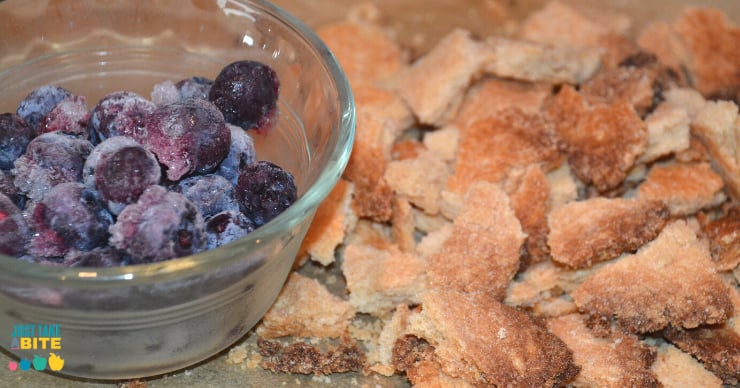
  8. 3/4 - 1 cup blueberries (fresh or frozen)
  9. 1/2 tsp. cinnamon (optional)
  10. 1/4 cup blueberries (optional)
Pie Crust
  1. Heat oven to 400*F.
  2. Combine the flour and sugar.
  3. Cut in the shortening/butter until crumbly.
  4. Add the water and mix until a dough forms.
  5. Spread the dough on a parchment lined baking sheet.
  6. Bake for 20 - 25 minutes, until golden brown.
  7. Cool and crumble.
Ice Cream
  1. Combine the cream, milk, egg yolks, flour, salt, vanilla, sweetener, cinnamon and 3/4 cup of blueberries.
  2. Blend until smooth.
  3. Taste and add more blueberries if stronger flavor is desired. Blend.
  4. Process ice cream in an ice cream mixer according to manufacturer's directions.
  5. Transfer ice cream to a freezer safe container.
  6. Mix 1/4 cup blueberries and pie crust pieces into the ice cream.
  7. Freeze ice cream until firm.
Notes
  1. If you don't have an ice cream maker you can beat the batter in a chilled bowl until it thickens.
  2. It is best to use one "white" flour for half of the flour in the pie crust (tapioca or white rice).
Just Take A Bite https://justtakeabite.com/
Blueberry Pie Ice Cream

Blueberry cheesecake pops

Blueberry Cheesecake Pops

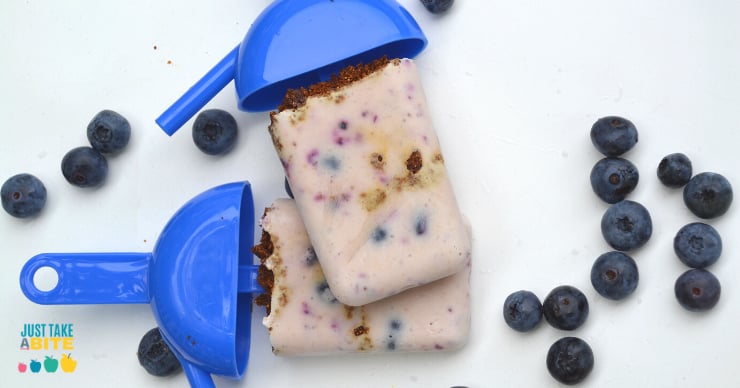
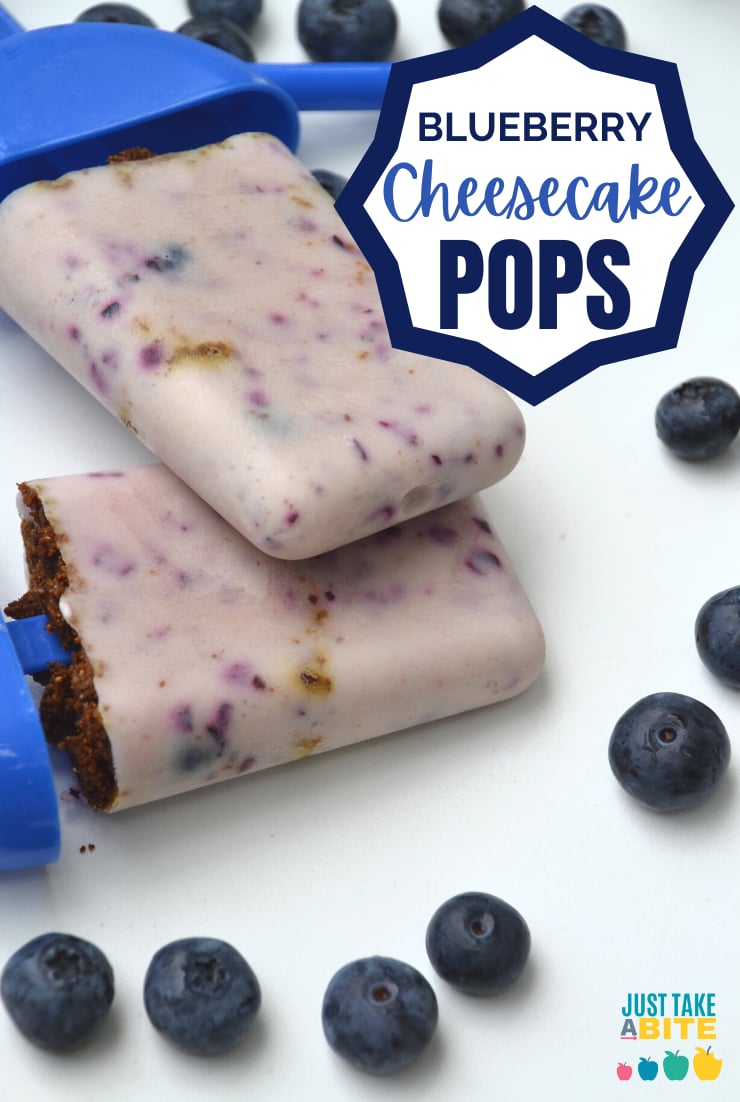
When the weather is hot and blueberries are fresh it’s the perfect time for blueberry cheesecake pops! Not too sweet but what a treat.

We go crazy for blueberry season here. Blueberries are an all around family favorite fruit. We mostly freeze them and eat them fresh.

But of course we use them for a few treats too.

Gluten-Free Blueberry Dessert

One of the easiest ways to use blueberries is in blueberry cheesecake pops. It only takes about five minutes to get them to the freezer. As a busy mom of four, the faster the better!

We almost always have homemade gluten free graham crackers in the cupboard, which makes treats like blueberry cheesecake pops a cinch. This time I used gluten free pumpkin spice grahams! Any homemade or store bought version that you tolerate will do.

Then all you have to do is blend, crush and pour.

Blueberry Cheesecake Pops

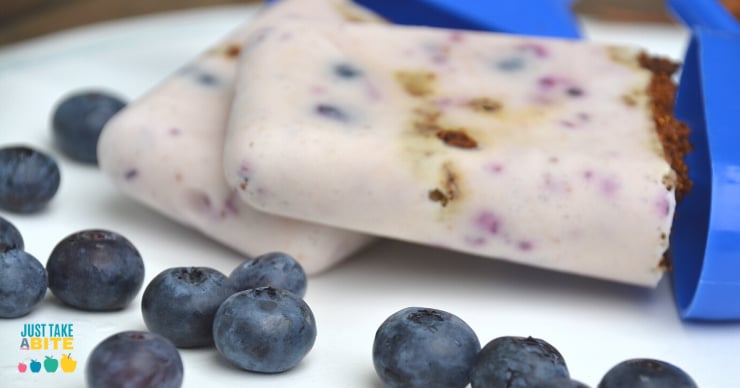
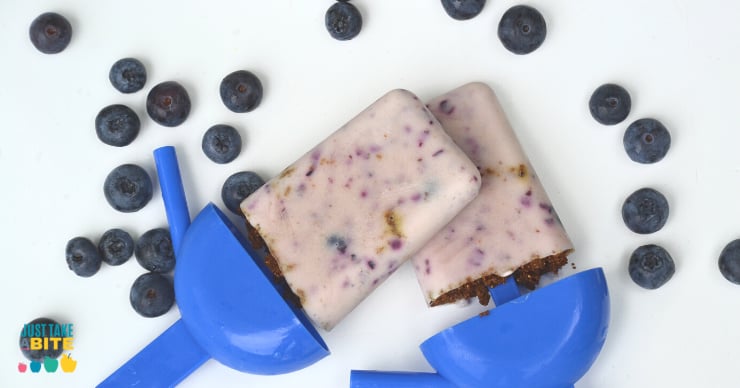
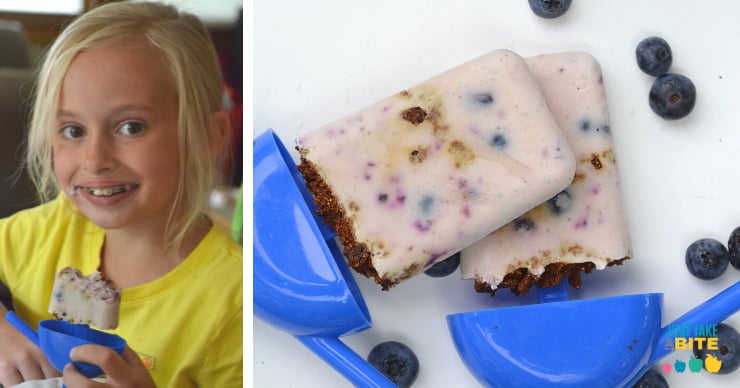
Slightly sweetened whole milk yogurt blended with blueberries gives the flavor of blueberry cheesecake. The crushed graham crackers mimic a graham cracker crust.

If you want some variety try swapping the blueberries for strawberries or raspberries. Or use all three for a mixed berry cheesecake pop!

Coconut milk or coconut yogurt can be used in place of the dairy yogurt as well for variety or for allergies.

Blueberry cheesecake pops

Healthy Blueberry Dessert

Blueberry cheesecake pops really are a treat. But you can also pack them with nutrients. They already have maple syrup and sea salt. Both contain lots of minerals.

Then there is the whole milk yogurt with healthy fat. Plus blueberries are bursting with vitamins.

If you really want to load up these popsicles with good stuff you can add egg yolk to the mix. I like to do this for my kids that sometimes struggle with focus. All of the B vitamins really help.

What to Make with Blueberries

If your kids are like mine they don’t want to wait for the popsicles to freeze. Blueberry cheesecake pops can be eaten as blueberry cheesecake yogurt if you are really in a hurry. Just blend, pour, stir and serve. Then you can serve this for breakfast!

Use a few of your fresh blueberries to make a treat the whole family will love. Blueberry cheesecake pops are dessert with nutrition packed inside.

What is your favorite way to enjoy blueberries?

Blueberry cheesecake pops

Blueberry Cheesecake Pops
Serves 4
A fun way to use your fresh blueberries in a sweet frozen treat. Yogurt, blueberries and graham crackers create a cold version of blueberry cheesecake.
Write a review
Print
Ingredients
  1. 1/2 cup blueberries, divided
  2. 3/4 cups plain, whole milk yogurt, coconut milk or coconut yogurt
  3. 2 Tbsp. maple syrup or honey
  4. 1/2 tsp. organic vanilla
  5. 1/4 tsp. unrefined sea salt
  6. 1/2 cup graham crackers, crushed
  7. optional: 1 pastured egg yolk
  8. optional: 1 tsp. lemon juice
Instructions
  1. Blend 1/4 cup blueberries, yogurt, maple syrup, vanilla, salt, egg yolk and lemon juice until pureed.
  2. Layer in the popsicle molds half of the yogurt mixture, fresh blueberries and graham cracker crumbs.
  3. Repeat with a second layer.
  4. Freeze until firm.
Notes
  1. Any graham cracker will work.
  2. You can replace the blueberries with any other fruit.
  3. If you don't want to do layers or your kids don't like chunks you can simply puree all of the ingredients and pour into the molds.
Just Take A Bite https://justtakeabite.com/
This post is linked to Savoring Saturdays.

Gluten-Free Honey Date Muffins {soaked, dairy-free, nut-free, corn-free}

Honey Date Muffins {Soaked Gluten Free Dairy Free Nut Free Corn Free} | Homemade Dutch Apple Pie

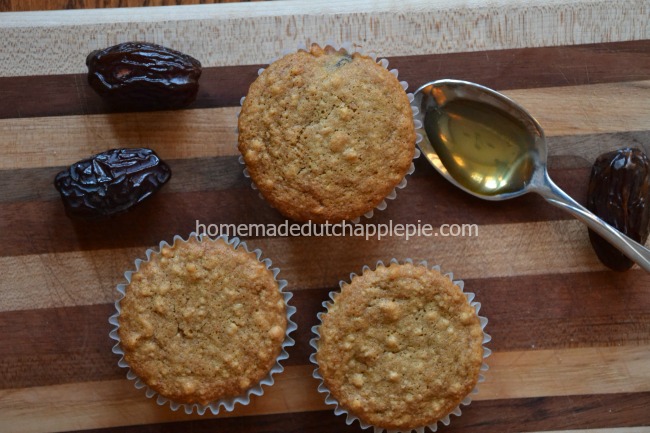
Two of my favorite natural sweeteners are honey and dates. They are such simple foods loaded with flavor.  In fact, they are so good you can eat them plain for an easy treat. My kids love a spoonful of honey or a couple dates as a snack.

I decided to combine them into one delicious muffin that is made with soaked grains. Plus these muffins are gluten and dairy free.

The end product is a mildly sweet muffin the whole family will love. Spread on a healthy dose of butter or coconut oil and you are on your way to great breakfast. Pair the muffins with a protein source like eggs, bacon, nuts or yogurt for a balanced meal. 

Honey Date Muffins {Soaked Gluten Free Dairy Free Nut Free Corn Free} | Homemade Dutch Apple Pie

Naturally Sweetened Gluten-Free Muffins

Honey date muffins are so easy to make. Soak the flour one day. Mix in the remaining ingredients and bake the next. These muffins also freeze well. So you can make a big batch, eat some fresh and freeze some for later.

Do you love salty and sweet combinations as much as I do? You could add cooked, crumbled sausage right into the batter for a complete meal all in one!

Honey Date Muffins

Honey and dates – simple yet full of flavor. They are the perfect combination for a breakfast or snack for the whole family. Get your flour soaking now so you can enjoy this nutritious treat. 

Honey Date Muffins {Soaked Gluten Free Dairy Free Nut Free Corn Free} | Homemade Dutch Apple Pie

Soaked Honey Date Muffins {gluten free, dairy free, nut free, corn free}
Yields 15
A simple soaked muffin with a touch of sweetness from honey and dates.
Write a review
Print
Ingredients
  1. 2 cups any combination gluten free flours
  2. 1/2 cup melted coconut oil or butter
  3. 2 Tbsp. lemon juice.
  4. 2 Tbsp. warm water
  5. 1/4 cup coconut sugar, maple syrup or honey
  6. 1/4 cup honey
  7. 1/2 tsp. baking soda
  8. 1 tsp. cream of tartar
  9. 1 tsp. tapioca flour or arrowroot
  10. 1/2 tsp. unrefined sea salt
  11. 2 eggs
  12. 1/2 cup chopped dates
Instructions
  1. Combine the flour, water, lemon juice and fat.
  2. Cover and let sit 7-24 hours.
  3. Heat the oven to 325*F. Grease a muffin pan or line with muffin cups.
  4. Add the sugar, honey, soda, cream of tartar, tapioca flour, salt and eggs to the soaked flour.
  5. Beat until well combined.
  6. Stir in the dates.
  7. Fill muffin cups 3/4 full with batter.
  8. Bake 25 - 30 minutes.
  9. Store in an airtight container.
Notes
  1. The muffins freeze well.
  2. The muffins can be made with whole wheat, spelt, kamut or einkorn flour if you are not gluten free.
  3. Stir 1/2 cup cooked, crumbled sausage or bacon into the batter with the dates before baking for a complete meal in one.
Just Take A Bite https://justtakeabite.com/

The Best Strategies for Feeding a Child with Oral Sensory Processing Disorder

Are meal times a battle? Is your child’s diet limited due to flavors and textures? Is chewing a chore? Would a delicious treat like leftover muffin bread pudding be out of the question because it’s “too mushy?” Take heart! I’ve got the best strategies for feeding a child with oral sensory issues.child refusing to eat

I have two kids with oral sensory issues. But I didn’t even know it until I wrote this post! To clarify, we’ve been working on my daughter’s sensory issues since she was a baby. But I didn’t realize some of my son’s behavior was related to sensory issues until I did more research.

Why is that? They are at the opposite ends of the spectrum. Some kids with oral sensory issues fear stimulation. It is the most obvious with refusal to chew, eat, etc. That is my oldest. I still remember being so excited to feed her solid food when she was six months old. Such a milestone with your first child! But it did not go as well as I had hoped. Everything came right back out. Little did I know we’d be battling that problem ten years later!

Some kids crave stimulation, like my son. He eats pretty well…but he always stuffs as much food in his mouth as possible and is constantly chewing on things (non-food items like clothes, toys and his hands). He seeks out oral stimulation. Maybe that’s why he loved nursing so much! Though he really had no interest in solid food until about ten months old.Are meal times a battle? Is your child's diet limited due to flavors, textures and trouble chewing? Here are the best strategies for feeding a child with oral sensory issues.

What is Oral Sensory Processing Disorder?

As you can see there is such a difference just between two kids in the same family. So you can imagine that the spectrum of oral sensory issues is quite broad. Here are some of the common symptoms.

The child…

  • won’t use utensils/eats with his hands
  • won’t stay in a chair during a meal
  • puts more food in his mouth than fits
  • chews with her mouth open
  • chews with her front teeth
  • chews on toys and clothes
  • holds food in her mouth for a long period of time
  • will only eat certain textures, sizes, shapes or colors of food
  • gags on food easily
  • refuses to try new foods
  • is afraid of eating
  • pushes food forward with his tongue instead of back

As if getting kids to eat a nourishing diet wasn’t hard enough. When you add Oral Sensory Processing Disorder it just compounds the problem. But take heart. It can be done! It just takes some work figuring out how best to meet your child’s needs.

I have a collection of strategies for feeding kids with all sorts of challenges. Some are simple tricks to try at home. Some require help from therapists and doctors. Start with one and keep working through the list to figure out what works best for you. I’ll share our own successful strategies as well.

Eating Styles Membership

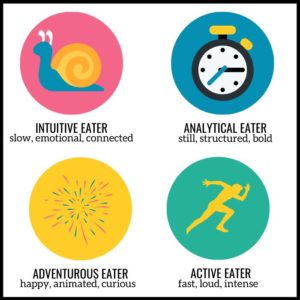
Also keep in mind that every child has a unique Eating Style that dictates how they eat. What seems like a sensory issue could in fact just be how they express themselves through eating. Learn more about your child’s Eating Style HERE!

Are meal times a battle? Is your child's diet limited due to flavors, textures and trouble chewing? Here are the best strategies for feeding a child with oral sensory processing disorder. #oralspd #pickyeaters #feedingkids

At-home Tools for Feeding a Child with Oral Sensory Processing Disorder

  1. Try different textures.
    It goes without saying that food texture is a huge obstacle with sensory issues. Mushy, chewy, crunchy, crispy liquid, solid. I’m sure your child has a multitude of categories. Figure out what textures your child is comfortable with and serve those foods first. Gradually try introducing new textures. Just one bite at a time is sufficient. Go at your child’s pace. You don’t want to make eating stressful or scary. Over time you can try larger quantities. If your child is a fan of smoothies I’ve got tons of healthy ones in my book Easy Nourishment for Picky Eaters.
  2. Let kids play with food.
    One of the best ways to get a child with oral sensory issues comfortable with a particular food is to let them play with it. Create a lunch with various dips, spreads and crackers. Make a snack of fruits and veggies and let them make a picture out of it. Don’t put any pressure on the child to eat it. Just let them have fun creating things.kids cooking
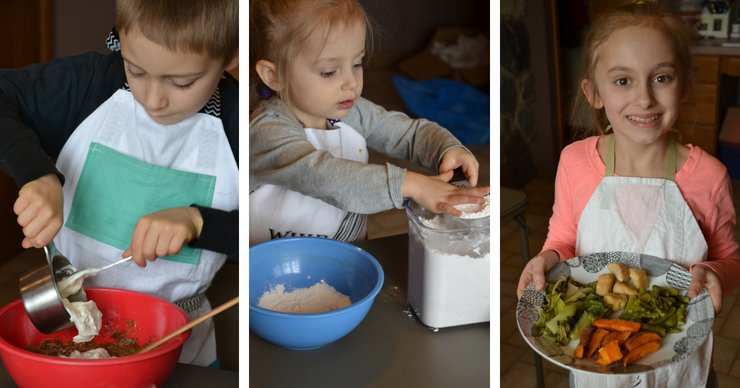
  3. Teach kids to cook.
    This is one of my favorite strategies. Not only does teaching your child to cook often get them to try new foods, it also sets them up for success as an adult. They’ll get feeding therapy and life skills all in one! We’ve been using the Kids Cook Real Food ecourse for over two years now. It has been amazing to watch my kids build confidence with their skills and be willing to try so many foods! It’s a win-win.
  4. Make meals fun.
    It never hurts to cater to a child’s playful nature. Try fun straws for drinking smoothies and pureed soups. Cut sandwiches into shapes. Use an assortment of cups with different shapes and textures. Or maybe get a new cup or straw as a prize for trying something new. Relate a meal to a story you just read (i.e. porridge from Goldilocks). Anything to associate eating with fun.
  5. Exercise the mouth.
    For some kids the physical act of eating is truly hard. Exercises can help train their muscles. Kind of like lifting weights for your mouth. Have them practice sucking from a straw, blowing bubbles, making sounds, chewing chewy and crunchy food. Anything that gets their mouth moving in different ways.
  6. Use different utensils.
    It drives my husband and I crazy that our two oldest rarely use utensils unless we tell them (force them!) to. I never really thought about how the utensils feel to them. Or that they could be challenging to manipulate (especially since our three-year old uses them so well!). If this is the case for your kids experiment with spoons and forks of different materials, sizes and shapes. Find something your child is comfortable putting in his mouth.
  7. Experience food away from meals.
    Kids learn that they are expected to eat at meal times. Which creates pressure and sometimes anxiety. Offer your child exposure to food away from a meal time, without expectations. Give her a plate of fruits and veggies to snack on as she pleases. Let her play with them. Make sure she knows she can eat the food if she wants or leave it all there. It’s up to her. This will help her relax and build confidence.
  8. Use body movement before eating.
    Another struggle for my kids is sitting in a chair to eat. Some kids just need to move to satisfy their need for stimulation. Body movement before a meal can help this. Before coming to the table have them try some jumping, rocking, hanging or climbing. Other forms of touch that might help are hugs and being wrapped in a blanket. Ease their senses first. Then start the meal. Or let them stand or sit on a balance ball to eat.
  9. Use chew toys.
    It may sound strange, but some kids just need to chew! They need constant oral stimulation. They can’t eat non-stop (though sometimes it seems they try to!). Candy and gum are not healthy options. A simple solution is a chew toy. There are special ones designed for older kids/kids with oral sensory issues. I’m tempted to get one for my son so he’ll stop putting his hands and toys in his mouth. For a long time I thought maybe he was cutting molars. But after a few years of the behavior I know he just needs oral stimulation.sweet potato burger
  10. Experiment with flavors.
    Generally kids with oral sensory issues need very bland and mild-flavored food. But that isn’t always the case. Some kids like a lot of spice. Talk to your child and experiment with different flavors. Salty, sweet, spicy, bitter, bold, mild. My oldest can’t handle any spice. But she loves tons of salt. My son, on the other hand, enjoys spicy food. Again, that difference between sensory avoidance and sensory stimulation is obvious.
  11. Improve gut health.
    Oral sensory issues are related to the nervous system, which is controlled by the brain. A nervous system dysfunction often points to leaky gut, where foreign invaders (such as food particles and toxins) leak through the intestines and cause an immune response. They also impact proper function of the brain. The solution is to work on gut health. This can include daily probiotics, digestive support like enzymes and sometimes a specific diet (remove allergens, elimination diet, rotation diet, etc.). 
  12. Stick to a schedule.
    Kids with sensory issues like routine. They want to know what to expect. They fear unknowns. Sticking to a regular eating schedule can be calming. They know when food is coming and when they are expected to eat. It is important to keep up the routine even on weekends, vacations, etc.

Orthodontic workTesting and Therapy for Oral Sensory Processing Disorder

  1. Orthodontic work to correct the palate.
    Oral sensory issues often coincide with structural problems with the mouth. Orthodontic work to expand the palate can help make the physical process of chewing and swallowing easier. It will also help with proper breathing. While traditional orthodontics may help, we found that Orthotropics was much more effective. You can read our story here.
  2. Speech and occupational therapy.
    Sometimes oral sensory issues point to a lack of proper reflex integration. All reflexes of the body should integrate during infancy if the child is developing properly. But it doesn’t always happen. My oldest still has her tongue thrust reflex, meaning she pushes food forward with her tongue instead of back to the throat for swallowing. Both speech and occupational therapy can help get all of the reflexes integrated properly and train the mouth to chew well.
  3. Craniosacral therapy, chiropractic care and functional neurology.
    All of these therapies focus on the whole body structure and how things work together. Tension in the neck and spine can cause the tongue to feel restricted, making chewing difficult. Getting the whole body in alignment and loosened will let your child relax and have an easier time eating. We have used all three of these therapies to help with breastfeeding issues and sensory problems in older kids.child chewing
  4. Vitamin and mineral deficiencies and imbalances.
    Nourishing food is a must when dealing with oral sensory issues. The root problem can be a vitamin and mineral deficiency and/or imbalance. It can also be related to heavy metals. Hair tissue mineral analysis is the best way to find out where your child is lacking and develop a plan for supplementation and dietary changes. Some simple supplements to start with are probiotics and digestive enzymes. These are beneficial to all children.
  5. Tongue and lip ties.
    Revising a tongue and/or lip tie can give a child more ability to chew and swallow properly. It will also improve speech and overall oral structure. Find a preferred provider (that treats with laser) to do the evaluation. A tongue tie may not be obvious to you.

Oral Sensory Feeding Problems

If your child is struggling with eating due to oral sensory issues there is a lot you can do to help! Try a few of the at-home strategies. And don’t be afraid to seek help from professionals. It can be life-changing for both you and your child.

Looking to dig even deeper into your child’s feeding struggles? I’ve got more tips and strategies in my book Why Won’t My Child Eat?!. Grab your copy here!

It’s always helpful to figure out your child’s Eating Style to meet their unique needs.

You can also assess your child’s mouth function with my Mouth Function Assesment Guide HERE.

Would you prefer 1:1 support? See if Nutritional Therapy + HTMA is right for you!

Have you tried any of these strategies for oral sensory feeding issues? Do you use others?

I’d love to hear what works for you!

There are so many diets and theories and opinions when it comes to health. I've experimented with many of them! As I celebrate another year of life I'm so excited to finally be able to find joy in nourishing my body.

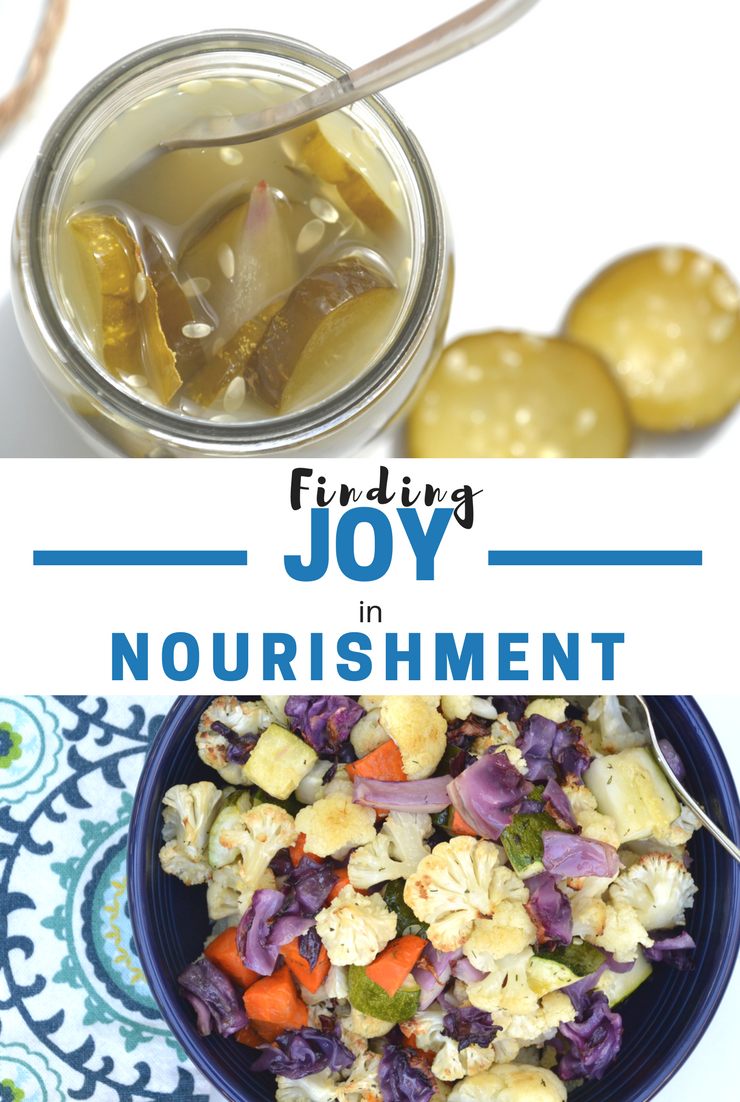
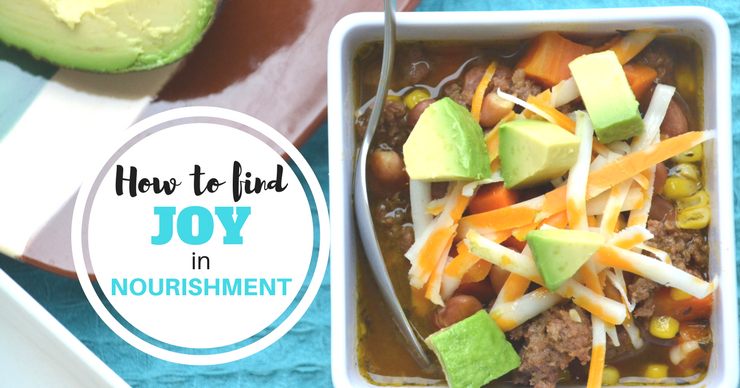
How to Find Joy in Nourishing Your Body

There are so many diets and theories and opinions when it comes to health. I’ve experimented with many of them! As I celebrate another year of life I’m so excited to finally be able to find joy in nourishing my body.There are so many diets and theories and opinions when it comes to health. I've experimented with many of them! As I celebrate another year of life I'm so excited to finally be able to find joy in nourishing my body.
You Have to Be Healthy to Eat Healthy

Itโ€™s something I often say to people frustrated with trying to eat the โ€œright wayโ€ but still not feeling great. There are so many diets that promote real food and healing. They all have merit, but that doesnโ€™t mean they work for everyone.

I know this because Iโ€™ve tried them (read some of my thoughts HERE). And the only thing I got was severe obsessive compulsive disorder, anxiety, more food intolerances and infertility. But no healing.

The real problem is they all include rules. Specific diets place restrictions on what you can eat and categorize food as good or bad. When a food is deemed bad or forbidden guess what happens? You want it! You are left with this constant decision making between doing the right thing or the wrong thing. And feeling guilty if you choose wrong. Or worse food starts to cause anxiety.There are so many diets and theories and opinions when it comes to health. I've experimented with many of them! As I celebrate another year of life I'm so excited to finally be able to find joy in nourishing my body.
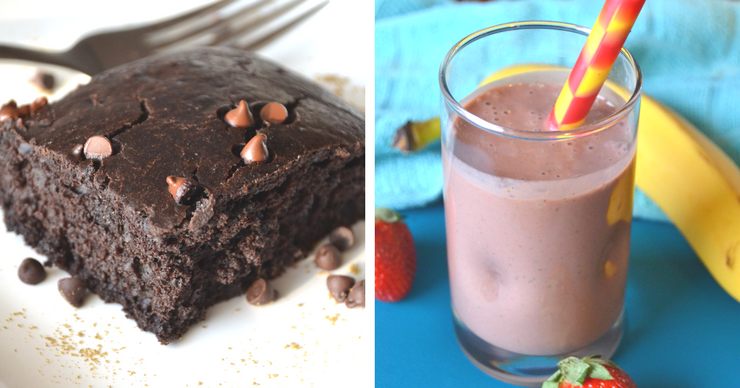
It took me the last twenty years to move past feeling like food is either good or bad. But I did it. And I love it! It is so freeing to finally enjoy food.

Help for Food Freedom

Are you hung up on trying to find the right diet for you? Are you wondering if low carb or grain free or high fat is right for you? Does it make you stressed just thinking about it? Here are some simple tips to get past the fear and back to joy.

  1. Start listening to your body.
    Take note of how you feel when you eat certain foods. Keep a food journal for a week or two if need be. If nuts bother your stomach, take a break from them. If you feel better eating more carbohydrates and less fat then go for it. Eat what makes YOU feel good, not what helps your neighbor or your favorite blogger. If you are dealing with an autoimmune disease or allergies that will impact what foods hurt or help.
  2. Get rid of the rules.
    Stop viewing food as good or bad. As long as itโ€™s real food itโ€™s ok. Enjoy a piece of homemade chocolate cake and ice cream. Make a big stack of pancakes with butter and real maple syrup for breakfast. When you restrict foods because you think you shouldnโ€™t eat them (instead of restricting because they actually make you feel bad) they create more stress. Ditch the diet and rigid rules.
  3. Start focusing on nourishment.
    This is where the fun begins. When you let go of unnecessary rules and youโ€™re not constantly debating between eating a salad and digging into a container of ice cream you can focus on really taking care of your body.

Finding Joy in Nourishment

I spent far too many years trying to eat the perfect diet. Only to feel stressed, anxious and deprived. Then I had to go the other direction of eating anything and everything to try to restore metabolic health (you can read about my journey HERE and HERE). All to find a place of balance. Now I find great joy in nourishing my body. Not because a diet tells me to. Because I want to.

I heard someone recently say that happiness is external and joy is internal. Being happy comes from your circumstances, but joy is a state of being that comes from within. And it’s true. Good food does make me happy. But it’s the joy and peace I have inside that motivates me to make healthy choices every day.There are so many diets and theories and opinions when it comes to health. I've experimented with many of them! As I celebrate another year of life I'm so excited to finally be able to find joy in nourishing my body.
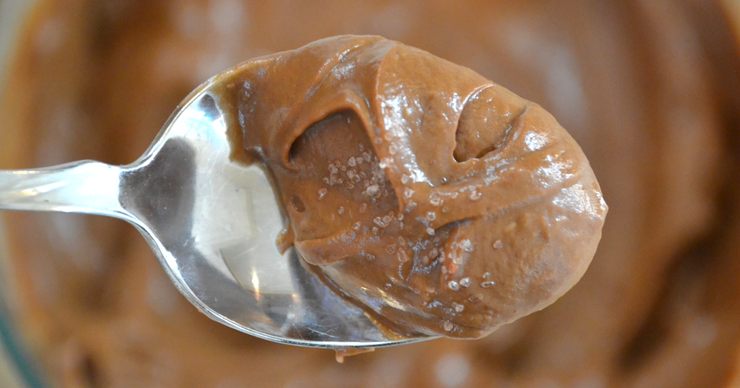
Balanced Nutrition is Key

Today eating is like an exciting adventure for me. I try to pack as many nutrients into my food as possible. I add desiccated liver and fermented kale to smoothies and salads. I eat sardines and anchovies a couple times a week. I eat pastured meats and eggs regularly. I aim for a rainbow of vegetables and plenty of healthy fats daily. I drink herbal teas for added minerals and to support my body and get my hormones back in balance. Itโ€™s almost like a fun game to see how many vitamins and minerals I can get each day. I feel good and the joy comes pouring out.

But I also enjoy a dish of ice cream when I want it. Sometimes I eat a bowl of mashed avocado and tortilla chips for breakfast (quick and delicious…and it’s easy to add liver to avocado!). I like to bake with my kids and make special sweet treats together (like gluten free Oreosยฎ and salted honey chocolates). Itโ€™s even rare that I go a day without at least a little bit of chocolate.There are so many diets and theories and opinions when it comes to health. I've experimented with many of them! As I celebrate another year of life I'm so excited to finally be able to find joy in nourishing my body.
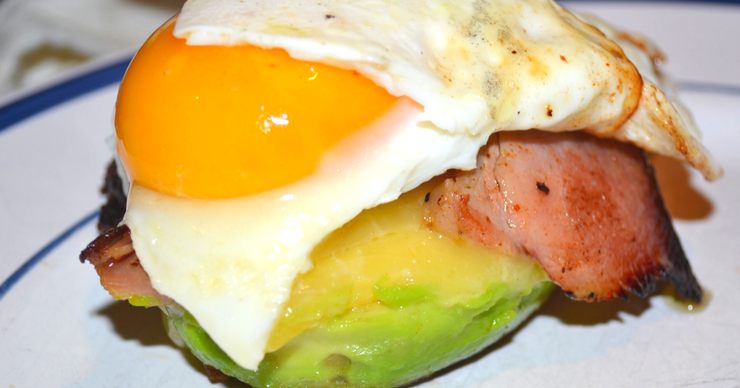
There is no more should or shouldn’t with food. There are no rules. There is no restriction. Which in turn eliminates cravings (imagine that!).

Now I love to fuel my body, and I love how it makes me feel. That does not mean my diet is perfect. Not every single bite of food has to be nutrient packed. And less healthy foods here and there don’t negate all the good stuff I put in my body every day.

Let go of Food Guilt

There is no guilt or feeling of reward for eating a certain way. I just truly love to eat nutrient dense food. No rules or special diets. I don’t eat GAPS or Paleo or AIP or low carb or any other specialized diet. I just eat real food that makes me feel good and that I know is helping me take care of my body. One day I might eat grain free while the next I might need some extra starch. And they are both just fine!

It’s very freeing to let go and find joy in nourishment. And it’s the healthiest I’ve ever been!

I am very blessed that I do not have an autoimmune condition or severe allergies. But I do have some sensitivities and health issues I’m still working through. But I try not to let them get me down. I nourish my body as best I can with my limitations and keep striving for full healing.

Eating real food is easy. There are limitless options. Eating real food that meets your needs can be hard. But once you figure out how to do it youโ€™ll love how you feel.There are so many diets and theories and opinions when it comes to health. I've experimented with many of them! As I celebrate another year of life I'm so excited to finally be able to find joy in nourishing my body.

Foods That Nourish

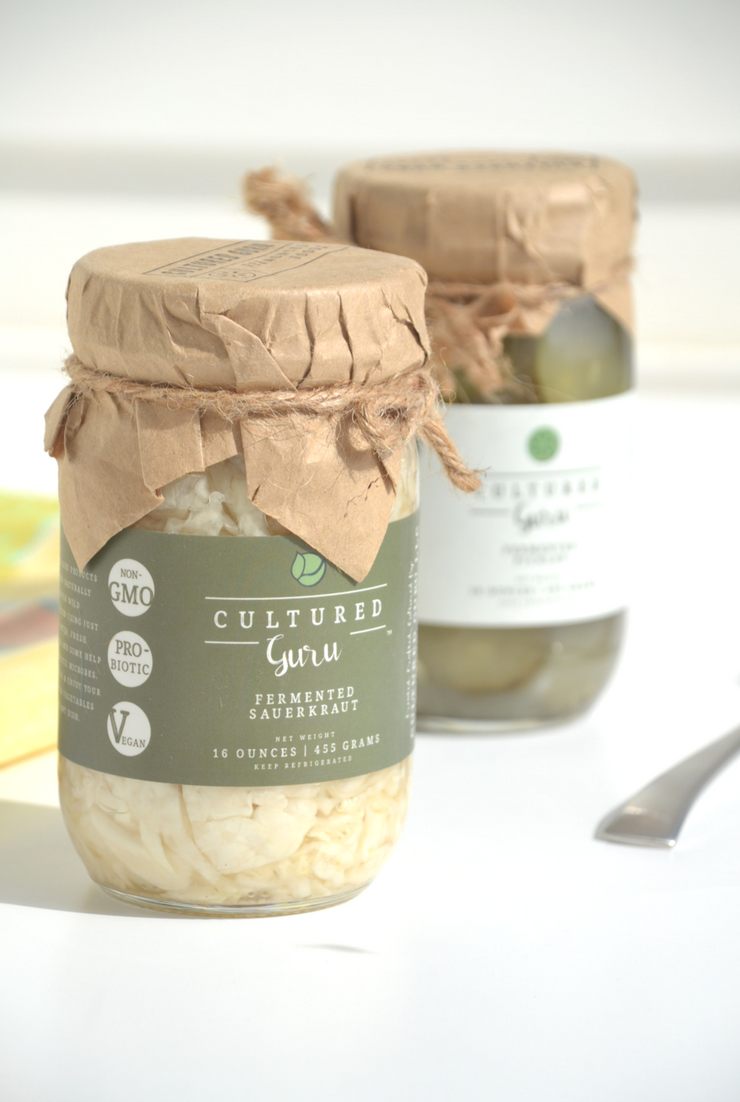
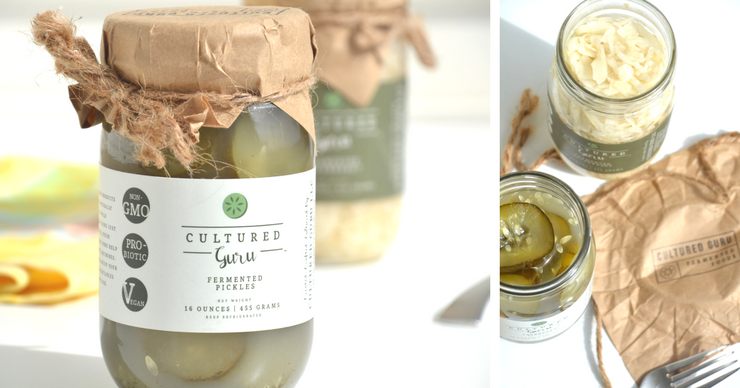
Some of my favorite nutrient dense foods are ferments. They are packed with natural probiotics. What I really love is how easy they are (take a big scoop and enjoy!) and how much my kids like them. My toddler can’t get enough sauerkraut. While we do make our own sometimes, I don’t always have time to pound cabbage.

I recently got the chance to try sauerkraut and fermented pickles from Cultured Guru.There are so many diets and theories and opinions when it comes to health. I've experimented with many of them! As I celebrate another year of life I'm so excited to finally be able to find joy in nourishing my body.
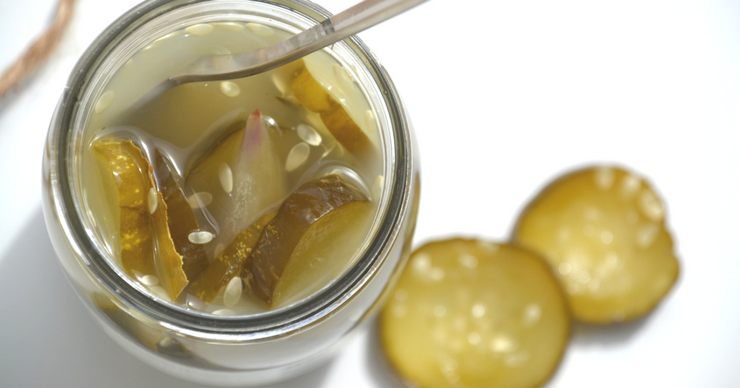
Both the kraut and pickles have just a few simple ingredients and taste amazing! Using traditional fermentation these products are teaming with probiotics. They make great additions to a meal or are the perfect quick snack.

My oldest can’t get enough of the pickles. She has oral SPD and doesn’t tolerate any amount of spice. So even though she likes pickles it’s rare we can find any she’ll eat. But she loves the Cultured Guru pickles! She loves the sauerkraut too. Another rarity for her.

I’ll be stocking up too. My kids and I can’t get enough!! Such a blessing when working on healing allergies!There are so many diets and theories and opinions when it comes to health. I've experimented with many of them! As I celebrate another year of life I'm so excited to finally be able to find joy in nourishing my body.
Super Charged Food for Kids

Another super food that tops my list is a traditional staple – organ meats. I get mine by adding Perfect Supplements desiccated liver to just about everything. I even make caramel with it! I also love the fermented kale, collagen and aquatic greens from Perfect Supplements. I add them to most of our smoothies.

You can get 10% off any of these Perfect Supplements products with the coupon code TAKE10.

Some of my other favorite foods include sardines, salmon, eggs, raw milk, butter, lard, tallow, pastured meats and a rainbow of vegetables. They all make my body smile.

You have to be healthy to eat healthy.

Iโ€™m so excited to finally be healthy so I can enjoy eating well and nourishing my body every day.

Are you ready to let go of rules and enjoy eating again? Ditch the diets and find joy in nourishing your body.

Today is my birthday, and I’m starting it with pure joy. Joy that I’m taking care of myself and this beautiful body God gave me.

Want to see what I eat for my #nourishingbreakfast #nourishinglunch and #nourishingdinner? Follow me on Instagram! It may inspire you…or it might gross you out. In my husband’s words, “You eat that for breakfast?!”There are so many diets and theories and opinions when it comes to health. I've experimented with many of them! As I celebrate another year of life I'm so excited to finally be able to find joy in nourishing my body.
Disclaimer: I am working with Cultured Guru for this post. I have been compensated for my time but all opinions are my own.
This metabolism boosting salted caramel not only tastes great, it is packed with nutrients and a secret ingredient!

Metabolism Boosting Salted Caramel {With A Secret Ingredient!}

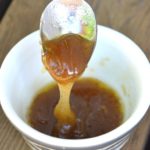
Looking for an easy way to get some liver down the hatch? This metabolism boosting salted caramel is easy to make, tastes great and is loaded with Vitamin A!

This metabolism boosting salted caramel not only tastes great, it is packed with nutrients and a secret ingredient!

This recipe was an accident.

For about a year now I’ve had so many things I can’t eat while breastfeeding that I stopped making salad dressing. I can’t do tomatoes, dairy, nuts, peas, coconut, mustard, garlic, eggs, vinegar. Seriously.

Getting creative.

But I LOVE salad. And I was not about to eat plain lettuce. So I would just put some olive oil, honey and salt on my salad and call it good.

After a while I decided to experiment a bit and added desiccated liver (this is the brand I use). Who knew I’d actually love the taste?! And it’s so healthy for a slow oxidizer like me with high tissue calcium levels. I need all the Vitamin A I can get.

I’m not one to mix up a bottle of dressing. I always just add the ingredients directly to my lettuce and mix it all together. But one day I tried mixing up the dressing first to see if it was easier.This metabolism boosting salted caramel not only tastes great, it is packed with nutrients and a secret ingredient!

Accidental Caramel

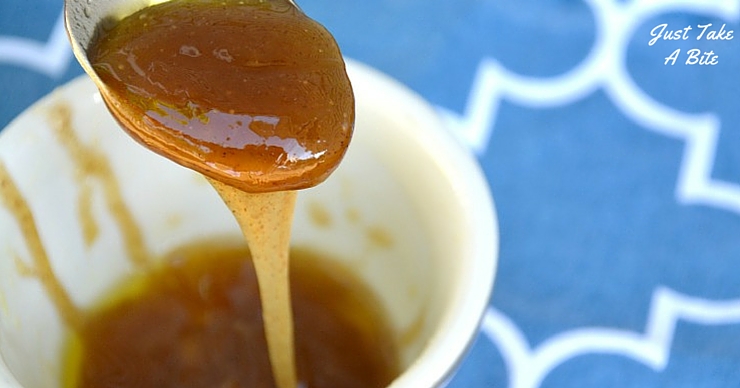
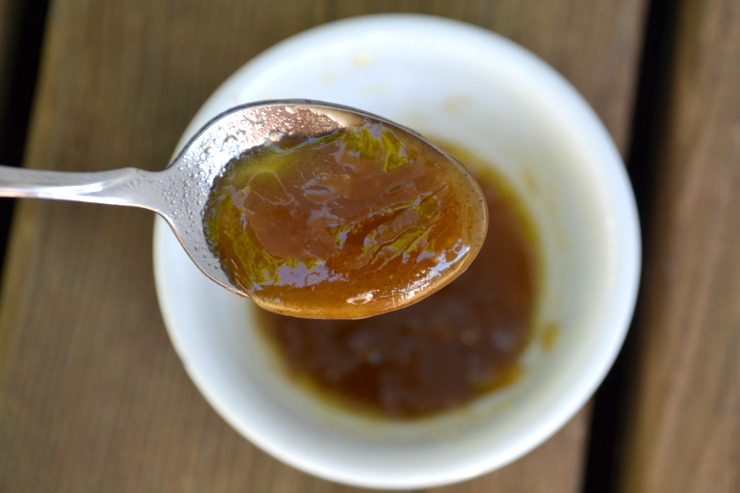
Imagine my surprise when instead of a dressing I ended up with a thick, gooey salted caramel! And my kids gathered around like baby birds begging for bites.

That is how my nutrient dense salted caramel came about.

It tastes great, is easy to make and my kids love it. Want to know something else? It’s great for boosting your metabolism too!

Metabolism Boosting Combination

If I am low on energy or haven’t gotten enough sleep this is the perfect pick-me-up. A little salt, a little sugar, a little fat and some vitamins.

This metabolism boosting salted caramel not only tastes great, it is packed with nutrients and a secret ingredient!

My girls and I all have slow metabolisms and are in need of some serious rest and recovery. So this salted caramel makes a great snack for all of us.

Easy Toddler Treat

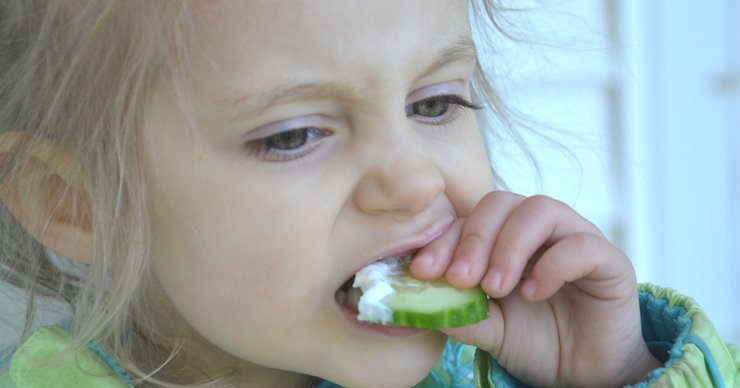
In fact, my toddler eats half of the lettuce and cucumbers out of my salad just because of this dressing. She’ll suck it off and then eat the vegetables. It’s that good!

You can eat the salted caramel with a spoon. I like to dip banana in it. Then you even get some starch with your sugar, salt and fat. It’s the perfect combination for a metabolic boost. Any fruit you like will work.

Metabolic Recovery

My journey with healing my metabolism has been a long one. You can read about what happened to me in 2013 and all of the things I learned in the process.

One thing that was pivotal for healing was The Nourished Metabolism by Elizabeth Walling of The Nourished Life. I have recommended this book to more people than any other book or real food resource.

I’ve probably read it five or six times myself. And I learn something new every time. I’m so glad I have a hard copy now! It’s a great reference.

I think just about everyone could benefit from Elizabeth’s advice. Especially all of my sleep-deprived mama friends. Even children and teens these days that are over scheduled, over stressed and under nourished need some help with their metabolism (have you checked your child’s body temperature lately? You might be surprised how low it is…it’s supposed to be 98.6!).

Whip up a batch of salted caramel (with liver!). Grab a spoon, your favorite fruit or even a homemade graham cracker for dipping. Then dive into The Nourished Metabolism. Trust me, you won’t be able to put it down. I read it almost cover-to-cover the first time through.

Have you assessed your metabolism lately? What are you doing to keep it running at full speed?

Try some salted caramel and all of Elizabeth’s tips in The Nourished Metabolism. You’ll be amazed at how great you feel.

This post is linked to Allergy Free Thursdays.

This metabolism boosting salted caramel not only tastes great, it is packed with nutrients and a secret ingredient!

Metabolism Boosting Salted Caramel (With A Secret Ingredient!)
Serves 1
A simple gooey caramel that will boost your metabolism and your nutrients with liver!
Write a review
Print
Ingredients
  1. 3/4 Tbsp. extra virgin olive oil
  2. 2 Tbsp. honey
  3. 1/8 tsp. unrefined sea salt (adjust to taste)
  4. 1 capsule Perfect Supplements desiccated liver
Instructions
  1. Combine all of the ingredients in a small bowl. Stir until well mixed. The mixture will thicken in about a minute.
  2. Eat with a spoon, with fruit for dipping or with graham crackers.
Notes
  1. This can be used as a salad dressing if you increase the oil to make it thinner.
  2. You can add one capsule of Organic India moringa to the mixture when using it as a salad dressing for extra nutrients.
Just Take A Bite https://justtakeabite.com/
Neapolitan and Spumoni Parfaits | Just Take A Bite

Breakfast Neapolitan and Spumoni Parfaits | Simple, Whole Foods!

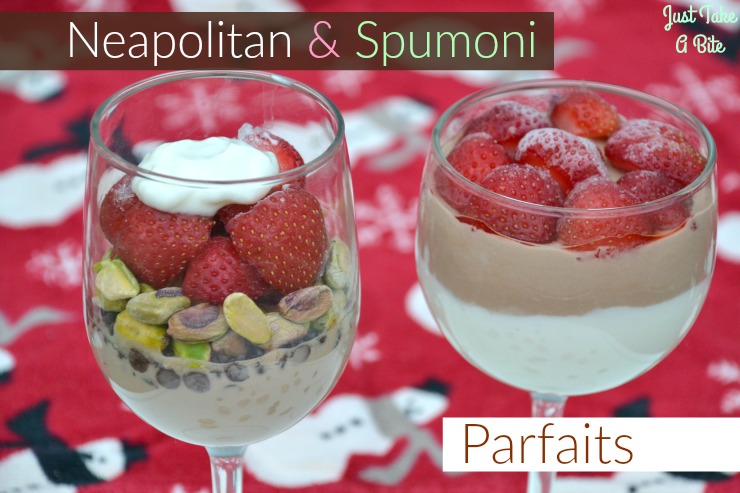
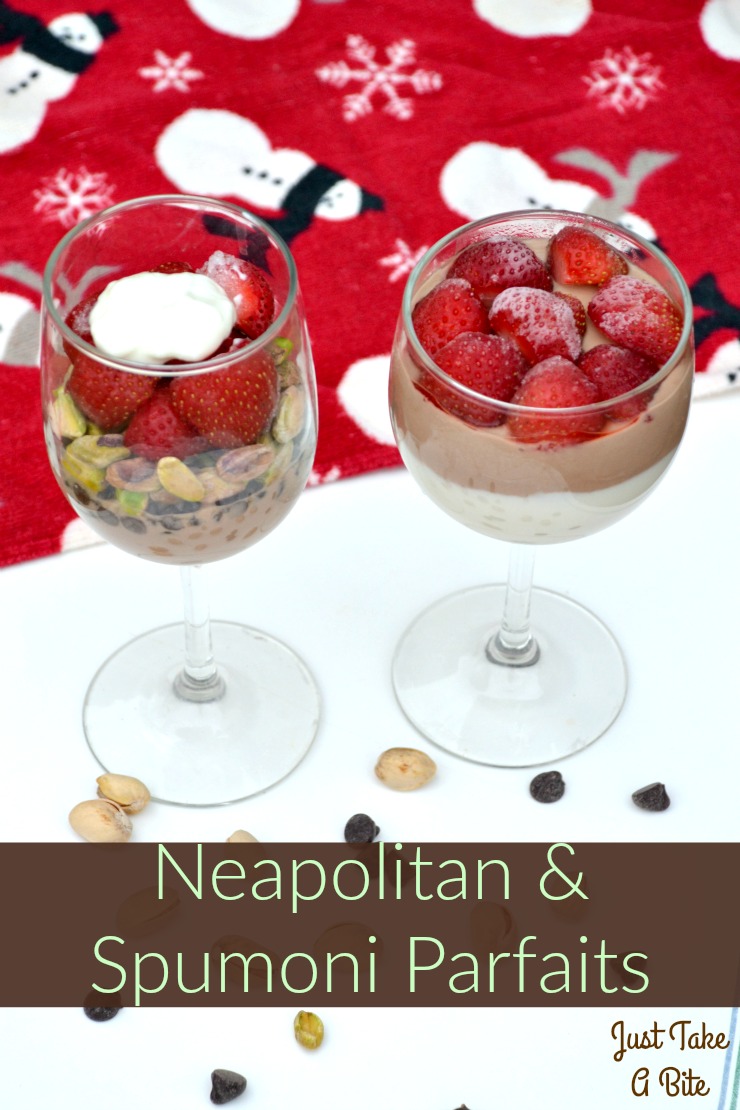
Looking for a way to get your winter dessert fix without reaching for ice cream? Turn breakfast into a special treat with these Neapolitan and spumoni parfaits!

Neapolitan and Spumoni Parfaits | Just Take A Bite

I have fond memories of eating lots of Neapolitan ice cream and spumoni ice cream growing up.

Of course I was like most kids and really just wanted the chocolate! Who doesn’t want chocolate?

Updated Neapolitan and Spumoni

I have recreated these classic flavor combinations in a healthy breakfast treat. Did I mention they are super easy to make too?

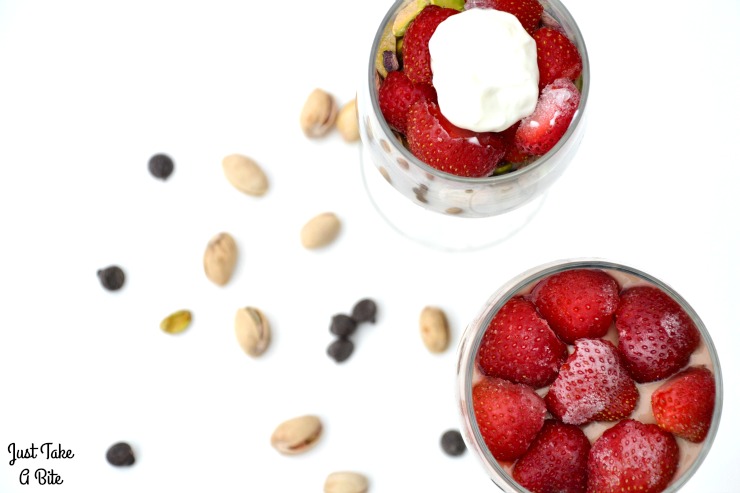
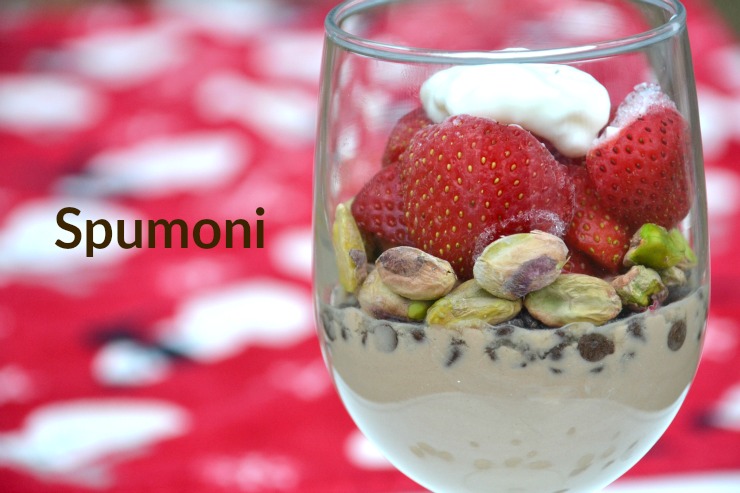
Neapolitan and spumoni parfaits use plain, whole milk yogurt, fresh or frozen fruit, organic cocoa powder and pistachio nuts. You get the flavors you love without any high fructose corn syrup, artificial flavors, or food dyes.

Neapolitan and Spumoni Parfaits | Just Take A Bite

Unique, Kid-Friendly Breakfast

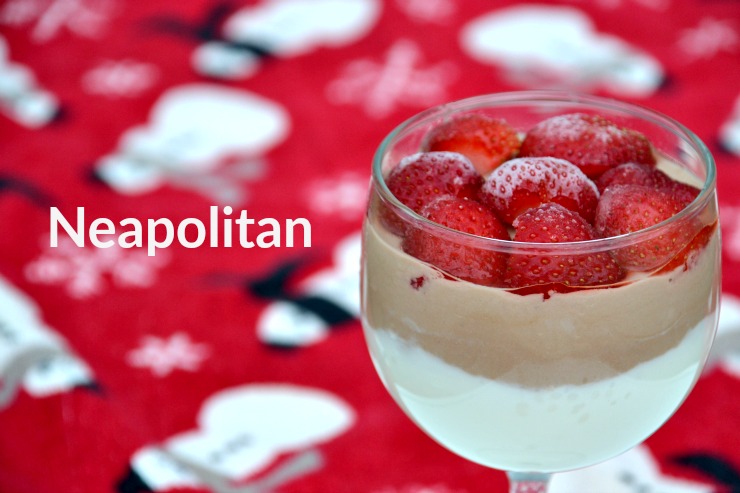
My kids went crazy over these parfaits! I’m not sure I’ve ever seen them eat  yogurt that quickly. I can’t blame them. What’s not to love about vanilla and chocolate yogurt combined with sweet strawberries?

Kids can help prepare Neapolitan and spumoni parfaits. It only requires pouring and mixing. They love the assembly part too.

Neapolitan and Spumoni Parfaits | Just Take A Bite

Holiday Breakfast Parfait

I love how festive these parfaits look. Hosting guests for the holidays? Prepare the parfaits the night before. Then wow your guests with a special treat in the morning. Wine glasses make fancy serving dishes.

You could even use these as a special Valentine’s Day dessert.

Neapolitan and Spumoni Parfaits | Just Take A Bite

This winter spruce up Saturday morning breakfast with a classic dessert flavor. Try both parfaits and see which one you like best. Or combine them to make a four layer parfait that includes chocolate, vanilla, strawberry and pistachio.

Are you ready to try something new for breakfast (or dessert!)?

Neapolitan and spumoni parfaits are simple and nutritious. Plus they are packed with flavor.

Looking for an actual dessert that captures the Neapolitan flavor? Try my grain and dairy free Neapolitan ice cream cake.

Neapolitan and Spumoni Parfaits | Just Take A Bite

Neapolitan Parfait
Serves 1
A yogurt parfait with the classic Neapolitan flavor of vanilla, chocolate and strawberry.
Write a review
Print
Vanilla layer
  1. 1/2 cup plain yogurt
  2. 1 Tbsp. organic cane sugar
  3. optional: 1/2 tsp. organic vanilla extract
Chocolate layer
  1. 1/3 cup plain yogurt
  2. 2 tsp. organic cocoa powder
  3. 1 Tbsp. maple syrup
  4. optional: 2 tsp. mini chocolate chips
Strawberry layer
  1. 1/4 cup fresh or frozen strawberries
Instructions
  1. In a small bowl combine the vanilla layer ingredients. Let sit 1 minute.
  2. In a small bowl combine the chocolate layer ingredients. Let sit 1 minute.
  3. Layer the vanilla yogurt, chocolate yogurt, chocolate chips and strawberries in a serving dish.
  4. Serve immediately or refrigerate.
Notes
  1. The cocoa powder and maple syrup can be replaced with 1 Tbsp. homemade chocolate sauce.
  2. If using frozen strawberries allow them to thaw for a few minutes before serving.
  3. The cocoa powder can be replaced with carob powder.
  4. Coconut yogurt can be used in place of the whole milk yogurt.
Just Take A Bite https://justtakeabite.com/
 Neapolitan and Spumoni Parfaits | Just Take A Bite

Spumoni Parfait
Serves 1
A breakfast parfait with the classic spumoni flavor of chocolate, strawberry and pistachio.
Write a review
Print
Chocolate layer
  1. 2/3 cup plain yogurt
  2. 4 tsp. organic cocoa powder
  3. 2 Tbsp. maple syrup
  4. optional: 3 tsp. mini chocolate chips
Strawberry layer
  1. 1/4 cup fresh or frozen strawberries
Pistachio layer
  1. 1/4 cup shelled pistachios
Instructions
  1. In a small bowl combine the chocolate layer ingredients. Let sit 1 minute.
  2. Layer the chocolate yogurt, chocolate chips, strawberries and pistachios in a serving dish.
  3. Serve immediately or refrigerate.
Notes
  1. The cocoa powder and maple syrup can be replaced with 1 Tbsp. homemade chocolate sauce.
  2. If using frozen strawberries allow them to thaw for a few minutes before serving.
  3. The cocoa powder can be replaced with carob powder.
  4. Coconut yogurt can be used in place of the whole milk yogurt.
Just Take A Bite https://justtakeabite.com/
Candy Corn Potatoes And Carrots | Just Take A Bite

Crockpot Candy Corn Potatoes and Carrots

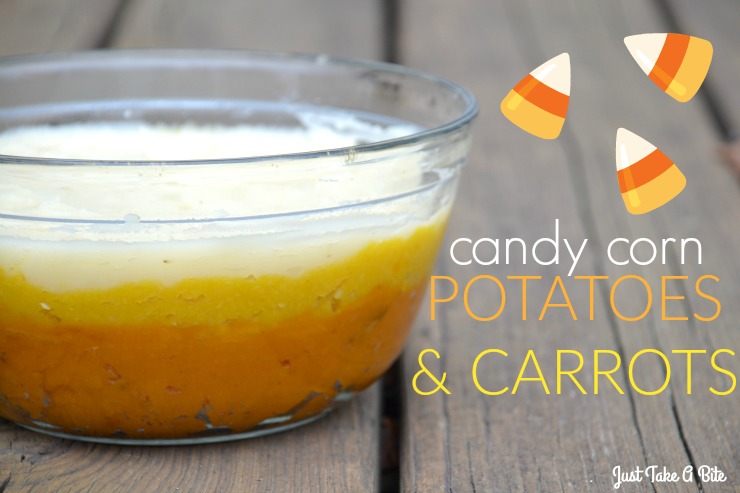
Holidays aren’t just about the sweets. Candy corn potatoes and carrots is festive and healthy! You won’t have any problem getting your kids to eat vegetables when they look like dessert.

Candy Corn Potatoes And Carrots | Just Take A Bite

I love fall.

I wish it could last longer. Mild temperatures. Beautiful colors. All things pumpkin.

Fun, Fall Food

I recently shared my candy corn finger jello recipe as a nod to fall and a tribute to my grandparents. In that same spirit I have another fun play on candy corn today. But this time it is savory!

Candy corn potatoes and carrots is a fun and healthy side dish. You can modify it to meet your dietary needs too.

Fall Vegetables

The base recipe uses white potatoes, sweet potatoes and carrots. But if you don’t want to use roots or don’t like quite that much starch (or have a crazy sensitivity/allergy to them like my daughter) then you can use pumpkin or squash (yellow/orange) and cauliflower (white)!

Candy Corn Potatoes And Carrots | Just Take A Bite

Quick Crockpot Side Dish

The preparation for candy corn potatoes and carrots is so simple because the crockpot does most of the work for you. Toss all of the veggies in the crockpot. Once they are cooked you simply puree and layer them.

The entire dish can be prepared in advance and just warmed before you eat. The warming can even be done in the crockpot!

Naturally Sweetened Sweets - A Community Cookbook

Sweet and Savory Fall Vegetables

I love how versatile candy corn potatoes are. You can add any seasoning, spices or even sweeteners you like.

My kids love a little sweetnes on their carrots and sweet potatoes. So I add just a touch of maple syrup or honey to the bottom layersy . But if you like things really savory adding salt, pepper and herbs would be just as delicious. Or you can find a happy medium by adding a pinch of cinnamon.

Candy Corn Potatoes And Carrots | Just Take A Bite

Go ahead and choose which color to put in which layer. I like the dark to light effect. But you can go with the traditional candy corn yellow, orange, and white scheme too.

Kid-Friendly Holiday Side Dish

Are you wondering what to serve for a holiday dinner that kids will actually eat? How about roast beef paired with candy corn vegetables and candy corn finger jello?! Your kids will love it. Plus they’ll fill up on nourishing foods and won’t crave a bunch of sweets later (can I get an Amen?!).

You could even turn this into a one pot meal by adding seasoned ground beef, lamb, chicken, or turkey between each layer. Candy corn casserole!

Surprise the kids with this delicious treat. Candy corn potatoes and carrots (or squash and cauliflower) is a healthy way to enjoy the holiday.

Do you have any creative holiday traditions or treats?

If not, start one with a festive dinner your kids will request year after year that includes candy corn potatoes and carrots.

Candy Corn Potatoes And Carrots | Just Take A Bite

Crockpot Candy Corn Potatoes and Carrots
Serves 6
A fun, fall side dish filled with vegetables.
Write a review
Print
Ingredients
  1. Orange layer: 3-5 sweet potatoes OR 1 orange flesh squash (pumpkin, butternut, kabocha)
  2. Yellow layer: 6-8 large yellow carrots OR 1 yellow flesh squash (acorn, spaghetti)
  3. White layer: 3-4 white potatoes OR 1 head cauliflower
  4. unrefined sea salt to taste
  5. water, broth or milk (enough to puree)
  6. optional: brown cane sugar, maple syrup, honey, herbs, cinnamon, spices
Instructions
  1. Peel and cut vegetables into large chunks.
  2. Place the vegetables in glass containers with a small amount of water or broth. Place the containers directly into the crockpot.
  3. Add about 1/2 inch of water to the bottom of the crockpot.
  4. Cook on high about 3 hours, until vegetables are tender.
  5. Remove containers from the crockpot.
  6. Add salt and any sweetener, herbs or spices and puree with an immersion blender (or in a blender). Add water, broth or milk if needed.
  7. Layer the vegetables in desired order in a see-through oven safe dish.
  8. Serve immediately or place in the crockpot on warm or cover and store in the refrigerator until ready to heat (in a 350*F oven for about 20 minutes).
Notes
  1. If using squash it can be roasted whole in the crockpot or oven, then cut open and the flesh scooped out. You can keep it as is or puree it at this point.
Just Take A Bite https://justtakeabite.com/
 In order for me to support my blogging activities, I may receive monetary compensation or other types of remuneration for my endorsement, recommendation, testimonial and/or link to any products or services from this blog. It will not change the cost of any products or services for you.

This post is linked to Savoring Saturdays.

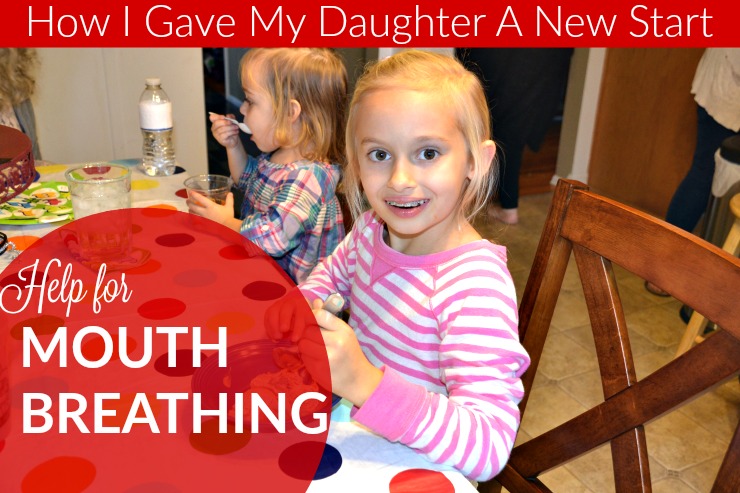
How I Gave My Daughter A New Start: Natural Remedies to Help Mouth Breathing

Does your child seem to sleep poorly or wake up grumpy? There are many causes, one of them being how your child breathes. There is natural help for mouth breathing to get a well-rested child.

How we are putting an end to mouth breathing through natural treatments and palette expansion.

Every parent does it. Every night.

Before you get in bed, you check on your sleeping child.

You stand there for a minute watching them lay there so peacefully.

Unless your child is a mouth breather.

Then you see covers strewn about and a child tossing and turning. You hear snoring and snuffling.

Sleeping While Mouth Breathing Looks Anything but Peaceful

Not only does it look bad, it is bad. Mouth breathing has a big impact on health and behavior. Here are some of the effects of mouth breathing.

  • Restless sleep/change positions constantly.
  • Lack of clean oxygen to the body (that comes through the nose).
  • Bad breath and body odor.
  • Sensitive teeth/chewing problems/dental problems.
  • Adrenal fatigue/lack of sleep.
  • Sleeping problems/hard to settle down/inability to nap.
  • Lack of focus/symptoms of ADD/ADHD.
  • Hyperactivity.
  • Mood swings/tantrums/meltdowns.
  • Oral sensory processing disorder.
  • Narrow mouth/palette.

This list of symptoms should not describe any child. But it does. My daughter included. She had displayed every single symptom on this list at only seven years old.How do I stop mouth breathing in my kids? We are putting an end to mouth breathing through natural treatments and palette expansion. #mouthbreathing #oralspd #kidshealth

Why do Kids Mouth Breathe?

Mouth breathing happens during the day and night and can have a variety of causes. For my daughter the root issue is environmental allergies.

Her first symptoms started at a very young age with chewing problems and sensitive teeth. She needed pureed foods until age two. But things really started to get worse around age three when she stopped napping and could no longer settle down during the day.

We played around with diet and removed gluten and anything artificial. We saw some improvement, but not enough.

How Allergies Impact Mouth Breathing

At five years old we had her tested for allergies and discovered severe dust mite and mold allergies. The allergist put her on a steroid nasal spray. Although hesitant we tried it for a while with no improvement. So we turned to more natural remedies.

How we are putting an end to mouth breathing through natural treatments and palette expansion.

Natural Treatment Options for Mouth Breathing

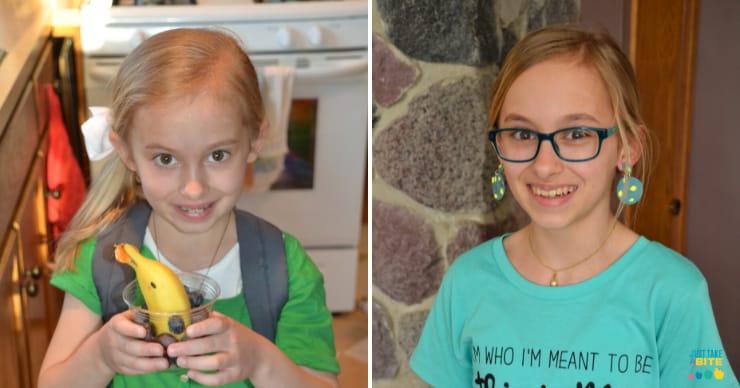
My daughter is now 13 and breathing through her nose most of the time. It is quite amazing to see the difference in her health, mood, and behavior. She has been given a new start after years of mouth breathing.

Every child is different and responds differently to treatments. But if your child is a mouth breather it is important to figure out what works for him or her and find a way for him or her to get quality oxygen and sleep. Here are the treatments we have used.

  1. Speech therapy – We saw a speech therapist for three years. It is great for calming the body, integrating reflexes, and training the mouth. Being able to do exercises at home that open the nasal passage is also wonderful.
  2. Remove food allergies – Allergies to food can cause inflammation anywhere in the body, including the nose/airway. You can figure out allergies through formal testing, an elimination diet, muscle testing, or trial and error. Cut the offending foods out completely while you work on healing.
  3. Craniosacral therapy – Sometimes breathing problems are due to a restriction in the body. CST releases tension and alows the airways to open naturally (learn more about CST here).
  4. Hair Tissue Mineral Analysis – When a child is lacking in minerals, is out of balance, or struggles to detox heavy metals, he or she can have numerous symptoms, including inflammation, allergies, and breathing difficulties. HTMA helps get to the root of the problem and get the body back in balance (learn more about HTMA here).
  5. Clean the whole house and clear out the bedroom – Dust and mold allergies are some of the biggest offenders. Dust mites live in mattresses, pillow cases, couches and stuffed animals. Dust collects quickly on dressers, toy boxes and bookshelves. There are some simple solutions.
  • Use dust mite covers on the mattress and pillow case.
  • Change bedding weekly and wash it in hot water.
  • Remove stuffed animals from the bed.
  • Clean the floor regularly. Wood floors are ideal. If possible remove carpet.
  • Remove as much clutter from the bedroom as possible.
  • Dust regularly in the bedroom and the whole house.
  • Keep windows free of mold.
  • Diffuse essential oils – Essential oils can provide a tremendous improvement in breathing. A blend of lemon, lavender and peppermint diffused through the night is effective for clearing airways. Purification is great too.

  • Palette expansion.

How we are putting an end to mouth breathing through natural treatments and palette expansion.

Palate Expansion for Mouth Breathing

Palate expansion has had the biggest impact on my daughter’s health. Her mouth breathing has caused her palate to gradually become narrower and narrower. We found a naturally-minded dentist that focuses on expansion plus reshaping the jaw. It is not just the typical expander for a few months and then move on to braces.
There are a few different methods of expansion. We are using Biobloc Orthotropics. It is a three-year process with several phases. First the mouth is widened to allow room for all of the teeth and to open the nasal passage. Then the jaw is reshaped.

My daughter is breathing through her nose more in the night and getting better quality sleep. She is using mouth exercises to practice keeping her mouth closed during the day to retrain her jaw. No more sitting with her mouth wide open!

We also use tape over her mouth at night. I know it sounds strange, but our orthodontist suggested it…and it really works! You can buy special tape already cut in strips or use a hypoallergenic medical tape. Just avoid it if your child has a cold or is really stuffy. You can read more about mouth taping here!

No more bad breath! She is also much more efficient at eating. Instead of a meal taking an hour she can finish in about ten minutes.

Mouth breathing is just one challenge that originates in the mouth. There are many conditions that start with the mouth! So how do you know what it is? Use this quick and easy Mouth Assessment Guide!

How do I stop mouth breathing in my kids? We are putting an end to mouth breathing through natural treatments and palette expansion.Can you Eliminate Mouth Breathing?

We have many days now of greatly improved focus and attention and with less hyperactivity. She is able to quickly get herself ready for school in the morning and stay on task at school.

Her adrenal health is gradually improving as she gets more sleep and we continue with a nutrient dense, allergen-free diet. Her hair and nails are stronger. She has not had severe skin problems this winter for the first time in years.

The mouth breathing is not 100% gone, but it is drastically decreased. We are still using tape at night and doing mouth exercises during the day.

Is Your Child a Mouth Breather?

Don’t let it go untreated. It will change the shape of the face and impact overall health. Find the root problem (i.e. allergies). Then seek appropriate treatment to eliminate it.

Finally, consider palate expansion to undo the structural damage, keep the nasal passage open, and create a beautiful smile with enough room for all of your child’s teeth. I’m so thankful we stopped the mouth breathing in its tracks, and my daughter has been given a new start. Her smile says it all.

Help for Mouth Breathing

This post is linked to Savoring Saturdays.

Sometimes it seems like more of a hassle than it's worth to get your kids in the kitchen. But that work will pay off, especially if you start early. That's why I let my toddler use knives!

I Let My Toddler Use Knives

Sometimes it seems like more of a hassle than it’s worth to get your kids in the kitchen. But that work will pay off, especially if you start early. That’s why I let my toddler use knives!

Sometimes it seems like more of a hassle than it's worth to get your kids in the kitchen. But that work will pay off, especially if you start early. That's why I let my toddler use knives!

Getting my kids in the kitchen is nothing new to me.

All three of my kids have been in the kitchen with me since birth…makes sense seeing as I spend half my day there!

I let my kids get involved as soon as they are able. My oldest was baking cookies with me at nine months.

Teaching Kids Life Skills

But I never really taught my kids a set of skills. I never really let them take control.

Until I started doing the Kids Cook Real Food ecourse from Kitchen Stewardship!

I started with my older kids (ages 7 and 4 at the time). They love it! And I love watching them gain confidence and asking to help in the kitchen.

Sometimes it seems like more of a hassle than it's worth to get your kids in the kitchen. But that work will pay off, especially if you start early. That's why I let my toddler use knives!

Toddlers Can Use Knives!

Little sister has been sitting on the sidelines observing until recently. She turned two in August. And she was more than ready to join in the fun!

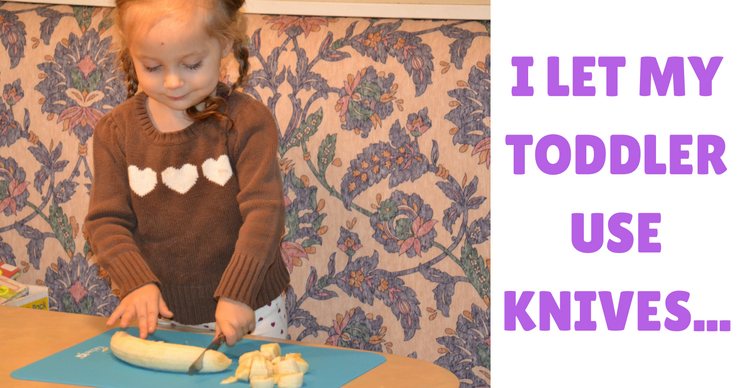
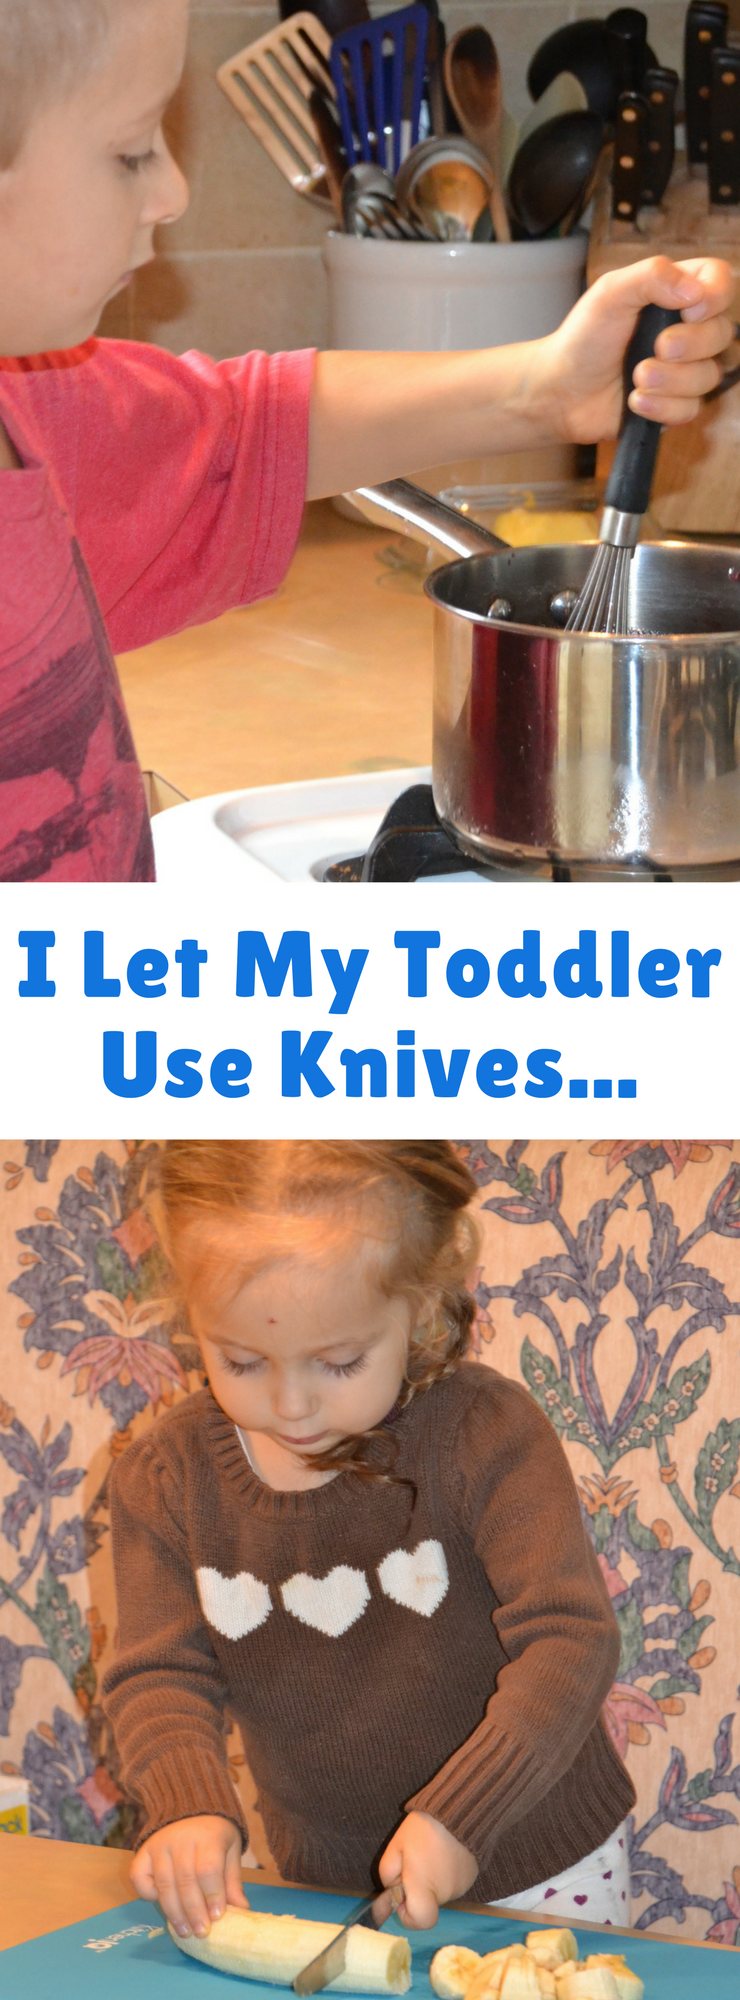
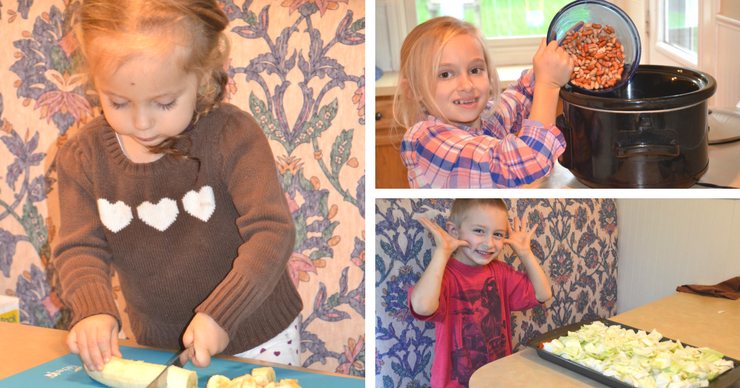
We started with knife skills. That may sound strange, but it really is an important skill and one that even a toddler can do. She loves to slice bananas any chance she gets. Every time we walk by them sitting on the counter she puts in her request.

I can teach her proper techniques while keeping her safe (cutting bananas with a butter knife is fairly harmless). And all of those banana slices she makes either go in her mouth or in the freezer for a delicious dessert or to add to smoothies later.

Sometimes it seems like more of a hassle than it's worth to get your kids in the kitchen. But that work will pay off, especially if you start early. That's why I let my toddler use knives!

Kitchen Skills for Kids

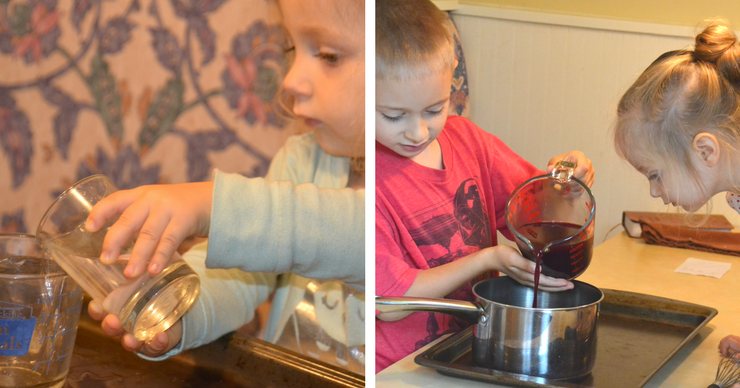
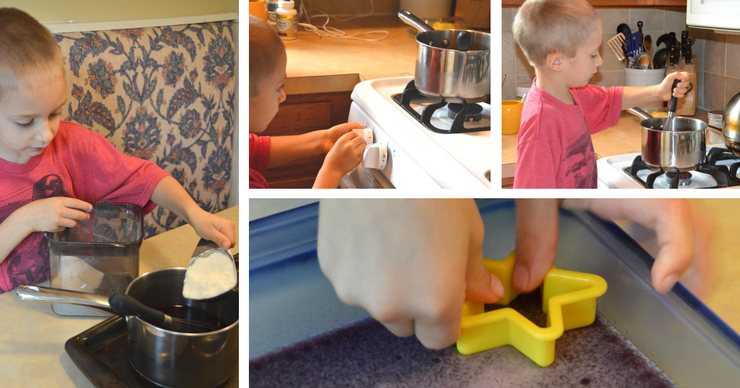
We are now moving on to other skills like measuring and pouring. She LOVES pouring beans or water back and forth in containers. Big brother does it right along with her to sharpen his skills. Then they make homemade fruit snacks on their own! Sometimes we use molds. Sometimes we make them in a pan so they can practice knife skills again by cutting them into cubes.

What five-year old do you know that can make his own healthy fruit snacks instead of eating the artificially colored and flavored waxy things out of a bag?

It really is possible.

Sometimes it seems like more of a hassle than it's worth to get your kids in the kitchen. But that work will pay off, especially if you start early. That's why I let my toddler use knives!

Kids in the Kitchen

My older kids (now 8 and 5) are always willing to lend a helping hand with dinner preparation. Which is such a blessing to me! And I get the pleasure of giving them praise and boosting their confidence.

My eight-year old has a goal this year of being able to make a whole meal on her own. Right now our goal is confidence and safety cooking at the stove. And now that we are homeschooling we are adding it right into our curriculum. It’s so much fun.

She is even starting to create her own recipes and keeps begging to start her own blog. Did I mention she’s only eight?!

You really will be amazed at just how much kids can do in the kitchen when you give them a chance.

Sometimes it seems like more of a hassle than it's worth to get your kids in the kitchen. But that work will pay off, especially if you start early. That's why I let my toddler use knives!

Kids Can Cook

Yes, even a two-year old can be helpful in the kitchen and start learning life skills. By the time my kids are teenagers I’m afraid I may be out of a job!

Are you ready to have some help in the kitchen?Kids Cook Real Food


Try the knife skills lessons for FREE!

Sometimes it seems like more of a hassle than it's worth to get your kids in the kitchen. But that work will pay off, especially if you start early. That's why I let my toddler use knives!

More Cooks in the Kitchen

It’s hard to believe I wrote this post over five years ago! I have now added another budding chef to the mix. My current toddler also loves getting messy in the kitchen with me. He is a big fan of washing dishes. That is another important skill!

My other chefs are 13, 10, and almost 7. They love to help plan meals every week and participate in dinner prep often.

I love that they are empowered to make healthy food choices and gain essential life skills. I have no worries about them taking ownership of their health as they get older.

But even after all these years we still go back to the Kids Cook Real Food ecourse for a refresher periodically. It’s great practice and motivation!

Adventurous Eater

Do you let your kids help (or take over) in the kitchen often? Has your toddler learned to properly use a knife yet?