Home ยป preparing grains

Tag: preparing grains

Soaked Teff Crackers | Just Take A Bite

Soaked Teff Crackers | Healthy Gluten-Free Snacks

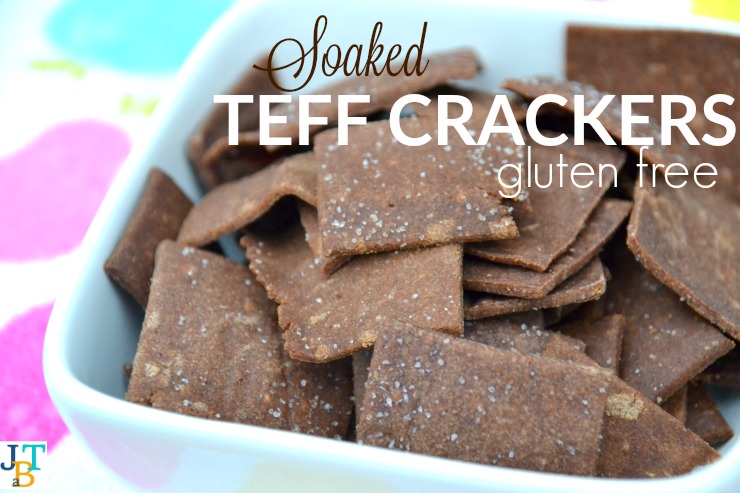
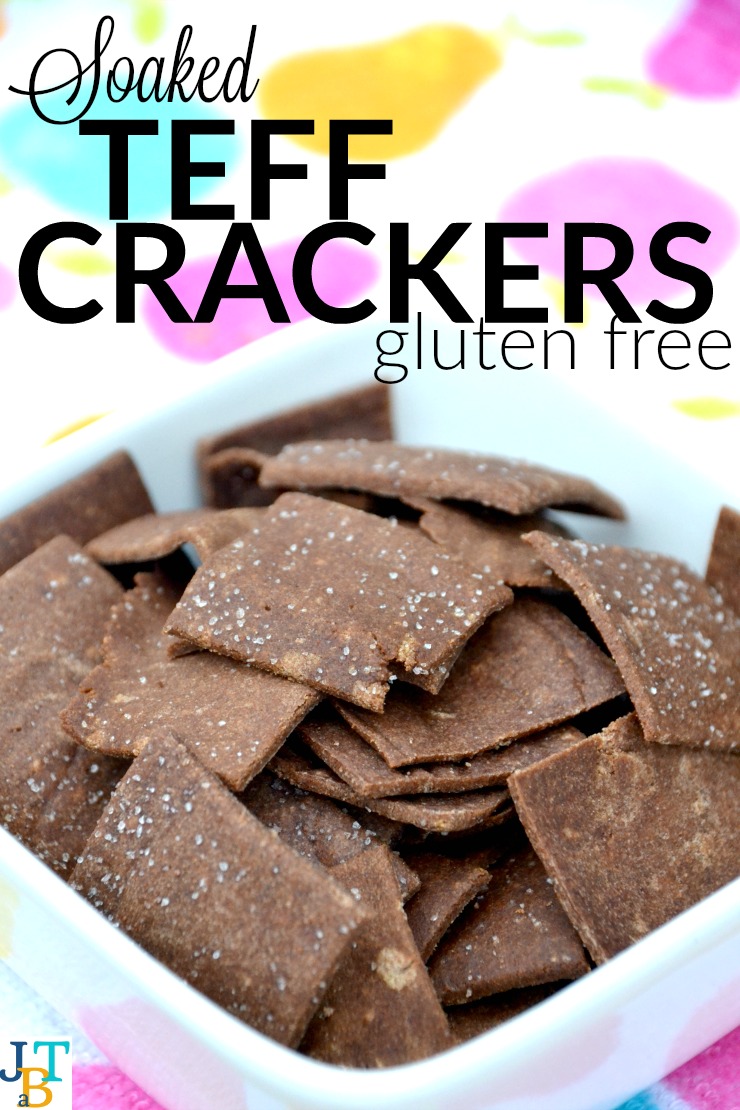
Tired of the same old crackers? Try something new with soaked teff crackers. Allergy-friendly, crunchy and salty these crackers are easy to eat for toddlers or strong enough to use for dipping.
Soaked Teff Crackers | Just Take A Bite

Normally when I do any gluten-free baking I use at least two different flours, usually three. I really like this combination.

Gluten-Free Baking with Teff

But when you are on a very limited diet and are trying to rotate starches, that gets tricky. You sometimes have to limit yourself to one grain/starch a day. Most gluten-free flours don’t work well alone (have you ever tried baking with just tapioca…it doesn’t work so well). But there is one that does.

Teff!
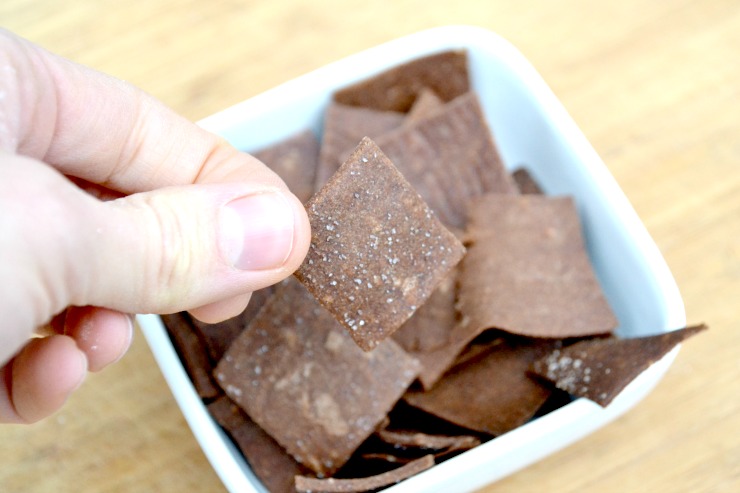
Soaked Teff Crackers | Just Take A Bite

What is Teff?

Teff is a very hearty grain that reminds me of wheat or rye. It gives great depth of flavor to baked goods. Sometimes I use it for about a quarter of the flour in my baking.

But other times I use it alone. Like in these soaked teff crackers.

Kid-Friendly Teff Crackers

I started making these crackers for my little one and I so we had something safe to snack on. But soon the whole family wanted them. My son even requested these in place of the crackers I had already made for him.

I like to keep a batch on hand at all times for dipping (hummus is my favorite), eating with soup or for an easy snack on the go.

These teff crackers have a hint of sweetness, so they are like Wheat Thinsยฎ. But they don’t have any vegetable oils, gums or fillers. Plus the flour is soaked for better digestion. Teff crackers are the perfect solution to delicious gluten-free snacking. I love to add extra salt on top to really satisfy my craving for a crunchy, salty snack.
Soaked Teff Crackers | Just Take A Bite

Easy Gluten-Free Snack for Kids

What’s even better is how easy they are to make! It takes about one minute to get the flour soaking. Then the next day you’ll have crackers in the oven with about ten minutes of hands-on time.

This is a great project for little hands. Invite your kids into the kitchen (check out this course for help!) and show them how fun and easy it is to make food from scratch.

Double the recipe and store half in the freezer. Snack on some and save some for easy lunch packing. Teff crackers, cheese slices and homemade lunch meat make the perfect homemade Lunchableยฎ.

The next time  you are in the mood for something crunchy make a batch of teff crackers. Just be sure to make it a big batch! They’ll go quickly.

Teff Recipes

One of my other favorite ways to use teff is to make teff porridge. It’s a great alternative to oatmeal!

Some great breakfasts or snacks are my teff and sorghum cherry bars or my teff and rice granola bars. They are both loaded with flavor.

Have you ever baked with teff?

Give it a try with these foolproof soaked teff crackers. The whole family will love them.
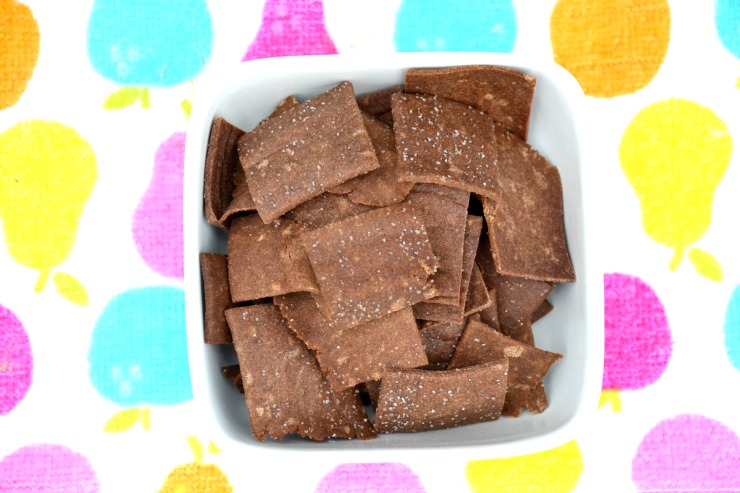
Soaked Teff Crackers | Just Take A Bite

Soaked Teff Crackers
Yields 50
A gluten free Wheat Thin style cracker made with teff flour.
Write a review
Print
Ingredients
  1. 2 cups teff flour
  2. 4 Tbsp. extra virgin olive oil (or melted lard, tallow or butter)
  3. 6 Tbsp. warm water
  4. 1 tsp. lemon juice
  5. 1 1/2 tsp. unrefined sea salt
  6. 6 tsp. organic cane sugar
  7. 1/2 tsp. baking soda
  8. 3-6 Tbsp. water
Instructions
  1. Combine the flour, fat, warm water and lemon juice.
  2. Cover and let sit 7-24 hours.
  3. Heat oven to 350*F.
  4. Add the salt, sugar, baking soda and 3 Tbsp. water to the soaked mixture.
  5. Mix and knead dough by hand until a ball forms. Add more water if needed.
  6. Split the dough into three equal parts.
  7. Cut four pieces of parchment paper (the size of a baking sheet).
  8. Place one piece of dough on one piece of parchment paper. Top with another sheet of parchment paper.
  9. Roll the dough between the paper until it is about 1/8" thick.
  10. Remove the top layer of paper.
  11. Cut into desired shapes with a pizza cutter or cookie cutters.
  12. Sprinkle extra salt on top of the dough.
  13. Transfer the parchment paper to a baking sheet.
  14. Repeat with the remaining portions of dough.
  15. Bake the crackers for about 20 minutes, until golden.
  16. Turn off oven. Leave the crackers in the oven for 7-10 minutes, until crisp.
  17. Remove from oven and let cool completely.
  18. Store crackers in an airtight container at room temperature for up to a month or in the freezer for up to a year.
Just Take A Bite https://justtakeabite.com/
 This post is linked to Savoring Saturdays.

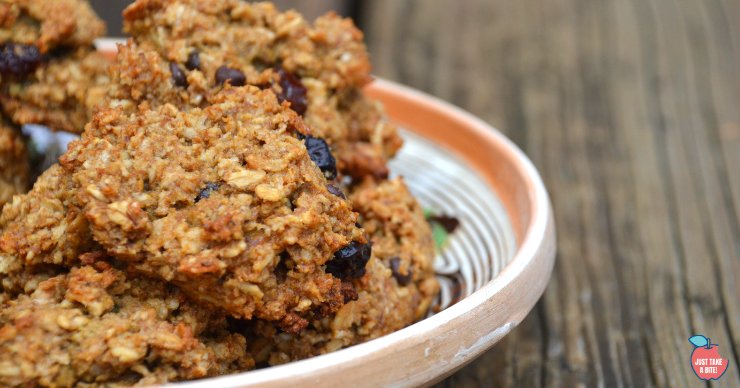
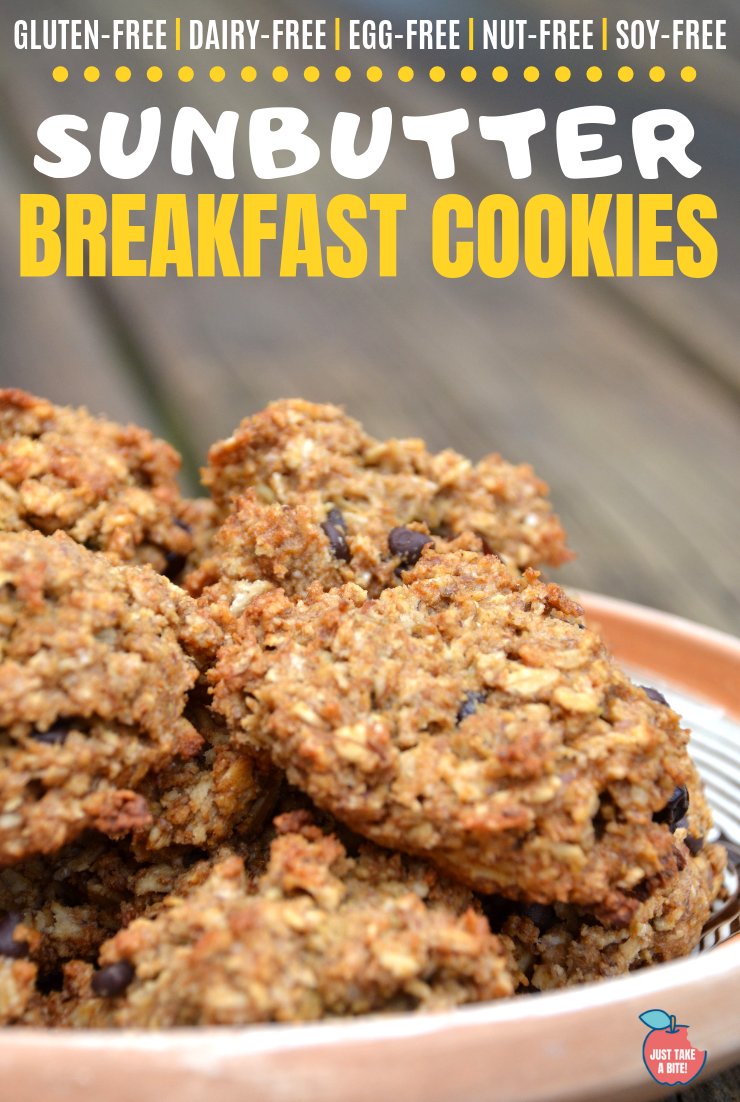
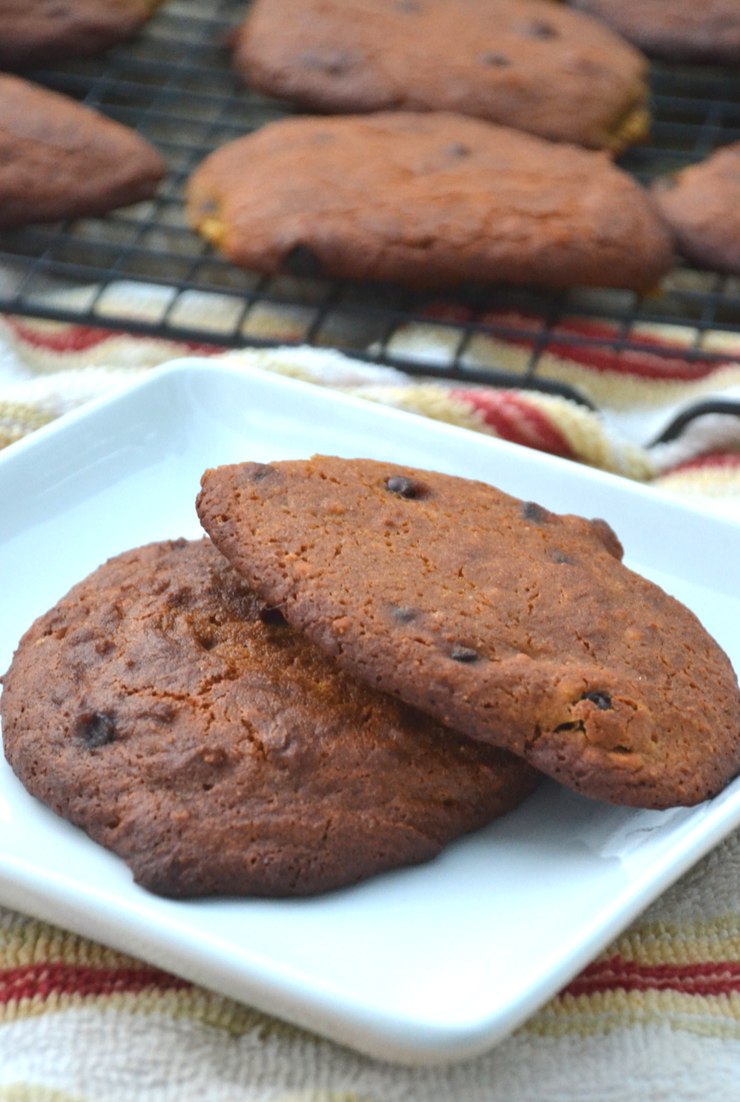
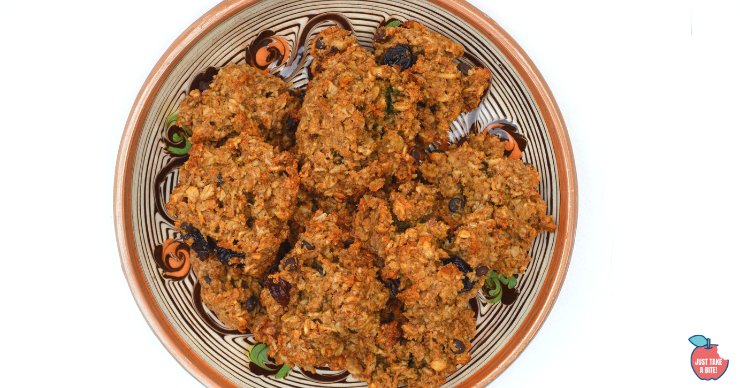
In need of an easy, allergen-free breakfast? These sunbutter breakfast cookies only take a few minutes of prep time and are free of gluten, dairy, eggs, nuts, rice, corn, soy and coconut.

Gluten-Free Sunbutter Breakfast Cookies

In need of an easy, allergen-free breakfast? These sunbutter breakfast cookies only take a few minutes of prep time and are free of gluten, dairy, eggs, nuts, rice, corn, soy and coconut.In need of an easy, allergen-free breakfast? These sunbutter breakfast cookies only take a few minutes of prep time and are free of gluten, dairy, eggs, nuts, rice, corn, soy and coconut.

When I ask my kids what they want for breakfast nine times out of ten they say breakfast cookies.

I don’t blame them. Who doesn’t want a cookie for breakfast?!

Easy Gluten-Free Breakfast Cookies

I’ve been making a variety of breakfast cookies for years. But recently we experimented with an egg free diet for my oldest. So I had to come up with yet another version.

Sunbutter makes a great allergy-friendly substitute for eggs. Not to mention it is delicious! It also replaces the fat. So there is no need to use dairy or coconut.

I also add some ground flax seeds to make sure the cookies hold together.In need of an easy, allergen-free breakfast? These sunbutter breakfast cookies only take a few minutes of prep time and are free of gluten, dairy, eggs, nuts, rice, corn, soy and coconut.

Soak Grains for Better Digestion

Sunbutter breakfast cookies start with a long soak to reduce the phytic acid content. This is especially important when using oats as they are very high in phytic acid.

If you’ve never soaked your grains before, rest assured it’s a very simple thing to do. Mix the grains with water and lemon juice. Done.

When you are ready to bake all you have to do is add the remaining ingredients, mix, scoop and bake.In need of an easy, allergen-free breakfast? These sunbutter breakfast cookies only take a few minutes of prep time and are free of gluten, dairy, eggs, nuts, rice, corn, soy and coconut.

Kids in the Kitchen

This is a great recipe to let little ones help with. No chopping. No egg cracking. No butter melting. Just measure, pour and mix.


You can teach even your youngest children all the necessary skills for making these delicious breakfast cookies with the Kids Cook Real Food eCourse! Check it out HERE.


Kids can even sample the ingredients as you go. Somebody has to make sure the honey tastes good, right?!

You can add whatever extras you like to sunbutter breakfast cookies. My kids always ask for mini chocolate chips. Dried fruit, nuts, seeds and coconut all work, depending on your dietary needs.In need of an easy, allergen-free breakfast? These sunbutter breakfast cookies only take a few minutes of prep time and are free of gluten, dairy, eggs, nuts, rice, corn, soy and coconut.

Seasonally-Inspired Breakfast Cookies

Change up the flavor of your sunbutter breakfast cookies by adding seasonal ingredients.

In the summer add diced strawberries, blueberries, or peaches.

For fall you could add some diced apples and cinnamon. Be sure to chop the apples finely enough to make them bite sized for kids.

Dried cranberries make a very festive cookie during the holidays.

Are you looking for an allergen friendly breakfast treat for your family? Sunbutter breakfast cookies will be a family favorite.

Easy Prep-Ahead Breakfast Cookies

Be sure to make a big batch so you can stock the freezer for effortless breakfasts on busy school mornings. Paired with a big glass of homemade rice milk you’ll have breakfast on the table in under a minute!

You can also add them to lunch boxes for a delicious and healthy treat.

I have to share a fun fact that I learned while making these.

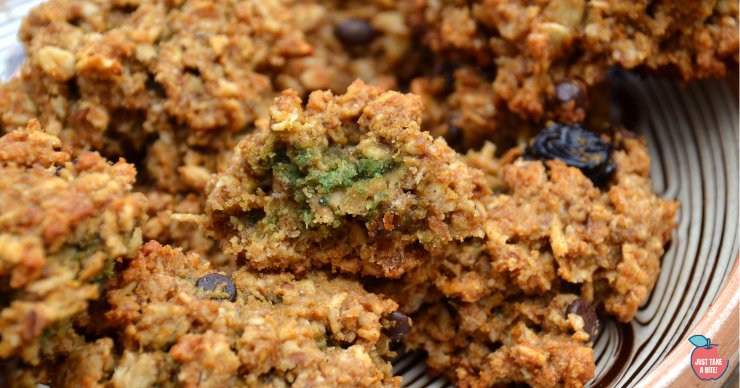
When you mix a lot of baking soda with sunbutter it turns green!

Don’t worry. I adjusted the recipe so you won’t have green cookies like we did. But it is perfectly safe to eat them even if they are green.

In need of an easy, allergen-free breakfast? These sunbutter breakfast cookies only take a few minutes of prep time and are free of gluten, dairy, eggs, nuts, rice, corn, soy and coconut.

In need of an easy, allergen-free breakfast? These sunbutter breakfast cookies only take a few minutes of prep time and are free of gluten, dairy, eggs, nuts, rice, corn, soy and coconut.
5 from 1 vote
Print

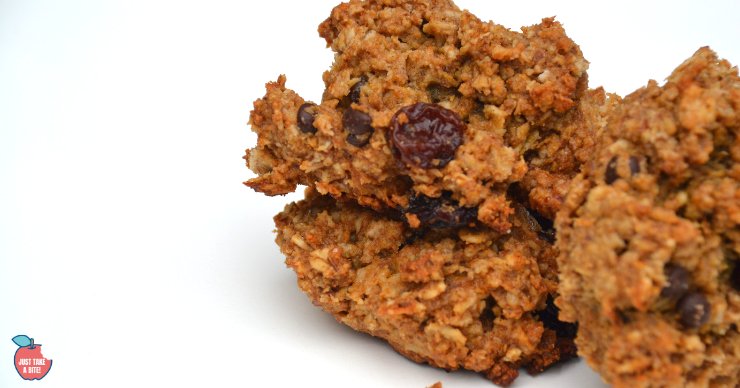
Allergen Free Sunbutter Breakfast Cookies

A simple breakfast cookies that is free of gluten, eggs, dairy, nuts, rice, corn and coconut.

Prep Time 10 minutes
Cook Time 20 minutes
Servings 20

Ingredients

  • 2 1/2 cups gluten-free oats
  • 1/2 cup sorghum flour or brown rice or amaranth
  • 3/4 cups warm water
  • 2 Tbsp. lemon juice
  • 1/2 cup sunbutter unsweetened
  • 2/3 cup honey
  • 1/2 tsp. salt
  • 1/2 tsp. baking soda
  • 1/4 cup ground flax seeds
  • 1/2 cup add-ins: chocolate chips dried fruit, coconut, seeds, nuts

Instructions

  1. Combine the oats, sorghum, water and lemon juice in a bowl. Cover and let sit 24 hours.

  2. Heat the oven to 350 degrees F. Line two baking sheets with parchment paper.

  3. Add the sunbutter, honey, salt, soda, and flax seeds to the oat mixture. Mix well.

  4. Stir in the add-ins.
  5. Scoop mounds of dough onto the prepared baking sheet (as large or as small as you like).

  6. Bake for 15 - 20 minutes (less time for smaller cookies, more time for larger cookies).
  7. Let cool.
  8. Store in sealed container in the refrigerator for up to a week or in the freezer for up to a year.
This post is linked to Savoring Saturdays.

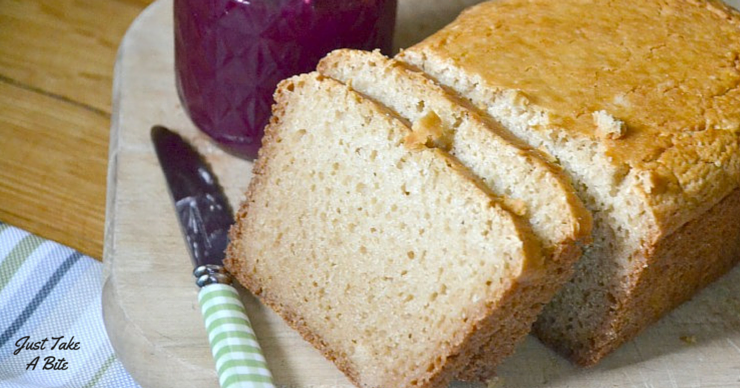
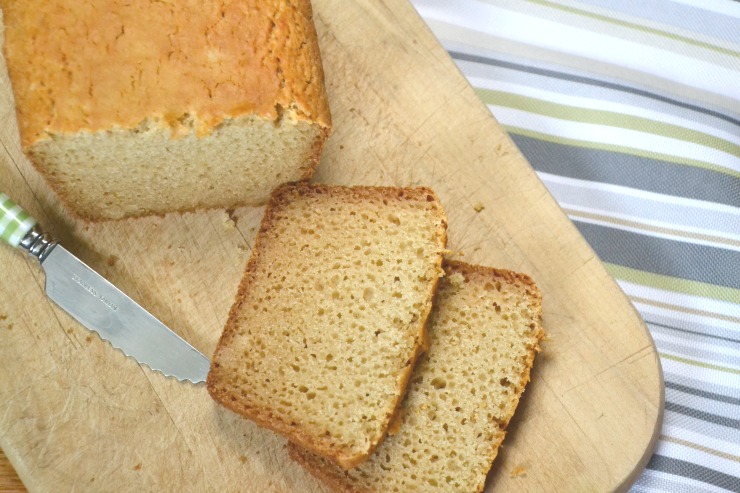
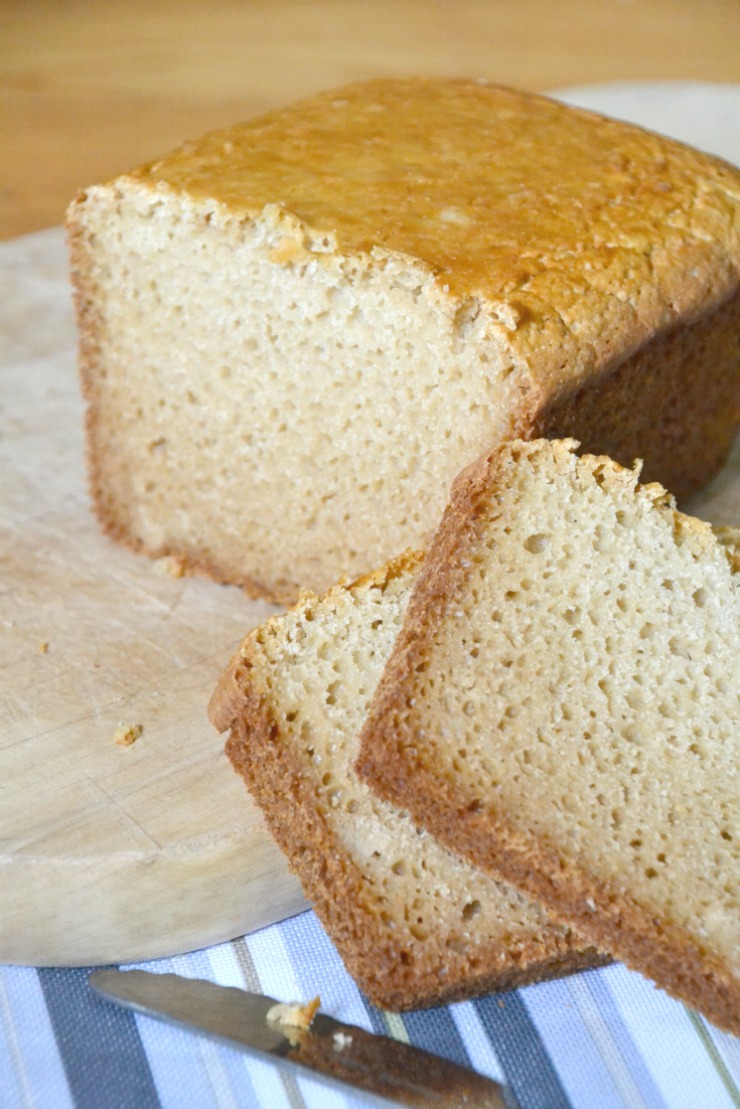
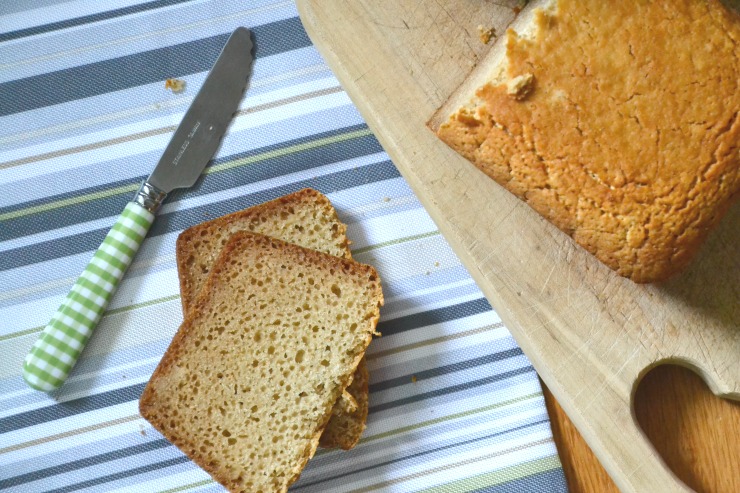
This easy allergen free bread is great for sandwiches or toast. Let the kids help make it!

Easy Allergen-Free Bread

Looking for a great gluten-free bread that holds together without allergens or gums? This allergen-free bread is easy to make and tastes great!This easy allergen free bread is great for sandwiches or toast. Let the kids help make it!

A couple years ago I spent at least six months trying to come up with a decent gluten free bread. I probably made at least fifty experimental loaves.

What did I come up with?

My “not-quite-perfect” gluten free bread. It tastes good. But it’s not quite as sturdy as I’d like. And it seems to turn out differently every time I make it!

Easy Allergen-Free Bread

Then when two of my kids added a bunch of new allergies I just stopped making bread. I really didn’t know how to bake anything safe for them. Back to experimenting.

This easy allergen free bread is great for sandwiches or toast. Let the kids help make it!

Eventually I got the hang of making decent muffins (my poor husband with texture issues had to suffer through some over-moist and dry, crumbly experiments).

Can You Bake Gluten-Free Bread Without Xanthan Gum?

One day I decided to try making a loaf of bread. Just to see what would happen.

Imagine my surprise when it turned out great! Actually way better than the gluten-free bread I had tried to create for so long.

Who knew you could cut out the eggs, dairy and binders and get something better?!

My allergen-free bread has no gluten, eggs, dairy, nuts, coconut, rice, corn, seeds or soy. And as with all of my baking it has no gums. As an added bonus, it is soaked so it’s gentler on the tummy.This easy allergen free bread is great for sandwiches or toast. Let the kids help make it!

Kid-approved Gluten-Free Bread

Want to know what my kids think about this allergen-free bread?

First kid: “This is AWESOME!”

Second kid: “This is only for me! Nobody else can have it.”

What Can You Make with Allergen-Free Bread?

Life sure is easier when you have bread. My son can enjoy sloppy joes, sandwiches with homemade lunch meat or toast with sunbutter (we love this brand because it is made in a peanut and tree nut facility). We even use it to make mini pizzas with our nutrient dense pizza sauce (no cheese necessary)!

Sometimes we use leftover pancakes or tortillas as “bread.” But this allergen free bread is definitely our first choice. I try to keep some in the freezer at all times for quick snacks, breakfasts and lunches. I even pre-slice it so I can just grab one slice at a time.

This easy allergen free bread is great for sandwiches or toast. Let the kids help make it!

Just a few simple ingredients, mixed by hand gives you a delicious and versatile bread. Soak the flour the day before (or skip that step if you didn’t plan ahead). Then it takes about five minutes to get the bread into the oven.

Just because you have allergies doesn’t mean you have to miss out on freshly baked bread. It also doesn’t mean  you have to resort to strange ingredients and binders (that actually often contain allergens!), like most store-bought versions have.

Looking for Homemade Allergen-Free Bread?

Give this allergen free bread a try. Your kids will be begging for more.

Better yet, get your kids in the kitchen to help make it! They can practice, measuring, pouring and mixing. This will definitely be on our list of things to bake as we go through the Kids Cook Real Food eCourse. Click here to learn more about it!

This easy allergen free bread is great for sandwiches or toast. Let the kids help make it!

5 from 1 vote
Print

Easy Allergen Free Bread

Prep Time 10 minutes
Cook Time 55 minutes
Total Time 1 hour 5 minutes
Author Mary | Just Take A Bite

Ingredients

  • 1 1/2 cups organic sorghum flour
  • 1/2 cup organic tapioca or white rice flour
  • 1/4 cup psyllium husk
  • 2/3 cup warm water
  • 1 Tbsp. lemon juice
  • 1 tsp. baking soda
  • 1 tsp. cream of tartar
  • 1/2 tsp. salt
  • 3 Tbsp. honey
  • 5 Tbsp. olive oil or avocado oil
  • 3 tsp. grassfed gelatin
  • 1/4 cup cold water
  • 3/4 cup hot water

Instructions

  1. Combine the flour, psyllium husk, warm water and lemon juice. Mix to remove any lumps. Cover and let sit 7 - 24 hours.

  2. Heat the oven to 350*F. Grease or line with parchment paper one medium bread pan.

  3. Combine the gelatin and cold water. Set aside.

  4. Add the baking soda, cream of tartar, salt, honey and oil to the flour mixture. Stir well.

  5. Add the hot water to the gelatin water and mix until dissolved.

  6. Add the gelatin water to the flour mixture. Blend well with a hand mixer to remove any lumps.

  7. Pour the dough in the prepared pans.

  8. Bake for 55 - 60 minutes, until golden.

  9. Allow to cool for 30 minutes before removing from the pan.

  10. Allow to cool for at least an additional 60 minutes before slicing.

  11. Store in a sealed container at room temperature for up to 5 days, in the fridge for up to a week or in the freezer for up to a year.
Recipe Notes

You can slice the bread before freezing.
You can replace any of the water with yogurt, whole milk, coconut yogurt, coconut milk, almond milk or rice milk for a moister bread.

I've got a solution for your busy weekday mornings. These grain free pumpkin spice breakfast cookies are so easy to make and loaded with good stuff. Plus kids love them!

Grain Free Pumpkin Spice Breakfast Cookies

I’ve got a solution for your busy weekday mornings. These grain free pumpkin spice breakfast cookies are so easy to make and loaded with good stuff. Plus kids love them!

*I am working with Perfect Supplements for this post. I have been compensated for my time commitment, but all opinions are my own. Some links are affiliate links. Using the links will not change the cost of anything for you.*

I've got a solution for your busy weekday mornings. These grain free pumpkin spice breakfast cookies are so easy to make and loaded with good stuff. Plus kids love them!

Life is BUSY. And just when you think your current busy situation is coming to an end…something else comes up. Last year we had so many activities. I was driving the kids here, there and everywhere. I hated it.

Fast forward a year. Now we are home a lot more. But we have a baby that requires a lot of my time and attention. It feels just as busy. Just in a different way.

Busy life = less time for making good food.

But I’m not giving up! No way. I came up with the perfect fall breakfast that you can prepare in advance. You can even make a double or triple batch to stock your freezer for weeks. And if you are teaching your kids to cook they can actually make them for you. How’s that for freeing up some time?!

Allergy Friendly Pumpkin Spice Breakfast Cookies

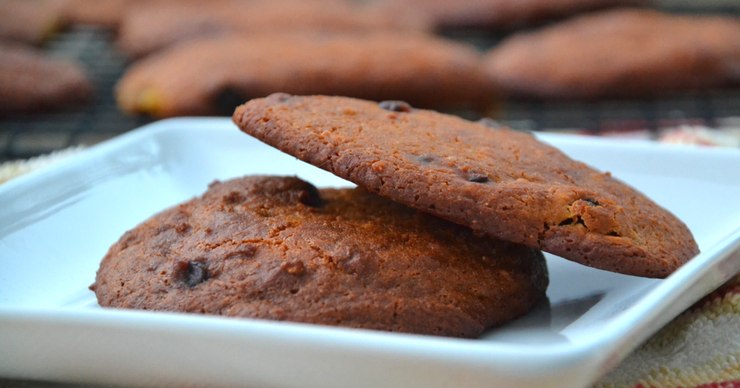
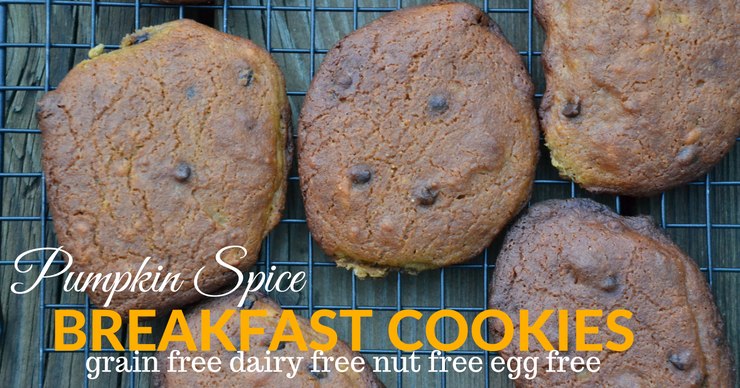
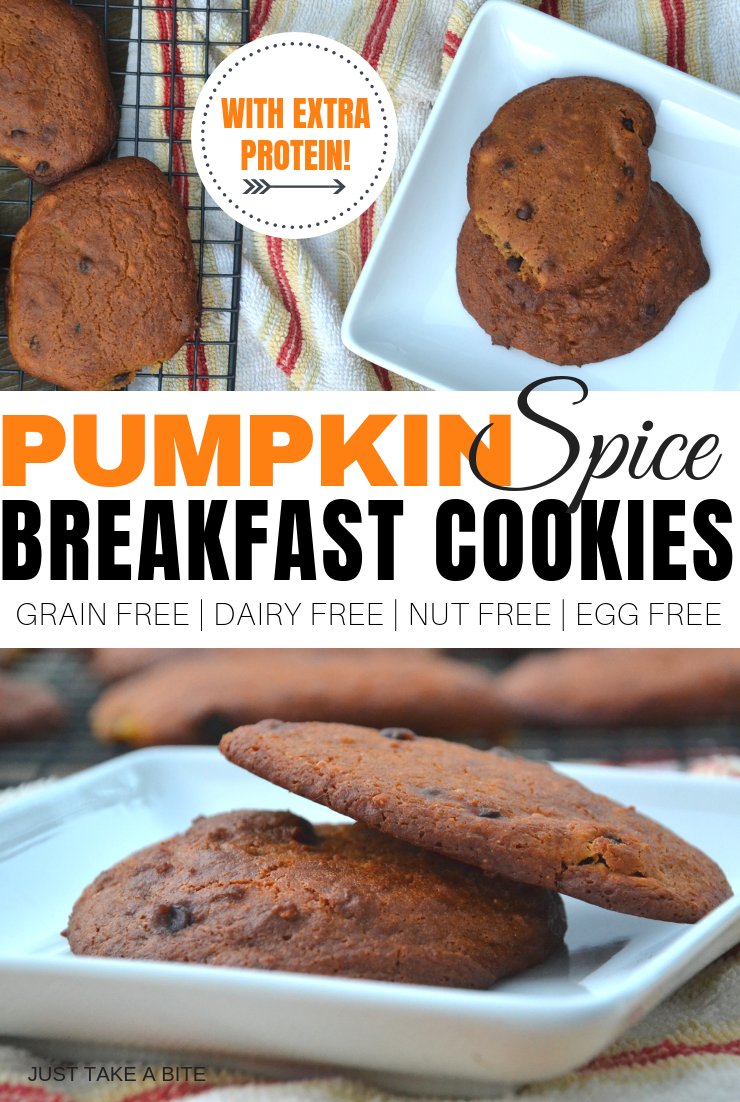
These pumpkin spice breakfast cookies are loaded with nourishing ingredients. Plus they taste great! They are super allergy friendly too. No grains, dairy, nuts, eggs or soy.

There is one secret ingredient that is really the star of the show.

Gelatin!

I love the grass-fed gelatin from Perfect Supplements. There is no strange smell. It gels beautifully. And since I do a lot of egg free baking it is my go-to ingredient.

These pumpkin spice breakfast cookies are also packed with coconut oil for healthy fat. Combine that with gelatin and garbanzo bean flour for protein. Plus tapioca flour for starch. It’s a complete breakfast that you can hold in your hand.

Grab a couple for the road, pair it with bacon and fresh fruit or pack one in your child’s lunch box. You get the flavors of fall in a nutritious cookie.

I've got a solution for your busy weekday mornings. These grain free pumpkin spice breakfast cookies are so easy to make and loaded with good stuff. Plus kids love them!

Grain Free Pumpkin Spice Breakfast Cookies
Yields 15
An allergy friendly breakfast cookie loaded with healthy protein, fat and carbs.
Write a review
Print
Ingredients
  1. 1 cup amaranth flour
  2. 3/4 cups tapioca flour
  3. 3/4 cups garbanzo bean flour
  4. 3/4 cups water
  5. 2 Tbsp. Perfect Supplements collagen
  6. 1 Tbsp. organic lemon juice
  7. 1/4 cup coconut oil, melted
  8. 1/2 cup pumpkin puree
  9. 1/2 cup organic cane sugar
  10. 3 tsp. Perfect Supplements gelatin
  11. 1/2 tsp. unrefined sea salt
  12. 1 tsp. baking soda
  13. 1 tsp. cinnamon
  14. 1/2 - 1 cup mix-ins of choice: raisins, dried cranberries, mini chocolate chips, sunflower seeds, pumpkin seeds
Instructions
  1. In a large bowl combine the flour, water, collagen and lemon juice.
  2. Mix well.
  3. Cover and let sit at room temperature 7 - 24 hours.
When ready to bake
  1. Heat oven to 375*F. Line two baking sheets with parchment paper or silpat.
  2. Add the coconut oil and pumpkin to the soaked mixture. Stir to combine.
  3. Add the sugar, gelatin, salt, baking soda and cinnamon. Mix well.
  4. Stir in your mix-ins of choice.
  5. Drop by large mounds onto the prepared baking pans.
  6. Bake for 25 - 30 minutes, until golden brown.
  7. Remove from oven and let cool for 5 minutes on baking pan.
  8. Serve warm or at room temperature.
  9. Store in a sealed container at room temperature for 3 days, in the refrigerator for up to a week or in the freezer for up to a year.
Just Take A Bite https://justtakeabite.com/

Prep Ahead Breakfast Cookies

I soak the seed and bean flours to help with digestion. I also prep the rest of the ingredients the night before. In the morning I just pour, mix and bake. I can have a batch of pumpkin spice breakfast cookies in the oven in about five minutes. Then we can eat some fresh and stick the rest in the freezer for a quick breakfast any day of the week.

Or if you like to do all of your prep work on the weekends that works too!

Add whatever mix-ins you like. Pumpkin seeds, sunflower seeds, flax seeds, chia seeds, mini chocolate chips, raisins, dried cranberries…they’re all good.

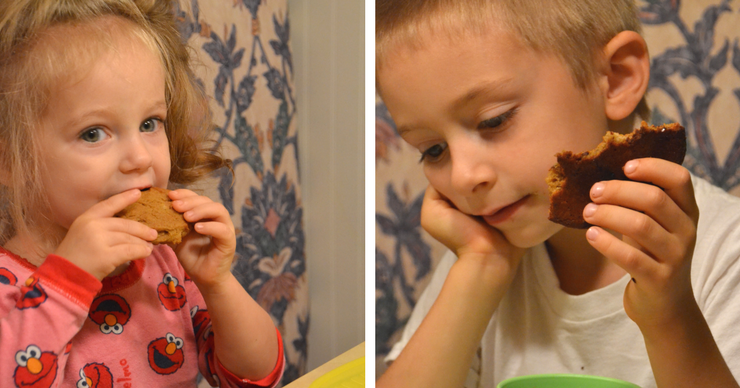
My kids LOVE these cookies. I think my toddler ate THREE one morning (yes, the toddler that used to barely eat anything). They are that good.

I've got a solution for your busy weekday mornings. These grain free pumpkin spice breakfast cookies are so easy to make and loaded with good stuff. Plus kids love them!

More To Love From Perfect Supplements

If you’ve never tried Perfect Supplements gelatin I highly recommend it. The quality is exceptional. But don’t stop there. Perfect Supplements carries such a wide variety of products.

Collagen

Like the collagen that I also use in the pumpkin spice breakfast cookies. I use it in all of our smoothies (like this blueberry spinach smoothie or this squash cherry smoothie). It was a life saver (literally) for my toddler when she was barely eating (check out how I got her to eat again with this “squash milk”).

Greens

We also recently tried both the fermented kale powder and the aquatic greens. They are perfect for smoothies. And the aquatic greens are especially great for those with allergies. I use it for my big kids as often as possible.

I could go on and on about all of the great products. But I’ll let you do some looking for yourself.

I've got a solution for your busy weekday mornings. These grain free pumpkin spice breakfast cookies are so easy to make and loaded with good stuff. Plus kids love them!

How to Save Money on Breakfast

Now for the best part.

You can use the coupon code TAKE10 at checkout to get 10% off your entire order!

I’ve got another great recipe that uses Perfect Supplements gelatin to share with you!

I've got a solution for your busy weekday mornings. These grain free pumpkin spice breakfast cookies are so easy to make and loaded with good stuff. Plus kids love them!

What is your favorite way to use gelatin?

Need more ideas for fun ways to add gelatin or collagen to your diet? Try these:

Strawberry Kiwi Gummies

Lemon Elderberry Gummies

Dairy Free Grilled Cheese

Homemade Fruit Snacks

Healing Hot Chocolate

Molasses Tonic

Squash Milk

Allergy Friendly Vanilla Cake

Chocolate Chip Banana Bread

Need a simple side dish that boosts the nutrient content of your meal while still tasting great? This Instant Pot turmeric rice is kid-friendly and so easy to make!

Instant Pot Turmeric Rice (with Liver!)

Need a simple side dish that boosts the nutrient content of your meal while still tasting great? This Instant Pot turmeric rice is kid-friendly and so easy to make!Need a simple side dish that boosts the nutrient content of your meal while still tasting great? This Instant Pot turmeric rice is kid-friendly and so easy to make!

When you are a gluten free family, you eat a lot of rice (except when you have a child allergic to riceโ€ฆso glad he healed from that!). Itโ€™s easy. And it goes with just about everything.

Iโ€™m the boring mom that usually just cooks plain white rice (itโ€™s much easier on our tummies than brown rice). Then my family gets to add whatever seasonings they like. My kids usually opt for cinnamon and a little sprinkle of organic cane sugar. I personally like just butter and salt.

Flavor Boost

My poor husband was getting pretty sick of plain rice. He grew up eating Rice-A-Roni and was missing flavor in his meal.

I went to my cupboard to see what I could add to the rice for some flavor. There was a bag of turmeric that I had purchased quite a while backโ€ฆbut never opened because I had no idea what to do with it! I had never even tasted turmeric myself. But I heard how good it is for you.
I decided to just take a leap and add some to our rice with a mix of other seasonings. Wonder of wondersโ€ฆmy kids LOVE it! And so does my husband.Need a simple side dish that boosts the nutrient content of your meal while still tasting great? This Instant Pot turmeric rice is kid-friendly and so easy to make!

They were all hesitant to try it at first. โ€œWhy is my rice yellow?!โ€ But after the first bite, they were hooked. And they aptly named it โ€œyellow rice.โ€

There is definitely no lack of flavor in this rice. And itโ€™s loaded with good stuff from turmeric to broth to liver (this is the brand I love)! Itโ€™s so good my mother-in-law served it for the whole relation when we visited for the holidays.

Interested in trying Instant Pot turmeric rice? Head over to Kitchen Stewardship where I’m sharing my quick and easy recipe!

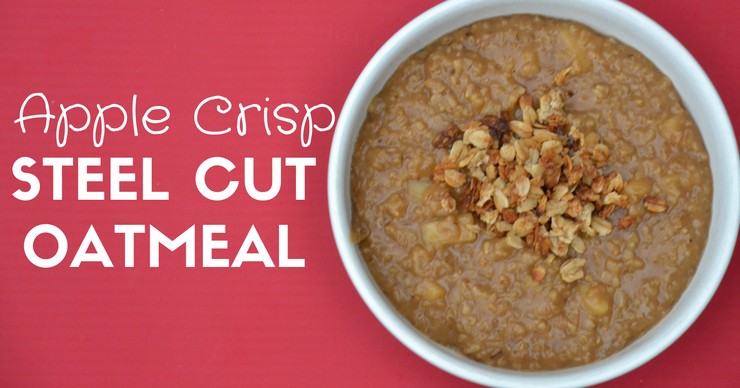
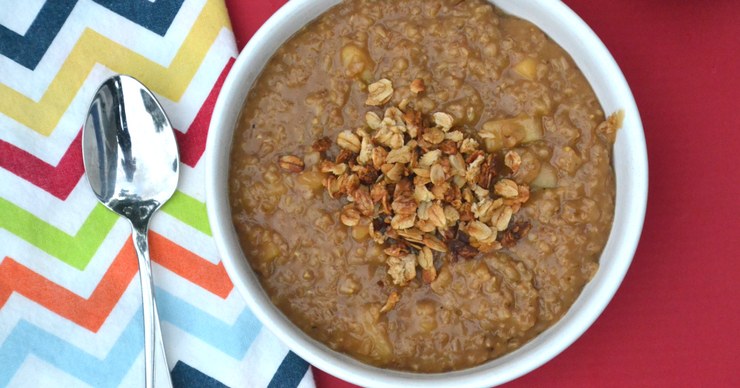
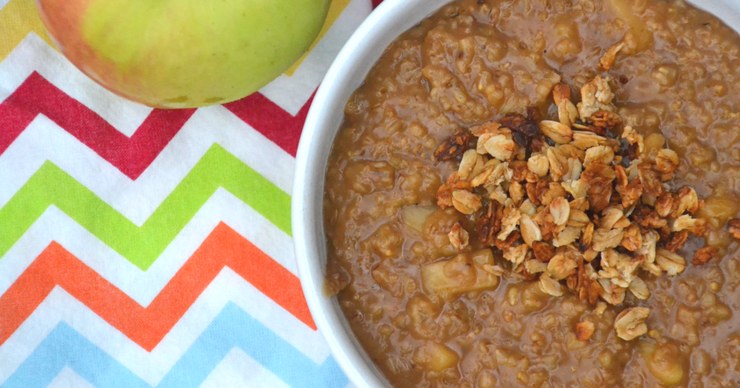
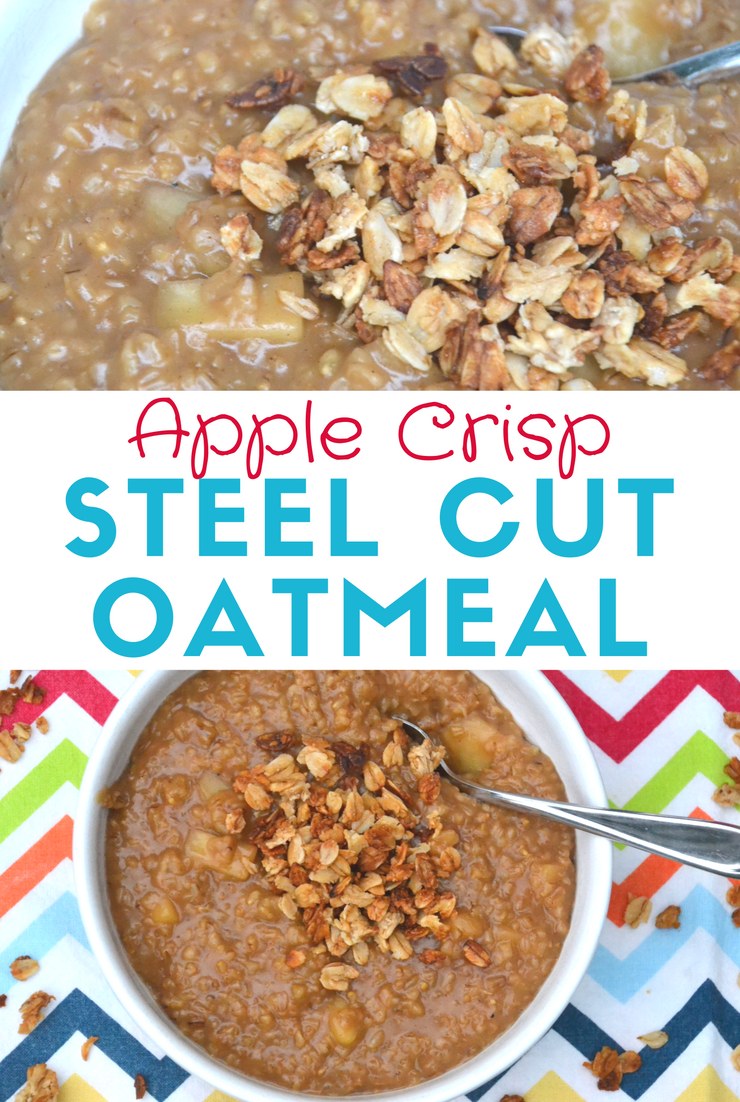
There is nothing quite like a hot bowl of oatmeal on a crisp fall day. Make it even better by turning it into apple crisp steel cut oatmeal with fresh apples and coconut sugar.

Apple Crisp Steel Cut Oatmeal

There is nothing quite like a hot bowl of oatmeal on a crisp fall day. Make it even better by turning it into apple crisp steel cut oatmeal with fresh apples and coconut sugar.

There is nothing quite like a hot bowl of oatmeal on a crisp fall day. Make it even better by turning it into apple crisp steel cut oatmeal with fresh apples and coconut sugar.

I am working with Bob’s Redmill and Stonyfield for this post. I have been compensated for my time commitment. But all opinions are my own.

I love the start of fall. The leaves are changing colors. There is a crispness to the air. And some of my absolute favorite produce is in season – squash, pumpkin, pears and apples!

There are so many ways to use apples, including canning homemade applesauce and turning them into sweet, cinnamony apple crisp (with homemade vanilla ice cream of course!)

There is nothing quite like a hot bowl of oatmeal on a crisp fall day. Make it even better by turning it into apple crisp steel cut oatmeal with fresh apples and coconut sugar. The perfect healthy breakfast.

Dessert For Breakfast

I don’t always have time to bake apple crisp. But I do always have time to make apple crisp steel cut oatmeal.

Soak the oats in whole milk plain yogurt a day ahead to make them easier to digest. Then add freshly diced apples, a sprinkle of cinnamon and a bit of coconut sugar for a sweet breakfast treat. The coconut sugar adds a great maple flavor that pairs beautifully with the apples and cinnamon.

Don’t forget to top your oatmeal with your favorite granola (ours is kettle corn granola!) for that crunchy apple crisp topping.

Steel Cut Versus Rolled

Even if you are not a big oatmeal fan you have to give this a try. I grew up hating oatmeal. I wanted to like it so badly. But I couldn’t handle the texture.

Then I tried steel cut oats. What a world of difference! Once you try them you won’t want to go back to the rolled variety. Steel cut oats keep their texture and don’t get mushy.

There is nothing quite like a hot bowl of oatmeal on a crisp fall day. Make it even better by turning it into apple crisp steel cut oatmeal with fresh apples and coconut sugar.

All around apple crisp steel cut oatmeal is a great breakfast. It does take about fifteen minutes to cook. So if you are pressed for time on weekdays you can save it for a weekend treat. Or just cook a big batch at the start of the week and reheat it on the stove or in the oven for a quick breakfast.

Make It Your Own

My husband loves to eat his oatmeal with fresh, raw milk on top. My daughter likes a dollop of vanilla yogurt on hers. It’s almost as good as apple crisp with ice cream!

Are you in need of a delicious fall breakfast that the kids will love?

Grab some Bob’s Redmill steel cut oats and coconut sugar and Stonyfield plain whole milk yogurt. Then hit up your local orchard for your favorite variety of apple. You’re already half way to an amazing breakfast.

There is nothing quite like a hot bowl of oatmeal on a crisp fall day. Make it even better by turning it into apple crisp steel cut oatmeal with fresh apples and coconut sugar.

Apple Crisp Steel Cut Oatmeal
Yields 4
A hot breakfast of steel cut oats, sweet apples and coconut sugar.
Write a review
Print
Ingredients
  1. 1 cup steel cut oats
  2. 1 cup warm water
  3. 1/2 cup whole milk plain yogurt
  4. 1 3/4 cups water
  5. 1/2 cup coconut sguar
  6. 1/2 cup peeled and diced apples
  7. 1/4 tsp. cinnamon
  8. pinch unrefined sea salt
  9. Optional toppings: milk, yogurt, granola, raisins, dried cranberries
Instructions
  1. In a small bowl combine the oats, 1 cup water and yogurt. Let sit 7 - 24 hours at room temperature.
  2. When ready to cook, combine the oat mixture, 1 3/4 cups water, coconut sugar, apples, cinnamon and salt in a medium sauce pan.
  3. Bring to a boil, reduce heat, and cook on low, stirring frequently, until the oats and apples are cooked, 15 - 20 minutes.
  4. Serve warm, plain or topped with milk or yogurt and granola.
Notes
  1. You can prepare the oatmeal in advance and store it in the refrigerator for up to a week. Reheat on the stove or in the oven with extra water added.
Just Take A Bite https://justtakeabite.com/
My Favorite Gluten Free Flour Mix | Just Take A Bite

My Favorite Gluten Free Flour Mix

Gluten free baking can be intimidating and challenging. There are so many flours to choose from! I’m helping you out with my favorite gluten free flour mix.

My Favorite Gluten Free Flour Mix | Just Take A Bite

If you’ve ever tried gluten free baking you know it can be tricky. I can make the same recipe ten times and it turns out just a little differently every time. Though that may have more to do with my lack of precise measuring when I bake.

At any rate, gluten free baking is not nearly as forgiving as baking with wheat.

The ratio of sugar to fat is very important. But the real key to successful gluten free baking is using the right blend of flours.

Use all starchy flour and you’ll get a dry, crumbly mess. Use all seeds and you might have a gooey, dense blob.

There are so many flours to choose from when it comes to gluten free baking. My recipes usually call for a gluten free flour mix of your choice. Everyone has different things on hand. And a variety of flours will work.

But after years of experimenting I have come up with my favorite gluten free flour mix.

Don’t worry, I’m not going to tell you some exact flours to use. This is a general rule. Then use what you have on hand.

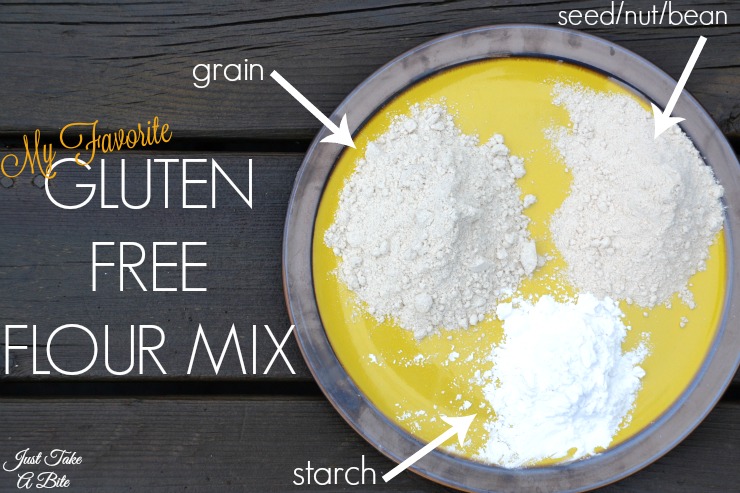
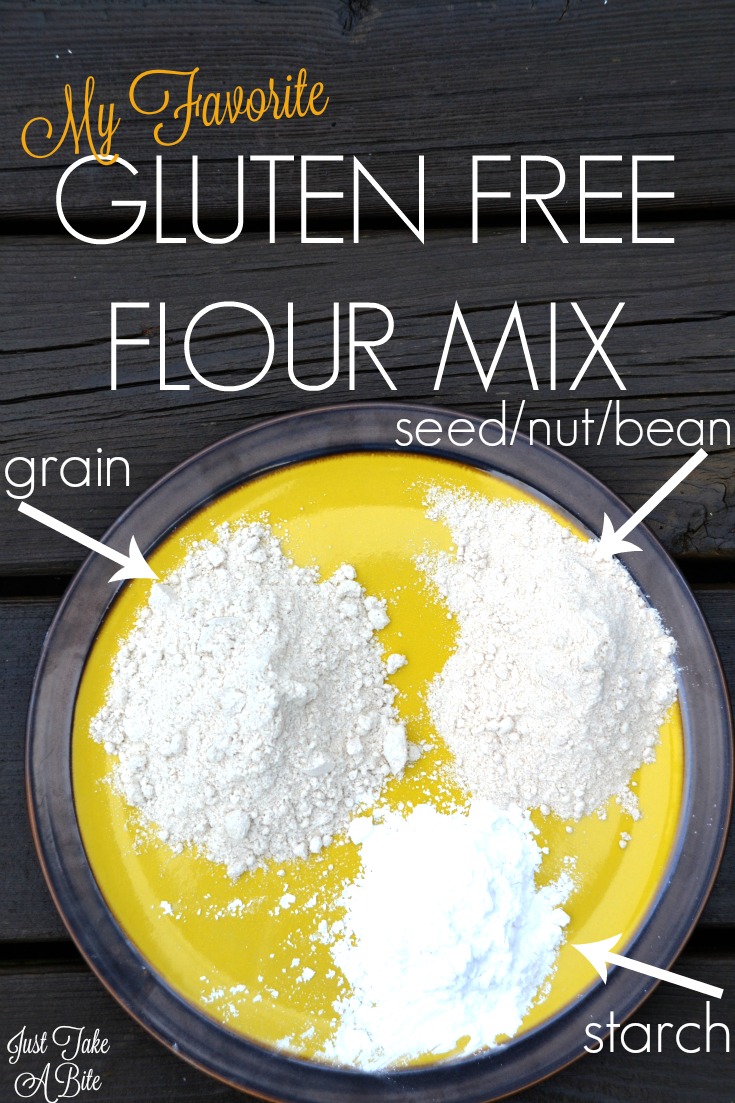
My gluten free flour mix is:

My Favorite Gluten Free Flour Mix | Just Take A Bite

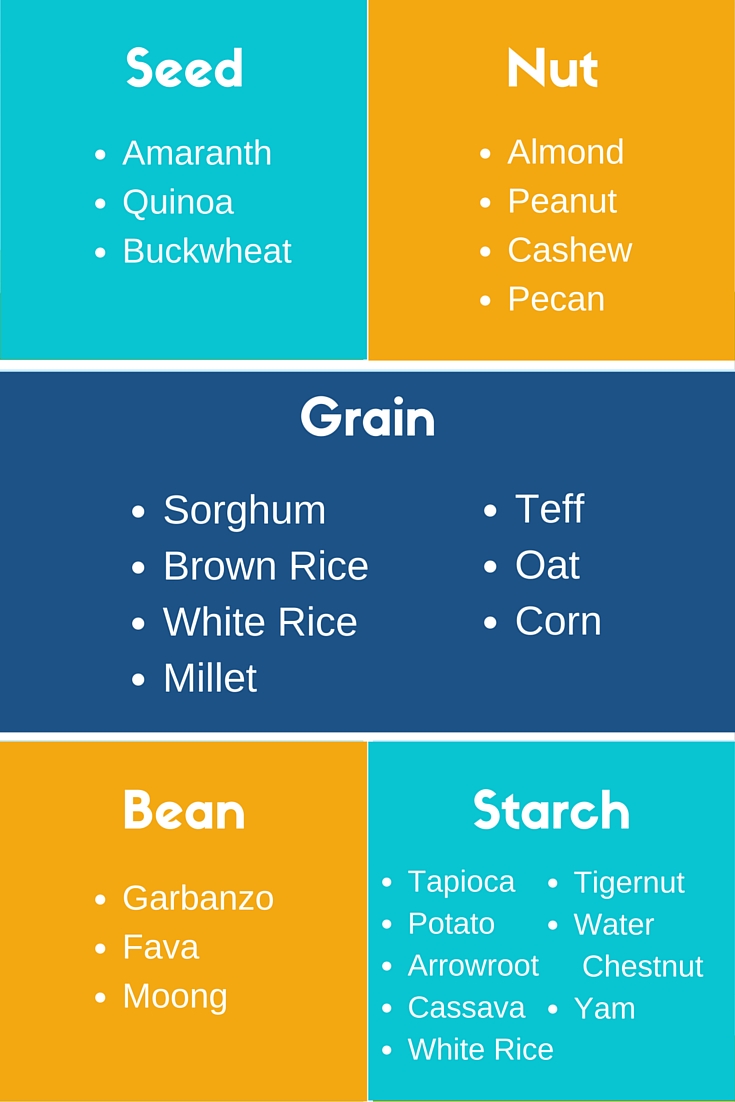
Not sure which is which? Here is a quick rundown of some common flours.

My Favorite Gluten Free Flour Mix | Just Take A Bite

For your next recipe that calls for two cups of gluten free flour use one cup of grain, a half cup of seed, nut or bean and a half cup of starch. Choose from the above lists. Play around with combinations to see what flavors you like best.

Give my gluten free flour mix a try and see how your gluten free baked goods turn out!

Note that white rice can be used as a grain or a starch. It is technically a grain. But white rice behaves similar to a starch.

My Favorite Gluten Free Flour Mix | Just Take A Bite

What is your favorite blend of flours?

I often use a combination of sorghum, amaranth and tapioca. My baked goods always come out well using those three.

Find your favorite combinations. Then mix up a whole batch so baking is simple. No measuring three or four flours at a time. Just use your mix!

Create a variety to rotate through different types of flour. Gluten free baking just got a little bit simpler.

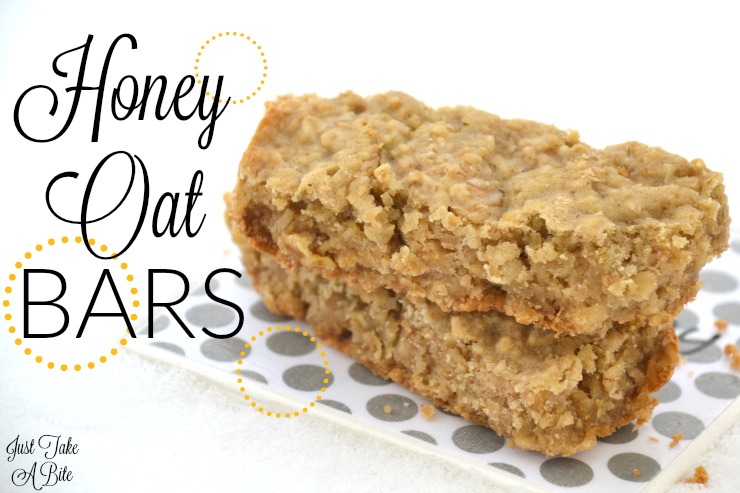
Simple Honey Oat Bars | Just Take A Bite

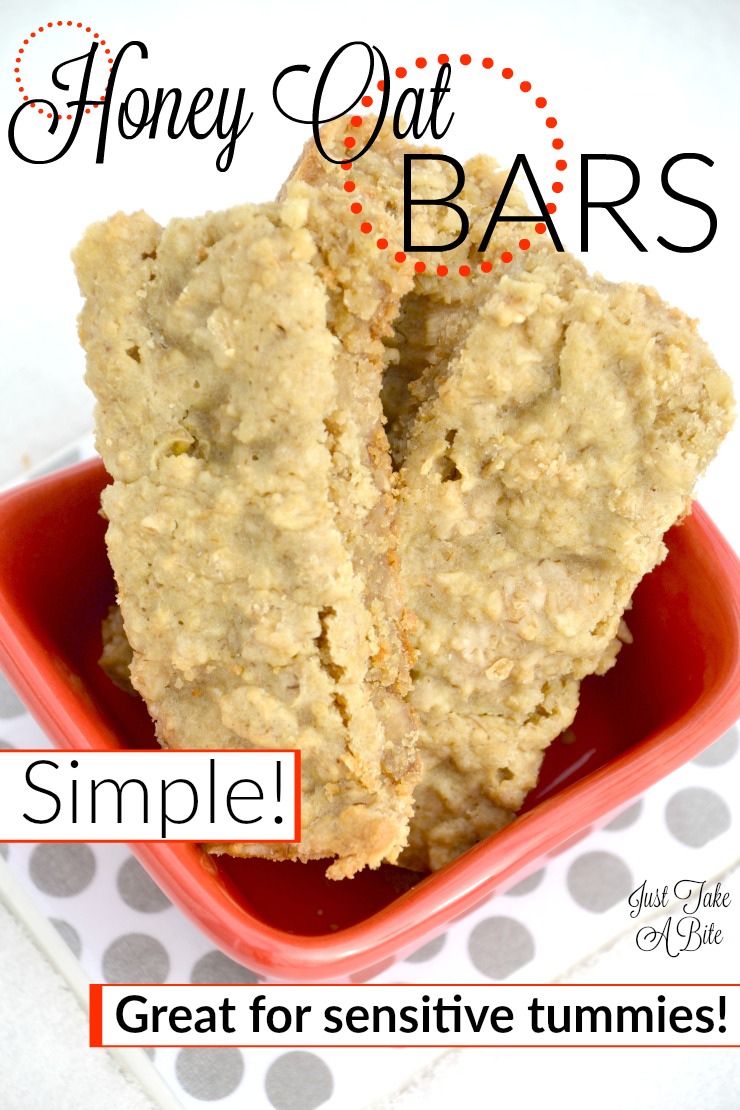
Simple Honey Oat Bars

When little tummies are recovering from illness it’s best to keep food simple and skip a lot of fat and sugar. These honey oat bars come together easily and are gentle on the tummy.

Simple Honey Oat Bars | Just Take A Bite

Did I mention my son was sick? That seems to be an ongoing battle this winter. My poor boy that has such a sensitive digestive system.

He had the recent stomach virus that went around. But unlike most people that were over it in a day or two he struggled with it for a week. And he could hardly eat that whole time. He spent his days either on the couch or in the bathroom.

BRAT diet doesn’t exist here.

Add all of his allergies on top of trying to keep his diet bland and starchy and you’ve got a real challenge. No gluten, rice, corn, potatoes or bananas.

Simple Honey Oat Bars | Just Take A Bite

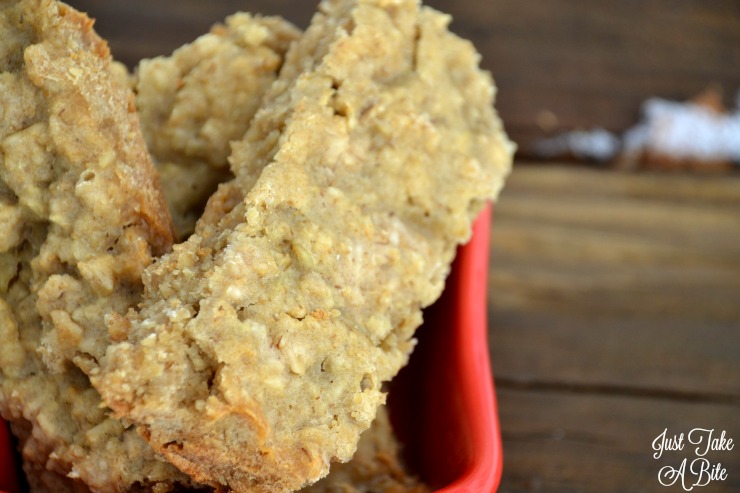
We decided to try oats. He basically lived on oatmeal for a week. And just when he thought he couldn’t handle another bowl of oatmeal I came up with these simple honey oat bars!

I wanted to keep them very low in fat to keep his tummy settled. So I used grass-fed gelatin in place of eggs. I also kept the sweetness low with just a touch of cane sugar and honey.

The combination of whole oats and ground oats helps the bars bind together.

Oats to the rescue.

My son loved them! And they kept him going. There was starch but also protein. Not to mention the gelatin was helpful for healing his upset tummy.

My daughter tried them too and thinks they’re great…even if she’s not sick. They make an easy, low sugar breakfast to keep stashed in the freezer for busy week days.

Get your oats soaking and whip up a batch or two of these simple honey oat bars. Always have some on hand to put upset bellies at ease.

Don’t forget to add activated charcoal to the diet as well to really stop the stomach upset.

What is your go-to food when recovering from a stomach virus?

Simple Honey Oat Bars | Just Take A Bite

Simple Honey Oat Bars
Yields 10
A simple, low fat oat bar that is perfect for settling little tummies after illness.
Write a review
Print
Ingredients
  1. 1 cup oat flour (grind rolled oats in a blender)
  2. 1 cup rolled oats
  3. 1 cup warm water
  4. 2 Tbsp. lemon juice
  5. 2 tsp. grass-fed gelatin (NOT collagen)
  6. 1/4 cup hot water
  7. 1 Tbsp. organic cane sugar
  8. 3 Tbsp. honey
  9. 2 Tbsp. melted butter, coconut oil, lard or tallow
  10. 1/2 tsp. baking soda
  11. 1/2 tsp. unrefined sea salt
Instructions
  1. Combine the oat flour, oats, warm water and lemon juice. Cover and let sit for 7-24 hours (24 hours is best for oats).
  2. Heat oven to 350 degrees F. Grease or line with parchment paper an 8" square baking pan.
  3. Add the gelatin to the hot water and stir until dissolved.
  4. Add all of the ingredients to the soaked oats. Mix well.
  5. Spread in the prepared pan.
  6. Bake 35 minutes.
  7. Cool and cut into bars.
  8. Store in a covered container for up to a week at room temperature, two weeks in the refrigerator or one year in the freezer.
Just Take A Bite https://justtakeabite.com/
 In order for me to support my blogging activities, I may receive monetary compensation or other types of remuneration for my endorsement, recommendation, testimonial and/or link to any products or services from this blog. It will not change the cost of any products or services for you.

This post is linked to Savoring Saturdays.

Sourdough Pumpkin Swiss Cake Rolls | Just Take A Bite

Sourdough Pumpkin Swiss Cake Rolls

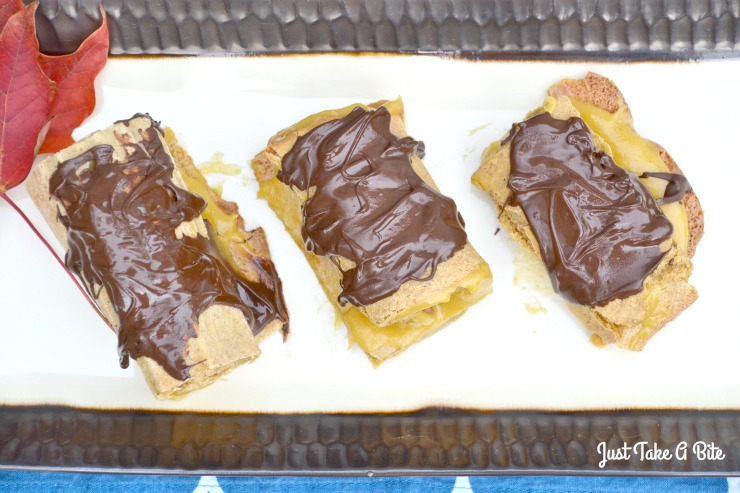
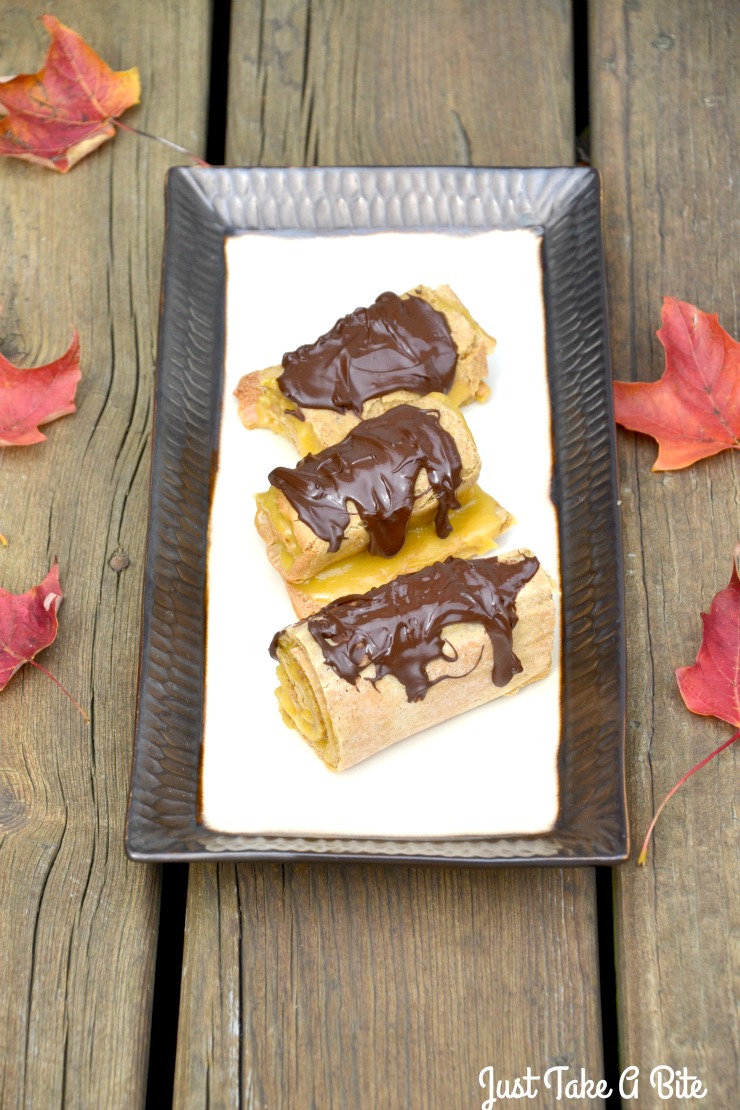
Are you looking for a non-traditional Thanksgiving dessert? Wow your guests with these fancy yet simple sourdough pumpkin swiss cake rolls.

Sourdough Pumpkin Swiss Cake Rolls | Just Take A Bite

Halloween may be over, but fall is just getting started! That means there is another month to indulge in all things pumpkin.

I grew up eating those little chocolate cake rolls out of a box…anyone else? They were good. Cake filled with cream rolled into a little log and covered with chocolate.

It’s been about twenty years since I’ve had one. But that doesn’t mean I don’t enjoy a good roll cake.

Sourdough Pumpkin Swiss Cake Rolls | Just Take A Bite

Free of just about everything.

I created this sourdough pumpkin swiss cake roll with myself in mind. I know that sounds bad, but I get a special treat about once every four months lately. The rest of the time I’m busy making stuff for my kids.

These delicious little cakes are free of dairy, nuts, soy, corn, rice, roots, coconut and eggs.

They are actually almost fat free too! That is NOT something I aim for. But it just happened.

It is not as much fun or as tasty to bake when you can’t use butter or coconut oil. So I ended up just making a dessert without an added fat.

Sourdough Pumpkin Swiss Cake Rolls | Just Take A Bite

Simple.

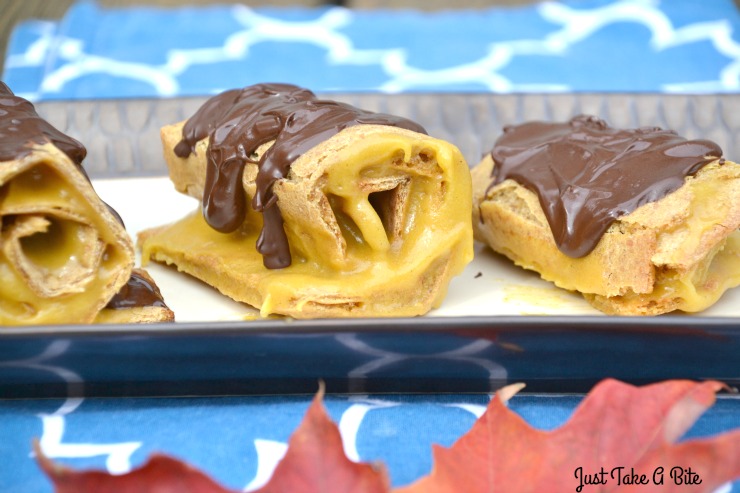
The cake is a simple pumpkin sourdough thin sheet cake. The filling is sugar, flour and pumpkin. That’s all.

Then top it with melted chocolate. Divine!

Sourdough pumpkin swiss cake rolls can be prepared in advance, up to a week ahead! One more thing to scratch off your Thanksgiving to-do list early.

Surprise your guests with this special dessert. No messing with ice cream or whipped cream. It is ready to eat.

Sourdough Pumpkin Swiss Cake Rolls | Just Take A Bite

The cake tastes great without the chocolate too. But it really adds a good flavor contrast. Pumpkin and chocolate are a perfect match.

And those extra crispy edges you trim off? They make a great snack dipped in the extra filling!

Looking for a unique Thanksgiving dessert this year?

Try sourdough pumpkin swiss cake rolls. You won’t find anything this good in a box!

Sourdough Pumpkin Swiss Cake Rolls | Just Take A Bite

Sourdough Pumpkin Swiss Cake Rolls
Yields 4
Sourdough pumpkin cake filled with pumpkin cream and topped with melted chocolate.
Write a review
Print
Cake
  1. 1/2 cup sourdough starter
  2. 1/2 cup all purpose flour
  3. 2 Tbsp. water
  4. 1/2 cup pureed pumpkin
  5. 1/4 cup organic brown cane sugar
  6. 1/4 tsp. baking soda
  7. 1/4 ts. unrefined sea salt
  8. 1/2 tsp. cinnamon
Filling
  1. 3/4 cup organic cane sugar
  2. 1/2 cup pureed pumpkin
  3. 1/2 tsp. cinnamon
  4. 4 Tbsp. all purpose flour
  5. Topping: 1/4 cup chocolate chips
Cake
  1. Combine the sourdough, flour and water. Let set one hour.
  2. Heat oven to 350*F. Line a medium size baking sheet with parchment paper.
  3. Add the pumpkin, brown sugar, soda, salt and cinnamon to the flour. Mix well.
  4. Spread evenly (not too thin) on the parchment paper.
  5. Bake 40 minutes.
Filling
  1. Blend the sugar on high in a high power blender to create powdered sugar.
  2. In a medium bowl beat the powdered sugar, pumpkin, cinnamon and flour on high for two minutes. Chill.
Assembly
  1. When the cake comes out of the oven cut it in half both vertically and horizontally to create 4 pieces. Trim any crispy edges.
  2. Let the cake cool for about 2 minutes.
  3. Spread filling on each piece of cake and roll. Use a toothpick to hold the cake in the rolled position if necessary.
  4. Chill the cakes in the refrigerator.
  5. When chilled melt the chocolate chips in a double boiler (glass bowl over a small saucepan with an inch of water).
  6. Drizzle the chocolate over the cakes.
  7. Chill.
  8. Keep the cakes in the refrigerator until ready to serve.
  9. Store in a covered container in the refrigerator for up to a week or in the freezer for up to 6 months.
Notes
  1. The filling can be made up to 3 days in advance or while the cake is baking.
  2. There will likely be extra filling. It is great for dipping graham crackers or using as frosting on muffins or cupcakes. It also tastes great eaten plain with extra melted chocolate swirled in.
Just Take A Bite https://justtakeabite.com/
 In order for me to support my blogging activities, I may receive monetary compensation or other types of remuneration for my endorsement, recommendation, testimonial and/or link to any products or services from this blog. It will not change the cost of any products or services for you.

Gluten Free Pumpkin Flax Granola Muffins | Just Take A Bite

Gluten Free Pumpkin Flax Granola Muffins

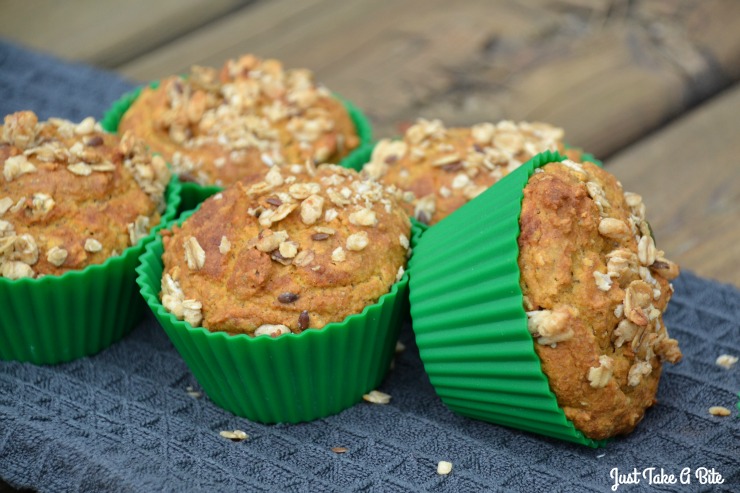
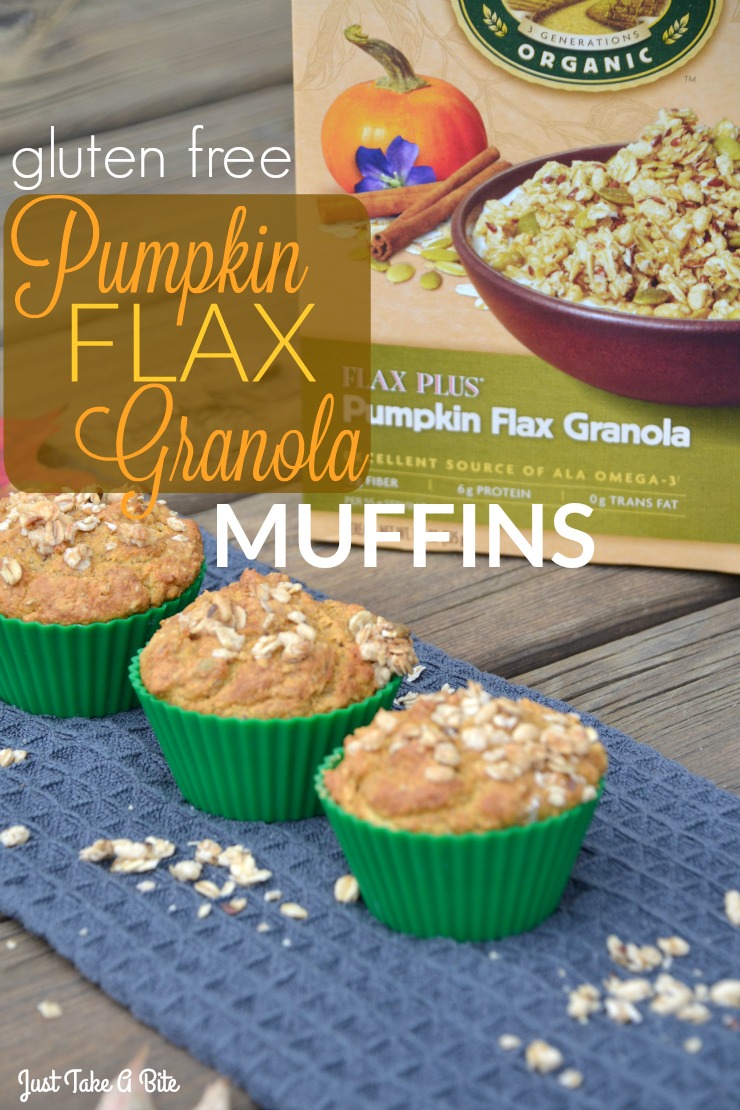
Can’t decide what to have for breakfast? Get your cereal and bread all in one with gluten free pumpkin flax granola muffins. They are the perfect way to start your day this fall.

Gluten Free Pumpkin Flax Granola Muffins | Just Take A Bite

I am working with Stonyfield and Nature’s Path for this post. I have been compensated for my time commitment. But the opinions and ideas are my own. I have not been paid to post positive reviews.

It’s no secret. I L-O-V-E granola. Really I love cereal of any kind.

But cereal is a rare commodity around here, only showing up on the breakfast menu when I have time to make some. Most cereal is just not healthy.

My kids enjoy my homemade granola. I make a kettle corn version that everyone goes crazy for.

But it sure is nice to get variety once in a while. And to give myself a break (it’s hard work cooking for a family with so many different allergies!)

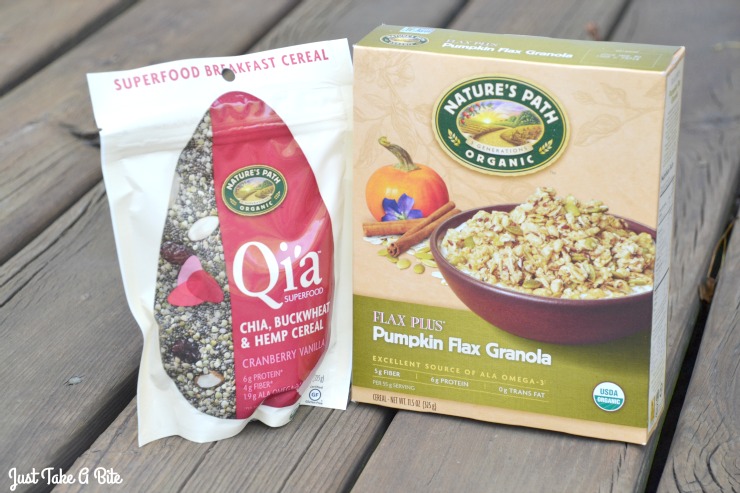
So I was excited to try two products from Nature’s Path – Pumpkin flax granola and Cranberry Vanilla Qia.

Gluten Free Pumpkin Flax Granola Muffins | Just Take A Bite

Big helpers.

Since I can’t have either my big kids gladly volunteered to be the taste testers!

Both kids really loved the Qia. It is a unique blend of seeds and dried fruit. We tried it in both milk and yogurt. Either way is great. Just mix and let it sit for five minutes. Breakfast is served.

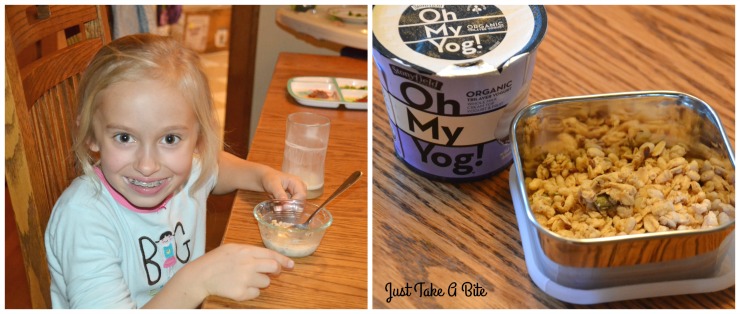
My oldest was the granola sampler (since my son is allergic to some of the ingredients). She gave it two thumbs up!

She even got an extra special treat one day with an Oh My Yog! yogurt and pumpkin flax granola in her lunch.

From a flavor standpoint both products are winners.

Gluten Free Pumpkin Flax Granola Muffins | Just Take A Bite

My kids reviewed the taste. I reviewed the ingredients.

I was disappointed to see soy oil in the granola. We try to avoid all soy. I also am not sure what oat syrup solids are. It sounds a lot like corn syrup solids, just using a different grain.

I was hopeful as I read the ingredient list of the Qia cereal. Until I got to the last one – natural vanilla flavor.

Gluten Free Pumpkin Flax Granola Muffins | Just Take A Bite

Natural flavor is my biggest pet peeve when it comes to “natural” products.

Natural flavor is pretty much the same thing as artificial flavor.

They may start with different ingredients, but the end product is about the same. And they impact my children the same way.

Both make my kids C-R-A-Z-Y.

Preparation is key.

I also think that seeds and grains need to be properly prepared to avoid nutrient deficiencies and to aid in digestion. Eating all of these oats and seeds that haven’t been soaked can be hard on the gut. My son seemed to have a really hard time with the seeds and had some off tummy days.

So I did let my kids try both products. But they are not items I would let them have regularly.

Pumpkin flax granola is good for those times when you are traveling or for those days here and there when you really have no time at all to prepare breakfast.

It also makes a great addition to muffins! Especially if you can’t have eggs.

Gluten Free Pumpkin Flax Granola Muffins | Just Take A Bite

Flax seed is a great egg substitute.

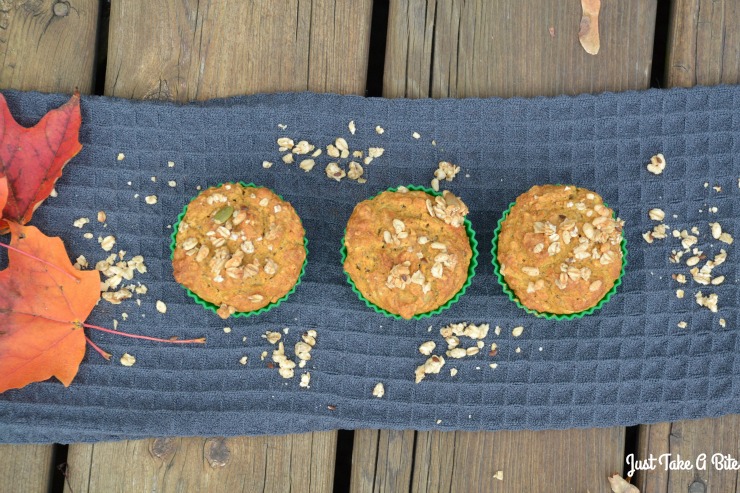
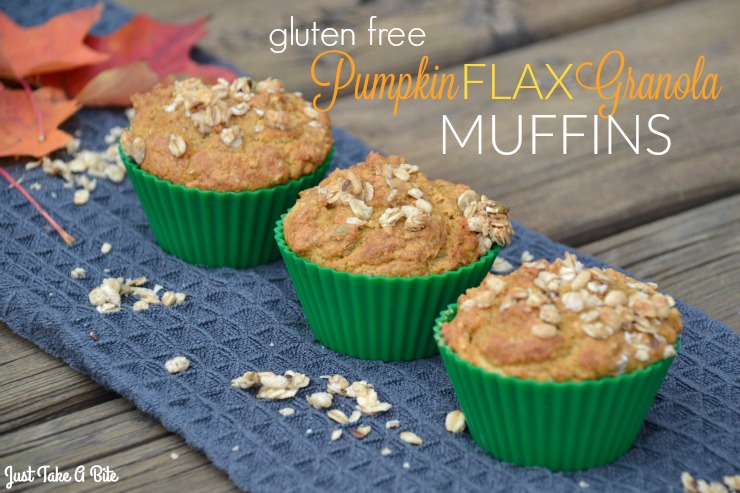
So I used the pumpkin flax flavor of the granola and bumped it up with real pumpkin and flax seeds to create gluten free egg free pumpkin flax granola muffins.

A little sprinkle of granola on top adds a nice crunch and burst of flavor.

Since I like to prepare my grains I used Stonyfield whole milk yogurt to soak the flour first. The yogurt not only breaks down the phytic acid, it also helps bind the muffins and give them a soft texture.

You can make the muffins with or without the granola added. I made some without for my son and he still loved them.

Pumpkin and flax are a great pair. Put them in a muffin and you have a great fall breakfast. Make a big batch to stock the freezer for easy weekday mornings.

Are you a cereal fan? Or do muffins top your list?

Why not put them together and enjoy some pumpkin flax granola muffins. Use pumpkin flax granola or your favorite homemade granola for a new twist on breakfast.

Gluten Free Pumpkin Flax Granola Muffins | Just Take A Bite | A gluten and egg free muffin packed with pumpkin and flax seeds plus granola for extra crunch

Gluten Free Pumpkin Flax Granola Muffins
Serves 12
A gluten and egg free muffin with pumpkin flavor and crunchy granola.
Write a review
Print
Ingredients
  1. 1 cup sorghum flour (or brown rice or whole wheat)
  2. 1/4 cup warm water
  3. 1/2 cup plain, whole milk yogurt
  4. 1 cup tapioca flour (or white rice or all purpose)
  5. 1/2 cup granola + 1/4 cup for topping
  6. 1/2 cup pureed pumpkin
  7. 2 Tbsp. ground flax seeds
  8. 1/3 cup organic cane sugar
  9. 1 tsp. baking soda
  10. 1/2 tsp. unrefined sea salt
  11. 3 Tbsp. whole milk
  12. Optional: 1/3 cup mini chocolate chips or dried fruit
Instructions
  1. In a large bowl combine the sorghum, water and yogurt. Cover and let sit 7-24 hours.
  2. Heat the oven to 350*F. Line a muffin pan with paper or silicon muffin cups.
  3. Add the flax seeds to the soaked flour. Let sit 5 minutes.
  4. Add the remaining ingredients (except granola for topping).
  5. Mix well.
  6. Fill muffin cups 3/4 full. Sprinkle granola on top of each muffin.
  7. Bake for 25 - 30 minutes.
Notes
  1. Squash or sweet potato can be used in place of the pumpkin.
  2. The muffins can be made without the granola.
  3. To make these dairy free replace the yogurt and milk with coconut milk or water.
Just Take A Bite https://justtakeabite.com/
 In order for me to support my blogging activities, I may receive monetary compensation or other types of remuneration for my endorsement, recommendation, testimonial and/or link to any products or services from this blog. It will not change the cost of any products or services for you.

This post is linked to Savoring Saturdays.