Home ยป sourdough

Tag: sourdough

Sourdough Pumpkin Swiss Cake Rolls | Just Take A Bite

Sourdough Pumpkin Swiss Cake Rolls

Are you looking for a non-traditional Thanksgiving dessert? Wow your guests with these fancy yet simple sourdough pumpkin swiss cake rolls.

Sourdough Pumpkin Swiss Cake Rolls | Just Take A Bite

Halloween may be over, but fall is just getting started! That means there is another month to indulge in all things pumpkin.

I grew up eating those little chocolate cake rolls out of a box…anyone else? They were good. Cake filled with cream rolled into a little log and covered with chocolate.

It’s been about twenty years since I’ve had one. But that doesn’t mean I don’t enjoy a good roll cake.

Sourdough Pumpkin Swiss Cake Rolls | Just Take A Bite

Free of just about everything.

I created this sourdough pumpkin swiss cake roll with myself in mind. I know that sounds bad, but I get a special treat about once every four months lately. The rest of the time I’m busy making stuff for my kids.

These delicious little cakes are free of dairy, nuts, soy, corn, rice, roots, coconut and eggs.

They are actually almost fat free too! That is NOT something I aim for. But it just happened.

It is not as much fun or as tasty to bake when you can’t use butter or coconut oil. So I ended up just making a dessert without an added fat.
Sourdough Pumpkin Swiss Cake Rolls | Just Take A Bite

Simple.

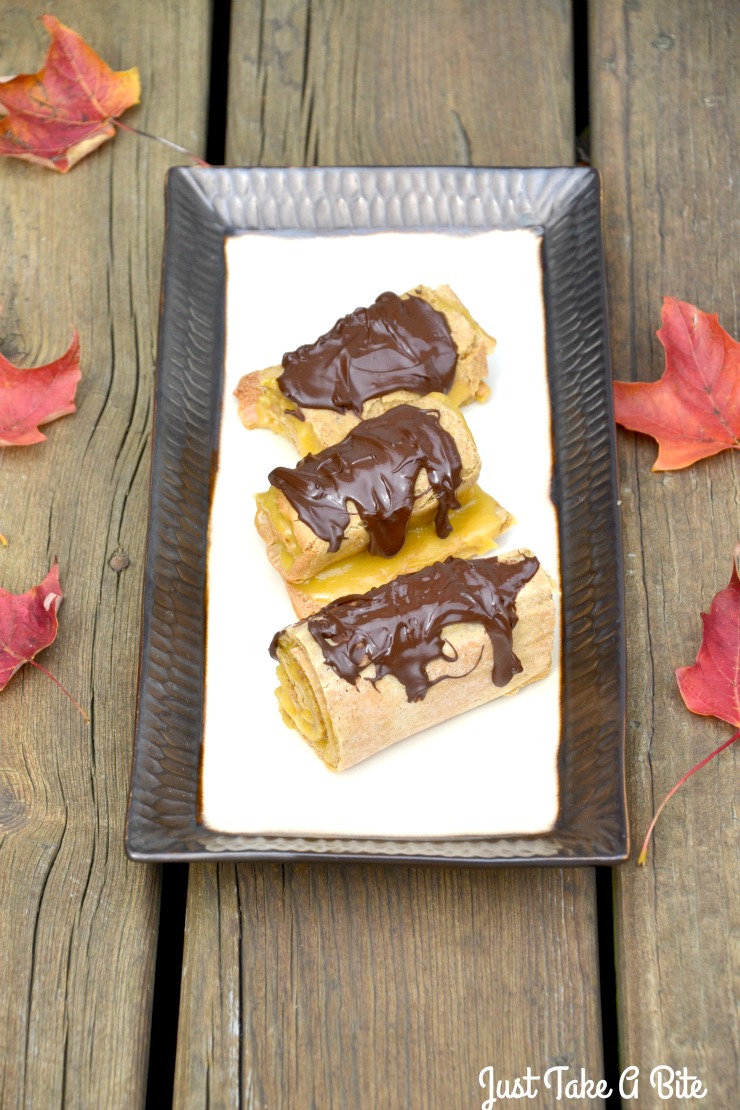
The cake is a simple pumpkin sourdough thin sheet cake. The filling is sugar, flour and pumpkin. That’s all.

Then top it with melted chocolate. Divine!

Sourdough pumpkin swiss cake rolls can be prepared in advance, up to a week ahead! One more thing to scratch off your Thanksgiving to-do list early.

Surprise your guests with this special dessert. No messing with ice cream or whipped cream. It is ready to eat.

Sourdough Pumpkin Swiss Cake Rolls | Just Take A Bite

The cake tastes great without the chocolate too. But it really adds a good flavor contrast. Pumpkin and chocolate are a perfect match.

And those extra crispy edges you trim off? They make a great snack dipped in the extra filling!

Looking for a unique Thanksgiving dessert this year?

Try sourdough pumpkin swiss cake rolls. You won’t find anything this good in a box!

Sourdough Pumpkin Swiss Cake Rolls | Just Take A Bite

Sourdough Pumpkin Swiss Cake Rolls
Yields 4
Sourdough pumpkin cake filled with pumpkin cream and topped with melted chocolate.
Write a review
Print
Cake
  1. 1/2 cup sourdough starter
  2. 1/2 cup all purpose flour
  3. 2 Tbsp. water
  4. 1/2 cup pureed pumpkin
  5. 1/4 cup organic brown cane sugar
  6. 1/4 tsp. baking soda
  7. 1/4 ts. unrefined sea salt
  8. 1/2 tsp. cinnamon
Filling
  1. 3/4 cup organic cane sugar
  2. 1/2 cup pureed pumpkin
  3. 1/2 tsp. cinnamon
  4. 4 Tbsp. all purpose flour
  5. Topping: 1/4 cup chocolate chips
Cake
  1. Combine the sourdough, flour and water. Let set one hour.
  2. Heat oven to 350*F. Line a medium size baking sheet with parchment paper.
  3. Add the pumpkin, brown sugar, soda, salt and cinnamon to the flour. Mix well.
  4. Spread evenly (not too thin) on the parchment paper.
  5. Bake 40 minutes.
Filling
  1. Blend the sugar on high in a high power blender to create powdered sugar.
  2. In a medium bowl beat the powdered sugar, pumpkin, cinnamon and flour on high for two minutes. Chill.
Assembly
  1. When the cake comes out of the oven cut it in half both vertically and horizontally to create 4 pieces. Trim any crispy edges.
  2. Let the cake cool for about 2 minutes.
  3. Spread filling on each piece of cake and roll. Use a toothpick to hold the cake in the rolled position if necessary.
  4. Chill the cakes in the refrigerator.
  5. When chilled melt the chocolate chips in a double boiler (glass bowl over a small saucepan with an inch of water).
  6. Drizzle the chocolate over the cakes.
  7. Chill.
  8. Keep the cakes in the refrigerator until ready to serve.
  9. Store in a covered container in the refrigerator for up to a week or in the freezer for up to 6 months.
Notes
  1. The filling can be made up to 3 days in advance or while the cake is baking.
  2. There will likely be extra filling. It is great for dipping graham crackers or using as frosting on muffins or cupcakes. It also tastes great eaten plain with extra melted chocolate swirled in.
Just Take A Bite https://justtakeabite.com/
 In order for me to support my blogging activities, I may receive monetary compensation or other types of remuneration for my endorsement, recommendation, testimonial and/or link to any products or services from this blog. It will not change the cost of any products or services for you.

Sourdough Pumpkin Pie Cereal | Just Take A Bite

Sourdough Pumpkin Pie Cereal

Pumpkin isn’t just for fall desserts. Try it in your breakfast! Sourdough pumpkin pie cereal is crunchy, sweet and easy to make. Eat it for breakfast covered in milk or sprinkled on yogurt.

Sourdough Pumpkin Pie Cereal | Just Take A Bite

Are you getting excited for all things pumpkin?

I know I am. It’s crazy to think that just a few years ago I wanted nothing to do with anything pumpkin.

I hated it.

I hated it as a child and as an adult. I just didn’t understand why everyone loved pumpkin pie, pumpkin cheesecake, pumpkin everything.

Until I started roasting fresh pumpkin.

What you get in a can doesn’t even compare to freshly roasted pumpkin.

Sourdough Pumpkin Pie Cereal | Just Take A Bite

Pumpkin, pumpkin everywhere!

Now I love to use pumpkin year round!

Not only is it packed with nutrients, but it tastes great. I use it in soups, breads, muffins, pasta, crackers, pie, ice cream, cheesecake. Pretty much any way you can think of.

I even love it plain with a touch of honey and sea salt.

And yes, I can even handle canned pumpkin now.

Pumpkin for breakfast.

One of my favorite ways to use pumpkin is in sourdough pumpkin pie cereal. It’s like pumpkin pie in your breakfast bowl.

Combine sourdough with pumpkin, sugar and spice and you’ve got an amazing start to your day.

Sourdough pumpkin pie cereal is great with milk. But you can also sprinkle it on yogurt. I like to add it to my salted caramel custard. It is my replacement for granola.

Sourdough Pumpkin Pie Cereal | Just Take A Bite

Pumpkin for snacks.

Most of the time I find myself just munching on it plain! Sourdough pumpkin pie cereal makes a great snack.

Better yet mix it with crispy nuts and dried apples for the perfect fall trail mix.

Any way you serve it this cereal is a delicious fall treat.

Sourdough pumpkin pie cereal is made with traditional sourdough for easier digestion and nutrient absorption. It is also dairy, egg, nut, corn, soy, coconut and rice free.

Are you in need of something different for breakfast this fall?

Grab some pumpkin (fresh or canned) and get a batch of sourdough pumpkin pie cereal started. The whole family will love it!
Sourdough Pumpkin Pie Cereal | Just Take A Bite

Sourdough Pumpkin Pie Cereal
Serves 12
Simple sourdough cereal with pumpkin and spice.
Write a review
Print
Ingredients
  1. 1 cup sourdough starter
  2. 1 cup wheat, spelt or rye flour
  3. 1/4 cup water
  4. 1 cup pureed pumpkin
  5. 3/4 cups organic cane sugar
  6. 1/2 tsp. baking soda
  7. 1/2 tsp. unrefined sea salt
  8. 1 tsp. cinnamon
Instructions
  1. Combine the starter, flour and water. Cover and let soak 6 - 24 hours.
  2. Line a large baking sheet with parchment paper. Heat oven to 350*F.
  3. Add the remaining ingredients to the flour mixture. Mix well.
  4. Spread on the parchment lined baking sheet.
  5. Bake for 1 hour.
  6. Let cool 10 minutes.
  7. Flip the whole "cake" (leaving the parchment paper on the baking sheet.
  8. Cut into small squares (using a pizza cutter or sharp knife).
  9. Bake another 45 minutes.
  10. Allow to cool completely.
  11. Store in a sealed container at room temperature for up to a month or in the freezer for up to a year.
Just Take A Bite https://justtakeabite.com/

In order for me to support my blogging activities, I may receive monetary compensation or other types of remuneration for my endorsement, recommendation, testimonial and/or link to any products or services from this blog. It will not change the cost of any products or services for you.

This post is linked to Savoring Saturdays.

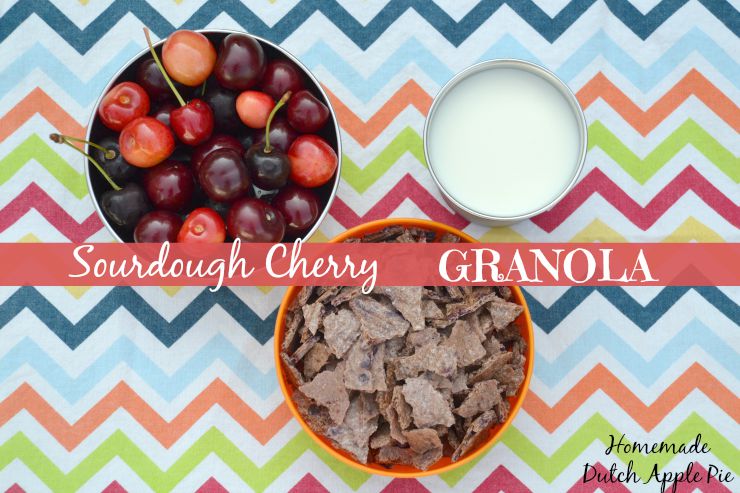
Sourdough Cherry Granola | Homemade Dutch Apple Pie

Sourdough Cherry Granola

Sourdough cherry granola is a simple, traditionally prepared breakfast cereal that incorporates fresh cherries with a touch of maple syrup and honey. No baking required and only five ingredients! It doesn’t get much easier.

Sourdough Cherry Granola | Homemade Dutch Apple Pie

When I was in college I got hooked on granola. I have no idea what brand they had, but the granola in the cereal bins in our cafeteria was amazing!

Just thinking about it makes me want a bowl. Granola and milk…two things I miss dearly.

I looked forward to it every single day. Yes, I said every day.

If you’ve been around here long you know that eating the same foods every day often leads to an intolerance or even allergy. Which is why I now am on a rotational diet.

Can you guess what I can’t eat now? Oats. Which means no traditional granola.

Sourdough Cherry Granola | Homemade Dutch Apple Pie

There are alternatives.

I’ve made alternative versions of granola over the years like grain free granola and soaked cereal.

Nuts have been out of my diet for a long time now. And lately my little one reacts to so many things that my grain options are dwindling…even many of my usual gluten free grains.

Instead I use a lot of sourdough right now (but of course I try not to eat it every day!)

What do you do with bowls full of cherries?

After cherry picking recently I was trying to brainstorm new ways to use up cherries. I decided to try my hand at making granola using my sourdough starter with added cherries for a sweet twist.

Making granola could not get any simpler! There are only five ingredients in sourdough cherry granola. All you do is mix and dehydrate.

The result is a sweet, fruity, crunchy cereal perfect for snacking or an easy summer breakfast.

Sourdough Cherry Granola | Homemade Dutch Apple Pie

Sourdough Cherry Granola
Serves 12
A sweet, fruity, crunchy granola made with traditional sourdough and sweet cherries.
Write a review
Print
Ingredients
  1. 2 1/2 cups sourdough starter
  2. 1 cup sweet cherries, pitted
  3. 1/4 cup honey
  4. 1/3 cup maple syrup
  5. 1 tsp. unrefined sea salt
  6. optional: 1/2 tsp. baking soda to make it a bit softer
  7. optional after drying: chopped nuts, dried fruit, coconut flakes, min chocolate chips
Instructions
  1. 3 - 9 hours before making the granola feed your sourdough starter so you have at least 3 1/2 cups.
  2. Puree the cherries in a blender.
  3. Mix the cherry puree, sourdough starter, honey, syrup and salt (and soda if using).
  4. Pour the mixture onto parchment lined dehydrator trays (this filled two trays in my Excalibur).
  5. Dry on the highest setting until crisp (this took about 15 hours for me).
  6. Break the granola into small pieces for granola or large pieces for crackers.
  7. Store in a sealed container in the cupboard or in the freezer for long term storage.
Notes
  1. You can replace the cherries with strawberries, blueberries, raspberries or a combination of fruit.
  2. You can use all honey or all maple syrup. The combination gives a neutral/mild sweet flavor.
Just Take A Bite https://justtakeabite.com/
There is no flour added to the sourdough starter so you don’t have to worry about waiting for grains to ferment.

There is also no need to worry about oats!

Are oats really that great?

It’s funny that oats are such a staple in our culture. Oatmeal is thought of as the “perfect breakfast” and great for heart health. But I find that many people have a really hard time digesting oats. Even my mom (that doesn’t know a ton about real food) thinks they are hard on your stomach.

And if they are not properly prepared they are extra hard on your gut due to the high phytic acid content.

I attempted to eat oats once recently…and my baby had such  horrible reflux or stomach pain (she can’t tell us which yet) that she just screamed. So it’s nice to have an alternative to the traditional oat-based cereals.

Sourdough Cherry Granola | Homemade Dutch Apple Pie

But how does it taste?

Now let’s get to the really important part – what my kids think.

They love it!

To be honest we haven’t been eating it as cereal much. But we have been munching on it a lot!

Sourdough cherry granola is the perfect finger food for snacks whether at home or on the go. It is not messy and stays good at room temperature.

I kept my sourdough cherry granola simple. If you want to spruce it up you can add dried fruit, nuts, coconut flakes or chocolate chips after it is dried and crumbled.

Not a cereal fan? Break the dried sheets into larger chunks for crackers!

Sourdough cherry granola is a great way to use fresh summer fruit. If you want to change it up you can swap blueberries, strawberries or raspberries for the cherries.

Give yourself a break.

This summer let yourself sleep in once in a while and wake up to a simple, no prep breakfast. Pour raw milk over your sourdough cherry granola or sprinkle the granola on a dish of whole milk yogurt.

Take five minutes and five ingredients to get sourdough cherry granola going. Then let your dehydrator do the work. Stock your pantry and your freezer with this delicious breakfast.

Are you a granola fan? What is your favorite version?

Sourdough Cherry Granola | Homemade Dutch Apple Pie

In order for me to support my blogging activities, I may receive monetary compensation or other types of remuneration for my endorsement, recommendation, testimonial and/or link to any products or services from this blog.

Sourdough Bagels with Strawberry Cream Cheese

Sourdough Bagels With Strawberry Cream Cheese | Homemade Dutch Apple PieIf I could only have one bread item it would be a bagel. I fell in love with them at an early age and still love them now!

But I rarely eat bagels since we are mostly gluten free and don’t eat store bought bread.

After getting a donut pan for Christmas (and then another one for my birthday!) I thought it would be fun to use them to make bagels. It sure was.

Sourdough bagels make an easy week day breakfast. Spread on some homemade strawberry cream cheese, butter, coconut oil or jam. Then add a protein and breakfast is served.Sourdough Bagels With Strawberry Cream Cheese | Homemade Dutch Apple Pie

My kids really enjoyed these bagels – especially with strawberry cream cheese.  The homemade cream cheese is easy to make and does not contain any artificial colors or sweeteners. I make it using homemade powdered sugar.

Whether you want a bagel for breakfast on the go, a fun lunch component or a family brunch, these sourdough bagels are perfect.

If you don’t have a donut pan you can simply shape the dough into rounds and bake them on a greased baking sheet. They may look a little more rustic, but they’ll taste just as good.

Do you enjoy bagels with cream cheese? Now you can have a real food version.

Sourdough Bagels With Strawberry Cream Cheese | Homemade Dutch Apple Pie

Sourdough Bagels With Strawberry Cream Cheese
Yields 8
Traditional sourdough bagels with homemade strawberry cream cheese.
Write a review
Print
Bagels
  1. 1 cup sourdough starter
  2. 2 cups spelt flour (or kamut, einkorn, whole wheat or rye)
  3. 2 tsp. sea salt
  4. 1/4 cup cold water
  5. 3 Tbsp. honey
  6. Optional mix ins or toppings - flax seeds, sesame seeds, caraway seeds, poppy seeds, salt, garlic powder, onion powder
Cream Cheese
  1. 3/4 cup yogurt
  2. 1/4 cup thawed strawberries
  3. 2 Tbsp. powdered sugar (see recipe for link)
  4. 3 tsp. tapioca flour
Bagels
  1. Feed your starter so you have at least 2 cups the day before making the bagels.
  2. Combine the starter, salt, water and honey in the bowl of a stand mixer.
  3. Add the flour and any optional add ins.
  4. Knead for 10 minutes.
  5. Divide the dough into 1/3 cup portions.
  6. Roll the dough pieces into long snakes and make a ring, attaching the ends together.
  7. Place the bagels on a greased or parchment lined baking sheet.
  8. Cover and let rise 6-12 hours.
  9. Brush with egg white mixed with a little water before baking if desired for a shiny crust.
  10. Bake at 350*F for 40 minutes.
Cream Cheese
  1. Strain the yogurt well in a cheesecloth or tea towel to remove all of the liquid.
  2. Place the strained yogurt in a medium bowl.
  3. Add the strawberries (with liquid), sugar and flour. Beat well with a hand mixer.
  4. Put the cream cheese in the refrigerator and chill to solidify.
Just Take A Bite https://justtakeabite.com/

Honey Sourdough Soft Pretzels With Bacon Cheddar Cheese Sauce

Honey Sourdough Soft Pretzels with Bacon Cheddar Cheese SauceA few months ago I re-introduced wheat into our diets in the form of traditionally prepared sourdough. So far it’s going very well.  It is the only wheat we eat. Since it is fermented most of the gluten is broken down. I also use spelt since it is a milder form of wheat.

Since then I’ve been making a variety of sourdough goodies. Of course I make plenty of bread. But I also make fun food like these soft pretzels.

My kids and my husband really enjoyed these – especially with a delicious bacon cheese sauce!Honey Sourdough Soft Pretzels with Bacon Cheddar Cheese Sauce | Homemade Dutch Apple Pie

Sourdough pretzels are super easy to make. The dough is very easy to work with.

The pretzels are also very filling. You can turn them into a simple Sunday night dinner by paring the pretzels and cheese with a salad (topped with a little protein and homemade dressing with healthy fat).  You’ll get a good balance of protein, carbohydrates and fat.

Need a treat while watching sports? Sourdough soft pretzels are perfect! You can make mini ones for munching like appetizers. Or you can really feel like you’re at the game by indulging in some giant pretzels like you’d get at a concession stand (minus the neon cheese and chemicals).Honey Sourdough Soft Pretzels with Bacon Cheddar Cheese Sauce | Homemade Dutch Apple Pie

These would also be great for a kid’s birthday party. Mini soft pretzels with little cheese cups for dipping.

Honey sourdough soft pretzels with bacon cheddar cheese sauce are fun for kids and adults.  Plus they are properly prepared and don’t contain any unhealthy ingredients. Honey Sourdough Soft Pretzels with Bacon Cheddar Cheese Sauce | Homemade Dutch Apple Pie

Honey Sourdough Soft Pretzels with Bacon Cheddar Cheese Sauce
Yields 10
A traditional sourdough soft pretzel with bacon cheese dipping sauce.
Write a review
Print
Bagels
  1. 2 cups sourdough starter
  2. 3 3/4 cups spelt flour (or kamut, einkorn, whole wheat or rye)
  3. 1/2 Tbsp. sea salt
  4. 1/3 cup cold water
  5. 3 Tbsp. honey
  6. sea salt for topping
Bacon Cheese Sauce
  1. 1 Tbsp. arrowroot or tapioca flour
  2. 1 Tbsp. bacon grease
  3. 1/2 cup milk
  4. 1/2 cup grated cheddar cheese
  5. 1/4 cup cooked, crumbled bacon (optional)
  6. salt and pepper to taste
Bagels
  1. In the bowl of a stand mixer combine the starter, salt, water and honey. Gently mix with a wooden spoon until the salt and honey dissolve.
  2. Add the flour. Mix with the dough hook for 15 minutes.
  3. Remove the dough from the mixer.
  4. Divide it into 10 - 12 equal portions.
  5. Roll the each piece of dough into a long snake and shape it into a pretzel.
  6. Place the pretzels on a greased or parchment lined baking sheet.
  7. Cover and let rise 6-12 hours.
  8. Bake at 350*F for 35 - 40 minutes.
  9. Brush with butter, oil or water and sprinkle on sea salt if desired.
  10. Store unused bagels in a sealed container at room temperature or in the freezer.
Bacon Cheese Sauce
  1. Cook and crumble bacon in advance if you want bacon pieces in your sauce. Reserve the bacon grease.
  2. In a small sauce pan combine the arrowroot and bacon grease. Heat over medium heat until the grease is melted and they combined.
  3. Slowly add the milk, whisking constantly.
  4. Continue to whisk until the milk heats and gets to the point it is about to boil.
  5. Reduce heat and add cheese. Whisk until the cheese is melted and combined into the sauce.
  6. Season with salt and pepper to taste.
  7. Add crumbled bacon if desired.
Notes
  1. If you want the bagel a bit sweeter you can add an extra 1-2 Tbsp. of honey or cane sugar.
  2. Any type of cheese that melts well can be used in place of cheddar.
Just Take A Bite https://justtakeabite.com/

The Hows and Whys of Preparing Grains

The Hows and Whys of Grains | Homemade Dutch Apple PieOne of my goals this year is to get back on track with properly preparing my grains. I’ve been doing it for years now, but got off track with pregnancy and a new baby.

Some may say to just avoid grains. But I tried that and learned that my body needs them! The most unhealthy I’ve ever been was when I went grain free.  Grains can be a very healthy part of a real food, traditional diet. Even Nourishing Traditions and GAPS mention the benefit of properly prepared grains.

So to help us all get to where we need to be I’m sharing some information about why you need to treat your grains in a special way if you are going to consume them and how it’s done.  I actually wrote most of this a couple years ago! But never shared it here. It’s a good reminder for myself. Hopefully it’s a great starting point or reminder for you as well.

In the weeks following this introduction I’ve got some basics and some fun recipes coming that all involve properly prepared grains. I hope you enjoy!

One of the oddest and most confusing aspects of real food is the idea of soaking grains. Switching to butter instead of margarine? No problem. Drinking raw milk instead of pasteurized? You bet. Using honey instead of corn syrup? Done. Get your flour wet before using it? Say that again? Wet flour? How could that work? And why would you want to?  But if you understand why you might find yourself turning your favorite baked goods into healthier soaked versions. The Hows and Whys of Grains | Homemade Dutch Apple Pie

It turns out there is actually a good reason to soak grains. Little things called phytates. Grains contain anti-nutrients as a protective mechanism. This protects them from weather and animals. But it also makes them difficult to digest. Your digestive juices are enemies of the grains just like any external enemy. Grains also have compounds that prevent active enzyme activity in your digestive system. This puts stress on your pancreas. 

In the unsoaked state grains contain phytates, which makes the minerals in the grains unavailable to you. This can lead to mineral deficiencies and poor bone density (one more thing I learned the hard way when I found out I have seven cavities!). Both enzyme inhibitors and phytic acid can be mostly neutralized by soaking the grains. This makes them easier to digest and makes the nutrients available to your body. This process also begins to pre-digest the grains, breaking down complex starches and tannins that can irritate your stomach, as well as beginning to break down proteins like gluten.The Hows and Whys of Grains | Homemade Dutch Apple Pie

So without soaking the grains they are very difficult to digest and are actually harmful to your body. This holds true for gluten-containing grains like wheat and rye but also for alternative grains like oats, amaranth and teff. In fact oats, such a dietary staple for so many, has the highest phytate content of any grains!

Grains that are not properly prepared are harmful. So how do you make them healthy? It’s not as hard as you might think. And, honestly, soaking often makes baking easier! It breaks up the process into very short steps that only take a few minutes here and there. The main thing you have to be willing to do is plan ahead. Soaking does take time. So if you want soaked pancakes in the morning, you have to plan and get them started the day before.The Hows and Whys of Grains | Homemade Dutch Apple Pie

The basic idea is that you use cultured dairy or another acid medium like lemon juice to soak the grains for at least 7 hours (ideally 24 hours) before using them. The length of time required will depend on the grain.

The easiest way to start is by using recipes that give exact instructions on what ingredients to use, how much and how long. Once you get the hang of it you can start experimenting. Simply replace the liquid in the recipe with a cultured/acidic medium (kefir, buttermilk, yogurt or warm water mixed with lemon juice), mix it with the grains, cover the bowl and let it sit. Then proceed with the recipe after the grains have soaked. You can also add the fat/oil during the soaking step.

Soaking can be used on all kinds of grains…wheat, oats, rice, etc. It is also used for lentils, beans and nuts. There are a few exceptions to the rule. Coconut flour, white rice, millet and flax seed are relatively low in phytic acid. Although soaking them will still be beneficial it is not as critical.

Although millet is low in phytic acid, it is goitrogenic. So limit your  millet intake if you have thyroid problems.

So what do you do if you don’t have time to soak your flour before baking, or what if you forgot to plan ahead? An alternative is to sprout the grains.  This is helpful for those times you have to do some last minute baking. Simply sprout the grains, dry them and grind them into flour. Then the phytates are already neutralized and you don’t have to soak it. You can buy sprouted grains if you do not want to make your own.The Hows and Whys of Grains | Homemade Dutch Apple Pie

A third option for dealing with phytates is sourdough. Sourdough also breaks down the phytates and makes the grains easier to digest. Sourdough can be used for all kinds of baked goods. If you want bread, sourdough is the way to go.

Soaking grains is a critical step in the baking process if you are not using sprouted grains or a sourdough starter. It is important for aiding digestion for everyone. It is especially crucial for anyone with a leaky gut, food allergies or food intolerances.  Even if you avoid some of the common grains like wheat and corn, you still have to properly prepare your food. If you have cut gluten out of your diet but have not noticed any improvement, try soaking the gluten free grains you eat. 

Some alternative grains and flours are teff, amaranth, tapicoa, millet, rice (white and brown), quinoa, coconut, hemp and garbanzo bean. These can be prepared in the same manner as their traditional counterparts. The Hows and Whys of Grains | Homemade Dutch Apple Pie

The next time you start baking ask yourself one question: “Is my flour wet?” If it is you’re on your way to a tasty treat that will be easier on your gut and provide your body with important vitamins and minerals.

Do you consume grains? What is your favorite way to prepare them?

Sourdough Bread


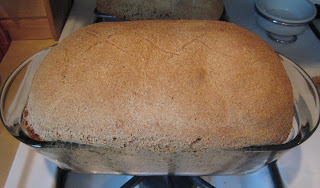
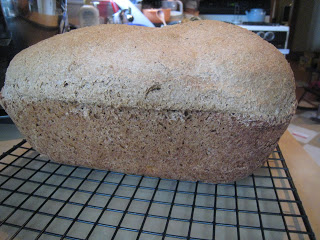
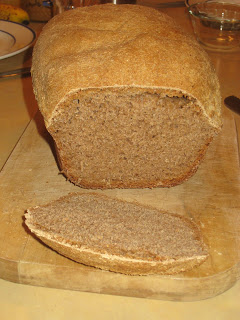
Sourdough Bread | Homemade Dutch Apple PieNow that I have a sourdough starter, I need to use it! My first experiment was the obvious…sourdough bread. I got the recipe from Nourishing Traditions.

The recipe makes a LOT of bread. I only did a half recipe to try it out. Especially since I had no idea if my starter was even good. I didn’t want to waste 13 cups of flour on something that might not work ๐Ÿ˜›  Plus I didn’t have 8 cups of starter.

After making quite a few loaves of sourdough bread now I have adjusted the recipe for making one loaf.

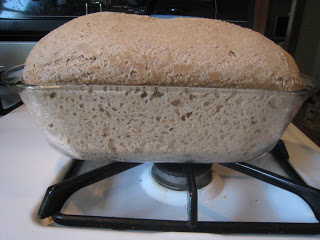
This is another plan ahead baking project. Sourdough bread has to rise for a long time. I mixed the dough in the morning (got the dough in the bread pans around 6:30 am). I didn’t end up baking it until about 6 pm! This works well if you want fresh bread for dinner.

Prepare the dough in the morning. Then pop it in the oven about 90 minutes before dinner.

For many people making traditional sourdough sounds intimidating. But it is actually so much easier than making a yeast bread.  You don’t have to worry about whether or not the yeast is working. You don’t have to get water temperatures just right. Sourdough is very forgiving. Plus it only takes three ingredients – flour, water and salt. Just mix, knead and bake.

Sourdough bread has a wonderful, mildly sour taste. It goes well with scrambled eggs or a bowl of soup. In my opinion the best way to eat it is plain with lots and lots of butter!

Sourdough bread is also great if you are pregnant or nursing.  The fermentation breaks down most of the gluten, if that is a concern (you must still avoid it if you have celiac). And sourdough bread helps with milk production. It is a great source of carbohydrates for a nursing mom.

Traditional sourdough is healthy and easy on your tummy. My whole family enjoys it even with our allergies and sensitivities. We seem to tolerate sourdough fine.

You can use a variety of flours when making sourdough. I always use rye for my starter. Then I usually use spelt for my baking. You can also use kamut or einkorn. Whole wheat works as well, but it may be harder to digest.

If you’ve never tried traditional sourdough bread you’re missing out! Get your sourdough starter going and whip up a loaf of fresh bread. Your whole family will enjoy it.

Once you’ve mastered sourdough bread you can try other delicious recipes like english muffins, honey walnut bread, granola muffins, crackers, breakfast cookiespizza dough and even graham crackers!

Do you enjoy sourdough bread? What is your favorite way to use sourdough?

Sourdough Bread
makes 1 large loaf

2 cups sourdough starter (at room temp)
3 cups spelt, kamut, einkorn or hard winter wheat flour
1/2 Tbsp. course sea salt
3/8 cup cold filtered water

The day before making the bread feed your sourdough starter (be sure you have at least 3 cups total) and leave it at room temperature.

Place the starter, salt and water in a large bowl (a stand mixer bowl works well) and mix with a wooden spoon until the salt has dissolved. Slowly mix in the flour (with a dough hook in a stand mixer). Add extra flour if the dough is too wet. Let it knead for 15 minutes.

Without pressing down the dough, cut or shape loaf into the desired shape and place it in a greased loaf pan. Cut a few slits in the top of the dough, cover and let rise from 4 to 12 hours.

Bake at 350 for about an hour. Allow to cool before slicing.

The bread will keep for up to a week without refrigeration.