Home ยป condiment

Tag: condiment

Missing tacos due to dietary restrictions? Bring back taco night with this simple night-shade free cucumber salsa. Free of allergens and nightshades, and low in Vitamin A, it's sure to be a hit!

Nightshade-Free Cucumber Salsa

Missing tacos due to dietary restrictions? Bring back taco night with this simple night-shade free cucumber salsa. Free of allergens and nightshades, and low in Vitamin A, it’s sure to be a hit!Missing tacos due to dietary restrictions? Bring back taco night with this simple night-shade free cucumber salsa. Free of allergens and nightshades, and low in Vitamin A, it's sure to be a hit!

Sometimes when Iโ€™m trying to meal plan and just canโ€™t think of anything to put on the menu, I crowd source. In other words, I ask my kids.

Itโ€™s inevitable that at least one of them suggests tacos (though I try not to bore my husband and actually serve them every week).

Itโ€™s usually my son making the suggestion. He has been my taco meat chef since he was six, and jumps at the chance to cook his โ€œfamousโ€ taco meat (you can get his taco seasoning recipe here).

Taco night has always been one of my favorites too, from childhood until now. I mean, who doesnโ€™t love a good taco?

Vitamin A Detox Diet Tacos

Our tacos have certainly evolved over the years, through all sorts of food allergies and dietary restrictions. These days taco night is a bit more challenging on the Vitamin A Detox Diet. No tomatoes, peppers, avocado, or cheese.

I know that may not sound like much is left.

But we still have delicious tacos regularly!Missing tacos due to dietary restrictions? Bring back taco night with this simple night-shade free cucumber salsa. Free of allergens and nightshades, and low in Vitamin A, it's sure to be a hit!

One key component is this nightshade-free cucumber salsa.

Not only is it easy to make, itโ€™s totally delicious! Even my pickiest eater loves it.

Nightshade-Free Cucumber Salsa

There is no cooking involved to make cucumber salsa. The most work youโ€™ll have to do is peel and chop a cucumber. Or better yet, delegate it to your kids. My oldest loves to make cucumber salsa for the family when weโ€™re having tacos.


Teach your kids to cook with the Kids Cook Real Food eCourse!

Check it out HERE!


Once the veggies are prepped you just mix all of the ingredients in a jar and let it chill for a few minutes. So, you can still have delicious salsa even if you donโ€™t remember to make it until fifteen minutes before dinner!Missing tacos due to dietary restrictions? Bring back taco night with this simple night-shade free cucumber salsa. Free of allergens and nightshades, and low in Vitamin A, it's sure to be a hit!

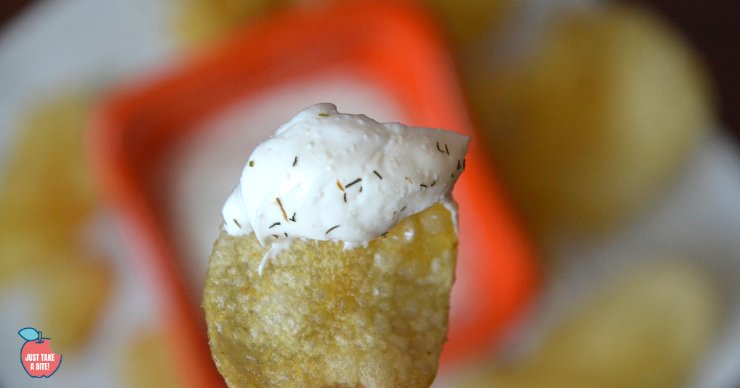
This nightshade-free cucumber salsa tastes amazing as a dip with organic tortilla chips.

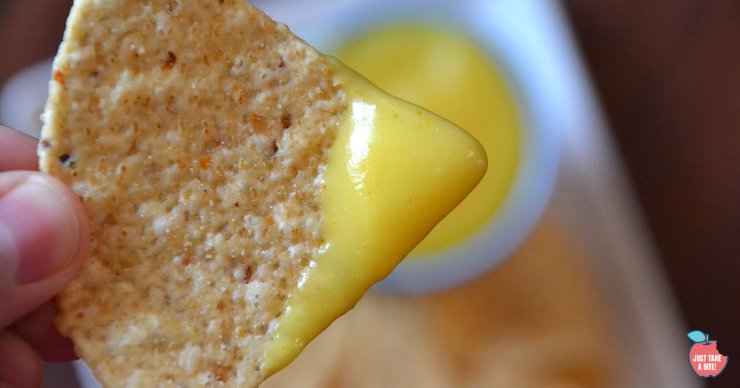
Most of the time we use it on tacos, taco bowls, or nachos (topped with this gooey dairy-free cheese sauce!).

What is on VAD Diet Tacos?

For VAD Diet-safe tacos we use either organic blue corn hard shells (I like this brand) or homemade white corn soft shells, and fill them with seasoned ground beef or chicken.

Toppings include:

  • Cucumber salsa
  • Grated zucchini cheese (grab the recipe here)
  • Sour cream (my kids can have a small amount of cream)
  • Black beans or refried pinto beans (I cook them in the Instant Pot)

Our tacos are simple, but so, so delicious!Missing tacos due to dietary restrictions? Bring back taco night with this simple night-shade free cucumber salsa. Free of allergens and nightshades, and low in Vitamin A, it's sure to be a hit!

What Are Nightshades?

Most healing diets eliminate nightshades. These include tomatoes, peppers, eggplants, and potatoes, plus a few other less-common foods like goji berries, ashwagandha, Cape gooseberries, ground cherries, and garden huckleberries.

For many people nightshades are a pain – literally. Nightshades cause calcinosis, a calcification of soft tissues, due to calcitriol. Calcitriol is a very potent hormone, possibly the most powerful hormone in your body!

Calcitriol tells your intestines to absorb calcium. Too much can quickly lead to hypercalcemia. This is the cause of calcium deposits in your soft tissue, also known as joint pain, muscle stiffness, arthritis, coronary artery disease, and more.

If you struggle with any type of chronic pain or weakness, consider cutting nightshades out of your diet. Or if you have issues with osteoporosis you might want to consider eliminating nightshades as well.

Here is a a great article on nightshades if you want to read more!

We do still eat some potatoes (though not if they are green or sprouting!). But we avoid all of the other nightshades.Missing tacos due to dietary restrictions? Bring back taco night with this simple night-shade free cucumber salsa. Free of allergens and nightshades, and low in Vitamin A, it's sure to be a hit!

Salsa Without Tomatoes

Now even if you are nightshade-free you can enjoy chips and salsa or everyoneโ€™s favorite taco night with this super simple cucumber salsa. Having salsa without tomatoes is totally doable and delicious.

What is taco night like at your house? What are your favorite toppings?

5 from 1 vote
Print

Nightshade-Free Cucumber Salsa (VAD Diet)

A quick and easy salsa free of nightshades.

Prep Time 10 minutes
Cook Time 0 minutes
Servings 4
Author Mary | Just Take A Bite

Ingredients

  • 2 cups cucumber peeled and diced
  • 1 1/2 tsp. apple cider vinegar or white vinegar
  • 3/4 tsp. salt
  • 1/4 tsp. garlic powder of 1 clove fresh garlic, minced
  • 1 1/2 tsp. organic cane sugar
  • 1/4 cup white onion, diced optional

Instructions

  1. Combine all of the ingredients in a jar.

  2. Mix and chill for at least 10 minutes.

  3. Store in the refrigerator for up to a week.

Summer preservation just got a little easier. This pectin-free easy strawberry freezer jam is the perfect way to use fresh strawberries. Just FOUR real food ingredients!

Pectin-Free Easy Strawberry Freezer Jam

Summer preservation just got a little easier. This pectin-free easy strawberry freezer jam is the perfect way to use fresh strawberries. Just FOUR real food ingredients!Summer preservation just got a little easier. This pectin-free easy strawberry freezer jam is the perfect way to use fresh strawberries. Just FOUR real food ingredients!

You know summer has arrived in Michigan when strawberries are in season. It’s an exciting time of year! But at the same time it means preservation season has also begun.

For me this lasts from June to November. Literally half of the year I am preserving food for the other half of the year! It’s a lot of work, but so worth all of the effort.

How to Preserve Strawberries

I’m always so thankful that we kick off preservation with fruit like strawberries. I can ease into it instead of jumping right into the labor intensive canning. Fresh strawberries are so easy to work with. Simply wash, hull and freeze. We usually freeze at least four gallons of strawberries to use all winter in yogurt, smoothies, and muffins.

While the strawberries are still fresh I like to make a lot of strawberry jam. It has recently become my preschooler’s favorite food. Our homemade gluten free bread toasted with butter and strawberry jam. No other flavor. Only strawberry.

Summer preservation just got a little easier. This pectin-free easy strawberry freezer jam is the perfect way to use fresh strawberries. Just FOUR real food ingredients!

How to Make Pectin-Free Strawberry Freezer Jam

There are so many ways to use strawberries when they are fresh. There are even plenty of ways to use them once they are frozen. But one of the best ways to use them, fresh or frozen, is by making strawberry jam!

I’ll confess. I’ve never been that great at making jam.

I followed recipes exactly. I bought various types of pectin. It just never seemed to turn out well. I think my husband was starting to wonder if I would ever make jam that wasn’t like liquid or totally solid.

So I created my own recipe for pectin-free easy strawberry freezer jam. And it is amazing!

I love this recipe because you don’t need pectin (the debate is still out on whether or not pectin is really that great for you). Instead it uses grass-fed gelatin (Use the code TAKE10 to get 10% off gelatin HERE).Summer preservation just got a little easier. This pectin-free easy strawberry freezer jam is the perfect way to use fresh strawberries. Just FOUR real food ingredients!

How to Stock Your Freezer with Jam

This pectin-free strawberry freezer jam recipe makes about five half-pints of jam.  Since it only takes about fifteen minutes to make you can easily cook several batches in one day while you have fresh strawberries.

Pectin-free easy strawberry freezer jam is great on toast. But  you can also spread it on pancakes, mix it into yogurt, or even use it as an ice cream topping! My kids like to eat it by the spoonful.  It’s that good.

Since creating this strawberry jam recipe I have upped my game in jam and jelly making! We now enjoy homemade pectin-free concord grape jelly, 5 minute peach jam, and red plum raspberry jelly! They are all pectin free!

Whether you still have fresh strawberries available or you already have your stash in the freezer, try making pectin-free easy strawberry freezer jam.

You’ll have a little taste of summer ready in your freezer all year long.Summer preservation just got a little easier. This pectin-free easy strawberry freezer jam is the perfect way to use fresh strawberries. Just FOUR real food ingredients!

Summer preservation just got a little easier. This pectin-free easy strawberry freezer jam is the perfect way to use fresh strawberries. Just FOUR real food ingredients!
5 from 2 votes
Print

Pectin-Free Easy Strawberry Freezer Jam

Simple strawberry freezer jam with only four ingredients and no pectin.

Prep Time 5 minutes
Cook Time 10 minutes
Total Time 15 minutes
Author Mary | Just Take A Bite

Ingredients

  • 1/4 cup organic lemon juice
  • 3 1/2 tsp. grass-fed gelatin
  • 3/4 cups organic cane sugar or coconut sugar or honey
  • 5 cups strawberries, washed, hulled and roughly chopped fresh or frozen

Instructions

  1. In a medium sauce pan combine the lemon juice and gelatin. Let sit 2 minutes

  2. Add the sweetener and strawberries.

  3. Cook over medium heat, stirring and mashing berries with a potato masher, for about 10 minutes.

  4. Pour the jam into half-pint jars.

  5. Chill jam in the refrigerator until set.

  6. Use the jam fresh or freeze until ready to use.

Recipe Notes

  • This makes about five half-pints.
  • If using frozen berries, thaw them at least partially before making the jam


Living dairy free isn't always easy. But it can certainly be delicious! This simple dairy free cheese sauce is perfect on nachos, pizza or mac 'n' cheese!

Simple Dairy-Free Cheese Sauce Recipe

Living dairy free isn’t always easy. But it can certainly be delicious! This simple dairy free cheese sauce is perfect on nachos, pizza or mac ‘n’ cheese!Living dairy free isn't always easy. But it can certainly be delicious! This simple dairy free cheese sauce is perfect on nachos, pizza or mac 'n' cheese!

Although we’ve been on a trial and error food journey for many years I think we have come to a first. For the first time all four kids and myself are dairy-free at the same time.

In some ways it’s a pain. I mean, how easy is it to grab some yogurt for breakfast or a slice of cheese for a snack?

But at the same time it’s been nice to have us all eating the same food! No making multiple versions of everything.

Dairy-Free Alternatives

With five out of six family members dairy-free I knew I’d have to get creative in the kitchen again. Eliminating all dairy impacts a lot of your meal options. And I’m not a fan of most store-bought dairy alternatives. They are loaded with synthetic vitamins (especially A and D!). Not to mention they often contain unhealthy oils, gums and stabilizers. No thanks.Living dairy free isn't always easy. But it can certainly be delicious! This simple dairy free cheese sauce is perfect on nachos, pizza or mac 'n' cheese! #dairyfree #glutenfree #allergenfree

Being someone that never shies away from a kitchen challenge I set to work recreating the basics. I started with rice milk since my oldest son has been drinking it for years. But until this point I had been buying it.

That led to experimenting with rice milk yogurt. And before I knew it I was making dairy-free cheese sauce!

Dairy-Free Substitute for Cheese

This recipe was sort of accidental. But that seems to be how the best ones are created! We were having a baked potato bar for dinner. I wanted to have broccoli and cheese sauce with it.

The sauce turned out so well that we tried it again with nachos. And again on pizza. And again in mac ‘n’ cheese. And again in omelettes.

In other words, my kids have gone crazy for it! I love it too. I think we’ve made it multiple times a week ever since I created the recipe!

The best part is that it’s so easy to make. My ten-year-old made it by herself the other day when the kids made me nachos for my birthday. You can see how hard they worked HERE.


My kid have been learning to cook for a few years now through the Kids Cook Real Food online cooking class. It’s one of the best investments I’ve made, both of my time and my money. Check it out here.


Living dairy free isn't always easy. But it can certainly be delicious! This simple dairy free cheese sauce is perfect on nachos, pizza or mac 'n' cheese! #dairyfree #glutenfree #allergenfreeEasy Protein on a Dairy-Free Diet

This dairy-free cheese sauce only has a few simple ingredients. Which always makes me happy. They include:

  • Organic rice flour
  • Water
  • Avocado oil or MCT oil
  • Salt
  • Organic cane sugar
  • Turmeric
  • Grassfed collagen

One of the star ingredients is grassfed collagen.

Collagen adds a bit of healthy protein to the cheese sauce. Not to mention collagen may improve your skin, hair and bone health (learn more here).

I always buy my collagen from Perfect Supplements. It is non-GMO and glyphosate free! Not to mention Perfect Supplements has the best deals.


Use the code TAKE10 to get 10% off your entire Perfect Supplements order.

Here’s a little secret. I always stock up when I buy collagen because I use it in SO MANY things every day.

If you buy three Perfect Supplements products you can get 25% off PLUS the extra 10%. That’s 35% off. And if you really want to stock up, you can get 30% off when you buy six…PLUS the 10% off. That’s 40% off!!

Perfect Supplements Sale


Living dairy free isn't always easy. But it can certainly be delicious! This simple dairy free cheese sauce is perfect on nachos, pizza or mac 'n' cheese! #dairyfree #glutenfree #allergenfreeSimple Dairy Substitutes

I’ve had readers asking me for weeks about the dairy-free cheese sauce recipe. And I’ve got it for you today! But I went a step farther and actually have TEN dairy-free recipes for you! An entire dairy substitute recipe book. For free.

The book includes recipes for a variety of dairy-free milks, yogurt, cheese (both sauce and sliced), ice cream and pudding. All of the recipes are kid approved.Living dairy free isn't always easy. But it can certainly be delicious! This simple dairy free cheese sauce is perfect on nachos, pizza or mac 'n' cheese! #dairyfree #glutenfree #allergenfree

The recipes are easy to make, gluten, egg and dairy-free, and don’t contain strange ingredients. Quite a few of the recipes include either collagen or gelatin, so make sure you grab yours HERE (use the code TAKE10).

Are you ready for some dairy-free goodness? Download your copy of 10 Simple Dairy Substitutes below.

Have you been missing some of your favorite foods on a dairy-free diet? You don’t have to suffer any longer! Grab my 10 Simple Dairy Substitutes ebook today and get cooking! Then come back and let me know how you like the cheese sauce!!

What form of dairy do you miss the most on a dairy-free diet?Living dairy free isn't always easy. But it can certainly be delicious! This simple dairy free cheese sauce is perfect on nachos, pizza or mac 'n' cheese! #dairyfree #glutenfree #allergenfree

Chips and dip make a great side dish for any party or picnic. Make it real food style with this easy homemade chip dip. Just ONE ingredient plus seasoning.

Easy Homemade Chip Dip

Chips and dip make a great side dish for any party or picnic. Make it real food style with this easy homemade chip dip. Just ONE ingredient plus seasoning.Chips and dip make a great side dish for any party or picnic. Make it real food style with this easy homemade chip dip. Just ONE ingredient plus seasoning.

One of the easiest side dishes any time of year is chips with dip. I know, you may be thinking that doesn’t sound very healthy. But it can be!

Buy your favorite kind of chip (we like the potato chips made with avocado oil or olive oil) or make a batch of homemade chips. Better yet swap the chips for some homemade teff crackers or gluten-free Wheat Thinยฎ style crackers. You still get the crunch without eating chips. Then all you have to do is take one minute to mix up a quick dip.

What is in Homemade Chip Dip?

This chip dip reminds me of my favorite childhood dip – french onion. What’s great about this homemade version is what it’s missing…namely MSG (read about the dangers of MSG here) or anything artificial. Just a few simple ingredients.

This is also not a dip full of spice. We keep it simple for the oral sensory issues in our family. But that doesn’t mean it’s low on flavor. This simple chip dip tastes great and packs a punch of flavor.Chips and dip make a great side dish for any party or picnic. Make it real food style with this easy homemade chip dip. Just ONE ingredient plus seasoning.

What Can you Dip in Chip Dip Besides Chips?

If you don’t eat chips, this dip works very well for fresh vegetables. Our favorite is cucumbers. We even enjoy it on a burger whether it’s with a bun or simply as a dip when going bun-less. That’s what my kids do most of the time since gluten-free buns are expensive. Plus it’s just easy for kids to dip!

Homemade chip dip is very versatile.

Easy Dip for Kids

Chip dip works well for packing school lunches. A tasty dip is a great way to get kids to eat fresh vegetables. Serve a combination of chips or crackers and veggies. Even if you have reluctant veggie eaters you might be surprised that they eat it all when served together.

Making chip dip is also a great activity for kids. Even the little ones. You really can’t mess it up (the recipe is very forgiving…and you can always add extra sour cream if they go a little overboard with seasoning).

My four-year-old LOVES to help in the kitchen. I like to put her on dip duty. It keeps her hands busy, and she feels so proud that she is helping.Chips and dip make a great side dish for any party or picnic. Make it real food style with this easy homemade chip dip. Just ONE ingredient plus seasoning.


All of my kids know their way around the kitchen thanks to the Kids Cook Real Food eCourse. We’ve been doing it since 2016! Check it out HERE if you’re interested in getting your kids cooking.


Is Chip Dip Dairy-Free?

This version of chip dip is made with dairy. While my kids are mostly dairy-free, they do tolerate butter and a small amount of cream. So we still use a little sour cream.

But if you can’t have any dairy you could make this with coconut sour cream or almond milk sour cream. Both sound delicious!

The next time you are in the mood for chips and dip try this simple homemade version of chip dip. It takes less than one minute to make and will be a family favorite.Chips and dip make a great side dish for any party or picnic. Make it real food style with this easy homemade chip dip. Just ONE ingredient plus seasoning.

Easy Homemade Chip Dip

A simple chip dip made with real ingredients that only takes a minute to prepare.

Prep Time 1 minute
Servings 8
Author Mary | Just Take A Bite

Ingredients

  • 2/3 cup organic sour cream
  • 1/2 tsp. salt
  • 1/2 tsp. organic garlic powder
  • 1/2 tsp. organic onion powder
  • 1 tsp. organic dried dill weed (optional - not allowed on VAD Diet)

Instructions

  1. Combine all of the ingredients in a glass jar.

  2. Mix until well combined. Adjust seasoning to taste.

  3. Serve with chips, crackers or vegetables.

  4. Store, covered, in the refrigerator for up to 2 weeks.

Grain and nut free mineral rich hummus makes the perfect snack or lunch box addition. This is will soon become a kid favorite for dipping veggies!

Grain and Nut Free Mineral Rich Hummus

Grain and nut free mineral rich hummus makes the perfect snack or lunch box addition. This is will soon become a kid favorite for dipping veggies!Grain and nut free mineral rich hummus makes the perfect snack or lunch box addition. This is will soon become a kid favorite for dipping veggies!

It’s time to get back to routines, back to school, back to nourishing lunches! If you haven’t set any goals, a good one is to make sure your kids are being nourished every single day at every meal.

It may sound daunting, but it’s not. Real food is actually quite simple. Want a snack? Have a pear. Have some pepper slices. Simple.

Want to know what else is simple?

My grain and nut free mineral rich hummus!

It’s so simple my kids can make it themselves. Just a few ingredients tossed in the blender. Done in less than five minutes.Grain and nut free mineral rich hummus makes the perfect snack or lunch box addition. This is will soon become a kid favorite for dipping veggies!

If you want to avoid using canned beans, the easiest way to cook chickpeas is in your Instant Pot!

But what makes it mineral rich?

In addition to the usual chickpeas and oil, I like to add pumpkin seeds. They are loaded with zinc, potassium, magnesium, iron, manganese, phosphorus and vitamin E!

The seeds are ground right into the hummus, so you’d never know they’re there. But they really boost the nutrition. You could also use sunflower seeds and/or hemp seeds to vary the minerals.Grain and nut free mineral rich hummus makes the perfect snack or lunch box addition. This is will soon become a kid favorite for dipping veggies!

Allergy Friendly Hummus

I like to keep my hummus very allergy friendly. No grains, nuts, dairy, eggs, soy or corn. Veggies with hummus is my go-to dish to bring to a family gathering. I have kids with allergies and a niece and nephew with allergies. So I try to make sure I bring something everyone can (and will!) eat.

My kids will eat hummus by the spoonful. I like to keep some on hand for easy snacks and lunch additions. If I have pepper and cucumber slices prepared, my three year old will grab a pile with the whole container of hummus and start dipping away.

This year make nourishing food a priority. But don’t stress yourself. Keep it simple with easy foods like fruits, veggies and my five minute grain and nut free mineral rich hummus. You never know, it might just be the trick to turn your kids into raw veggie lovers!

Are your kids adventurous eaters? They might like my pesto hummus!Grain and nut free mineral rich hummus makes the perfect snack or lunch box addition. This is will soon become a kid favorite for dipping veggies!

Grain and Nut Free Mineral Rich Hummus
Serves 10
A simple, mineral rich dip for veggies or crackers.
Write a review
Print
Ingredients
  1. 1 1/2 cups chickpeas (cooked, boxed or canned), drained, liquid reserved
  2. 4 Tbsp. extra virgin olive oil or avocado oil
  3. 6 Tbsp. bean liquid or water
  4. 2 Tbsp. pumpkin seeds (or sunflower or hemp)
  5. 1/4 tsp. unrefined sea salt
  6. 1/4 tsp. garlic powder
  7. 1/2 tsp. onion powder
  8. 1/4 tsp. dillweed (optional)
  9. 1/4 tsp. desiccated liver (optional)
Instructions
  1. Combine all of the ingredients in a blender.
  2. Blend on high until smooth. Add extra liquid/water if needed.
  3. Adjust seasoning to taste.
  4. Serve immediately or refrigerate (up to one week) until ready to serve.
Just Take A Bite https://justtakeabite.com/
Ready to dress up your summer salad? In less than five minutes this creamy spinach pesto salad dressing goes from the blender to your bowl!

Creamy Spinach Pesto Salad Dressing

Ready to dress up your summer salad? In less than five minutes this creamy spinach pesto salad dressing goes from the blender to your bowl!

Ready to dress up your summer salad? In less than five minutes this creamy spinach pesto salad dressing goes from the blender to your bowl!

I don’t know about about you but when June rolls around I am so ready to get my salad on! I actually love eating salads year round. But something about the warm, summer weather makes me crave salad.

And when it comes to dressing I am not a traditional girl. Ranch? No thanks. Italian? Blech. I used to always eat honey mustard (I even have over four versions of it on the blog!!), but when I had to give up mustard for two years I lost that taste too.

Ready to dress up your summer salad? In less than five minutes this creamy spinach pesto salad dressing goes from the blender to your bowl!

My New Favorite

These days my salad dressing usually contains desiccated liver, fermented kale or aquatic greens…or all three if I’m really feeling the need to boost nutrients.

But there is one thing I always love on my salads – pesto! I usually make a really mild and simple version of pesto with peas (super kid friendly!!!).

Ready to dress up your summer salad? In less than five minutes this creamy spinach pesto salad dressing goes from the blender to your bowl!

Recently I had the opportunity to try some Taylor Farms organic salad mixes. I went right for the baby spinach and popped it in the blender with olive oil, Stonyfield whole milk yogurt and seasoning. Amazing!

I served it with dinner on a bed of Taylor Farms mixed spring greens. The family loved it! My six-year old still isn’t a fan of lettuce salads. So he had cucumber, avocado and parmesan cheese topped with the creamy spinach pesto.  He sure was happy with his salad – and even asked for it again the next day!

Ready to dress up your summer salad? In less than five minutes this creamy spinach pesto salad dressing goes from the blender to your bowl!

Kid-Friendly Greens

Creamy spinach pesto is a great way to get your kids to eat their greens. It does not taste like eating spinach (my son will vouch for that!). Plus it is combined with healthy fats like whole milk yogurt and extra virgin olive oil to help utilize the vitamins and minerals in the spinach.

Ready to dress up your summer salad? In less than five minutes this creamy spinach pesto salad dressing goes from the blender to your bowl!

Even if your kids aren’t big salad eaters yet this creamy spinach pesto works well for dipping veggies or even chicken nuggets. We also like to eat it on noodles (pesto pasta!).

Ready to dress up your summer salad? In less than five minutes this creamy spinach pesto salad dressing goes from the blender to your bowl!

Sometimes I’m sneaky and add a little desiccated liver. My kids don’t mind the taste since I add it to everything. It really boosts the Vitamin A content!

If you’re like me and craving a good summer salad this dressing is for you! Grab a big bowl, some Taylor Farms organic salad mix, your favorite salad toppers and a big helping of creamy spinach pesto! Summer has officially begun.

What is your favorite salad dressing? Do you make your own dressing creations?

Ready to dress up your summer salad? In less than five minutes this creamy spinach pesto salad dressing goes from the blender to your bowl!

Creamy Spinach Pesto Salad Dressing
Serves 6
A creamy green dressing the whole family will love!
Write a review
Print
Ingredients
  1. 2 cups tightly packed spinach
  2. 1/2 cup frozen peas, thawed
  3. 2 Tbsp. plain, whole milk yogurt
  4. 2 Tbsp. extra virgin olive oil
  5. 1/4 - 1/2 tsp. unrefined sea salt
  6. 1/8 tsp. garlic powder
  7. 1/8 tsp. onion powder
  8. optional: 1/8 tsp. desiccated liver, 1/8 tsp. fermented kale powder, 1 Tbsp. pumpkin seeds, 1/4 cup grated Parmesan cheese
Instructions
  1. Run warm water over the peas to thaw or let sit on the counter to thaw.
  2. In a blender combine the spinach, peas, yogurt, oil, salt, garlic, onion and optional ingredients if desired.
  3. Blend on high until smooth, scraping sides as necessary.
  4. Adjust seasoning to taste.
  5. Serve immediately or store in the refrigerator up to one week.
Notes
  1. This dressing works well on salads, as a veggie dip, on pasta or for chicken nuggets.
  2. This recipe makes one cup of dressing and is easily doubled or tripled to serve at a picnic.
Just Take A Bite https://justtakeabite.com/
I am working with Stonyfield Yogurt and Taylor Farms for this post. I have been compensated for my time but all opinions expressed are my own.

Do you make mom self-care a priority or do you put yourself at the bottom of the to-do list? Here are simple steps to make mom matter!

Simple Steps Towards Mom Self-Care plus a Quick Vegetable Dip Recipe

Do you make mom self-care a priority or do you put yourself at the bottom of the to-do list? Here are simple steps to make mom matter!Do you make mom self-care a priority or do you put yourself at the bottom of the to-do list? Here are simple steps to make mom matter!

I’ve been mom-wired for as long as I can remember. I wanted to play with dolls all day every day from the time I was very little. I dreamed about nursing babies instead of being a princess. I loved to make food for my siblings and their friends and would even clean up after them. I was always willing to help around the house. I would just sit in the kitchen and watch my mom bake because it fascinated me.

Real Mom Life

I can’t say a whole lot has changed since then. I now have three kids of my own. I still love to cook for them and take care of them. It’s fun to dress them in cute clothes and do fun activities with them.

My writing is much the same. It focuses on feeding kids nourishing food and working through picky eating and allergies. All of my recipes have to be kid-approved. I even wrote two books about feeding kids (check them out here)!

Putting Mom Last?

You may have noticed that one thing has been left out of all of this…myself. Yes, I am just like so many other moms. I put myself at the bottom of my to-do list.

As I write this post I’m starting day seven of my husband being out of town. With a house and farm to care for, three kids to feed and tend to, lots of activities and home schooling I bet you can imagine how much time is left to think about myself (next to none).Do you make mom self-care a priority or do you put yourself at the bottom of the to-do list? Here are simple steps to make mom matter!

Mom Life Rocks!

I don’t say any of this to take pity on myself. It’s actually quite the opposite! I love my life. I wouldn’t change it for the world. But sometimes (ok, almost all the time) I forget that mom needs care too.

Over the last few months I have finally made it my goal to really focus on my health and making nourishing food a priority (i.e. sardines, liver and spinach for breakfast!!). It has been amazing to see my health continue to improve (even after 2 1/2 years of breastfeeding on a very restricted diet that left me worn out and depleted). I actually feel better now than I ever have. It’s a good thing since my life requires a lot of energy!

How Body Shape Fluctuates After Childbirth

Along with the  health changes have come changes in my body shape. For a while now I’ve been in a constant state of exhaustion and adrenal fatigue. This leads to skinny legs and booty with weight in the belly. Plus you lose muscle. For this once fit and active woman it was strange…but eventually became my normal. My husband and I even joked that I seemed to loose more booty and gain more belly with each child (now I know that is from being so run down)!

But as my health has been reversing back to balanced hormones and fully rested my weight is shifting back to the places it should be. I have a figure again! And now my clothes don’t fit (especially pants!).Do you make mom self-care a priority or do you put yourself at the bottom of the to-do list? Here are simple steps to make mom matter!

What’s the Problem?

Yet one thing I still never do for myself is buy new clothes. Although it sounds trivial, when you’re wearing old yoga pants and ten year old t-shirts with holes in the armpits every day, it really doesn’t make you feel so great about how you look. It impacts your self esteem. And your kids notice. But it’s about all I have that fits.

You can imagine my excitement when I had the opportunity to partner with Stonyfield Yogurt and prAna again. I’ve worked with them in the past to help me figure out my style and learn to embrace bold. This time I combined both my love of simplicity and my need for bold colors with this royal blue dress. It fits perfectly with prAna’s celebration of #TheWholeYou. This dress is ALL me.

From the moment I pulled it out of the box I knew it would be one of my favorite pieces of clothing. Sometimes I get caught up in budgets and kids’ needs and forget that I have needs to. I am always willing to go without. I forget that a few simple pieces of clothing that actually fit and make me feel good can make a world of difference in my attitude and my confidence.Do you make mom self-care a priority or do you put yourself at the bottom of the to-do list? Here are simple steps to make mom matter!

How to Make Time for Self Care

I want to encourage you to do something today to take care of yourself. Whether it be taking a walk alone, meeting a friend for coffee and having uninterrupted adult conversations, finishing that book that’s been half read for months, taking a yoga class, going on a date with your spouse or buying a new outfit that really makes you feel good.

Moms often forget that they have needs too. I don’t know about you, but I need a reminder once in a while (or maybe all the time) to not always put myself last. A happy, healthy mom is better able to care for her family and help create a happy, healthy home.Do you make mom self-care a priority or do you put yourself at the bottom of the to-do list? Here are simple steps to make mom matter!

Mom Wardrobe Inspiration

I’ve got TWO ways to take mom off the bottom of the to-do list today.

First, check out prAna and buy yourself something nice. Seriously, their clothes are AMAZING. So comfortable and good quality. If you’re like me that is so important since I don’t buy new clothes often. It has to last. Do you make mom self-care a priority or do you put yourself at the bottom of the to-do list? Here are simple steps to make mom matter!

Easy Homemade Vegetable Dip

Second I’ve got a yummy treat for you (though you can share if you want – my kids sure love it…there I go again, handing over my food to my kids). I LOVE vegetables. I always have. But I like raw veggies even more with dip. You can make this super simple dip in about sixty seconds. Jazz up your veggies with something delicious and do your body a favor with nourishing foods. It’s a win-win.

All those great vitamins in vegetables need fat for absorption. So Stonyfield full fat Greek yogurt makes the perfect base. Add some seasoning and you’ve got a great snack or addition to your lunch.Do you make mom self-care a priority or do you put yourself at the bottom of the to-do list? Here are simple steps to make mom matter!

60 Second Veggie Dip
Serves 4
A quick and nutritious veggie dip using Greek yogurt.
Write a review
Print
Ingredients
  1. 1 cup Stonyfield whole milk Greek yogurt
  2. 1/8 tsp. unrefined sea salt
  3. 1/4 - 1/2 tsp. garlic powder
  4. 1/4 tsp. onion salt
  5. 3/4 tsp. dried dill weed
  6. (optional: 1/2 tsp. desiccated liver)
  7. (optional: 1/4 tsp. turmeric)
Instructions
  1. Combine all of the ingredients. Add more garlic or onion if desired.
  2. Store in the refrigerator for up to a week.
Notes
  1. You can substitute sour cream for the yogurt
  2. This is great as a vegetable dip, chip dip or topping for tacos or nachos.
Just Take A Bite https://justtakeabite.com/

What are you doing today for some mom self-care? I’d love to hear how you make time for yourself! I have a lot to learn.

I am working with Stonyfield Yogurt and prAna on this post. I have been compensated for my time commitment but all opinions are my own.

Pistachio Pea Pesto | Just Take A Bite

Pistachio Pea Pesto

With the return of spring comes color and new life. Add some of both to your meal with this bright and flavorful pistachio pea pesto.

Pistachio Pea Pesto | Just Take A Bite

If there is an easy way to get your kids to eat vegetables it is in a sauce. Put the sauce on pasta or pizza. Instant hit!

This pistachio pea pesto is no exception. Parents love the loads of vegetables and healthy fat from nuts. Kids love the taste and color.

Easy “peasy.”

The really great thing about this pesto is how easy it is to make. Only six ingredients (and the cheese is even optional). Toss them all in the blender and itโ€™s done. No cooking. Just puree and serve. It is easy enough for kids to make themselves!

Mix pistachio pea pesto with your favorite variety of noodles for an easy weeknight meal that can even be made gluten or grain free. Add some extra peas and nuts into the pasta for texture and nutrition. Leftover cooked chicken also makes a great addition for a complete meal.

But the possibilities donโ€™t end there. Make pizza night a little more special with pesto pizza. Make or buy your favorite pizza crust. Top it with pistachio pea pesto and some fresh mozzarella. Bake and serve.

Pistachio Pea Pesto | Just Take A Bite

Whether you are vegetarian or just looking to save a little money on your grocery bill either of these would make a great meatless meal.

The possibilities are endless! Head over to Super Healthy Kids where I’m sharing this easy pistachio pea pesto recipe and more fun ways to use it.

Pectin Free Concord Grape Jelly | Homemade Dutch Apple Pie

Pectin Free Concord Grape Jelly

Wondering what to do with your homemade grape juice? Make grape jelly of course! It is a classic kid favorite that is easy to make and perfect for your pb&j!

Pectin Free Concord Grape Jelly | Homemade Dutch Apple Pie

Growing up we ate one flavor of jelly.

Grape.

That’s it.

At home. Grape. In a restaurant. Grape. On toast. Grape. On a sandwich. Grape.

That was really all we knew and all we wanted.

No jelly here.

Want to know something? I have never bought grape jelly for my kids. Most grape jellies are filled with high fructose corn syrup. Not to mention the texture kind of grosses me out now.

But homemade grape jelly – that is a whole different story. Especially when it comes from juice you made yourself!

Pectin Free Concord Grape Jelly | Homemade Dutch Apple Pie

No pectin. No canning.

The unique thing about my grape jelly is that I skip the pectin and the canning.

Most pectin contains dextrose. That’s just sugar, right? Well, yes, sort of.

But it usually comes from corn. My son is allergic to corn. So I don’t use pectin.

Instead I use gelatin and then freeze the jelly. That turns this into such a simple task. It takes about five minutes to make a whole batch of jelly.

This was my own experiment with creating an easy and allergen friendly grape jelly.

Pectin Free Concord Grape Jelly | Homemade Dutch Apple Pie

No complaints.

The consensus from my family? Great! Everyone loves it. Even the adults that grew up with more traditional jelly (both homemade and store bought).

My kids rave about it and keep asking for it on their bread.

We have been enjoying it on toast and on sunbutter and jelly sandwiches. I personally love it on sourdough bread. The contrast between the sour and sweet is delicious.

Pectin Free Concord Grape Jelly | Homemade Dutch Apple Pie

No fears.

Are you intimidated by the idea of making your own grape jelly? Set those fears aside. This pectin free concord grape jelly is so easy!

Use your homemade grape juice or quality organic grape juice. Add some grass-fed gelatin and you’re minutes away from homemade grape jelly.

Your kids will love it, and you’ll feel good about what they’re eating. No more high fructose corn syrup, dextrose and citric acid for breakfast. Just whole, simple ingredients.

Once you get the freezer stocked with grape jelly grab some blueberry juice to make blueberry jelly! It’s another great addition to your morning eggs and toast.

Pectin Free Concord Grape Jelly | Homemade Dutch Apple Pie

Pectin Free Concord Grape Jelly
Yields 7
Homemade grape jelly that is free of pectin and high fructose corn syrup.
Write a review
Print
Ingredients
  1. 4 cups unsweetened concord grape juice
  2. 3 cups organic cane sugar
  3. 6 1/2 tsp. grass-fed gelatin
Instructions
  1. In a medium saucepan combine the juice and sugar. Whisk.
  2. Slowly pour in the gelatin and whisk.
  3. Let sit one minute.
  4. Turn on heat to medium/low.
  5. Slowly whisk until the mixture is warm and the sugar and gelatin are dissolved, about 5 minutes.
  6. Remove from heat.
  7. Fill half pint glass jars, leaving 1 inch of head space.
  8. Put a lid on the jars and refrigerate until fully gelled, at least 8 hours.
  9. Store in the refrigerator for up to 3 weeks or in the freezer for up to 1 year.
Notes
  1. You may need to adjust the sweetness depending on the sweetness of the juice and your taste.
  2. You can increase the gelatin to 8 Tbsp. and pour the whole batch into molds or a glass pan to make grape gummies.
Just Take A Bite https://justtakeabite.com/

In order for me to support my blogging activities, I may receive monetary compensation or other types of remuneration for my endorsement, recommendation, testimonial and/or link to any products or services from this blog. It will not change the cost of any products or services for you.

This post is linked to Savoring Saturdays.

Herb Roasted Vegetables with Creamy Honey Mustard | Homemade Dutch Apple Pie

Herb Roasted Vegetables with Creamy Honey Mustard Dressing

Herb roasted vegetables with creamy honey mustard dressing put a new spin on salad. They make the perfect side dish all year long.

Herb Roasted Vegetables with Creamy Honey Mustard | Homemade Dutch Apple Pie

I am partnering with Wayfair and Stonyfield for this post. I have been compensated for my time commitment to use these products. However, my opinions are entirely my own and I have not been paid to publish positive comments.

I love a fresh salad in the summer. To be honest I could eat a salad for breakfast, lunch and dinner all summer long!

But I do have a family to cook for. And I don’t have any big salad fans.

That means it’s time to put a new spin on salad.

My kids LOVE roasted vegetables. They often eat all of their vegetables first when I roast them.

So when challenged by Stonyfield and Wayfair to create a new summer salad I went with something I knew my kids would enjoy.

Herb roasted vegetables with creamy honey mustard is a hearty summer salad everyone will love.

Herb Roasted Vegetables with Creamy Honey Mustard | Homemade Dutch Apple Pie

The vegetables.

Most of the time I roast cauliflower, Brussels sprouts or cabbage. If you think those are vegetables your kids don’t like try them roasted. You might be surprised!

During the summer there are plenty of other fresh vegetables to add to the mix, like zucchini, peppers and beans.

I used a combination of year round staples and fresh summer vegetables to create a colorful blend.

Add lots of extra virgin olive oil, unrefined sea salt and some fresh or dried herbs for a pop of flavor.

Herb Roasted Vegetables with Creamy Honey Mustard | Homemade Dutch Apple Pie

The dressing.

What’s a salad without dressing? To top this beautiful blend I put a creamy spin on my favorite honey mustard by adding whole milk Stonyfield yogurt.

The bright yellow dressing really pops against the rainbow of vegetables. And it adds a burst of flavor. Roasted vegetables with creamy honey mustard will be the center of attention at your dinner table.

Creamy honey mustard also makes a great veggie dip.

My kids may not be huge salad fans, but they do love veggies and dip! So another way to eat salad in the summer is to skip the lettuce and go straight for fresh vegetables with creamy honey mustard.

Herb Roasted Vegetables with Creamy Honey Mustard | Homemade Dutch Apple Pie

The presentation.

Herb roasted vegetables with creamy honey mustard is a great salad for entertaining. All of the prep work is done in advance so you can visit with your guests.

But you can’t serve a beautiful salad without the proper dishes. That’s where Wayfair comes in.

Have you checked out their assortment of salad bowls and kitchen gadgets? There is so much to choose from!

My favorite color is blue and I like simple. So of course I picked a stunning cobalt blue salad bowl. I love how it is wide and shallow – perfect for presenting a colorful salad. You can see the whole assortment of vegetables.

I have been searching for a salad dressing container for some time now. I usually just use a small mason jar. But for serving to guests that is not so convenient. This cruet is just what I’ve been looking for. (Plus I learned a new word…cruet). These will come in so handy when I serve salads at parties and family gatherings.

Herb Roasted Vegetables with Creamy Honey Mustard | Homemade Dutch Apple Pie

My favorite product from Wayfair is this set of condiment cups. They are perfect for dipping veggies in dressing. They are also great for holding after school snacks. They come in four fun colors so each kid can pick what color they like. Did you know that can make vegetables taste better? It can.

Whether you need a fancy salad to serve to guests or you’re just trying to get your kids to eat more veggies, herb roasted vegetables with creamy honey mustard work well.

Let your kids help chop all of the vegetables and make the simple dressing. Then use some fun, festive serveware from Wayfair to brighten up the table.

What is your favorite summer salad? How do you dress it up?

Let Stonyfield and Wayfair spruce up your next salad.

Herb Roasted Vegetables with Creamy Honey Mustard | Homemade Dutch Apple Pie

Herb Roasted Vegetables with Creamy Honey Mustard Dressing
Serves 6
Bright vegetables seasoned with herbs and drizzled with a creamy honey mustard dressing.
Write a review
Print
Vegetables
  1. 10 cups variety of vegetables (cauliflower, Brussels sprouts, carrots, onions, peppers, zucchini, cabbage, beets, parsnips, rutabaga)
  2. 1/3 cup extra virgin olive oil
  3. 2 tsp. unrefined sea salt
  4. 1 tsp. dried basil
  5. 1/2 tsp. dried thyme
  6. 1 tsp. dried dillweed
Dressing
  1. 1/2 cup plain, whole milk yogurt
  2. 1/2 cup honey
  3. 1/4 cup mustard
  4. 1/4 tsp. unrefined sea salt
Vegetables
  1. Cut the vegetables into uniform chunks.
  2. Heat oven to 375*F.
  3. Place vegetables on a parchment lined baking sheet.
  4. Pour olive oil over vegetables and season with salt and herbs.
  5. Toss to coat.
  6. Bake for about 1 hour, until vegetables are tender and browned.
Dressing
  1. Combine all of the ingredients and mix well.
  2. Refrigerate until ready to serve.
  3. Serve vegetables warm, drizzled with honey mustard.
Notes
  1. The dressing can be made in advance.
  2. The dressing will last about 2 weeks in the refrigerator.
  3. The dressing can be used as a veggie dip.
Just Take A Bite https://justtakeabite.com/

In order for me to support my blogging activities, I may receive monetary compensation or other types of remuneration for my endorsement, recommendation, testimonial and/or link to any products or services from this blog.