One of my goals this year is to get back on track with properly preparing my grains. I’ve been doing it for years now, but got off track with pregnancy and a new baby.
Some may say to just avoid grains. But I tried that and learned that my body needs them! The most unhealthy I’ve ever been was when I went grain free. Grains can be a very healthy part of a real food, traditional diet. Even Nourishing Traditions and GAPS mention the benefit of properly prepared grains.
So to help us all get to where we need to be I’m sharing some information about why you need to treat your grains in a special way if you are going to consume them and how it’s done. I actually wrote most of this a couple years ago! But never shared it here. It’s a good reminder for myself. Hopefully it’s a great starting point or reminder for you as well.
In the weeks following this introduction I’ve got some basics and some fun recipes coming that all involve properly prepared grains. I hope you enjoy!
One of the oddest and most confusing aspects of real food is the idea of soaking grains. Switching to butter instead of margarine? No problem. Drinking raw milk instead of pasteurized? You bet. Using honey instead of corn syrup? Done. Get your flour wet before using it? Say that again? Wet flour? How could that work? And why would you want to? But if you understand why you might find yourself turning your favorite baked goods into healthier soaked versions.
It turns out there is actually a good reason to soak grains. Little things called phytates. Grains contain anti-nutrients as a protective mechanism. This protects them from weather and animals. But it also makes them difficult to digest. Your digestive juices are enemies of the grains just like any external enemy. Grains also have compounds that prevent active enzyme activity in your digestive system. This puts stress on your pancreas.
In the unsoaked state grains contain phytates, which makes the minerals in the grains unavailable to you. This can lead to mineral deficiencies and poor bone density (one more thing I learned the hard way when I found out I have seven cavities!). Both enzyme inhibitors and phytic acid can be mostly neutralized by soaking the grains. This makes them easier to digest and makes the nutrients available to your body. This process also begins to pre-digest the grains, breaking down complex starches and tannins that can irritate your stomach, as well as beginning to break down proteins like gluten.
So without soaking the grains they are very difficult to digest and are actually harmful to your body. This holds true for gluten-containing grains like wheat and rye but also for alternative grains like oats, amaranth and teff. In fact oats, such a dietary staple for so many, has the highest phytate content of any grains!
Grains that are not properly prepared are harmful. So how do you make them healthy? It’s not as hard as you might think. And, honestly, soaking often makes baking easier! It breaks up the process into very short steps that only take a few minutes here and there. The main thing you have to be willing to do is plan ahead. Soaking does take time. So if you want soaked pancakes in the morning, you have to plan and get them started the day before.
The basic idea is that you use cultured dairy or another acid medium like lemon juice to soak the grains for at least 7 hours (ideally 24 hours) before using them. The length of time required will depend on the grain.
The easiest way to start is by using recipes that give exact instructions on what ingredients to use, how much and how long. Once you get the hang of it you can start experimenting. Simply replace the liquid in the recipe with a cultured/acidic medium (kefir, buttermilk, yogurt or warm water mixed with lemon juice), mix it with the grains, cover the bowl and let it sit. Then proceed with the recipe after the grains have soaked. You can also add the fat/oil during the soaking step.
Soaking can be used on all kinds of grains…wheat, oats, rice, etc. It is also used for lentils, beans and nuts. There are a few exceptions to the rule. Coconut flour, white rice, millet and flax seed are relatively low in phytic acid. Although soaking them will still be beneficial it is not as critical.
Although millet is low in phytic acid, it is goitrogenic. So limit your millet intake if you have thyroid problems.
So what do you do if you don’t have time to soak your flour before baking, or what if you forgot to plan ahead? An alternative is to sprout the grains. This is helpful for those times you have to do some last minute baking. Simply sprout the grains, dry them and grind them into flour. Then the phytates are already neutralized and you don’t have to soak it. You can buy sprouted grains if you do not want to make your own.
A third option for dealing with phytates is sourdough. Sourdough also breaks down the phytates and makes the grains easier to digest. Sourdough can be used for all kinds of baked goods. If you want bread, sourdough is the way to go.
Soaking grains is a critical step in the baking process if you are not using sprouted grains or a sourdough starter. It is important for aiding digestion for everyone. It is especially crucial for anyone with a leaky gut, food allergies or food intolerances. Even if you avoid some of the common grains like wheat and corn, you still have to properly prepare your food. If you have cut gluten out of your diet but have not noticed any improvement, try soaking the gluten free grains you eat.
Some alternative grains and flours are teff, amaranth, tapicoa, millet, rice (white and brown), quinoa, coconut, hemp and garbanzo bean. These can be prepared in the same manner as their traditional counterparts.
The next time you start baking ask yourself one question: “Is my flour wet?” If it is you’re on your way to a tasty treat that will be easier on your gut and provide your body with important vitamins and minerals.
Do you consume grains? What is your favorite way to prepare them?
“Do you have a picky eater? Are meal times a battle? Before you get frustrated and assume your child is just strong-willed, take a closer look at what is really going on.
Yes, some kids truly do like to feel in control and may assert this behavior at meal times. In that case it is just a phase. But for many it is not a choice. There is a big difference.
Refusing to eat broccoli for a period of time is not a big deal. Being distracted one day by a new toy during lunch is no cause for concern. But if feeding your child is causing frustration at every single meal he or she may have oral sensitivities related to sensory processing disorder (SPD).”
Now that March is underway it is time to think about my 2014 goals! It only took 2 1/2 months. This year I’m focusing on simplifying life and getting back to the basics. I want to make room and time for people and relationships.
One thing that stood out as I was making my goals was that I didn’t even really think about food or diet in terms of my own health. That is a big sign of healing. I don’t have a special diet. I eat nutrient-rich food. I eat what my body likes/what makes me feel good. I eat enough to support my body and my baby. It’s nice to not have a laundry list of diet do’s and don’ts as part of my goals this year.
~~~~~~~~~~~2014 GOALS~~~~~~~~~~~
1. Get back to the basics with nutrition.
I first learned about real food about four years ago. I took the time to really understand what nutrition meant and how to feed my family. Over the years with my own health struggles, dietary restrictions for my kids (for allergies) and times of doing what you can just to get by (during things like miscarriage and early pregnancy) I have lost sight of that a little bit.
Sometimes I’m even amazed when I look back through my old posts. I posted a lot of good information! So it’s time to get back to the basics of nutrition. I never strayed too far. But I know I can do better with getting some of the junk out of our house. As I get my energy back I also hope to get my passion and drive back for making real, homemade food that is nourishing for my family.
This will include simple steps like adding egg yolks, coconut oil, gelatin and bone broth to foods whenever I can. I may also re-post some old articles to help myself get back on track.
I’m not going to be extreme. I know there has to be balance. I also know I’m human and can only do so much. But I’m also ready to put in the effort to make sure my family is nourished.
As part of this I may start re-reading Nourishing Traditions. It has such a wealth of knowledge.
Once I am feeling better I will also do a one week challenge with my kids to see how they do with absolutely no packaged food. They don’t eat much as it is. But over the last few months we’ve had to go with convenience sometimes because it was all I could manage. We need to break the habit and get back to real food.
This is not about restriction. This is not about a special diet. This does not mean we can’t enjoy other food when we are out or with friends. This is about sticking to real, nourishing foods the majority of the time and especially at home. It’s easy to lose sight of that in our culture. I want to be sure my kids know what true health means.
2. Simplify and de-clutter my house and my life.
One of the biggest sources of stress for our whole family is the clutter and mess in the house. With me being only able to do the minimum around the house for the last three months it has gotten even worse. It’s time to finally do something about it.
When I used to think about cleaning what came to mind was organizing and making things look neat. I didn’t care about dust bunnies in the corner or mold spots on the ceiling as long as things were in order.
But now that my daughter has been diagnosed with severe dust and mold allergies, cleaning has a whole new meaning. I’m starting to notice every little spec of dirt in our house. I’m realizing just how dirty it is!
So my cleaning goal is two-fold. I want to get things organized and get rid of things we don’t use/don’t need. I also want to do a thorough cleaning of the whole house. I want my daughter and my husband to be able to breathe better and feel better at home.
The cleaning will be better for our health. The neatness will make everyone happier. It will create more peace. There will also be a place for everything…which means clean up will be much easier.
This will also free up a lot of time (especially mine!). Instead of spending half of my day just trying to stay on top of the mess, I’ll have more time for my family and for doing other things. By bed time everyone will be much happier and calmer.
3. Make relationships a priority.
I probably want this or even write it as a goal every year. It is one of my biggest struggles. I am an introvert by nature (extreme introvert and painfully shy). So making friends is very difficult. Add to that severe OCD, feelings of isolation from infertility, anxiety…you get the picture. For most of my life I’ve just gone the easy route. I avoid deep friendships. I keep everything surface level. I don’t let anyone in. I try to hide all the things I don’t like about myself. But it’t not a good way to live. It’s also not a good example for my children.
I did have some very close friends when I was younger. But life changes as you get older. I’ve also had deep friendships that have caused a lot of hurt. After that it was hard to open up to anyone again.
Over the years I have realized that having close friends is one of the biggest things missing in my life. I have a wonderful husband and a great family (both my family and my in-laws). I am thankful for a couple friends that I keep in touch with regularly via email.
But this year I want to build lasting friendships. I want to put in the effort, let others into my life and drop my guard. It will not be easy. But I think it’s worth the effort.
In addition to making friends, I wan to make sure that my relationship with my husband is a priority. This is especially critical before baby #3 arrives. Since our children are almost six and three, now is a good time to go on dates and spend time together.
I also want to make sure my kids get plenty of attention before the baby comes. I will try to continue our monthly mommy/daughter dates. I will also try to do special things for my son. Finally we will make the most of our summer and do lots of fun things, like going to the beach, playgrounds, etc.
Life will be very different in September with a new baby and my big girl in school all day. So we are going to enjoy our family of four for the summer.
4. Work on myself.
This year I want to really think about how my actions impact my children (and others around me). I want to be a good example to my kids. This includes things like facing my fears, making friends and trusting God.
My daughter already struggles with anxiety, just like I did when I was little. I need to teach her how to handle anxiety and how to let it go. I have to do this through the way I handle my own anxiety.
I will have two big adjustments later this year. I will be adjusting to life with three children. I will also be adjusting to my daughter being in school all day. I plan to prepare myself mentally for these changes.
My yearly goals would not be complete without talking about my health. Thankfully this year there isn’t too much to think about. My main focus is to keep my thyroid levels and medication well-monitored, both during and after pregnancy.
I need to focus on eating enough quality food, getting moderate exercise and getting plenty of sleep. Yes, good health really is that simple.
Finally, I want to take more time to read. I don’t do it very often these days. But I have a lot of books that have been sitting on my desk for a long time. I also have a lot of Kindle books. So I am going to read more and watch TV less. I just got a few new books last week as an early birthday present. I’ve already finished one of them!
5. Focus on my writing.
My writing has taken a back seat for the last few months. After my miscarriage I lost my focus and energy. I had to really concentrate on my health. Then when I had bad morning sickness I simply could not sit at the computer to write.
Now that I’m starting to feel better I’m finally getting my desire to write back! It feels great. Although my kids don’t like to give me time to do it.
I switched my site from Blogger to WordPress earlier this year. But being so sick I didn’t have time to do anything else with it. I want to learn more about WP and update the look of my site.
I want to write about a variety of topics. I will still post recipes. I will also be writing about health issues.
I will continue to learn about photography and work on my skills.
I am also hoping to start doing some giveaways this year!
6. Word for the year – LOVE.
Last year I started focusing on a word for the year. It was acceptance. Last year was definitely a year of acceptance. It took a while to figure out a word for this year. But it turns out I didn’t really have to figure it out. During the first two months of this year God has bombarded me with the word LOVE.
My daily email devotions started in January with “40 Days of Love.” At church we did a series called “How’s It Growing” where we talked about spiritual disciplines…the final and most important being love.
For Valentine’s Day this year my daughter made all of her cards. We found a pack of cheap bracelets for her to use for the girls in her class. They each got two. At the end there were two bracelets left that I told her she could keep for herself. Instead she kept one and gave one to me in my card. Like a good mother I put it on…and it’s been on ever since! It’s just a little, plastic red bracelet. But it reminds me daily to love.
There have been plenty of other signs of love as well.
So this year I am focusing on love. I want to give love. I want to be loved.
I have been reminded constantly this year already about how much God loves me. It’s incomprehensible. But it is so comforting. Even when I’m worried or anxious or not so happy with myself…God still loves me unconditionally.
I want to show this same love to others. I want to show my husband and my kids unconditional love.
This year I hope to work hard to make life simpler and make room for building relationships and setting a good example to my children. It all comes down to simplify and love. I’m excited to see what God has in store for us this year.
Every time I think about writing what I learned in 2013 my mind goes in a million directions. I learned so much. I learned it all the hard way – through first hand experience.
I know I’m not alone. I know I’m not the only one struggling with these problems. So I want to share my journey with others in the hopes that someone else doesn’t have to go through the struggles like I did.
So here is my attempt at sharing some of these lessons. I hope to go into more detail on some of the topics in separate posts later. For now, here is some of what I learned in 2013 (and over the last ten years).
1. Eat enough food.
I fell into this trap for many years. And I see it in so many well-meaning sites and books. Time and time again it is suggested that women should eat 1200 – 1500 calories a day to loose weight and be healthy. This is far too little to sustain your health.
Unless you are on complete bedrest and can barely move your body most women should eat a minimum of 2,000 calories a day. You should consume even more than that if you are active and exercise. If you starve your body it will not function well. If you feed your body you’ll feel great. Combining enough quality food with moderate exercise is a great way to maintain your health in the long term.
2. Eat what works for your body.
Don’t follow a prescribed diet (GAPS, Paleo, low carb, etc.) just because someone else says it’s great.
This is another lesson I had to learn the (very) hard way. I’ve been on every diet you can think of to try to feel good. For me it was never about losing weight. I just wanted to feel good and heal my body. So I tried the IBS diet, low fat, high fiber, dairy free, egg free, wheat free, red meat free, grain free, GAPS, low carb,…I’ve tried them all.
Where did that get me? Feeling worse than when I started. Over the last 10 years I have learned to eat what works for my body. And that is what makes me feel good.
Just because your friend tried eating paleo and feels great doesn’t mean it’s the perfect diet for you. Just because someone says grains are evil doesn’t mean they don’t work for you.
I have read over and over about how things like potatoes, bananas and root vegetables are “safe” starches and much better for you than grains. I am living proof that this is not true for everyone. If I eat potatoes and bananas I will be in so much pain. But I MUST eat gluten free grains daily to feel good.
All this boils down to – don’t restrict your diet just because someone else says it’s good. Eat a variety of real food that makes you feel good and gives you the energy you need. Don’t cut foods (real food) out of your diet if they aren’t causing you problems. You won’t find your “perfect” diet in any book. You have to figure out what works for you.
3. Real food is great! But sometimes it can be beneficial to stray away from it.
I know this sounds contradictory to what my site is all about. But it’s true. I still firmly believe in fueling your body with healthy, homemade real food…most of the time.
But depending on the state of your health, there are times when you can benefit from some less than ideal foods. For someone that has been on a strict diet (like paleo or GAPS) and is underfed and unhealthy, processed foods can be a great jumpstart to getting back to full health. Processed foods are easy to digest (yes, frozen pizza is often easier to digest than a big plate of vegetables). It is also easy to quickly increase your calorie intake with processed foods.
I am not recommending this as a permanent solution to health by any means. But it can be beneficial if you are recovering from undereating or a condition called orthorexia. Once your body is not starving anymore you can go back to eating real, quality food. You just have to be sure to eat plenty of it.
Having bad morning sickness was a good way to break me of my orthorexia. I do love to fuel my body properly with quality food. But sometimes I can be too strict about it…and it fuels my OCD and anxiety. I had to just learn to eat whatever I could manage for the last couple months. I am really looking forward to getting back to eating mostly healthy food. My body is ready for it. But it was nice to have a break and just eat whatever I wanted. It was a great way to change my mindset and figure out how to find balance.
4. Don’t drink too much water.
One of the best things I did for my health in 2013 was to stop drinking so much water. There really is no science behind the 8 glasses a day rule. And if you really think about it, it doesn’t make sense to force yourself to drink water. If your body needs fluids it will let you know.
Drinking too much water is a great way to slow down your metabolism, lower your body temperature and feel cold all the time. It will also flush the vitamins and minerals out of your body.
5. Get plenty of sleep.
This sounds like common sense. But there are probably very few people that actually get enough sleep. For a healthy individual seven hours of uninterrupted sleep is the minimum needed. Most people need at last eight. And for someone that has been sleep-deprived for a while nine or ten hours is ideal.
Quality sleep with no problems falling or staying asleep is a sign of good health. While you sleep is also the time when your body repairs itself. So if you’re trying to heal and you’re not getting enough sleep you’re setting yourself up for failure.
I went for years and years getting very poor sleep. I had too much to get done in a day to spend my time sleeping. But at some point I just had no energy and could barely function. It has been great over the last couple months to get nine or ten hours of sleep a day (night time + a nap). My body really needed it. Hopefully soon I can stop taking a nap every day and just stick with my eight hours a night and have it be sufficient.
Even if every other part of your lifestyle is ideal, if you’re not getting enough sleep you won’t feel your best.
6. Exercise is great…if you are eating and sleeping enough.
If you are not eating or sleeping enough, it can be beneficial to take a break from exercise. When you do exercise it’s good to do a variety of things like weight lifting, yoga and walking. You don’t have to push yourself to extremes to be healthy and fit. Too much aerobic exercise may be harmful.
I used to run every single day. And do nothing else. Now I still enjoy running. But I don’t do it every day. Actually I haven’t done any running in a long time because my body was not healthy enough. When I was healing I stuck to short walks and bikes. I also did gentle yoga. I got new weights for Christmas…but haven’t been able to use them. Maybe by next Christmas I’ll be able to start lifting weights 🙂
Move your body doing what you enjoy. Make sure to do a variety of things to work all parts of your body. And combine it with enough food and enough sleep. That is the way to stay healthy.
7. Basal body temperature can tell you a lot about your health.
Basal body temperature is your temperature when you first wake up in the morning. Another great thing I did for my health in 2013 was to check my temperature every single morning and keep a spreadsheet of it.
Your bbt can tell you if your metabolism is working well or not. For women it can also tell you when you ovulate/how your hormones are functioning. So it is a good indicator of health (since metabolism is a key factor in health). It is also great for understanding fertility and either getting pregnant or preventing pregnancy.
A healthy individual with a well-functioning metabolism should have a bbt of at least 97.8 F in the morning. Higher is even better. You can also check your temperature throughout the day to get an idea of how your food and activity level impacts your body temperature. It will help you see what keeps you warm (boosting metabolism) or makes you cold (suppressing metabolism). Then you can adjust your lifestyle accordingly.
For women, bbt is lower (but still usually around the 97.8 range for a healthy individual) in the first half of your cycle when estrogen is dominant and progesterone is low. When you ovulate there is often a temperature drop for one day. Then after ovulation progesterone increases, raising your temperature.
It will take a few months of charting your temperature to get an idea of how your body works and to see if there are any patterns. For example, as I was healing and charting my bbt there wasn’t really a pattern that I noticed at first. My cycles were not regular. But after a while I noticed that if my bbt dropped into the 96’s (or below) even for one day my body was way off and was struggling to get my hormone levels up. And it would be at least two weeks before ovulation. A bbt below 97 meant a restart for me. If my bbt stayed in the 97’s for two weeks I knew ovulation was coming. And after ovulation my bbt was always at least in the 98’s and sometimes 99’s. Once my bbt started dropping that meant the start of a new cycle.
Charting my bbt was the easiest change I made the whole year. But it told me more about my health than just about anything else I did.
8. Focus on health, not looks.
I think I’ve been saying this for years. So it’s not completely new. But deep down I don’t think I fully believed it. I did shift my mindset to focus on health a long time ago. But I didn’t ever drop the focus on looks and size. I still wanted to be thin.
In 2013 my control over my size was taken away. With my thyroid totally out of whack my weight kept going up and up. There was nothing I could do about it. For the first time I truly had to focus 100% on my health.
Did I always like how I looked? No. Did I want to loose some weight? Yes. But that was completely secondary. My health was front and center. And it always will be now, no matter what size I am.
When I look to the future I think about how I want to impact my children. I would much rather teach them to take care of themselves and be healthy. I don’t want to teach them to be obsessed with looks and size. So I am done with that.
Don’t try to be a certain size or weight. Treat your body well. And give your body what it needs to be healthy. You’ll be so much happier. Love yourself and take care of yourself.
9. Change is a very gradual process.
Change does not happen over night. No matter what the next fad diet or workout video tells you. If you want to make changes that are sustainable long term it will be a very gradual process.
Do you want to loose weight? That’s fine. But know that it will take a while. Do you want to eat healthier? That’s a wonderful thing to do. But don’t go crazy trying to do everything at once.
Small, consistent steps each day will get you where you want to be. Don’t get upset because two weeks into making changes you haven’t noticed any big improvements. Give it time.
Healing takes time. Weight gain or loss takes time. A healthy diet takes time. Don’t rush it and set yourself up for failure. I’ve been working on getting healthy for about 15 years now. And I’m finally getting there. One step at a time.
10. Your thyroid can have a big impact on your health.
I was diagnosed as hypothyroid in 2006. I was put on a synthetic thyroid hormone and had my TSH checked about once a year. I really knew nothing about thyroid. I figured the doctor knew what he was doing. I didn’t have any hypothyroid symptoms that I knew of. So I didn’t bother to learn about it. I didn’t think it was that big of a deal.
Seven years later I finally had to learn more about it. I wish I would have researched it sooner. I didn’t realize just how much your thyroid could impact your health. I think there are about 200 symptoms that can be attributed to thyroid dysfunction.
Last year I learned so much about the thyroid. I learned what blood work you need to get done and how to interpret the results. Just because your levels are in the “normal” range does not mean you are on the right dose of medication. You have to look at the symptoms more than the numbers.
I learned about the different kinds of medications, how to take them and how to get correct dosage.
I learned how other hormones can impact your thyroid and vice versa.
I learned that iron levels and adrenal problems can mimic thyroid problems. And they need to be addressed first.
I can’t say that I have my thyroid problem 100% figured out yet. It is the last piece of the puzzle that I’m still working on. And I will be writing more on this topic in the future. I will be getting my thyroid hormones levels rechecked in a week and go from there to see if adjustments need to be made.
11. Manage stress.
Stress can be as bad for your health as lack of sleep, a poor diet and lack of exercise. Stress can suppress your metabolism. It can alter your hormones. It can come in many forms too.
Find a way to manage your stress to stay healthy. Take time to do things you enjoy – reading, writing, visiting with friends. It’s also important to find techniques to relax such as walking, yoga or reading the Bible. Figure out what works for you and make it a priority.
12. Adrenal health is very important.
Your adrenal glands play a huge role in your health. If you are not getting enough sleep, aren’t eating enough, are exercising too much or are too stressed, your adrenal glands have to work overtime to compensate.
This works for a while. That is what they are for. They raise your cortisol levels to compensate. But if you do it for too long you stress the adrenals and eventually it leads to adrenal fatigue. Then your cortisol bottoms out and it takes a lot of work to get it back up.
If you think you are suffering from adrenal problems it’s great to do a 24-hour saliva test to check your cortisol levels. I had it done early last year. I’m thankful that my levels were just slightly raised. Which means I was doing ok, but starting to make them work a little too hard. By altering my sleep, diet and exercise I was able to get my cortisol levels back to normal.
13. Birth control is not for everyone…and probably not good for most women.
This is another less I had to learn the very hard way. But it wasn’t until years after I stopped birth control that I realized how much it had harmed me.
A few months before I got married I started birth control. That’s what you do, right? I knew nothing about what it was or what it actually does to your body. But had I not made that one decision I probably never would have struggled with infertility for so many years.
When I was in college I got my health under control. Things weren’t perfect, but I was eating enough, sleeping enough and exercising regularly. I had found a good balance. And for the first time in my life I had regular cycles every single month. This lasted a few years…until I started birth control.
Once on birth control things started to change. The changes were gradual. And I never attributed them to the birth control. But now that I have done a lot of research I can see the big picture. I started to gain weight. Five pounds or so. Nothing major. My anxiety started to get worse. My OCD started to get worse. Eventually I started having panic attacks. My gut got so messed up that I started restrictive diets to try to help. My weight went way down from restriction. I was a big mess. I even had to switch to a new form of birth control because I was starting to puke every month from the hormones. In case you haven’t noticed by now my body is extremely sensitive to any hormone fluctuations.
After stopping birth control three years later it was too late. My hormones were non-existent. I was underweight. I was hypothyroid. My OCD was so out of control that I could barely function. My anxiety was so bad. I had to start seeing a psychologist. My digestive system was so messed up that I had to have major colon surgery. Eventually we started fertility treatments.
I think almost all of this could have been avoided had I not taken birth control. It messed up both my mind and my body.
I know not everyone reacts the same way to hormones. And I’m sure there are cases where it can be helpful. But please do your research before considering any type of birth control. I know that it is something I will never take again. It has taken me many years to get my life back. I’m not going down that road ever again.
14. Be your own advocate.
One big lesson I have learned over the last ten years is that you have to stand up for yourself. Don’t let doctors brush you off or tell you you’re fine when you know you’re not. If something doesn’t feel right, find a doctor that will help.
I had GI problems for years. I finally was brave enough to talk to my doctor about it. He referred me to a gastroenterologist. Great. I thought I’d finally get the help I needed. He asked a few questions, felt my stomach and told me I was healthy and fine. Eventually I got him to run a few tests. But he still said I was fine. I knew I was not. I had to research and research and finally diagnose myself. Even then when I told the nurse at my doctor’s office what I thought was the problem she said “you don’t have that. You’re too young” without missing a beat…over the phone…without asking me a single question. I’m so thankful I was persistent and didn’t just say ok. I finally got referred to a colon surgeon who confirmed my diagnosis and immediately scheduled surgery.
This has happened time and time again to me. I go to a doctor, even specialists, trying to get help. And they tell me I’m fine. Even though I know I’m not. I have had to figure out all of my problems on my own…and just use doctors to get medications and treatments.
15. PCOS is a confusing topic.
When I had my first appointment with an endocrinologist he asked some questions and made an assumption about my health. He assumed I had PCOS (polycystic ovarian syndrome). He ran some tests and did an ultrasound. His conclusion? I had what he called polyfollicular ovaries.
Great. What does that mean? I never really did find out from him or anyone. I tried to research it for years. Nobody else used that term. I have come to some of my own conclusions (as usual). But it’s still confusing.
Many women with PCOS are overweight or have trouble maintaining their weight. Many women with PCOS have irregular cycles and heavy, painful periods. Many women with PCOS struggle with facial hair. Did that sound like me? Not really. I just had no periods.
The common solutions for PCOS are losing weight, eating low carb and taking Metformin to help with insulin resistance. Did I need any of that. No. In fact, eating low carb made my situation worse.
Where did that leave me? Basically my body would try to grow some follicles/eggs each month. But my hormone levels weren’t high enough to mature the eggs. So instead of having one dominant follicle that released an egg (ovulation) I’d have lots of small follicles that did nothing but sit there. Which on ultrasound looks like little cysts. They are really just lots of follicles…polyfollicular.
Even when doing IVF I would have tons of follicles start growing. But very few actually matured enough for the egg to be good (hence our seven rounds of IVF and two good eggs out of almost forty that were retrieved and fertilized). That is also why I would have a condition called hyperstimulation every time. There were too many follicles.
I still don’t have a full answer about what this means. One endo said it’s from bad communication between the brain and the ovaries. Could I technically be classified as having PCOS? I don’t know. I don’t really have the symptoms. My condition is helped by being a healthy weight and taking care of myself. Finding balance with sleep, exercise and food. I also think it is related to my thyroid problem.
All this to say that if you have been diagnosed with PCOS please do your research to figure out where you fit into the criteria and what treatment is best for you.
15 weeks
16. Let God have control.
I’ve known my whole life that ultimately God is in control. But I also know I can make choices. For most of my life I’ve tried to be in control. I ask God for things I want. I ask for things to go my way. If things are good I say it’s God’s plan. But when things aren’t going so well it’s hard to believe it’s still true.
I have such a strong desire to be in control that I could not let go on my own. In 2013 God took the control out of my hands. And it was wonderful. It doesn’t mean that my life was great. Actually it was very hard. But it gave me such freedom to not have to hold every little detail of my life in perfect balance. It was terrifying and wonderful at the same time.
It is so good to know and have proof that God really does have things in his control. He knows what I need. His plans may be different than mine. His timing may be different than mine. But I don’t have to worry about it.
On my own, trying to keep control, I probably would not have had any more children. I would not have made the necessary changes on my own. But with God in control we are expecting baby #3. And the door is open for more. That is something we can decide as a couple down the road. But just to know the door is open, even if we decide not to have more kids, is amazing.
17. OCD does not have to control my life.
It’s no secret that I’ve struggled with pretty severe obsessive compulsive disorder for many years now. I was finally diagnosed/finally realized that I had it about five years ago. And I’ve been working on treating it ever since.
It has been a long and difficult journey. No matter how much I told myself my compulsions were silly and illogical I couldn’t stop. I went through a lot of exposure therapy and have made progress over the years.
Over the last seven months once again God has allowed me to change. When He takes the control, my OCD does not have to control me.
Especially during the first trimester of this pregnancy I had to just let everything go. I just had to do what I could to get through each day. If that meant laying on the couch most of the day, then that’s what I did. If that meant eating less than ideal food, then that’s what I did. If that meant my digestion was so messed up that I was in pain, I didn’t let it bother me or make me anxious. I just kept on going.
I’m so happy to be able to continue this process of eliminating my OCD. My fear does not have to take control. I can give it to God. And I’m never going back to where I was.
It’s hard to think back to when I was first married. It’s hard to think about all the time I wasted being consumed by my thoughts and compulsions. I am very blessed to have such a loving husband that never judged or got upset with me. He helped me through it. And with each child I’ve let more of it go. I’m a type A person. So I will never be 100% cured from OCD. It’s part of my nature. But it will no longer control my life. It will only be an asset and be used for good things. It is what fuels the drive and determination I’ve always had. But if it hinders my relationships or my life it has to go.
Final Thoughts
It feels so good to share all of this information in hopes of helping even one other person. But even more than that it feels good to write it out and be done with the things that have burdened me for so many years. I know how to be healthy and happy. I’m ready to move on to 2014 now.
As I mentioned at the beginning of this post I’ll be digging deeper into some of these topics later. For now if you’d like to do some research on your own, here are some great resources I’ve come across.
It seems I keep learning new stuff every day 🙂 I have read part of Change Your Brain Change Your Life (I still have a lot of reading and learning to do!). And there is a lot of great information. One thing that really stood out to me already was the discussion of the sympathetic vs. the parasympathetic nervous system.
“There are two branches of [the autonomic nervous] system. One of these branches, the sympathetic nervous system, is often referred to as the “fight or flight” branch. It helps you burn energy. The other branch is the parasympathetic nervous system. This branch helps you conserve energy. It also helps you digest food.” (1)
Both in GAPS and CYBCYL I have read about this. And I found that I have major sympathetic dominance. This correlates to OCD, worry, anxiety, etc. It also correlates to slow/poor digestion. When your sympathetic nervous systems is overactive you are often in a fight or flight state. This state shuts down unnecessary processes…as in digestion. I knew that my anxiety made my digestion worse. This just makes it really understandable now. And gives me direction. I need to calm my sympathetic nervous system and stimulate my parasympathetic nervous system (I mentioned this once in an update post after reading about it in the GAPS FAQ). This will let my digestive system function and get rid of the worry. It will help my brain and gut function normally.
So I was doing a little research on diet related to the PNS, and I came across metabolic typing. Bill Wolcott says that different people have different nutritional needs (makes sense). Some people need more protein and fats, while others need more carbohydrates, depending on whether you are sympathetic or parasympathetic dominant. And depending on how your body burns energy. Here is the basic idea behind this type of diet. You can do an online test to see what type of diet you need. Turns out I’m a carbo type…which corresponds to your body functioning best with a high carb, low fat, lower protein diet.
“Generally speaking, if you’re a carbo type you need a higher percentage of carbohydrates in your diet in order to strengthen the parasympathetic branch of your nervous system, which is weaker than your sympathetic system, and thereby alkalinize your too-acid metabolism. Or you need more carbohydrates to speed up your naturally slow cellular oxidation rate, thereby bringing it into balance by acidifying your too-alkaline metabolism. Carbo types typically do well on a low-fat, relatively low-protein diet — one that includes liberal amounts of carbohydrates in the form of vegetables, fruits and whole grains. However, carbo types need to remember that a “low-protein” diet does not mean a “no-protein” diet. In fact, most carbo types will find that they need to include protein at most meals, but they need to focus on leaner, lighter meats, seafood and poultry than protein types. They should restrict their consumption of red meat in favor of light meat chicken and turkey and lighter seafood such as haddock, cod, perch, sole, catfish and flounder. If you’re a carbo type you should stick to low-fat dairy products, but you can eat a very wide selection of vegetables, fruits, and grains. However, many carbo types, like protein types, do best by focusing on vegetables that contain low or moderate levels of sugar and starch.”(2)
This is definitely not the way I’ve been eating. By following GAPS I tended to eat a high protein/fat, low carb diet. Not intentionally. That’s just what tends to happen since GAPS is so focused on nourishing animal foods and fats. I’m finding that GAPS tends to be better suited for people with parasympathetic dominance (protein types). And this might be why I struggle so much with too much meat (especially beef) or fat or nuts. I don’t balance it with the proper amount of carbs.
Does this mean I need to start eating tons of bread, pasta, etc.? Absolutely not! Does this mean you can’t do GAPS and follow metabolic typing? No. I have to be more deliberate about my food choices and ratios. Carbs come from vegetables. When I put food on my plate I need to add more vegetables and less meat (the opposite of how I’ve been eating). Grains still may not be the best option for me. I have to try and see. Here is some info from Dr. Mercola on this issue.
“While this is technically correct, if one doesn’t understand the practical distinction between grains and vegetables, one is likely headed for a health disaster. It is important to remember that over two-thirds of Americans are either obese or overweight, and nearly every one of these individuals needs to lower their insulin levels.
Additionally, most people with high blood pressure, high cholesterol and diabetes also struggle with elevated insulin levels that respond quite well to grain restriction.
So what nearly all of these people–likely over 85 percent of the U.S. population–will benefit from is not a low-carb diet (the Atkins Diet), but the grain-free diet outlined in detail in my new book.
So if you are a Carb Nutritional Type™ you will require about 60 percent of your food as carbs, 25 percent protein and 15 percent fat, but this type may need as little as 10 percent fat and as high as 80 percent carbs in exceptional times. If you followed an Atkins Diet you might improve initially but eventually your system would break down because it required far more carbohydrate.
Once a person attains a normal weight and does not struggle with other insulin related disorders, it is actually possible to consume some grains and remain perfectly healthy. Carb types actually can do quite well with grains, but remember this is likely to only be about 15 percent of the population at best.
Don’t stress out about the percentages; they are only rough guidelines. Even if they needed to be precise, you wouldn’t take the time or make the effort to eat exact percentages of foods every single time you ate, especially for the rest of your life. Additionally, your activity and stress levels will affect and alter the quantity of food, as well as the ratio of proteins, fats and carbohydrates, you need to feel your best. Last, there is also a circadian rhythm to account for. Your biochemistry moves through various phases throughout the day. These rhythms involve your hormonal output, your acid/alkaline shifts, your waking/sleeping times and many other time-based variables. While some people will have a need for the same ratios of protein, fat and carbs at each meal, others will discover that they need very different ratios at the different meals in order to derive optimum energy, well being and performance” (3)
I’ve been so focused on eating protein and fat and grain free that I think I got too low carb (again, not intentionally). While this may have helped seal my gut, it made my PNS even slower…resulting in slower digestion…and not improving my OCD.
What does this all mean? It means I have some experimenting to do. It means I need to be conscious of the ratios of food on my plate. It means I need to increase veggies. It means I’m gradually returning to where I started this journey…a whole/real food balanced diet that does not include processed foods and sugar. At the moment I am still eating a full GAPS diet. But I need to shift it a bit so that I eat plenty of carbohydrates and not quite as much protein and fat. And see if my body handles that better. I would like to add a small amount of properly prepared grains (soaked, fermented, sourdough) as well in the near future and see how I do. I don’t intend to eat “low fat.” I still think I need plenty of healthy fat. But maybe not quite as much as I have been eating and in better balance with my carb intake. I will still eat full fat dairy. I’m not a fan of low fat dairy, especially when nursing and trying to get my hormones in balance. And I don’t intend to eat tons of grains. I don’t think that’s good for anyone. I’m going to try to find the right balance of nourishing food for my body. For now that will focus on shifting from high protein/fat to high carbohydrate. In some ways this sounds like a big change, but in other ways it’s not. Really I just need to eat more vegetables 😛 And I need to be sure I’m not eating sweets. I need to combine all of information I’ve learned over the last couple years with this new information and with what I know about my own body. I still believe in eating lots of nourishing foods like eggs, butter, broth, coconut oil, fish, etc. But the quantities may have to be adjusted for each person’s body/metabolism type. Let the experimentation begin!
I know some people don’t believe in metabolic typing. I can’t say at this point if it does or does not work. But I’m going to try it. I figure I have nothing to lose. If it doesn’t give me improvement, then I find something else. But then again it might help! So this is where I’m at right now. I would also like to try to figure out Rebecca’s metabolic profile to see if I need to adjust her diet. I can’t assume hers is the same as mine. Everyone’s is different. And it can change throughout your life. Again, this is where I’m at for now. I’ll see how it goes and continue to listen to my body while focusing on healthy, real, nourishing food.
I will have to experiment with my ratios. I am a carbo type. But I think I lean a little towards a mixed type too…which would require an equal balance of protein, fat and carbs.
I am curious to see if this has any impact on Abram as well. He has had digestive issues lately, slow digestion. Is it possible that my carb/protein ratios can impact the makeup of my milk in the same way? I guess we’ll see.
There is still more that I’m learning and would like to share at some point. I will be looking into supplements. And I hope to do a series of posts on brain function and tools to overcome problems.
Do you have any experience with metabolic typing? Any thoughts or opinions? I will update as I experiment. But I’d love to hear stories from others as well.
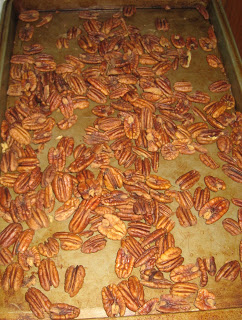
Nuts, what can I say about nuts? I love them! And they can be part of a very healthy diet. Or they can cause your body major stress. There are a couple different issues with nuts. I’ll start with how they should be prepared.
Nuts of all kinds (walnuts, pecans, almonds, peanuts, cashews, etc.) should be soaked and dehydrated before you eat them. Why? It’s the same idea as I discussed about grains…why they need to be soaked. Like grains, nuts contain phytates, which makes them very hard on your digestive system and your whole body. By soaking and dehydrating nuts you neutralize the phytates. Then your body can absorb the nutrients. According to Nourishing Traditions, “nuts contain numerous enzyme inhibitors that can put a real strain on the digestive mechanism if consumed in excess. Nuts are easier to digest, and their nutrients more readily available, if they are first soaked…then dried.” Nuts do contain a lot of vitamins and minerals (the list includes calcium, iron, magnesium, phosphorus, potassium, selenium, B complex, carotenoids, vitamin C, copper, and zinc) and are a great source of protein. Nuts also have a very high fat content, anywhere from 60% to 80% of calories from fat. Plus they make a great on-the-go snack. Or even a great addition to salads or mixed in yogurt. They give you the crunch you’re looking for…especially if you’re cutting out other foods like grains. They can be used to make milk substitutes, make flour, used in baking, to make nut butters, etc. Nuts are recommended as part of healthy, Real Food diet. They are recommended as part of a healthy diet for pregnancy. And many Real Food activists are in favor of eating properly prepared nuts.
So, how do you make crispy nuts? It’s quite simple. You soak the nuts in a combo of water and unrefined sea salt (time and quantities vary for each kind of nut). Then drain and dehydrate. I always do a large batch and freeze them. They are great right out of the freezer. No need to thaw. And they will stay good much longer that way. Here are a few versions of crispy nuts/seeds:
Are nuts, even properly prepared, a good option for everyone? Not necessarily. Nuts do contain a fair amount of omega-6 fatty acids. As long as you’re eating a whole food diet and no processed foods, this shouldn’t be a problem. But if you already get a lot of omega-6 in your diet you don’t want to add more. We need more omega-3 and way less omega-6. And for all of the omega-6 you intake you need to counteract it with more omega-3…which is harder to get. According to Nourishing Traditions, “a diet high in unsaturated fatty acids, especially polyunsaturated (omega-6…i.e. vegetable oils), can destroy the body’s supply of vitamin E and cause muscular lesions, brain lesions and degeneration of blood vessels. Care must be taken not to include a large amount of polyunsaturated oil in the diet without a corresponding increase in the intake of vitamin E.” Also, some people may not tolerate nuts well. Nuts are not recommended on diets like SCD. Check out Kat’s experience. And of course there is the obvious nut allergy. If you’re allergic to nuts, avoid them.
So, where do I stand? At this point I say all things in moderation. Don’t go overboard with nuts. But unless you notice a problem when you eat them, I say go for it. I can say without a doubt that nuts that are not properly prepared kill my gut. I now know why in high school and college I had some of the stomach problems I did…I ate peanuts every single day! Big handfuls. Yikes. I knew they had an impact. But I ate them anyway. If I even eat a small amount now I notice. I do eat crispy nuts almost every day. And my daughter loves them too. Maybe some day I’ll experiment and go without for a while to see if I notice a difference. But for now I regularly enjoy crispy nuts as part of a healthy diet.
I have tried to avoid nitrites and nitrates for a while now. Especially while pregnant. And since we’re serving ham for Christmas…something that often contains both…I figured now would be a good time to talk about them. They are found in most processed meats, like hot dogs, lunch meat, bacon, etc.
So, what are they and what can they do to you?
I’ll start with sodium nitrate.
Sodium nitrate is in a lot of processed meats. But did you know it’s also used in the “manufacture of glass antifoamer, fertilizer, dyes and potassium nitrate, also in pharmaceuticals, oxidant and metal hot-treating”? Should that same thing really be in our food?
So what does it actually do to you? “Sodium nitrate may damage your blood vessels, making your arteries more likely to harden and narrow, leading to heart disease. Nitrates may also affect the way your body uses sugar, making you more likely to develop diabetes.”
Also, “nitrates in food are a danger in that they can be converted to nitrites, which can react in your stomach to form nitrosamines. Nitrosamines are potent cancer-causing chemicals.”
I find that these days sodium nitrate isn’t used quite as commonly as sodium nitrite. So, on to chemical number two.
Sodium nitrite is actually a poison. It is used to give processed meat a pinky color instead of looking gray (like regular cooked meat does). It has been shown to cause cancer, especially pancreatic and colorectal. “The USDA actually tried to ban sodium nitrite from the food supply back in the 1970’s, but it was overruled by the meat industry which knew that the chemical made meat look visually more appealing and therefore increased sales of processed meat products.”
Sodium nitrite is also “suspected of playing a role in the development of migraines and chronic obstructive lung disease.”
Pregnant women need to be especially careful about sodium nitrite “due to the greatly heightened risk of brain tumors in infants.” Sodium nitrite is especially dangerous to fetuses, infants and children.
These two nasty ingredients are in most processed meats today. But what else in that commonly served meat? Most list some kind of mechanically separated meat in the ingredients. Which means “a paste-like meat product produced by forcing beef, pork, turkey or chicken bones, with attached edible meat, under high pressure through a sieve or similar device to separate the bone from the edible meat tissue.” This can even include spinal cords. Gross!
Do you feed your child hot dogs regularly? “Leukemia skyrockets by 700% following the consumption of hot dogs. (Preston-Martin, S. et al. “N-nitroso compounds and childhood brain tumors: A case-control study.” Cancer Res. 1982; 42:5240-5.)” No thanks.
If you do some research you will find a lot of meat companies say it’s totally safe. Of course they do. They want to sell their product! But if you look at the real evidence, you’ll see sodium nitrate and nitrite is not good for you at all. Especially children. So the next time you want to feed your child a hot dog, make sure it’s nitrate/nitrite free.
I served a fresh ham roast for Christmas dinner last night. And it was not pink. And it did not taste like it had been preserved in chemicals for months. It was nice 🙂 I spent way too many years consuming large amounts of lunch meat. Thankfully I have not had any in several years. And I hope to prevent my children from eating it as much as possible as well. The more chemicals we can avoid the better.
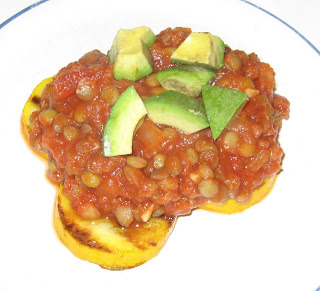
A couple weeks ago my SIL posted a recipe for sloppy lentils. It sounded so good. And it was a perfect meal for us since I’m trying to add more lentils into our diet (so healthy and great for fertility). I tried it last night. Yum!!! All 3 of us loved it. My original plan was to serve it over corn bread…but it’s just too hot to bake right now. I do want to try that sometime, but not this week. I debated about a few ways to serve this and ultimately decided to serve it over grilled yellow zucchini (since I had some fresh from the farmer’s market). Much healthier and much easier on my tummy. It was really good! I served it with shredded cheese and avocado. Justin and Rebecca also used some tortilla chips for scooping. This is a great recipe. Very easy. Very quick prep (as long as you plan ahead). It makes quite a bit, so there are lots of leftovers for lunches or another dinner. And it’s so versatile. You can serve it on buns, over cornbread, in tortillas, with chips, over veggies. So many options. I’m glad I tried this. Loved it.
Sloppy Lentils
3 cups water
1 cup lentils, rinsed (I used green)
salt to taste (optional)
1 cup chopped onion (I used about 1/3 cup)
3 tablespoons olive oil
15 oz can diced tomatoes
1/2-1 (6 ounce) can tomato paste (I used the full can)
2 cloves garlic, minced
1/2 cup ketchup
1 teaspoon mustard powder (I just used regular mustard)
1 tablespoon chili powder (I didn’t add quite this much…Rebecca doesn’t like spicy food)
3-5 tablespoons rapadura, molasses, or honey (I used about 4 Tbsp. brown cane sugar)
1 Tbsp white vinegar
salt and ground black pepper to taste
4 hamburger buns, split (or corn bread, tortillas, chips, veggies)
Soaking Step, optional (I did this): Allow lentils to soak overnight in warm filtered water with 2 Tablespoons acid medium (I used the liquid part of my kefir). Rinse and cook as described below.
Combine water and lentils in a saucepan. Season with salt and pepper, if desired. Bring to a boil over high heat, then reduce heat to medium-low, cover, and simmer until tender, about 30 minutes, stirring occasionally. The cook time may depend on the type of lentil you use, too… so keep that in mind so that you don’t overcook them. (I soaked my lentils the night before and then cooked them in the morning. I proceeded with the recipe at dinner time with a bowl full of already cooked lentils 🙂
Meanwhile, cook the onions in olive oil in a large skillet over medium heat until the onions have softened and are translucent. Add tomatoes, garlic, tomato paste, ketchup, mustard powder, chili powder, sweetener, vinegar, salt and pepper. Simmer 5 to 10 minutes until thickened.
Drain lentils and reserve cooking liquid. Stir lentils into sauce mixture, adding cooking liquid or water as needed to obtain the desired “sloppy joe” consistency. Serve on buns (or other bread or veggie).
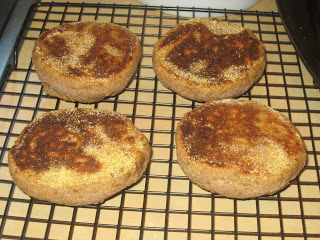
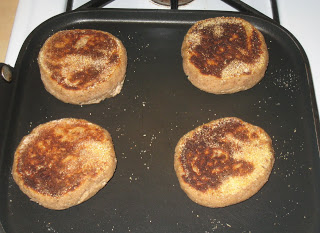
My husband is a big fan of english muffins, but I stopped buying them a while ago since they aren’t healthy. Since then I’ve been looking for good recipes for healthy english muffins. I’ve made a couple kinds in the past. One turned out very well…but it was made with white flour.
A couple weeks ago when I was searching for new sourdough recipes I found a lot of sourdough english muffin recipes. I’d never thought of that. So I did a search for whole wheat sourdough english muffins. And the first good one I came across was from GNOWFGLINS. I tried it yesterday. The verdict…awesome!!!
My daughter and I shared one with dinner last night, and we had them for breakfast this morning. Yum!! If you don’t like sourdough, you won’t like these. But if you do (like I do…can’t believe how much I love it now), you will definitely like these. And they are quite simple to make.
When I first read the directions it seemed like a long process. But really each step goes very quickly. The first day you just mix a few ingredients together. The second day you add a few more ingredients, shape the muffins, let them rest a bit and cook them. Not much hands on time at all.
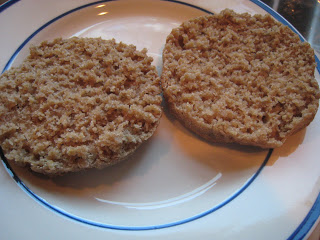
This is a keeper recipe for sure! They are light and moist. Perfect. I used bulgur flour for this batch. Any flour will do…and will produce a slightly different texture. I also added a little ground flax seed. And I used kefir for my liquid…made them even healthier! If you’re looking for a way to use your sourdough starter (or use up some kefir :), give these a try!
Whole Wheat Sourdough English Muffins
1/2 cup sourdough starter (thick or thin)
1 cup liquid (water*, milk, fermented dairy, coconut milk…)
2 cups flour (your choice –bulgur flour, splet, kamut, einkorn, whole wheat)
Add-ins like seeds, dried fruit, or chopped nuts
1 Tbsp. raw honey (or any other sweetener)
3/4 to 1 tsp. sea salt of choice
1 tsp. baking soda
*Note: The English muffins will turn out if you use water instead of full fat or fermented dairy and if you add more flour initially for easier kneading. However, the results will not be as soft on the outside or as tender on the inside once you’ve finished the cooking.
Day 1:
Place 1/2 cup sourdough starter (thick or thin) into a medium size bowl. Pour onto that the 1 cup of liquid. This is the first place where the recipe is very flexible. Your liquid could be water, milk, any fermented dairy, coconut milk… Stir to combine starter and liquid. If your sourdough starter is very stiff, you might need an extra 1/4 cup of liquid.
Once combined, add 2 cups of flour to the mixture. This is the second place where the recipe is very flexible. Use any combination of flours. Stir well to combine. Along with the flour, I often add in a couple Tbsp. of ground flax seed or poppy and caraway seeds (when I make delicious rye sourdough english muffins). The soaking affects the seeds as well as the flour. So, great! Cover and let your dough sit overnight, even up to 24 hours.
Day 2:
On top of your soaked dough, sprinkle 1 tsp. unrefined sea salt, 1 tsp. baking soda, and 1 Tbsp. honey. Use a wooden spoon to push/cut/stir in your newly added ingredients. Don’t worry about incorporating it perfectly; you will be kneading it in just a moment.
This next part of the directions might feel a little strange, because you are kneading something that could be quite wet. Pour about 1 tablespoon of olive oil onto the counter and spread it around with your hand and then rub hands together. Dump out the dough onto the oiled spot and knead the dough for 2 to 3 minutes. The purpose of this kneading is to incorporate the honey, baking soda, and salt. After this, take a pizza cutter and separate the dough into 8 equal portions. (Be sure you use plenty of oil…the dough is wet and sticky.)
The dough is quite wet. At this time, it is helpful to dust hands with flour before shaping each muffin. You might prefer to use all-purpose flour for this dusting, or sprouted flour where the sprouting has done the work of soaking.
With dusted hands, pick up a portion and gently shape it into your muffin – about 1 finger thick and maybe 2-1/2 inches wide. Size and shape are not important here. Place your muffins on a lightly floured or cornmealed (greased might work if you want to stay away from newly added flour) sheet of wax paper or parchment paper. Cover with a dish towel and let rest for 45 minutes to 1 hour.
About 5 minutes before you want to griddle/skillet your muffins, set the heat to medium. You don’t want the muffins to brown too quickly because the insides need a chance to cook. You do not need to grease the skillet/griddle.
Carefully transfer the muffins onto your heat source. Cook the muffins for about five minutes on each side. You can take a little peek every now and again to make sure the bottoms are not getting too brown. When it is time to flip, do this carefully. Your muffins will plump up beautifully, and you do not want to deflate them by being too rough. Cook for the second five minutes. Now, if you find that the outside edge of your muffin is not as done as you like, feel free to pop these into a 350 degree oven for 5-10 minutes.
They last for at least a week in a sealed container on the counter. They also freeze beautifully. Might want to slice them first. And it most definitely works to double or triple the recipe.
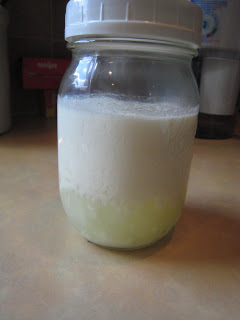
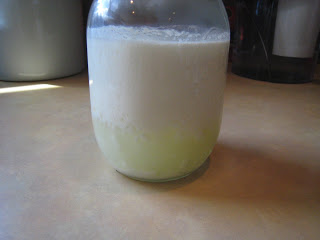
Last week I got some kefir grains and made my first attempt at making some. I wasn’t really sure what I was doing or what it was supposed to look like/taste like. And it didn’t seem to work that well. So I did a little more research, watched a few videos and tried again this week. Well, I think it worked this time 🙂 And it really wasn’t hard at all. I think I just hadn’t given my grains enough time to adjust/grow before. My first batch of kefir is still probably on the thin side. But it’s way thicker than the stuff I made last week. I mixed kefir and yogurt together yesterday for lunch. That worked well. The kefir does have a pretty strong sour taste. I love the tangy taste of plain yogurt. But kefir is different. I haven’t accquired the taste for eating it plain yet. But maybe I will over time. I’m excited to have kefir and to try in various recipes. And mostly excited about its impact on my gut 🙂
In addition to dairy kefir there is also water kefir. Which also is great for your digestive system. I’ve read about it many places. Maybe I’ll try that next (thanks for the suggestions Sara and Donielle!).
Here’s the basic idea of how to make dairy kefir:
Kefir
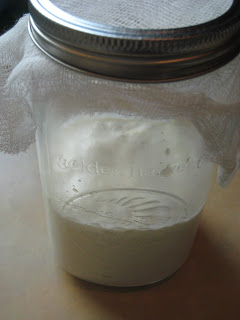
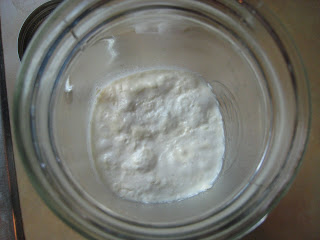
1. Put kefir grains in a clean container (a mason jar works well) 2. Poor milk into the jar (how much milk you use depends on how many grains you have and how much kefir you want to make. To start out I’m only using about a cup of milk.) and stir with non-metallic spoon.
3. Cover jar loosely (I use cheesecloth secured with a ring) 4. Set in a warm spot, away from sunlight (I put mine in a kitchen cupboard…above my oven) 5. In 12 – 48 hours you should have kefir (The time depends on your grains and how strong you like the kefir)
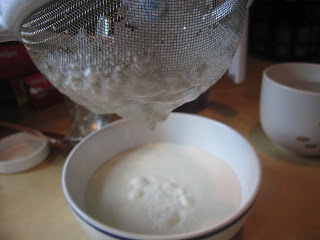
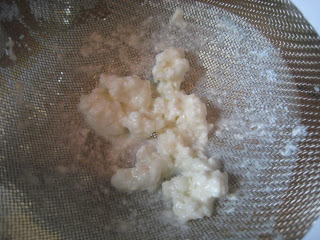
6. Strain the kefir into another jar. (I pour it through a strainer)
7. Put the grains back into the old jar and pour milk on top. Repeat steps 3 – 6 for more kefir. Or store in the refrigerator if you want a break from making kefir.
8. Cover the kefir you just made. You can put it right in the refrigerator. Or you can let it set out a while to continue to thicken and separate. If it separates the top portion will be thicker, like yogurt. The bottom will be whey. You can use them together or separate, just like you do with yogurt.

 One of my goals this year is to get back on track with properly preparing my grains. I’ve been doing it for years now, but got off track with pregnancy and a new baby.


 “Do you have a picky eater? Are meal times a battle? Before you get frustrated and assume your child is just strong-willed, take a closer look at what is really going on.