
Just read this post on Heavenly Homemakers about an ice cream experiment. Crazy! And really makes you think twice about what you buy vs. what you make. We’ve really been enjoying either organic or homemade ice cream over the past month. Can’t wait to dig into my latest creation on Sat. for Justin’s birthday…chocolate peanut butter cookies ‘n’ cream 🙂
Author: Mary | Just Take A Bite
English Muffins
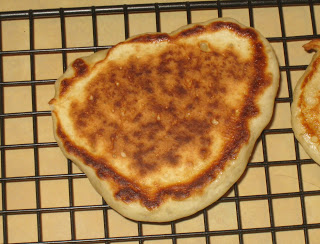
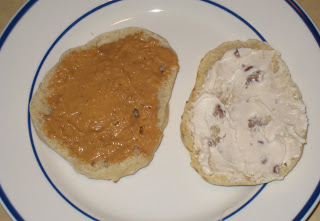
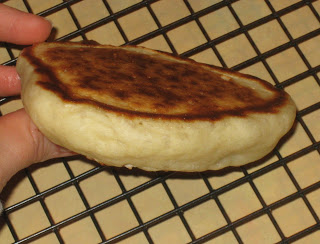
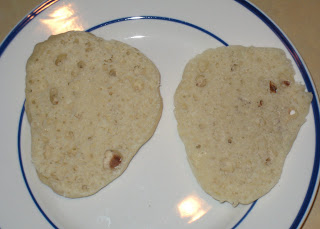
A few weeks ago I tried making english muffins. They didn’t turn out very well. They were super dense…not at all the texture of an english muffin. I decided to give it another try yesterday with a completely different recipe. I found this recipe link on my SIL’s blog. The recipe is from Baking Bites. The concept of these muffins is more like a pancake than bread. These turned out great!!! Plus they are way easier to make. No long knead and rise times. And they puff up just like you expect. I’m so glad I tried these. I had one for breakfast this morning. Yum! This is a keeper recipe for sure. I’m anxious to make the cinnamon raisin version and maybe even experiment with adding some whole wheat flour. The hardest part about making these is getting the griddle temp correct. It has to be high enough to make them puff, but low enough that they can be on long enough to cook through without burning. I had a mix of results as I adjusted the temp. But overall they turned out well. Maybe next time I’ll try my electric skillet so I can be sure to have an even temp throughout. I got 10 muffins out of this.
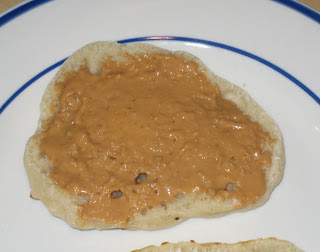
English Muffins
1/3 cup water, warm (110F)
1 Tbsp. sugar
2 1/2 tsp. active dry yeast
1 cup nonfat milk, slightly warm (100-110F) (I used 1%)
3/4 tsp. salt
2 cups all purpose flour
In a large bowl, whisk together water, sugar and yeast and let mixture stand for 10 minutes, until slightly foamy.
Using a wooden spoon, stir in remaining ingredients and mix until smooth. Cover with plastic wrap and set aside for 40 minutes.
Heat a griddle/nonstick frying pan over medium/medium-high heat (water dropped on the griddle evaporates very quickly). Lightly grease with cooking spray. Drop dough by scant 1/4 cupfuls onto greased surface and cook until medium brown on the bottom.

The top will look set and the sides will appear somewhat dry. The exact time depends on the temperature of your griddle and the size of your muffins, but expect this to take several minutes. Flip over and cook 2nd side until brown.

Cool on wire rack for at least 15 minutes or until completely cool.
When ready to serve, split muffins with a fork and toast.
Serve with butter, jam, peanut butter, etc.
Makes 10-12 muffins.
Chewy Granola Bars
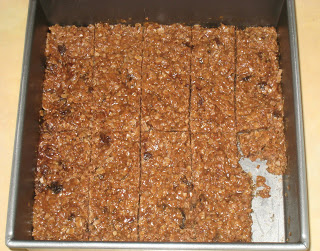
Last week I made crunchy granola bars and I was thinking I wanted to find a recipe for chewy granola bars. Wouldn’t you know it Laura posted a recipe for some yesterday on Heavenly Homemakers 🙂 I thought I would try them sometime. Then yesterday morning Rebecca and I came home from shopping and she said “time to bake!” And she climbed into the booth at the breakfast knook (our baking spot). So I figured I’d give them a try already since they sounded so easy. They were soooo easy to make. Took less than 10 min. (prep…they take a couple hours in the fridge to finish). These are good, but a bit on the gooey side. If I make them again I’ll have to modify things a bit. First, I used quick oats. I knew rolled oats would be better, but I was trying to be quick since Rebecca was ready to go. So I used the oats I had upstairs instead of having to go to the basement. And I think the ratio is a little off…there should be more oats or less liquid…maybe less peanut butter. I’m not sure. This is a good base recipe, but I’ll have to experiment a bit. They remind me a lot of chocolate no bake cookies (I put some chocolate chips in mine). So they taste a little more like a cookie to me than a granola bar. Again, I’ll have to experiment. I’m glad I tried them, though. And they do taste really good! Just a bit softer than I’d like. Ignore the missing piece in the pan. We tried them before taking a picture 🙂
**Edited 4/25/10 – I made another batch of these yesterday using rolled oats and coconut oil. So good!! And they hold together much better. I also used a combo of peanut butter and homemade cashew butter. The combo gives them a good flavor.
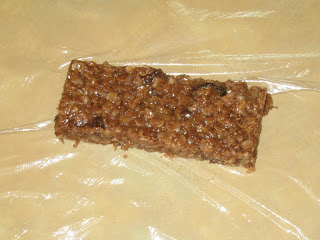
Chewy Granola Bars
1/2 cup peanut butter or sunbutter
1/3 cup honey
1/3 cup coconut oil (or butter)
2 cups rolled oats
1 cup total of any combination of: sesame seeds, coconut flakes, sunflower seeds, dried fruit, mini chocolate chips
In a medium sized saucepan, melt together peanut butter, honey and coconut oil.
Remove from heat and add the oats. Mix well. Add additional mix-ins and stir well.
Spread mixture into a parchment lined 8×8 or 9×4 pan.
Chill for two hours, then cut into bars.
Store in the refigerator or freezer.
Chocolate Chip Brownies
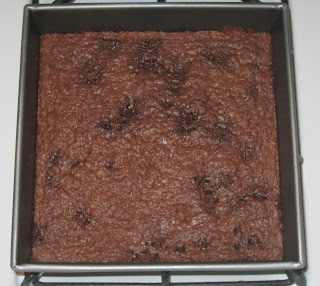
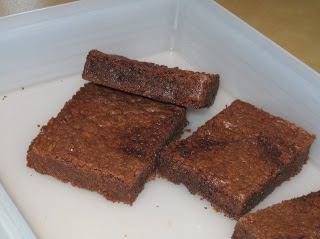
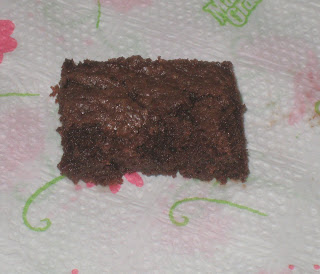
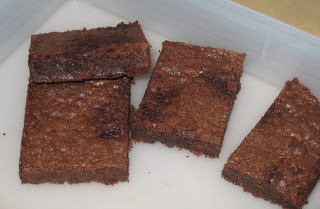
Yesterday afternoon Rebecca and I had some free time. And what do we usually do with free time? Bake! I wanted to make something with my homemade chocolate chips. I debated between a couple recipes but decided to try the chocolate chip brownie recipe from Heavenly Homemakers. It uses whole wheat flour and is so simple to make! No big mess. And we all love them. Although what’s not to like about butter, sugar and chocolate? 🙂 This is seriously so simple. I had the batter in the pan before the oven was heated…even with Rebecca helping me. These taste great and are healthy…in relative terms…organic ingredients, all from scratch. That doesn’t mean you can eat the whole pan, but they are far better than anything you can buy. They would make awesome brownie sundaes with our homemade ice cream and homemade chocolate sauce. Mmmm 🙂 The chocolate chips kind of melted. But you can still tell where they are. And they add a little extra burst of chocolate. I’m curious how they will work in cookies. This is a keeper recipe for sure. I think I’ll have to double the recipe next time.
Chocolate Chip Brownies
1 stick butter, melted
1 cup rapadura
1/4 cup cocoa powder
1 egg
1 tsp. vanilla
3/4 cup whole wheat flour
1/2 cup homemade chocolate chips (chunks)
Stir together butter, rapadura and cocoa. Mix in egg and vanilla. Stir in flour and mix until combined. Fold in chocolate chips.
Pour into a 8×8 baking stone or pan. Bake at 350 degrees for 20 minutes, or until a toothpick inserted in the center comes out clean.
Granola Bars
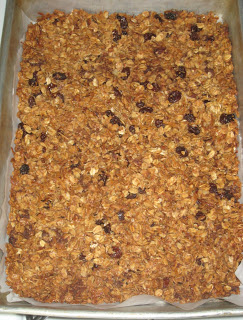
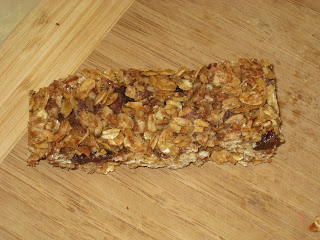
I got a new Barefoot Contessa cookbook (Back to Basics) for my birthday. I love it! I made my first recipe from it yesterday…granola bars. YUM!!! I’ve wanted to make granola bars for a long time, and there are so many different recipes out there. I figured I’d start with this one since I just got this cookbook. These are really easy to make and so good. They do have a lot of sugar…but I guess that’s why they’re so good 😛 When you first take them out of the oven they are super soft…you wonder how they will be granola bars. But after a few hours they are totally firm and crunchy. These are hard granola bars, not chewy. They were a little tough to cut without having them crumble too much. But the crumbs are so good too. This would also make awesome granola. If you just crumble it all instead of cutting bars. It tastes like the stuff you buy in the store…but without the HFCS, etc. I saved all of the crumbs to use in my cereal or mixed with yogurt. And to munch on by itself 🙂
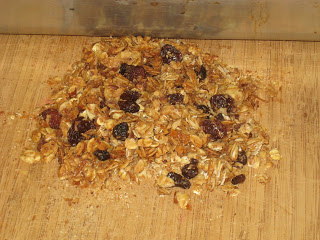 We all think these are awesome! I’ll be making them again for sure. I got 15 granola bars out of this. I modified the recipe a little bit. Since I don’t have an 8×12 pan I made a little bit more than the regular recipe and used a 9×13 pan. I also just used raisins for the fruit since that’s what I have. And I added some of my homemade chocolate chips. As I figured the chocolate chips pretty much just melted. But it still tastes great. A little bit of a chocolatey bite here and there. Mmmm 🙂 In place of the sliced almonds I used some finely ground pecans. I didn’t want big chunks of nuts for Rebecca’s sake. This makes a great breakfast. And super easy! A homemade granola bar with some fresh fruit. Doesn’t get much better than that. I kept a few out and froze the rest.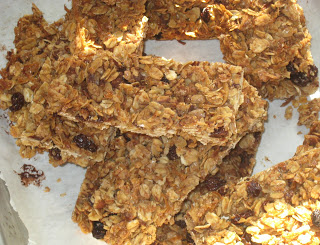
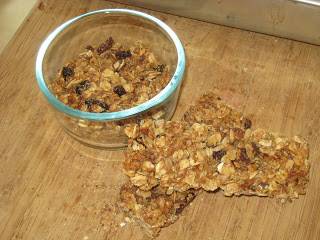
Granola Bar
2 cups old-fashioned oatmeal
1 cup sliced almonds (I used ground pecans.) (preferably soaked and dehydrated)
1 cup shredded coconut, loosely packed
1/2 cup toasted wheat germ (I didn’t toast mine. Leave this out to be GF)
3 tablespoons unsalted butter
2/3 cup honey
1/4 cup light brown cane sugar, lightly packed or sucanat
1 1/2 teaspoons pure vanilla extract
1/4 teaspoon salt
1/2 cup chopped pitted dates (I used about a cup of raisins and a handful of chocolate chips. Any fruit, seed or chip would work.)
1/2 cup chopped dried apricots
1/2 cup dried cranberries
Preheat the oven to 350 degrees F. Butter an 8 by 12-inch baking dish and line it with parchment paper.
Toss the oatmeal, almonds, and coconut together on a sheet pan and bake for 10 to 12 minutes, stirring occasionally, until lightly browned. Transfer the mixture to a large mixing bowl and stir in the wheat germ.
Reduce the oven temperature to 300 degrees F.
Place the butter, honey, brown sugar, vanilla, and salt in a small saucepan and bring to a boil over medium heat. Cook and stir for a minute, then pour over the toasted oatmeal mixture. Add the dates, apricots, and cranberries and stir well.
Pour the mixture into the prepared pan. Wet your fingers and lightly press the mixture evenly into the pan (I just used the back of a wooden spoon…tried to pack it down well). Bake for 25 to 30 minutes, until light golden brown (I baked it for 30 min.). Cool for at least 2 to 3 hours before cutting into squares. Serve at room temperature.
Whole Wheat Pita Bread
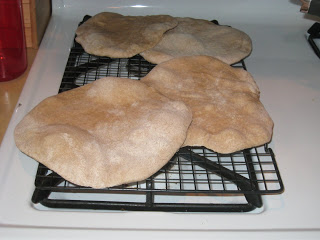
I can now cross one more bread experiment off my list…pita bread! I’ve wanted to make it for a while. But it seemed like such a tough thing to make. Would it really work? How does that pocket get in there? And what recipe to try? I’ve looked at so many. I did one more search yesterday morning and found a recipe on The Fresh Loaf that looked fairly simple. And I decided to just go for it. And you know what? It worked!!! It really worked! I can’t believe that I made good pita bread…on the first try! I am super excited. I made the dough right before Rebecca went down for her nap so it could rise while she was sleeping and then we could finish it after she got up. So my dough rose for quite a while…probably close to 3 hours. The longer the better 🙂 This was actually really simple to make. And it tastes awesome! When they were done I broke one open…and it had a nice big pocket! I tore off a couple chunks for us to try. Then Rebecca grabbed an entire half and proceeded to eat the whole thing 🙂 She LOVES fresh bread. She actually loves it before it’s even baked 😛 She likes to eat the dough or even the flour while we’re baking. She’s a baker in the making for sure. No complaints from her with our baking projects so far this month 🙂 Anyway, this was really easy and so good. I had planned to use the pita bread for our dinner tonight, but I just couldn’t pass up fresh pita bread. So I swapped meal plans for Sun. and Mon. (see update in my weekly menu). I had also cooked dried chickpeas just in time to make fresh hummus…literally…I drained the water and put the chickpeas right in the processor to make the hummus about 20 min. before dinner. I served it with avocado, cucumber and spinach.
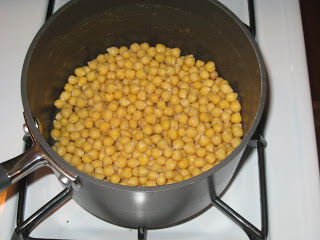
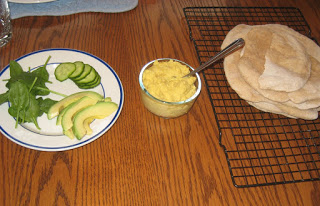
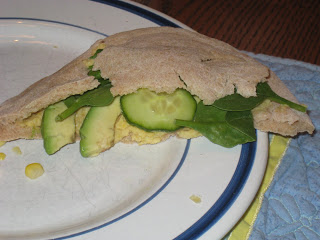
It doesn’t get more fresh and homemade than that. Pita right out of the oven and fresh hummus made with organic chickpeas right out of the pan. It was soooo good. Rebecca ate a huge pile of the chickpeas (she could eat beans at every meal:) and even more pita. She almost ate a whole one herself!
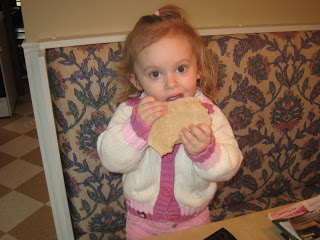
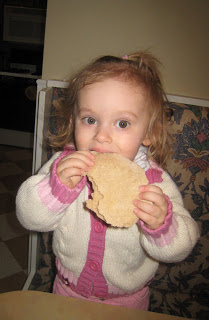
I will definitely be making our pita from scratch now. This made 8, so I have 5 in the freezer for future use. Yea pita bread!!! And I think I’m starting to get the hang of bread making. The real trick for me has been figuring out the correct dough consistency. I’m learning that in the past my dough was way too dry. I know now to err on the side of being too moist. I’m getting excited to keep trying more bread now that I’m getting better at it 🙂 And this experiment and meal was a great way to wind down my 30th birthday 🙂 I felt pretty good about what I accomplished.
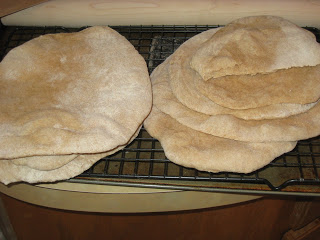
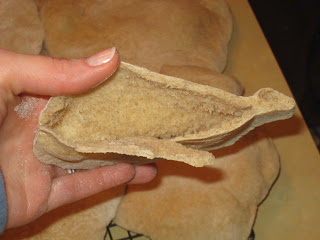
Homemade Whole Wheat Pita Bread
3 cups flour (you can use any combo of white and whole wheat…I used 2 cups bread flour and 1 cup whole wheat flour)
1 1/2 tsp. salt
1 Tbsp. sugar or honey
1 packet instant (bread machine) yeast (or, if from bulk, 2 tsp. yeast) (you can use active dry yeast but then you have to activate it first with water/sugar…then adjust the water amount you add later in the recipe)
1 1/4 to 1 1/2 cups water, roughly at room temperature
2 Tbsp. olive oil, vegetable oil, butter, or shortening (I used EVOO)
Mix the yeast in with the flour, salt, and sugar. Add the olive oil and 1 1/4 cup water and stir together with a wooden spoon. All of the ingredients should form a ball. If some of the flour will not stick to the ball, add more water (I mixed all of this in my stand mixer bowl).
Once all of the ingredients form a ball, place the ball on a work surface, such as a cutting board, and knead the dough for approximately 10 minutes (or until your hands get tired). If you are using an electric mixer, mix it at low speed for 10 minutes (I used my mixer).
(The purpose of kneading is to thoroughly combine the ingredients and to break down the flour so that the dough will become stretchy and elastic and rise well in the oven. A simple hand kneading technique is to firmly press down on the dough with the palm of your hand, fold the dough in half toward you like you are closing an envelope, rotate the dough 90 degrees and then repeat these steps, but whatever technique you are comfortable using should work.)
When you are done kneading the dough, place it in a bowl that has been lightly coated with oil. Form a ball out of the dough and place it into the bowl, rolling the ball of dough around in the bowl so that it has a light coat of oil on all sides. Cover the bowl with plastic wrap or a damp kitchen towel and set aside to rise until it has doubled in size, approximately 90 minutes.
When it has doubled in size, punch the dough down to release some of the trapped gases and divide it into 8 pieces. Roll each piece into a ball, place on a baking sheet, cover the balls with a damp kitchen towel, and let them rest for 20 minutes. This step allows the dough to relax so that it’ll be easier to shape.
While the dough is resting, preheat the oven to 400 degrees. If you have a baking stone, put it in the oven to preheat as well. If you do not have a baking stone, turn a cookie sheet upside down and place it on the middle rack of the oven while you are preheating the oven (I used a baking sheet). This will be the surface on which you bake your pitas.
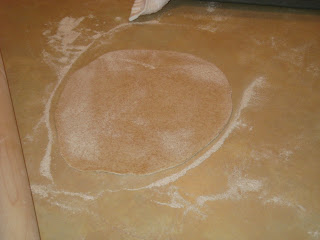
After the dough has relaxed for 20 minutes, spread a light coating of flour on a work surface and place one of the balls of dough there. Sprinkle a little bit of flour on top of the dough and use a rolling pin or your hands to stretch and flatten the dough. You should be able to roll it out to between 1/8 and 1/4 inch thick (I think they puff better if they are thinner). If the dough does not stretch sufficiently you can cover it with the damp towel and let it rest 5 to 10 minutes before trying again.
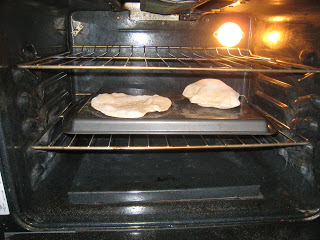
If you have a spray bottle in the kitchen, spray a light mist of water onto your baking surface and close the oven for 30 seconds. Supposedly this step reduces the blistering on the outside of your pitas. I’ve skipped it many times in the past and still been pleased with my breads, so if you don’t have a bottle handy it isn’t a big deal (I did not do this, and it still worked fine). Open the oven and place as many pitas as you can fit on the hot baking surface (I did 2 at a time). They should be baked through and puffy after 3 minutes (mine took about 4 min.). If you want your pitas to be crispy and brown you can bake them for an additional 3 to 5 minutes, but it isn’t necessary. Enjoy your fresh pita! Store in the refrigerator or freezer.
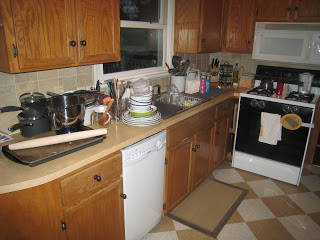
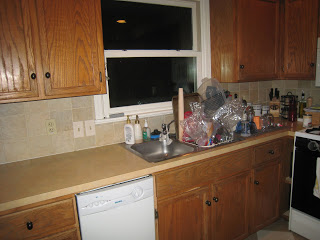
And on a side note. Just wanted to show what a disaster my kitchen is when I’m doing lots of baking without a dishwasher 😛 Not a pretty sight. I can’t wait until we either get ours fixed or get a new one! I hardly have a spot to cook in my kitchen!
After breakfast, lunch, dinner and baking are over.
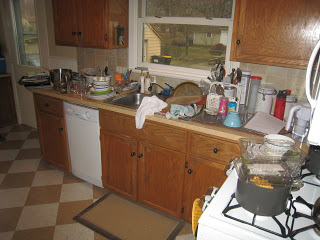
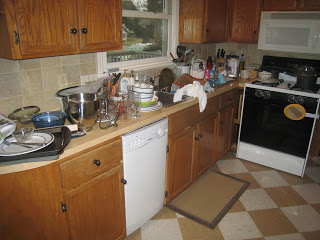
After “clean up.” Things are rinsed, piled, etc…but still a very crowded kitchen.
After my wonderful husband did the dishes. Still a full counter, but at least it’s clean 🙂
Thousand Island Dressing
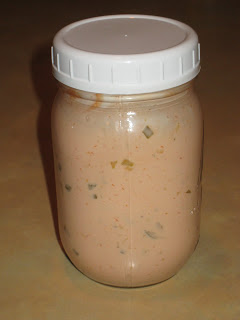
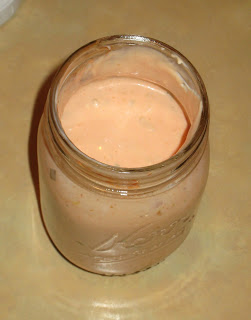
Thousand Island Dressing is my favorite salad dressing. I almost always use it when I have salads. I’ve never tried making it and always just assumed it was tough to make. But apparently not 😛 I’m sure there are lots of variations out there, but I found an easy recipe on Heavenly Homemakers. I didn’t even add all the ingredients…just 3! That’s it, 3 ingredients. And it tastes great! Who knew it was that easy? I made it in about 3 min. this morning. I can’t wait to try it on our cobb salad tonight!! I need to calculate the cost too. I bet it’s pretty cheap. I made the dressing in a pint jar. It makes almost a full pint. Maybe sometime I’ll try making the full recipe. But for today I did just the first 3 ingredients. Yum! The toughest part about this was attempting to take a decent picture 😛 And tasting salad dressing at 5:00 in the morning 😉
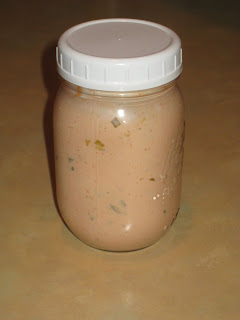
Thousand Island Dressing
1 cup mayonnaise
1/3 cup ketchup
1/4 cup pickle relish
1 Tbsp. minced onion (I didn’t add this…just didn’t feel like chopping onion this morning 😛 It tastes fine without it…but probably would be good with it too.)
1 hard boiled egg, chopped (optional…I didn’t add this.)
Mix ingredients, cover and chill.
Ice Cream!!
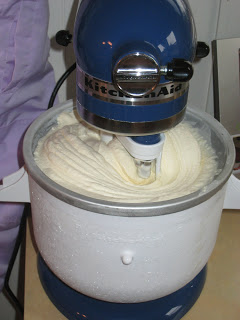
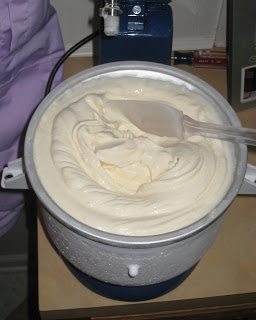
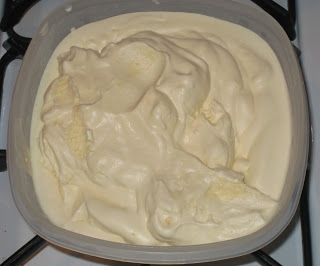
Anyone that knows me knows I LOVE ice cream. I refrain from eating it too often (meaning I try to keep it to once or twice a week) since I do try to be healthy, but I could eat it every day 🙂 I used to…but I know better now 😛 Anyway, I got an ice cream maker attachment for my mixer for Christmas. And I tried it yesterday. I just made the basic french vanilla recipe that comes with the attachment. Wow is that good!!! I wanted to eat all of it right out of the mixer 😛 One of the best parts about it is that you can make it with good quality ingredients and know exactly what’s in it. No HFCS, no hydrogenated oils, no chemicals. I used organic half and half and free range eggs, so I feel like this is fairly healthy ice cream in terms of quality. And I am very impressed with the flavor. Some homemade ice cream is too sweet or just tastes weird. But this is really good. And the consistency is good too. We do love Hudsonville ice cream…but this may even top that. Plus I like the quality factor much better in my ice cream 🙂 I have to figure out how much ice cream one batch makes (it is quite a bit). Then I can compare costs of homemade vs. boughten. But cost aside this is definitley something I would feel good about feeding my family. I used some of it for my birthday ice cream cake (that’s assembled and frosted but not decorated…pics to come later). The rest is in the freezer for yummy sundaes with homemade hot fudge (Rebecca wants that every single day…she knows what’s good:). I will definitely make this a regular item in our house. And I’m anxious to experiment with all kinds of flavors. You wouldn’t believe all of the ice cream flavors I’ve envisioned over the years 😛 Anyway, I’m not going to post the recipe. It’s just a basic kitchen aid vanilla ice cream. I just wanted to share my first ice cream experience with my new attachment. It was super easy. And oh so yummy. I highly recommend making your own ice cream. I do have a soft serve ice cream maker, but the ice cream it makes is definitely not as good.
Cashew Butter
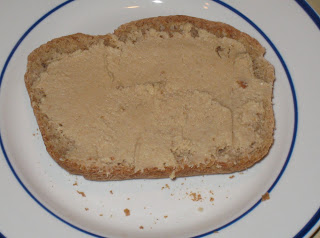
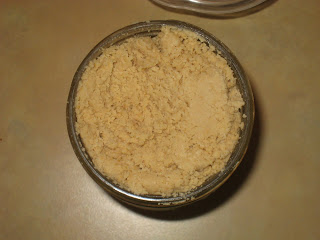
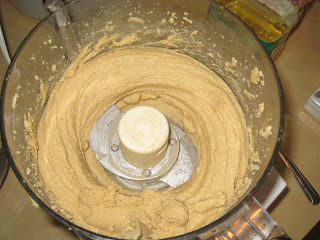
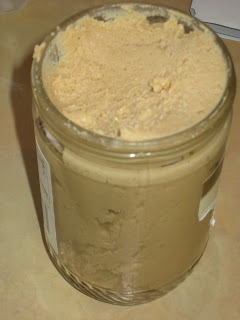
I’ve been wanting to make homemade peanut butter, cashew butter, etc. for a long time. I finally got around to it yesterday. I decided to make cashew butter first. I’ve never actually had cashew butter, but cashews are my favorite nut. I knew you could make peanut butter by just grinding peanuts, so I figured cashews would work the same way. Well, kind of. I first did just cashews. But the butter was a little dry/crumbly. I thought it needed some moisture/oil, but I wasn’t sure what kind. So then I decided I should probably actually look up how to make cashew butter 😛 Every recipe I found was identical, so I’ll post that. I didn’t follow the recipe in terms of quantities. I just added, mixed and tasted to get it how I wanted it/get it smooth. This is soooo good. I’m so glad I tried it. And now we have a full jar (plus a little extra) of good quality cashew butter. I used just a pinch of salt and a drizzle of agave nectar to add flavor. Justin says he still likes peanut butter better. Me, I’m not sure. The cashew butter is really good. Maybe I’ll have to try adding in some other flavors sometime too…chocolate, cherry, vanilla,…we’ll see. It sure made a yummy breakfast on toasted homemade wheat bread (fresh baked last night) this morning!! Can’t wait to try our cashew butter and jelly sandwiches later this week. I’ll post the before and after pictures.
Before oil.
After oil.
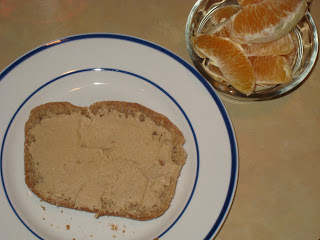
Cashew Butter
2 cups unsalted roasted cashews (I used a combo of raw and roasted organic cashews)
2 to 3 Tbsp. vegetable oil (I used canola oil)
1/4 tsp. salt
1 tsp. sugar, optional (I used agave nectar. Honey would work too.)
In a food processor or blender, combine the nuts, 2 tablespoons of the oil, the salt, and the sugar, if desired. Process on high speed for 30 seconds. Scrape down the sides with a rubber spatula and process to desired smoothness, adding more oil, 1 teaspoon at a time, if a smoother butter is desired. Adjust the seasoning, to taste.
Transfer to a bowl to use as a dip, spread, or in other recipes, or place in an airtight container and refrigerate until ready to use.
English Muffins
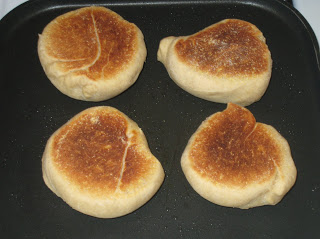
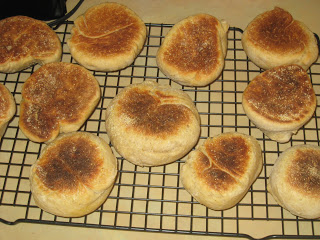
Yesterday I made my first attempt at english muffins. I don’t eat them often, but Justin loves them. And it’s one more thing I could save money on by making myself. I got the recipe from Pete Bakes. I’ve had it tagged for a long time but never made the time to try them. My first attempt…so-so. As usual I had rising issues. The flavor is good and they look ok, but they are quite dense. They are more like rolls than english muffins. I think one of my main issues with bread making is I’m not sure what dough is supposed to feel/look like when it is ready/when it has enough flour, enough moisture and has been kneaded enough. I need to get that first step right. Then the rest is easy. I’m thinking my dough wasn’t moist enough or hadn’t been kneaded enough. I used my stand mixer…which adds another factor since I’m still experimenting with that. Anyway, I’m glad I tried them. And I’m sure I’ll give them another try at some point. I made a double batch (not so sure that was a good idea now :P) since I didn’t want to go through all the work for just 6 english muffins. Justin had one for a snack last night. He said it had good flavor but was quite heavy (as you can see from the picture of one cut open). As usual Rebecca enjoyed them 🙂 She loves to munch on rolls, bagels, etc. She just carries it around with her as she plays 🙂 I guess I just have to keep practicing. Eventually I’ll get good at bread making 🙂 The original recipe says it makes 6 english muffins. I think it would work well to make it into more than that…each ball of dough seemed like a lot. I thnk having less dough in each one would have helped with the baking/density issue too.
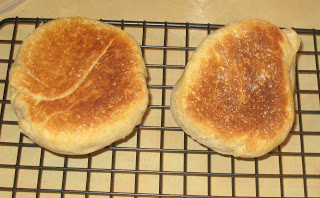
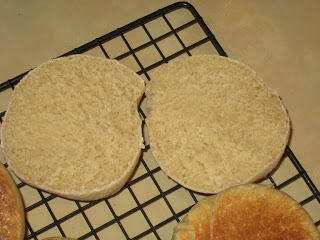
English Muffins
2 1/4 cups flour (I used a mix of all purpose and white whole wheat)
1/2 Tbsp. sugar
1/4 tsp. salt
1 1/4 tsp. instant yeast
1 Tbsp. shortening or butter (at room temperature) (I used butter)
3/4 – 1 cup milk (at room temperature)
cornmeal for sprinkling
In a large bowl, stir together the flour, sugar, salt and yeast. mix in the shortening and 3/4 cup of the milk. add the remaining milk if the dough is too dry. Transfer the dough to a floured surface and knead for about 10 minutes (I used my stand mixer for this). Place in a lightly oiled bowl and roll to coat. Cover the bowl with plastic wrap and let rise for about an hour (I let it rise for about 1 1/2 hours…still didn’t rise much).
Divide the dough into 6 equal pieces and shape into balls. Lay parchment paper on a baking sheet and spray or lightly coat with oil and sprinkle with cornmeal (I used silpat). Move the dough balls to the baking sheet evenly spaced apart (giving them room to rise more). Cover the pan loosely with plastic wrap and allow them to rise for another hour.
Heat the oven to 350 F and heat up a skillet on medium heat on the stovetop. Brush the skillet with oil and gently transfer the dough balls to the skillet a few at a time. Allow them to cook on the skillet for 5-8 minutes, until the bottoms are nicely browned. Carefully flip and cook the other side for about 5-8 minutes more. They should flatten as they cook.
When the muffins look as if they are about to burn, remove them from the skillet with a spatula and transfer quickly to a baking sheet. Bake at 350 for 5-8 minutes. Do not wait until all of the muffins have been cooked on the skillet before moving them to the oven – as the first batch is baking, move the second batch of muffins to the skillet.
Transfer the baked muffins to a cooling rack and let cool for at least 30 minutes before slicing or serving. Store them as you would muffins you buy in the store – in a sealed ziploc bag in the fridge or freezer.