Home » Kid-friendly Recipes » gluten free » Page 38

Category: gluten free

Nut Butter Bread (grain free, dairy free, GAPS-legal)

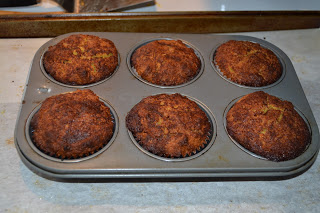
I’m trying to do more grain free baking to have easy stuff on hand for myself. Yesterday I tried a new bread recipe from Grain Free Foodies. It sounded odd…making bread without any flour…just use nut butter. Would that work? But I gave it a shot…and it worked!!

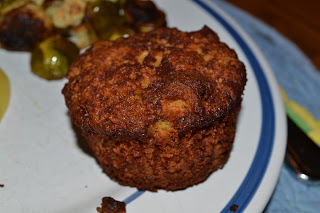
This is really good (especially with lots of butter or homemade almond butter on it). And it’s a good base. I went for the sweeter version, although it didn’t turn out very sweet. I’ll have to add more honey next time. And maybe some cinnamon and raisins. Mmmm. I’d like to try a savory variety too. Either way this is very good and so simple to make.

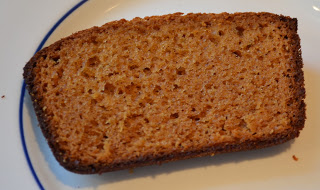
I just mixed it by hand in one bowl. It only took a few minutes to throw together. I used natural peanut butter. Worked very well. I’m glad to have an easy, grain free snack for myself…and a way to get more butter in my diet 🙂

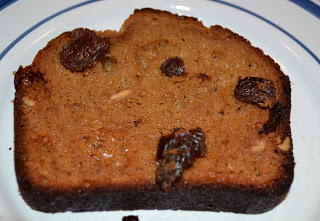
*Edited 4/20/11 – I made a cinnamon raisin version today. YUM!!! I’m sure this loaf won’t last long 🙂

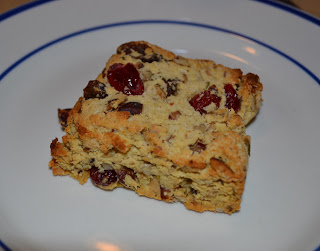
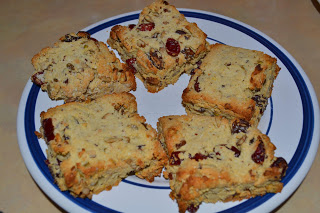
*Edited 5/30/11 – I made a chocolate chip version last week (had to keep myself from eating it all in one sitting!). And I made a garlic version today. First savory version. Turned out well. I just cut out the honey and added extra salt and some garlic powder. I have also updated the recipe to be baking soda free so that it really is GAPS legal.

You can turn this into grain free pumpkin bread by replacing half of the nut butter with pureed pumpkin.

Nut Butter Bread

1 cup nut butter (or seed butter)
1/4 cup honey
3 eggs, separated
Pinch of salt
1 T vinegar or lemon juice

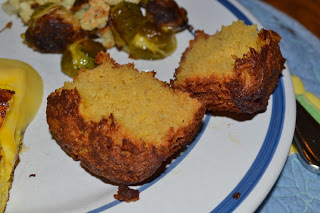
Beat egg whites until stiff. Set aside. Combine nut butter, honey, egg yolks and salt. Fold in egg whites. Add the vinegar or lemon juice (and any other add-ins) and mix well, then pour into a greased loaf pan.

Bake about 40 minutes in a 350 degree oven. It is done when a knife or toothpick comes out clean.

For a sweet bread, increase the honey to 1/2 cup and add cinnamon and whatever other spices you like, such as nutmeg or ground cloves. Adding more honey will extend the baking time so keep an eye on this. Cinnamon and raisins are great in this!

*To make it savory, reduce or omit the honey, and add a little more salt as well as crushed garlic, onion powder (if it is SCD-legal), and other savory spices such as thyme.

*To make pumpkin bread replace half of the nut butter with pureed pumpkin.

Cinnamon Bun Muffins (grain free, dairy free)

I tried another recipe from Elana’s Pantry last night – Cinnamon Bun Muffins. Another hit! Who knew grain free baked goods could taste so good? 🙂  These were very easy to make. And all 3 of use loved them. Elana has a cream cheese frosting recipe to go with it. I didn’t add any frosting. They are great without. I just piled on lots of butter 🙂  As usual, I substituted some ingredients (I’ll post the way I made them). I used coconut oil for all of the oil, which makes these dairy free. But you could use butter instead. Her recipes says it makes 9 muffins. I made them a bit bigger and got 6. They took quite a bit longer to bake that way. They are fairly dense/filling with all of the almond and coconut flour. Definitely a nice treat. And they were a great complement to our omelet and roasted veggies. Next time I make them I might add some cinnamon to the muffin mixture to make them have even more cinnamon flavor.

Cinnamon Bun Muffins

Topping:
2 Tbsp. honey
1 Tbsp. cinnamon
1 Tbsp. melted coconut oil or butter

Muffins:
1 cup blanced almond flour
2 Tbsp. coconut flour
1/2 tsp. baking soda
1/4 tsp. sea salt
1/4 cup melted coconut oil or butter
1/4 cup honey
3 eggs
1 Tbsp. vanilla extract

Mix topping. Set aside.

Combine almond flour, coconut flour, baking soda and salt in a medium bowl. In a large bowl blend together oil, honey, eggs and vanilla. Blend dry ingredients into wet and scoop a scant ¼ cup* at a time into lined muffin cups. Spoon topping onto muffins. Bake muffins for 8-12 minutes at 350.

*I filled the muffin cups at least 3/4 full and made 6 muffins. I baked them at 350 for 20-23 min.

Grain Free Muesli Scones

I tried another grain free breakfast recipe from Elana’s Pantry this morning (she has lots of great looking recipes!). Muesli scones. Yum!!! I LOVE anything like museli/granola. And I love scones too. Put them together…and make them grain free…awesome! These are super easy to make. And they taste great. Justin and I both really like them. They are even better when you pile butter on top 🙂  I served them with blueberry, cherry, strawberry kefir smoothies. A wonderful, nutritious combo to start the day. Again, I substituted ingredients a little (I personally don’t think agave is healthy at all, so I use honey). And I used what nuts/seeds/fruit I had on hand. I ended up with a combo of raisins, cranberries, crispy sunflower seeds, crispy pistachios, crispy peacans and crispy haszelnuts. Also, the recipe says it makes 16 scones…those would be pretty tiny scones. I made 9…and they still weren’t that big. I baked 5 this morning and froze 4 to have on hand for an easy breakfast some other time. You can prep the dough ahead and stick it in the fridge to bake later too (I prepped it early and then baked them just before breakfast so they were fresh out of hte oven). LOVE this recipe. I will for sure make these again.

Grain Free Muesli Scones

2 cups blanched almond flour
½ tsp. celtic sea salt
½ tsp. baking soda
——————————————-
¼ cup dried cranberries
¼ cup dried apricots, cut into ¼-inch pieces
¼ cup sunflower seeds
¼ cup sesame seeds
¼ cup pistachios, coarsely chopped
——————————————–
**whatever combo you like, preferably with crispy nuts/seeds – I used raisins, cranberries, crispy sunflower seeds, crispy pistachios, crispy peacans and crispy haszelnuts.**
———————————————
1 large egg (size does matter as dough will not hold together with a small or medium egg)
2 Tbsp. raw honey (I used a bit more than this.)

1.In a large bowl, combine almond flour, salt and soda.
2.Stir in dried fruit, seeds and nuts.
3.In a small bowl combine egg and honey.
4.Stir wet ingredients into dry.
5.Use your hands to form dough.
6.Shape dough into a 6 ½ x 6 ½ square that is about ¾” thick.
7.Cut dough into 9 squares.
8.Bake at 350° on a parchment paper lined baking sheet for 12 minutes.

Peanut Butter Cups (grain free, dairy free, egg free, gluten free)

Yesterday I wanted a fun, easy baking project for Rebecca and me. A while back I had seen a recipe for homemade peanut butter cups on The Coconut Mama. They sounded so easy and so good. So we gave them a try yesterday. YUM!!! These are very good. Who knew it was so easy to make your own peanut butter cups that are so much healthier? It’s not something I’ll make all the time since it’s not a cheap treat. It uses quite a bit of coconut oil…and it only made 5 pb cups. But definitely a fun indulgence once in a while. Rebecca helped me put the ingredients in the processor. Then I did the rest…while she helped lick spoons 😛  I made one subsitution (that would make mine not dairy free). I used regular butter instead of coconut butter since I don’t have any. Still worked great. I also used my homemade peanut butter that I already had on hand. Which made this a very quick project. You could use boughten natural pb too. They aren’t the prettiest pb cups, especially on the first try. But they sure are good. Quite messy, but that’s what you get when you don’t add a bunch of hydrogenated oils, etc. to make them shelf stable. Mine don’t look exactly like the kind you buy…I probably added a little too much pb…but is that really possible? 🙂

Chocolate Peanut Butter Cups

Chocolate

3 Tbsp. organic cocoa powder
2 Tbsp. coconut butter (or regular butter, softened)
1/4 cup + 1 Tbsp. of coconut oil
Sweeten with raw honey or maple syrup (I used a few Tbsp. of raw honey)

Blend well in blender of food processor.

Peanut Butter (this is my recipe…for a full batch of pb, way more than you need for the cups)

2 cups crispy nuts, such as peanuts, almonds or cashews
3/4 cup coconut oil
2 Tbsp. raw honey
1 tsp. sea salt

Place nuts and sea salt in food processor and grind to a fine powder. Add honey and coconut oil and process until “butter” becomes smooth. It will be somewhat liquid but will harden when chilled. Store in an airtight container in the refrigerator. Serve at room temp.

To assemble pb cups:

Scoop chocolate, 1 Tbsp. at a time, into muffin paper cups (I used my silicon muffin cups) until the bottom is covered with chocolate. Add 2 tsp. of peanut butter. Then cover peanut butter with more chocolate.

Freeze peanut butter cups 4-6 hours before serving (mine only took about 1 hour…then I let them set on the counter for a few minutes before eating them).

Grain Free Breakfast Bars

I’m just starting to experiment with some alternative/grain free flours. So far I’ve only used almond flour. And only to make grain free fish sticks and salmon cakes. This morning I used it for some actual baking. I made a batch of grain free breakfast bars. I got the recipe from Elana’s Pantry. I modified it a bit to use healthier ingredients. These are really easy and really good!!! Justin and I both like them. And it’s nice to have something grain free that isn’t just a huge pile of chopped nuts 😛  I’m anxious to keep experimenting with almond flour. I also bought some coconut flour to try. These bars were a tiny bit crumbly. I’ll probably add a little more honey and/or oil next time to hold them together better. Very excited to have a breakfast bar that I can eat. And it even kind of tastes like I’m eating my beloved/forbidden oats 🙂

*Edited 4/9/11 – I made a 2nd batch today. I used a little more coconut oil and honey. And I added a little bit of coconut flour. They turned out great!! Less crumbly. A little more bar-like. 18 minutes in the oven seemed to work well.

Grain Free Breakfast Bars

1 ¼ cup blanched almond flour
¼ teaspoon celtic sea salt
¼ teaspoon baking soda
¼ cup melted coconut oil or butter (I used coconut oil)
¼ cup raw honey or pure maple syrup (I used honey)
1 tsp. vanilla extract
½ cup shredded coconut
————————-
½ cup pumpkin seeds
½ cup sunflower seeds
¼ cup almond slivers
————————-
**I used 1 1/4 cups of whatever crispy nuts/seeds I had on hand/sounded good. Today I used crispy sunflower seeds, chopped crispy almonds and chopped crispy walnuts.
¼ cup raisins

In a small bowl, combine almond flour, salt and baking soda. In a large bowl, combine the oil, honey and vanilla. Stir dry ingredients into wet. Mix in coconut, seeds, nuts and raisins. Grease an 8×8 baking dish with butter or coconut oil. Press the dough into the baking dish, wetting your hands with water to help pat the dough down evenly (I didn’t need to use water). Bake at 350° for 18-20 min. Let cool. Cut into squares.

Honey Roasted Peanuts

Back in high school and college I ate honey roasted peanuts all-the-time. Like every single day. I haven’t had them in a long time now. I know any kind of nut in a jar from the store would kill my tummy (MSG anyone?).

But this week I was making some crispy peanuts. And I thought it might be fun to try to make honey roasted peanuts. They turned out well.

This is another fun grain free snack to munch on that is GAPS friendly. They would also be good mixed in with regular popcorn, caramel corn or kettle corn.

Honey Roasted Peanuts

2 cups crispy peanuts
raw honey to coat (2-3 Tbsp.)
sea salt to taste (1-2 tsp.)

Mix nuts, honey and salt. Spread on parchment lined baking sheet. Bake at 250 for 10-15 minutes (check on them to make sure they don’t burn). Let cool completely. Break apart. Store in sealed container.

Cheese Crisps (gluten/grain free)

My SIL posted a recipe this week for cheese crisps. And I knew I had to try them right away! Eating gluten free/mostly grain free I miss things like crackers. These are a great substitute. I just made a very small batch last night to try them out as I was making dinner. So easy. And very good! Rebecca kept sneaking up to the counter and grabbing another one 😛  I love that these are easy and fast enough to make while you’re cooking dinner. So you can have a fresh batch whenever you need. I used mild white cheddar last night…happened to be the cheese that was opened. I’ll have to try it with other kinds as well. Looking forward to having some with our soup tonight. Maybe I’ll try sliced cheese on my cheese crackers 😛  I didn’t add any seasoning. I thought they were great as is. But I’ll have to try that sometime.

Edited 3/11/11 – I tried these with marble cheese and parmesan cheese last night. LOVE the parmesan.

Cheese Crisps

your favorite block of cheese OR your favorite shredded cheese
seasonings of your choice (optional)
parchment paper

Preheat your oven to 350. Put some parchment paper on a cookie sheet.

I used a block of cheese, but you can use shredded cheese if that’s what you have, or what you prefer. If you’re using shredded cheese, toss it together in a bowl with any seasonings you feel like using. You can try lots of different seasoning options. Just don’t use salt… cheese is already salty enough on its own. Once you have the shredded cheese and seasoings mixed, place about a teaspoonful of cheese in little mounds all over the parchment-lined cookie sheet, spaced out because they will spread.

If you’re using a block of cheese, slice it thinly and cut it into little squares. About an inch square is good. Again, they will spread out, so place these on the parchment-lined cookie sheet with some space between them.

Bake for 5-7 minutes. Then take a peek. The cheese will be all bubbly. If the edges are starting to crisp up or brown a little, take them out. If you’re not sure, leave it in for another minute or two. I had to leave mine in for about 9 minutes. If you take them out too soon, you won’t get crisps… you’ll just have rubbery melted cheese.

When you remove them from the oven, you’ll need to let them cool. I just pulled the parchment off the cookie sheet and placed it on my counter. If you don’t have cool to the touch counters, then place the crisps on a cool plate. After a few minutes, they’ll be crisp.

Gluten Free…Is It For Me? Or Maybe Even Grain Free?

I’m starting to realize it’s just not worth it. The momentary pleasure of eating something made with wheat is just not worth the pain and suffereing that comes after. Over the last couple months I’ve been making big steps towards becoming “mostly” grain free. But this month I started out a little more strict. And I think it was what I needed to shed some light on the next steps in my journey towards healing my gut. I had 2 days in a row of eating completely grain free. And I was feeling quite good. Then Wednesday I had sourdough muffins in the morning and burritos on whole wheat tortillas in the evening. This was a great experiment and told me a lot. I know my body well enough by now to know that foods usually impact me about 24 hours after I eat them (give or take). So if I’m not feeling well I can usually have a pretty good idea of at least what meal the offender came from. Yesterday was a great example. I felt great in the morning. Which means the sourdough muffins didn’t seem to cause much harm (they were made only with sourdough and sprouted wheat flour). But in the afternoon…it hit. The intestinal distress. And I knew right away it was the whole wheat tortillas (boughten) I had eaten the evening before. And it was like a light went on. I’ve gone back and forth for a long time about trying to eat completley gluten free or grain free. But I never go all in. But yesterday it just clicked. I saw how good I could feel. And how bad I could feel just from one meal with wheat. And I thought it’s just not worth it.

The crazy thing is that as usual I see God’s perfect timing. I am 9 weeks away from having baby #2. And it weighs heavy on my mind often about how I am going to handle 2 kids while not feeling well so often. But I had a glimpse of how I could feel earlier in the week. And it just seemed like God was clearning things up this week about what direction to take…just in time.

I don’t know for sure how far I’ll need to take this. But I am thankful to at least have a starting point and some direction. So I’m going to do a montly goal update now instead of waiting until April. My plan for this month is to start with only eating wheat that is soaked, sprouted or sourdough. And aside from that eat gluten free (and oat and potato free). I know it won’t be easy, but I’m anxious to see how much it helps. I’m sure I will have slip ups, but hopefully not many. I will make one exception to have a piece of my birthday cake 🙂  Depending on how I do I may go totally gluten free next month. And depending on how that goes I may try totally grain free at some point. And down the road I think I want to go even farther and do GAPS. But for now this is where I’m starting. I hope it will be a big help. I feel very good about this decision and am excited to see how I feel. God has given me a sense of peace about this path. All in his perfect time 🙂

I’ll have to make more of an effort this month to make sprouted flour. And I’ll have to start experimenting with recipes using sprouted flour. See how I handle it. One step at a time. Odd to say, but I was actually quite thankful for a bad day yesterday since it made things seem so clear. But hopefully the bad days will be fewer and fewer 🙂  I just wish the recovery period from eating wheat didn’t last so long. As I said before, it’s just not worth it. A few bites of food for a couple days of misery. No thanks.

Crispy Brazil Nuts

I’ve been on a nut frenzy lately 😛  I’ve been trying all different kinds of nuts. Right now we have crispy walnuts, almonds, pecans, cashews, brazil nuts, hazel nuts, pistachios, macadamia nuts and sunflower seeds in our house. I love having a big variety to snack on and use in recipes. And it’s fun to try new kinds. I figured I’d update my cirspy nut recipes with the ones I’ve made recently. Same method as usual.

Crispy Brazil Nuts

4 cups raw brazil nuts
1 Tbsp. unrefined sea salt
filtered water

Soak nuts in salted water for at least 7 hours. Drain. Dry in dehydrator or oven set to 150 for 12 – 24 hours. I found that the brazil nuts took longer than 24 hours because they are so big/thick.