Home Β» Kid-friendly Recipes Β» dessert Β» Page 22

Category: dessert

Ice Cream Cones

Since it was such a rainy day yesterday Rebecca and I tackled another experimental baking project…ice cream cones! I haven’t had much luck finding a recipe that looks all that great. But I found this one from Disney Family Fun a long time ago. Figured I’d give it a shot. The cone is like the cookie style cones you sometimes see at ice cream shops. It reminds me of a mix between a sugar cookie and a fortune cookie. I think I made them a little thicker than I’d like, but it was a first attempt. The really tough part is shaping them. I don’t have a cone shaper (note to self…put on gift list:), so I have to try to do it by hand…while they are super hot, just out of the oven. It’s tough to roll it and pinch the end before it starts cooling. But it was a fun experiment. One didn’t roll well at all, so we used that to munch on. We haven’t tried them with ice cream yet. I’ll update when we do. This is a decent base recipe. It would work well for making ice cream bowls or even making your own fortune cookies. And best of all, no HFCS or hydrogenated oils! I’m glad we tried it.
**Edited 4-13-10: These taste great with ice cream!!

Ice Cream Cones

2/3 cup sugar
3 egg whites
1 cup all-purpose flour
1/2 teaspoon vanilla extract
1/3 cup melted butter

Heat the oven to 400ΒΊ F (350ΒΊ F if you’re using a dark-coated baking sheet). In a medium-size bowl, beat the sugar and egg whites with an electric mixer for 30 seconds.

Mix in the flour until smooth, then add the vanilla extract and melted butter. For each cone, scoop 2 1/2 tablespoons of batter onto the baking sheet, spreading the batter into thin 6-inch circles (use a measuring spoon for accuracy). (Try to get it quite thin…I think that is the trick. And I also think it helps to grease the baking sheet.)

Bake for 7 or 8 minutes or until golden, then remove the sheet from the oven (they need to get quite dark to work well, darker than I expected. Otherwise it stays too doughy.). Working quickly, form each cookie into a cone (a parent’s job), pinching the tip to seal it tightly. Allow the cones to cool seam side down on a rack.

Chocolate Cake

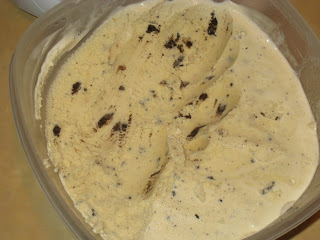
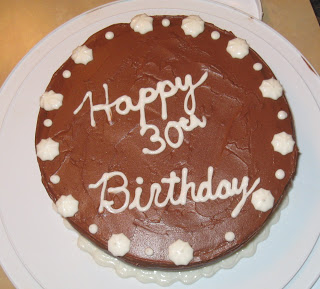
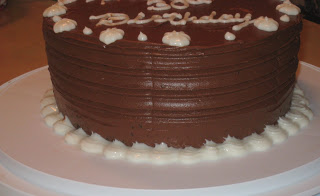
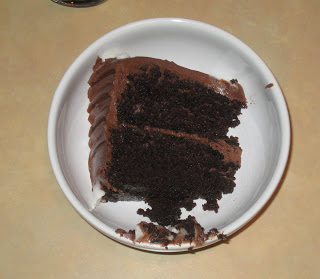
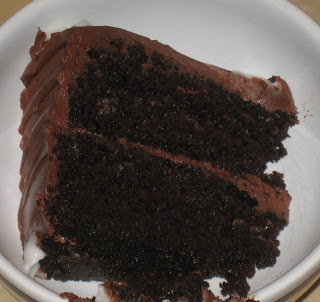
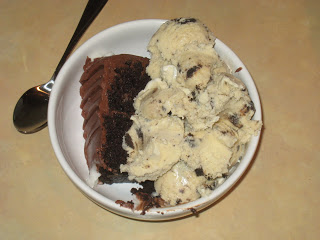
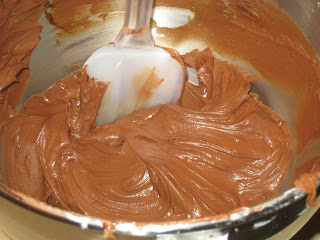
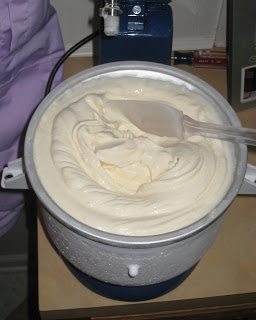
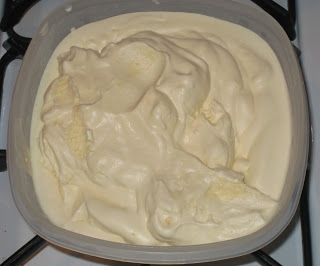
Tomorrow is Justin’s 30th birthday. We celebrated yesterday. One day while I was in the process of figuring out what kind of cake to make Rebecca and I happened to browse through my Barefoot Contessa at Home cookbook…yes, Rebecca likes to read cookbooks with me πŸ™‚Β  And I came across her recipe for Beatty’s Chocolate Cake. It looked so chocolatey and good. I decided to try it. The secret is that she uses coffee to really bring out the chocolate flavor. This is a VERY moist cake…super chocolatey. And very very good πŸ™‚Β  I’m glad I tried it. All 3 of us love it. I also made her recipe for chocolate frosting to go with it. It was also really good. A little on the light/fluffy side for my personal taste, but still very good. And I think the frosting has a bit too much coffee flavor…again, for my taste. Justin thought it was great. This is a cake I’ll make again for sure! We had it with homemade chocolate peanut butter cookies and cream ice cream (I fournd some organic oreo-type cookies with peanut butter filling…mmmm).Β 
Β 
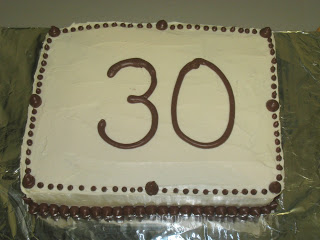
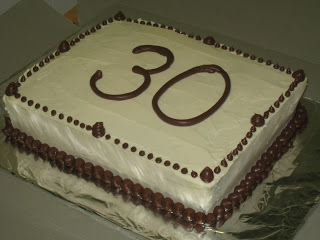
What a birthday treat!! Poor us…having to eat this for a few days in a row πŸ™‚Β  I’ll probably have to freeze some of the cake, though. It’s quite rich, so you can’t eat a huge piece. And I don’t think any of us needs to eat it every day for a week straight πŸ˜›Β  Try to focus on the pictures of the actual cake and not the decoration. I did the frosting/decorating in a rush early in the morning. And Justin told me to use his cake to experiment with some tools he had gotten me for Christmas. So this was my first attempt at the side deco. I was also using up some old icing…that was not very good consistency. So shortly after I took the pics it just started to all melt together. Glad I took a few pics right away πŸ™‚

Beatty’s Chocolate Cake

Butter, for greasing the pans
1 3/4 cups all-purpose flour, plus more for pans
2 cups sugar
3/4 cups good cocoa powder
2 tsp. baking soda
1 tsp. baking powder
1 tsp. kosher salt
1 cup buttermilk, shaken
1/2 cup vegetable oil (I used canola)
2 extra-large eggs, at room temperature
1 tsp. pure vanilla extract
1 cup freshly brewed hot coffee

Preheat the oven to 350 degrees F. Butter 2 (8-inch) round cake pans. Line with parchment paper, then butter and flour the pans.

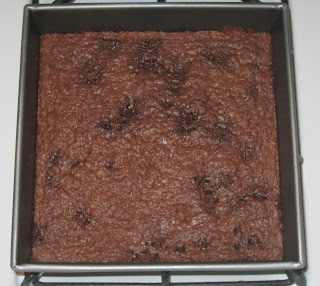
Sift the flour, sugar, cocoa, baking soda, baking powder, and salt into the bowl of an electric mixer fitted with a paddle attachment and mix on low speed until combined. In another bowl, combine the buttermilk, oil, eggs, and vanilla. With the mixer on low speed, slowly add the wet ingredients to the dry. With mixer still on low, add the coffee and stir just to combine, scraping the bottom of the bowl with a rubber spatula. Pour the batter into the prepared pans and bake for 35 to 40 minutes, until a cake tester comes out clean. Cool in the pans for 30 minutes, then turn them out onto a cooling rack and cool completely.

Place 1 layer, flat side up, on a flat plate or cake pedestal. With a knife or offset spatula, spread the top with frosting. Place the second layer on top, rounded side up, and spread the frosting evenly on the top and sides of the cake.

Chocolate Frosting

6 oz. good semisweet chocolate
1/2Β lb. (2 sticks) unsalted butter, at room temperature
1 extra-large egg yolk, at room temperature
1 tsp. pure vanilla extract
1 1/4 cups sifted confectioners’ sugar
1Β Tbsp. instant coffee powder

Chop the chocolate and place it in a heat-proof bowl set over a pan of simmering water. Stir until just melted and set aside until cooled to room temperature.

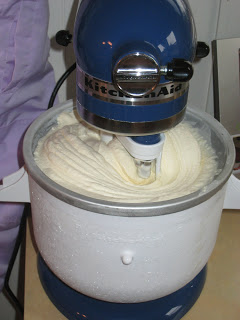
In the bowl of an electric mixer fitted with a paddle attachment, beat the butter on medium-high speed until light yellow and fluffy, about 3 minutes. Add the egg yolk and vanilla and continue beating for 3 minutes. Turn the mixer to low, gradually add the confectioners’ sugar, then beat at medium speed, scraping down the bowl as necessary, until smooth and creamy. Dissolve the coffee powder in 2 teaspoons of the hottest tap water. On low speed, add the chocolate and coffee to the butter mixture and mix until blended. Don’t whip! Spread immediately on the cooled cake.

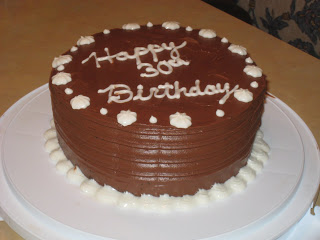
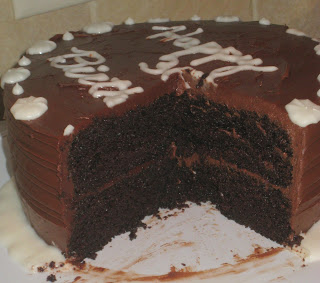
And here are a couple pics of the cake Justin is bringing to work. Chocolate cake with chocolate frosting in the middle and cream cheese frosting on the outside.

Chocolate Chip Brownies

Yesterday afternoon Rebecca and I had some free time. And what do we usually do with free time? Bake! I wanted to make something with my homemade chocolate chips. I debated betweenΒ a couple recipes but decided to try the chocolate chip brownie recipe from Heavenly Homemakers. It uses whole wheat flour and is so simple to make! No big mess. And we all love them. Although what’s not to like about butter, sugar and chocolate? πŸ™‚Β  This is seriously so simple. I had the batter in the pan before the oven was heated…even with Rebecca helping me. These taste great and are healthy…in relative terms…organic ingredients, all from scratch. That doesn’t mean you can eat the whole pan, but they are far better than anything you can buy. They would make awesome brownie sundaes with our homemade ice cream and homemade chocolate sauce. Mmmm πŸ™‚Β  The chocolate chips kind of melted. But you can still tell where they are. And they add a little extra burst of chocolate. I’m curious how they will work in cookies. This is a keeper recipe for sure. I think I’ll have to double the recipe next time.

Chocolate Chip Brownies

1 stick butter, melted
1 cup rapadura
1/4 cup cocoa powder
1 egg
1 tsp. vanilla
3/4 cup whole wheat flour
1/2 cup homemade chocolate chips (chunks)

Stir together butter, rapadura and cocoa. Mix in egg and vanilla. Stir in flour and mix until combined. Fold in chocolate chips.

Pour into a 8Γ—8 baking stone or pan. Bake at 350 degrees for 20 minutes, or until a toothpick inserted in the center comes out clean.

Ice Cream!!

Anyone that knows me knows I LOVE ice cream. I refrain from eating it too often (meaning I try to keep it to once or twice a week)Β since I do try to be healthy, but I could eat it every day πŸ™‚Β  I used to…but I know better now πŸ˜›Β  Anyway, I got an ice cream maker attachment for my mixer for Christmas. And I tried it yesterday. I just made the basic french vanilla recipe that comes with the attachment. Wow is that good!!! I wanted to eat all of it right out of the mixer πŸ˜›Β  One of the best parts about it is that you can make it with good quality ingredients and know exactly what’s in it. No HFCS, no hydrogenated oils, no chemicals. I used organic half and half and free range eggs, so I feel like this is fairly healthy ice cream in terms of quality. And I am very impressed with the flavor. Some homemade ice cream is too sweet or just tastes weird. But this is really good. And the consistency is good too. We do love Hudsonville ice cream…but this mayΒ even top that. Plus I like the quality factor much better in my ice creamΒ πŸ™‚Β  I have to figure out how much ice cream one batch makes (it is quite a bit). Then I can compare costs of homemade vs. boughten. But cost aside this is definitley something I would feel good about feeding my family. I used some of it for my birthday ice cream cake (that’s assembled and frosted but not decorated…pics to come later). The rest is in the freezer for yummy sundaes with homemade hot fudge (Rebecca wants that every single day…she knows what’s good:). I will definitely make this a regular item in our house. And I’m anxious to experiment with all kinds of flavors. You wouldn’t believe all of the ice cream flavors I’ve envisioned over the years πŸ˜›Β  Anyway, I’m not going to post the recipe. It’s just a basic kitchen aid vanilla ice cream. I just wanted to share my first ice cream experience with my new attachment. It was super easy. And oh so yummy. I highly recommend making your own ice cream. I do have a soft serve ice cream maker, but the ice cream it makes is definitely not as good.

Bread Pudding

Since I’m focusing on bread this month I decided to make bread pudding last night. It’s really more of a dessert. But I served it as a side dish with our quiche. I usually serve quiche with some kind of sweet bread, so it’s really not that different. I love bread pudding. But I’ve actually never made it before. And haven’t had it in years. This is my mom’s recipe. So simple and so good!! We all loved it. It’s hard to stop eating it πŸ˜›Β  It’s soft and sweet and has kind of a custardy feel to it from the eggs. And the great thing about it is that everyone pretty much always has the ingredients on hand. And it’s a great way to use up the end pieces of bread (that normally get thrown away in our house). They actually work better than regular slices. A very budget friendly dessert! And a great way to use up those last few slices of bread in a loaf. This is great on it’s own, warm or cold. And it’s also good with some vanilla ice cream on top. I bet it would be good with some apple slices baked in too. Maybe I’ll have to try that some time. Can’t wait to have more tonight! And I just thought of it…I bet this would even be a good breakfast…bread, eggs, milk, raisins…sounds good to me! That may be on our menu soon πŸ˜‰

This post is linked to Fat Tuesday at Real Food Forager.

**Edited 4/24/10 – I made this today with a peeled and chopped apple. Yum!!!! Makes it even better.

Bread Pudding

4 cups bread, cubed (whole wheat, sourdough, cinnamon raisin…whatever you like) (just tear it into rough chunks)
2 cups scalded millk (heated to almost boiling)
1/4 cup butter, melted
1/2 cup organic cane sugar or sucanat (honey or maple syrup would probably work too)
2 eggs, slightly beaten
1/4 tsp. salt
1/2 cup raisins (optional, but they really do make it so much better πŸ™‚
1 tsp. cinnamon or nutmeg (I used cinnamon)
1 apple, peeled and chopped (optional – to make apple raisin bread pudding)

Place bread crumbs in a large bowl. Pour milk over top. Let cool slightly. Add remaining ingredients. Pour into greased 1 1/2 qt. casserole. Bake at 325 for about 1 hour, until knife inserted in center comes out clean (I baked mine for a little over an hour).

Homemade Whole Wheat Vanilla Wafers

In my ongoing efforts to make theΒ  majority of our food (including snacks) from scratch I tried a new recipe yesterday for whole wheat vanilla wafers. I got the recipe from Heavenly Homemakers. I used to eat just about as many vanilla wafers as I did graham crackers πŸ˜›Β  I lived on them for a while. Then realized how much junk was in them and haven’t had any in a long time. So I was excited to find this recipe.


These are super easy to make! Very quick prep. And they are very good. They don’t taste exactly like a vanilla wafer…a little on the buttery side. But they are good.

Whole Wheat Vanilla Wafers
makes ~55 cookies

1/2 cup butter, softened
3/4 cup sucanat or brown sugar
1 egg
1 tsp. vanilla extract
1 cup whole wheat flour
1/4 tsp. sea salt
1/2 tsp. baking powder

Cream butter and sucanat together. Beat in egg and vanilla extract. Stir in flour, salt and baking powder.

Line a baking sheet with parchment paper. Put nickel size mounds on the parchment paper. I just used a cookie scoop and made little mounds.

Bake at 325Β° for fifteen minutes. Turn off the oven and let the cookies sit inside for a half hour or so to crisp.

Turtle Cheesecake

I am in charge of dessert for my extended family Christmas party this year. One of the things I decided to make is turtle cheesecake. I LOVE cheesecake (chocolate covered is my favorite). This is a recipe I got from a Philadelphia cream cheese box years ago. I’ve made it once before for a work Christmas party for Justin. Let’s just say I don’t think any other dessert was even touched before this was gone πŸ™‚Β  That’s how good it is. Oreos, cream cheese, caramel, pecans…mmmm. It’s in the oven right now. I’ll add pics later when it’s done.

Ultimate Turtle Cheesecake

2 cups Oreo Chocolate Cookie crumbs (I used my food processor to make the cookies into crumbs…first time trying that…wow, that is so much easier and works so much better than doing it by hand πŸ™‚
6 Tbsp. butter, melted
1 bag (14 oz.) caramels
1/2 cup milk
1/2 cup pecan pieces
3 pkgs. (8 oz. each) cream cheese, softened
3/4 cup sugar
1 Tbsp. vanilla
3 eggs
2 squares semi-sweet baking chocolate (2 oz.)

Mix cookie crumbs and better. Press onto bottom and 2″ up sides of a 9″ springform pan. Place caramels and milk in a small microwavable bowl. Microwave on high 3 min., until caramels are completely melted, stirring after each minute. Pour 1/2 of the caramel mixture into cruts. Refrigerate 10 min. Set remaining caramel aside for later use in topping.

Beat cream cheese, sugar and vanilla on medium speed until well blended. Add eggs, 1 at a time, mixing on low speed after each addition just until blended. Pour over caramel mixture in crust.

Bake at 325 for 65 min. to 70 min. or until center is almost set.**Β  Run knife around side of pan to loosen cake. Cool before removing side of pan. Refrigerate 4 hours or over night.

Top with remaining caramel mixture and pecans just before serving. Melt chocolate as directed on package. Drizzle over cheesecake. Store leftover cheesecake in refrigerator. Makes 16 servings.

**Normally when I make cheesecake I put tinfoil underneath the pan and around the outside. Then I put it in a large pan and add water. Since this recipe did not say to do either I didn’t this time. Well, part way through baking I noticed a smell and smoke in the kitchen. Some of the butter from the crust was dripping down in the oven. So, a tip…use the foil or at least a baking pan underneath so you don’t end up with a mess.

Dutch Apple Pie

Finally, the long awaited homemade dutch apple pie! This is an amazing pie! I’m not much of a pie person, but I’ll eat this any time. It’s like apple pie and apple crisp combined.
 

 I got this recipe from my mom. I think she got it from one of my grandmas. A great recipe handed down through the generations!

If you like apple desserts you will LOVE Dutch apple pie.

Dutch Apple Pie

Filling:
 
5 large tart apples, pared, cored and cut into thin slices
1/2 cup light brown sugar (orgainc cane brown sugar or sucanat)
1 tsp. cinnamon
 
Topping:
 
1/2 cup organic cane sugar or sucanat
3/4 cup flour (all purpose, whole wheat or a combination of tapioca and white rice to make it gluten free)
1/3 cup butter, chilled (or lard, tallow or palm shortening)
 
Single pie crust:
 
1 1/4 cups all purpose flour (or whole wheat)
1/2 tsp. salt
1/3 cup + 1 Tbsp. palm shortening, cold butter, lard or tallow
1/8 cup + 2 Tbsp. water w/ 1/2 tsp. vinegar
 
Pie Crust:
 
Sift the flour and salt. Cut in half of the shortening until it resembles corn meal. Cut in other half until it looks like small peas.
 
Add the water + vinegar and mix well. (You can do this all in a food processor for a very quick dough).
 
Roll out the dough and place in 9″ pie plate.You can use a gluten free pie crust as well.

 
Pie:
Heat oven to 400*F.
 
Arrange the apple slices in the pastry lined 9″ pie pan.
 
Combine the brown sugar and cinnamon. Sprinkle over the apples.
 
Combine the white sugar and flour.
 
Cut in the butter until the mixture is crumbly. Sprinkle over the apples.
 
Bake 40-45 min.

Pumpkin White Chocolate Scones

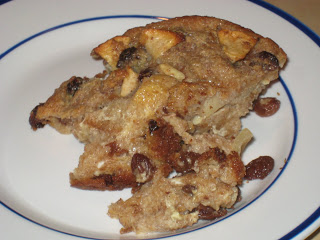
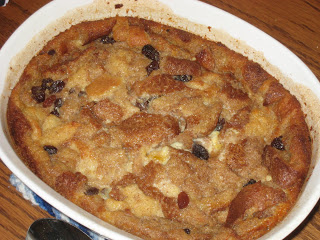
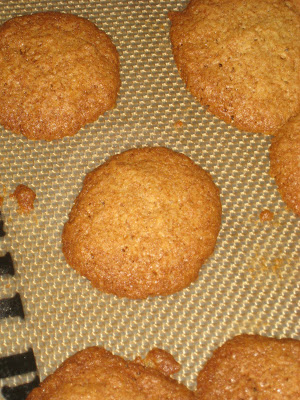
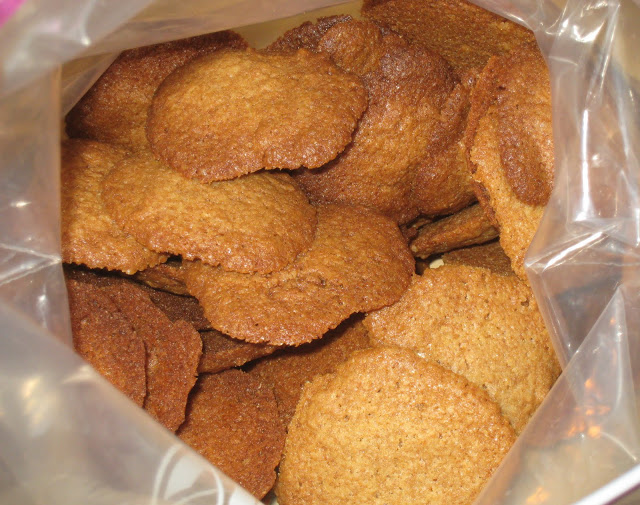
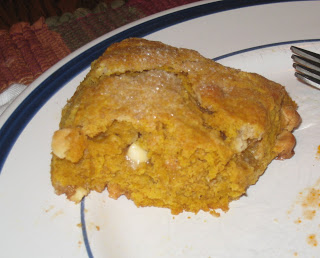
Last night for dinner I made quiche. And I always like to make scones when I make quiche. I saw a recipe for pumpkin white chocolate scones recently on Two Peas and Their Pod, and I knew I had to try them! These were so good!!! All 3 of us loved them. Simple to make, like most scones. I love that. Plus I had some buttermilk to use up. I didn’t add the glaze last night. I might try that tonight or if we have them for breakfast some day this week (**Update…the glaze is awesome!!! I didn’t think they could get any better…but they did πŸ™‚. I got 8 scones out of the dough. I baked 3 and froze 5. I’ll bake another 3 with dinner tonight and save 2 for a breakfast. Some dried cherries might be good in these, but definitely not necessary. The chocolate chips added just the right amount of sweetness. There aren’t enough to make them super chocolatey. But you get a little hint of chocolate in most bites. I bet milk chocolate would be good too in place of the white. Definitely a keeper recipe. And that’s one positive pumpkin experience for me. Hopefully there will be many more this month πŸ™‚
Pumpkin White Chocolate Scones

Scone Dough:

2 cups all purpose flour
1/3 cup light brown sugar
1/4 tsp. ground ginger
1/2 tsp. ground cinnamon
1/4 tsp. ground nutmeg
1/2 tsp. baking powder
1/4 tsp. baking soda
1/4 tsp. salt
1/2 cup cold unsalted butter, cut into pieces
1/3 cup white chocolate chips
1/2 cup buttermilk
1/2 cup canned pumpkin
1 tsp. pure vanilla
1 Tbsp. cream
Turbinado sugar for sprinkling on top

Spice glaze:

1 cup powdered sugar
1/2 tsp. cinnamon
1/8 tsp. cloves
sprinkle of nutmeg
milk
Add as much milk until desired consistency. Drizzle or spread over cooled scones.

Preheat oven to 400 degrees F and place rack in middle of oven. Line a baking sheet with parchment paper or Silpat.In a large bowl, whisk together the flour, sugar, spices, baking powder, baking soda and salt. Cut the butter into small pieces and blend into the flour mixture with a pastry blender or two knives. I use my hands! The mixture should look like coarse crumbs. Stir in the white chocolate.

In a separate bowl mix together the buttermilk, pumpkin puree and vanilla and then add the buttermilk mixture to the flour mixture. Mix just until the dough comes together. Do not over mix the dough.Transfer to a lightly floured surface and knead dough gently four or five times and then pat the dough into a circle that is about 7 inches (18 cm) round and about 11/2 inches (3.75 cm) thick. Cut this circle in half, then cut each half into 3 pie-shaped wedges (triangles) (I cut it into 8 triangles). Place the scones on the baking sheet. Brush the tops of the scones with the cream and sprinkle a little Turbinado sugar on top.Place the baking sheet inside another baking sheet to prevent the bottoms of the scones from over browning. Bake for about 20 minutes or until golden brown and a toothpick inserted in the middle comes out clean. Transfer to a wire rack to cool and drizzle scones with the glaze.

Banket

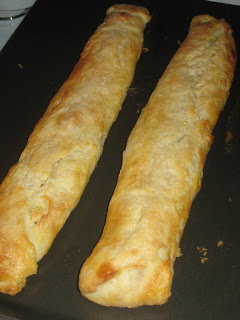
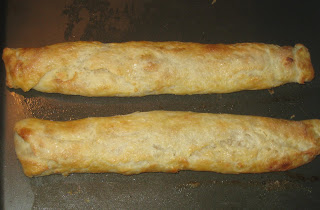
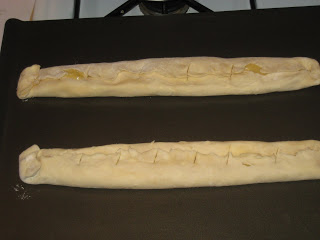
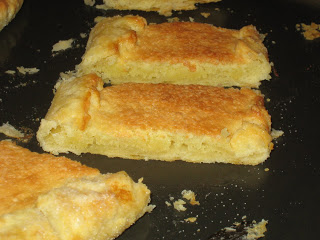
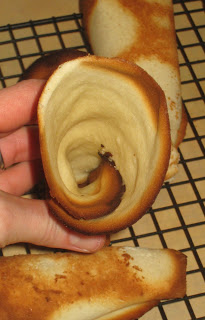
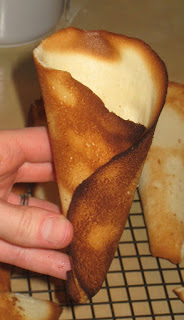
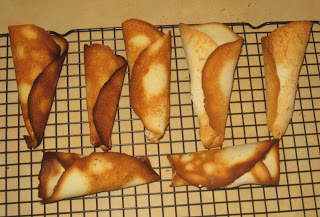
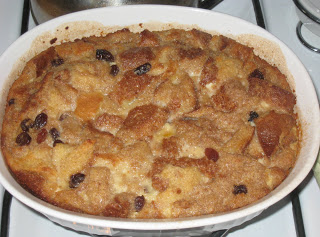
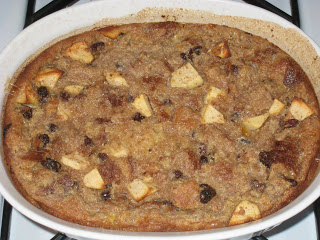
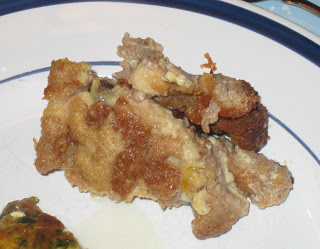
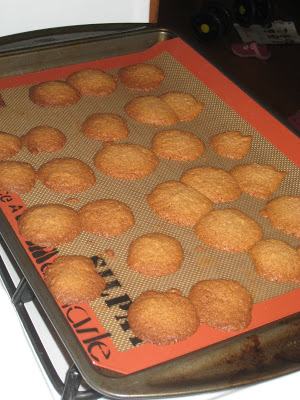
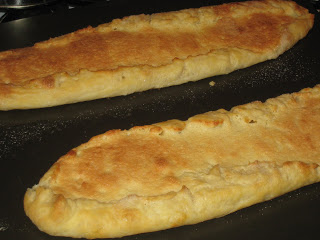
I made my first batch of banket this morning. For those that don’t know banket is a traditional Dutch pastry. Although when I was visited The Netherlands I could not find any…and nobody seemed to know what I was talking about! Strange. Anyway, I made the dough and the filling last night so they could chill overnight. Then rolled and filled the dough and baked it this morning. Each step was super easy and very fast. I always assumed banket would be tough to make. But it was actually really easy. Although I may have to try another batch soon. I still have almond paste to use up. And I think I need to redeem my effort. I did not get the dough to seal very well, and it opened up while it baked. So it’s kind of open faced banket πŸ˜› It still tastes good, just isn’t quite the way it’s supposed to be. You can see the difference in the unbaked and baked pics. Justin had some with breakfast this morning. He said it was very good. I tried a little bite. And even though I don’t like almond at all I even thought it was pretty good. I got the recipe from All Recipes. Definitely a keeper. I only made a half recipe. And I froze most of it.

Banket

2 cups all-purpose flour
1 cup butter
1/2 cup water
1 1/2 cups almond paste
2 eggs
3/4 cup white sugar
1/4 teaspoon almond extract
1 pinch salt
1 egg white, beaten

In a large bowl, cut cold butter or margarine into flour until the mixture has a crumb-like texture. Make a well in the center, add cold water. Mix together until the mixture forms a ball. Do not overmix. Chill dough.

Preheat oven to 450 degrees F (225 degrees C). Grease cookie sheets.

In a medium bowl, blend together almond paste, eggs, 3/4 cup sugar, almond extract and salt.
Divide dough in 4 parts, and roll into 15 inch strips. Place filling along the center of each long strip of dough. Roll up, and pinch the ends to seal.

Place strips 2 inches apart on cookie sheet. Brush with egg white, and sprinkle with the remaining sugar. Bake for 15 to 20 minutes, or until golden.

**11/26/09 – Updated pics at top of post after 2nd attempt. The dough stayed sealed this time.