Home » Kid-friendly Recipes » dessert » Page 4

Category: dessert

Everything Free Chocolate Cranberry Cookies | Just Take A Bite

Everything Free Chocolate Cranberry Cookies

No need to give up special treats just because you have allergies. These everything free chocolate cranberry cookies are free of gluten, dairy, eggs, nuts, corn, soy and coconut but they taste amazing!

Everything Free Chocolate Cranberry Cookies | Just Take A Bite

I’m always on the lookout for allergen friendly recipes. But usually when a recipe says allergen friendly there is still something in it that my kids can’t have. So I have to be creative and do a lot of substituting. It also means I don’t bake many treats.

Sometimes you just need a cookie.

But we were all in the mood for cookies. So I came up with these everything free chocolate cranberry cookies. And since my son is allergic to cocoa his weren’t even chocolate chip. He just had cranberry cookies.

Everything Free Chocolate Cranberry Cookies | Just Take A Bite

Being egg and dairy free I didn’t really think they’d turn out that well.

Amazing results.

To my amazement they were so good. Actually the best cookie I have tasted in a long time. I think we ate a whole batch (half recipe) in about a day. I could have eaten them all myself…but I didn’t think my kids would be very happy about that.

Tallow is my secret.

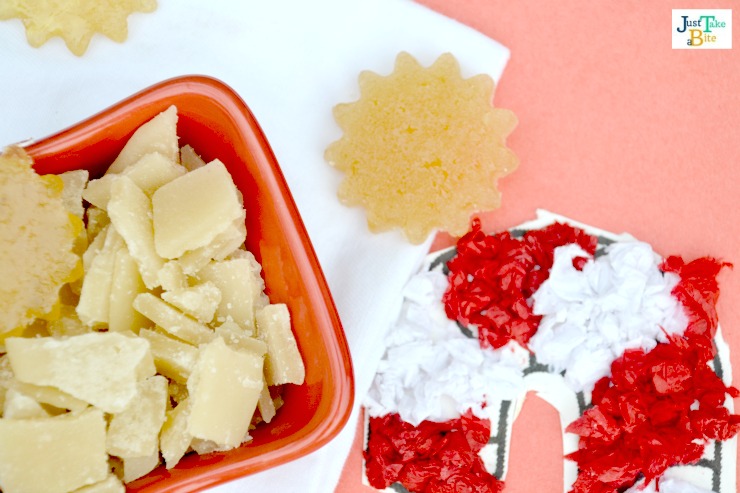
I used tallow for the fat, which is about the best replacement for butter. Any softened fat will work including lard, palm shortening and butter. Even sunbutter could work. I generally don’t use coconut oil for cookies because they tend to all apart.

I replaced the eggs with grass-fed gelatin and water. They held together perfectly!

My favorite chocolate is Enjoy Life chocolate chips. No dairy, nuts or eggs.

Everything Free Chocolate Cranberry Cookies | Just Take A Bite

Truly free of everything.

Even in my family with about a million different allergies we could all enjoy these everything free chocolate cranberry cookies. Which means they really are free of just about everything! Try putting your own spin on them by using any dried fruit, spices or even carob chips. Dried cherries would be delicious!

I think I need to make a double batch now to keep some stashed in the freezer. It’s nice to have an easy, truly allergen friendly treat on hand.

Are you searching for an allergen friendly cookie that actually tastes good?

The search is over! Everyone will love these everything free chocolate cranberry cookies, whether they have allergies or not!

Everything Free Chocolate Cranberry Cookies | Just Take A Bite

Everything Free Chocolate Cranberry Cookies
Yields 30
An allergen friendly, easy-to-make cookie.
Write a review
Print
Ingredients
  1. 1/2 cup organic cane sugar
  2. 1/2 cup fat of choice, room temperature (tallow, lard, butter, palm shortening) OR sunbutter
  3. 4 tsp. grass-fed gelatin
  4. 1/2 cup + 2 Tbsp. hot water
  5. 1/4 cup honey
  6. 1 1/2 cups brown rice flour (or sorghum)
  7. 1/2 cup teff flour
  8. 1 tsp. baking soda
  9. 1/2 tsp. unrefined sea salt
  10. 1/2 cup optional add-ins: chocolate chips, dried fruit
Instructions
  1. Heat oven to 350*F. Line two baking sheets with parchment paper or silpat.
  2. Cream the sugar and softened fat.
  3. Dissolve the gelatin in the hot water.
  4. Add the gelatin water and honey to the creamed mixture. Beat well.
  5. Add the flour, baking soda and salt. Beat well.
  6. Stir in any add-ins.
  7. Scoop 2 Tbsp. mounds of dough, an inch apart, onto prepared baking sheets.
  8. Bake 20 minutes.
Notes
  1. Store the cookies in a sealed container at room temperature for up to 10 days or in the freezer for up to a year.
Just Take A Bite https://justtakeabite.com/
This post is linked to Savoring Saturdays.

In order for me to support my blogging activities, I may receive monetary compensation or other types of remuneration for my endorsement, recommendation, testimonial and/or link to any products or services from this blog. It will not change the cost of any products or services for you.

Two Ingredient Allergen Friendly Nestle Crunch Bites | Just Take A Bite

Two Ingredient Allergen Friendly Nestle Crunch® Bites

This Valentine’s Day get your kids in the kitchen to whip up a special treat. These two ingredient allergen friendly Nestle Crunch® bites are easy to make and fun to eat!

Two Ingredient Allergen Friendly Nestle Crunch Bites | Just Take A Bite

I’m a sucker for just about anything chocolate. Especially when it comes to Valentine’s Day.

Allergies and chocolate do mesh.

Having kids with allergies and food sensitivities has actually increased my love of chocolate.

That may sound strange. But we pretty much avoid all fruity candy. My kids don’t eat anything with food coloring (can you say crazy pills?!). Plus my son is allergic to corn (corn syrup, cornstarch, etc.).

So when it comes to treats we stick to chocolate. Even with dairy allergies we all love the Enjoy Life chocolate chips. They are great plain or in a cookie. But they are even more fun when melted and turned into a delicious candy.

We’ve made chocolate covered toffee and salted honey chocolates (my personal favorite!).

Two Ingredient Allergen Friendly Nestle Crunch Bites | Just Take A Bite

A family favorite.

But hands down my kids love these Nestle Crunch® Bites the best. And they really couldn’t be any simpler to make.

  1. Melt chocolate.
  2. Add coconut.
  3. Pour in molds.

Yes, they are that easy. Yes, they are grain, dairy, nut, soy, rice, egg and corn free.

The little bits of unsweetened coconut give the slightest crunch that tastes just like the crisp rice of Nestle Crunch® bars.

So much fun.

Let your kids choose some fun molds and create a special treat you can feel good about.

Package them up as gifts for friends or family. And don’t forget your spouse! Everyone will want some.

Two Ingredient Allergen Friendly Nestle Crunch Bites | Just Take A Bite

This Valentine’s Day skip the expensive boxed chocolates filled with artificial colors and flavors. Show your friends and family how much you love them with homemade Nestle Crunch® Bites.

Just two simple ingredients. No common allergens. Five minutes of hands on time. Happy Valentine’s Day!

Have you ever made homemade chocolates? Did you know they could be this easy?

Give two ingredient allergen friendly Nestle Crunch® bites a try. You might get some extra love in return.

Two Ingredient Allergen Friendly Nestle Crunch Bites | Just Take A Bite

Two Ingredient Allergen Friendly Nestle Crunch® Bites
Yields 30
A simple allergen friendly chocolate that is grain, nut, dairy, rice, corn, soy and egg free.
Write a review
Print
Ingredients
  1. 1 cup Enjoy Life Chocolate Chunks (semi-sweet) or Dark Chocolate Morsels
  2. 2 - 3 Tbsp. finely shredded unsweetened coconut
Instructions
  1. Melt the chocolate in a double boiler (or glass bowl over a saucepan with about an inch of water).
  2. Turn off the heat.
  3. Add the coconut and stir until combined.
  4. Pour the chocolate into molds.
  5. Refrigerate until firm.
  6. Unmold.
  7. Store in a covered container in the refrigerator for up to a month.
Just Take A Bite https://justtakeabite.com/
 In order for me to support my blogging activities, I may receive monetary compensation or other types of remuneration for my endorsement, recommendation, testimonial and/or link to any products or services from this blog. It will not change the cost of any products or services for you.

Easy Coconut Snowballs | Just Take A Bite

Easy Coconut Snowballs

Are you dreaming of a white Christmas? Even if there is no snow outside you can have a white Christmas inside with these little coconut snowballs. Just four ingredients create a fun, healthy treat.

Easy Coconut Snowballs | Just Take A Bite

If you’re looking for a last minute holiday treat that you can make in minutes I’ve got you covered!

These coconut snowballs only have four ingredients. And they taste like peppermint.

So easy!

All it takes is about five minutes of mixing, melting and pouring. Then form the mixture into balls once it has cooled.

Easy Coconut Snowballs | Just Take A Bite

I like to add these to my kids’ lunches. I make sure they are getting healthy fat. They love having a little treat with their meal.

Coconut snowballs would also make great finger food for a holiday party. Set a tray out for guests and watch them disappear!

Easy Coconut Snowballs | Just Take A Bite

You can use cane sugar or powdered cane sugar (simply blend cane sugar in a high speed blender until powdered) to make coconut snowballs. The flavor is the same. Using powdered sugar creates a smoother texture.

Easy Coconut Snowballs | Just Take A Bite

Let it snow.

Somehow we don’t have snow yet in Michigan this year! I’m not sure if we’ll end up with a white Christmas. But we can make it white with our own snow!

Are you dreaming of a white Christmas?

Get in the kitchen and create a little snowstorm with the kids. Everyone will have fun and stay warm.

Easy Coconut Snowballs | Just Take A Bite

Easy Coconut Snowballs
Yields 9
A minty coconut snowball that makes a great treat or any time snack.
Write a review
Print
Ingredients
  1. 3 Tbsp. organic cane sugar OR powdered cane sugar
  2. 1/4 cup unsweetened shredded coconut
  3. 3 Tbsp. coconut oil
  4. 1/2 tsp. peppermint extract
Instructions
  1. Combine the sugar, coconut and oil in a small saucepan.
  2. Heat over medium heat, stirring until the sugar and oil are melted.
  3. Remove from heat.
  4. Add peppermint extract.
  5. Pour into a small glass dish.
  6. Refrigerate until solid, but not hard (1-2 hours)
  7. Scoop into tsp. size balls.
  8. Store in the refrigerator.
  9. Serve cold or room temperature.
Notes
  1. You can add a tsp. of cocoa powder to the mix to make dirty snowballs.
  2. You can dip the chilled snowballs into melted chocolate.
  3. If your mixture is too hard to scoop simply leave it out to come to room temperature.
  4. You can make your own powdered sugar by blending cane sugar in a high powered blender until fine.
Just Take A Bite https://justtakeabite.com/
In order for me to support my blogging activities, I may receive monetary compensation or other types of remuneration for my endorsement, recommendation, testimonial and/or link to any products or services from this blog. It will not change the cost of any products or services for you.

Peppermint Stick Ice Cream | Just Take A Bite

Peppermint Stick Ice Cream

Celebrate Christmas with the traditional flavors of peppermint and chocolate in this homemade version of peppermint stick ice cream topped with hot fudge.

Peppermint Stick Ice Cream | Just Take A Bite

Mint and chocolate. Chocolate and mint.

It is a match made in heaven. And it is a favorite of my entire family.

One of my husband’s requests every Christmas is peppermint stick ice cream with hot fudge. I usually buy some. A little holiday indulgence.

But this year I wanted my kids to enjoy it too.

So I created my own version of peppermint candy and used it to make peppermint stick ice cream.

Peppermint Stick Ice Cream | Just Take A Bite

It tastes great as is. But it is even better topped with gluten free hot fudge or chocolate sauce. Or you can add chocolate right into the ice cream with mini chocolate chips.

It only takes about three minutes to prepare the ice cream batter. Then the hard part begins – waiting for it to churn and freeze!

Peppermint Stick Ice Cream | Just Take A Bite

Peppermint stick ice cream can be dairy free by using coconut milk. The eggs are also optional, so it is very allergen friendly.

There really isn’t much more to say about this delicious Christmas treat. Run to the kitchen and get a batch started. The taste will speak for itself.

Creamy mint ice cream with little bits of crunchy peppermint candy scattered throughout. Your whole family is sure to love it.

Peppermint Stick Ice Cream | Just Take A Bite

What Christmas goodies do you make every year? Sugar cookies? Gingerbread men? Apple pie?

This year give peppermint stick ice cream a try. Maybe you’ll make it part of your Christmas tradition!

Get the peppermint candy recipe here!

Peppermint Stick Ice Cream | Just Take A Bite

Peppermint Stick Ice Cream
Serves 12
Mint ice cream with homemade peppermint candy pieces.
Write a review
Print
Ingredients
  1. 2 1/2 cups cream (preferably raw) (or coconut milk)
  2. 1/2 cup whole milk (preferably raw) (or coconut milk)
  3. 1/2 - 3/4 cups choice of sweetener (organic cane sugar, honey, maple syrup)
  4. 1 tsp. peppermint extract
  5. 1 Tbsp. organic vanilla or vodka (note that some vanilla comes from corn)
  6. 2 egg yolks (optional)
  7. 1 Tbsp. tapioca or arrowroot (optional)
  8. 1/2 recipe peppermint candy, broken into small pieces (see post for recipe link)
  9. 1/3 cup mini chocolate chips (optional)
Instructions
  1. In a blender combine all of the ingredients, except candy and chocolate chips.
  2. Blend until well mixed. Adjust sweetness and peppermint flavor if needed.
  3. Process in an ice cream mixer according to manufacturer instructions.
  4. Transfer ice cream to a freezer safe container.
  5. Stir in candy and chocolate chips.
  6. Freeze until firm.
Notes
  1. The batter should be slightly sweeter than you want the ice cream to taste. The sweetness will go down as the ice cream churns.
  2. Serve with hot fudge.
Just Take A Bite https://justtakeabite.com/
This post is linked to Savoring Saturdays.

In order for me to support my blogging activities, I may receive monetary compensation or other types of remuneration for my endorsement, recommendation, testimonial and/or link to any products or services from this blog. It will not change the cost of any products or services for you.

Homemade Peppermint Candy | Just Take A Bite

Homemade Peppermint Candy

Surprise your kids this year with a unique Christmas treat. No HFCS or food dyes. Homemade peppermint candy is easy to make and allergen friendly!

Homemade Peppermint Candy | Just Take A Bite

You can’t have Christmas without a candy cane. Peppermint and Christmas go hand in hand.

One thing you can do without this time of year, though, is artificial flavor and color. The excitement and wonder of Christmas is plenty to make my kids extra hyper and excited. I don’t need junk food to do that.

Finding balance.

But I’m also not Scrooge. I do want my kids to enjoy special treats this time of year. Emotional well-being is just as important as physical well-being. That includes creating memories and indulging in festive goodies.

So rather than miss out on the traditional minty treats I created my own!

Homemade Peppermint Candy | Just Take A Bite

Homemade peppermint candy only takes about ten minutes to make and is ready to eat soon after.

Safe for those with allergies and oral SPD.

One of the great things about homemade candy is that you control the flavor.

My oldest has oral SPD. So she can’t handle much mint. Yet she loves mint flavored desserts! Just mildly flavored. And that is not something you can find in a store.

I go very light with my peppermint flavor. But you can make it as minty as you like. My candy was actually almost too minty for her. I could scale back the mint just a touch.

Homemade Peppermint Candy | Just Take A Bite

The other fun thing about homemade peppermint candy is being able to choose the shape. I did stars that look like snowflakes. Candy cane molds would be perfect for this time of year! Let the kids pick what shape they like.

Note that silicon works best for hard candy since you have to pour it into molds while very hot.

Great for the whole family.

Peppermint candy is the perfect treat for the whole family. I even let my toddler try some! Even though the candy is hard it dissolves easily and can be chewed. So I broke off a few small chunks for her to taste.

Normally I like to share recipes that kids can help make. But this one is definitely for adults since you are working with hot sugar.

Homemade Peppermint Candy | Just Take A Bite

But don’t let that stop you from getting your kids in the kitchen! It is so fun to watch the candy-making process. It makes a great science lesson. Plus demonstration is the first step in teaching your kids how to cook.

This year take small steps to make your holidays happy yet healthy. Homemade peppermint candy is ready in no time and can be made days or even weeks in advance.

Are you ready to create some great Christmas memories?

I hope they include the wonderful flavor of peppermint candy.

Be sure to come back tomorrow! I’ve got another unique holiday treat that utilizes these fun candies.

Homemade Peppermint Candy | Just Take A Bite

Homemade Peppermint Candy
Yields 10
A simple, allergen friendly mint candy.
Write a review
Print
Ingredients
  1. 1/2 cup organic cane sugar
  2. 3 Tbsp. water
  3. 1/2 tsp. peppermint extract
Instructions
  1. Mix the sugar and water in a saucepan.
  2. Bring to a boil over medium heat, stirring.
  3. Simmer until the temperature reaches 300*F (this will take about ten minutes, the mixture will start to get thick/syrupy)
  4. Remove from heat.
  5. Add the peppermint extract
  6. Immediately pour into candy molds and let set until firm.
  7. Store in a closed container in the refrigerator for up to two months. The candy can be stored at room temperature, but keeping it cool is best.
Notes
  1. You can adjust the peppermint flavor to your liking. Make a batch according to the recipe. Then make another batch with more or less extract to meet your tastes.
  2. The candy can be made with silicon molds, on parchment paper (just pour in rounds) or in one large chunk in a glass pan (then broken into pieces once cooled).
  3. This works for suckers as well.
Just Take A Bite https://justtakeabite.com/
This post is linked to Savoring Saturdays.

In order for me to support my blogging activities, I may receive monetary compensation or other types of remuneration for my endorsement, recommendation, testimonial and/or link to any products or services from this blog. It will not change the cost of any products or services for you.

Creamy Cranberry Jello | Just Take A Bite

Creamy Cranberry Jello

Looking for a kid-friendly spin on cranberry sauce? Try some creamy cranberry jello! It is packed with nutrients and kids will love the taste.

Creamy Cranberry Jello | Just Take A Bite

I am working with Stonyfield for this post. I have been compensated for my time commitment. But the opinions and ideas are my own. I have not been paid to post positive reviews.

I’ll be honest. I always skipped the cranberry sauce growing up.

Tart, gelatinous red stuff shaped like a can…not really my thing. I’m not even sure I ever actually tasted it!

It looked that bad to me.

Not much has changed.

Fast forward thirty years. I’m still not entirely sure I’ve ever tasted cranberry sauce. I honestly couldn’t tell you what it tastes like. Even though it sounds really good…assuming it’s not out of a can.

I’ve never made it or served it to my family (though this homemade version from Raising Generation Nourished sure looks good!)

So when challenged by Stonyfield to recreate a holiday dish using yogurt I figured I should try to improve on the one Thanksgiving dish I never even bother making.

Creamy Cranberry Jello | Just Take A Bite

I turned cranberry sauce into creamy cranberry jello!

Sweet success.

My kids love it.

A little sweet. A little tart. A little creamy. Perfect.

Creamy cranberry jello really couldn’t be any easier to make either.

Five ingredients. Five minutes of hands on time.

The cranberry comes from pure cranberry juice. The creaminess comes from Stonyfield Plain Greek yogurt or strained whole milk yogurt. And the jello comes from quality grass-fed gelatin.

I love the simplicity of this dish and that it is very kid-friendly. I also love that you can make it up to a couple days in advance. One less thing to think about the day of Thanksgiving or Christmas!

If your kids tend to be hesitant to try new foods and flavors like cranberry try using these fun Thanksgiving printables.

Thanksgiving-stickers

They can be printed out on a self-adhesive paper and placed on soup bowls, paper plates, napkins and glasses. Cute illustrations can sometimes motivate children to eat, but if that’s not enough, writing out funny rhymes or riddles about food can really do the trick.

They can also be used for labeling each dish so those with allergies know what’s safe.

Are you still finalizing your holiday meal plans?

Be sure to keep cranberries ON the menu this year. Nobody will pass them up in the form of creamy cranberry jello. Not even the kids!

Creamy Cranberry Jello | Just Take A Bite

Creamy Cranberry Jello
Serves 8
A creamy, kid friendly twist on cranberry sauce.
Write a review
Print
Ingredients
  1. 2 cups pure cranberry juice (NOT cranberry juice cocktail)
  2. 1 cup organic cane sugar
  3. 1/4 tsp. unrefined sea salt
  4. 1/2 cup Greek yogurt or 1 cup whole milk yogurt, strained
  5. 1 1/2 - 2 Tbsp. grass-fed gelatin
Instructions
  1. In a medium saucepan combine the juice, sugar, salt and yogurt. Whisk until combined.
  2. Add the gelatin while whisking to prevent clumping. Let sit one minute.
  3. Heat over medium heat, whisking frequently, until the sugar and gelatin are dissolved (about 3 minutes, mixture will be warm).
  4. Pour into a heat-safe serving dish.
  5. Refrigerate until firm.
  6. Serve cold.
Notes
  1. If you like your jello on the softer side use 1 1/2 Tbsp. of gelatin. If you like it firmer use 2 Tbsp. of gelatin.
  2. You can turn this into finger jello by using 2 1/2 - 3 Tbsp. of gelatin.
  3. You can add whole cranberries to the jello before refrigerating.
  4. You can replace half of the sugar with honey. You may need to increase the gelatin slightly.
  5. You can substitute coconut yogurt to make this dairy free.
Just Take A Bite https://justtakeabite.com/

Looking for more delicious jello recipes for the holidays? Give these a try!

Candy Corn Finger Jello

Pear Lime Jello Salad

Strawberry Lemon Jello Salad

Cherry Rhubarb Jello

In order for me to support my blogging activities, I may receive monetary compensation or other types of remuneration for my endorsement, recommendation, testimonial and/or link to any products or services from this blog. It will not change the cost of any products or services for you.

Sourdough Pumpkin Swiss Cake Rolls | Just Take A Bite

Sourdough Pumpkin Swiss Cake Rolls

Are you looking for a non-traditional Thanksgiving dessert? Wow your guests with these fancy yet simple sourdough pumpkin swiss cake rolls.

Sourdough Pumpkin Swiss Cake Rolls | Just Take A Bite

Halloween may be over, but fall is just getting started! That means there is another month to indulge in all things pumpkin.

I grew up eating those little chocolate cake rolls out of a box…anyone else? They were good. Cake filled with cream rolled into a little log and covered with chocolate.

It’s been about twenty years since I’ve had one. But that doesn’t mean I don’t enjoy a good roll cake.

Sourdough Pumpkin Swiss Cake Rolls | Just Take A Bite

Free of just about everything.

I created this sourdough pumpkin swiss cake roll with myself in mind. I know that sounds bad, but I get a special treat about once every four months lately. The rest of the time I’m busy making stuff for my kids.

These delicious little cakes are free of dairy, nuts, soy, corn, rice, roots, coconut and eggs.

They are actually almost fat free too! That is NOT something I aim for. But it just happened.

It is not as much fun or as tasty to bake when you can’t use butter or coconut oil. So I ended up just making a dessert without an added fat.

Sourdough Pumpkin Swiss Cake Rolls | Just Take A Bite

Simple.

The cake is a simple pumpkin sourdough thin sheet cake. The filling is sugar, flour and pumpkin. That’s all.

Then top it with melted chocolate. Divine!

Sourdough pumpkin swiss cake rolls can be prepared in advance, up to a week ahead! One more thing to scratch off your Thanksgiving to-do list early.

Surprise your guests with this special dessert. No messing with ice cream or whipped cream. It is ready to eat.

Sourdough Pumpkin Swiss Cake Rolls | Just Take A Bite

The cake tastes great without the chocolate too. But it really adds a good flavor contrast. Pumpkin and chocolate are a perfect match.

And those extra crispy edges you trim off? They make a great snack dipped in the extra filling!

Looking for a unique Thanksgiving dessert this year?

Try sourdough pumpkin swiss cake rolls. You won’t find anything this good in a box!

Sourdough Pumpkin Swiss Cake Rolls | Just Take A Bite

Sourdough Pumpkin Swiss Cake Rolls
Yields 4
Sourdough pumpkin cake filled with pumpkin cream and topped with melted chocolate.
Write a review
Print
Cake
  1. 1/2 cup sourdough starter
  2. 1/2 cup all purpose flour
  3. 2 Tbsp. water
  4. 1/2 cup pureed pumpkin
  5. 1/4 cup organic brown cane sugar
  6. 1/4 tsp. baking soda
  7. 1/4 ts. unrefined sea salt
  8. 1/2 tsp. cinnamon
Filling
  1. 3/4 cup organic cane sugar
  2. 1/2 cup pureed pumpkin
  3. 1/2 tsp. cinnamon
  4. 4 Tbsp. all purpose flour
  5. Topping: 1/4 cup chocolate chips
Cake
  1. Combine the sourdough, flour and water. Let set one hour.
  2. Heat oven to 350*F. Line a medium size baking sheet with parchment paper.
  3. Add the pumpkin, brown sugar, soda, salt and cinnamon to the flour. Mix well.
  4. Spread evenly (not too thin) on the parchment paper.
  5. Bake 40 minutes.
Filling
  1. Blend the sugar on high in a high power blender to create powdered sugar.
  2. In a medium bowl beat the powdered sugar, pumpkin, cinnamon and flour on high for two minutes. Chill.
Assembly
  1. When the cake comes out of the oven cut it in half both vertically and horizontally to create 4 pieces. Trim any crispy edges.
  2. Let the cake cool for about 2 minutes.
  3. Spread filling on each piece of cake and roll. Use a toothpick to hold the cake in the rolled position if necessary.
  4. Chill the cakes in the refrigerator.
  5. When chilled melt the chocolate chips in a double boiler (glass bowl over a small saucepan with an inch of water).
  6. Drizzle the chocolate over the cakes.
  7. Chill.
  8. Keep the cakes in the refrigerator until ready to serve.
  9. Store in a covered container in the refrigerator for up to a week or in the freezer for up to 6 months.
Notes
  1. The filling can be made up to 3 days in advance or while the cake is baking.
  2. There will likely be extra filling. It is great for dipping graham crackers or using as frosting on muffins or cupcakes. It also tastes great eaten plain with extra melted chocolate swirled in.
Just Take A Bite https://justtakeabite.com/
 In order for me to support my blogging activities, I may receive monetary compensation or other types of remuneration for my endorsement, recommendation, testimonial and/or link to any products or services from this blog. It will not change the cost of any products or services for you.

Einkorn Chocolate Chip Cookies | Just Take A Bite

Einkorn Chocolate Chip Cookies

These einkorn chocolate chip cookies are a remake of the classic. Simple and delicious, yet free of dairy, nuts, soy, corn, rice, coconut and egg whites.

Einkorn Chocolate Chip Cookies | Just Take A Bite

Who doesn’t love chocolate chip cookies? I know I sure do!

Mom’s cookies are the best.

Growing up my mom was famous for her chocolate chip cookies (and still is!). It was rare we didn’t have any in the house.

We would eat two or three fresh out of the oven. 

She still brings her cookies to every family function or church event. They aren’t fancy, just plain old all purpose flour, butter, sugar, etc. But she somehow transforms the ingredients into something unique.

I miss those cookies. I can almost taste one right now.

Einkorn Chocolate Chip Cookies | Just Take A Bite

Finding an alternative.

Even though I can’t eat my mom’s cookies I can indulge in einkorn chocolate chip cookies once in a while.

This version is super easy to make. Plus it doesn’t have dairy, nuts, soy, corn, rice, coconut or egg whites.

Einkorn Chocolate Chip Cookies | Just Take A Bite

Dessert or breakfast.

If you need a quick treat einkorn chocolate chip cookies are perfect. Or use the base and add whatever you like to make it your own.

There is no need to soak the flour, which makes them even easier!

Add dried fruit and seeds to create a breakfast cookie. Or keep it classic with just chocolate chips.

Smart Sweets

No matter what you add they’re good! Especially fresh out of the oven.

Soft cookie dough with melted chocolate.

Who can resist that?!

In need of a cookie fix?

Try something new with einkorn chocolate chip cookies.

Einkorn Chocolate Chip Cookies | Just Take A Bite | A twist on the classic chocolate chip cookie that is free of dairy, nuts, soy, rice, corn and coconut

Einkorn Chocolate Chip Cookies
Yields 12
A twist on the classic chocolate chip cookie using einkorn flour.
Write a review
Print
Ingredients
  1. 1 cup einkorn flour
  2. 1/2 cup whole wheat, all purpose or white rice flour
  3. 1/2 tsp. unrefined sea salt
  4. 1 tsp. baking soda
  5. 1/2 cup honey
  6. 3 egg yolks
  7. 1/4 cup olive oil, avocado oil or melted tallow
  8. 1/4 cup add-ins: chocolate chips, dried fruit, seeds
Instructions
  1. Heat oven to 350*F.
  2. In a large bowl combine all of the ingredients except add-ins. Beat until well combined.
  3. Stir in chocolate chips.
  4. Scoop mounds onto a parchment lined baking sheet.
  5. Bake for 15 minutes.
  6. Cool and store in a sealed container for up to a week or in the freezer for up to a year.
Just Take A Bite https://justtakeabite.com/
 In order for me to support my blogging activities, I may receive monetary compensation or other types of remuneration for my endorsement, recommendation, testimonial and/or link to any products or services from this blog. It will not change the cost of any products or services for you.

Candy Corn Finger Jello | Just Take A Bite

Candy Corn Finger Jello: KS Post

Candy corn finger jello is the perfect Halloween treat. It has bright colors and fruit flavor without anything artificial.

Candy Corn Finger Jello | Just Take A Bite

I’ve never been that crazy about  Halloween.

Don’t get me wrong, getting dressed up is fun. Spending time with friends is great.

Of course as a kid the candy is the real star of the show.

An adult perspective.

But on the whole it’s more of a hassle than anything, especially as a parent. Scrambling to find a costume (I’m cheap and just get creative with what we have on hand…anybody with me?). Spending half the week’s grocery budget on junk food for the neighborhood. Not my cup of tea.

But there is one part of Halloween and fall in general that I have always loved.

Candy corn.

I liked the taste. But more than that it reminded me of my grandparents. They lived on a farm and always kept a chicken feeder on the kitchen table to feed their little chicks – their grandchildren!

For some reason I was more into this tradition than any of my siblings or cousins. If my grandparents knew I was coming they were sure to stock it with candy corn for me. I ran to it first thing when I entered the house to check and have a little chicken feed.

My days of visiting the farm are coming to an end as my grandmother passed away earlier this year and my grandfather is in hospice. But when I do get there the chicken feeder is still sitting there on the table as soon as I walk in the door.

Candy Corn Finger Jello | Just Take A Bite || Candy corn finger jello is the perfect Halloween treat. It has bright colors and fruit flavor without anything artificial.

A new tradition.

I am honored that it will soon be the centerpiece of my own table! I can carry on the tradition of feeding my kids and someday grandkids just like little chicks.

But in a different way.

My candy corn will not come out of a bag. It will not have artificial flavors and food coloring.

Instead it will be full of nourishing gelatin!

Want to see how I made this fun treat? Head over to Kitchen Stewardship! I’ll show you just how easy and healthy candy corn finger jello is.

If you’re looking for more holiday treats check out these great real food dessert books:

Naturally Sweetened Sweets - A Community Cookbook

Smart Sweets

This post is linked to Savoring Saturdays.

No Bake Pumpkin Cheesecake Cups | Just Take A Bite

No Bake Pumpkin Cheesecake Cups

Looking for an easy, prep ahead fall breakfast? These no bake pumpkin cheesecake cups are great for kids and adults. Plus they are packed with nutrition.

No Bake Pumpkin Cheesecake Cups | Just Take A Bite

One of my favorite foods is cheesecake. It comes in a close second behind ice cream. Yes, I love my creamy dairy desserts!

However, I don’t have time to make cheesecake very often. So I came up with a cheater version for fall.

Pumpkin cheesecake cups do require about two minutes of heating to dissolve the gelatin. But there is no baking involved. All of the prep work takes about five minutes of hands on time. In fact pumpkin cheesecake cups are so easy to prepare that even your kids can make them!

No Bake Pumpkin Cheesecake Cups | Just Take A Bite

Nutrition first.

Pumpkin is a superstar when it comes to vitamins. So any way I can add it to our diet is a bonus. Then you add yogurt with probiotics and healthy fat.

Don’t forget about the gelatin! This will help aid digestion and boost the protein content.

I love that I can make a batch of pumpkin cheesecake cups before bed and breakfast is ready in the morning. So when I have a child wake up at 6 am and tell me he’s starving we don’t have a mini crisis (i.e. meltdown).

Pumpkin cheesecake cups also work really well for school lunches. Kids see it as a treat. I see it as a source of protein and vegetables. A win for everyone.

No Bake Pumpkin Cheesecake Cups | Just Take A Bite

Perfect any time of day.

Of course you can always serve these for dessert too. Make a big batch for a crowd. Add some crumbled gluten free pumpkin spice graham crackers to individual cups to mimic crust. You’ll get rave reviews and be able to sit and enjoy some with your guests!

This recipe makes enough for two cheesecake cups. It can easily be scaled up to make as many servings as you need. They will stay good in the refrigerator for up to a week so you can make a batch to enjoy all week long. Though I can guarantee they won’t last very long!

If you like your cheesecake really soft you can reduce the gelatin about 1/2 tsp. If you like it super firm you can increase the gelatin about 1/2 tsp. Adjust it to make your ideal cheesecake.

Are you enjoying all things pumpkin right now?

Add these no bake pumpkin cheesecake cups to your list of must try treats!

No Bake Pumpkin Cheesecake Cups | Just Take A Bite


No Bake Pumpkin Cheesecake Cups
Serves 2
Write a review
Print
Ingredients
  1. 3/4 cup plain greek yogurt or strained whole milk yogurt
  2. 1/4 cup pureed pumpkin
  3. 1/4 cup honey
  4. 3 tsp. grass-fed gelatin
  5. 1/2 tsp. cinnamon
  6. 2 homemade graham crackers or 1 store-bought graham cracker
Instructions
  1. Strain whole milk yogurt for one hour (it takes about 1 1/2 cups of yogurt to get 3/4 cups thick yogurt).
  2. Crush graham crackers and place in the bottom of two small containers (1/2 pint jars work well)
  3. Combine the yogurt, pumpkin, honey, cinnamon and gelatin in a small saucepan.
  4. Let sit one minute.
  5. Heat on low-med until the gelatin is dissolved and the mixture is liquid, about 2-3 minutes.
  6. Pour the mixture over the graham crackers and chill until set.
Notes
  1. Pumpkin cheesecake cups will stay good in the refrigerator for up to a week.
  2. Squash can be used in place of the pumpkin.
  3. Coconut milk yogurt can be used in place of the dairy yogurt.
Just Take A Bite https://justtakeabite.com/

In order for me to support my blogging activities, I may receive monetary compensation or other types of remuneration for my endorsement, recommendation, testimonial and/or link to any products or services from this blog. It will not change the cost of any products or services for  you.

This post is linked to Savoring Saturdays.