Home » Kid-friendly Recipes » Page 60

Category: Kid-friendly Recipes

It is so important to cook homemade, healthy food. But it’s not always easy to find kid-friendly recipes.

That’s where I come in. I’ve got hundreds of kid-tested and approved recipes that won’t keep you in the kitchen for hours or stretch your budget too thin.

I focus on allergy-friendly, whole foods. But I always cook with kids in mind. I take all sorts of feeding challenges into account too.

We’ve dealt with every allergy possible, so I’ve created recipes that are gluten free, nut free, dairy free, egg free, soy free, corn free, coconut free and more!

Kid-friendly recipes don’t have to be boring. And they are certainly not limited to chicken nuggets and pizza every night.

A nourished child will enjoy a wide variety of fruits, vegetables, proteins, carbohydrates and fats. Get your kids in the kitchen with you and start cooking! Have fun with food and your kids will learn to love eating.

Simple Whole Wheat Bread

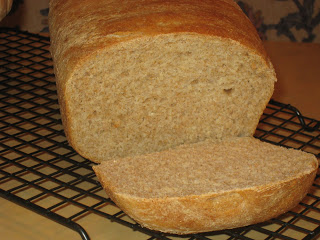
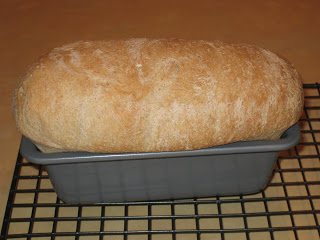
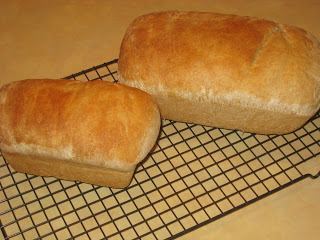
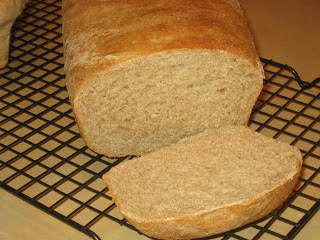
I baked my first loaf of bread for the month yesterday. I did a quick search for easy whole wheat bread, and this is first recipe I found. It’s from All Recipes. It had great reviews and didn’t sound too complicated. It’s not 100% whole wheat, but I bet you could replace some of the bread flour with whole wheat or white whole wheat flour to make it closer to 100%. I just stuck with the original recipe for my first try. This turned out really well! It was quite simple to make. And I used my mixer! No kneading by hand 🙂  Definitely a good turnout considering some of the bad breads I’ve baked in the past. I think part of my problem has been patience. Yesterday when I was making the bread I was also playing with Rebecca, making dinner, getting her to bed, etc. So each of the rise times I let go a lot longer than usual since I was busy. And it really made a difference! I still have a ways to go to become a decent bread baker, but this was a good attempt. I didn’t get it out of the oven until about 9:30 last night, but I still couldn’t resist cutting into it and tasting a sliver while it was warm. YUM!! Very soft, moist and mildly sweet. Not too heavy either. I can’t wait to try it tonight for our sandwiches. See how it holds up for sandwich bread. I only made a half recipe, so I did one full loaf and one small loaf.
Simple Whole Wheat Bread

3 cups warm water (110 degrees F/45 degrees C)
2 (.25 oz.) packages active dry yeast (4 1/2 tsp.)
1/3 cup honey
5 cups bread flour

3 Tbsp. butter, melted
1/3 cup honey
1 Tbsp. salt
3 1/2 cups whole wheat flour
2 Tbsp. butter, melted

In a large bowl (I did this right in my stand mixer bowl), mix warm water, yeast, and 1/3 cup honey. Add 5 cups white bread flour, and stir to combine. Let set for 30 minutes, or until big and bubbly (I let it set for about 45 min.).

Mix in 3 Tbsp. melted butter, 1/3 cup honey, and salt. Stir in 2 cups whole wheat flour. Flour a flat surface and knead with whole wheat flour until not real sticky – just pulling away from the counter, but still sticky to touch. This may take an additional 2 to 4 cups of whole wheat flour (I kneaded it in my mixer for a few minutes). Place in a greased bowl, turning once to coat the surface of the dough (I used my mixer bowl for this too…only got one bowl dirty:). Cover with a dishtowel. Let rise in a warm place until doubled (I let it rise for about 70 min.).

Punch down, and divide into 3 loaves. Place in greased 9 x 5 inch loaf pans, and allow to rise until dough has topped the pans by one inch (I let it rise for about 90 minutes).

Bake at 350 degrees F (175 degrees C) for 25 to 30 minutes; do not overbake. Lightly brush the tops of loaves with 2 Tbsp. melted butter or margarine when done to prevent crust from getting hard (I used a little butter spray). Cool completely.

**Edited 3/4/10
This makes awesome sandwich bread!! I used my electric knife to cut normal size slices. So good! I hope I can keep up with the bread baking. This is far better than boughten bread. It’s homemade for us!

Mexican Lasagna

Here is another recipe from my MIL. Also very good.

Mexican Lasagna

1/2 lb. ground beef
2 slices onion, choped
1/2 clove garlic, minced
3/4 cup cottage cheese
1/2 cup sour cream
1 tsp. cumin
1/8 tsp. salt
1 1/4 cups salsa
2 large whole wheat tortillas (use corn or other GF tortillas to make this GF)
3/4 cup shredded monterey jack or mozzarella cheese

Cook beef, onion and garlic in pan. Drain. Combine the cottage cheese, sour cream, cumin, and salt. Spread 1/2 cup of salsa across the bottom of an 8×8 baking dish. Place 1 tortilla over salsa. Spread half of cottage cheese mixture on top. Top with half of the beef. Top with 1/2 cup of salsa and 1/4 cup of cheese. Repeat layering – tortilla, cottage cheese, beef. Top with remaining salsa and cheese. Bake for 30 min. at 350.

*I think it would be good with some beans added to the cottage cheese mixture.
*It would probably work well to prep this ahead and either freeze it for later use or to bake later in the day.

Burritos

I got this recipe from my MIL. I think she said she got it from my SIL Shannon. Very good!!

Burritos

1 can black beans
1 can diced tomatoes with green chilies
1 tsp. cumin
1 tsp. chili powder
1 green pepper, diced
1 onion, diced
8 whole wheat tortillas (you could use corn or some kind of GF tortillas to make this GF)
1/4 cup sour cream
1 cup salsa
grated colby jack cheese

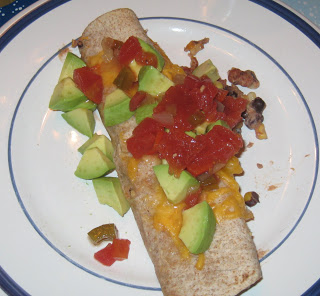
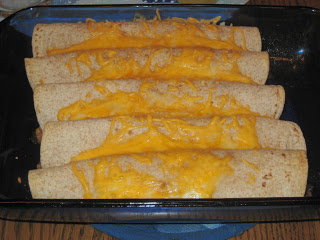
Saute pepper and onion in oil for 2-4 minutes (do not brown). Add beans, tomatoes, cumin, salsa, chili powder and sour cream. Heat through. Fill tortilla shells with mixutre, sprinkling inside filling with grated cheese. Roll up, place in a 9×13 pan seam side down. Sprinkle top with grated cheese. Bake at 350 for 10 min.

Cinnamon Applesauce Bread

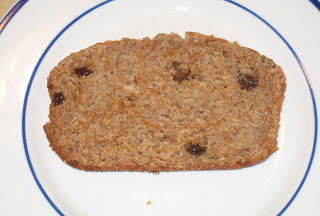
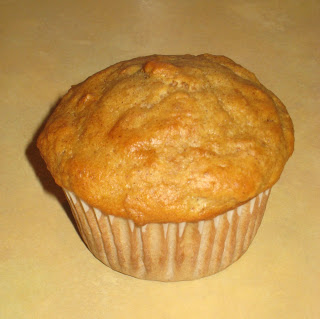
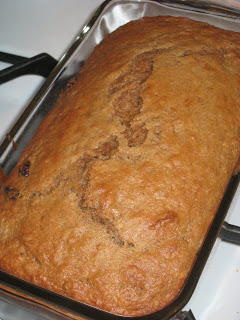
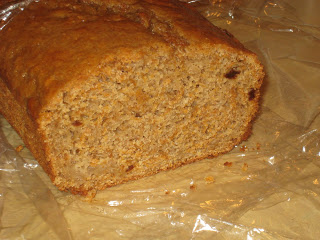
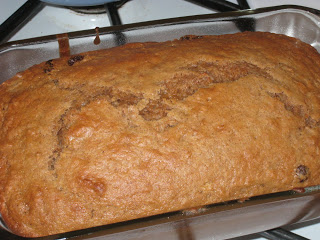
I am bringing a meal to one of my sister’s friends today (that my sister made). I decided to do some baking yesterday to add to it. I searched through my recipe box and found an old recipe for cinnamon applesauce bread. I don’t even remember if I’ve ever made it. I’m pretty sure I’ve had the recipe since before I got married. It was very easy to make. And it tastes very good!! I was able to use my mixer…with no problems! The recipe is for a loaf of bread. I made muffins instead (then I can give most of them away but keep a few for us to try :). We had some for breakfast today. Yum!

**Edited 4-9-10 – I made this in loaf form yesterday. Very good! A fairly dense bread, but moist and sweet. I used raisin bran (natural version) and added raisins. A very easy bread. Great to make wtih kids.

Cinnamon Applesauce Bread

1 1/2 cups flour
1 Tbsp. baking powder
1 1/2 tsp. cinnamon
1/4 tsp. salt
1 egg
1 cup chunky applesauce (I happened to have about 1 cup left in a jar of homemade chunky applesauce in the fridge)
3/4 cup firmly packed light brown sugar
2/3 cup skim milk (I used 1%)
2 Tbsp. vegetable oil (I used canola)
1 1/2 cups bran flakes (I used Wheaties)
1/4 cup chopped walnuts (optional)
1/2 cup raisins (my optional addition…I just added them to the few we were keeping)

Mix flour, baking powder, cinnamon and salt in a large bowl. In a separate bowl beat the egg. Stir in the applesauce, sugar, milk and oil. Add to flour mixture. Stir until moistened (batter will be lumpy). Stir in cereal (and walnuts/raisins).

Pour inot a greased 9×5 loaf pan. (I poured it into 12 paper lined muffin cups.)

Bake at 350 for 55 min., or until toothpick inserted in center comes out clean (I did about 30 min. for the muffins). Cool 10 min. Remove from pan. Cool completely on wire rack.

Crispy Cheese Crackers

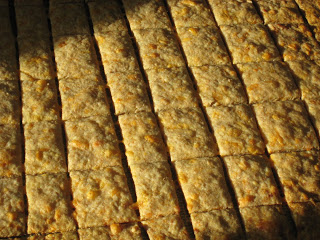
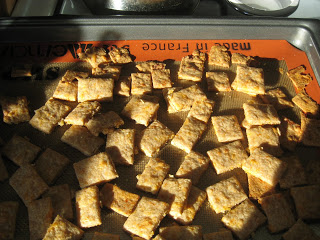
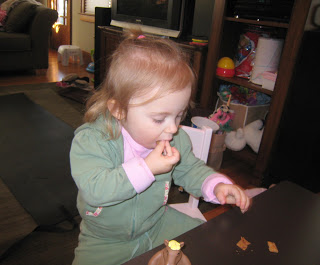
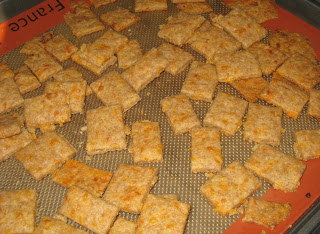
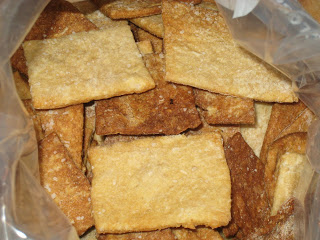
Since Kindermusik was cancelled yesterday and Rebecca was up at 5:30 we needed some activities to fill our day. As usual I decided to do some baking. We made crispy cheese crackers. It’s another Heavenly Homemaker recipe. Super simple. And so good! And one more thing I can make from scratch instead of buying at the store…healthier and cheaper! As with my past efforst at crackers I’ll need a few tries to perfect these. It was a pretty tough dough to roll…and I ended up not getting it all thin enough. So the crackers on the edges were really good. But the ones in the middle are a bit thick and not as crisp. But still taste good. I had to use more water than the recipe calls for to form a ball of dough. Probably more like a 1/4 cup. We’ll see how it goes the next time I try them. There will definitely be a next time! Rebecca loves these. A great kid-friendly snack, and something a child can help make.

Crispy Cheese Crackers

¼ cup butter, softened
¼ tsp. sea salt
1 cup shredded cheddar cheese, room temperature (I used a combo of cheddar and mozzarella…what I had on hand)
1 cup whole wheat flour
¼ tsp. baking powder
1 Tbsp. cold water (I used about a 1/4 cup)

Use beaters or food processor to mix butter and salt until creamy (I used a hand mixer). Add cheese. Mix well. Gradually add flour, baking powder and water, mixing until dough begins to form a ball. Form dough into a ball with hands.

Roll the dough into 1/8 inch thickness onto a cookie sheet. (I put a silpat on the baking sheet and then put parchment paper over the dough for the rolling to prevent sticking) Cut the rolled out dough into 1 ½ inch squares. Bake 15 minutes at 350° or until lightly browned. Turn off the oven and leave the crackers inside to crisp up (I left them in for about 10 min.). Store tightly covered.

Crockpot Rice and Beans

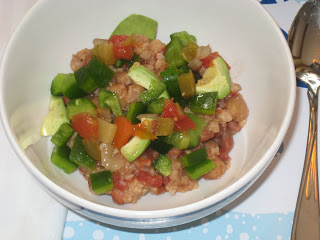
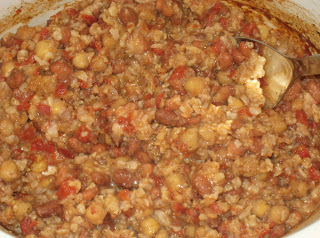
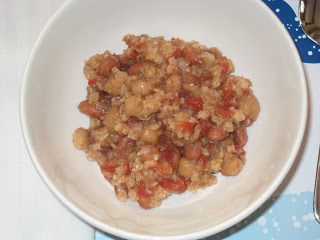
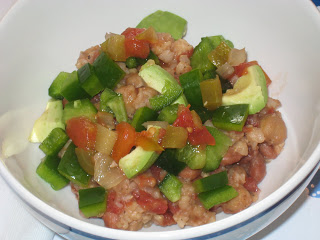
For lunch yesterday I wanted light, simple, healthy (since I knew Super Bowl evening food wouldn’t be)…rice and beans fit all 3. I got this recipe from A Year of Slow Cooking. It’s so so simple to prep. Literally about 5 min. I’ve never actually made or even had rice and beans. This was really good. All 3 of us liked it. Especially Rebecca. I think she’d eat rice and beans (of any kind) every day 🙂  I replaced the black beans with chick peas for Rebecca’s sake. And I scaled back the rice a bit (I like a different ratio of rice to beans, and I didn’t want to make too much). Since this was cooking while we were at church I couldn’t monitor it. So the rice was pretty mushy, but still very good. Next time I won’t cook it quite as long. I had it on high for a little bit and then on low, total of about 6 hours. This is good on its own, but we added some toppings. I served it with diced green pepper, avocado, salsa, sour cream and cheddar cheese. I’m not a huge sour cream fan, but that really went well with this. A great, cheap, meatless, healthy meal. I’ll be making this again for sure! I bet it would be good with some veggies added in too.

Crockpot Rice and Beans

1 can of black beans, drained and rinsed (I substituted chick peas…any bean will do.)
1 can of pinto beans, drained and rinsed
1 cup of rice (I used organic brown rice. I used 3/4 cups of rice and 1 1/2 cups of liquid.)
1 can (14.5 oz) of diced tomatoes, drained, liquid reserved
1 Tbsp. olive oil
1/2 tsp. kosher salt
1 tsp. Italian seasoning
1/2 Tbsp. dried onion flakes (I don’t have onion flakes. I added garlic powder.)

Put the olive oil into the bottom of your crockpot, and add the rice. Swirl the rice around in the olive oil, until it is coated nicely. Add the beans and tomatoes. Add water to the reserved tomato juice to equal 2 cups of liquid. Add to crockpot. Add seasonings. Stir well. Cover and cook on low for about 6 hours, or on high for 3-4.

Black Bean Burrito Bake

We tried a recipe from my SIL last night for black bean burrito bake. This was super easy to make and really good!!! We all liked it. Rebecca helped me make it (that’s how easy it is) and she kept picking things out of the bowl to eat as we went. She LOVES beans…but they don’t always love her 😛  She absolutely loved the filling. She had that plain for dinner with her tortilla on the side instead of together. The filling would work well as a dip. I followed my SIL’s advice and added some of the cheese and salsa to the filling. And also added some chili powder, salt and garlic powder. I didn’t add the chile. We like flavor, but not heat. This comes together really quickly and is a filling, healthy, meatless meal (it would be good with shredded chicken too). I didn’t bother with the food processor. I just mashed the beans with a fork, so I could do everything in one bowl…mash, pour, mix. So easy and hardly any clean up. I easily got 5 burritos out of this. And had some extra for Rebecca to eat plain. I didn’t quite add a full can of black beans. I did add a few pinto beans (Rebecca handles those better). A great recipe! I’m looking forward to having the leftovers for dinner tonight! I served it with sour cream, salsa and avocado. These are quite filling. One burrito was enough for me for a meal.

Black Bean Burrito Bake

1 (7oz.) can chipotle chiles in adobo sauce (I didn’t add this)
1/2 cup reduced-fat sour cream
1 (15oz.) can black beans, rinsed, drained, and divided (I used 1/2 can for mashing and 1/4 can + 1/4 can pinto beans whole)
1 cup frozen whole-kernel corn, thawed
4 (8-inch) flour tortillas (I used 5 and could have probably done 6; I used whole wheat) (use corn tortillas or other GF tortillas to make this GF)
Cooking spray
1 cup bottled salsa (I added about 3/4 cup to the filling…some homemade (mild) and some organic corn and black bean (medium) and then served more on the side)
1/2 cup (2 oz.) shredded Monterey Jack cheese (I used some MJ and some reduced fat cheddar…I added some to the filling and some on top)
(I also added about 1 tsp. chili powder and a little sprinkle of garlic powder and salt)

Preheat oven to 350°. Remove one chile from can. Chop chile. Reserve remaining adobo sauce and chiles for another use. Combine sour cream and chile in a medium bowl; let stand 10 minutes. (I skipped this.)  Place half of beans in a food processor; process until finely chopped (I just mashed them with a fork). Add chopped beans, remaining beans, and corn to sour cream mixture (I added the whole beans, corn, salsa, cheese, seasoning and plain sour cream to the mashed beans…only used one bowl).

Spoon 1/2 cup bean mixture down the center of each tortilla. Roll up tortillas; place, seam side down, in an 11 x 7-inch baking dish coated with cooking spray. Spread salsa over tortillas (I didn’t do this…gets a bit messy); sprinkle with cheese. Cover and bake at 350° for 20 minutes or until thoroughly heated (I baked 20 min. covered and then about 10 min. uncovered).

Crockpot Cream of Tomato Soup

I’ve been wanting to make tomato soup for quite a while now. While searching for recipes I came across this one on Perfect Entertaining. It sounded simple and good. And it was! Justin and I both really liked it (and Justin has only had tomato soup once or twice in his life!). It went well with grilled cheese. I didn’t follow the directions completely. I didn’t saute the carrots and onions…they get plenty soft during cooking to puree them, so why waste the time? And I used canned tomatoes instead of fresh (a huge time saver…and much better quality tomatoes at this time of year). It still turned out great. This made a very big batch. I decided to remove some of the soup and put it in a sauce pan (enough for our dinner) and then add the cream to that. I froze the rest in smaller containers. Now I have 7 containers of homemade tomato soup on hand! No more boughten canned soup 🙂  I bet it would be good to can this, but I don’t have time right now. But maybe when I run out of my current stock I’ll try that. Overall a great recipe.

Crockpot Cream of Tomato Soup

(This cream of tomato soup is rich and hearty and very delicious. It can be used as a substitute for canned tomato soup with excellent results and cannot be beat when served with grilled cheese sandwiches. Mix and match any of the suggested herbs and spices for a marvelous soup. For a traditional blend we use 2 tablespoons Italian parsley, 1 tablespoon oregano, and 1 tablespoon basil.)

2 Tbsp. olive oil (I didn’t add this)
1 large chopped onion
3 crushed garlic cloves
2 minced carrots (I just did a rough chop into slices)
2 pounds peeled and diced tomatoes (reserve and add all juices) (I used 1 large can of diced tomatoes and 1 large can of crushed tomatoes)
4 cups chicken or vegetable stock or broth
3 Tbsp. tomato paste
2 Tbsp. sugar (I added a little more than this)
1 Tbsp. lemon juice
Salt
Pepper
2-4 Tbsp. freshly chopped herbs (basil, oregano, rosemary, thyme, marjoram, savory, chervil, Italian parsley, mint, lavender) or 1-2 tsp. dried herbs or spices (Italian spices, basil, oregano, marjoram, thyme, cumin, curry powder, nutmeg) (I used dried Italian seasoning and garlic powder)
1 cup heavy cream (I used whole milk…what we had on hand)

Combine the oil, onion, garlic, and carrot in the crockpot. Cook on high, stirring frequently, until the onion softens. (This can also be done in a skillet.) (I skipped this step.) Add the remaining ingredients except for the herbs and spices and cream. Cover and cook on low for 8-12 hours (I cooked mine on high for about 7 hours). Add the herbs and adjust seasoning. Cool slightly and puree in small batches (I used an immersion blender). Return to the crockpot and add the cream. Reheat until piping hot, or else cool and chill before serving.

Butternut Squash Soup

I tried a new squash soup for dinner last night. I’ve had some cream cheese in the fridge for a while that I wanted to use up. And I was also trying to use up some squash. I did some searching on All Recipes and came across this recipe. I didn’t follow the recipe completely…ok, not much at all, mostly just the idea of adding cream cheese. We got home later than we had hoped from shopping yesterday so I totally skipped the onions (I’m sure they would be good/add great flavor). And I used squash that I had already cooked (from freezer). So there really wasn’t much to it in terms of cooking. Basically  just throw everything in the pan, heat, blend, serve. It turned out great! Justin and I both really liked it. Rebecca didn’t try it since dinner was running late. I gave her pb and j. And for some reason lately she does not like squash at all so I doubt she would have liked it anyway. Definitely a keeper recipe. The cream cheese adds a unique creaminess to it. I never would have thought of adding that. I’ll post the original recipe and what I did. I didn’t actually measure anything, just added what looked/tasted right. I didn’t get very good pics since I was in a rush.

Butternut Squash Soup

6 Tbsp. chopped onion (I skipped this)
4 Tbsp. margarine (I skipped this)
6 cups peeled and cubed butternut squash (I used a combo of mooregold and butternut squash that I had already baked/mashed…maybe 3 cups?)
3 cups water (I used about 1 1/2 cups)
4 cubes chicken bouillon (I used a few teaspoons of organic chicken better than bouillon)
1/2 tsp. dried marjoram
1/4 tsp. ground black pepper
1/8 tsp. ground cayenne pepper (I skipped this and added some garlic powder, paprika and salt)
2 (8 ounce) packages cream cheese (I used about 2/3 of one (8 oz.) pkg., softened)

In a large saucepan, saute onions in margarine until tender. Add squash, water, bouillon, marjoram, black pepper and cayenne pepper. Bring to boil; cook 20 minutes, or until squash is tender. (I skipped all of this and just put the squash, seasoning, water, BTB and cream cheese in a pan and heated).

Puree squash and cream cheese in a blender or food processor in batches until smooth. Return to saucepan, and heat through. Do not allow to boil. (I used an immersion blender right in the pan).

Homemade Wheat Thins

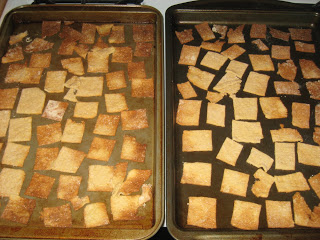
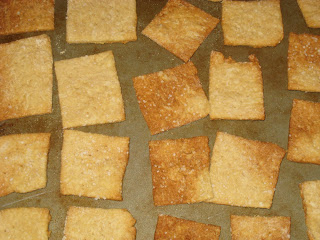
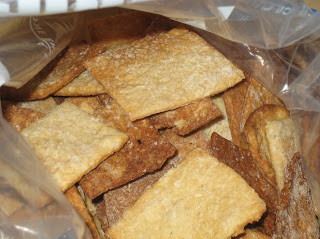
Rebecca and I were housebound yesterday since we both have colds. We didn’t visit my grandparents as planned…don’t want to get them sick! And Justin had his first class of the semester, which means no Daddy around all day. So, Rebecca and I had an entire day of just the two of us, stuck in the house with nothing to do! It was a long day 😛  I hadn’t intended to do any more baking this week, but I needed some kind of project to fill our afternoon. I did a quick search of the recipes I’ve had on hold for a while and decided to try homemade Wheat Thins. I got the recipe from Pete Bakes. They sounded very easy. And they were! And so good!! I love Wheat Thins. A salty cracker with a hint of sweetness 🙂  But I don’t buy them anymore. I gave up all that processed junk a while ago. I have to say, these really do taste like Wheat Thins. Seriously. I have to experiment with getting them the right thickness/doneness. Mine were a little too thick I think. And the ones on the edges of the pan got darker than the ones in the middle. But the flavor is spot on. Definitely something I’ll be making again and again and again 🙂  As I put them in the cupboard yesterday I realized I currently have homemade graham crackers, vanilla wafers and wheat thins on hand. Not bad 🙂

Homemade Wheat Thins

1 1/2 cups flour (all-purpose)

1/2 cup whole wheat flour (I used 1 cup all purpose flour and 1 cup white whole wheat flour)
1/2 cup sugar
1/4 tsp. salt
2 Tbsp. butter (at room temperature)
2/3 cup milk
salt (or other dried herbs and seasoning) for sprinkling

In a large bowl, combine the flours, sugar and salt. Cut in the butter and mix until you have a coarse meal.

Slowly blend in the milk just until you have a dough that will hold together. Divide the dough into 2 pieces for rolling.

Roll the dough out on a floured surface to about 1/8 inch thickness. Sprinkle with salt and roll over lightly with the rolling pin again. Cut the dough into 2×2 inch squares. Poke each square several times with a fork.

Transfer squares to an ungreased baking sheet and bake at 325 F for 20-25 minutes, until crackers are golden brown.