Home » Kid-friendly Recipes » snack » Page 22

Category: snack

Soaked Date Scones

I tried a Nourishing Traditions recipe this morning for date scones. These were really easy to make since the food processor does most of the work. And they turned out great!! Mildly sweet. A nice crust. A definite keeper.

This recipe is a great base for any flavor scone. I used dates and raisins today. I’ll have to play around with other flavors.

This post is linked to Fat Tuesday at Real Food Forager.


Soaked Date Scones

3 1/2 cups whole wheat flour (or spelt or kamut)
1 cup buttermilk (I used a little over 1 cup of a combination of yogurt and kefir.)
4 Tbsp. melted butter or lard
1 1/2 tsp. sea salt
2 tsp. baking soda
3 Tbsp. rapadura or coconut sugar
1 cup chopped dates (or any dried fruit)

Mix flour with buttermilk (or yogurt) to form a thick dough. Cover. Let soak for 12-24 hours.

Place dough in a food processor. Process several minutes to knead. Melt butter with rapadura. Add butter mixture, salt and soda to dough. Process until mixed. Add dates and pulse a few times.

Remove dough to a well floured board. Roll dough to about 3/4 inch thickness. Cut into rounds with a glass or to any shape you like (I just cut odd shapes with a pastry cutter). Place on a buttered or parchment lined baking sheet. (I sprinkled a little extra sugar on top at this point.)  Bake at 350 for 35-40 min. Serve warm with butter.

Soaked Whole Wheat Chocolate Chip Cookies

Rebecca and I had our Mommy/daughter date last night. And we had to pack a picnic dinner. When I asked her what she wanted to pack one of her requests was chocolate chip cookies. I decided to make a healthier version for us to make/take. I used the breakfast cookie recipe as a starting point and made a few modifications. The cookies turned out quite well. They are softer than a “normal” cookie. But they taste great! And I felt good about us eating them. We actually had some with lunch and dinner!

This post is linked to Fat Tuesday at Real Food Forager.

Soaked Cookies

1 1/2 cups whole wheat flour
1/2 cup rolled oats
3/4 cups butter, divided (1/2 cup melted, 1/4 cup softened)
1/2 cup buttermilk, yogurt or kefir (I used whole milk yogurt)
1/2 – 3/4 cup honey (sweetened to your liking)
1 egg
1/2 tsp. salt
1/2 tsp. baking soda
1 tsp. vanilla
1 cup chocolate chips (or any add in you like – nuts, raisins, etc.)

Combine flour, oats, yogurt and melted butter. Cover and let sit at least 7 hours.

Add softened butter and honey to flour. Blend with mixer until creamed. Add remaining ingredients (except chips). Blend well. Stir in chips.

Drop by spoonful onto ungreased cookie sheet. Bake at 350 for 20 minutes.

Soaked Donuts

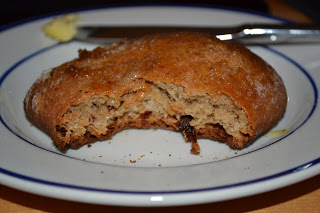
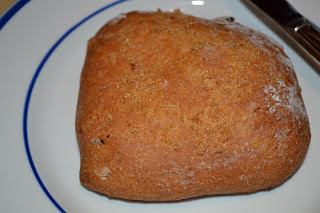
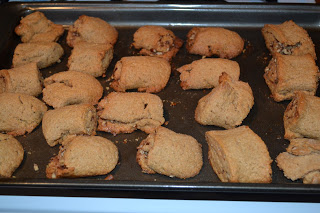
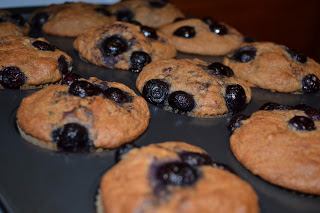
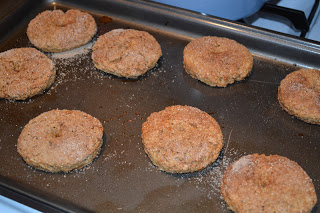
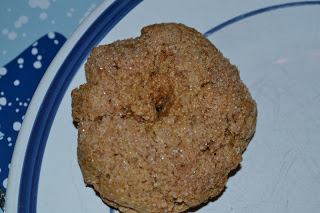
Yes, it’s another new soaked recipe from the Kitchen Stewardship e-book. Can you tell I’m enjoying experimenting with soaked grains again? 🙂  This recipe comes from Adrienne at Whole New Mom. I’ve never actually made donuts before. It’s been on my things to try list for a long time. These looked easy…and soaked 🙂  They turned out quite well. Obviously they are not like the doughy fried things you’d get at Dunkin Donuts. But they are good. Moderately sweet. A touch of cinnamon. Yum! All 3 of us really enjoyed them. And they really are super simple to make. Maybe I’ll try turning them into a nutty version next time. Or even make some kind of glaze. It’ll be fun to experiment. I love having a treat like this that I can feel good about feeding my family. For a bedtime snack last night Rebecca had a little pudding and part of a donut. That sounds awful. But in reality it was a very healthy snack…raw milk, egg yolks, soaked whole wheat…can’t beat that 🙂  I only made a half batch and got 16 donuts out of it. I used a juice glass to cut the donuts and then just made the hole with my finger.

Soaked Cinnamon Sugar Donuts

4 1/2 cups whole grain flour (use 5 1/2 if using spelt)
4 tsp. baking powder
1 tsp. baking soda
1/2 tsp. salt
1/2 tsp. nutmeg
1 tsp. cinnamon
2 eggs
1 cup granulated sweetener (I used organic cane sugar)
5 Tbsp. coconut oil, melted
1 T apple cider vinegar or lemon juice added to milk or milk substitute to make a total of 1 c liquid)

3 Tbsp. granulated sweetener (I used organic cane sugar)
1 tsp. cinnamon

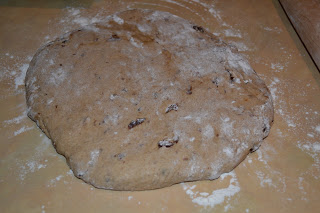
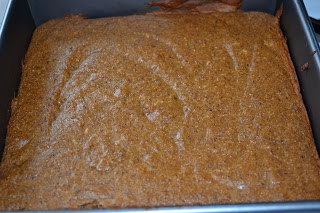
Combine the flour, sweeteners, fats, and liquids together (excluding the eggs). Let dough rest for 12-24 hours. Add remaining ingredients and mix well.

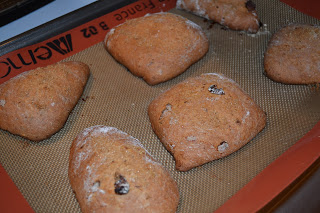
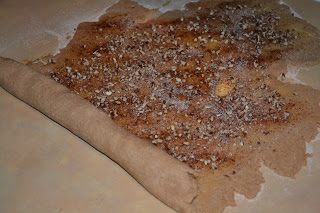
Roll out dough to approximately 1/2″ thickness. Cut out donuts with cutter, ring or shape into desired shapes. Brush tops with melted coconut oil, milk, milk substitute, or water. Sprinkle with topping.

Bake at 425 degrees for 8-10 minutes.

———————————————-

You may find that you need to be flexible with the amount of flour that you use for this recipe depending on the grain that you choose. You will want a very stiff dough that is not wet at all, like a shortbread. For spelt, you will probably need about 5 1/2 cups.

For gluten-free flours, use 25% more baking powder and soda. I typically use whatever I happen to have on hand. Yesterday I used 3 c sweet brown rice flour with 1 1/2 cups sorghum with success. I had to increase the liquid to about 1 1/2 cups to make it pliable, however.

For a sugar free version, a mixture of 1/2 xylitol and 1/2 erythritol for the granulated sweetener works great.

Non-soaking Method:

Just mix the dry ingredients in one bowl and the wets in the other. Then add the dries to the wets. Continue with the recipe directions.

Soaked Cream Cheese Breakfast Pastry

I’m trying to make more properly prepared grains these days. So this week I tried a Nourishing Traditions recipe for cream cheese breakfast pastries. You use homemade cream cheese to soak the flour. They turned out really well! If Justin approves of a soaked baked good I call it a winner. And they were quite simple to make. They are best served warm. They reheat very well. This makes quite a few pastries too, so now I have a stock in the freezer.

This post is linked to Fat Tuesday at Real Food Forager.

Cream Cheese Breakfast Pastries
makes 18-24

1/2 cup butter, softened
1 cup homemade cream cheese, softened
2 cups whole wheat flour
1/2 cup rapadura
1 Tbsp. vanilla
1 tsp. salt
1/4 cup melted butter
2 tsp. cinnamon
1/4 cup crispy pecans, finely chopped

Mix butter, cream cheese and flour using an electric beater. Leave in a warm place 12-24 hours.

Mix in rapadura, vanilla and salt (I used my hand mixer for this).

Roll out dough on floured surface to 1/4″ thickness. Brush with melted butter. Sprinkle with cinnamon and pecans (I also sprinkled a little cane sugar on). Roll up 1 1/2 turns and cut dough lengthwise. Repeat two more times. You should now have three long rolls. Cut the rolls crosswise into 1 or 1 1/2″ lengths. Place individual pastries on a buttered baking sheet. Bake at 300 degrees for 45 minutes. Serve warm.

These store well in the freezer or refrigerator and the flavor improves with time. Reheat before serving.

Apple Raisin Cake

Yesterday Rebecca and I made a simple “cake” for our baking project. The recipe is from my Vitamix cookbook. In the book it is called a bread. But it is baked in an 8″ pan and is a lot more like cake to me. The end product is very good. It’s quite moist from all of the dried fruit. Not too sweet (I do think you could decrease the honey a bit and be just fine, though). And I like the simplicity of being able to mix it all in the blender. That being said…it was not so simple when I actually made it. I followed the directions…and could not get the batter to mix at all. I was constantly scraping, trying to stir things, etc. I ended up adding extra water and starting and stopping at least 10 times. It turned into quite a mess 😛  If I make this again I think I’ll add more liquid right from the start. And possibly have an extra blending step before I add the dried fruit. I did not have lemon, so I just skipped that. And I skipped the orange peel.

Apple Raisin Cake

1 cup whole wheat flour (preferably freshly ground…3/4 cups wheat berries ground in the dry blender)
1/4 cup uncooked rolled oats
1 medium apple, quartered, seeded
1 thin slice lemon, peeled, seeded
2 Tbsp. water (I probably used about 1/3 cup)
1 thin slice orange with peel
1/2 cup honey (I’ll probably use 1/3 cup next time)
1/2 tsp. ground cinnamon
1/4 tsp. salt
1 tsp. baking soda
1/4 tsp. allspice
1 cup raisins, dates or other dried fruit (I used a combo of raisins, dates and dried cranberries)

Heat oven to 350. Grease an 8″ baking pan.

Place flour adn oats into blender. Blend on  high 1 minute.

Add the rest of the ingredients in the order listed. Blend for 30 seconds, or until mixture is smooth and batter-like. (Next time I will do this in two steps…all of the ingredients except the dried fruit, blend, then add fruit and blend again). Pour into baking pan.

Bake for 25-30 minutes.

Soaked Whole Wheat Muffins

I had some buttermilk to use up, so I looked in my Nourishing Traditions cookbook for a recipe. I came across the Basic Muffin Recipe. A super simple soaked muffin that you can make in just about any flavor you want. I baked a batch of blueberry muffins this morning. Very good! And very easy. Now that I’m hoping to try a small amount of grains soon, and since I’m trying to really get back on track with healthy eating for the whole family, I figured it was good to get back into the habit of soaking grains. This is a great basic recipe. I’ll use it again for sure.

Soaked Whole Wheat Muffins
makes 15-20

3 cups whole wheat flour
2 cups buttermilk, kefir or yogurt (I used half buttermilk and half yogurt)
2 eggs
1 tsp. salt
1/4 cup maple syrup
2 tsp. baking soda
1 tsp. vanilla extract
3 Tbsp. melted butter

Soak flour in buttermilk, kefir or yogurt in a warm place for 12-24 hours (muffins will rise better if soaked for 24 hours). Blend in remaining ingredients. Pour into well greased muffin tins (I used paper muffin cups) about 3/4 full. Bake at 325 for 1 hour.

Variations:

Raisin – add 1/2 cup raisins and 1/2 tsp .cinnamon
Blueberry – add 1 cup fresh or frozen blueberries (do not add them to the batter, place them on top of the muffins after filling the tin so they don’t sink to the bottom)
Dried cherry – add 4 oz. dried cherries and 1/2 cup chopped crispy pecans
Fruit spice – add 2 ripe peeled, chopped pears or peaches, 1/2 tsp. cinnamon, 1/8 tsp. cloves, 1/8 tsp. nutmeg.
Lemon – add grated rind of 2 lemons and 1/2 cup chopped crispy pecans
Ginger – add 1 Tbsp. freshly grated ginger and 1 tsp. ground ginger. Omit vanilla.

Baked Peanut Butter Oatmeal

We celebrated Christmas as a family yesterday. So I decided to make something new for breakfast. I tried baked peanut butter oatmeal. I got the recipe from Lynn’s Kitchen Adventures. I’ve never made baked oatmeal before. To be honest it’s very rare that I make oatmeal of any kind at all. But this sounded good. And very simple! Justin and Rebecca both liked it. Although Rebecca had her usual chewing issues with oats. A small piece took her an hour and some tantrums to get through. She just won’t chew oats. So she won’t be eating the leftovers today 😛  I served it with homemade vanilla yogurt (poured on top). That worked well. You could pour milk on too. Or just eat it plain. It can be served warm or cold. It’s actually firm enough that you could eat it as a bar for an on the go breakfast or snack. For the first attempt I made the recipe as is. Next time maybe I’ll try soaking the oats and using rolled oats instead of instant. This is a filling quick prep breakfast. I think I’ll be making baked oatmeal more often. There are so many flavors you could make. Today Justin gets it with homemade banana yogurt. Peanut butter and bananas…yum 🙂  I’m guessing you can prep this the night before to make it even easier. I made a half recipe in a 9″ pan.

Baked Peanut Butter Oatmeal

3 cups quick cooking oats
1/2 cup brown sugar
1 cup milk
2 Tbsp. butter, melted
2 eggs
2 tsp. baking powder
3/4 tsp. salt
2 tsp. vanilla
1/2 cup peanut butter

Mix all ingredients together and stir well. Spread in a greased 9×13 pan. Bake at 350 for 20-25 minutes. If you like it a little crunchy on top cook for a few minutes longer. Serve with warm milk or yogurt poured over top.

Bacon Wrapped Dates (grain free, nut free, dairy free, egg free, GAPS-legal)

If you are a fan of sweet and salty foods you’ll love bacon wrapped dates! Add in some cheese for the perfect appetizer or snack.

I remember when I first tried a date about six years ago. I was blown away by the taste. It’s like a perfect little dessert. No need to bake or add sugar. Bonus that dates have minerals for a little nutritional boost.

How to Use Dates

But you can go a step beyond simply eating dates. Stuff them with cheese and wrap them with bacon. A quick run through the oven and you have an amazing snack or appetizer.

Bacon wrapped dates are so easy to make. And SO delicious. Salty and sweet together.

You can eat these fresh from the oven or right out of the fridge. I prepped these a couple hours before dinner and then just put them in the oven later. Very handy.

Allergy Friendly Stuffed Dates

If you can’t do dairy just skip the cheese or replace it with sunbutter. My kids love to snack on dates filled with sunbutter.

You can also add chopped dates to granola or try this sweet and salty snack mix. When you bake dates they taste even sweeter! My kids think they are candy.

Bacon wrapped dates make the perfect appetizer for any holiday or big game day. And they really couldn’t be any easier. Your kids can help make them too (check out the Kids Cook Real Food eCourse if you want to teach your kids to cook).

How do you like to eat dates?

Prepped Dates
 
Baked Dates

Bacon Wrapped Dates

Ingredients:

  • Nitrate-free bacon
  • Dates, organic if possible
  • Any type of cheese, cubed (optional)

Instructions:

  1. Preheat the oven to 350F.
  2. Cut the bacon slices in half.
  3. Pit the dates and cut them in half. Stuff with cheese if desired.
  4. Wrap each date with a half a slice of bacon. Use toothpicks if necessary. Set on a baking dish.
  5. Bake for 15-20 minutes, or until the bacon gets crispy and the cheese is melted. Remove the dates from the oven and transfer them serving dish.
  6. You can store the unused dates in the refrigerator. They are even good cold!

Sour Cream Ice Cream (grain free, nut free, GAPS-legal)

Now that I’ve been eating raw sour cream for a few weeks I figured it was safe to finally make sour cream ice cream!! I’ve been anxious to make it for some time now. A dairy ice cream I can actually eat? I haven’t had that since before Abram was born. And anyone that knows how much I love ice cream knows that 7 months without ice cream is like pure torture for me. The basic recipe comes from the GAPS book. This particular version and quantities are from Hanah at Gapalicious. I only made a half batch yesterday and mostly eyeballed quantities. It doesn’t have to be exact. I made vanilla. Then I reserved a small amount and added some cocoa to try making chocolate.

Overall verdict…good! But after several tries now at making ice cream sweetened with honey I’m just not crazy about the flavor it gives vanilla ice cream. I may have to go non-GAPS and use maple syrup next time. Or maybe try using date paste. I am happy with the texture of the ice cream. And I like how safe/healthy it is. It’s basically the same ingredients I use to make smoothies and russian custard…just in a frozen version. I’ll have to play around with flavors. I really like the chocolate version I made (at the moment I allow myself a little cocoa). Crispy nuts would be a nice addition too.

This post is linked to Fat Tuesday on Real Food Forager.

Sour Cream Ice Cream

4 cups sour cream
4 farm fresh eggs, separated
1/2 cup raw honey
1/4 cup vanilla extract

In a small bowl whip the eggs whites until stiff. In a separate bowl whip egg yolks until pale yellow and thickened.

In a large bowl whip together sour cream and honey until well combined and fluffy. Add the yolks and vanilla to the whipped cream and mix well. Then gently fold in the egg whites. Transfer the ice cream to a freezable container and freeze until solid.
If you want to make any variations just add your favorite combination in place of the vanilla.

Salted Caramel Dip (grain free, dairy free, egg free, GAPS-legal)

One of the moms at my MOPS table posted a link for a caramel dip from My New Roots on FB recently. It looked super easy and sounded good. Plus it’s sugar free and GAPS legal!! Last week I finally got around to buying dates so I could try it. I made it yesterday morning. It was very easy to make. And it’s good!! Honestly I like it better plain than using it for an apple dip. Although I did really enjoy it last night as a dip for dried apple chips. It’s a great way to get your sugar fix without actually eating sugar. I’m glad I tried this. It’s a healthy, delicious treat. Plus I discovered that I love dates!! And they are great natural sweeteners. I will be using dates more often for sure. I even reserved the soaking liquid and have been using it to sweeten smoothies and drinks.

Unfortunately Rebecca doesn’t like it. I think it’s a texture issue with her. I’m guessing if I made it a bit thicker (increased the ratio of nuts to dates) she’d like it. Maybe I’ll try that next time.

This is a great treat for breakfast, a snack or a dessert.

This post is linked to Fat Tuesday at Real Food Forager.

Salted Caramel Dip
Makes 2 cups

2 cups pitted Medjool dates
¼ cup raw nut or seed butter (almond, cashew, sesame tahini, sunflower) (I used some whole crispy almonds and some natural crunchy peanut butter…I used more than 1/4 cup)
4 tsp. fresh lemon juice
½ tsp. sea salt (or more to taste)
1 vanilla bean, seeds scraped (I used a little splash of homemade vanilla)
soaking water as needed

1. Soak dates for at least 4 hours in water.
2. Drain dates, reserving the soak water**.
3. Add dates to a food processor along with all other ingredients, except for soaking water. Blend on high until dates are smooth. Add soaking water, 1 tablespoon at a time until the desired consistency is reached (for a sauce to pour or drizzle, add more water).
4. Store in an airtight glass container in the fridge for up to a week.

**Reserve remaining soaking water to use as a simple syrup/sweetener.