Home » Kid-friendly Recipes » snack » Page 21

Category: snack

Apple Honey Crunch – Three Ways

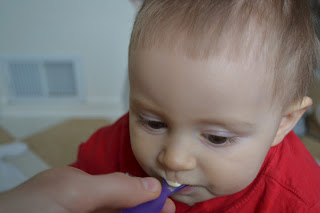
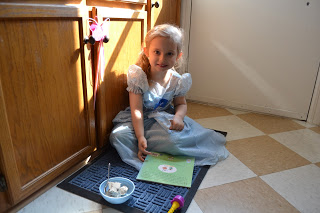
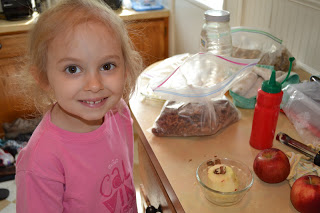
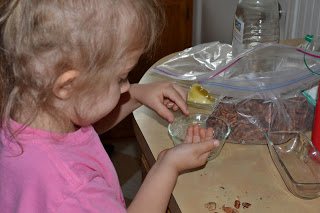
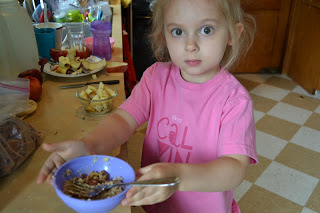
Rebecca has been helping me in the kitchen since before she was one. Now that she is four she is becoming quite a little chef! Rebecca often plays cooking and will come up with all kinds of meals/recipes/goodies. She actually has some really good ideas! When she does we try to make them. This week while she was playing she was making “apple honey crunch.” We brainstormed about how to make it…and gave it a try. We came up with three versions. They were all very simple to make and tasted great. One is kind of like a baked apple/apple dumpling. One is like apple cobbler. And one is like a brittle. They each only use a few ingredients and are very kid friendly. We just did small versions of each. They are great for individual servings. Or you can make them in larger quantities. Want to have some fun in the kitchen with your kids? Try Rebecca’s apple honey crunch recipes 🙂  Two of them are even grain free/gluten free/GAPS legal.

This post is linked to Fat Tuesday at Real Food Forager.

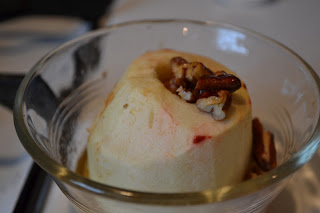
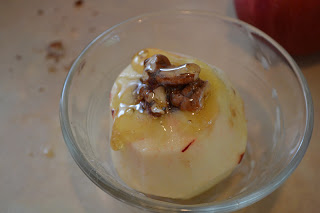
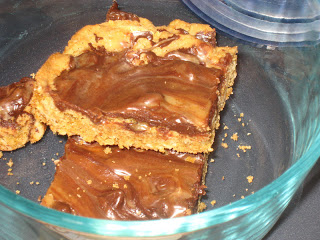
Apple Honey Crunch (dumpling style)
1 apple
1/8 cup chopped crispy nuts (we used pecans and walnuts)
1 Tbsp. honey

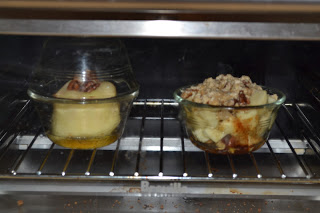
Peel and core apple. Place the apple in a small, buttered glass/oven safe dish (I used my small pyrex dishes). Sprinkle half of the nuts into the center of the apple. Pour honey into hole. Top with remaining nuts. You can add an extra little drizzle of honey over the apple if you like. Place another bowl over the apple (inverted) as a lid. Bake at 375 for 40 minutes (until the apple is soft). Let cool. Enjoy!

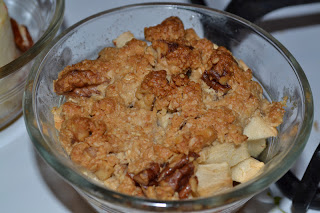
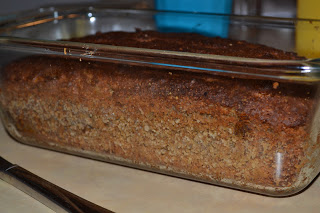
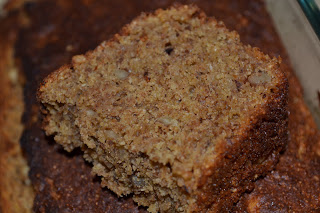
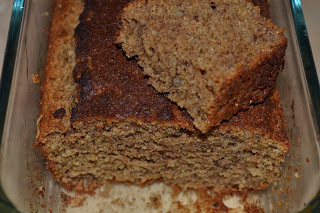
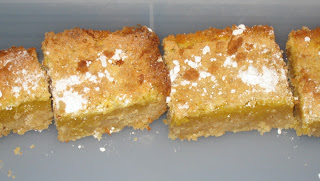
Apple Honey Crunch (cobbler style)

1 apple
1/8 cup chopped crispy nuts (we used pecans and walnuts)
2 Tbsp. honey
1/4 cup ground oats (or whole oats or whole wheat flour)
2 Tbsp. softened butter
1/2 tsp. cinnamon

Peel and chop apple. Sprinkle a few of the nuts in the bottom of a small, buttered glass/oven safe dish (I used my small pyrex dishes). Put apple chunks on top. Sprinkle on cinnamon.

Mix oats, butter and honey. Sprinkle over apples. (lick bowl 🙂

Bake at 375 for 35 minutes – until the top is golden and crunchy.

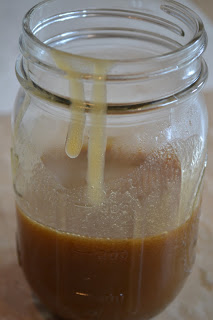
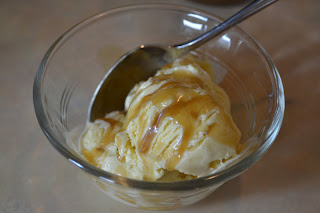
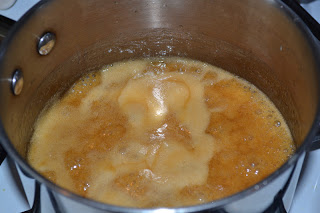
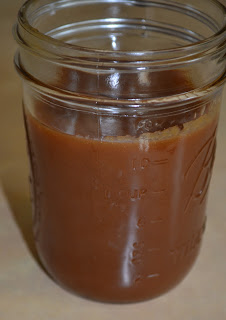
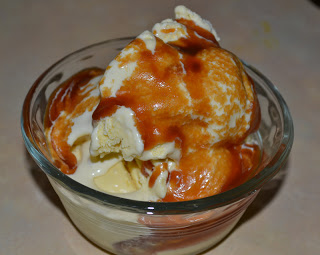
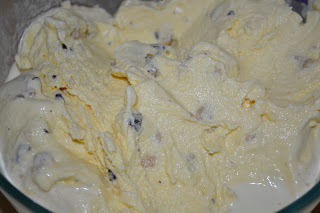
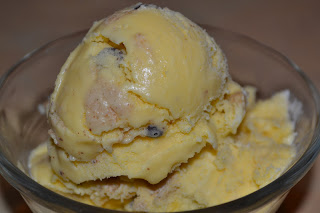
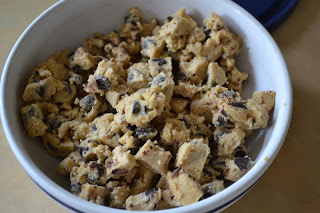
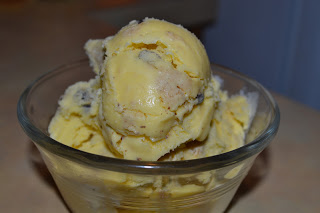
Apple Honey Crunch (brittle or ice cream topping)
*This didn’t get quite as solid as I would have liked. Some parts stayed a bit soft. But it was still very good. We will experiment with it to get it just right. As is it would make an awesome topping for ice cream (if you just chill it instead of freeze it).

1 apple
1/4 cup crispy nuts (broken into large pieces) (we used pecans and walnuts)
1/4 cup coconut oil
1/4 cup honey

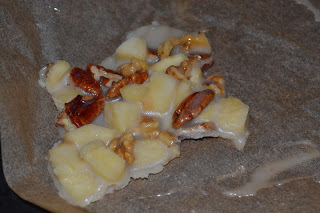
Peel and chop apple. Cook the apple in coconut oil in small pan. When apple is tender stir in honey. Cook about 2 minutes. Remove from heat. Stir in nuts.*  Pour onto a parchment lined baking sheet. Place in freezer until solid. Break into chunks. Store in the freezer to remain solid.

*You can also pour this into a glass container and allow to cool (on the counter or in the fridge) and use it as a topping for ice cream, pancakes or waffles or as a mix in for yogurt.

Butterscotch Sauce

Tuesday we made some awesome caramel sauce with our extra cream. But I didn’t use all of the cream. So yesterday we used a little more and tried butterscotch. I got the recipe from Smitten Kitchen. It is so simple to make (only takes about 5 minutes) and is sooooo good. I like the butterscotch even better than the caramel. Rebecca and I sampled a little on homemade vanilla ice cream. A little piece of heaven 🙂  I think we might have homemade butterscotch sauce on hand more often now 🙂

Butterscotch

1/4 cup (1/2 stick) unsalted butter
1/2 cup packed organic brown cane sugar or sucanat
1/2 cup heavy cream
1/2 tsp. unrefined sea salt, plus more to taste
1 1/2 tsp. vanilla extract, plus more to taste

Melt butter in a medium heavy-bottomed saucepan over medium heat. Add the sugar, cream and salt and whisk until well blended. Bring to a very gentle boil and cook for about five minutes, whisking occasionally.

Remove from heat and add one teaspoon of the vanilla extract, stirring to combine. Dip a spoon in the sauce and carefully taste the sauce (without burning your tongue!) to see if you want to add additional pinches of salt or splashes of vanilla. Tweak it to your taste, whisking well after each addition (I used about 3/4 tsp. salt and 1 1/4 tsp. vanilla).

Serve cold or warm over vanilla ice cream. The sauce will thicken as it cools. It can be refrigerated in an airtight container and reheated in a toaster oven or small saucepan.

Caramel Sauce

Every week I skim some cream from our fresh milk. Most weeks I have a purpose for it…and often wish there was more! This week I didn’t have an urgent need for it. I have plenty of sour cream. I think we are even good with homemade ice cream. So I decided to make caramel sauce…something to go with our fabulous homemade ice cream 🙂

I’ve made caramel before, but it never seemed to work properly. I followed the directions, but I would cook it and cook it and cook it and never get it up to temp. So I decided to try a new recipe. I found one that looked simple on Lick My Spoon for Salted Caramel Sauce. There are good step by step directions. And you don’t have to monitor the temperature.

I gave it a go yesterday. It turned out very well. And it was quite quick and simple. I just made regular caramel, not salted. But I’m sure that would be very good too. It tastes great right after making it. As it cools it gets a lot thicker. It would be great for dipping apples when it’s cold. You simply warm it a bit to soften it to use on ice cream. Homemade caramel is a simple and delicous treat.

Caramel Sauce

1 cup cane sugar
6 Tbsp. unsalted butter, cut into chunks
1/2 cup heavy cream
1/4 cup water
Heat the sugar and water in a 2-quart or 3-quart saucepan over medium-high heat. Stir to help the sugar dissolve, but stop stirring when the sugar comes to a boil. You can swirl the pan a bit if you want.

When the liquid sugar hits a dark amber color, add all the butter to the pan. The mixture will foam up and thicken. Whisk until the butter has melted. Once the butter has melted, take the pan off the heat.

Add the cream to the pan (the mixture will foam up again) and continue to whisk to incorporate.

Let cool in the pan for a couple minutes, then pour into a glass jar and let cool to room temperature. Don’t worry if the sauce seems a bit too thin at first, it will thicken as it cools. Store in the refrigerator. Warm before serving to loosen it up again.

Honey Walnut Sourdough Bread


This morning I made a new flavor of sourdough bread. I used my sourdough muffin recipe as the base. I modified it slightly to make a bread and to change the flavor. 

The combination of walnuts and honey is very good together. And a hint of cinnamon adds just the right amount of spice. Delicious!

This post is linked to Fresh Bites Friday and Fat Tuesday.

Honey Walnut Sourdough Bread

1 cup whole wheat flour
1 tsp. baking soda
1/4 cup sucanat
1/4 cup honey
1/4 tsp. salt
1 tsp. cinnamon
1/2 cup chopped crispy walnuts
————–
1 egg
1 tsp. vanilla
1/4 cup oil (I use melted coconut oil. Butter would also work.)
1 cup sourdough starter

Preheat oven to 400F.

Combine wet ingredients in a medium bowl. Add dry ingredients. Mix quickly and spoon into buttered bread pan.

Bake 30 minutes.

Lemon Bars

I also made a batch of lemon bars for Justin’s birthday treats. This is another recipe from my MIL. It’s a simple recipe. I’m generally not a huge fan of lemon bars, but these are good. Justin says they aren’t that sweet (not as sweet as some lemon bars). I think they are quite sweet. Just depends on your taste buds I guess 😛  Again, I subbed more natural ingredients for most of this. But I did still use the powdered sugar. These turned out well. The only issue I had was that they took way longer to bake than the recipe said. After 20 minutes the middle was still totally liquid. I ended up baking them for about 40 minutes.

Lemon Bars

1 3/4 cups flour (you can use whole wheat flour)
1 cup butter (cold)
1/2 cup powdered sugar (you could probably sub cane sugar and the crust would still taste fine)

4 eggs
2 cups cane sugar
1/4 cup lemon juice (juice of about 2 lemons)
4 Tbsp. flour (I would use AP flour for this since it is for thickening. You could also try corn starch or arrow root)
1 tsp. baking powder
1/4 tsp. salt

Cut butter through flour and powdered sugar (I did this in the food processor. Makes it very simple). Pat dough into a greased 9×13 pan. Bake at 350 for 20 minutes.

While dough is baking prepare lemon filling. Beat eggs. Add sugar, lemon juice, flour, baking powder and salt. Mix well. Pour over crust. Bake for about 40 minutes (until center is set). Sprinkle with powdered sugar. Let cool before cutting.

Peanut Butter Chocolate Bars

Justin’s birthday is this week. He requested some treats to bring to work. So yesterday Rebecca and I made two batches of bars. The first is peanut butter chocolate bars. This recipe is from my MIL. I definitely wouldn’t call this a “healthy” recipe. You can sub most ingredients for natural ones. The only one I didn’t really was the powdered sugar in the frosting. I know you can make your own powdered sugar, but I didn’t. I figured it wasn’t too critical since I was giving most of them away 😛  They sure taste good. But not something to indulge in often. I forgot to take pictures until they were all cut up. And I only had my small camera handy, so not the best shot.

Peanut Butter Chocolate Bars

1/2 cup brown cane sugar or sucanat
1/2 cup cane sugar
1/2 cup butter, softened
1 egg
1 tsp. vanilla
1/2 tsp. baking soda
1 cup flour (you can use whole wheat)
1 cup rolled oats

6 oz. chocolate chips
1/2 cup powdered sugar
1/4 cup natural peanut butter
1/2 tsp. vanilla
1-3 Tbsp. milk

Cream sugars and butter. Add egg and vanilla. Beat. Stir in flour and baking soda. Add oats. Stir. Spread in a greased 9×13 pan (this is kind of tough. It will be a very thin layer. I usualy have to use my hands to do it, lightly dusted with flour). Bake at 350 for 18 min. While it is baking mix the sugar, peanut butter, vanilla and milk to make a frosting. Take bars from the oven and sprinkle with chocolate chips. Drizzle frosting on top. Swirl chip and frosting over bars (the chips should melt). Let cool.

Cookie Dough Ice Cream

Since learning just how healthy ice cream is (homemade of course) I’ve been making it a lot lately. Which means experimenting with new flavors.

This week I made cookie dough ice cream. One of my favorites! And it turned out great!!! I had some for snack last night and for breakfast today 😛  It’s just a basic vanilla with homemade cookie dough chunks. Yum!!

I baked cookies on Saturday. SoI made a full batch of dough and reserved about a cup of it for the ice cream. My son also got his first little taste of vanilla ice cream (his first taste of anything sweetened!). Just a couple little bites. He seemed to enjoy it.

This post is linked to Fat Tuesday at Real Food Forager.


Cookie Dough Ice Cream

Ice Cream

3 cups cream (preferably raw)
3 egg yolks
1 Tbsp. vanilla
1/2 cup maple syrup (or honey)

Cookie Dough (full recipe for cookies…scale down for just one batch of ice cream, freeze it in one cup portions for future use or make some cookies with the rest 🙂

2 1/4 cups whole wheat flour (or any combination of gluten free flours)
1 tsp. baking soda
1/2 tsp. salt
1/2 cup butter, softened
1/2 cup palm shortening (you can use all butter, but I like the combo of butter and shortening)
3/4 cups cane sugar
3/4 cups rapadura or brown cane sugar
1 tsp. vanilla
2 eggs
1 1/2 cups chcolate chips (optional…works well without chips for the ice cream)

Prepare the cookie dough:

Cream butter, shortening, sugars and vanilla. Add eggs, beat well.Add dry ingredients. Mix well. Stir in chocolate chips.

Place one cup of dough in plastic wrap. Flatten to about 1/2 inch. Freeze.

*You can make cookies with the remaining dough: Bake at 350 for ~ 10 minutes.
*You can freeze the remaining dough as one large batch to make cookies later or in one cup portions to make more ice cream later.

To make the ice cream:

Thaw dough for 5 minutes on counter. Cut/break into small chunks. Place in a bowl and return to freezer.

Mix cream, egg yolks, vanilla and syrup with a whisk until well combined. Process in an ice cream maker (takes about 20 minutes in my Kitchen Aid attachment). Add frozen cookie dough pieces during the last minute of processing. Store in an airtight container in the freezer.

Blurple Moon Ice Cream (Blue Moon Take Two)

I tried making blue moon ice cream last week. The ice cream was good…but it didn’t really taste like blue moon. I decided to try again this week. I did some more research and asked for opinions on flavor. From what I’ve read the flavor of blue moon is actually nutmeg! I never would have guessed that. I think there are some variations of the flavor. Some say it also has a lot of almond. The most surprising thing is that there is no fruit flavor. The color really fools you. For this attempt I mostly went with nutmeg. But I also added a little bit of homemade almond butter for a hint of almond flavor. And I added some blueberry puree for a little color (it didn’t really impact the flavor). Rebecca insisted it had to have some color. It’s more of a purple than blue (“blurple” :), but at least it’s natural. I’ll have to keep experimenting with homemade/natural coloring to make it more blue. This was a pretty successful attempt at homemade blue moon. It really does taste like the blue moon flavor! “Cinderella” really enjoyed it. I didn’t measure anything when I made it. I just tasted as I went along until I got the flavor I wanted. So I’ll do my best to write down a recipe. If you try it please taste the batter and adjust the flavor as needed before putting it in the ice cream maker.

You can use this same flavor idea for other things besides ice cream. I made some blue moon yogurt for Rebecca’s lunch yesterday (plain yogurt with maple syrup, a little blueberry puree and a sprinkle of nutmeg). You could even try blue moon pudding or pudding pops (add some nutmeg to homemade vanilla pudding…freeze it in molds for pops).

Now that I’ve come up with a decent homemade blue moon maybe I’ll have to really challenge myself and try to make homemade superman ice cream. Anybody know what flavors the yellow and pink ice creams are?

This post is linked to Fat Tuesday at Real Food Forager, Real Food Wednesdays and Fight Back Friday.

Blurple Moon Ice Cream

3 cups cream (preferably raw)
3 egg yolks
1/2 cup maple syrup (adjust to your taste)
2 tsp. vanilla extract
2 tsp. lemon juice
1-3 tsp. nutmeg (adjust to your taste)
2 Tbsp. homemade almond butter or 1/4 cup crispy almonds
1-2 Tbsp. arrowroot powder (not necessary, but it does help texture)

blueberry puree (optional for color)
1/3 cup blueberries (fresh or frozen)
1 Tbsp. maple syrup

Cook blueberries and syrup on low heat until berries soften and release juice. Strain. Cool.

In blender or food processor (I used my Vitamix) combine all ingredients (including blueberry puree if using), making sure the almonds are totally blended. Taste. Adjust syrup, nutmeg and almond to taste. Process in ice cream maker (mine took 20 minutes in my Kitchen Aid attachment). Store in freezer.

Soaked Graham Crackers

I’ve been making a lot of soaked baked goods lately. Through my recent experimenting I know that I handle them a lot better than unsoaked. One of my favorite foods is graham crackers. I used to live on them…the boughten, processed kind :\  But I haven’t been able to eat them in a long time, even my homemade grahams.

I have made them with sprouted flour in the past. That works ok, but the texture isn’t great. So I decided to experiment and see if I could make a soaked version. I used the graham cracker recipe I always use as a base and then added/adjusted ingredients.

I was quite impressed with the outcome! Crispy and sweet. A perfect treat for me…and my family. Rebecca had one with almond butter for breakfast yesterday 🙂  I made a small batch since I was experimenting. And next time I’ll try to get them a little thinner I think. But overall a great first attempt! I’m so excited to have soaked graham crackers. Now I just have to keep myself from eating them all in one day 😛

This post is linked to Fat Tuesday at Real Food ForagerReal Food Wednesdays and Fight Back Friday.

Soaked Whole Wheat Graham Crackers

2 cups organic whole wheat flour, all purpose flour or a combination of the two

1 cup yogurt, kefir or buttermilk
1/2 cup melted butter or coconut oil (I sometimes use half of each)

1/2 – 2/3 cup rapadura or cane sugar (adjust to your taste)
1/2 tsp. baking soda (optional)
1/2 tsp. salt
1/4 tsp. cinnamon (optional)
6Tbsp. honey (you can substitute molasses for some of the honey for a stronger “graham” flavor)
1 tsp. vanilla

Mix flour, yogurt and butter/oil in a glass bowl. Cover and let sit 7-24 hours.

Heat oven to 350. Add remaining ingredients to flour mixture. Stir until well combined. The dough should be quite moist and sticky.

Split dough into 2 equal parts. Put 1/2 of dough on a parchment paper or silpat lined baking sheet. Spread with a spoon until you have a fairly even layer covering the baking sheet. It will be a bit lumpy, not smooth. Repeat with 2nd half of dough on another pan.

Bake for about 10 minutes. Remove from oven and cut into squares (with pizza cutter). If the dough sticks to the pizza cutter bake them another 5 minutes and try again. After cutting them into squares, return the pans to the oven and bake another 5 minutes.

Remove the crackers from the oven. Transfer them to a dehydrator tray (you can keep them on the parchment until they are dry enough to handle without breaking) and dry them for 2-6 hours (until they are crispy/dry). Let cool. Store in an airtight container. You can also freeze them for long term storage.

Soaked Soft Pretzels

Between a sick baby and a power outage I haven’t had much computer time lately. So I’m trying to catch up on posts. Last week I made some soaked whole wheat bread again. But I made a bigger batch of dough and used half of it to make soft pretzels. It was an experiment…and it turned out great! Unfortunately right after I finished mixing the dough the power went out. So I had to roll/shape pretzels in the dark with a crying baby. Not exactly ideal conditions. So I had to be pretty quick and couldn’t see that well…and ended up with pretty large pretzels. If I make them again I’ll roll them a lot thinner. Regardless they taste great! Slather them with butter and salt right out of the oven. Yum! And they make great bread for a sandwich…a pretzel bun. This is a great snack for me to have on hand…soaked wheat with lots of salt. Exactly what my body needs.

Soaked Soft Pretzels

2 cups whole wheat flour
1/2 cup buttermilk, kefir or yogurt
3/4 cups very warm water
1 egg
1cup organic white unbleached flour
1/8 cup warm/hot water
1/8 cup coconut oil
1 Tbsp. yeast
1/4 cup local raw honey
1/2 Tbsp. sea salt

The day before, add wheat, buttermilk, and water to your stand mixer. Mix just until all the flour is wet. Cover and let set at least 7 hours but 12 or more is even better and you may even have a nice sourdough taste. I usually try to do 24 hours. Soak it one morning. Mix it the next morning.

The next day, or whenever you’re ready to finish your bread, add the egg and white flour. Add coconut oil to the hot water (so it melts). Once it’s melted, add it in, and start mixing on the lowest speed.

Add the yeast, keep mixing on lowest speed. Add honey and seal salt.

When the dough has cleaned up the sides and middle of the bowl, check how the dough feels and see if you need a bit more water or flour (you’ll know if it feels too dry or wet), and then set the timer for 14 minutes and continue mixing on the lowest speed.

Meanwhile, butter two baking pans. When the dough is done, use buttered hands to split it into 10 equal pieces. Roll each piece into a long string. Shape into pretzels. Place on baking sheets.

The rise time depends on the temp in your kitchen – usually 2-3 hours. Bake at 350 degrees for 20-25 min.

When you take them out of the oven, brush them with butter and sprinkle with sea salt. Be sure to add plenty of salt or you might be like me and have a three year old telling you “I desparately need more salt.” Place on a rack to cool…or devour immediately 🙂