Home » Archives for Mary | Just Take A Bite » Page 108

Author: Mary | Just Take A Bite

Poached Eggs

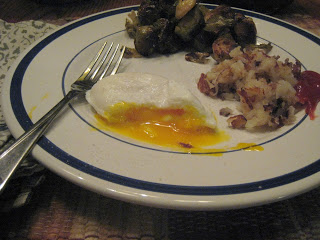
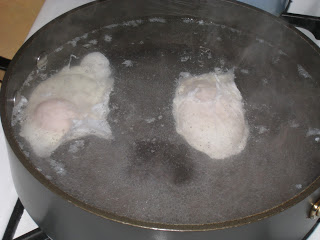
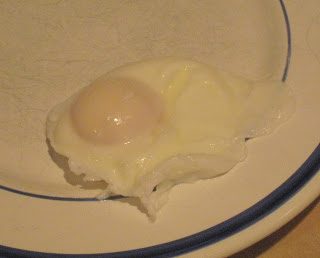
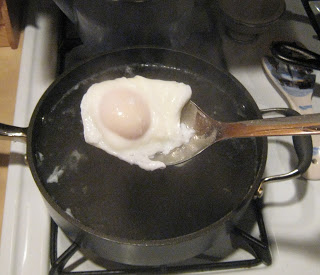
Along with our new potatoes last night we tried a new form of egg – poached. I had never made them before. And Justin and I had never actually even had one. I’ve always been a little scared to try making one…cooking an egg in a pan of water sounds tricky. But in one of my recent issues of Cooking Light there was a little tutorial on how to make poached eggs. It sounded really easy. So I gave it a try. It really was very easy. And quick! And they taste great. Very similar to a soft boiled egg. These days I try to eat at least one egg a day. And the runnier the yolk the better (the less it’s cooked the more nutrients it retains). So this was perfect. And even more perfect with our fresh eggs from Lubbers Farm. Do you see the color of that yolk? Amazing. Rebecca is hit and miss with eggs. Just depends what mood she’s in and how her gag reflexes are working 😛  So I just made her scrambled eggs last night. But she did try a bite of mine and said she liked it. Maybe next time I’ll make one for her too. Now that I’m eating eggs so much it’s fun to experiment with different ways to make them. This one is a winner for sure. It would be very good served right on top of hasbrowns or a piece of toast to soak up all that rich, creamy golden yolk.

Poached Eggs

Fill shallow pan with about 2 inches of water. Bring to a boil, then turn down to a simmer. Add a few tsp. of vinegar. Crack each egg into a small dish. Gently pour egg into water (it will sink to the bottom at first). Let cook for about 3 min. Remove from water with slotted spoon to drain. Place on plate, potatoes or toast. Sprinkle with sea salt. Enjoy!

Alfredo/Pestofredo Sauce

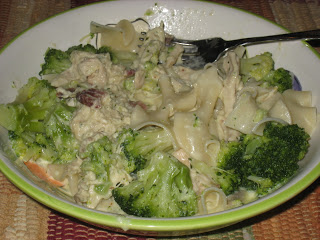
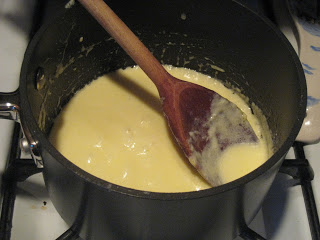
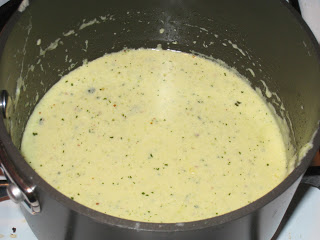
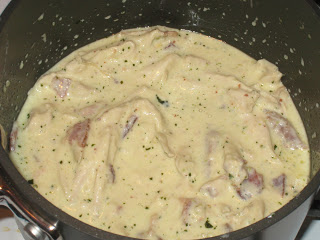
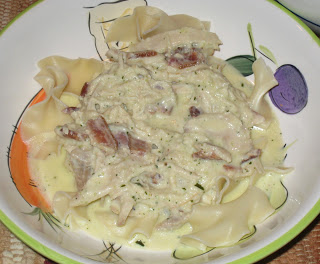
Recently I saw an easy recipe for alfredo sauce posted on Heavenly Homemakers. I haven’t made alfredo sauce in ages. And I have some fresh cream from our raw milk to use. So I thought I’d try it. But I added to it to make it my own recipe 🙂  I turned our alfredo into pestofredo…alfredo sauce with homemade pesto mixed in. And I added shredded chicken and crumbled bacon as well. Yum!!! I served it over egg noodles and added broccoli. We all liked it. The alfredo sauce is very good on its own. And super easy. With pesto added it’s good too. Either way you can’t go wrong. I only made a half batch since I only had 1 cup of cream. I ended up adding some milk to thin it out a little…it got very thick. It made enough for our dinner and a lunch for Justin. Maybe next time I’ll make the full batch…if I have 2 cups of cream handy. I’ll post pictures of all of the stages…alfredo, pestofredo, pestofredo w/ chicken and bacon, over pasta, with broccoli added.

Alfredo/Pestofredo Sauce

1/2 cup butter
One pint of cream (2 cups)
1 garlic clove (I just used some garlic powder)
2 Tbsp. cream cheese
1/2 cup grated parmesan cheese
(3-4 Tbsp. pesto)
(shredded chicken, bacon)

Bring the butter, cream, garlic and cream cheese to a boil. Turn down the heat, simmer and stir for about two minutes. Add the grated cheese and stir until melted. Simmer the sauce for 15-20 minutes until it becomes “thick and saucy”, stirring occasionally.

To make pesto fredo, stir in pesto during last minute of cooking.

Optional – add in chicken and/or bacon during last few minutes of coooking.

Sloppy Cornbread

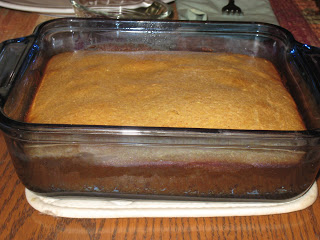
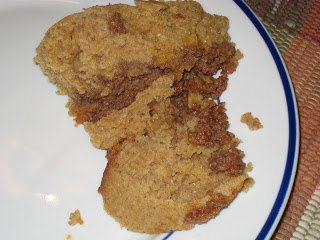
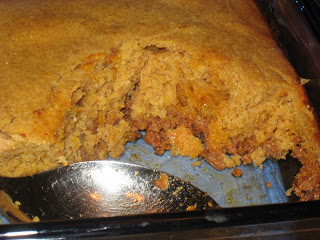
Now that I’m starting to feel better I want to get back into the habit of trying new recipes. So last night I tried another Heavenly Homemakers recipe. It’s called Sloppy Cornbread. It’s basically sloppy joe meat topped with cornbread. Very simple. And very good! We all liked it. And I’m not even a huge sloppy joe fan…but I did like the taste of her sloppy joe recipe. Maybe I’ll use that the next time I make them…and maybe I’ll actually eat it then 🙂  We all really liked this. But the ratio of meat to cornbread was off for us. Way too much cornbread. I only made a half recipe (1 lb. of meat, 1/2 recipe of cornbread). Next time I’ll only do 1/4 recipe of cornbread or less. But definitely a keeper. This would work well with taco meat too…kind of tex mex. I’ll post the recipe with my ratios. You’ll see from the pictures…it mostly looks like cornbread 😛

Sloppy Joe (this is 1/2 recipe)

1 lb. ground meat (beef, turkey, venison or lamb)
1 Tbsp. minced onion (I just used onion powder)
1/2 cup ketchup
1/2 tsp. mustard (I used about 3 tsp.)
1/4 tsp. garlic powder
1/2 Tbsp. worchestershire sauce (I didn’t have any, so I just added extra salt)
sea salt to taste
Brown meat and onion together. Add remaining ingredients, stirring well. Allow mixture to simmer in the skillet for a few minutes.

Cornbread (this is 1/4 recipe)

1/4 cup cornmeal
1/4 cup whole wheat flour
1/4 tsp. baking powder
1/4 tsp. salt
1 egg
1 Tbsp. honey (I used more than this since we like our cornbread a little sweeter)
1 Tbsp. melted butter
1/4 – 1/2 cup buttermilk

Stir dry ingredients. Add wet ingredients and stir.

Sloppy Cornbread

Place sloppy joe meat in 9″ square pan. Top with cornbread batter. Bake for 20 min. at 400. You can sprinkle cheese on top before baking if desired.

Hamburger Pie ("Favorite Casserole")

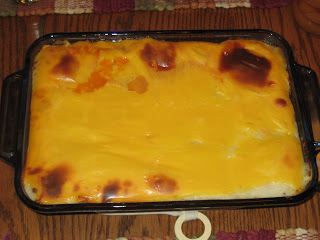
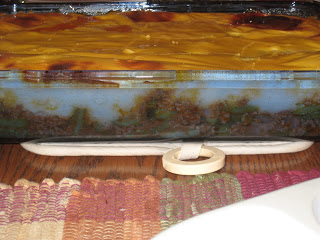
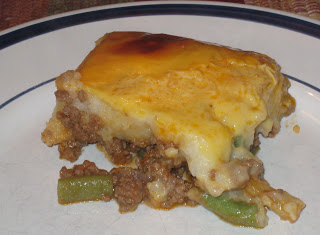
Last night I made an old classic casserole that Justin grew up eating. His family called it favorite casserole, but it’s really hamburger pie. It’s a lot like shepherd’s pie…beef, potatoes and veggies. We haven’t had it in a long time, but Justin requested it. And it kind of sounded good to me 😛  As long as you have mashed potatoes it’s very easy to make.

I made mashed potatoes in the morning so that prep was easy at dinner time. As far as casseroles go this one is pretty good. I wouldn’t call it my “favorite” 😛  But maybe that’s because I didn’t grow up eating it.

Hamburger Pie

1 lb. ground beef
1/4 cup chopped onion
2 cups mashed potatoes (as much as you like, at least enough for a thin layer on top)
1 cup shredded cheese (leave out the cheese to make it dairy free. You can add a thin layer of pureed squash in place of the cheese to add flavor)
salt and peper to taste (I also added garlic powder)
1 cup tomato soup
2 cups cooked green beans (cut or french style)

Heat oven to 350.

Brown the meat with onion. Season. Stir in the beans and soup. Pour into ungreased 11×7 pan (you could use 9×13 if you want a thinner layer…just be sure to have enough potatoes to cover it).

Spread the potatoes over top. Top with cheese. Bake until hot and top is slightly brown (30-40 min.).

Spinach Pie

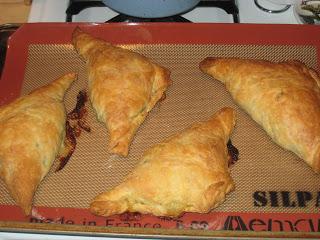
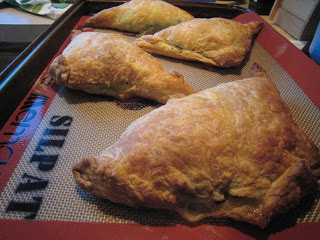
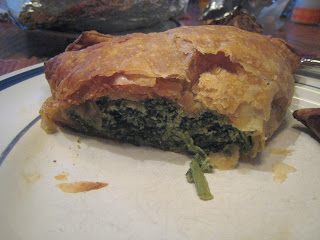
The other day Rebecca was talking about spinach pies. I have no idea where she even heard of them. We’ve never had them at home before. But it actually sounded good to me (rare these days that anything sounds good). And I remembered I had some puff pastry in the freezer (I know, not the healthiest, but not horrible when you eat it once or twice a year 😛  And right now I’ll eat anything that I can stomach.). So I decided to come up with a spinach pie. I did a search for recipes. Pretty much every recipe I saw uses phyllo dough. And almost all of them use feta…which does not appeal to me (and may not be safe?) right now. So I came up with my own recipe. And it turned out great!! All 3 of us loved them. I even managed to eat one for breakfast this morning! First day this week eating something besides toast and peanut butter. I didn’t measure anything while I was making them. Just added what looked/tasted right. So I’ll try to estimate quantities. Definitely something I’ll make again. Very easy and tasty. And a great way to get some spinach into our diets. You could prep them ahead and bake later. These were so easy to make that Rebecca could help me. I love that. While prepping the filling I was worried it would be kind of mushy. But the egg really holds everything together well. It firmed up nicely while baking. Almost like a quiche…but not nearly as eggy. You could easily add some cooked bacon or ham to get more protein in these. But they are plenty satisfying without meat.

Spinach Pie
makes 4 individual pastries

1 sheet puff pastry, thawed
1/3 cup red onion, chopped
10 oz. frozen chopped spinach, thawed, drained
1 cup ricotta cheese
1/2 cup shredded mont. jack cheese
salt and garlic powder to taste
1 egg

Saute onion in olive oil until soft, about 5 min. Add spinach. Cook until soft. Season to taste. Put mixture in bowl. Add cheese (enough to make a creamy mixture) and extra seasoning if necessary. Add egg. Mix.

Heat oven to 400. Roll puff pastry on floured surface until big enough to make 4 large squares. Use pizza cutter or knife to cut into 4 squares. Place 1/4 of filling in middle of each square. Fold in half to make triangle. Pinch edges with fingers. Seal well with edge of fork.

Place on parchment or silpat lined baking sheet. Bake for 35 min. Let cool about 5 min. before cutting into pastries.

How to Cut Up a Chicken

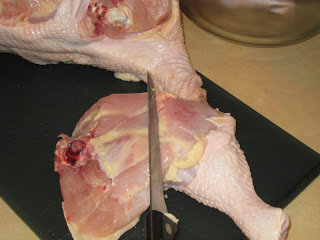
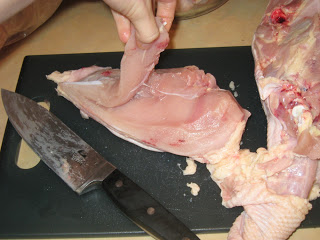
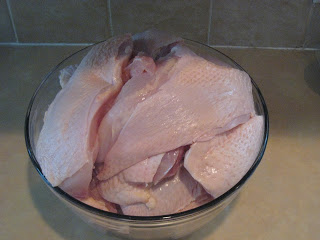
Yesterday we got four fresh organic chickens from one of Justin’s co-workers. I knew I’d have to cut them up myself, so before hand I did some research. A few months ago Kat posted a link on her blog to a video that gives good directions. So I watched that. It seemed pretty simple. And it was! Who knew. You can go to Kat’s blog to get the link if you want to see the video. I’ll give a very basic run down of how I did it. I only cut up 2 birds. The second one went a lot faster than the first. With a little practice you could probably do a whole chicken in 5-10 min. Be sure to use a good, sharp knife.

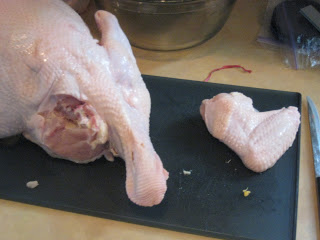
1. Cut off the wings, right at the joint. Then cut off the tip of the wing to use in stock. There really isn’t any meat on it.

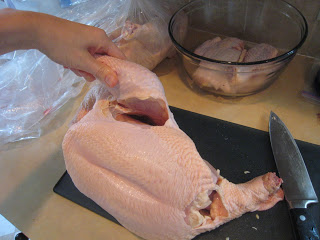
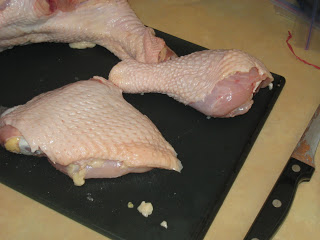
2. Cut off the legs. Start cutting around the drumstick. As you pull on it you’ll see where the thigh is and just follow that along.

3. Separate the drumstick from the thigh. There is a natural line of fat at the top of the drumstick that you can use as a cutting guide.

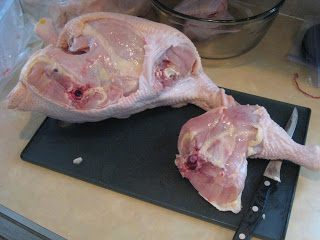
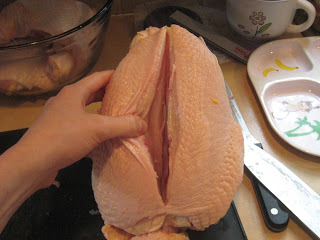
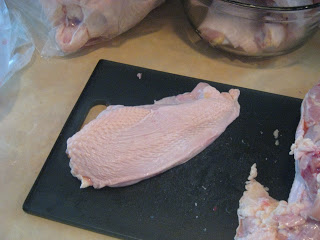
4. Cut off the breasts. Make a slit down the middle. And gradually cut as you pull the breast away from the bone (one on each side).

5. Remove the tender from the breast. You don’t have to do this. But it’s simple. The tender naturally pulls away.

That’s it. You can leave the skin on or remove it from any of the pieces. I left it on. Pretty simple. Maybe next year I’ll be daring enough to order more chickens now that I know how easy it is. And if I can do it while nauseous anyone can do it 🙂  I vacuum sealed and froze all of the chicken after cutting it up. And I used all of the scraps for stock.

What is IVF?

What is In Vitro Fertilization? Seems like a silly question to me. But that’s because it’s been part of my life for 4 years now. And now that we’ve had to talk about it so often with people I start to wonder…how many people really know what it is? When I tell someone we went through IVF to conceive our children they kind of look at me like, I’ve heard of that, but I really have no idea what you’re talking about. And I think most people have a misconstrued idea of what it is…like a doctor magically makes babies and makes you pregnant. Four years ago when we started on this infertility journey I had no clue what it was. When I was told that was our only option to have children I still wasn’t really sure what it was. We had to do a fair amount of research and learn a lot from our doctor. Plus just learn as we went along. Now that we’ve been through 3 fresh IVF cycles and 6 IVF transfers I have a pretty good idea of what IVF is and what it is not 🙂  And I thought it would be good to share with others. What is IVF…through a patient’s eyes.

First off I want to say IVF is NOT a “sure thing” by any means. I’ve heard that term used (even on a real food blog!). Some people think that it is the “easy” way to conceive…to be able to have your children exactly when you want. I think celebrities/media/tv shows have caused this. In reality it is quite the opposite. IVF is never guaranteed to work. It can be a very long, tiring, difficult, emotional process. And so unpredictable. Some couples go through years of treatments and never conceive.

Also, doctors do NOTcreate babies/life via IVF. Only God can do that. A doctor helps a woman mature her eggs with drugs and monitoring and puts them with the sperm. Then if an embryo forms (naturally) it is placed in the woman’s uterus. The doctor can NOT implant an embryo (despite what you hear on tv shows/movies). That is a natural process that only God can do. An embryo is transferred into the uterus…and nature takes its course. If you ever hear someone say they had an embryo implanted they don’t know what they’re talking about. That is physically impossible.

That being said, I’ll get on with what IVF is. In Vitro simply refers to any biological procedure that is performed outside the organism it would normally be occurring in. The egg and sperm are joined outside the woman’s body. I’ll start with the basics of IVF. There are basically 3 steps in the process. First the woman’s uterus is kept quiet…meaning prevented from ovulating/producing eggs. This often means taking birth control pills. Or in my case means doing nothing since I don’t ovulate without drugs 😛  Then comes the stimulation/retrieval phase. The woman is given hormones to make her body mature some eggs. Once the eggs are the right size/mature enough the doctor removes the eggs from the follicles (via a needle guided by ultrasound). The eggs and sperm are then joined. This can be done just as it would in nature (egg and sperm put in same place and let nature take it’s course). Or a single sperm can be injected into each egg (called ICSI – intracytoplasmic sperm injection) if the sperm is improperly shaped (this does not make the sperm fertilize the egg…it still has the same odds of fertilization as if it were not injected). The final step is transfer. If any of the eggs have been fertilized some of them are transferred into the woman’s uterus when they are anywhere from 3-6 days old. Any remaining embryos are frozen. If one or more of the transferred embryos implants into the woman’s uterus she becomes pregnant.

Sounds pretty simple and straight forward. But of course it’s not really that simple. There are so many factors that go into each part of the process. There are so many reasons a couple goes through IVF in the first place…unexplained infertility, female factor (anovulation, PCOS, only one ovary, blocked tubes, cysts,…), male factor (low sperm count, poor movement, bad morphology (shape), vasectomy reversal,…) and a combination of these and many other factors. So each couple has a unique treatment and odds of success/failure (just because you “know someone that got pregnant naturally after their first round of IVF” it does not mean anything to someone else going through IVF. They have completely different situations and obstacles to overcome). And even every doctor has different methods/ideas. It would take way too long to go into that much detail. So I thought the easiest thing to do would be to share my story/path. Even that is quite long and complicated. So I’ll just go through our most recent IVF cycle. Show you what a few months in the life of an IVFer are like 🙂

June 11 – June 23: take prometrium pill one time/day each day; take estrace pill one time/day each day (continue to take estrace through whole process) (prometrium is to induce a period, estrace is to prepare my body for stimulation)
June 15: one time injection of dep-lupron (done by nurse) to start maturing eggs
July 8: 1st ultrasound to make sure uterus is quiet; start follistim shot and menopur shot in PM (I do these shots myself in my stomach)
July 9 – 12: follisitim shot 2x/day, menopur shot 2x/day
July 13: 2nd ultrasound to check on eggs/follicles – over 10 in each ovary; follistim shot 1x, menopur shot 2x
July 14 – 15: menopur shot 2x/day
July 16: 3rd ultrasound check – 10-15 follicles on right, 10-18 follicles on left; follistim shot 1x, menopur shot 1x
July 17: 4th ultrasound check – 8-14 follicles on right, 12-20 follicle on left; follisitim shot 1x, menopur shot 1x
July 18: menopur shot 2x
July 19: hcg trigger shot – 1x shot to make my body think it’s time to ovulate and finish maturing the eggs – Justin gives me this one (in the butt).
July 20 – 23: antibiotics (pills) 2x/day
July 21: Egg retrieval – sedated while Dr. uses an ultrasound guided needle to remove every egg from the follicles. My total count was around 50 this time. Just to give an idea of how many that is, a woman normally produces/releases 1 egg each month. I did over 50 at once. Very uncomfortable.
July 23 – 26: progesterone shot 2x/day (Justin does this one for me…in the butt)
July 26: ultrasound belly check – confirmed OHSS (ovarian hyperstimulation syndrome). I look about 6 months pregnant. Ovaries are swollen. I’m severely nauseous and can barely get off the couch. Go to hospital for albumin infusion to balance protein levels in my blood. All embryos frozen, no fresh transfer due to OHSS.
July 22 – August 2: recover from OHSS

August 5 – August 14: estrace pills 2x/day
August 15 – 20: estrace pills 3x/day
August 17: ultrasound to make sure uterus is quiet/fully recovered and to check lining
August 21 – 10 weeks of pregnancy: estrace pills 2x/day, progesterone shot 2x/day (Justin does this when he’s home, else I do it myself…in the butt)
August 24: frozen embryo transfer (FET) – transfered 3, day 3 embryos (3 embryos put into my uterus via a small catheter, takes about 5 min. Then I have to lay down for an hour and a half)
September 2: beta 1 (pregnancy test/check hcg level) – blood test – 120 (positive!)
September 8: beta 2 – 1223 (hcg level increasing as it should…typically doubles every 48-72 hours)
September 14: beta 3 – 8220 (hcg still rising as it should)
September 21: 1st pregnancy ultrasound – one sack and heartbeat seen. Pregnancy confirmed.
October 12: 2nd pregnancy ultrasound – still to come :), estrace pills and progesterone shot go down to 1x/day
October 19: stop estrace and progesterone – released to regular OB

That’s what happened this cycle. This one thankfully turned out well. Our last cycle was much more grueling…a fresh stimulation cycle, OHSS, then 3 failed FETs. And having to start all over.

As you can see it is by no means easy. Anyone who thinks that has no clue what it is. It is expensive, physically demanding and extremely emotional. I would not wish for anyone to ever have to go through it. It disturbs me how the media portrays IVF as such a simple thing that guarantees a woman gets pregnant. I didn’t even mention in here all of the side effects of the drugs, the weight gain, emotions, inability to make plans, etc. It disrupts your whole life.

And no, it is not that common for women to get pregnant with high order multiples. But that’s all you see on the reality shows. Most of those couples did not do IVF (they did IUI…a much simpler procedure). And in my opinion had very irresponsible doctors.

So that’s IVF in a nutshell. At least my version. It’s hard to explain all of the details, but hopefully you get a small idea of what it is. Although I hate going through the process it has given me such a deep appreciation for children and the miracle of life. I hope you enjoyed reading more about our journey. Always feel free to ask any questions. I’m an open book. I pray that God will use my journey through infertility and IVF for his glory. Hopefully in a few weeks we’ll be done with IVF for a while and can feel somewhat normal again. But this will always be a part of our lives, even after we’re done having children. It’s part of our unique story 🙂

How to Render Lard

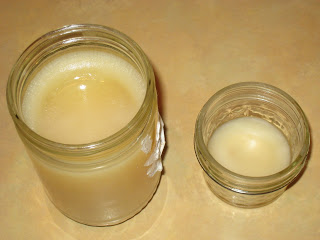
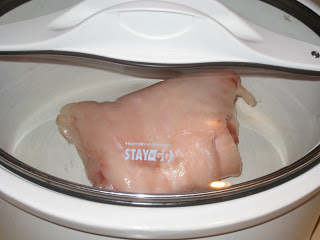
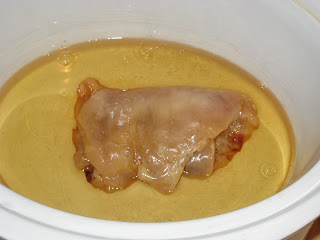
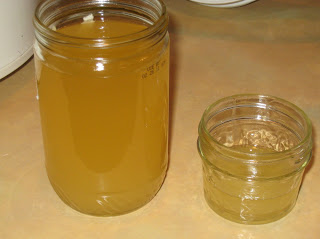
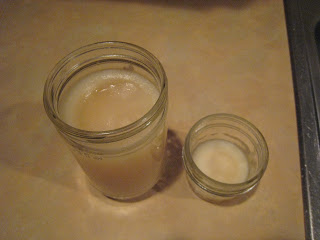
Yesterday I finally attempted to render the lard we got from our co-op a while back. I did a fair amount of research before trying. Some methods just sounded like way too much work (cutting it all up, cooking it for days, etc.). I found a link for a crockpot method that sounded much easier. So that’s what I did. Yesterday morning I stuck the lard in the crockpot (it was still mostly frozen…you don’t have to have it thawed completely), turned it on low and let it go. I did end up putting the crockpot in the garage because it has a very strong smell. And it’s definitely not one I enjoy right now (too bad it doesn’t smell like bacon cooking :P). I let it cook for 24 hours total. There was still some left, but I decided I was done with it. I was ready to totally air out the house 😛  Plus I might need my crockpot for chicken stock later today. I still got quite a bit of lard even without cooking the whole thing. I poured it through a cheesecloth into a jar just to be sure there weren’t any bits of junk. Then I let it cool and stuck it in the refrigerator. So far it seems to have worked. It looks right, I think. I’m anxious to try cooking with it! I guess that will be the real test. This lasts for a long time in the refrigerator.

Rendered Lard
1. Place lard in crockpot.

2. Turn crockpot to low.
(2a. Put crockpot in the garage.)
3. Let cook until lard is cooked down enough to your liking (it will turn to liquid).
4. Pour lard liquid into a clean jar (you may strain it at this point).
5. Let cool.
6. Refrigerate.
7. Use in place of butter or oil for cooking/frying/baking.

4, 3, 2, 1, 0…A Look Back

Four years ago today I was sick…quite sick. And I was at the hospital for major colon surgery. That was a turning point in my life. But I had a long road ahead of me. I never, ever want to go through something like that again, but I am so thankful for the changes it brought to my life. It’s hard for me now to remember what my life was like before surgery. I wasn’t actually living. It is also hard to believe it’s been four years!

Three years ago I was almost 9 weeks pregnant with my first miracle baby that I wasn’t sure I’d ever have. But God is good. And he blessed us beyond belief.

Two years ago I was enjoying life with a busy baby, cutting her first teeth and learning to roll over, while I was trying to figure out what motherhood is all about 🙂

One year ago I was just starting out on my journey to deal with my OCD and a few days away from starting medications for our first attempt at trying for baby #2. We were hopeful and excited since it had worked the first time. Little did we know the journey we’d be on for the next year. And although it was extremely tough, we are thankful for everything God taught us and how he helped us grow in our faith.

Today I am rejoicing that we saw one perfect little heartbeat on our ultrasound yesterday. Despite our worries and fears God has given us just what we need. And we are so excited to welcome this little one into our lives next spring. God is good!!

Sometimes we wish we could know what the future holds. We are always waiting for something, wondering how something will turn out, etc. And being a planner that is very true for me. But I am thankful I do not know God’s plans. If anyone had told me four years ago what was in store I’m not sure what I would have thought. But I’m glad God knows all the details and knows just what I need. Even if the journey is long and difficult he is still in control and loves me more than I can fathom. And his plans are perfect. He’s using every little trial to make me the woman he wants me to be.

I am rejoicing today and looking forward to what God has planned for the next four years. It may not be what I have planned. It might be tough. But I know it will be for God’s glory. My prayer is that God will use me, my story, my struggles for his glory. That I may be a blessing to others and share what God has taught me. That God will open doors, challenge me and use me.

FAT – What’s Good, What’s Bad And Why You NEED It

For my second healthy eating series post I thought I’d do another topic that I have lots of personal experience with. FAT. Have I ever been “fat”? No. Did I spend way too many years of my life obsessing over fat? Yes! And now that I know how important fat is in your diet I wish I hadn’t been so fat-phobic. It has had a serious impact on my health.

I’ll start with my story. Around 9th grade I started to become much more conscious of my body…and comparing myself to everyone else. I didn’t like how I looked. So I decided to stop eating fat. Almost completely. Seriously. I ate about as low fat as humanly possible. If something was available in a fat free version, I ate it. If I had to I’d tolerate some low fat stuff. I was literally scared of fat. I wouldn’t touch anything with oil or butter. I lost weight…too much weight. And was not healthy at all. I was getting zero nutrition, just empty, fat free calories. But I didn’t see that. I saw someone that was “skinny.” So I liked it. Once I got into that mode it was a long road for me to get out of it. That’s when my OCD really picked up. What I ate…how much, how little, how much fat became an obsession. I was very unhealthy for many years. My weight went up and down as I was more or less strict about things. But I was always very obsessed with weight and what I ate. It really wasn’t until about a year ago that I truly started to change my mindset. And seeing food as nourishing. I wish I had understood sooner how much damage I was doing to my body. I believe that my low fat eating and eating of bad fats (when I did eat fat) were some of the biggest contributors to my digestive and fertility problems. And I am working hard to heal both now by eating plenty (and I mean plenty) of real, healthy fat. The funny thing about it is that I was always so scared to eat fat. I was afraid I would get fat. But I eat a substantial amount of fat now every day. And I exercise less than ever. And I haven’t gained an ounce 🙂  In fact I’ve actually lost a couple pounds from adding real fat to my diet. Not that I need to. It’s just how it works…real fat doesn’t make you fat.

Now on to the details about fat. First and foremost…YOU NEED FAT. Yes, you need plenty of fat in your diet. Many of the vitamins in our food are fat soluble. Which means that in order to absorb and use them you need to eat fat. Like if you eat a vegetable plain you can’t absorb some of the nutrients. So all those years that I cringed at the idea of putting butter on my vegetables and thinking I was eating “healthy” I was really robbing my body of half of the nutrients in my food. I now put a very generous amount of butter (real butter) on all of my cooked vegetables. Aside from absorbing nutrients, your body needs fat to function. Your brain is made up mostly of fat. Even your immune systems suffers when you don’t eat enough fat.

So, what kind of fat should you eat? Probably not what you think. You should eat plenty of saturated fat. And eliminate as much polyunsaturated fat as possible from your diet. What does that mean?

Say YES to:

Extra Virgin Olive Oil
Coconut Oil
Real Butter
Lard
Tallow
Fatty Animal Products
Whole Milk/Dairy

Say NO to:

vegetable oil
canola oil
safflower oil
sunflower oil
soybean oil
margarine
imitation butter/butter sprays/butter spreads
low fat milk/dairy
extra lean animal products

I know it sounds contrary to what you hear these days. But it’s true. No, saturated fat does not give you heart disease/high cholesterol. It actually makes your body function the way it should.

What does cause major health problems is polyunsaturated fats. And the problem is they are in EVERYTHING. Which is a great reason to not buy any packaged food and to not eat out often. If something comes in a box or bag, chances are it’s filled with polyunsaturated fat. And most restaurants cook with it. I mean, why not? It’s cheap. People are told it’s healthy. Big food and drug companies profit from it. But sadly it’s what’s killing Americans and causing obesity, cancer and so many other health problems.

I know I’m just scratching the surface here. My goal is just to make people aware (I wish someone had explained to me sooner how critical healthy fat was). Please research and learn as much as you can. It could save your life. For some more detailed information about healthy fats Elizabeth at The Nourished Life has done some wonderful posts:

http://www.livingthenourishedlife.com/2009/12/weight-loss-wednesday-how-much-fat-is.html
http://www.livingthenourishedlife.com/2010/01/get-saturated-four-reasons-saturated.html
http://www.livingthenourishedlife.com/2010/08/polyunsaturated-oils-lead-to-higher.html
http://www.livingthenourishedlife.com/2010/08/can-grass-fed-beef-melt-your-fat-away-3.html
http://www.livingthenourishedlife.com/2009/12/nourishing-baby-steps-small-changes-for_16.html
http://www.livingthenourishedlife.com/2009/11/why-i-use-real-butter-on-my-toast.html

There are many other Real Food bloggers that have great info as well.

I’m so happy that I am now free to eat fat 🙂  It has truly changed my life…both my mental state and my physical. It was a big factor in the success of our latest IVF cycle. And the healing I have already experienced on my digestive system, my reproductive system and my OCD is amazing. Please say YES to fat. Just make sure it’s the good kind. And don’t make the same mistake I made by eating a low fat diet. That is not the way to lose weight, lower cholesterol, “be healthy.” You’ll just be filling your body with empty calories, preventing your body from absorbing the nutrients it needs and increasing your chances of serious illness.