Home » Archives for Mary | Just Take A Bite » Page 107

Author: Mary | Just Take A Bite

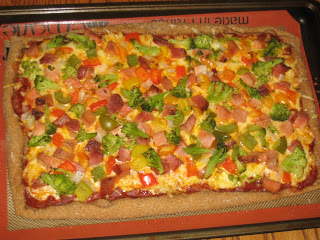
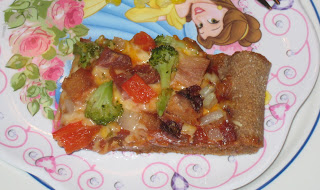
Sourdough Pizza

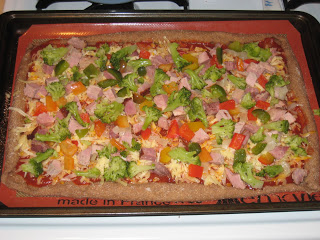
I’m always looking for new ways to use my sourdough. A while back I found a great recipe for sourdough pizza crust on Kitchen Stewardship. I’ve been wanting to try it for a while.

Since ham pizza is my daughter’s favorite, and we have a bunch of good quality (nitrite/nitrate free) ham leftover from Christmas I figured it was a great time to try it.

How Did It Go?

The recipe is very easy to make. And you do all the dough prep ahead of time so that dinner time is easy. The end result…great!

I thought it was very good. The recipe made enough dough for one large rectangular pizza.

There were only a couple issues with our pizza. First, I forgot to buy mozzarella cheese…so ours had a combo of mild cheddar, marble and parmesan. It still tasted great.

Uh Oh!

The other thing is that the recipe says to put the dough on Silpat. Which I did. And it works great. But I left it on the Silpat…and my pizza cutter went through it. So that one had to go in the trash…and they’re not cheap!

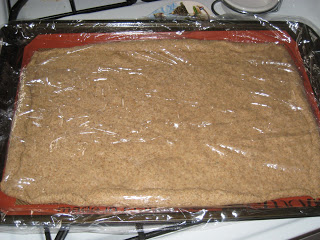
So do take the pizza off the Silpat before cutting. After that incident I put the pizza on a large wood cutting board. Worked well. Honestly I think it would work just fine to not even use a Silpat in the first place. You could put the dough right on the pan. You could dust the pan with cornmeal or use parchment paper.

Aside from that the pizza was really good. I thought it had a great texture…not too thin, not too thick. I will be making sourdough pizza again for sure.

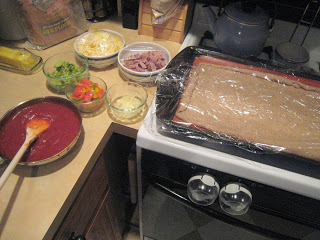
Check out the full recipe at Kitchen Stewardship. I’ll show the process below.

Sourdough Pizza

1 1/2 cups “discarded” sourdough starter (I just use my sd starter normally…I never discard anything.)
2 Tbsp. olive oil
3/4 tsp. salt
1 – 1 1/2 cups whole wheat flour (I used 3/4 cups ww, 1/4 cup rye and 1/2 cup sprouted ww…just what I had on hand)
—————–
sauce – I used my homeamde pizza sauce.
toppings – I used a combo of cheeses, ham, broccoli, peppers and sauteed onion.

You can also freeze the pizza crusts after they have been par-baked and save them for future use.

Simple Steps to Healthy Eating

When I started my journey towards eating Real Food, it all sounded so overwhelming. I started by reading Nourishing Traditions. It has so much information. And I knew I didn’t have much time to get my eating on track. So I had to jump head first into a lot of change. Thankfully I am a very determined person and do not give up on things easily. So this did not deter me. But I know that is not the case for everyone. So I wanted to come up with a list of some simple things you can do to start eating better. You can do one at a time or a bunch together. Whatever works. But each one individually is fairly simple. And might make the process easier if you tackle one at a time. Once it becomes part of your life try another one.

Simple Steps Towards Eating Real Food

* Replace vegetable oils with real butter, coconut oil and extra virgin olive oil.
* Experiment with soaking grains by using recipes that give specific instructions.
* Take fermented cod liver oil/butter oil daily (Green Pastures)
* Eat probiotic food daily (fermented food, yogurt, kefir) and/or take a supplement. Eating some full fat yogurt daily is an easy way to start.
* Replace white flour with whole wheat flour.
* Replace white/brown/powdered sugar with raw honey, real maple syrup or pure cane sugar.
* Use full fat dairy products.
* Replace pastuerized, homogenized milk with pastuerized, non-homogenized. (For those living in MI, Mooville Creamline is a great choice). If possible use raw milk.
* Do not eat a vegetarian diet. Quality meat is essential for proper nutrition.
* Eat good quality eggs often. Eat the yolks raw or runny when possible for the most nutrition.
* Eat organic produce when possible. Avoid anything grown with pesticides, fertilizers, chemicals, etc. Visiting the local farmer’s market in the summer is a great way to get quality produce. Use it fresh and preserve it for the winter.
* Eat seafood regularly.
* Replace cereal with other healthy breakfast foods.
* Avoid using the microwave.
* Replace plastic food storage containers with glass containers.

Nitrites, Nitrates and Processed Meat…You Won’t Find Them Here

I have tried to avoid nitrites and nitrates for a while now. Especially while pregnant. And since we’re serving ham for Christmas…something that often contains both…I figured now would be a good time to talk about them. They are found in most processed meats, like hot dogs, lunch  meat, bacon, etc.

So, what are they and what can they do to you?

I’ll start with sodium nitrate.

Sodium nitrate is in a lot of processed meats. But did you know it’s also used in the “manufacture of glass antifoamer, fertilizer, dyes and potassium nitrate, also in pharmaceuticals, oxidant and metal hot-treating”? Should that same thing really be in our food?

So what does it actually do to you? “Sodium nitrate may damage your blood vessels, making your arteries more likely to harden and narrow, leading to heart disease. Nitrates may also affect the way your body uses sugar, making you more likely to develop diabetes.”

Also, “nitrates in food are a danger in that they can be converted to nitrites, which can react in your stomach to form nitrosamines. Nitrosamines are potent cancer-causing chemicals.”

I find that these days sodium nitrate isn’t used quite as commonly as sodium nitrite. So, on to chemical number two.

Sodium nitrite is actually a poison. It is used to give processed meat a pinky color instead of looking gray (like regular cooked meat does). It has been shown to cause cancer, especially pancreatic and colorectal. “The USDA actually tried to ban sodium nitrite from the food supply back in the 1970’s, but it was overruled by the meat industry which knew that the chemical made meat look visually more appealing and therefore increased sales of processed meat products.”

Sodium nitrite is also “suspected of playing a role in the development of migraines and chronic obstructive lung disease.”

Pregnant women need to be especially careful about sodium nitrite “due to the greatly heightened risk of brain tumors in infants.” Sodium nitrite is especially dangerous to fetuses, infants and children.

These two nasty ingredients are in most processed meats today. But what else in that commonly served meat? Most list some kind of mechanically separated meat in the ingredients. Which means “a paste-like meat product produced by forcing beef, pork, turkey or chicken bones, with attached edible meat, under high pressure through a sieve or similar device to separate the bone from the edible meat tissue.” This can even include spinal cords. Gross!

Do you feed your child hot dogs regularly? “Leukemia skyrockets by 700% following the consumption of hot dogs. (Preston-Martin, S. et al. “N-nitroso compounds and childhood brain tumors: A case-control study.” Cancer Res. 1982; 42:5240-5.)”  No thanks.

If you do some research you will find a lot of meat companies say it’s totally safe. Of course they do. They want to sell their product! But if you look at the real evidence, you’ll see sodium nitrate and nitrite is not good for you at all. Especially children. So the next time you want to feed your child a hot dog, make sure it’s nitrate/nitrite free.

I served a fresh ham roast for Christmas dinner last night. And it was not pink. And it did not taste like it had been preserved in chemicals for months. It was nice 🙂  I spent way too many years consuming large amounts of lunch meat. Thankfully I have not had any in several  years. And I hope to prevent my children from eating it as much as possible as well. The more chemicals we can avoid the better.

Dental Health and Homemade Toothpaste

When I started on my journey towards natural foods and lifestyle I read a lot of bad stuff about fluoride. So I decided to switch to a more natural toothpaste…without fluoride. My next criteria was to avoid SLS (sodium laurel sulfate). That really limited the options. Almost every “natural” toothpaste I found has SLS. But Burts Bees doesn’t. So I’ve been using that for quite a while. And I have the children’s version for Rebecca. I figured I had avoided all the bad stuff. And Rebecca and I both like it.

Then a few months ago I started getting some very sensitive teeth. I’ve always had very healthy teeth. Sure, a few cavities, but overall very good. And I wondered what was going on. At my last dentist appt. they said they didn’t really see anything. Maybe the very beginning stages of receding gums. They thought it might be related to pg. But I knew it was more than that.

So recently I did some searching again, and read Donielle’s post about her search for natural toothpaste. And found the answer…at least what I think is the answer…glycerin. When companies make natural toothpaste and cut out the chemicals they turn to glycerin. Sadly glycerin coats your teeth and prevents it from remineralizing. So while I did cut out the chemicals, I also was not really helping my teeth. And I’m paying for it. And I DON’T want to ruin Rebecca’s teeth.

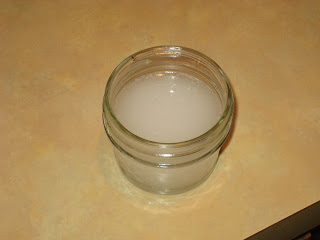
So of course I wanted to fix the problem asap. But if I can’t use regular fluoride toothpaste and I can’t buy a decent natural toothpaste, then what? I make my own 🙂  Over the last few days I’ve just been brushing with baking soda and water. It’s not a good long term solution since it can be harsh on your teeth. But I thought it was a good temporary solution to get the gylcerin off my teeth and avoid bad stuff. And today I made my first batch of homemade toothpaste. I looked at Donielle’s recipe and did some searching. I wanted something that was effective and safe for Rebecca (since she doesn’t spit yet). I found an easy recipe (almost identical to Donielle’s) on Lusa Organics. It’s mostly just coconut oil. So it’s safe to swallow. And it really is so easy to make. It only takes a few minutes. I tried it this morning. It did have a little bit of a soapy aftertaste at first. But it went away quickly. And I think after using it a few days I won’t even notice it. I’ve heard that if you add baking soda that can help eliminate the soapy taste. I’ll probably try it both ways. And keep experimenting to get the flavor just right. But this is good enough for now. I’m so happy to have found a healthy alternative that will hopefully help restore the health of my teeth. My mouth already feels much cleaner after only a few days of cutting out my “natural” toothpaste. It was like there was always a film I couldn’t get off. Now I know why. I’m anxious for Rebecca to try the toothpaste. Hopefully she’ll do ok with it. I didn’t add any sweetener since I don’t have xylitol or stevia. And I’m not sure how I feel about either of them. I figure if we can manage without it’s better for us.

I’ll update again sometime after using this toothpaste for a while. Hopefully I’ll notice some big improvements.

I also wanted to give a little info about the dangers of fluoride and conventional toothpaste:

*Fluoride is a toxic substance. Check the label on your toothpaste…it gives warnings about being poisonous. Keep out of reach of children. Doesn’t sound like something I want in my mouth. “If the formulation contains fluoride ion higher than 1000 ppm, it can cause poison; and the fluoride ion can react with calcium ion and magnesium in the human body and cause low level calcium ion and magnesium ion in blood. In some cases it has caused heart and muscle problems. If a child were to take a big spoonful of this fluoride and get it down, it is a poison that could kill the child. That is why the government has finally decided to act on this long standing issue regarding fluoridation.”

*Fluoride can impact fertility. It can cause various problems with sperm.

*”Chronic exposure to fluoride has also been linked to thyroid and neurological disorders, hormonal imbalances, and heart disease.”

*It can cause cancer.

*It can change bone structure and strength.

*It can cause birth defects and perinatal deaths.

*It has not been proven effective in preventing cavities.

*It impairs the immune system.

*It inhibits the body from using key enzymes.

Personally I’d rather not use it. And I don’t want my children exposed to it either. We use a water filter to eliminate the fluoride from our water and use fluoride free toothpaste. Any little bit we can do helps. How about you? Are you ingesting too much fluoride?

**Edited 12/26/10 – So, I have not used my glycerin based toothpaste in about 2 weeks. And my teeth are feeling so much better!!! Almost all of the sensitivity is gone. The one tooth that was REALLY bad still has a tiny bit. But nowhere near what it was. I can now brush my teeth and eat without pain. I plan to make a 2nd batch of toothpaste this week trying it with baking soda and stevia. See how that turns out.

A couple of not so good things. First, I realized my water filter does NOT filter fluoride 🙁  So disappointed about that. I’ll have to do some searching to see what other filters I can find. It would be ideal to have a filter right on our sink instead of having to keep filling a container.

Second…I have not found a solution for Rebecca yet. She was not a fan of the homemade toothpaste (I’ll have to keep experimenting with the recipe and flavors). So I went the opposite direction and let her try some of the nasty normal kids toothpaste with sweeteners, etc. I don’t like it, but at least it has less glycerin. But she gagged on it, puked up her breakfast and cried. So a no go there. For now I’ve been only using a tiny amount of the glycerin based toothpaste. And we just bought her a special princess “rinse cup” so hopefully we can start trying that out this week. If she’s rinsing that will at least help a little. Hopefully we’ll find a solution soon.

**Edited 2/21/11 – I have made 2 versions of homemade toothpaste. One is just Dr. Bronner’s, coconut oil, water and peppermint oil. The other adds baking soda and stevia to that. Both work really well. I try not to use the baking soda version too often so I don’t damage my teeth. My tooth sensitivity is almost completely gone. I only notice it once in a great while on one tooth.

I also finally got Rebecca to stop using Burt’s Bees. We use Kids Spry Tooth Gel. Works well.

Homemade Toothpaste

2 tsp. Natural Liquid Soap (try unscented Dr. Bronner’s or similar)
4 Tbsp. Coconut Oil
1 Tbsp. Water
2 Tbsp. Xylitol (optional)
1/2 tsp. Stevia powder
10-20 drops Peppermint Essential Oil
5-10 drops Spearmint or Sweet Orange Essential Oil

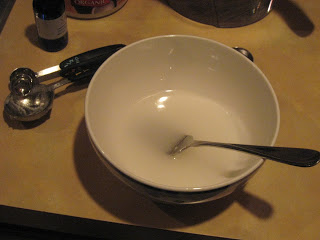
Boil a small pan of water. Measure out 1 Tbsp. of the water and stir into it Xylitol (optional). Stir to dissolve. Melt coconut oil and add to water mixture. Measure in soap and stevia and blend (a stick blender works well if you have one. Otherwise use your regular blender or whisk by hand like mad). Blend while the formula cools enough to stay combined. Add essential oils and transfer to a clean squeeze or pump bottle. Cool completely, shake well.

Peppermint Stick Buster Bars

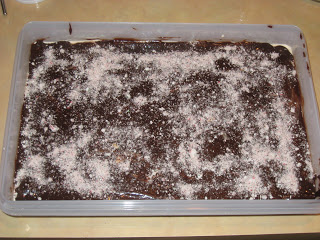
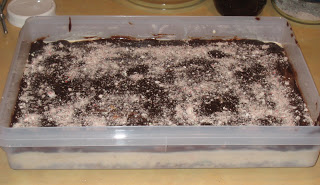
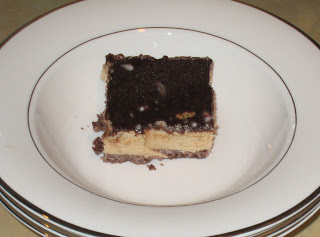
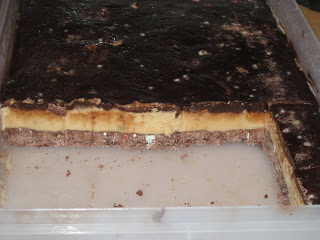
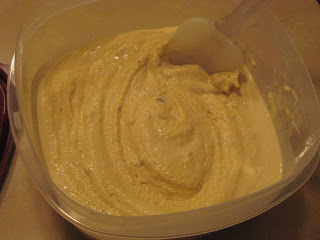
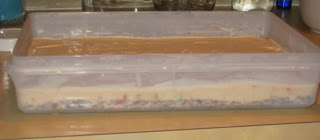
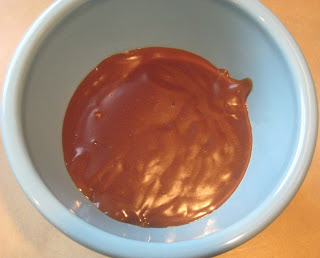
Every year we buy peppermint stick ice cream around Christmas. And eat it with homemade hot fudge. Mmmm. So a few weeks ago I decided to try making my own peppermint stick ice cream…since homemade ice cream is so much better 🙂  It turned out great. Then as I was thinking of desserts for our Christmas parties next week I thought it would be fun to make a version of buster bars with peppermint stick ice cream. I made it yesterday. Looks sooooo good!! Too bad I can’t taste it until next week 😛  But I’m sure it will be good. I used the idea of my MIL’s buster bars, but really the final product/ingredients are very different. I used organic cookies, homemade ice cream, and my recipe for chocolate sauce. So this is my healthy holiday version of buster bars. You have to make it in steps. But each step is pretty easy. I make the chocolate sauce a day ahead. Then the next day I can assemble the rest.

Edited 12/23/10 – These are awesome!!!!!!!!!

Peppermint Stick Buster Bars

Chocolate Sauce:

1 cup pure cane sugar
1/3 cup cocoa
2 Tbsp. flour or arrowroot powder (I tried 1 Tbsp. of each for this. Seemed to work well. Gets thick much faster and stays thicker. I do use whole wheat flour for this…works just fine.)
1/4 tsp. unrefined sea salt
1 cup boiling water
1 Tbsp. butter
3/4 tsp. vanilla

Peppermint Stick Ice Cream:

3 egg yolks
1/2 cup maple syrup
2 tsp. vanilla extract
2 tsp. peppermint extract
1 Tbsp. arrowroot powder
3 cups heavy cream (preferabley raw, not ultrapasteurized)
1/2 cup crushed candy canes (I use my food processor to crush them.)

Bars:

1 lb. chocolate cookies, crushed (I used organic creme filled cookies. I would like to try using my homemade chocolate graham crackers sometime. I use my food processor to crush them.)
1/2 cup butter, melted
1 recipe peppermint stick ice cream
1 recipe chocolate sauce
Crushed candy canes (optional) (I use  my food processor to crush them.)

————————————-
To make the chocolate sauce:

Blend sugar, cocoa, flour and salt in sauce pan. Turn on heat and add boiling water. Bring to a boil. Cook, stirring constantly, until thick, about 10-12 minutes (for just flour) or 5 min. (for arrowroot powder). Remove from heat. Stir in butter and vanilla. Store in refrigerator.

To make the ice cream:

Beat egg yolks and blend in remaining ingrdients (except candy canes) (I do this all by hand with a whisk in a large measuring cup). Pour into an ice cream maker and process according to instructions (about 20 min. in my Kitchen Aid ice cream maker attachment). Add candy canes during the last minute of processing.

To make the bars:
Mix cookies and melted butter (I also added a little bit of crushed candy canes to the crust.). Pat into 9×13 pan (I use a 9×13 tupperware)  Put in refrigerator to harden while you make the ice cream. Make ice cream. Immediately spread on top of crust. Let freeze until firm (at least several hours). Spread chocolate sauce over top. Sprinkle with candy cane pieces. Freeze.

Is It That Simple?

Lately I’ve been reading through the book of Matthew. Jesus tells a lot of parables to try to get the people to understand his message. Sometimes when I read it, it seems like he’s telling the people the same stuff over and over…and they just don’t get it. It seems so simple, yet so difficult. Jesus is just trying to get them to listen to him and follow God’s commands. But they have their own ideas, want to be in control and have a hard time accepting something different than what they know. I normally take each parable on its own…there is meaning to each one. But when I look at them as a whole Jesus is really saying the same things…believe in God, serve only Him, love each other. But there is still a lot of confusion…even for the disciples that walked and talked with Jesus daily.

This idea really struck me yesterday. Funny how life with a toddler can teach you a lot. Yesterday was one of those days where it seemed like Rebecca did not listen to/hear a single word I said. I could repeat 10 times in a row not to touch the ornaments on the tree, but she would not take her hands off. Or I would ask her to come to get her shoes on when it was time to go away…but she would not come. Or at gymnastics she was so distracted by the other kids that she could not pay attention to the teacher, me or what she should be doing. No matter how loudly I spoke, she didn’t even turn in my direction. It was like I wasn’t even there. I got frustrated because it seemed like such a simple thing…listen to what I’m saying and obey. Don’t worry about what the other kids are doing (running away, being silly, etc.), focus on what you are supposed to be doing. I know you might want to keep playing or touch things that are fascinating, but Mommy knows what’s best right now. And as I was reading my Bible it dawned on me that we often act like toddlers when it comes to our Christian life. We read the Bible, but it goes in one ear and out the other. We know God’s commands and yet we don’t always follow them. We worry so much about what other people are doing/what other people think that we don’t think about what God has called us to do. God speaks, but we drown him out and keep doing what we want to do. We have such a simple task…to listen and obey God. And yet we make it so difficult.

In one of my recent devotional emails it talked about obeying God. Here is what it said about obedience:

God smiles when we obey him wholeheartedly. That means doing whatever God asks without reservation or hesitation. You don’t procrastinate and say, “I’ll pray about it.” You do it without delay. Every parent knows that delayed obedience is really disobedience.
 God doesn’t owe you an explanation or reason for everything he asks you to do. Understanding can wait, but obedience can’t. Instant obedience will teach you more about God than a lifetime of Bible discussions. In fact, you will never understand some commands until you obey them first. Obedience unlocks understanding.

Often we try to offer God partial obedience. We want to pick and choose the commands we obey. We make a list of the commands we like and obey those while ignoring the ones we think are unreasonable, difficult, expensive, or unpopular. I’ll attend church but I won’t tithe. I’ll read my Bible but won’t forgive the person who hurt me. Yet partial obedience is disobedience.


Wholehearted obedience is done joyfully, with enthusiasm. The Bible says, “Obey him gladly.” (Psalm 100:2 LB)
 This is the attitude of David: “Just tell me what to do and I will do it, Lord. As long as I live I’ll wholeheartedly obey.” (Psalm 119:33 LB)


James, speaking to Christians, said, “We please God by what we do and not only by what we believe.” (James 2:24 CEV)


God’s Word is clear that you can’t earn your salvation. It comes only by grace, not your effort. But as a child of God you can bring pleasure to your heavenly Father through obedience. Any act of obedience is also an act of worship.


Why is obedience so pleasing to God? Because it proves you really love him. Jesus said, “If you love me, you will obey my commandments.” (John 14:15 TEV)
 
God wants us to listen and obey. Simple, right? Yes, but also not really. But we must try. As someone that struggles with OCD this is especially tough for me. To totally give up control and obey God. But I know that if I do God has great things planned and can fully use me. So I will try. Simple or not.

Beefy Enchilada Bake

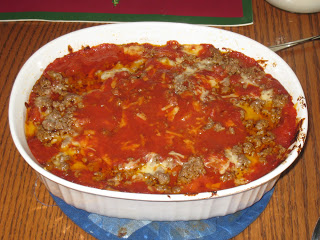
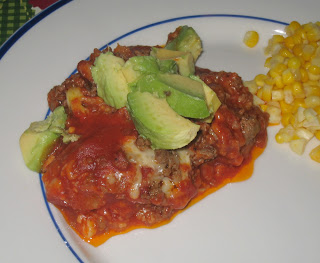
Last night for dinner I tried yet another Heavenly Homemaker recipe. I love Laura’s recipes because they are easy to make, healthy and use a few simple ingredients. This enchilada bake was no exception. Very easy and very good. I almost thought it sounded too simple…that it might be bland. But it was very good! All three of us loved it. And it was very easy to make. Laura didn’t mention what size pan to use, so I just used a 1 1/2 qt. casserole. And I scaled back on the sauce a bit…and had plenty. I don’t have much cheese in the house (our milk farm was out this week!), so I only used 1 cup. But it was still very good. I used up a few old corn tortillas that have been in the freezer for a while and some homemade whole wheat tortillas. Both worked well. This is also a great prep ahead meal. You can prep it in the morning and bake it for dinner. Or you can prep it and freeze it for later. I’ll have to keep this one in mind when I’m prepping freezer meals before baby #2 arrives 🙂  I served it with avocado and homemade salsa. Sour cream would be very good on it too.

Beefy Enchilada Bake

1 lb. ground hamburger meat
3 Tbsp. arrowroot powder or flour (I used 2 Tbsp.)
1/2 cup water (I used 1/4 cup)
1-2 tsp. chili powder (depending on your taste)
salt
3 cups tomato sauce (I used about 2 cups)
8 oz. shredded cheddar cheese
12 corn tortillas (I used 4 corn and 4 whole wheat. This is gluten free if you use just corn.)

Brown hamburger meat. Do not drain grease! Put cooked hamburger meat in separate bowl, salt and set aside. Sprinkle arrowroot powder into the grease and stir (if you do not have enough grease to absorb the arrowroot powder, add 2 Tbps. butter). Keep your burner on medium to high heat. Pour in water and “smoosh” the clumps of arrowroot powder/grease around while you stir the water in. This will thicken and make a gravy. Pour in tomato sauce and chili powder. Stir well until bubbly. This is now your enchilada sauce! (I added some salt and garlic powder to the sauce in addition to the chili powder.)

Cut corn tortillas into one inch strips. Dip tortilla strips in enchilada sauce and coat thoroughly. (I just ripped the tortillas into big chunks and threw them all in the pan and stirred. then I spooned out sauce and tortilla for each layer.) Cover bottom of baking dish with enchilada sauce coated tortilla strips. (I used a 1 1/2 qt. casserole with my quantities listed above. You might need a bigger pan for the full recipe.) Sprinkle 1/3 of the cooked ground beef over the tortillas…then a little cheese. Repeat layers twice more: enchilada sauce coated tortilla strips, meat, cheese. If you have any leftover enchilada sauce, drizzle it over the top.

Cover and bake at 350° for 30 – 40 minutes or until bubbly. (I baked it for about 45 min., then removed the cover and baked another 5 min.)

*I think adding some veggies right into the casserole layers would be good (corn, peppers, onions, etc.). Then it could be an all-in-one meal.

Creamy Chocolate Pudding

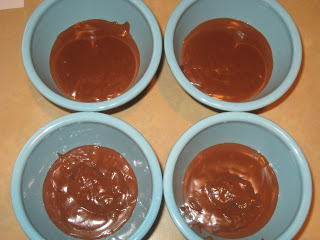
I am not a big fan of pudding. But I’ve been wanting to try making REAL pudding for a while. And now that we have lots of raw milk and Christmas is coming I figured it was a good time to try. I used the Heavenly Homemaker recipe. It turned out really well. So easy to make…and so fast. Rebecca liked helping mix everything and then watching me stir it on the stove. This is definitely not like the stuff you get out of box. This is rich and thick. I actually kind of like it. Not sure I could eat a large amount, but it is good. And I love how healthy it is…raw milk, fresh egg yolks, real butter. What a great treat. I’ll definitely be making this again. I need to try the vanilla and butterscotch too.
Creamy Chocolate Pudding
2 1/2 cups milk
3 egg yolks
2/3 cup rapadura or 1/2 cup real maple syrup (I used cane sugar)
1/4 cup cocoa powder
4 Tbsp. arrowroot powder
1/4 tsp. sea salt
3 Tbsp. butter
1 tsp. vanilla

In a medium saucepan, whisk together milk, egg yolks, rapadura or maple syrup, cocoa, arrowroot powder and salt. Cook over medium heat, stirring CONSTANTLY until pudding begins to thicken. Remove immediately from the heat, and continue to stir until pudding is creamy. Add butter and vanilla and continue to stir until mixed. Pour into serving dishes and serve warm, or chill for two hours and serve cold.

Whole Wheat Gingerbread Cookies

My goal this year is to make healthy holiday treats. I’ve never made gingerbread cookies before…and have never even had one! My mom never made them growing up because she doesn’t like them. I’m not a fan of ginger, so I didn’t know if I’d like them. But I wanted to try. I found a recipe for whole wheat cookies on englightened cooking. They were very easy to make. And they turned out really well. They are a bit on the gingery side for me, but I can still eat them. Rebecca really likes them. Justin does too. And they are not overly sweet.

For the deocrating I was trying to also go the healthy route. I had seen on Heavenly Homemakers how to make your own powdered sugar. But when it was time to make the icing my blender was dirty. So I tried using my food processor…didn’t work. So I had to just grab the regular, white, processed stuff. I’ll try making powdered sugar some other time. At least that’s the only bad thing on them. And really there isn’t much icing per cookie. I still used raw milk for the icing. And we decrated with chocolate covered raisins, yogurt covered raisins, gum drops, sprinkles and chocolate candies…all from the health food store. Rebecca enjoyed helping with these. But she only made it part way through decorating because she wanted to lick every piece of candy before putting it on the cookie :p  I guess she figured out how to get the treats.

Overall a great recipe. It would work well for making a gingerbread house too. The dough was really nice to work with. I only made a half recipe since it was my first try. And it made quite a few cookies. A full recipe would make a LOT.

Please note that my photos are unedited right now. So they may not be the best.

Whole Wheat Gingerbread Cookies

2/3 cup molasses (not robust)
2/3 cup packed dark brown sugar (I used organic brown cane sugar)
2 Tbsp. ground ginger
1 Tbsp. ground cinnamon
1 tsp. ground cardamom (optional, you can use allspice) (I skipped this)
1/2 tsp. ground cloves
2 tsp. baking soda
2 sticks (1 cup) unsalted butter, cut into tablespoon pieces
1 large egg, lightly beaten
3 and 3/4 cups white whole wheat flour (I used freshly ground hard winter wheat)
1/2 tsp. salt
1/4 cup all-purpose flour (I used my freshly ground wheat flour for this too)

Preheat oven to 325°F. Line 2 large cookie sheets with parchment paper.

Bring molasses, brown sugar, and spices to a boil in a 4- to 5-quart heavy saucepan over moderate heat, stirring occasionally, and remove from heat. Stir in baking soda (mixture will foam up), then stir in butter a few pieces at a time, letting each addition melt before adding next, until all butter is melted. Stir in the egg until combined; stir in white whole wheat flour and salt.

Transfer dough to a lightly floured surface and knead, dusting with as much of the 1/4 cup all-purpose flour as needed to prevent sticking, until soft and easy to handle, 30 seconds to 1 minute. Halve dough, then wrap 1 half in plastic wrap and keep at room temperature.

Roll out remaining dough to 1/4 inch thickness on a lightly floured board.

Cut out cookies with cutters; transfer to prepared sheets, arranging them about 1 inch apart.

Bake cookies in upper and lower thirds of oven; switching position of sheets halfway through baking, until edges are slightly darker, 11-13 minutes total (do not overbake—watch carefully!). Transfer cookies to racks. Cool completely. Repeat with remaining dough and scraps (re-roll once). Makes about 3 dozen medium cookies, Decorate, or eat straight up.

Microwaves…Why I Don’t Use Mine

Earlier this year as I was changing my diet/lifestyle and just getting started on my journey toward true health I read quite a bit about microwaves. Up until then I used my microwave a lot. Every day for lunch I would quick nuke something for Rebecca and myself. If I needed to defrost something, into the microwave it went. If I was in a rush and didn’t have time to bake something, the microwave to the rescue – casseroles, leftovers, baked potatoes, etc.

Fast forward to today…I haven’t touched my microwave in months. And honestly I want it out of my kitchen. It’s huge. And it takes up so much space above my stove. I’ve learned that warming leftovers on the stovetop is faster and healthier than using a microwave. Plus it makes the food taste a LOT better. So, what made me rethink the microwave? Here is some of the info I ran across while learning how to eat real food.

First there is the whole cancer issue. Do they/don’t they cause cancer? “Studies have been conducted on food that have been thawed, cooked and heated in microwaves. The results showed that many food molecules were converted into carcinogens. The glucoside and galactoside present in frozen foods gets converted into carcinogenic substance. Plant alkaloids in vegetables were converted into carcinogens. Milk and cereals heated in microwaves also had some of their amino acids converted into carcinogens.” Carcinogens in my food? No thanks. And even if there is still debate, I’d rather take my chances with avoiding it. If it was a definitive no I think we’d know that by now.

Personally I think the food just tastes worse. The texture, consistency, etc. changes. And food is heated unevenly. You can get hot spots. Take one bite and you think your food is ready. Take another and you burn your mouth. It can even be dangerous to heat liquids because they might have such uneven heating. There are some foods that can explode or catch fire in a microwave. Ever tried microwaving carrots? I’ve seen a few too many sparks from those 😛

What does it do to the food? A lot. It changes it completely. And basically takes away any bit of nutrition that was in your food. According to author Nina Plank “The microwave destroys antioxidants, enzymes, and vitamins dramatically more than conventional heat.” If all of the nutrients are gone from my food after heating it in the microwave what’s the point of eating it? If it doesn’t nourish my body I’m just eating empty, useless and potentially harmful calories. And making less room for good stuff. Here are a few specifics:

“Microwaves significantly decrease the nutritional value of the foods up to 60 to 90% of the normal level. There is reduction in vitamin B 12, that is necessary for red blood cell formation and building up nervous system. The flavonoid content of the food decreases by 97% when cooked in microwave oven. Flavonoids contain anti cancer, anti-inflammatory and anti-microbial properties. There is significant decrease in vitamin C, vitamin E, essential mineral and lipotropic factors in food. Glucosides, nitrilosides, alkaloids present in the vegetables are damaged significantly.”

“The radiations decrease the immune system of humans and regular eating of microwave cooked foods causes memory loss, emotional problems and decrease in IQ. Microwave cooked food also can lead to decrease in hormone production.”

There are so many microwaveable convenience foods available. Eating them is about as healthy as eating the box or bag they come in. What little nutrition was in it to begin with is gone after cooking it in the microwave. You can even “steam” vegetables in the microwaves now. But you’re left with a pile of bland, nutritionless, harmful food.
Aside from the direct effects on food itself, heating any kind of plastic (containers, plastic wrap, etc.) in the microwave is dangerous. The plastic leaches toxins (BPA, phthalates) into the food. Ever wonder why you can’t get that spaghetti sauce residue out of your tupperware? Because it has soaked into the plastic…while some of the plastic soaked into your food. Even my fertility specialist, who doesn’t give much advice on diet/lifestyle when it comes to fertility, gave a stern warning about never heating food in plastic and never heating plastic in general…don’t even wash it in the dishwasher. It can have serious effects on your fertility (low sperm count, altering hormones) and overall health. “The cancer causing compounds in the plastic containers and plastic wraps percolate into the food cooked in microwave oven. Bisphenol A is a chemical toxin present in plastic bottles that can percolate into foods and cause cancer, early puberty, obesity and diabetes”

I was quite disturbed this morning while reading Cooking Light to see their advice about microwaves while answering a reader’s question:

“Is it true that microwaving veggies removes all of their nutrients?”

“Any cooking method reduces nutrient levels in vegetables to some degree…the good news: Because microwaving uses less heat, less water and requires shorter cooking times, it has a less destructive effect on nutrients, particularly water-soluble, heat-sensitive vitamins like vitamin C.”

It’s sad that people are getting this kind of advice from a “healthy” magazine. I think this Q&A might have been the final appalling “health” advice in this magazine to warrant a review sometime. For now I can say I will not be renewing my subscription.

There is plenty more information out there about microwave use (for and against). There is a lot of information about the science behind it and what is happening to the food at the molecular level. Quite fascinating…and disturbing. What was once food is turned into something totally different at a structural level. It is a personal decision. But I have decided it is best for my family to avoid it as much as possible. Note to self…ask Justin to remove microwave and replace it with a regular stove hood 🙂  I grew up eating microwaved eggs…a nutrient powerhouse turned lifeless. I can’t undo the potential damage that was done. I can’t control how food is prepared when we are eating in restaurants (which is thankfully VERY rare) or other people’s homes. I can’t change the fact that my husband has to use a microwave to heat his lunch at work. But I can do my part to eliminate our use of/exposure to microwaves at home.

So, how about you? Do you rely heavily on your microwave for cooking? Is it just an eye sore in your kitchen that is collecting dust? Or are you microwave free?

If you’d like to read more here are a few good articles:

The Proven Dangers of Microwaves
Kelly the Kitchen Kop
The Healthy Home Economist
Health, Wealth and Happiness
The Dangers of Microwave Ovens
Dangers of Microwaves
Dangers of Microwave Cooking