Home » Archives for Mary | Just Take A Bite » Page 106

Author: Mary | Just Take A Bite

Mexican Layer Dip

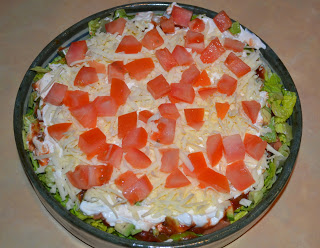
I’m sure everyone has their own version of “7 layer dip.” I got a recipe many years ago from my sister called Mexican 8 Layer Dip. I haven’t made it in a long time. But I made some this morning for our Super Bowl dinner tonight. I think I ended up with 7 layers. I’ll post it as I made it. I love this recipe/idea because you can basically add whatever you/your family likes. I was also happy to finally have a chance to use one of my new serving dishes I got for Christmas. It was perfect for this!

Mexican Layer Dip

2 cups shredded lettuce
1 can refried beans
1/2 cup salsa
8 oz. sour cream
1 avocado, diced or guacamole or avocado dip
1 cup shredded cheddar cheese
1/2 cup diced tomatoes
(other possible toppings – sliced olives, diced onion, taco sauce, sliced green onions, sliced mushrooms, diced green chiles, corn)

Layer on platter in order listed. Cover and chill 4-24 hours. Serve with tortilla chips, crackers or raw veggies.

Peanut Butter Ice Cream

Our winter cow share sadly comes to an end next week. So I figured I better squeeze in one more batch of ice cream while we have our wonderful raw cream.

I wanted to try a new flavor and decided on peanut butter. I love ice cream with peanut butter in it!

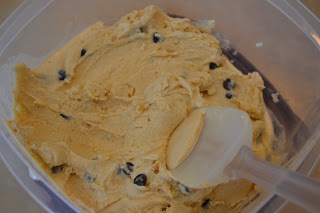
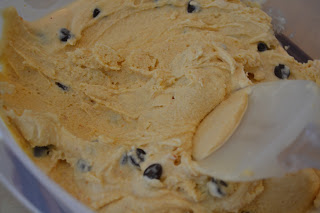
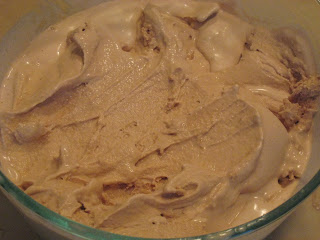
This turned out great. I added a few chocolate chips too. It’s almost like eating cookie dough in ice cream form. It even looks like it. Yum!!!

Peanut Butter Ice Cream

3 egg yolks (optional)
1/2 cup maple syrup, honey or cane sugar
1 Tbsp. vanilla extract
1 Tbsp. arrowroot
3 cups heavy cream, not ultrapasteurized
1/3 – 1/2 cup peanut butter (natural or homemade)
1/2 cup chocolate chips (optional)

Combine all of the ingredients (except chocolate chips) in a blender. Blend until well combined.

Pour the mixture into an ice cream maker and process according to instructions. During the last minute add the chocolate chips.

Transfer the ice cream to a freezer safe container. Freeze until firm.

Beefy Cream Cheese Salsa Dip (Taco Dip/Topping)

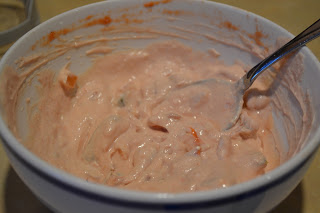
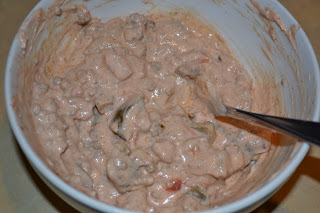
I wanted to try one of the dip recipes from Heavenly Homemakers last night. I was debating between the cream cheese salsa dip and the simple chip dip. When I looked at the recipes I realized I couldn’t do the chip dip because I don’t have any sour cream. But I did have leftover taco meat to use up. So I kind of combined the recipes/made it my own and made beefy cream cheese salsa dip. Or taco dip. It’s Laura’s cream cheese salsa dip with taco meat mixed in. Turned out great!!! A very easy and fun food. It only took a few minutes to make (since I already had the meat cooked, just had to warm it a little). And it’s filling enough (meat, cheese, veggies) to make it part of a main dish. You can use it as a dip with chips or veggies. Or even put it over rice or pasta. It’s also very healthy. I used homemade cream cheese, homemade salsa and taco meat with homemade taco seasoning. I didn’t actually measure anything. I just added what looked right. Note that the top picture is just the cream cheese salsa dip. The bottom picture has the meat added.

Beefy Cream Cheese Salsa Dip (Taco Dip/Topping)

1 (8 oz.) package cream cheese (or homemade)
1 ¼ cups salsa
1/2 – 1 lb. taco meat (adjust to your taste)
Tortilla chips, veggies, rice or pasta

Lay cream cheese out on counter for 1-2 hours to soften. Put softened cream cheese and salsa in a bowl and mix with beaters (I just used a spoon.) until thoroughly combined. Warm meat. Stir into cream cheese mix. Serve with tortilla chips (or fresh veggies or over rice or pasta).

Pancake and Sausage Muffins

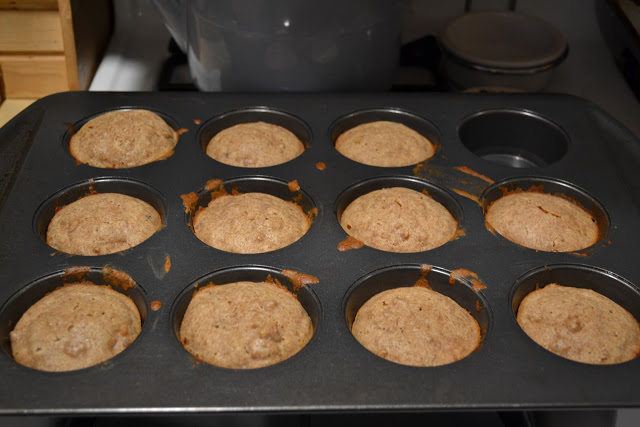
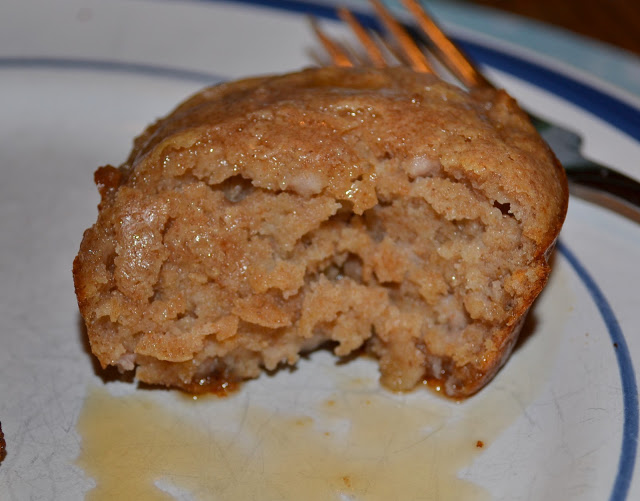
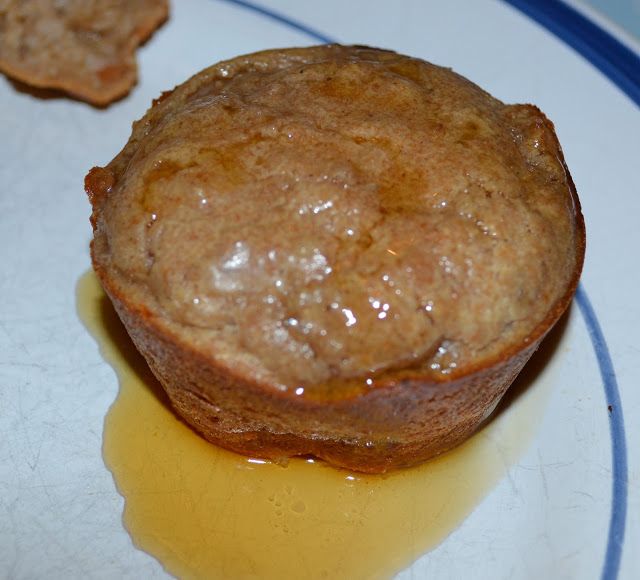
For dinner last night I tried another Heavenly Homemaker recipe (and there are more to come:). Ever since Laura posted her pancake and sausage muffin recipe I’ve wanted to try them. Pancakes and sausage are great on their own, but mixed together? Awesome! All three of us loved these. And they are very easy to make. Plus they make a lot so you can freeze some for a quick breakfast. I only made a half batch and got 11 muffins. I also doubled the amount of meat (used a 1/2 lb. for a half batch). We like ours meaty 🙂  Another great thing about them is that you can soak the grains. Always a plus for me. I didn’t have buttermilk on hand, so I used a combo of sour milk (milk + vinegar) and plain yogurt.

This recipe would also work well if you want to serve pancakes to a large group but don’t want to stand at the stove forever. They would be great without the meat. Just make the muffin part and then you have a ton of pancakes done at once 🙂

I think this will be one of our new favorites. Pancakes and sausage covered in butter and real maple syrup. Mmm 🙂  I’m still trying to figure out how to take decent pictures with our new camera. So bear with me.

Pancake and Sausage Muffins

2 cups whole wheat flour
1 tsp. baking powder
1/2 tsp. sea salt
1 1/2 cups milk or buttermilk (I used a little more than this.)
2 eggs
1/3 cup melted butter
1/2 pound cooked (and at least partially cooled) turkey sausage (or nine sausage links, cut in half) (I used pork breakfast sausage…1 lb. per full recipe)
Real grade B maple syrup

To soak grains:
If you want to soak your flour overnight to break down the phytates to aid in digestion, mix the flour and cultured buttermilk in a glass bowl, cover and let it sit on your countertop for 12 hours or so. The next morning, mix the remaining ingredients in and bake as directed below.

To make w/o soaking grains:
If you don’t soak the flour ahead of time: Mix dry ingredients together. Add milk or buttermilk, eggs and melted butter. Stir in browned turkey sausage.

Pour batter into 18 buttered muffin tins. (I don’t recommend paper muffin liners for this as it will stick.) (A full recipe for me would make 20 – 22 muffins). Bake at 350° for 15-20 minutes (mine took about 25 min.) or until the muffins are lightly browned. Serve with butter and maple syrup.

Nuts – How To Eat Them

Nuts, what can I say about nuts? I love them! And they can be part of a very healthy diet. Or they can cause your body major stress. There are a couple different issues with nuts. I’ll start with how they should be prepared.

Nuts of all kinds (walnuts, pecans, almonds, peanuts, cashews, etc.) should be soaked and dehydrated before you eat them. Why? It’s the same idea as I discussed about grains…why they need to be soaked. Like grains, nuts contain phytates, which makes them very hard on your digestive system and your whole body. By soaking and dehydrating nuts you neutralize the phytates. Then your body can absorb the nutrients. According to Nourishing Traditions, “nuts contain numerous enzyme inhibitors that can put a real strain on the digestive mechanism if consumed in excess. Nuts are easier to digest, and their nutrients more readily available, if they are first soaked…then dried.” Nuts do contain a lot of vitamins and minerals (the list includes calcium, iron, magnesium, phosphorus, potassium, selenium, B complex, carotenoids, vitamin C, copper, and zinc) and are a great source of protein. Nuts also have a very high fat content, anywhere from 60% to 80% of calories from fat. Plus they make a great on-the-go snack. Or even a great addition to salads or mixed in yogurt. They give you the crunch you’re looking for…especially if you’re cutting out other foods like grains. They can be used to make milk substitutes, make flour, used in baking, to make nut butters, etc. Nuts are recommended as part of healthy, Real Food diet. They are recommended as part of a healthy diet for pregnancy. And many Real Food activists are in favor of eating properly prepared nuts.

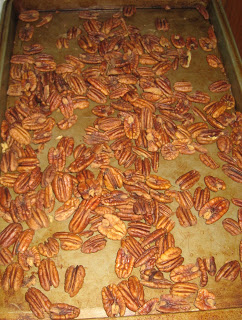
So, how do you make crispy nuts? It’s quite simple. You soak the nuts in a combo of water and unrefined sea salt (time and quantities vary for each kind of nut). Then drain and dehydrate. I always do a large batch and freeze them. They are great right out of the freezer. No need to thaw. And they will stay good much longer that way. Here are a few versions of crispy nuts/seeds:

Crispy peanuts
Crispy pecans
Crispy almonds
Crispy walnuts
Crispy cashews
Crispy pumpkin seeds

Are nuts, even properly prepared, a good option for everyone? Not necessarily. Nuts do contain a fair amount of omega-6 fatty acids. As long as you’re eating a whole food diet and no processed foods, this shouldn’t be a problem. But if you already get a lot of omega-6 in your diet you don’t want to add more. We need more omega-3 and way less omega-6. And for all of the omega-6 you intake you need to counteract it with more omega-3…which is harder to get. According to Nourishing Traditions, “a diet high in unsaturated fatty acids, especially polyunsaturated (omega-6…i.e. vegetable oils), can destroy the body’s supply of vitamin E and cause muscular lesions, brain lesions and degeneration of blood vessels. Care must be taken not to include a large amount of polyunsaturated oil in the diet without a corresponding increase in the intake of vitamin E.” Also, some people may not tolerate nuts well. Nuts are not recommended on diets like SCD. Check out Kat’s experience. And of course there is the obvious nut allergy. If you’re allergic to nuts, avoid them.

So, where do I stand? At this point I say all things in moderation. Don’t go overboard with nuts. But unless you notice a problem when you eat them, I say go for it. I can say without a doubt that nuts that are not properly prepared kill my gut. I now know why in high school and college I had some of the stomach problems I did…I ate peanuts every single day! Big handfuls. Yikes. I knew they  had an impact. But I ate them anyway. If I even eat a small amount now I notice. I do eat crispy nuts almost every day. And my daughter loves them too. Maybe some day I’ll experiment and go without for a while to see if I notice a difference. But for now I regularly enjoy crispy nuts as part of a healthy diet.

Cinnamon Vanilla Cookies

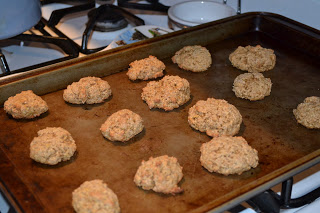
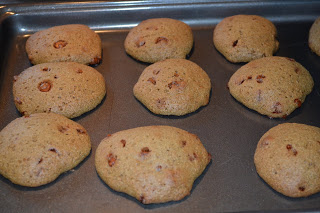
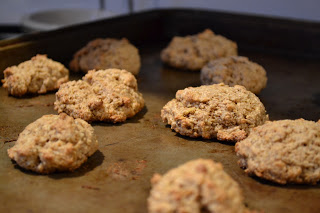
Yesterday Rebecca said she wanted to bake. And since we had been looking at her new Strawberry Shortcake coloring book she told me she wanted to make strawberry cookies and vanilla cookies. When she got up from her nap the first thing on her agenda was to make the cookies. I quickly started searching for strawberry cookie recipes. Then she said she just wanted vanilla. So I did a quick search for “vanilla cookies” with nothing really in mind. This is the first recipe I came across. It had no comments, no pictures, nothing. But it sounded very easy and quick. And that’s what we needed. I had no idea if these would turn out at all. There isn’t even any fat (butter/oil) added to the cookies. But I figured I’m an experienced baker and might be able to make it work. So I decided to just go for it.

I have to say this is the fastest cookie I’ve ever made. And Rebecca could help with all of it. I only made a half recipe since I thought it might be a flop. After mixing the dough there was not nearly enough moisture (as I expected with only 1 egg as the liquid). So I debated about what to add and decided to add a little milk. That gave a soft dough. I dropped them onto the cookie sheet and went for it. They’re not bad. Very mildly sweet. A soft cookie. Rebecca seemed to really like them. It would actually be a good cookie for a young child/toddler because it’s not too sweet or crispy. And it uses all good ingredients. A half batch made about 15 cookies. I think if I make them again (which is likely on those days where Rebecca decides she wants to bake all of a sudden…and this recipe doesn’t require any softened butter, special ingredients, planning ahead) I might try adding cinnamon. Or some kind of chips (chocolate or butterscotch).

I’ll post the recipe the way I made it…using whole wheat flour and adding milk. I also adjusted the sugar since my brown sugar is like one big block. So I had to use regular cane sugar. Overall a decent cookie. Great recipe for baking with young kids. And Rebecca got her “vanilla cookies.” 🙂  She seemed very satisfied with what we came up with.

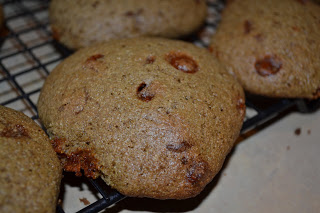
**Edited 9/4/11 – I made a batch of cinnamon vanilla cookies yesterday. They turned out great! I added cinnamon to the dough. And mixed in cinnamon chips. The cinnamon really improves the taste of these cookies. I bet they would be really good with a little cinnamon glaze. Then they would be triple cinnamon cookies. Maybe we’ll try that next time. I made a double batch this time and made the cookies a little bigger. I got 20 good sized cookies. I’ll update the recipe.

Cinnamon Vanilla Cookies
makes 10 cookies

3/4 cups whole wheat flour
3/8 cups sucanat
1/4 tsp. baking soda
1/4 tsp. salt
1 tsp. vanilla extract
1 egg
1/8 – 1/4 cup milk (enough to moisten dough)
2 tsp. cinnamon
1/2 cup cinnamon chips

Mix all ingredients (except chips) in one bowl (I just mixed it with a wooden spoon). Stir in cinnamon chips. Drop by spoonfuls onto ungreased cookie sheet and bake at 425 degrees for 8-10 minutes (I did 8 min.).

Phytates…What Are They And What To Do About Them

One of the things that intrigued me and confused me the most when starting my Real Food journey was the idea of soaking grains. You mean I’m supposed to get my flour wet before using it? As someone that loves to bake that just didn’t make sense to me. And when I first heard about it I kind of ignored the idea. But as I gradually read more and more I thought there might be something to it. So I did some research to find out why. And I gave it a try.

Turns out there is actually a good reason to soak or sprout grains. A little thing called phytates. Grains contain anti-nutrients to make them difficult to digest and compounds that prevent active enzyme activity in your digestive system. This puts stress on your pancreas. In the unsoaked/unsprouted state grains contain phytates which makes the minerals in the grains unavailable to us. This can lead to mineral deficiencies and poor bone density. Both enzyme inhibitors and phytic acid can be neutralized by soaking grains. This makes them easier to digest and makes the nutrients available to your body. This process also begins to pre-digest the grains, breaking down complex starches and tannins that can irritate your stomach, as well as beginning to break down proteins like gluten.

So without soaking or sprouting grains they are very difficult to digest and are actually harmful to your body. The best thing to do…soak, sprout or use sourdough.

So, how exactly do you do that? It’s not as hard as you’d think. And honestly I think that soaking often makes baking easier! It breaks up the process into very short steps that only take a few minutes here and there. The main thing you have to be willing to do…PLAN AHEAD. Soaking does take time. So if you want soaked pancakes in the morning, you have to plan and get them started the night before.

The basic idea is that you use cultured dairy or another acid medium to soak the grains for at least 7 hours before using them. The easiest way to start is by using recipes that give exact instructions on what ingredients to use, how much and how long. Once you get the hang of it you can start experimenting.

Soaking can be used on all kinds of grains…wheat, oats, rice, etc. It is also used for lentils, beans and nuts.

What if I don’t always have time to soak my flour before baking or what if I forgot to plan ahead? An alternative is to sprout the wheat. I often do this so that I have flour on hand for those times I want to do some last minute baking. You sprout the wheat berries, dry them and grind them into flour. Then the phytates are already neutralized and you don’t have to soak it. I have directions on how to sprout wheat berries (or any other grains) here. You will need a grain mill to do this. I have an attachment for my stand mixer. It works well, but you can only do small batches of flour. Some day I’d like to get a real grain mill. The other good thing about grinding your own wheat (sprouted or not)…it’s cheap! Wheat berries are definitely cheaper than whole wheat flour. I just got 25 lbs. of berries for $22.

A third option for dealing with phytates…sourdough. Sourdough also breaks down the phytates and makes the grains easier to digest. Sourdough can be used for all kinds of baked goods. Here’s how I made my sourdough starter. It’s actually very easy. And it’s been going strong ever since.

Finally, phytates are not limited to grains. They are also found in nuts and seeds. To reduce the phytates in nuts and seeds you have to soak and dry them. A simple process. And you can do a huge batch at once and store them in the freezer so you have them on hand. A healthy, easy snack. The method is the same for all nuts, just some variations on soaking time and salt amounts. I have made peanuts, almonds, pecans, walnuts and cashews. All very good.

Well, my little peanut is calling me from her bed…and she’s probably soaked 😛  So I’ll call this good for today. I hope it sheds a little light on the idea behind soaking and sprouting. It really is good for your tummy and your health.

Muesli

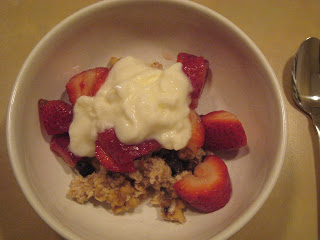
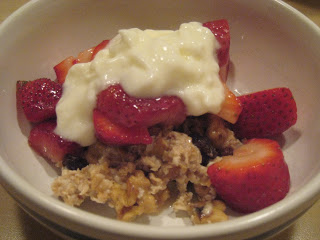
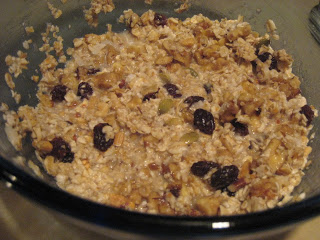
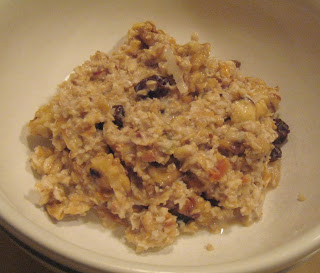
In my search through my Barefoot Contessa cookbooks this month I came across a recipe for muesli that sounded good and easy. I’m always looking for new breakfast ideas to give us a little variety. This was super easy and really good. It’s a lot like granola, just softer. And I LOVE granola. Unfortunately oats don’t agree with my tummy too well. So I know I have to limit my intake. But this is a tasty breakfast option once in a while. I love how easy it is too. I’ve seen other versions of muesli that are soaked a lot longer…and probably better for you because of that. So I’ll have to try other recipes sometime. But this was a great first attempt at muesli. And I actually used one of my cookbooks this month 🙂  The recipe calls for strawberries and raspberries. I just used strawberries. Any berry would work really well. I also added a few extra raisins. If you are trying to find breakfast options to replace cold cereal this is a good one. And it’s pretty versatile. You could add in other things besides nuts and raisins, like coconut and seeds.

Muesli with Red Berries
serves 2 (fairly small servings)

1/3 cup quick cooking oatmeal
1 1/2 Tbsp. coarsely chopped toasted hazelnuts (I used crispy walnuts)
2 Tbsp. granola with raisins (I used homemade)
pinch of salt
1/3 cup hottest tap water
1 Tbsp. honey (raw is best)
4 large ripe strawberries, hulled and sliced
6 to 8 fresh raspberries
2 tsp. cane sugar
greek yogurt (I used full fat plain yogurt)

Mix oatmeal, nuts, granola and salt in a bowl. Pour the water and honey over the mixture, stir and set aside to soak for 12 – 15 minutes.

Meanwhile, toss the berries and sugar in a bowl and allow to macerate. (If you want to cut back on sugar you could skip this step and just use fresh fruit. It would still taste very good.)

When ready to eat, divide the muesli between 2 bowls. Top with berries and yogurt.

Baked Onion Rings

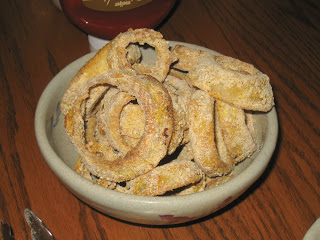
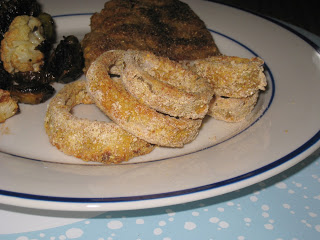
I haven’t made onion rings in a long time, but they sounded good this week. So I pulled out my old recipe. It’s fairly simple and pretty good. I think I got the recipe from an IBS message board years ago. So it’s not a fattening version of onion rings. The next time I make onion rings I want to try another recipe and actually fry them. But this one works well. Even Rebecca ate some after some initial hesitation 🙂  I don’t have any actual amounts for the ingredients on my recipe. But I’ll try to come up with some approximations.

Onion Rings

1 large onion
1 cup whole wheat flour
2 eggs
1 cup cornmeal
1/2 cup bread crumbs
salt and pepper to taste

Slice onion in 1/4″ – 1/2″ thick rings. Place flour in shallow bowl. Beat eggs in a shallow bowl. Mix cornmeal and bread crumbs in shallow bowl. Dip onions in flour, then egg (be sure it’s fully coated), then cornmeal (make more cornmeal mixture if it gets too clumpy or is running out). Place on cookie sheet. Spray/mist with olive oil. Sprinkle with salt and pepper to taste. Bake at 400 degrees for 25 – 30 minutes. Serve plain or with ketchup.

Chocolate Ice Cream…Homemade Frosty

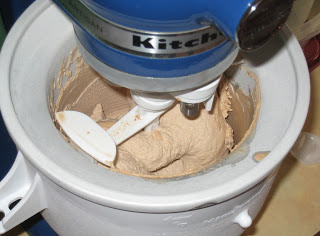
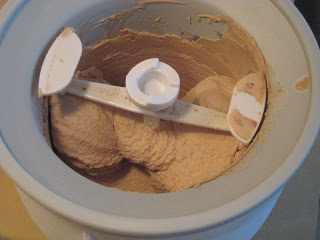
I’ve made homemade ice cream quite a few times now. Especially now that we have raw milk and good cream (that I don’t have to pay an arm and a leg for). But I’ve never tried chocolate. So yesterday afternoon I experimented and came up with a recipe. I didn’t make a huge batch since I didn’t have a full 3 cups of cream, but Rebecca really wanted to make ice cream 😛  So we used what we had. I’ll try to adjust quantities for a full recipe. It turned out really well! I intentionally didn’t make it super chocolatey. It’s kind of a light chocolate…and tastes just like a Wendy’s Frosty 🙂  All 3 of us love it. I used cocoa and chocolate extract for the chocolate flavor. You could probably use carob in place of the cocoa…and adjust the extract to get the flavor you like.

Chocolate Ice Cream (Healthy Frosty)

3 egg yolks
1/2 cup maple syrup
2 tsp. vanilla extract
1 – 2 Tbsp. cocoa or carob powder
2 tsp. chocolate extract (adjust to your taste)
1 Tbsp. arrowroot
3 cups heavy cream, not ultrapasteurized, preferably raw

Beat egg yolks in 4 cup measuring cup. Mix in arrowroot until lumps are gone. Whisk in remaining ingrdients. Pour into an ice cream maker and process according to instructions (about 15 – 20 min. in my Kitchen Aid ice cream maker attachment). Transfer to a shallow plastic container, cover and store in freezer.

This is awesome served immediately. It’s like soft serve/like a Frosty. It’s great after it’s been in the freezer for a while too.