Home » Archives for Mary | Just Take A Bite » Page 105

Author: Mary | Just Take A Bite

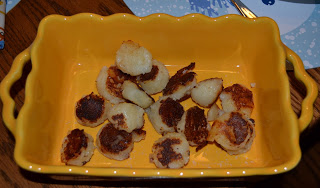
Tater Tots

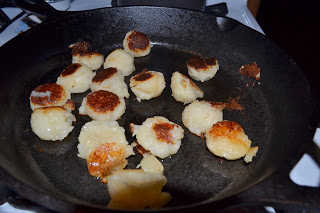
I also made tater tots for dinner last night. It’s a recipe I saw recently on Heavenly Homemakers. I grew up eating tater tots a lot. But I haven’t had one in many many years. And this sounded like a fun finger food to go with our chicken nuggets. These are pretty simple to make. And they turned out quite well. We all liked them (I tried to be good and only had 2…since I’m avoiding potatoes…but I at least had to taste them). This was the first time I used palm shortening for frying. That worked really well! Gives a great flavor. I’ll have to do that more often. My potatoes didn’t really shred in the food processor. It was mostly mush. But it still worked just fine. Next time I’ll try to cook the potatoes sooner so that I can refrigerate them for a while before shredding. I made a pretty big batch. We ate some with dinner, and I froze the rest. I’ll be serving some for dinner tonight. I’ll see how it goes to bake them in the oven after being frozen. Overall a great recipe. And yet another healthy convenience food to have on hand. I love that my daughter has never had a chicken nugget or tater tot out of a box. She doesn’t even know they exist 🙂  If it comes from the freezer…it’s still homemade. And you can serve them with fermented ketchup to make them even healthier!
 

Homemade Tater Tots

3-4 medium russett potatoes (I used our red skin potatoes from our garden)
Oil of choice (Palm Shortening or Expeller Pressed Coconut Oil)
Sea Salt

First, scrub and bake your potatoes. Allow the potatoes to cool. Peel the potatoes.

Chop the peeled and cooled potatoes and throw them in a food processor to shred finely. I’d recommend using the “pulse” setting if you have one.

Next, heat some oil in a skillet (medium heat). You just need enough oil to barely cover the bottom of the skillet.

Use a small cookie scoop and pack in the shredded potatoes to make a nice firm ball. (If you don’t really pack it in, the potatoes will just fall apart when you place the ball in the skillet.) Gently set the ball into the skillet. Allow it to cook thoroughly on one side before carefully turning it over. Press the ball down slightly when you turn it. Each side takes about 3-4 minutes to cook.

Remove tater tots once they look nice and crispy and golden brown. Sprinkle with desired amount of sea salt.

Serve right away or cool and freeze on baking pan.
Chicken Nuggets

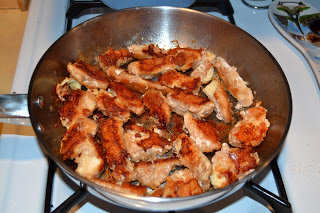
Last night for dinner I made chicken nuggets. This isn’t a new recipe for me. And I’ve actually posted this recipe before as fried chicken. But the last time I made chicken nuggets I made them this way (instead of just a simple breading and baking them) and we all LOVED them. And it’s super easy. So I thought I’d repost as chicken nuggets. I served them with homemade honey mustard. SOOOO good. The next time I make these I might try to make a really big batch and freeze a bunch so I have frozen chicken nuggets on hand. Healthy convenience food.

Homemade Chicken Nuggets

boneless skinless chicken breasts or tenders, cut into chunks of your size (can do nuggets or strips)
whole wheat flour
oil for frying (I use EVOO, lard and/or palm shortening)

Heat enough oil in large pan to cover bottom over medium heat. Coat chicken pieces in flour. Place in hot oil. Brown on one side (about 5 minutes). Flip over, reduce heat to low and cover. Cook for 50 minutes. Remove cover. Flip over and cook over medium heat for a couple minutes to crisp other side of nuggets.

Cat in the Hat Cake

My nephew just turned 3. This year he wanted a Cat in the Hat party. This is the cake I made for it. Turned out pretty well I think. A 12″ white cake with sprinkles. It was fun to get to be creative and do some drawing. And I used healthier ingredients in the cake. Mostly organic/natural. Happy Birthday, Carson!

Whole Wheat Beer Bread

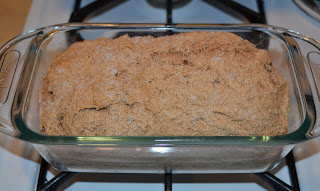
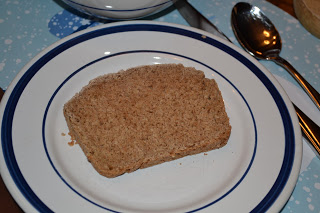
One of the first recipes I “posted” on my blog was beer bread. I guess I never actually posted the recipe…just a picture and a link to my cousin’s wife’s blog. Her blog is now by invite only, so that doesn’t do much good 😛  I haven’t made this bread in a long time because it uses white self rising flour. Not something I use anymore. Then the other day I thought it sounded good and wondered if I could modify it to make it healthier. So last night I gave it a shot. And it worked!! All 3 of us loved it. It is one of the easiest breads you can make. Rebecca practically made it by herself…and she’s 2. So glad I gave it a try. It tastes great and it’s nice to have a recipe on hand for bread that you can throw together in 5 minutes. I’ll post both versions of the recipe. I’ll definitely be using the whole wheat version from now on. The dough is very sticky and takes a little work to stir. I also sprinkle some sea salt on top of the dough before I bake it. I love that little salty bite of the crust. Any kind of beer will do…but it will alter the flavor. When we have beer in the house it’s usually a dark beer. We’ve also used Woodchuck cider before. That was good. I have yet to attempt making it with root beer. Not sure if that works or not. And maybe at some point I’ll experiment with soaking the dough or using sourdough. But for now at least I have a whole wheat version.

Whole Wheat Beer Bread

(white flour/non-NT version)
3 cups self-rising flour
3 Tbsp. sugar
1 bottle/can any flavor beer
——————————————
(whole wheat version…the one I use)
3 cups whole wheat flour
1 1/2 tsp. salt
4 1/2 tsp. aluminum free baking powder
3 Tbsp. cane sugar or sucanat
1 bottle/can any flavor beer

Mix all ingredients until dough forms. Add dough to a buttered medium loaf pan. Bake for 40-45 min. at 350 degrees until golden brown and baked through.

Crispy Hazel Nuts

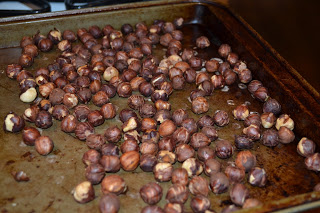
In addition to macadamia nuts I soaked/dried some hazel nuts. I’m not sure I’ve ever even had a hazel nut. But I wanted to try it. Same process. And another yummy snack 🙂  I’m having fun experimenting with different nuts (since I LOVE nuts). Maybe next I’ll try Brazil. I hear those are quite healthy too.

Crispy Hazel Nuts

4 cups of raw nuts
1 Tbsp. unrefined sea salt
filtered water

Mix nuts with salt and water and leave in a warm place for at least 7 hours or overnight (I generally soak them for 24 hours.). Drain. Spread nuts on baking pan. Place in oven on lowest setting (150 degrees) for 12 to 24 hours (or in a dehydrator), stirring once in a while, until completely dry and crisp. Store in an airtight container. The nuts will keep longer in the refrigerator or freezer.

Crispy Macadamia Nuts

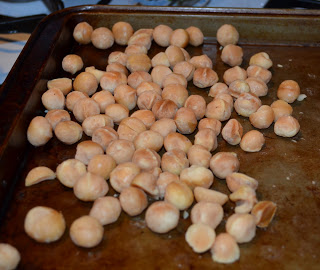
This week I tried soaking a couple new kinds of nuts. One was macadamia. After doing my post on nuts and reading about how healthy they are I wanted to try some right away. I don’t think I’ve eaten one in years. Boy are they good! I only did a small batch to try them out. I’ll have to stock up on more for sure. Same process as most nuts. Soak with water and salt. Dry.

Crispy Macadamia Nuts

4 cups raw macadamia nuts
1 Tbsp. unrefined sea salt
filtered water

Mix nuts with salt and water and leave in a warm place for at least 7 hours or overnight (I generally soak them for 24 hours.). Drain. Spread nuts on baking pan. Place in oven on lowest setting (150 degrees) for 12 to 24 hours (or in a dehydrator), stirring once in a while, until completely dry and crisp. The macadamia nuts absorb a lot of water. It took over 24 hours to get mine completely dry. Store in an airtight container in the refrigerator or freezer. Macadamia nuts don’t last long at room temp.

Grain Free Muesli

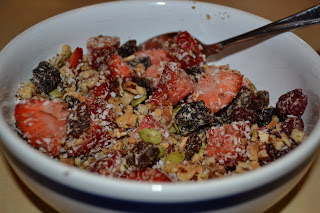
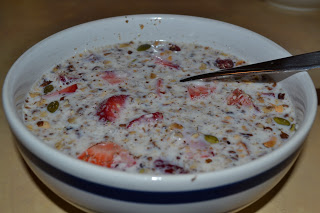
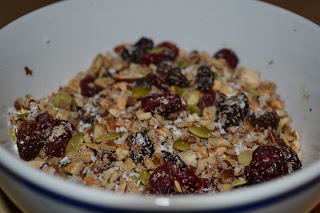
I recently made muesli for the first time. And it was really good! But my tummy doesn’t handle oats very well. So I can’t eat that. Then I came across this recipe on Gluten Free Diva for a grain free version of muesli. I tried it this morning. Awesome!! It’s basically the same ingredients I use for my grain free granola, except you don’t add fat/sugar and bake it. So it’s super easy to make. Only takes a few minutes. Plus this uses fresh fruit. You can add whatever you like to this recipe…as long as it’s not grains 🙂  And you can make a big batch to have on hand and just add fresh fruit when you eat it. It will freeze very well. This is a great option for quick breakfasts, summer breakfasts (when you don’t want anything hot) or if you’re a long time cereal lover (like me:) but don’t want to eat that junk anymore. This was the closest thing I’ve had to a bowl of cereal in a LONG time (I think I might be going on a year now!). What a treat! And I don’t have to worry about it killing my stomach. Love it. I didn’t actually measure anything. I just added what looked good. Adjust to your taste. I’ll post the original recipe (for 1 serving) with some of my adjustments in ().

Grain Free Muesli

3 strips of dried banana AND/OR 3 – 6 chopped dates (I used prunes)
one small handful dark raisins (I used golden raisins)
7 raw almonds, chopped (I used a combo of crispy almonds, crispy pecans and crispy walnuts)
7 raw pecan halves, chopped
handful raw sunflower seeds (not roasted or salted) (I used crispy pumpkin seeds)
1 – 2 tablespoons grated unsweeted coconut
one chopped apple (I gave Justin some apple chunks in his. I left them out of mine.)
about 6 – 8 blackberries or the berry of your choice (I used strawberries. Blueberries would be very good…great option in the summer.)

Mix all ingredients (except fresh fruit). Store in a closed container (freeze for long term storage or keep at room temp for shorter term). When ready to serve mix in fresh fruit. Top with milk or stir into yogurt.

Goulash

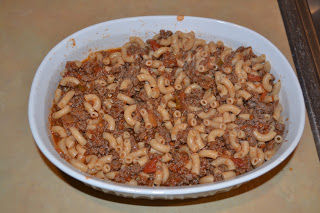
Last night I made an old classic for dinner. It’s one of those recipes that’s not really much of a recipe…just beef, sauce and noodles. But it’s my mom’s recipe for goulash. We ate this a lot growing up. I haven’t made it in a long time. But it’s always good and easy. I prepped it in the morning. Then at dinner time all I had to do was stick it in the oven (handy since I was going out for dinner and Justin was home/feeding Rebecca). I took the picture before I actually baked the casserole.

Goulash

2 cups elbow noodles, cooked and drained
1 lb. ground beef, cooked and drained
1 jar spaghetti sauce (preferably homemade)
salt to taste
garlic powder to taste
grated parmesan cheese for serving

Mix noodles, beef, sauce and seasoning in 2 qt. casserole. Bake at 350 degrees for 45 min. – 1 hr. Served topped with parmesan cheese.

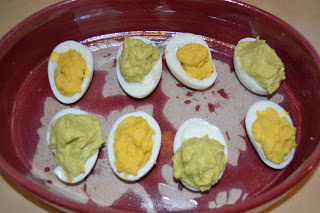
Green and Yellow Deviled Eggs (Packers Eggs)

Since my husband is from WI and is a huge GB Packers fan…and they were in (and won!) the Super Bowl  yesterday I wanted to make something fun for the occasion. I decided to make yellow and green deviled eggs. I made regular deviled eggs for the yellow. And I added avocado for green. Again, I didn’t really measure anything. I’ll try to give a rough estimate. I only made 4 eggs total. You can increase the recipe for a large group. I ate leftovers for breakfast this morning. Yum! Deviled eggs are good any time of day 🙂

Green Deviled Eggs

2 hardboiled eggs
1/4 – 1/2 ripe avocado
1 Tbsp. mayo (preferable homemade)
salt to taste

Yellow Deviled Eggs

2 hardboiled eggs
2 Tbsp. mayo (preferably homemade)
1 – 2 tsp. mustard
salt to taste

Split eggs in half. Put whites in a serving dish. Put yolks in a food processor (I use a mini processor for such small quantities). Process for a few seconds. Add remaining ingredients. Blend. Adjust to taste. Fill egg whites with yolk mixture. Chill.

*Note – the green eggs will turn color after a while because of the avocado. So don’t make them too far in advance.

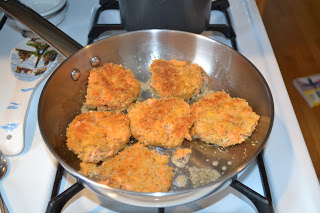
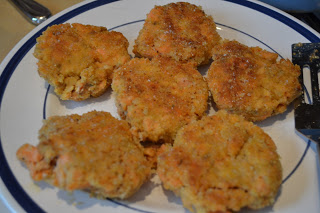
Grain Free Salmon Cakes

Yesterday I wanted something light for lunch since I knew we’d have a bigger, snacky dinner. And I’m trying to get more seafood into my diet right now. So I decided to make salmon cakes. I’ve made them before…but a recipe that takes some extra work and prep ahead. I wanted something easy. So I threw these together using what I had on hand. Simple, quick, healthy. And delicious!! All 3 of us liked them. And I’m excited to eat the leftovers. I cooked a couple salmon filets to use in these. You could used canned salmon. I didn’t measure anything. But I’ll try to give rough estimates of what I added.

My daughter LOVES these (and she can be picky about fish). So if you are trying to get your kids to eat more healthy seafood give these a try.

Salmon Cakes
makes ~ 7 cakes

2 (6 oz.) salmon filets, cooked OR 1 (14 oz.) can salmon
1 egg (optional)
1/4 cup mayo (preferably homemade)
1/2 – 1 tsp. Old Bay seasoning
1/2 – 1 tsp. sea salt

1/4 cup – 1/2 cup almond flour and/or coconut flour

Crumble salmon in a bowl. Add egg, mayo and seasoning. Mix well. Form into balls. Roll in flour and flatten slightly. At this point you can cover and refrigerate them (helps to firm them up/hold them together before cooking. and allows you to prep them ahead) or cook them immediately.

To cook, heat a large skillet and add butter, coconut oil, palm shortening and/or lard. Cook salmon cakes in oil/butter for about 5-7 min. per side.

Serve plain or with tartar sauce (homemade mayo mixed with a little sweet pickle relish).