Home » Archives for Mary | Just Take A Bite » Page 114

Author: Mary | Just Take A Bite

Sprouted Beans (and grains) – Colander Method

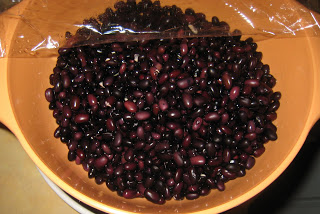
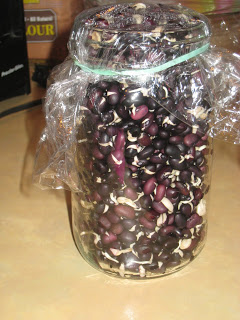
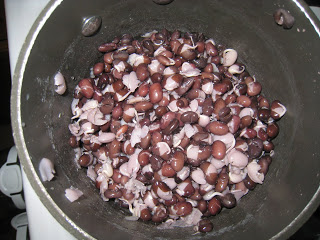
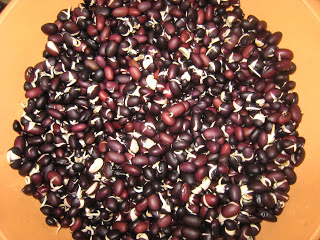
I am making a black bean soup for dinner tonight. Originally I had planned to make beans like I always do…soak and then toss them in the crockpot with the rest of the ingredients. But then I thought this might be a good opportunity to make my first attempt at sprouting. I found an easy colander method on The Nourishing Gourmet. It was so simple! And now we have a huge jar of sprouted black beans in the fridge. I was actually quite surprised how quickly they started sprouting. I cooked some of them this morning to add to our soup. They taste great (even at 4:30 am :)! And they only take about 20 min. to cook once they’re sprouted. I decided to cook them separately so that I could rinse them afterward to make sure I got any extra gas-producing stuff off 😛  I’m anxious to see if Rebecca and I tolerate them better this way. Rebecca had a few already with lunch. She gobbled them up like always. It’ll be fun to try sprouting other beans and get a stock in my fridge. And at some point to try sprouting other things, like grains. This method can be used with any legume or grain as long as it’s large enough to not go through the colaner. For smaller things I’ll need to get a sprouting jar/screen. You can use any amount of beans you like. I did a fairly big batch of black beans. Just beware that the larger the pile the longer it takes to dry.

Colander Sprouting (legumes or grains)

Equipment:
large bowl
colander
small kitchen towel (I just used a loose covering of plastic wrap)
plate

Place the legume or grain you wish to sprout in a large bowl and cover with water. Leave to soak 8-12 hours (overnight works well). Then drain in your colander, and rinse very well (the water should run clear). Drain, and then place on your plate-to catch any drips-and cover with a kitchen towel. Now all you have to do is rinse and drain every 8-12 hours (think morning and evening). When I rinse, I gently shake the colander a bit to make sure that all of the beans are getting wet.
And then it’s just a matter of waiting until you see little sprouts. For both legumes and grains, you generally aren’t wanting the sprouts to get really big, as they taste better when the sprouts are small. So when you see the sprouts starting to shoot out, rinse one more time, and leave for another 8-12 hours to drain thoroughly (they should be dry to the touch) (mine took about 2 1/2 days for the whole process…soak to dry). Then place in a mason jar or other container to keep in the fridge. And you are done!

You can cook them the same way you normally cook beans (simmering water). But they cook much faster. My black beans took about 20 min.

Soaked Granola

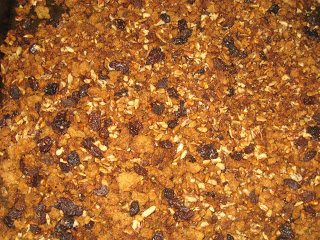
Last week I made a batch of soaked oats and crispy pecans. Then I used them to make homemade granola. I used my usual granola recipe. But I added coconut oil instead of another kind of fat. Maybe next time I’ll try butter too. This turned out really well. Although I did let it bake a bit longer than I would have liked since I was busy with other things. It is crunchier than the granola you make with unsoaked oats. But I like that. I’ll be making my granola like this from now on to make it easier on my tummy. I’ll repost my granola recipe here.

Mary’s Soaked Granola
*this can be gluten free if you don’t use wheat bran and if you tolerate/use GF oats

12 cups soaked and dried rolled oats
2 cups dried fruit (any mix or just raisins)
2 tsp. cinnamon

optional mix ins:
1 1/2 cups ground flax seed
1 1/2 cups wheat bran or wheat germ
1 cup chopped nuts (crispy pecans, walnuts or almondsl)
1 cup seeds (pumpkin, sesame, sunflower, etc.)
1 cup coconut (sweetened or unsweetened…whatever you prefer, I used organic unsweetened)
1/2 cup honey
1/2 cup maple syrup
1/2 cup coconut oil, melted butter or EVOO (or a combo)

Heat oven to 325. Mix all dry ingredients, except fruit and crispy nuts, in one or two large bowls (however it is easiest to stir). (Mix a small amount of safe (oats, coconut, wheat bran, coconut, rasisins), dry ingredients in a smaller bowl for a toddler to mix and eat:) Pour honey, syrup and oil over dry ingredients. Mix well. Spread granola onto baking sheets (you can do all of it on 2 sheets…they’ll be very full. Or you can do it on 4 sheets (2 batches) so that it bakes a little more evenly. You may have to cut the baking time down a bit if you do it on 4 pans). Bake 20 – 30 min., stirring 2 or 3 times throughout. Add fruit and nuts during the last 5 min. or after granola is done baking. Let cool. Store in sealed container or bag. Freezes well. I generally freeze it in gallon freezer bags then just take out a little at a time as we need it. It can even be eaten directly from the freezer. You can scale the recipe down if you don’t want to make a large batch. I make a ton and freeze it so that I don’t have to make it all the time.

Soaked Pot Roast

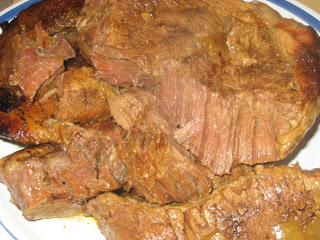
On Monday I made a roast to use up more of our Voogt beef since we’ll be getting a new batch soon. I found a soaking method in Nourishing Traditions to make the meat more tender/easier to digest. So I used that suggestion and then made my roast in the crockpot. I didn’t follow the actual pot roast recipe. I’ll just post the recipe for preparing the meat. I also didn’t have several days to soak my meat. But I think any amount of soaking helps. This turned out great! Yummy tender meat.

Soaked Pot Roast

3 lb. roast (I used a round bone roast)
1 quart buttermilk (I just used enough to cover the roast)
2 Tbsp. butter
2 Tbsp. EVOO

Using a needle or skewer (I used a knife) stick the meat all over. Place in a bowl or glass loaf pan (I used an 11×7 glass baking pan). Pour buttermilk over top. Cover. Allow to marinate in the refrigerator, turning occasionally, for several days.

Remove from the buttermilk and dry off meat with paper towels. In a pan brown on all sides in butter and oil.

At this point I put the meat in the crockpot with some carrots, potatoes and onions. I removed any extra fat from the pan and then deglazed it a bit with water. I added that water to the crockpot. The roast cooked for about 12 hours.

Crockpot Hawaiian Chicken

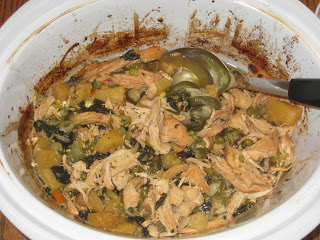
For lunch on Sunday I made crockpot Hawaiian chicken. I’ve made it before, but I guess I haven’t posted it. It’s a super simple recipe from A Year of Slowcooking. I modified it a bit this time to make it a little more like sweet and sour chicken. Either way it’s very good! And so easy to make. Just toss a few ingredients in, mix and turn it on. I usually serve it over rice. I sprinkled some crispy pecans over mine for a little crunch.

Crockpot Hawaiian Chicken

enough chicken for 4 (I used 2 large chicken breasts…they were frozen when I put them in. I shredded the meat part way through cooking)
20 oz can of pineapple chunks, drained (I added some of the juice to the crockpot)
1/4 cup soy sauce (I didni’t use much soy sauce this time…not a big fan of soy)
1 tsp. red pepper flakes (I skipped this this time, but it is good in here)
(I added some organic maple syrup to sweeten it a bit. Honey would work well too, but I was out of honey.)
(I added some mixed frozen veggies.)

Place the chicken into the crockpot. Drain the pineapple, and add the chunks with the soy sauce and the red pepper flakes. (Add veggies and honey/syrup.)

Cook on low for 4-6 hours, or on high for 3-4 (I had mine on high for longer.)  Shred chicken or break into smaller chunks if desired.

Serve over rice, quinoa, or on a bed of fresh spinach.

Homemade Poptarts

cinnamon brown sugar

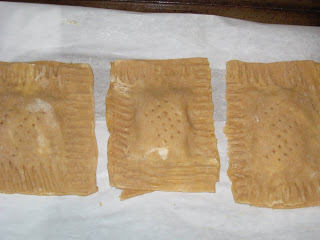
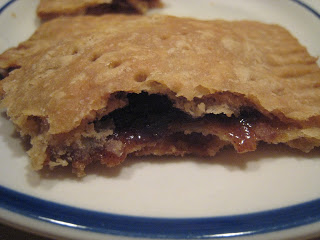
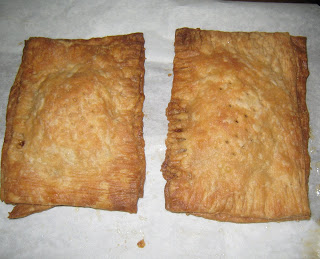
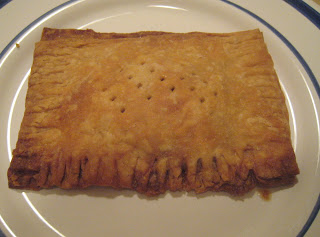
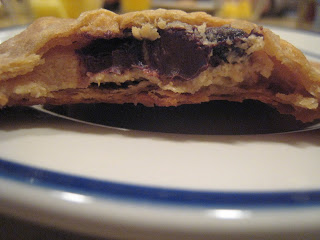
I recently found a recipe for homemade poptarts (my MOPS group posted a link to the recipe…from Smitten Kitchen). I had to give it a try! So I made them for breakfast today. I made the dough last night and assembled and baked them this morning. In hindsight I think it’d be easier to do all the assembly the night before and then just bake them in the morning. There was still a fair amount of work to do this morning and I was quite rushed. They were fun, though. And taste great!! I made a few with a brown sugar cinnamon filling, a couple with peanut butter and chocolate and a couple with cashew butter and chocolate. I’d like to try them with my homemade cherry jam sometime too. We tried the cinnamon sugar today. Mmmm. That was always my favorite flavor poptart. (Side note…I now can’t believe I used to eat them…so bad for you…all chemicals and processed junk). Of course I couldn’t make them totally according to the recipe…I wanted to up the nutrition. I compromised for my first attempt…I didn’t soak the grains, but I did use whole wheat flour (white whole wheat). Next time I’ll experiment with soaking the flour first. I’m so glad I tried these! A fun breakfast to have once in a while. And so many filling possibilities. And it just dawned on me that I’ve been wanting to replace Justin’s Saturday morning toaster strudel with something homemade for a long time…and this is exactly it! So you could call them homemade poptarts or homemade toaster strudels. Justin says they are breakfast pastries 🙂  Either way they are so much better for you than anything you buy in a box. We’ll be trying the peanut butter chocolate ones tomorrow. And I have a couple packs of homemade poptarts in the freezer now for easy breakfasts. I didn’t use any glaze, but you could. I just haven’t figured out a healthy way to do it yet (need to replace powdered sugar somehow).

cashew butter chocolate

Homemade Poptarts (or Toaster Strudels or Breakfast Pastries)

Pastry

2 cups (8 1/2 oz.) all-purpose flour (I used white whole wheat)
1 Tbsp. sugar (I used organic cane sugar)
1 tsp. salt (I used sea salt)
1 cup (2 sticks or 8 oz.) unsalted butter, cut into pats
1 large egg
2 Tbsp. (1 oz.) milk (I used whole milk)
1 additional large egg (to brush on pastry)

Cinnamon Filling (enough for 9 tarts)

1/2 cup (3 3/4 oz.) brown sugar (I used orgainc brown cane sugar)
1 to 1 1/2 tsp. ground cinnamon, to taste
4 tsp. all-purpose flour (I used white whole wheat)

Jam Filling

3/4 cup (8 oz.) jam
1 Tbsp. cornstarch mixed with 1 Tbsp. cold water

Alternate fillings: 9 Tbsp. chocolate chips, 9 Tbsp. Nutella or other chocolate-hazelnut paste or 9 Tbsp. of a delight of your choice, such as salted caramel or a nut paste

To make cinnamon filling: Whisk together the sugar, cinnamon, and flour.

To make jam filling: Mix the jam with the cornstarch/water in a small saucepan. Bring the mixture to a boil, and simmer, stirring, for 2 minutes. Remove from the heat, and set aside to cool. Use to fill the pastry tarts.

Make the dough: Whisk together the flour, sugar, and salt. Work in the butter with your fingers, pastry blender or food processor until pea-sized lumps of butter are still visible, and the mixture holds together when you squeeze it. If you’ve used a food processor, transfer the mixture to a large bowl. Whisk one egg and milk together and stir them into the dough, mixing just until everything is cohesive, kneading briefly on a well-floured counter if necessary.

Divide the dough in half (approximately 8 1/4 oz. each), shape each half into a smooth rectangle, about 3×5 inches. You can roll this out immediately or wrap each half in plastic and refrigerate for up to 2 days.

Assemble the tarts: If the dough has been chilled, remove it from the refrigerator and allow it to soften and become workable, about 15 to 30 minutes. Place one piece on a lightly floured work surface, and roll it into a rectangle about 1/8″ thick, large enough that you can trim it to an even 9″ x 12″. [You can use a 9″ x 13″ pan, laid on top, as guidance.] Repeat with the second piece of dough. Set trimmings aside. Cut each piece of dough into thirds – you’ll form nine 3″ x 4″ rectangles.

Beat the additional egg and brush it over the entire surface of the first dough. This will be the “inside” of the tart; the egg is to help glue the lid on. Place a heaping tablespoon of filling into the center of each rectangle, keeping a bare 1/2-inch perimeter around it. Place a second rectangle of dough atop the first, using your fingertips to press firmly around the pocket of filling, sealing the dough well on all sides. Press the tines of a fork all around the edge of the rectangle. Repeat with remaining tarts.

Gently place the tarts on a lightly greased or parchment-lined baking sheet. Prick the top of each tart multiple times with a fork; you want to make sure steam can escape, or the tarts will become billowy pillows rather than flat toaster pastries. Refrigerate the tarts (they don’t need to be covered) for 30 minutes, while you preheat your oven to 350°F. (You can refrigerate them at this point and bake them later (i.e. the next morning). Or you can freeze them at this point…wrap in plastic wrap, parchment paper or wax paper and place in freezer bag. Thaw in fridge slightly before baking. Follow same baking instructions.)

Bake the tarts: Remove the tarts form the fridge, and bake them for 20 to 25 minutes, until they’re a light golden brown. Cool in pan on rack.

Charming tip from King Arthur: Sprinkle the dough trimmings with cinnamon-sugar; these have nothing to do with your toaster pastries, but it’s a shame to discard them, and they make a wonderful snack. While the tarts are chilling, bake these trimmings for 13 to 15 minutes, till they’re golden brown.

Salmon, Pea and Spinach Pasta

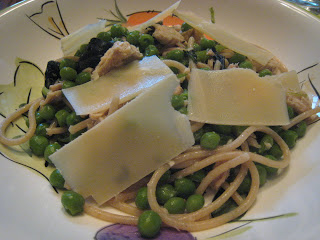
Last night for dinner I made a new pasta recipe. I based it on a recipe from the May 2010 issue of Cooking Light – spring linguine with basil. But then modified it (quite a bit) to use what I had on hand/for our tastes. I knew I wanted to make a pasta with salmon and this looked so simple…and like something I could easily add seafood to. And it was! And very good!! We all liked it. A light, healthy, quick prep meal. I’ll post the original recipe and my mods.

Spring Linguine with Basil
Salmon, Pea and Spinach Pasta

9 oz. uncooked fresh linguine (I used about 8oz. organic whole wheat spaghetti)
1 cup shelled fresh green peas (I used about 1 1/2 cups frozen organic peas)
(I also added some frozen organic chopped spinach)
4 tsp. EVOO
1 Tbsp. unsalted butter
2 Tbsp. fresh lemon juice (I skipped this)
1/2 tsp. salt (I used more than this)
1/4 tsp. pepper (I skipped this)
(I added garlic powder)
(I added 1 small can of salmon, broken up)
1/4 cup thinly sliced fresh basil (I used dried since I don’t have my fresh basil yet)
2 oz. shaved fresh Paremigiano-Reggiano cheese (I used fresh parmesan)
(I added some chopped crispy pecans)

Cook pasta. Add peas (and spinach) to pasta during the last 2 minutes of cooking time. Drain, reserving 1/4 cup pasta liquid.

Heat oil and butter in pan over medium heat 1 min. Remove from heat (I didn’t do this…I let it keep cooking with the pasta in the pan for a few min.); stir in pasta mixture, pasta water, juice, salt and pepper (and garlic powder, dried basil and salmon). Toss well.

Divide into 4 bowls. Top each with 1 Tbsp. basil and 2 Tbsp. cheese (and 1 oz. pecans).

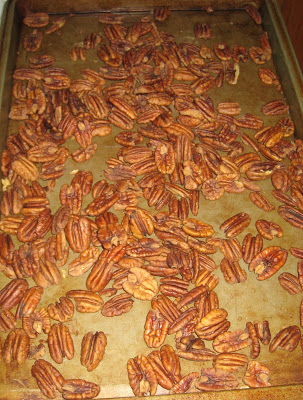
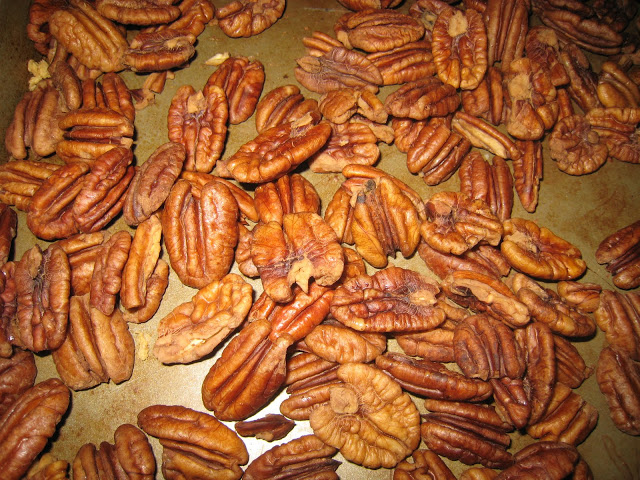
Crispy Pecans (Soaked and Dehydrated)

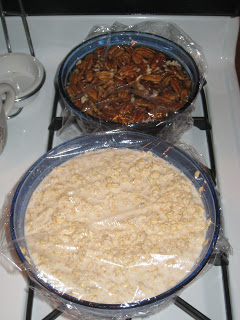
I soaked and dehydrated some pecans the same time I soaked my oats. It is a similar process except you use salt instead of yogurt. But the soak and dry times were the same. And I had them in the oven together. Very efficient. The soaking and drying process for most nuts and seeds is the same. But there are some variations of times.

I did pecans for my first attempt. These are great!!! I love eating nuts plain. But they are even better like this (in flavor…almost a sweetness to them). Plus they are so much better for you! Love it. And now they are all set to use in  my granola. I’ll just post the recipe for pecans here. As I try different varieties of nuts I’ll post them separately. My hope is to start making all of our peanut butter/nut butter from scratch…using soaked nuts. Then maybe I can finally eat nut butter without worrying about how it will impact my tummy 🙂  I wish someone had told me a long time ago there was a way to  make your food easier to digest 🙂

I got this recipe from the Nourishing Traditions cookbook. But you can find it many places if you do a search on soaking nuts. These are great for baking, sprinkling on salads or pasta or just for a snack!

Crispy Pecans

4 cups (1 lb.) pecan halves
2 tsp. sea salt
water

Mix pecans with salt and water and leave in a warm place for at least 7 hours or overnight (I soaked them for close to 24 hours.). Drain. Spread pecans on baking pan. Place in oven on lowest setting (150 degrees) for 12 to 24 hours (I did bout 15 hours.), stirring once in a while, until completely dry and crisp. You can also dry them in a dehydrator. Store in an airtight container.

Soaked and Dehyrdated Oats

As I continue on my healthy eating journey I’m experimenting more and more. This week I tried soaking and dehydrating oats. I’m hopeful this will make them easier for me to to digest. Plus it will break down the phytates and make the nutrients more readily available. It is very simple to do. Hardly any active time at all. But the total time is over 24 hours. Still, not much to it. You just have to be sure you won’t need the oven for anything else (unless you’re using a dehydrator…mine is too small to do a big batch of oats). I should get another batch going soon so I have a good amount. I started small on my first try…just to see how it would go (5 cups). The end product is not like the oats you buy. They are quite hard. My plan is to use them in granola and granola bars. That way I can enjoy some of my favorite food and still have it be soaked. I’m anxious to see if they work well. I’m just about out of granola, so I’ll be trying them soon. There are quite a few variations out there about the oat to water ratio. I used the recipe from Just Making Noise that uses a 1:1 ratio. I’ve seen 1:2 and 1:3 as well. Also, some people say to rinse them and some don’t. Just depends if you want them to have a tanginess to them or not 🙂  I’ll post the 4 cup quantities and the per cup quantities so you can adjust however much you want to make.

Soaked and Dehydrated Oats

4 cups rolled oats (NOT instant)
4 cups filtered water
8 Tbsp. whey, lemon/lime juice, kefir or yohgurt (I used plain full fat yogurt)

————————————————————
PER CUP (adjust to however much you want to make)
1 cup rolled oats
1 cup water
2 Tbsp. whey, lemon juice, kefir or yogurt
————————————————————————

Warm the 4 cups of water in a saucepan (you don’t need a microwave) till warm to touch. Do not let it boil! (I didn’t warm mine. My water was room temp.)

Pour the oats, water and acid medium (whey, etc..) into a large glass bowl and mix thoroughly. Cover the bowl with a towel or plate (I covered it loosely with plastic wrap.) and let it sit overnight in your oven or on your counter (wherever you have space).
Important: Let it sit for 8 – 24 hours… 12 hours is okay, but I always soak mine for 24 hours to reduce the phytic acid as much as possible. (I soaked mine for just under 24 hours).

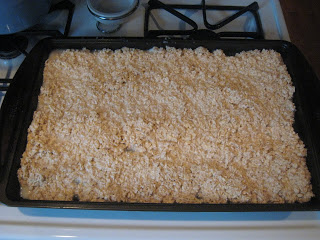
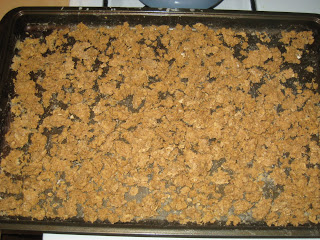
Spread the oats on parchment paper in your tray or cookie pan (for oven drying) or put in dehydrator set on the highest temp (if you have that option) until completely dry. It can take anywhere from 6 to 24 hours… depending on your dehydrator. You can dry the oats in your oven set on the lowest temperature. (I rinsed and drained the oats, then placed them on a baking pan (no parchment…worked fine). I dried them in the oven at the lowest temp (around 150) for about 15 hours. I stirred them periodcially to expose the moist areas.).

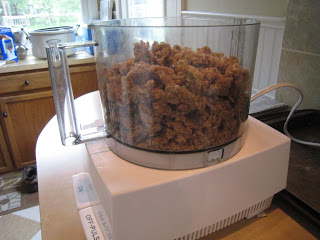
When the oats are dried, you will be able to break them into chunks. Put the chunks in your food processor or blender and pulse until coarsely ground (kinda like oatmeal flakes). Don’t grind it fine unless you want oat flour.

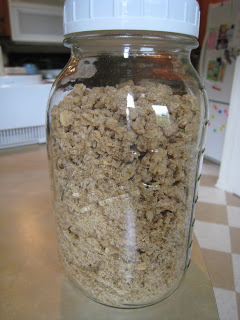
Pour the oats in a sealed container and store in your fridge or in a cool, dark place. Ta-daaa! There you go… you have ‘Soaked & Ready’ Oats for satisfying your urge to make cookies (or granola or granola bars)! Remember, you can make this however much you want.

Peanut Butter Frosting

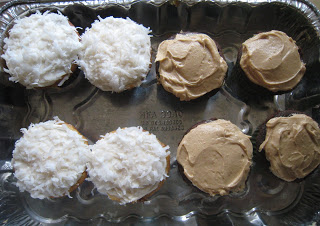
Last weekend I brought cupcakes to my SIL and BIL’s open house. I made 2 kinds – coconut and chocolate peanut butter. I got the recipe for the chocolate peanut butter cupcakes from my Barefoot Contessa cookbook. I decided to just use my regular chocolate cake recipe with her frosting recipe. Super simple and SO good. What’s not to like about chocolate and peanut butter together? 🙂  It’s not the healthiest recipe…but what cake/frosting is? 😛  Definitely a keeper. And I was finally able to use up my last bit of JIF peanut butter that’s been in my cupboard for a while! We haven’t used that stuff in a long time (total junk). But I sometimes have it on hand for baking…and giving away 🙂  I didn’t have quite enough so I did use some natural peanut butter. Still worked fine. I think Ina suggests Skippy (more junk). Just depends how “bad” you want to make the frosting. This makes quite a bit. I frosted about 2 dozen cupcakes pretty generously.

I won’t have any pictures uploaded until we get our pc hard drive fixed. Too much of a pain to do it on the laptop. Check back in a week or so for pics (at least I hope it won’t be more than a week!)

Peanut Butter Frosting

1 cup confectioners’ sugar
1 cup creamy peanut butter
5 tablespoons unsalted butter, at room temperature
3/4 teaspoon pure vanilla extract
1/4 teaspoon kosher salt
1/3 cup heavy cream

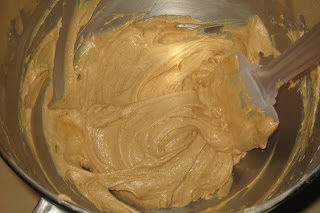
Place the confectioners’ sugar, peanut butter, butter, vanilla, and salt in the bowl of an electric mixer fitted with a paddle attachment. Mix on medium-low speed until creamy, scraping down the bowl with a rubber spatula as you work. Add the cream and beat on high speed until the mixture is light and smooth.

God Speaks, and I Surrender All…

Well, I’m trying to. Not long ago I wrote a post about being alone. That was how I felt the day after I found out what we had hoped would be baby #2 was not. That was 4 weeks ago. I was at a very low point. But since then God has really been working in me and showing me that he uses all things for his purpose and for the good of those who love him. A while back I wrote some posts about the various ways we hear God speaking. Well, he’s showing me more ways lately. We had a MOPS speaker recently that talked about taking off your mask and listening to God. Those were both exactly what I needed to hear. They allowed me to open up about our recent IVF journey. It also opened me up to truly listening to what God has to say. Not long after we found out the last IVF transfer didn’t work I read a blog post by Karen Hossink (http://surviving-motherhood.blogspot.com/ ) that talked about taking the long way around. God used Karen to speak to me. Sometimes God takes us the long way around to get to where we need to go. But he has a reason. That has given me peace and hope as we wait on this journey. Then Karen read one of my posts on my family’s blog that I had written about Rebecca. And she commented on it…using MY OWN WORDS to speak to me. Here is what I said:

“Rebecca is acting more and more like 2 now as well. She has strong opinions and doesn’t like to be told no. She seems to think that no always means something is permanent. Like if it’s potty time and we tell her to put a doll down she thinks she can’t ever have it back. She starts crying saying “you can’t have it.” Hopefully at some point she’ll understand that it’s only for a minute. In the mean time whenever we need to do something (like run upstairs for a minute) she feels it’s necessary to pick up every toy in a 10 foot radius that she can possilby hold in her arms and take it with her 😛 Just in case.”

Here was Karen’s response:

“I have to say, though, most adults I know don’t like to be told NO, either. Sometimes we act more like two-year-olds than grown-ups. *sigh*”

Here I was writing about my 2 year old…laughing about how she always thinks a “no” is permanent, when it’s only temporary. Karen helped me see that God does the same thing with me. Sometimes he says “no,” and I get all worked up that it means something will never happen. When in reality it just may be that something else needs to happen first…and God knows best and knows exactly what I need when I need it. I just have to trust that he is in control. Just like Rebecca can trust that what I’m doing is in her best interest. I have to do the same with my heavenly father.

God truly speaks through other moms and even through me! One final woman that has touched me recently is another speaker (and mom) that we had at MOPS this year. She wrote a book (Joy in the Morning…just finished reading it today) about the hardship her family faced when her 4 year old daughter had a rare disease which caused her whole body to shut down. It took months in the hospital and months of therapy for her to recover. Their whole life was turned upside down. But they learned to surrender everything to God and know that he had a plan and purpose for this. Her ability to surrender her life 100% to God was amazing. For a while she couldn’t even touch her daughter. She couldn’t do anything for her little girl. So she had to surrender her 100% to God and trust he was taking care of her when all she could do was sit back and watch.

Through this book, prayer, and daily email devotions I get (that all focused on surrender a week ago) God has really been working on this with me. I have major control issues. Hello, I have OCD! The whole basis of it is that you want total control of some aspect of your life. But God has been slowly allowing me to give up that control. To totally surrender to him. It started with the IVF/fertility stuff. I let go of the hold I had on our story/our struggles. I had kept it a secret. But God told me to just let it go, open up, be vulnerable. He would use our struggles for his purpose. And since then I have felt a great sense of peace about our situation. I do not know what the future holds. I do not know if we will have 1 more child, 5 more children or no more biological children. But I do know that whatever happens is in God’s hands. I can surrender it all to him and trust 100% that he is in control. He is using my life for his purpose. And however he needs to do that is ok with me. And I know that I would not have been able to do this had we not gone through our infertility struggles and our recent loss. I still struggle with what happened. But at the same time I praise and thank God for using it to draw me to him. I’ve never felt such freedom in  my life.

You’ll notice that at the beginning of this post I said I was trying to surrender all. Well, I am. But it is so tough. There are a lot of things in my life that I keep a tight grip on/try to control. But the main thing is my OCD. It impacts every minute of my life. And it’s so hard to give up that control. But I know God can do it. He can free me from it. And he WILL do it in his time. When I started my treatment for OCD a year ago just talking about it made me panic. Now when I think about letting it go I get butterflies, almost a sense of excitement. God is giving me a spirit of boldness to take a step out in faith. To trust him 100% and know that he will be guiding me every step of the way. Again he will use my struggles for his plans and purpose. He can use me, yes me, to be a light to others. My OCD issues are very intertwined with my digestive issues. And in my May goal post I said a long term goal was to be able to stop using Miralax and Citrucel. They are like my security blankets…knowing they will ensure at least a degree of function/normalcy. But over the last week I decided to go from taking more than my normal dose (bumped it up during my IVF stuff because of how much the hormones affect me) to taking about 3/4 dose. I figure I’ll never know if I never try. So I just decided to do it. And God will take care of the rest. He is faithful. As I sit her typing I’m in an OCD type state. A year ago I would have been panicking right now based on how I’m feeling. But today I just keep reminding myself that God is in control. I don’t have to be. Just let it go. Surrender it to God. And I remain calm…mostly 😉  I’m getting there.

I am slowly learning to truly listen to God and to surrender every aspect of my life to him. I know that my circumstances are irrelevant. God can and will use me. He cares about me. He wants good for me. He wants to use me, even in the midst of my trials, for his purpose. So I strive towards that goal…to fulfill God’s purpose for my life. And one day at a time I try to surrender all to him.