Home » Archives for Mary | Just Take A Bite » Page 113

Author: Mary | Just Take A Bite

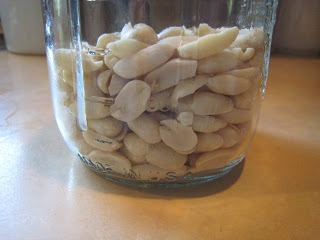
Crispy Peanuts

I made a batch of crispy peanuts this week. Similar method to the pecans and walnuts I’ve made. I used my dehydrator this time since it’s too hot to use the oven. It took a little longer but worked just fine. These are really good. And they’re even better in homemade peanut butter 🙂

Crispy peanuts

4 cups raw peanuts, preferably skinless
1 Tbsp. sea salt
filtered water

Mix peanuts with salt and water and leave in a warm place for at least 7 hours. Drain in a colander. Spread on stainless steel baking pan and place in 150 degree oven for 12 to 24 hours, turning occasionally, until completely dry and crisp. Store in an airtight container.

Fermented Fruit Chutney

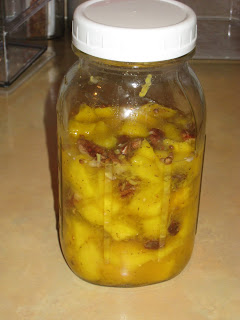
Last night I made another lacto-fermented recipe – fruit chutney. I used mangos, but you can use a variety of fruits. I don’t know if I’ve ever had chutney. But it sounded interesting. You generally eat it with meat. This smelled so good when I made it. Kind of like fresh lemonade 🙂  It looks a little odd because you see nuts and raisins floating around. But I bet it will taste very good. I only made a half recipe. This also comes from Nourishing Traditions

**Updated 5/30/10 – This turned out pretty well. We had it with beef brisket. They paired nicely. Justin said it tasted like something from a fancy restaurant 🙂  Neither Justin nor I are huge mango fans, so I think next time I try this I’ll use a different fruit. I bet apples or pears would be really good. And I think a little less salt would be good too.
Fruit chutney
Makes 1 quart

3 cups fresh peaches, pears, apples, mango or papaya
1/2 cup flitered water
grated rind of 2 lemons (preferably organic since you’re using the rind)
juice of 2 lemons
1/8 cup Rapadura (or cane sugar)
2 tsp. sea salt (unrefined)
1/4 cup whey
1/2 cup crispy pecans, chopped
1/2 cup dark raisins
1 tsp. ground cumin
1/2 tsp. red pepper flakes (I skipped this)
1/2 tsp. dried green peppercorns, crushed (I used some fresh ground black pepper)
1/2 tsp. dried thyme
1 tsp. fennel seeds (I skipped these)
1 tsp. coriander seeds

Mix water, lemon juice, lemond rind, Rapadura, salt and whey. Peel fruit and cut up into lemon juice mixture. Mix with nuts, raisins, herbs and spices and place in a quart-sized wide-mouth mason jar. Press down lightly with a wooden pounder or meat hammer (I used the end of a wooden spoon), adding more water if necessary to cover the fruit. The mixture should be at least 1 inch below the top of the jar. Cover tightly and keep at room temperature for 2 days before transferring to refrigerator. This should be eaten within 2 months.

Fermented Ketchup

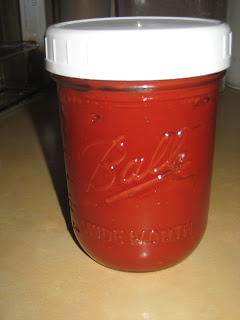
Another lacto-fermented food that sounded easy…and like something we would use regularly is ketchup! I’ve been wanting to make ketchup for a long time. And this sounded so easy and so good for my tummy. Perfect! It really was so simple to make. I can’t wait to try it later this week. I did have a little taste when I mixed it…yum! Ketchup that helps you dgiest your food…genius 🙂  I only made a half recipe. This is from Nourishing Traditions. I like the quote from the author:

“A return to ancient preservation methods would transform America’s favorite condiment from a health liability (produced in huge factories) to a beneficial digestive aid (produced as an artisinal product in farming communities).”

**Updated 5/30/10 – We tried this with beef brisket and french fries last night. Yum!!! It has a little different taste than the ketchup we normally use. But it’s still very good. It reminds me a little of pizza sauce. Rebecca didn’t even notice it wasn’t what we usually eat. Or if she did she liked this one better. She was easting it plain…scooping it with her fork and eating it 🙂  There wasn’t any left on her plate at the end of the meal. Definitely a keeper and a very easy way to eat fermented foods.

Feremented Ketchup
Makes 1 quart

3 cups canned tomato paste
1/4 cup whey
1 Tbsp. sea salt (be sure it’s unrefined)
1/2 cup maple syrup
1/4 tsp. cayenne pepper (I left this out)
3 cloves garlic, peeled and mashed
1/2 cup homemade fish sauce or commercial fish sauce (I used commercial…maybe someday I’ll make my own)

Mix all ingredients until well blended. Place in a quart-sized wide-mouth mason jar. The top of the ketchup should be at least 1 inch below the top of the jar. Leave at room temp for about 2 days before transferring to the refrigerator.

Fermented Bean Paste

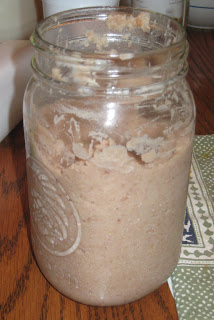
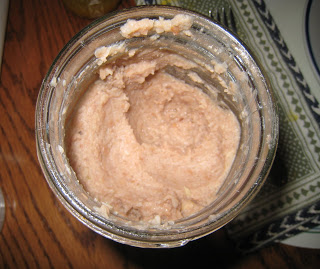
I’m trying out some recipes of lacto-fermented foods. Why? Because it’s good for digestion, of course 🙂  It enhances the food’s digestibility and increases the vitamin level. It also produces helpful enzymes and antibiotic and anticarcinogenic substances. And it promotes the growth of healthy flora in the intestines. To top it off…it’s easy! So I say, why not? And especially now that it’s hot it’s nice to be able to make food that you don’t have to cook. My first recipe is fermented bean paste. It sounded easy and delicious…kind of like hummus or refried beans. We haven’t used it yet, so I’ll have to update later with the verdict. I did taste just a little when I made it. It was quite strong, but good. I think part of the strong flavor comes from the onions I used…my FIL grows very strong onions. Maybe next time I’ll use a milder onion. I forgot to take a picture when I made it, so I’ll have to update later after we try it. You do need whey to make this (and most fermented fruits/veggies). You can make whey by straining yogurt. Very simple  I got this recipe from Nourishing Traditions.

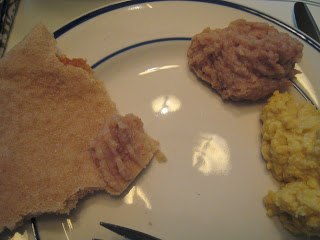
*Updated 5/29/10 – We tried this last night. It’s quite good. Justin and I both liked it. Like I said before, it’s very strong. The next time I make it I’ll use a milder onion. But it’s still good. I served it with homemade pita bread (along with some hummus). Great combo. And it’s good enough that I sometimes eat a spoonful before a meal (even if I’m not serving it with the meal) just to help my tummy. That’s what it’s for 🙂  It’s kind of a condiment…like having pickles with a meal. You just have a little with your meal.

Fermented Bean Paste
makes 1 quart

3 cups beans, cooked and drained (I used pinto beans…soaked for about 24 hours then cooked  for an hour or two)
1 onion, peeled and coursely chopped (I didn’t use this much onion and it was still very strong)
3 cloves garlic, peeled
1 Tbsp. sea salt (make sure it’s unrefined sea salt)
4 Tbsp. whey

Place the onion and garlic in food processor and process until well chopped. Add remaining ingredients and process until smooth. Place in quart-sized wide-mouth jar, leaving 1 inch of space between the top of the beans and the top of the jar. Cover tightly and leave at room temp for about 3 days before transferring to the refrigerator (it might take less time if your house is hot or longer if it’s cold). Serve as a dip with pita chips or tortilla chips.

Homemade Whey, Cream Cheese and Greek Yogurt

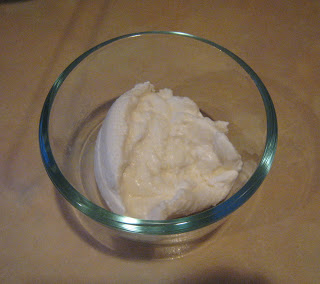
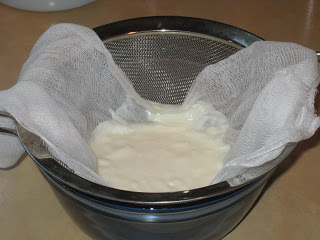
I’m starting to venture into the land of homemade dairy products. Last night I started with the easiest ones…cream cheese and whey. It only takes one ingredient…yogurt. At some point I’d like to make my own yogurt, but for now I just use Stonyfield organic plain full fat yogurt. My real motivation for doing this was to get the whey. I need it for some recipes this week. It’s just an added bonus that you get two foods out of this recipe. What’s left after removing the whey could be cream cheese or greek (strained/thick) yogurt. Whichever you’d like to use it for. If you use it for cream cheese it will be a very soft cream cheese. Not like what you buy. This will be the real deal 🙂  I didn’t make a ton since this was my first attempt…just used what was left in the container of yogurt (maybe 1 cup?). It took a couple hours for it to drain. So easy. Can’t wait to try out our new cream cheese 🙂  I got the recipe/method from my Nourishing Traditions cookbook.

Whey, Cream Cheese and Greek Yogurt
Cheesecloth or towel for straining
Glass bowl
2 qts. piima milk, whole milk buttermilk, yogurt or raw milk
If you are using piima milk or buttermilk, let stand at room temp 1-2 days until the milk visibly separates into white curds and yellowish whey. If you are using yogurt no advance preparation is needed. If you are using raw milk, place the milk in a clean glass container and allow to stand at room temp 1-4 days, until it separates.
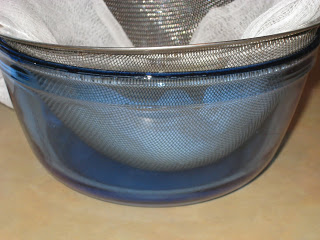
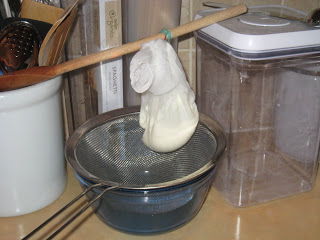
Line a large strainer set over a bowl with a clean dish towel (I used cheese cloth). Pour in the yogurt or separated milk. Cover. Let stand a room temp for several hours. The whey will run into the bowl and the milk solids will stay in the strainer. Tie up the towel with the milk solids inside, being careful not to squeeze. Let drain. When the bag stops dripping, the cheese is ready. Store whey in a mason jar and cream cheese in a covered glass container. Refrigerated, the cream cheese keeps for about 1 month and the whey for about 6 months.

Whole Wheat Soaked Tortillas

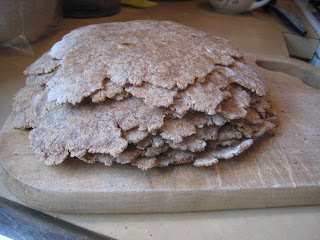
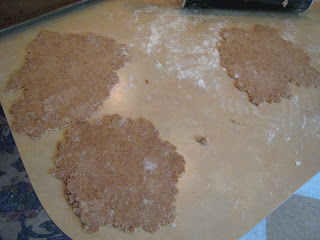
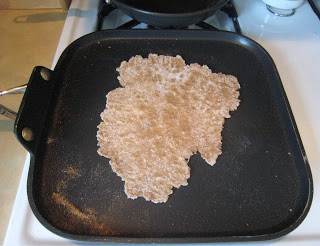
I’ve had tortillas on my list of things to try making for a long time now. I recently found a soaked recipe that sounded super simple on Naturally Knocked Up. So I had to try them. These really are soooo easy to make. And they’re good! As usual Rebecca ate a whole one as soon as it came off the pan 🙂  She’s my taste-tester. She definitely approved. And they were great wtih our tacos last night (more on that later). Of course with any first attempt they weren’t perfect. I only made a half batch for my first try. I got around 15 tortillas out of it. They were a little dryer and a little thicker than we’d ideally like, but still very good. The recipe says the dough can sit for 1 to 8 hours. Mine actually sat for a little over 8 hours. And the tops of the dough balls got dried out a little. I think next time I’ll make the dough slightly more moist. And I’ll cover the balls better or not let them sit as long. I’ll also try to roll them a little thinner next time. I did get them farily thin, but they could still be thinner. I love that these are soaked (I used yogurt this time. Maybe next time I’ll try whey) and that they are whole wheat. And now I have supply of homemade tortillas in the freezer! These didn’t take long to make. I prepped the dough in about 10 min. in the morning. Then making them took a half hour or less. I could roll one or two while one was cooking. And I had most of the mess cleaned up before the last one was done cooking.

Whole Wheat Soaked Tortillas

5 cups of flour (I used whole wheat)
2 teaspoons salt (I used sea salt)
1/2 cup oil (I used EVOO)
1 1/2 – 1 3/4 cup boiling water
2 Tbsp whey, kefir, yogurt, etc. (I used yogurt)

Mix the flours and salt together and then hand mix in the oil and whey. Mix and rub together until it kinda looks like oatmeal. Make a well in the center and pour the boiling water in. Stir together until dough forms and is neither sticky or crumbly. Then roll into golf ball sized balls. For burritos, make them a bit bigger, for smaller tacos make just a tad smaller. Let sit, covered, for at least an hour or up to 8 hours.

Then start rolling. (get your non stick pan started on a fairly high heat for about 5 minutes before you throw one on).

Plop it down on a hot naked pan (no grease!) for about 10 seconds until you see it just start to bubble around the edges.

Flip over and let set for about 30 seconds. (Sometimes they puff up and I’ll either just leave ‘em or hold them down with a spatula, either way they turn out fine)

Flip over to the first side and cook for another 30 seconds. After doing a couple you’ll begin to see exactly how high your stovetop should be set. You want them to cook quick, but not burn. Leave them undercooked and they can get dense.

Sourdough Bread


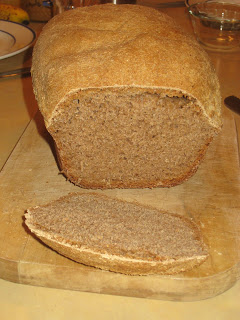
Sourdough Bread | Homemade Dutch Apple PieNow that I have a sourdough starter, I need to use it! My first experiment was the obvious…sourdough bread. I got the recipe from Nourishing Traditions.

The recipe makes a LOT of bread. I only did a half recipe to try it out. Especially since I had no idea if my starter was even good. I didn’t want to waste 13 cups of flour on something that might not work 😛  Plus I didn’t have 8 cups of starter.

After making quite a few loaves of sourdough bread now I have adjusted the recipe for making one loaf.
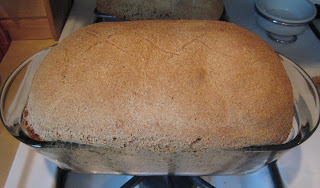
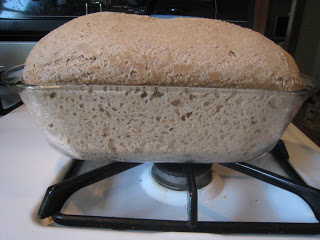
This is another plan ahead baking project. Sourdough bread has to rise for a long time. I mixed the dough in the morning (got the dough in the bread pans around 6:30 am). I didn’t end up baking it until about 6 pm! This works well if you want fresh bread for dinner.

Prepare the dough in the morning. Then pop it in the oven about 90 minutes before dinner.

For many people making traditional sourdough sounds intimidating. But it is actually so much easier than making a yeast bread.  You don’t have to worry about whether or not the yeast is working. You don’t have to get water temperatures just right. Sourdough is very forgiving. Plus it only takes three ingredients – flour, water and salt. Just mix, knead and bake.
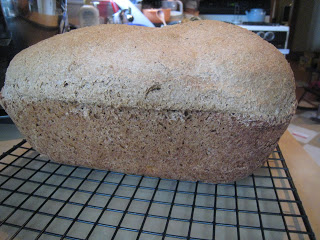
Sourdough bread has a wonderful, mildly sour taste. It goes well with scrambled eggs or a bowl of soup. In my opinion the best way to eat it is plain with lots and lots of butter!

Sourdough bread is also great if you are pregnant or nursing.  The fermentation breaks down most of the gluten, if that is a concern (you must still avoid it if you have celiac). And sourdough bread helps with milk production. It is a great source of carbohydrates for a nursing mom.

Traditional sourdough is healthy and easy on your tummy. My whole family enjoys it even with our allergies and sensitivities. We seem to tolerate sourdough fine.

You can use a variety of flours when making sourdough. I always use rye for my starter. Then I usually use spelt for my baking. You can also use kamut or einkorn. Whole wheat works as well, but it may be harder to digest.

If you’ve never tried traditional sourdough bread you’re missing out! Get your sourdough starter going and whip up a loaf of fresh bread. Your whole family will enjoy it.

Once you’ve mastered sourdough bread you can try other delicious recipes like english muffins, honey walnut bread, granola muffins, crackers, breakfast cookiespizza dough and even graham crackers!

Do you enjoy sourdough bread? What is your favorite way to use sourdough?

Sourdough Bread
makes 1 large loaf

2 cups sourdough starter (at room temp)
3 cups spelt, kamut, einkorn or hard winter wheat flour
1/2 Tbsp. course sea salt
3/8 cup cold filtered water

The day before making the bread feed your sourdough starter (be sure you have at least 3 cups total) and leave it at room temperature.

Place the starter, salt and water in a large bowl (a stand mixer bowl works well) and mix with a wooden spoon until the salt has dissolved. Slowly mix in the flour (with a dough hook in a stand mixer). Add extra flour if the dough is too wet. Let it knead for 15 minutes.

Without pressing down the dough, cut or shape loaf into the desired shape and place it in a greased loaf pan. Cut a few slits in the top of the dough, cover and let rise from 4 to 12 hours.

Bake at 350 for about an hour. Allow to cool before slicing.

The bread will keep for up to a week without refrigeration.

Sourdough Starter

 
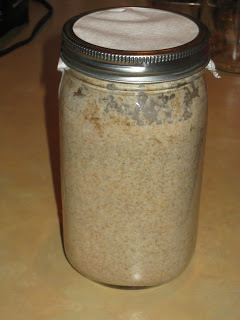
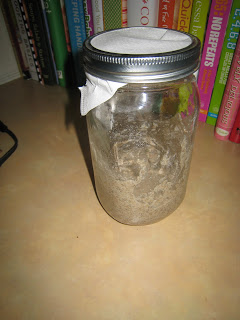
Don’t let the term sourdough starter scare you. Creating one is a simple process of mixing flour and water in a jar. Really, that’s all!
I’ve read a lot about the benefits of sourdough products recently. And I wanted to try it. But that requires a sourdough starter.
 
 
Sounds a bit daunting. Which is why I’ve never made sourdough anything before. But I decided to give it a go.
 
Turns out it’s not really that hard. All you do is mix flour and water and let it sit. 
 
It takes a week to make. I’m glad I tried this! Now I have a sourdough starter in my fridge…for use any time I want to make something with sourdough. Yeah! 
 
All I have to do is feed it once a week to keep it going. I need to start looking for sourdough recipes now.
Sourdough Starter
2 clean glass or plastic jars or bowls (not metal, mason jars work well)

A non metallic spoon

A light weight towel
 
rye, splet or whole wheat flour (rye generally gives the best results)
 
water
 
The ratio of water to flour is 1:1 when starting a new sourdough starter.

Day 1

Place a 1:1 ratio of flour and water into a clean and sterilized jar and stir well. About 1/2 cup of each is a good starting point. Cover with a towel and set in an open area so it can start collecting the natural yeast.

Day 2

Transfer the starter to a clean jar/bowl and feed your starter another 1:1 ratio of flour and water in the same amount you used for day one. So if you used 1/2 cup for each, you’ll use 1/2 cup again. Stir well, cover, and set back out.

Day 3-6

Repeat the process of day two, feeding your starter a 1:1 ratio of flour and water (in a clean jar/bowl). It will start to get bubbly and you’ll also notice it separate a bit and get a watery layer.

Day 7 

Your starter should now have gone through the bubbly stage and smell somewhat ’sour’. Transfer to a clean jar and feed it one more time.

At this point it is ready to use! You can now do one of 2 things.

1. Test out some new recipes! Just make sure you feed it again before you put it in the fridge to store.
2. Cover and store it in the fridge for use later.

How to Maintain Your Starter:

Feed your starter once a week (if not using for a recipe) or when you use it. Use the same 1:1 ratio of water and flour and store it in the refrigerator.

If you use it for a recipe, feed it the same 1:1 ratio and let it sit out again for just a couple hours before storing in the fridge.

If the starter is really watery add a little extra flour. If it is really thick add a little extra water.

Crockpot Salsa Chicken and Black Bean Soup

For dinner last night I tried a new soup recipe. I saw it on my SIL’s blog. It’s originally from A Year of Slowcooking. So easy and so good!!! Plus I got to try my sprouted black beans. This only took a couple minutes to throw together. Love that. I served it with avocado, cheddar cheese and tortilla chips. I had sour cream, but none of us used it. I only used about half the amount of liquid since I didn’t want a huge batch. Worked very well. Still plenty leftover for another meal.

Crockpot Salsa Chicken and Black Bean Soup

1 pound chicken (I used one large chicken breast)
1 cup dried black beans (or 2 cans, drained and rinsed) (I used about 1 1/2 cups sprouted and cooked beans)
4 cups chicken broth (I used 2 cups water plus some salt, garlic powder and chili powder)
1 cup sliced mushrooms (I didn’t add these)
1 cup frozen corn
1 jar prepared salsa (16 oz) (I used a pt. of homemade salsa)
1 1/2 tsp. cumin
1/2 cup sour cream (to stir in at the end) (we didn’t use this)
shredded cheddar cheese, avocado slices, cilantro (all optional)

I used a 6 quart crockpot. You will need a 4 quart or larger.

If you know you are going to make this the night before soak the black beans in enough water to cover and another 2 inches overnight. In the morning, drain the water and rinse the beans. (Or you can sprout your beans.)

If you don’t have super hard water or live in a super high altitude, you can quick soak the beans by pouring boiling water over them and let them sit for an hour or two.

Drain and rinse the beans. Add to the crockpot. Put in the chicken, and add the broth and salsa. Pour in the corn and mushrooms, and add the cumin. Stir, but don’t disturb the beans – let them stay at the bottom of the pot, closest to the heating element.

Cover and cook on high for 9 hours (if you are using dry, unsoaked beans…not recommended for anyone with digestive issues :).

If you are using beans you soaked overnight, canned beans, or pre-cooked beans, you can cook on low for 6-8 hours, or on high for 4-5 -similar to normal soup-cooking time. (I added my cooked beans during the last hour…I didn’t want them to cook any more than they already had.. I just wanted them warmed.)

If you’d like to thicken the broth, you can use your immersible blender to blend a bit of the beans and chicken. If you don’t have one, scoop out 2 cups of the soup and carefully blend in your traditional blender. Stir the mixture back into the crockpot.

Stir in the 1/2 cup of sour cream before serving (optional). Garnish with shredded cheese and avocado slices.

Crispy Walnuts

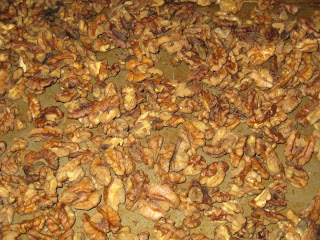
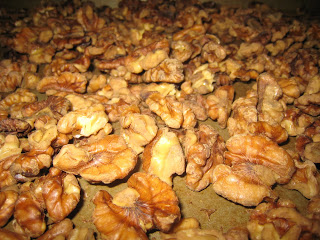
I made a batch of crispy walnuts this week. Yum!!! And so simple. It’s the exact same method I used for the crispy pecans. Just note that walnuts can go rancid faster than pecans. So they should be stored in the refrigerator or freezer.

Crispy Walnuts

4 cups (1 lb.) walnuts
2 tsp. sea salt
water

Mix walnuts with salt and water (I covered them loosely with plastic wrap.) and leave in a warm place for at least 7 hours or overnight (I soaked them for close to 24 hours.). Drain. Spread walnuts on baking pan. Place in oven on lowest setting (150 degrees) for 12 to 24 hours, stirring once in a while, until completely dry and crisp. Store in an airtight container in the refigerator or freezer.