Home ยป Archives for Mary | Just Take A Bite ยป Page 93

Author: Mary | Just Take A Bite

Cooked Yogurt

After making raw yogurt I decided to try a cooked version. At first it looks hard. It seems like there are a lot of steps. But in reality it’s very easy. You’re basically doingย 4 things – heat the milk, let it cool a little, add the culture and let it sit. So it’s really not much more work than making raw yogurt. You just have to heat it and let it cool a little first. I followed my SIL’s directions at Today’s Menu Take It Or Leave It. Very easy to follow.
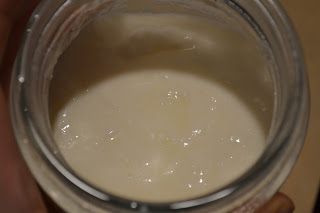
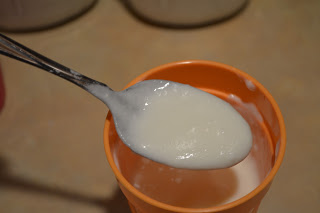
And the outcome…great! This produced a very smooth, creamy, flavorful yogurt. I made some vanilla yogurt with it for Justin this morning. He thought it tasted great. I’m sure Rebecca will like it too. This will definitely be my go-to method for making yogurt. I still want to play around a little with how long I let it culture. This batch was very mild…not much of the tang of normal plain yogurt. But that’s not a bad thing.

I’m so glad I FINALLY got around to making my own yogurt (I’ve been wanting to for about a year now…don’t know why I never did). There are several reasons I’m glad to be making this now. First…it’s healthy! Lots of healthy bacteria. Second…it will save a lot of money! That’s a big one. I buy yogurt every week. It’s one of the biggest expenses. I hate spending so much for so little. This will be a huge money saver…especially since we’ve got all this great raw milk to use up anyway. Third, it will save me trips to the store ๐Ÿ™‚ย  I don’t have to worry about running out of yogurt. If we’re getting low I can just make more. This will really help me with my goal of only going to the grocery store every other week instead of every week. Finally, you can make any flavor you want ๐Ÿ™‚ย  If I want to buy organic full fat yogurt at the store I can get plain, vanilla, strawberry or chocolate. That’s it. Now I can make whatever flavors we want. I made vanilla this morning. But we can make any kind of fruit flavor, peanut butter, chocolate, apple cinnamon, whatever. And I don’t have to worry about feeding my family unhealthy sugar. I can use honey or maple syrup to sweeten it…and I’m sure less of it than the boughten variety.

Now that we have this great yogurt I am so anxious for me to be able to eat it!! Yogurt is one of the foods I miss the most from going dairy free. I used to eat it daily. Hopefully in a week or two I can add it back in. That will be a happy day ๐Ÿ™‚

If you have never made your own yogurt I encourage you to try it! It really is very easy. It does not require much hands on time at all. And if you get it going in the morning you can have some ready by the afternoon. I thought it was easy the first time I made it. So I’m sure it will be even easier now that I know how. Even if you don’t have raw milk, you can make your own yogurt. It will still be healthy and much cheaper.

I didn’t take step-by-step photos like my SIL did. If you want a really detailed description check out her blog. Here’s the slightly condensed version of her recipe.
Homemade Cooked Yogurt

Ingredients and Equipment:

milk (preferably raw, but pasteurized willwork…NOT ultra-pasteurized)
yogurt starter (I used some plain, boughten yogurt for my first batch and I’ll use my homemade yogurt from now on)

quart sized jars with lids
large stockpot with lid
water for boiling
a dish rag
a thermometer, either candy or meat will work
a large cooler or incubator
a large towel

Put your dish rag in the bottom of your stockpot. This helps stabilize the jar(s). Then pour milk into your quart sized jars. Make sure you leave about an inch or so of room from the top of the jar. Place the jar in the pot and fill the stockpot with water at least half-way up side of jar. You’ll want to bring this to a boil. I place my thermometer in the water so that it sterilizes.

Once your water is boiling, turn the heat down a little, to around medium to medium-high… enough to maintain a good simmer. Move your thermometer to a jar of milk… having it in the water till boiling sterilized it. You’ll want to keep it going until it reaches 180-185 degrees (this only took a few minutes for me once the water was boiling).
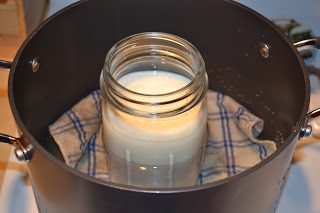
Once the milk has reached 180-185 degrees, turn the burner off. Lift the jar out of the water and onto the counter. Put a cap on the jar. Do not pour the water out of the pot. Put a lid on the pot and place it inside your cooler, making sure the towel surrounds the pot so that it doesn’t melt your cooler. Leave the lid on the pot and put the lid on your cooler.

Now you wait for your milk to come down to between 90 – 120 degrees. I’ve found that between 100 – 105 is optimal for me… this makes a nice, thick, creamy yogurt. This takes about an hour and a half. You can either check the temperature with your thermometer once you think it could be reaching the proper temperature. Or you can just feel the outside of the jar. Remember that our body temperature is 98.6 degrees, so you want it to be slightly warmer than your hands. If its too hot to hold, its not there yet. I checked the temperature with the thermometer the first time I made yogurt, but haven’t checked it since. I just go by feeling the heat on the outside of the jar.

Once your milk is at the proper incubation temperature, you will need to stir in about 2 Tablespoons of yogurt starter into each quart of milk. Be sure to stir gently, as you are stirring in living organisms and don’t want to jostle them too much.

Next, place the lid back on the jar tightly. Open up your cooler and place the jar(s) into your cooler next to the warm pot of water. Remove the lid from the pot and be sure the towel is nestled around your jar(s). Place the lid back on the cooler and let it incubate for 4-24 hours.

The longer it sits, the more tart it will get. I’ve incubated my yogurt for anywhere from 6 hours to 14 hours. I found that at 6 hours, it wasn’t quite thick enough for my liking. 8 hours seemed to produce a good, thick, creamy yogurt with a hint of sweetness. I didn’t notice much change in thickness by increasing the time, just a more tart taste. I try to only let mine go 8-10 hours normally (I did 8 hours…it was good!)

Once your incubation time is up, transfer your jar(s) to the freezer for about an hour. Don’t open them before you do, just put them right in there. After that time is up, transfer them to the refrigerator. You’ll get a true sense of the consistency of the yogurt at this point. Don’t be alarmed if there is some whey on top of the yogurt, this is totally normal. Just stir it into the yogurt.

Before you start enjoying your new batch of yogurt, be sure to reserve a couple tablespoons of your fresh yogurt in a small glass jar in the fridge. This will be your yogurt starter for your next batch. And remember to reserve more than a couple tablespoons if you make more than a quart at a time.

———————-
That is a lot of wording for a simple process. Here is the shortened version:

1. Heat milk in a quart jar in a pot of boiling water to 180 -185 degrees.
2.ย Remove from water, cover and let milk cool on counter to 90 – 120 degrees.
3. Stir in yogurt culture.
4. Cover and keep in a warm spot for 4-24 hours to culture.
5. Chill.

Flavored Yogurt

You can mix in anything you like to flavor your homemade yogurt. To add extra nutrition stir in egg yolks and coconut oil. Here are some ideas:

Vanilla – stir in homemade vanilla extractย and maple syrup or honey
Fruit – blueberry, strawberry, cherry, raspberry, peach, bananaย (you can mush up whole fruit, mix in pureed fruit or use homemade fruit preserves/jams) with honey or maple syrup for sweetness if needed
Apple Cinnamon – stir in homemade apple butter and honey
Pumpkin Pie – stir in pumpkin puree, honey and cinnamon (we’ve even added a little crumbled pie crust for a real treat)
Peanut Butter – stir in smooth, natural peanut butter and honey (or any kind of homemade nut butter) (add a few chocolate chips for a real treat/dessert)
Raw Yogurt

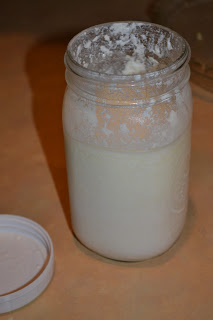
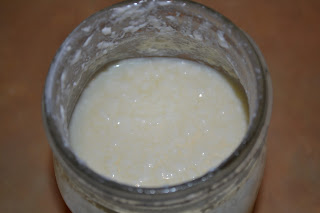
Last week I made my first batch of yogurt. I decided to start with the easiest method. After all, if the easiest method produces good yogurt it makes sense to make it that way. Plus the easiest method keeps the milk raw and unheated. So you don’t lose anything. I followed the method in the GAPS book. You basically put some yogurt into milk and let it sit. That’s it.

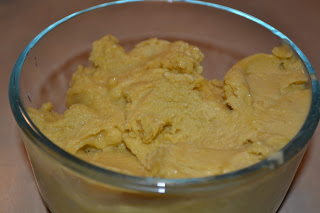
Did it work? Yes, it did. But it doesn’t produce quite the texture we like. It was quite lumpy/loose (you can tell in the picture). It doesn’t get smooth when you stir it. It tastes fine. And honestly I’d be ok eating it. But I think Justin and Rebecca weren’t crazy about it. They have more of a texture issue than I do. So this will not be my regular method of making yogurt. But I might do it once in a while for myself or if I’m really in a rush and don’t have time to make the cooked version. From what I understand this method is more unpredictable…meaning it will turn out differently every time. I bet this yogurt would work well for making cottage cheese.

I’m glad I tried this. Who knew making yogurt could be so easy?

Raw Yogurt

1 quart raw milk
1/4 cup plain, live yogurt

Mix yogurt into milk. Cover. Place jar in a warm, dark spot to culture for 24 hours. Transfer to fridge.

Guest Post – Pumpkin Smoothie…Plus GAPS-legal Pumpkin Ice Cream!

Today I have a guest post at Gapalicious! My first guest post. Go check it out. Thanks, Hannah for asking me!

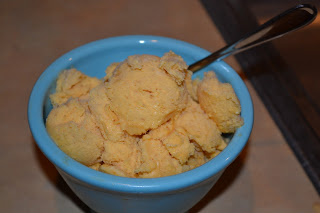
A little add on to my smoothie post…you can turn it into ice cream! Yesterday morning I made my usual smoothie. Then I put half of it in my ice cream maker. 15 minutes later…GAPS-legal, nourishing pumpkin pie ice cream ๐Ÿ™‚ย  If you don’t have an ice cream maker you can just freeze it as is. I’ve done that too. Still a tasty cold treat ๐Ÿ™‚ย  And you can freeze it in single servings so it’s all set to go when you want it…and so you don’t goย overboardย ๐Ÿ˜‰ย  Ice cream is my absolute favorite food…and the hardest thing I had to give up. But I’m finding ways to get my fix again…the healthy way.

Pumpkin Pie Pudding Parfait

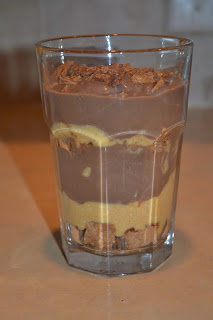
We are currently getting 3 gallons of milk a week. And since I can’t drink milk yet, that is a fair amount to use. So I was trying to think of things to make with itย last week and decided to make a batch of creamy chocolate pudding. Then as I was thinking about what dessert to make when we have guests this weekend I thought it would be fun to do a parfait. So I came up with the idea of a pumpkin pie pudding parfait. I didn’t want my first experiment to be on guests, so I made some last night. I made a slightly sweetened pie crust and a pumpkin cream cheese mixture. And layered that with the pudding. Turned out great! When I make it for real I’ll use vanilla pudding. But it was good with chocolate too. And I love that this uses all (well, mostly all…I did use some powdered sugar)ย good, homemade ingredients…even the cream cheese was from our homemade raw yogurt. I didn’t measure anything when I made the pumpkin filling. And I only made a small batch. So I’ll have to guess on that. This is a fun, healthy, fall dessert.

This post is linked to Fat Tuesday at Real Food Forager.

Pumpkin Pie Pudding Parfait
serves 2

Pie Crust:
1 cup whole wheat flour
1/2 cup palm shortening or butter
1 tsp. salt
1/4 cup cane sugar
1/4 cup water

Mix flour, salt and sugar. Blend in shortening until crumbly. Add water until soft dough forms. Roll onto parchment paper and bake at 375 for about 25-30 minutes…until golden. Let cool.

Pumpkin Filling:
1/2 cup pumpkin
1 cup cream cheese (preferably homemade)
1/2 cup powdered sugar
2 Tbsp. honey or maple syrup

Mix all ingredients together. Adjust sweetness to taste. Chill.

Creamy Vanilla Pudding (Heavenly Homemakers recipe):
(this is a full recipe of pudding…you don’t need this much for 2 parfaits)

2 1/2 cups milk
3 egg yolks
1/2 cup real maple syrup (grade B is best for you) or honey
4 Tbsp. arrowroot powder (or organic corn starch)
1/4 tsp. sea salt
1 Tbsp. butter
1 tsp. vanilla

In a medium saucepan, whisk together milk, egg yolks, maple syrup, arrowroot powder and salt. Cook over medium heat, stirring CONSTANTLY until pudding begins to thicken. Stir over the heat for about 15 more seconds. Remove immediately from the heat, and continue to stir until pudding is creamy. (I use my whisk the whole time for stirring and find this works great!) Add butter and vanilla and continue to stir until mixed. Pour into a glass container, cover and chill.

Parfait:

Just before ready to serveย assemble the parfait. Layer chunks of pie crust, pumpkin filling and pudding. Then repeat. End with pie crust.

The Letter I

Last week we did the letter I. Kind of a tough letter. We didn’t do a whole lot. We took lots of time to use our imagination (our big I word). Rebecca is very good at that.

Letter I

food – we made pumpkin ice cream
character – integrity (stand up for what you believe in)
craft – we made an igloo craft (but I forgot to take a picture) and talked about eskimos
play – imagination
outings – farm, trick-or-treating, baby-sitter, KM, MOPS
KM assignment – being creative
Memory verse – Enter his gates with thanksgiving and his courts with praise.

Meal Plans Week of 11-6-11

Here we are…one of the worst mornings of the year in my opinion…adjusting to the time change. Which means my body is not happy. And I already have a cranky little boy up. And who knows when Rebecca will be up. Not the ideal start to the week. Hopefully everyone will adjust quickly. I’m glad that after church we have the rest of the day to relax.

Last week was a nice week. We had a fair amount of down time. We played and played. I got some more organizing and cleaning done around the house. We did have a few outings as well – we had our first milk pick up, we went to Kindermusik and MOPS. And Justin and I went out for dinner on Friday. We couldn’t go to the restaurant we wanted, but we still had a nice dinner. I guess we’ll have to plan another date so we can try the other restaurant ๐Ÿ™‚  In the kitchen I got started on lots of dairy products. I made pumpkin ice cream, raw sour cream, kefir and raw yogurt. I’m experimenting with yogurt methods and I’ll post about them later. I was pleasantly surprised with the raw/uncooked version. It’s the easiest. And both Rebecca and Justin ate it fine. But I still want to experiment with other methods before I settle on how I want to do it regularly. I also made creamy chocolate pudding. Now that we have a lot of milk I have to think of ways to use it ๐Ÿ™‚

This week will be a little bit busier than last week. Today is church. Monday is milk pick up. Tuesday is Kindermusik and voting. Wednesday will be Meijer (so thankful I didn’t have to go last week!!! I hope that trend continues). Friday I have nursery duty for the MOPS steering team. Saturday morning Justin has an orchestra concert. In the evening we are having one of his co-workers (and family) over for dinner.

So I’ll be doing a little extra cleaning this week in preparation for guests. Plus some extra baking. I also want to continue to experiment with dairy products. I want to make more yogurt and sour cream. Possibly butter. And I might experiment with some GAPS-legal ice cream. I have a couple methods to try. I need to make a new batch of pesto and mayo. I’d also like to cook more squash and some pumpkin. Our letter this week is J. Not sure what kitchen work will relate to that. I’ll see what I can come up with. For Saturday I haven’t totally decided on a dessert, but I have an idea for a pumpkin pie parfait that I think I want to try. Else I’ll do cheesecake of pumpkin cheese pie. For the dessert I might need to make some homemade cream cheese and whipped cream.

As always still trying to figure out what my body is doing. The end of last week was pretty rough. I think it was from the introduction of raw sour cream. I think I’m going through more die off. From everything I’ve read (and I read a lot…I went through almost every single FAQ on the GAPS site on Friday loking for answers) in the long run the sour cream will really help me. But the adjustment is not pleasant. It didn’t help that in conjunction with it I was decreasing the miralax more (less than a half dose!) and ate steak and an apple. I think I was just asking for trouble. And now I’m paying for it. Still trying to get my body back on track. I was reminded when I was reading through the FAQs that muscle meat is hard to digest (steak). Stick to gelatinous meats. Bring on the bone ๐Ÿ˜›  Steak just doesn’t sit well with me. I also still wonder about vitamins/minerals. I mentioned them in my monthly goals post. The one that stands out is magnesium. Lots of people use magnesium to help with digestion (just check out the laxative section in the store…all kinds of forms of magnesium). So I wonder if I need more/if that would help. One of the reasons that it stands out is that over the last year I’ve noticed that whenever I drink hot chocolate it seems like my body instantly absorbs the fluids and it helps my tummy. I always thought it was crazy. Why would hot chocolate help? But then I read that cocoa contains magnesium! I drank hot chocolate almost daily during my pregnancy. It was the only way I could drink water sometimes. And lately I’ve been drinking it again (a homemade version with just raw cocoa and honey…and yes, raw cocoa is GAPS legal if you are on full GAPS). Oddly enough it seems to help. So I will continue to look into that. I’m always learning. The other thing I’ve noticed is that my tongue often tells me when I’m sensitive to a food. For the last few years whenever I eat pineapple my tongue burns/stings for half the day. And now it seems to do that with some of the other foods I’m sensitive to…like carrots, grains and apples. I just have to listen to my body.

Rebecca continues to make progress with her eating/tastes. And Abram is growing like a weed. He will be 6 months old this week. He’s moving all over the place. He hasn’t quite gotten into a full crawl, but he is doing an army crawl. And we switched him to a bigger car seat. No more infant carrier. He has one tooth coming in. And probably more on the way.

Anyway, I have a hungry little boy here. Here’s what’s on the menu for now.
—————
S (church, make parfait)
  L – chicken and veggies in cp (make stock/broth), scalloped potatoes
  D – strawberry milkshakes, buttered popcorn, crackers w/ raw cheese and balogna, apple slices, homemade sweet potato chips (Junk food dinner:)

M (make ice cream, GF, make yogurt)
  D – sloppy joes on homemade buns, roasted squash, sweet potato chips

T (KM, vote, make sour cream)
  D – sloppy joe pizza

W (make pesto, dentist, make sour cream Meijer)
  D – misc. leftovers, salmon cakes, peas

Th (make hot fudge,make smoothies, make yogurt, Meijer, make caramel)
  D – homemade sauasage patties, baked sweet potatoes chunks, peas

F (clean, MOPS nursery, roast beets, bake cheesecake and squash)
  D – pea soup, bread

S (bake bread, clean, laundry, concert, guests)
  D – pork roast w/ fruit, squash, beans, applesauce, rolls, cheesecake 

God’s Perfect Timing and Placement

It’s been quite a while since I’ve written any reflective posts. But I’ve been thinking lately about God’s perfect timing. I’ve talked about it in the past. And I was reminded of it again lately. Oddly enough it relates to food ๐Ÿ™‚

Last winter we tried raw milk for the first time. It was at a farm close to home. And it was only for the winter…a perfect way to try it and see if we liked it. And perfect timing…it coincided with my 2nd trimester of pregnancy almost down to the day. The trimester when dairy is such a critical nutrient as the baby’s muscles are forming. I was able to drink tons of nourishing raw milk every day during my  second trimester. It was wonderful. Then our winter share ended. And I stopped drinking much milk since we didn’t have raw milk anymore. Then I started doing GAPS. And after Abram was born I went totally dairy free. It really seemed to help with his reflux and my gut. Although I still would have liked to give Rebecca raw milk it wasn’t critical for me anymore. I’ve mentioned a few times now that we just started a new cow share. It is so wonderful to have healthy raw milk again. Although this option was available to us for the past year we didn’t take advantage of it. We debated. It seemed like a bit of a drive. We were kind of waiting to see if we’d get a winter share again from the farm we got it last year. We were on the waiting list there and wondered if there would be any openings (no luck). So we just waited and went without raw milk for a while. Then in August we took a tour of Grassfields Farm. We got our beef and our pork there this year. And they are such nice people. We love their cheese and chicken as well. I mentioned on facebook that we had visited. And wouldn’t you know it, one of the moms from my MOPS table was thinking about getting a cow share there. And wanted to know if we were going to do the same and wanted to share the drive/pick up. We had always said we’d be more open to going there if we could share the work. And God just set it all up for us…right at the perfect time. It just so happens that as we were considering it and talking with the other mom I decided to start adding dairy back into my diet. I think it will now benefit both Abram and me. But I didn’t want to add dairy unless it was raw. So we talked about it and prayed about it. And tried the milk. And decided to go for it! In the few weeks before we got our milk I was able to introduce ghee and butter. Then just when I was ready to move to the next step was our first week of raw milk…and I could make raw sour cream to add in. Perfect. It also happens to be a great time for Rebecca to get back on raw milk. Just in the last couple weeks she is making such progress on her eating and her tastes changing. And I feel like giving her raw milk is one of the final steps we need to take for her. Also, Abram will be 6 months old next week. So he’ll be starting solids very soon. And if he is going to have any dairy I want it to be raw. Again, God worked everything out in his perfect time, in the perfect season. My healing from GAPS seems to be hitting a rough patch at the moment. The last few weeks have been up and down. I think adding cultured raw dairy is the boost I need to keep things going and continue healing. And get the nutrients I need. And maybe gain a few pounds back? ๐Ÿ˜›

God doesn’t only have perfect timing. He has perfect placement. As I mentioned I am now sharing the milk pick up with a mom from my MOPS table. She also happens to have a daughter in Rebecca’s Kindermusik class and lives close by. When MOPS started this year I was a little nervous about who would be at my table. I really enjoyed getting to know the women at my table last year. So I wasn’t sure how it would go, if I would connect with anyone, etc. Then I met Stephanie (the one we’re getting milk with). And then I found out that another mom at my table is into natural living. She already has a cow share at Grassfields, eats real food, actually knows what GAPS is, eats grain free at times, reads the blogs I read, etc. So yesterday I had the pleasure of talking to her and getting to know her a little more. Sometimes I feel like the only person around me that eats the way I do, etc. And then to end up at a MOPS table with not one but two women that share the same views I do?? That’s just crazy. And amazing. And to top it off our tables are arranged by where we live…which means that these women live very close to me. I am very excited to get to know these women better.

There are days when I feel like I’m making such good progress, feeling good, on the right track, etc. And there are days where I wonder if I’m doing anything right and maybe I’m just crazy for trying to heal my body with GAPS (like during the last few really rough days I’ve had). Then God shows me that He is in control. He is leading me down this path. He has plans to prosper me, not to harm me. He knows what I need and when I need it. We go through all different seasons in our lives. And this just happens to be the season I’m in right now. When I look at the big picture I see how far I’ve come from a few years ago. And each step along the way has been in God’s perfect time. So I will be patient and see where he wants me to go next. I am excited to be making a step in the right direction for the health of our whole family. And I am excited to have the opportunity to develop new friendships and get the support I need from other women.

God is perfect. And his plans are perfect. I will trust in that and hold on to that hope daily, through the good days and the bad days. God is using me for his good and perfect plan. And for that I am thankful.

Sour Cream (GAPS-legal)

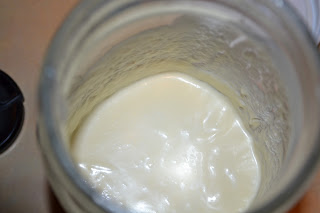
I mentioned before that we started our cow share on Monday. So my dairy adventures continue this week. I made ice cream on Tuesday. Yesterday I made sour cream. I have read various methods on how to do it/what ingredients to use. So I just started experimenting and using what I have on hand. I used a little bit of cream that was left after making ice cream and some plain yogurt for the culture. I was very happy to see that it thickened nicely and has great flavor. I really enjoyed it in my soup this morning. I’ll have to experiment with times and ratios. I was just using a little leftover cream to give it a try this time. I think I used about a pint of cream and a couple Tbsp. of yogurt. It cultured for about 24 hours. Now I understand why it was so hard to find a “recipe” for sour cream. There isn’t really one. Just mix cream with a live culture and let it sour in a warm place. I’ll have to update this post when I figure out our ideal ratios. But I’m thankful that my first attempt went well. Maybe I’ll trying making it with kefir sometime to get even more good bacteria in it. It was almost impossible to take a picture of it. But you get the idea. Today’s adventure…yogurt. Post(s) to come ๐Ÿ™‚ย  Homemade sour cream is allowed already on GAPS intro. So this is a great dairy product to make right away when doing GAPS.

Sour Cream

Cream (preferably raw) (1 pt – 1 qt)
live culture (yogurt, kefir, buttermilk) (2-5 Tbsp.)

Mix cream and yogurt in a glass jar. Cover and place in a warm, dark spot for about 24 hours to culture. Transfer to the refrigerator.

Pepper Steak (Grain Free, Dairy Free, GAPS-legal)

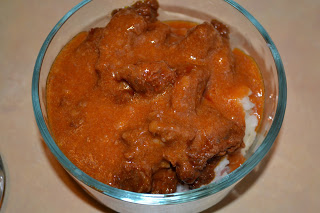
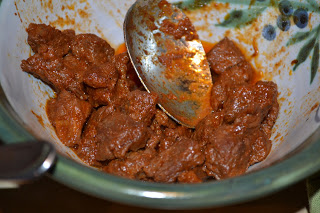
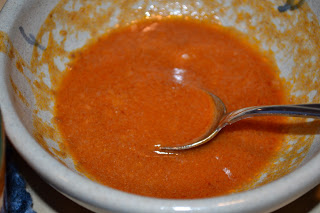
Once in a while I ask Justin if he has any specific requests for dinner. This week he asked for pepper steak and mashed potatoes. So that’s what I made last night. It’s a recipe from my MIL. It’s very simple and very good. I adjusted the ingredients to make it healthier (since I don’t use soy sauce or bouillion). The full recipe is not GAPS legal. But just the steak part is (minus the gravy). The gravy uses flour, so that part is not grain free. But the meat is great without the gravy. There is plenty of sauce in the pan that you can use as gravy even if you don’t thicken it. I put mine on top of squash. Justin had his over mashed potatoes. We all enjoyed it. The one thing I have never understood is why it’s called pepper steak…there is no pepper in it ๐Ÿ˜›  The recipe calls for round steak. Use whatever you have. I used sirloin because that’s what I could find first buried under all of our pork ๐Ÿ˜›  This is a great recipe to use with grassfed beef since it simmers a long time and the meat gets very tender. I hadn’t intended to post this recipe at first, but after serving it I realized I should. So I had to take pictures of what was left after dinner and what I packed for Justin’s lunch.

Pepper Steak

1 large steak (round or sirloin work well), cut into chunks
olive oil, coconut oil, lard or palm shortening
1 cup beef broth, chicken broth or water (may need more as it cooks)
1/4 cup ketchup (I used homemade fermented ketchup)
salt and garlic powder to taste

1 Tbsp. flour
1/4 cup cold water

Brown meat in oil in skillet. Add water/broth, ketchup and seasoning. Cover and simmer over low heat 1 1/2 hours. Stir periodically and add extra liquid if it gets too dry. You can serve it like this over veggies, rice or potatoes.

To make gravy: Remove meat from pan. Mix flour and water until the lumps are gone. Gradually add the flour mixture to the sauce in the pan, stirring over low heat. Add more water until desired consistency and quantity of gravy. Serve gravy on the side or add the meat back to the pan for serving.

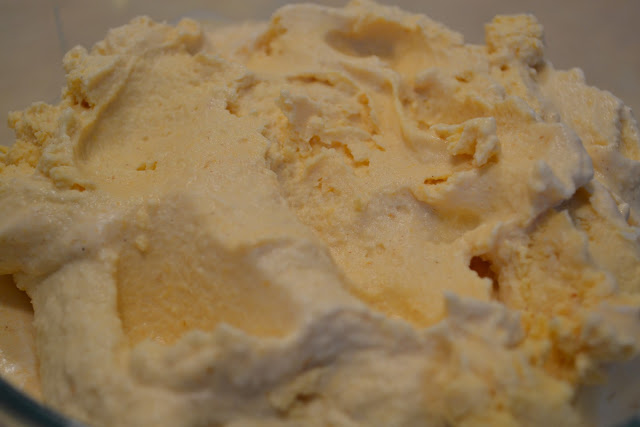
Pumpkin Ice Cream

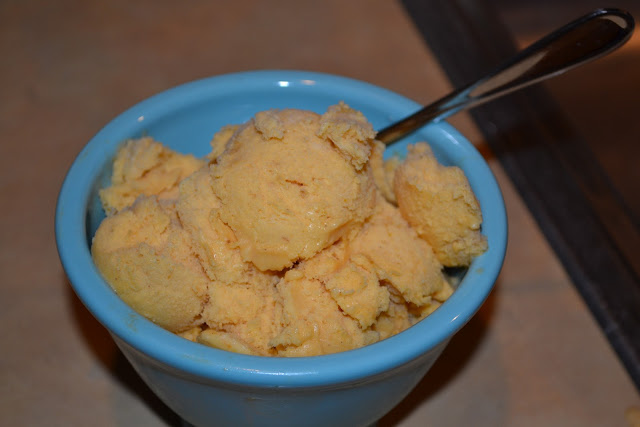
We are finally getting raw milk again. We had our first pick up on Monday. So of course on Tuesday we had to make ice cream…in November ๐Ÿ˜›

I used the usual Nourishing Traditions recipe and tweaked it a little to make pumpkin ice cream. YUM!!! All three of us like it.

I used a combination of honey and syrup for the sweetener to give a neutral flavor.

Pumpkin ice cream made with fresh raw cream is the perfect fall treat. If you can’t have dairy coconut milk would work too.

Pumpkin Spice Ice Cream
Makes 1 quart

3 egg yolks (optional)
1/2 cup maple syrup, honey or cane sugar (or any combination)
2 tsp. vanilla extract
2 1/2 cups heavy cream (preferably raw, not ultrapasteurized)
1/2 cups whole milk (preferably raw, not ultrapasteurized)
1 cup pureed pumpkin
2 tsp. cinnamon
1 tsp. pumpkin pie spice

In a blender mix all of the ingredients. Taste. Make sure it is a little extra sweet (the sweetness decreases when it freezes).

Pour into an ice cream maker and process according to instructions (It took about 20 min. in my Kitchen Aid ice cream maker attachment).

Transfer to a shallow container, cover and store in freezer.