Home » Kid-friendly Recipes » Page 35

Category: Kid-friendly Recipes

It is so important to cook homemade, healthy food. But it’s not always easy to find kid-friendly recipes.

That’s where I come in. I’ve got hundreds of kid-tested and approved recipes that won’t keep you in the kitchen for hours or stretch your budget too thin.

I focus on allergy-friendly, whole foods. But I always cook with kids in mind. I take all sorts of feeding challenges into account too.

We’ve dealt with every allergy possible, so I’ve created recipes that are gluten free, nut free, dairy free, egg free, soy free, corn free, coconut free and more!

Kid-friendly recipes don’t have to be boring. And they are certainly not limited to chicken nuggets and pizza every night.

A nourished child will enjoy a wide variety of fruits, vegetables, proteins, carbohydrates and fats. Get your kids in the kitchen with you and start cooking! Have fun with food and your kids will learn to love eating.

Baked Apples

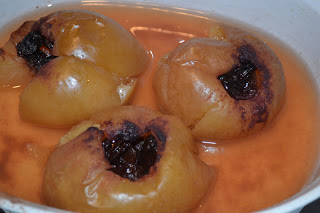
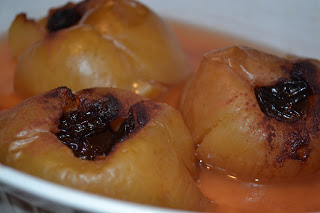
I’m always looking for new breakfast ideas. This week I came across Cara’s recipe for slow cooker baked apples.  It was just what I needed – grain and nut free and easy prep.

I was going to make them in the crockpot, but then I changed my  mind. Since I was only making a few I didn’t want to get my big crockpot dirty. So I just prepped them this morning and baked them in the oven.

So easy and so delicious! Justin said they were great. He had his topped with homemade vanilla yogurt.

I will definitely be making these again. Such a great idea for a healthy breakfast. I didn’t follow the recipe exactly since I was going from memory when I made it. It still turned out great.

The next time I make it I might modify things and just do a pan of sliced baked apples**. Then you don’t have to worry about the apples opening/the toppings falling out. And you can serve up as much or as little as you want. Plus I don’t have to worry about a picky eater complaining about apple peels 😛

Baked Apples

6 medium apples
¼ cup raisins
¼ cup honey (I also added a little organic cane sugar)
1 tsp. cinnamon
6 Tbsp. coconut oil, butter, or ghee (I forgot this…oops)
 
Core apples. To core, using an apple corer or paring knife, cut around the core (about ¼ inch from the stem all the way around) but leave about half an inch at the bottom. Use the knife to ‘drill out’ the core.
 
Divide raisins, honey, cinnamon, and coconut oil between the apples.
 
Place apples in a crock pot and add ½ inch of water. Cook on low overnight and enjoy a hot breakfast in the morning!
 
Alternatively, bake covered at 350 degrees in a glass dish for 45 minutes-1 hour in the morning.
 
**Next time I will try peeling and slicing the apples. Place them in a buttered baking dish. Sprinkle with cinnamon, honey and raisins. Cover and bake at 350 for 25 minutes.

Top with with cream, yogurt, coconut milk, or just eat plain.

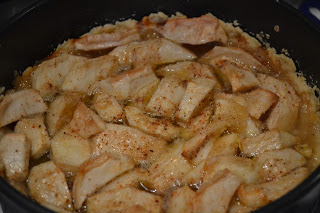
Scalloped Sweet Potatoes and Apples

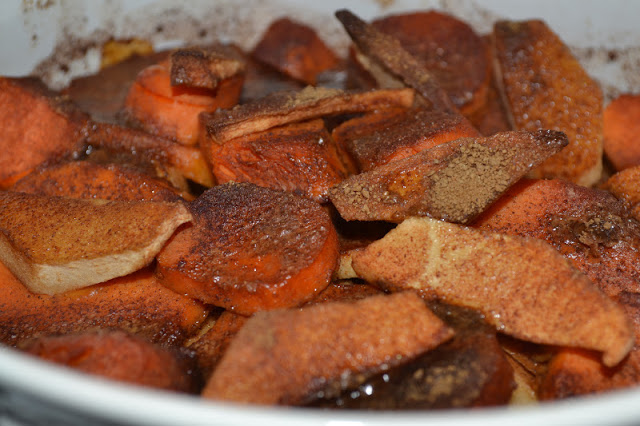
Earlier this week I made another recipe from my Old Pennsylvania Dutch Recipes book. It is called Scalloped Sweet Potatoes and Apples. Perfect for fall in Michigan!

It was quite easy to make and turned out really well. I cooked the sweet potatoes first thing in the morning. Then did the peeling and slicing when it was time to make dinner.

This got two thumbs up from the family. I used sweet potatoes from our garden and apples from my in-laws’ farm. It would be a great recipe for a large crowd, a holiday or a potluck. I only made a half recipe and we had plenty of leftovers.

This post is linked to Fight Back Friday and Fresh Bites Friday.

Scalloped Sweet Potatoes and Apples

6 medium sweet potatoes
1 1/2 cups apple slices
1/2 cup rapadura (or organic cane brown sugar)
1/2 tsp. salt
1 tsp. ground mace (I don’t even know what mace is…I just used cinnamon)
1/4 cup butter

Wash and cook sweet potatoes in boiling water to cover until just tender. Peel and cut into crosswise slices 1/4 in. thick.

Butter a 2 qt. casserole and arrange one half of the sweet potatoes in the bottom. Then later one half of the apple slices. Sprinkle with one half of a mixture of the brown sugar, salt and mace. Dot with 2 Tbsp. butter. Repeat layering, ending with apples, seasoning and butter.

Bake at 350 degrees for 50 minutes.

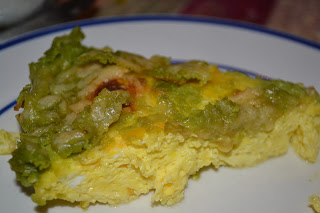
Grain Free Pesto Topped Quiche…Or Egg Pizza

Eggs and pesto go very well together. I’ve made a pesto quiche before…one version that had pesto on the bottom and one that had it mixed in.

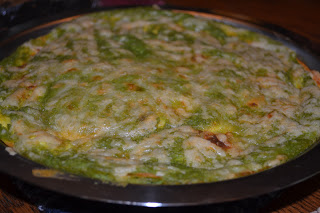
The problem is that the pesto usually kind of gets lost in the eggs. Sometimes you can’t even tell it’s there. So last night I decided to top our quiche with pesto.

I made a simple egg and cheese quiche. I let it bake until the top was just set. Then I topped it with pesto and extra cheese.

It worked very well. The pesto stayed on top and added great flavor.

Are you grain free and looking for a pizza substitute? Make the quiche thinner and this is like pesto pizza! You could even add extra toppings. Mushrooms, onions, peppers,…I may need to try this very soon.

The next time you make quiche, instead of mixing all of the meat and vegetables inside consider topping it. The possibilities are endless. (Plus picky eaters can pick off what they don’t like that way 🙂

This makes a great breakfast, brunch, lunch or dinner! And the leftovers are good warm or cold. Perfect for a quick weekday breakfast.

What is your favorite way to make quiche? What toppings would you add?

Pesto Topped Quiche

1/2 – 1 cup pesto (I blend peas, olive oil, salt and garlic powder for a simple allergen free pesto. You can add nuts and cheese and use basil or spinach for a more traditional pesto)
4 eggs + 5 egg yolks
1 cup milk or dairy kefir
salt, pepper and garlic powder to taste
1 cup shredded cheese (I used a combo of marble and parmesan)
1/4 cup shredded parmesan cheese

Grease a 9″ pie plate. Mix eggs, milk, seasoning and  1 cup shredded cheese. Pour into prepared pan.

Bake at 375 for 20 – 30 minutes, until top is set.

Spread pesto on quiche. Sprinkle parmesan cheese over top.

Bake another 25 – 35 minutes, until eggs are fully set.

Let set for 5 minutes before serving.

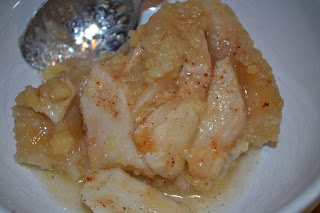
Dutch Apple Tart

I recently pulled out my Old Pennsylvania Dutch Recipes book again. As I flipped through it I realized there are so many recipes in it that I want to try! I was specifically looking for some kind of apple dessert.

There were quite a few. I chose Dutch apple tart…very fitting for me 🙂

It is a pretty simple recipe, and it turned out great!! It is a little messy since the sugar creates a syrup. But so delicious.

Serve it with ice cream and drizzle the extra syrup over top.

I did have a little problem with the pastry being too dry. It needs more water than the recipe calls for.

It’s not a very photogenic dessert, but I did what I could 😛

Dutch Apple Tart

1 pastry recipe, prepared (recipe below)

1 Tbsp. flour (I used organic all purpose, but whole wheat would probably work fine as long as it’s finely ground)
1 cup organic cane sugar
5 medium-size apples, pared, cored and quartered
1/4 tsp. ground nutmeg
2 Tbsp. butter

Pastry:
1 1/2 cups flour (organic all purpose or whole wheat)
1/2 tsp. salt
1/2 cup lard, butter or palm shortening
3-6 Tbsp. cold water

Mix flour and salt. Cut in butter until crumbly (I use a food processor for this). Add water gradually until the dough just holds together.

Line an 8″ round baking dish with the pastry. Sprinkle a mixture of the flour and 1/4 cup of the sugar on the bottom of the pastry.

Put apples cut side down on the pastry. Sprinkle with a mixture of the remaining sugar and nutmeg.

Dot with butter.

Bake at 350 degrees for about 55 minutes, or until apples are tender and a rich syrup has formed.

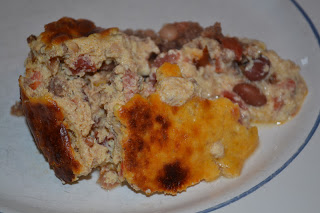
Chili Cheesecake

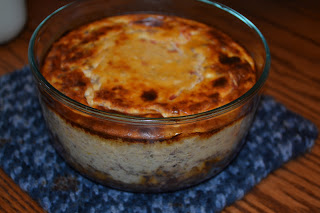
A couple weeks ago I was watching the show The Best Thing I Ever Ate. One of the dishes featured was a savory cheesecake. It looked pretty good, although I can’t remember at all now what was in it. It got me thinking…maybe I should try making a savory cheesecake.

I had some leftover chili I didn’t know what to do with. So I turned it into chili cheesecake.

I honestly had about 5 minutes to prepare this dish after running in the door from a visit to the the doctor and running errands. I thought it might be a huge failure. I didn’t have a recipe. I didn’t measure. I just dumped, mixed and stuck it in the oven. Praying it would have enough time to bake and that it wouldn’t be a pan of slop when it came out.

To my great surprise it actually turned out really well. Both of the kids even loved it.

This is a great way to use up leftovers and come up with any kind of savory cheesecake you can imagine. You can eat it as is or use it as a dip.

It’s been almost a week now since I made it so I’ll do my best to remember what I did 😛  I just made a small dish. You can scale it up to make it in a pie dish or spring form pan.

Chili Cheesecake

1/2 cup crushed tortilla chips (for a “crust”…this is optional…the chips get soft when baked)
1 cup chili (you could use taco meat, cooked ground meat, shredded chicken, or any vegetables you like)
1 cup homemade cream cheese
3/4 cup homemade sour cream
1 egg
2 egg yolks
seasoning to taste

Place tortilla chips in the bottom of a small baking dish (I used a 4 cup pyrex dish). Top the chips with half of the chili.

Mix the rest of the chili, the cream cheese, the sour cream and the eggs. Adjust seasoning to taste.

Pour the mixture over the layer of chili.

Bake at 400 degrees for about an hour (until set all the way through). Let set 5 minutes before serving.

Chocolate Chip Cheese Ball

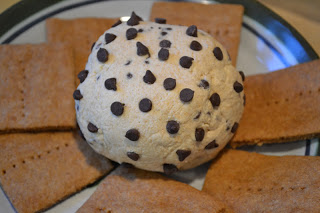
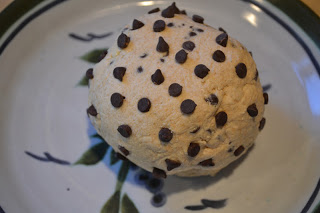
I’ve had a recipe for a chocolate chip cheese ball in my list of recipes to try for a long time. I finally decided to make it. I modified it to use real ingredients. I did use regular chocolate chips. I still need to get to the store to try to find better quality chips. Or I need to find time to make my own again. But aside from that it was all good stuff.

It turned out great! A real treat. It’s kind of like eating cookie dough. I served it with a fresh batch of homemade graham crackers. A sweet twist on a cheese ball. Delicious.

The original recipe says to coat it in nuts. I didn’t do that since I can’t eat nuts. I just added some extra chocolate chips to the outside. Dried coconut flakes would be good too. It’s mostly for looks. You really don’t need to coat it in anything.

This post is linked to Fat Tuesday.

Chocolate Chip Cheese Ball

5 oz. homemade cream cheese
1/3 cup white whole wheat flour (you can use cornstarch or arrowroot. Use a little less than 1/3 cup)
1/3 cup maple syrup
1/4 tsp. vanilla
5 Tbsp. butter, softened
2-4 tsp. molasses
mini chocolate chips

Beat the cream cheese and butter. Mix in the flour, syrup, vanilla and molasses. Taste for sweetness. Add extra syrup or molasses if needed. Stir in chocolate chips (as few or as many as you like).

Refrigerate for two hours.

Scoop onto plastic wrap and form into a ball.

Wrap in plastic wrap and refrigerate until ready to serve.

You can roll the ball in chopped crispy nuts, coconut or more chocolate chips.

Banana Split Ice Cream

If you know me, you know I LOVE ice cream. I only eat my homemade ice cream since I know exactly what’s in it. My body does not tolerate all of the fillers, starches, etc. in store-bought ice cream. I’m always trying to come up with new flavors.

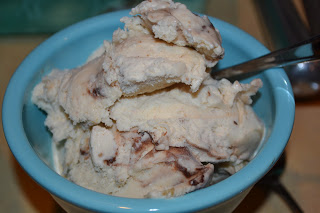
On Sunday I had some cream that needed to be used…which means ice cream. I had some bananas that were getting ripe. So I thought I’d make strawberry banana. Which then morphed into banana split ice cream.

I did a strawberry banana ice cream with walnuts and fudge swirled in. Delicious! And so easy. Using banana really thickened the ice cream. It was done in 10 minutes instead of the usual 20. Love it.

Banana Split Ice Cream

3 cups heavy cream (preferably raw)
3 egg yolks
1 ripe medium banana
1/2 cup frozen strawberries (fresh will work, but frozen helps it thicken and freeze faster)
1/4 cup honey
1/3 cup maple syrup (you can do all honey or all maple syrup)
1/3 cup chopped crispy nuts
hot fudge sauce (recipe below)

In a blender mix cream, yolks, banana, strawberries, honey and syrup. Taste. Make sure it is a little overly sweet (the sweetness will go down after it freezes).

Pour into ice cream maker and process until done (mine took 10 minutes in a Kitchen Aid mixer attachment).

During the last minute of processing add nuts.

Put the ice cream in a freezer safe container. Drop small spoonfuls of fudge into the ice cream and mix very gently. Don’t mix it in. Just fold over the ice cream so the drops of fudge stay in tact as much as possible. It’ll be like pieces of fudge when it freezes. Freeze until firm.

Hot Fudge Sauce
(prepare this in advance so it is cold when you make the ice cream)

1 cup organic cane sugar
1/3 cup cocoa
2 Tbsp. organic all purpose flour (or arrowroot or cornstarch)
1/4 tsp. salt
1 cup boiling water
1 Tbsp. butter
3/4 tsp. vanilla
 
Blend sugar, cocoa, flour and salt in sauce pan.
 
Turn on heat and add boiling water. Bring to a boil.
 
Cook, stirring constantly, until thick, about 3-6 minutes.
 
Remove from heat. Stir in butter and vanilla. Store in refrigerator.

Breakfast Cups

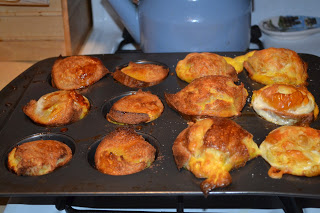
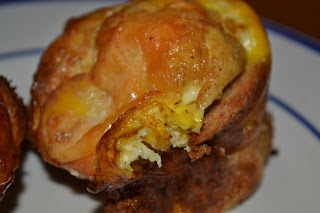
A couple weeks ago I made a simple breakfast for dinner. I made egg cups and french toast cups. They came together very quickly, and we all enjoyed them. I even got them prepped mostly one handed since that’s about the only way to make dinner without running into the other room every five seconds to get Abram down from something he’s climbed on.

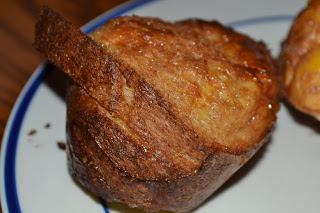
The basis of the recipe is putting bread in muffin cups. Then add whatever to it you want. I did eggs and cheese in some. I did eggs and maple syrup in some.

You could also use the bread in a muffin cup idea with things like sloppy joes or cheeseburger cups or pot pie. The bread is kind of the crust. Then be creative and go from there.

It’s fun to have individual servings, especially for kids. And it’s much faster than making a crust 🙂

These are great for a brunch or for a party. They are also a great prep ahead breakfast. Make them the night before or freeze a bunch and warm them when you need them.

Breakfast Cups

Mini quiche breakfast cups

3 slices whole wheat bread (or whatever bread you tolerate…gluten free, grain free, etc.)
5 eggs
1/2 cup milk
1/2 cup shredded cheese
salt and pepper to taste

Grease 6 cups of a muffin tin. Mix eggs, milk and seasoning. Place 1/4 slice of bread* in each muffin cup. Top with a little cheese. Evenly distrbute the eggs among the cups. Add another 1/4 slice of bread to each cup and push down so it absorbs the eggs. Top with extra cheese if desired. Bake at 350 for 25 – 30 minutes.

Mini french toast cups

3 slices whole wheat bread (or whatever bread you tolerate…gluten free, grain free, etc.)
6 eggs
1/2 cup milk
1/3 cup pure maple syrup
cinnamon (optional)

Grease 6 cups of a muffin tin. Mix eggs, milk and cinnamon. Place 1/4 slice of bread* in each muffin cup. Pour a little maple syrup on top. Repeat with another 1/4 slice of bread and syrup. Evenly distribute the eggs among the cups. Push bread down to be sure it all gets saturated with the eggs. Bake at 350 for 25 – 30 minutes.

*You can also do it with bread torn into chunks instead of keeping it as slices. This works espically well for french toast.

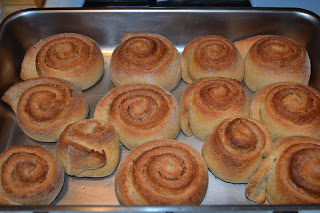
Whole Wheat Cinnamon Rolls

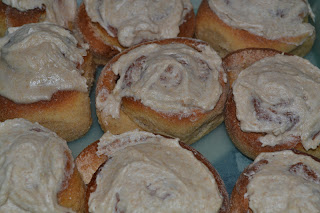
I’ve been wanting to make a batch of cinnamon rolls for some time now. I haven’t made any in years. I finally made some over the weekend. The recipe is from my MIL.

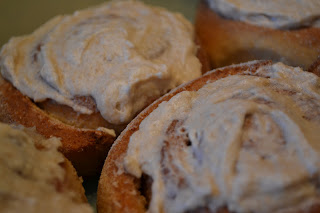
I made a few modifications to meet our standards of healthy. They turned out great!! Rebecca declared them the “best breakfast I’ve ever had.” You can’t beat that.

This is really two recipes – a basic sweet roll dough and the actual cinnamon roll. I prepped the dough Friday night, then made the cinnamon rolls Saturday morning. It worked out well.

I made my own version of frosting to top them. Delicious!

This post is linked to Fat Tuesday and Real Food Wednesday.

Whole Wheat Cinnamon Rolls

Sweet Roll Dough

2 1/4 tsp. active dry yeast
1/4 cup warm water
1/4 cup lukewarm milk
1/4 cup cane sugar
1/4 cup palm shortening
1/2 tsp. salt
1 egg
2 1/2 cups white whole wheat flour

Cinnamon Rolls

Sweet roll dough
2 Tbsp. butter, softened (room temp)
1/3 cup cane sugar
2 tsp. cinnamon

Frosting

1/4 cup palm shortening
1/4 cup white whole wheat flour (finely ground)
1/4 cup maple syrup

———————————
Dissolve the yeast in the warm water in a stand mixer bowl (or a large bowl if doing it by hand). Mix in milk, sugar, salt, egg, shortening and 1 1/2 cups of flour. Mix until smooth. Mix in remaining flour until a soft dough forms (add extra flour if it’s too wet). Knead by hand or with dough hook for about 5 minutes. Pour a small amount of oil on the dough and turn to coat.

At this point you can cover and refrigerate the dough for 3-4 days. Or you can use it immediately.

When you are ready to make the cinnamon rolls let the dough rise until double in size, about 2 hours (it could take longer if it was in the refrigerator…it has to come to room temp before it will rise).

Roll the dough into a 9×15 rectangle. Spread with the softened butter. Sprinkle mixture of sugar and cinnamon over top. Roll up the dough starting with the long side (so it is 15″ long). Pinch the edge of the dough to seal it.

Cut the roll into 15 equal slices.

Place slices flat side up in a greased 9×13 pan, leaving a little space between them. Let the rolls rise again until double (about 45 minutes).

Bake at 375 for 25 minutes.

Allow to cool slightly.

While the cinnamon rolls are baking mix the shortening, flour and syrup to make the frosting.

When the cinnamon rolls are slightly cooled add the frosting on top. Serve immediately.

The cinnamon rolls can be frozen before or after frosting them.

Chicken Noodle Sour Cream Cakes (RR)

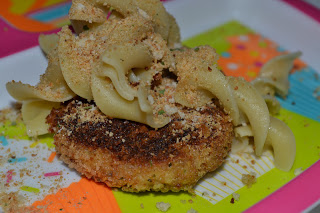
Last night we made Rebecca’s most recent recipe creation. She called them noodle cream cakes. When I asked her how to make them she said they were chicken sour cream cakes with noodle and bread crumb topping.

They actually turned out quite well. I never would have thought to add sour cream to my chicken cakes…but it was really good! I’ll probably do that more often now when I make things like salmon cakes and tuna cakes.

I didn’t measure anything. Whenever I make “cakes” I just add and taste as I go. I’ll try to give approximate quantities.

Chicken Noodle Sour Cream Cakes

1 1/2 cups cooked, diced chicken
1/2 cup sour cream (preferably homemade)
1/4 cup mayonnaise (preferably homemade)
2 egg yolks
1/3 cup bread crumbs
salt, garlic powder, herbs to taste
bread crumbs to coat

cooked noodles (we used egg noodles)
butter, salt, garlic powder (optional for noodles)
seasoned bread crumbs for topping

Mix chicken, sour cream, mayo, yolks and bread crumbs. Add seasoning. Add more sour cream (if too dry) or more bread crumbs (if too wet) to get a thick mixture. Adjust seasoning to taste.

Form meat mixture into patties. Coat with bread crumbs. Cook in hot oil (coconut oil, butter, lard) in skillet over medium heat until golden brown, about 6 minutes per side.

While chicken cakes are cooking, cook the noodles. You can serve them plain. I added butter, salt and garlic powder.

Serve the chicken cakes topped with noodles and a sprinkle of bread crumbs.