Home » Kid-friendly Recipes » Page 36

Category: Kid-friendly Recipes

It is so important to cook homemade, healthy food. But it’s not always easy to find kid-friendly recipes.

That’s where I come in. I’ve got hundreds of kid-tested and approved recipes that won’t keep you in the kitchen for hours or stretch your budget too thin.

I focus on allergy-friendly, whole foods. But I always cook with kids in mind. I take all sorts of feeding challenges into account too.

We’ve dealt with every allergy possible, so I’ve created recipes that are gluten free, nut free, dairy free, egg free, soy free, corn free, coconut free and more!

Kid-friendly recipes don’t have to be boring. And they are certainly not limited to chicken nuggets and pizza every night.

A nourished child will enjoy a wide variety of fruits, vegetables, proteins, carbohydrates and fats. Get your kids in the kitchen with you and start cooking! Have fun with food and your kids will learn to love eating.

Zucchini Soup | Homemade Dutch Apple Pie

Zucchini Soup

Zucchini soup is a great way to use up some of your larger zucchini and get kids to eat it! Pair it with zucchini crackers and cheese…lunch is served.

Zucchini Soup | Homemade Dutch Apple Pie

Zucchini just keeps coming.

I’m still working on using up the last of the zucchini from our garden. Sound familiar? You can only make so much zucchini bread!

One nourishing way to use that extra zucchini is in zucchini soup. It is so good! And so simple. Just cook and puree some vegetables in broth. It turns into a creamy, flavorful nourishing soup.

Zucchini is the base. But you can add any vegetables to complement the zucchini.

I like to use the zucchini that gets a little too big for soup. You can’t tell the difference.

Getting ready for fall.

As fall approaches and I think about school…I also think about sickness. Once all of those kids are together the germs start spreading.

Eating zucchini soup during the summer is a great way to build up the immune system ahead of time. Getting your family to consume broth year round is a great idea.

Soup for breakfast.

I eat soup for breakfast most days. I love it when I have leftover soup that I can just grab out of the fridge and eat cold. Zucchini soup is perfect for an easy breakfast or lunch that you don’t have to cook.

It also makes a great dip for raw vegetables or crackers.

Are you struggling to come up with more ways to use your zucchini? Try zucchini soup!

Zucchini Soup

3 medium zucchinis, chopped
1 small carrot, chopped
1 small red onion, chopped
2 cups chicken broth
salt, pepper, garlic powder to taste
1 cup diced, cooked chicken (optional)

  1. Cook vegetables in broth until very tender, about 30 minutes.
  2. Add seasoning.
  3. Puree with an immersion blender or regular blender.
  4. Return soup to pot, taste and adjust seasoning.
  5. Add diced, cooked chicken and simmer for 10 minutes.

Here are a few more zucchini recipes you may enjoy:

Zucchini cake with two frostings

Zucchini crackers

Zucchini pizza bites

Chocolate zucchini scones

Zucchini salmon cakes

Chocolate zucchini cupcakes

BLT…and P?

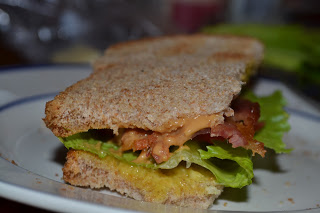
I’m finally playing catch up with some recipe posts after finishing all of my other writing assignments. Recently we had BLTs for dinner. But we made one addition…we added peanut butter! I know it sounds crazy and kind of gross. I thought the same thing when I stumbled on this idea at Simple Organized Living. But after reading the comments and seeing how many people really liked it I gave it a try.

Turns out it’s pretty good. It gives you the delicious salty/sweet combo. It’s important to put the peanut butter on the bacon side of the sandwich.

I’ve always loved BLTs. Most of the time I also put avocado on them. Now there is one more ingredient we can add.

Have you ever tried peanut butter on your BLT? What do you think?

BLTP

2 slices bread
3 strips cooked bacon
2 slices fresh tomatoes
leaf lettuce
homemade mayonnaise
peanut butter

Toast bread. Spread one slice with mayonnaise. Spread the other slice with peanut butter. On the mayonnaise slice add lettuce, then tomatoes, then bacon. Top with the peanut butter slice. Enjoy!

Buster Bars (updated recipe)

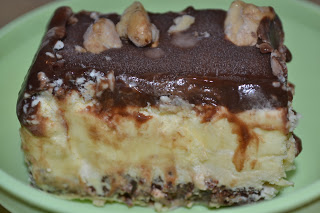
My MIL introduced me to buster bars years ago. I’m not sure where the name comes from…maybe if you eat too many you’ll bust your pants 😛  Whatever the case they are delicious. Chocolate, ice cream, nuts…yum.

I’ve made them several times. I made a peppermint stick version a couple years ago. Amazing!

After making our homemade Oreos Justin asked about buster bars…since the crust is made out of Oreos. So I made an updated real food version of buster bars. They take some work, but they are worth it!

I made the cookies for the crust ahead of time. Other than that I made everything and assembled it in about an hour. This is a great summer (or anytime) treat. You can experiment with flavors of the crust and the ice cream. Mint and chocolate work well. You could also do peanut butter and chocolate. Or even a fruity version. You can’t go wrong.

This post is linked to Fat Tuesday and Real Food Wednesday.

Buster Bars

Fudge Sauce:

1 cup pure cane sugar
1/3 cup cocoa
3 Tbsp. organic AP flour (you may also use cornstarch or arrowroot)
1/4 tsp. unrefined sea salt
1 cup boiling water
1 Tbsp. butter
3/4 tsp. vanilla

Chocolate Cookie:

3/4 cups whole wheat flour
1/4 cup cocoa powder
2 tsp. chocolate extract
1/4 cup organic cane sugar
1/2 tsp. baking soda
1/4 tsp. salt
1/4 cup butter, room temp (you can substitute coconut oil or palm shortening)
3 Tbsp. honey
water

Vanilla Ice Cream:

3 egg yolks
1/3 cup maple syrup
1/4 cup honey
1 tsp. vanilla extract
3 cups heavy cream (preferably raw, not ultra pasteurized)

Cream Filling:

1/4 cup organic palm shortening
5 – 6 Tbsp. organic all purpose flour (you can substitute corn starch or arrow root)
1/4 cup maple syrup

—————————————————————–

Fudge sauce can be made in advance. Do not pour on ice cream layer until the ice cream is firm and the sauce is completely cooled.

Blend sugar, cocoa, flour and salt in sauce pan. Turn on heat and add boiling water. Bring to a boil. Cook, stirring constantly, until thick, about 3-4 minutes. Remove from heat. Stir in butter and vanilla. Store in refrigerator.

——————————

Make the chocolate cookie at least an hour in advance. I do it a day ahead.

Cream butter and sugar in a large bowl. Add cocoa and chocolate extract. Blend well (a hand mixer works well). Taste. Add more chocolate extract until strong enough. Add flour, baking soda, salt and honey. Blend well. If dough is still crumbly slowly add water, 1 Tbsp. at a time until dough will hold together when squeezed with your hand.
Place dough on a parchment lined baking sheet. Roll until the dough is about 1/8 – 1/4″ thick. Bake at 350 for 13 minutes. Let cool completely.

When cookie is cooled break into chunks and process into crumbs in a food processor. This can all be done in advance.

——————————-

Cream shortening, flour and maple syrup in a small bowl. Add more flour for a stiffer cream (note that it will firm up/become solid when chilled). Add more maple syrup for a sweeter cream.

——————————-

Blend ice cream ingredients in a blender. Taste. Make sure it is a little overly sweet. The sweetness will go away once the ice cream is churned. Process in ice cream maker (mine takes about 15 minutes in a Kitchen Aid ice cream attachment).

———————————

Assemble the Buster Bars:

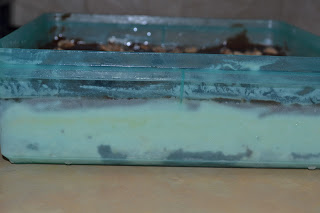
Mix chocolate cookie crumbs with 1/4 cup melted butter. Press into the bottom of a 9×9 or 9×13 pan (preferably one with a lid) (a smaller pan will give you thicker bars). Place in the freezer.

Prepare the cream filling. Spread over cookie crust. Return to freezer.

Make ice cream. Immediately spread over cream filling. At this point you can add some toppings. I added a handful of chocolate chips. You could also do any kind of nut. Return to freezer and let set completely.

When ice cream is solid spread fudge sauce over top. You may add more toppings here. I did some chopped nuts. You could add  more crushed cookie. Return to freezer until fudge is solid.

Remove from freezer about 5 minutes before serving to make cutting easier.

Real Cheesecake

I love cheesecake.  It comes in a close second for my all time favorite food. Right behind ice cream. I don’t make it often. And I haven’t made it in quite some time. I’ve been wanting to make a REAL cheesecake for a while. But it takes work to make all of the ingredients before you can even make the cheesecake.

This week it just so happened that we had a lot of yogurt (I made a little extra to use up milk) and some sourdough graham crackers that needed to be used up. So it was the perfect time to experiment.

I used the yogurt to make real cream cheese (next time you want to buy cream cheese at the store check the ingredients…you might be surprised by the fillers/thickeners they add). I also made raw sour cream this week.

Then it was cheesecake time.

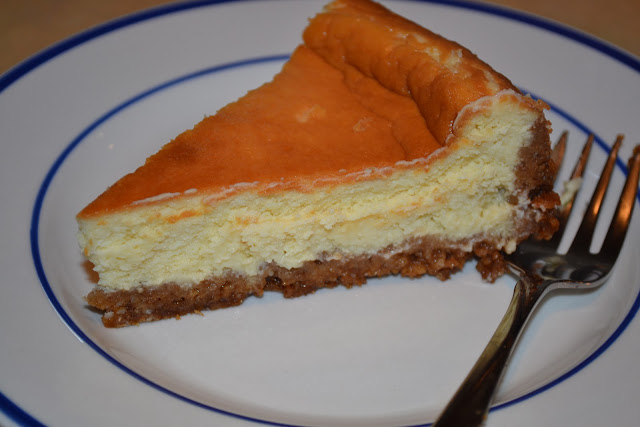
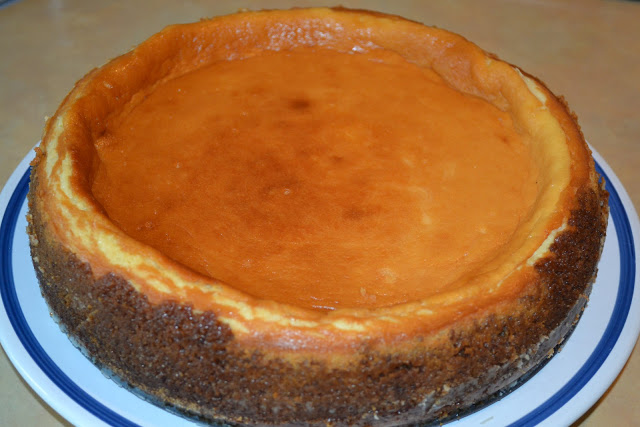
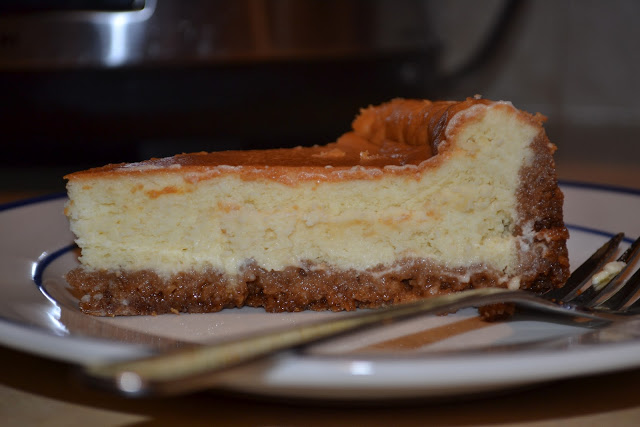
The outcome…AMAZING! Real cheesecake with totally real ingredients. I’m  in heaven 🙂  It did turn out a tiny bit softer than I like (I like my cheesecake really firm…like almost crumbly…I usually let mine sit in the freezer for a while :). But for most people it would be just right. I scaled back the cream in the recipe below. You could also add a little arrowroot, cornstarch or AP flour to make it thicker.
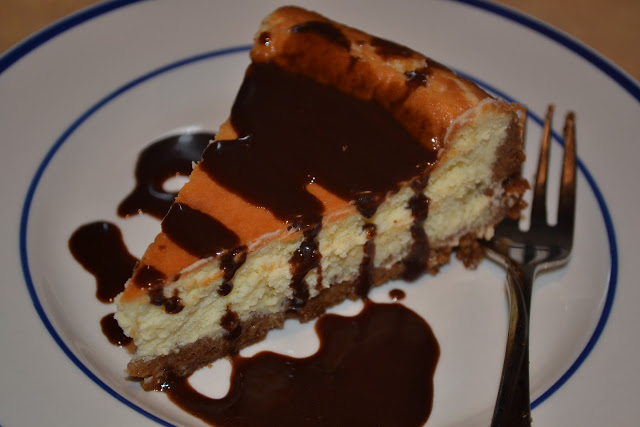
This is about as real as it gets when it comes to dessert. A totally from scratch cheesecake. A cheesecake I feel comfortable calling healthy 🙂  It’s great on its own…even better with some homemade fudge sauce over top.

This can be made gluten free by using gluten free or soaked gluten free graham crackers. Or you can make a special holiday dessert using pumpkin spice graham crackers or chocolate graham crackers!

Do you love cheesecake? Give this version a try. Let me know if you love real cheesecake as much as I do.

This post is linked to Fat Tuesday and Real Food Wednesday.


Cheesecake

2 cups graham cracker crumbs (whole wheat, sourdough, gluten free, soaked gluten free, pumpkin spice, chocolate or soaked) (pulse in food processor to make crumbs)
1 1/4 cup cane sugar
1/2 cup butter or coconut oil (or a combination)
2 cups homemade cream cheese (It took about 1 1/2 qts. of homemade yogurt to get this)
1 cup homemade sour cream
3 eggs
1 tsp. vanilla extract
1 Tbsp. lemon juice (optional)

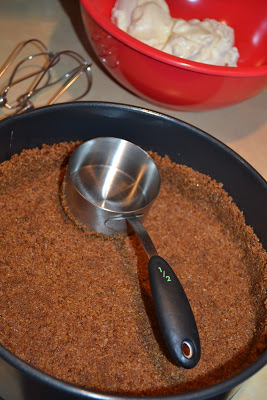
Melt the butter and stir into the crumb mixture. Press into the bottom of a greased 9″ spring form pan. Set aside.
 
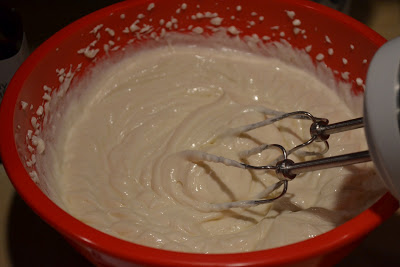
Using an electric mixer blend the cream cheese, sour cream and the remaining sugar until creamy, wiping down the sides of the bowl and the beaters with a spatula to incorporate all the cheese. Add the eggs 1 at a time, beating after each addition. Slowly stir the lemon juice into the cheese mixture.

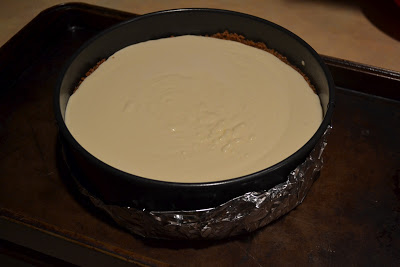
Meanwhile preheat the oven to 350. Place aluminum foil under the springform pan and up the sides (this prevents any water from getting in). Put the prepared pan into a slightly larger rectangular pan. Pour cheese mixture into the springform pan. Set both pans in the oven and fill the rectangular pan with water, half way up the sides of the round pan. Bake until firm and golden brown, about 90 min. Turn off oven, open slightly and let cheesecake set for about 30 min. Remove from water bath. Let cool on counter for 60 min. Cover and let cool completely in refrigerator (at least 4 hours).

Place cheesecake in the freezer for an hour or two before serving to make it really firm.

Sourdough Brownies

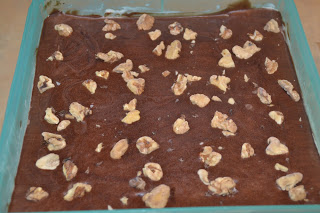
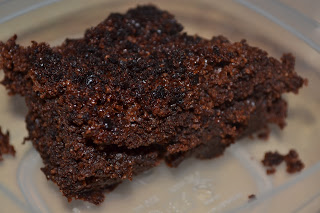
Yesterday I tried another sourdough recipe from Cake Walk for brownies. This recipe is very simple to make. And the brownies are delicious! They definitely don’t taste like sourdough.

I added a few chocolate chips instead of nuts. They turned out the slightest bit crumbly. Maybe next time I’ll add an extra egg. But overall very good. Rebecca had no problems eating one 🙂  A healthier version of brownies – sourdough and whole wheat.

Sourdough Brownies

1/3 cup butter
1 cup cane sugar
2 oz. bittersweet chocolate (I used 1 oz. unsweetened and 1 oz. milk chocolate)
1 egg (I’ll try 2 next time)
1/2 cup whole wheat flour
1/4 cup cocoa powder
1/2 cup sourdough starter
1/2 tsp. baking soda
1/2 tsp. salt
1 tsp. vanilla
(I added about 1 tsp. chocolate extract)
1/2 cup chopped nuts or chocolate chips (optional)

Heat oven to 375. Grease a 9×9 inch pan with butter and set aside.

Melt butter and chocolate over low heat in a small saucepan. Set aside to cool.

In a medium bowl, whisk together flour, cocoa powder, baking soda, salt and sugar and set aside.

Stir egg, sourdough starter and vanilla into cooled chocolate mixture, and mix until well blended.

Add wet mixture to dry mixture and stir gently to combine. Fold in nuts, and spread into prepared pan.

Bake 30 to 35 minutes or until the edges begin to pull away from pan. Let cool before serving.

Crockpot Peppercorn Steak

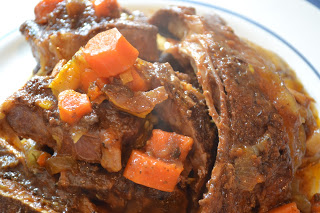
We still have quite a bit of beef in our freezer from last year. I’m always looking for new ways to cook it. After searching for a steak recipe I found a simple one on A Year of Slow cooking. I modified it a little, using what I had on hand.
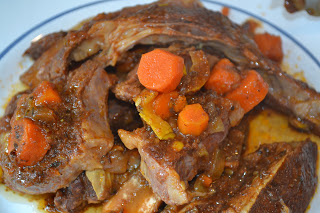
It turned out great! I used rib steak…which I don’t generally care about much. But it was very tender and flavorful this way. I would definitely make this again. I served it over rice. It would also work well over mashed potatoes or polenta. You could also add potatoes right in the crockpot and make it a one pot meal. I’ll post the recipe the way I made it.

Crockpot Peppercorn Steak

Steak (any kind you like. I used one large rib steak. There was plenty of sauce. I could have cooked two steaks in it)
1 pint tomato soup (preferably homemade, else plain tomato sauce)
1/2 cup water
1 small onion, chopped
4 large carrots, chopped
1 medium zucchini, sliced
(any vegetables you like will work here)
2 tsp. sea salt
2 tsp. Italian seasoning
1//2 tsp. pepper

Place meat in crockpot. Add vegetables. Pour in tomato soup, water and seasoning. Cook on low 7 or more hours (the longer it cooks the more tender it will be) or on high 5 or more hours.

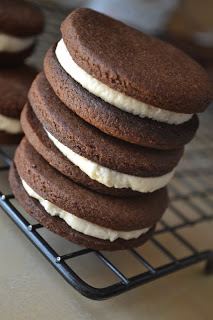
Homemade Whole Wheat "Oreos"

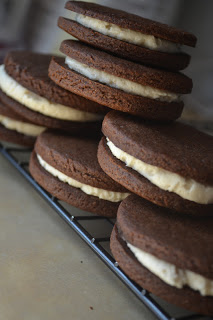
On Sunday Rebecca got to try an Oreo at church (slight cringe :P). Then she asked if we could make our own Oreos so we could make Oreo sundaes (love this girl…what four year-old asks if she can make something from scratch instead of going and buying more:). Why not? So that was our project yesterday.

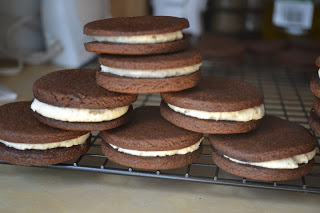
I had no recipe and no real starting point. I just started experimenting. And I must admit I am quite impressed with what we came up with! Sometimes homemade baked goods taste good…but not quite like the “real” thing. These actually really taste like Oreos…but they are made with REAL ingredients.

These do not have all of the preservatives and hydrogenated oils that make them shelf stable for half a year. So I store them in the refrigerator. That also keeps the cream filling solid. You can make a big batch and freeze them.

There really isn’t much more to say except these are delicious! The whole family agreed. What could top homemade Oreos? We made homemade cookies and cream ice cream with some of them later in the day 🙂  I also used some leftover cookie to make cookies and cream yogurt. Yum! I’m taking a cookie break today, though 😛

I used butter in my cookie dough. I find that it gives the best consistency/firmness. But if you want to make them vegan/dairy free you could use coconut oil or palm shortening in place of the butter. I also used all purpose flour in the cream filling because that is what I tolerate. You could use organic corn starch or arrow root. I personally like the soft texture the flour gives. Maybe next time I make them I’ll even try soaking the cookie dough.

Please give these a try and let me know what you think! Can you make homemade Oreos? Yes you can! If you think they look good, wait until you taste them!

This post is  linked to Real Food Wednesdays and Fresh Bites Friday and Fat Tuesday.

Whole Wheat “Oreos”
makes 17 – 20 cookies (depending on the size of your cookie cutter and the thickness of your dough)

1/4 cup organic palm shortening
5 – 6 Tbsp. organic all purpose flour (you can substitute corn starch or arrow root)
1/4 cup maple syrup

1 1/2 cups whole wheat flour
1/2 cup cocoa powder
3-4 tsp. chocolate extract
1/2 cup organic cane sugar
1 tsp. baking soda
1/2 tsp. salt
1/2 cup butter, room temp (you can substitute coconut oil or palm shortening)
6 Tbsp. honey
water

To make the cookies:

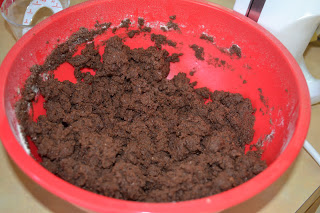
Cream butter and sugar in a large bowl. Add cocoa and chocolate extract. Blend well (a hand mixer works well). Taste. Add more chocolate extract until strong enough. Add flour, baking soda, salt and honey. Blend well. If dough is still crumbly slowly add water, 1 Tbsp. at a time until dough will hold together when squeezed with your hand.

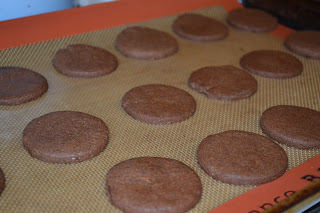
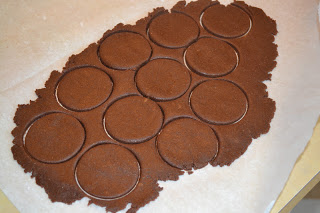
Place 1/3 of dough onto parchment paper. Place another layer of parchment paper over top. Roll dough between parchment paper until it is 1/8 – 1/4″ thick. Remove top paper. Cut circles and place onto parchment lined baking sheet. Repeat this process until you have used all of the dough.

Bake cookies at 350 for about 13 minutes. Allow to cool completely.

To make the filling:

Cream shortening, flour and maple syrup in a small bowl. Add more flour for a stiffer cream (note that it will firm up/become solid when chilled). Add more maple syrup for a sweeter cream. You can prep the filling ahead and store it in the refrigerator. Let it come to room temperature before filling cookies.

To assemble the cookies:

Place the cream filling in a small plastic bag. Cut off one of the corners of the bag for a pastry bag. Pipe some cream onto the center of one cookie, leaving space at the edge . Top with another cookie. Press together just until the cream reaches the edge. Repeat this process until all of the cookies are filled. Store in an airtight container in the refrigerator. You can also freeze the cookies.

Sourdough Peanut Butter Blondies (vegan)

I’ve been searching for new sourdough recipes lately. I came across a recipe for sourdough peanut butter blondies on Cake Walk. They looked simple and delicious.

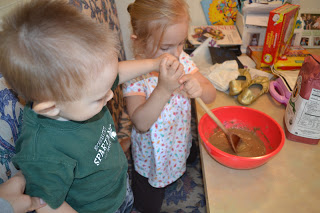
Yesterday morning both kids helped me make them (that’s how easy they are to make). It only takes a few minutes to mix the batter. Then pop them in the oven.

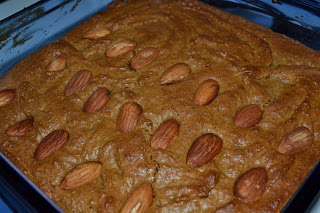
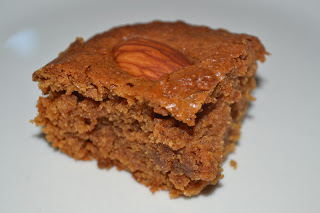
They turned out quite well. Very moist and chewy. They were a little heavy on the peanut butter taste for me. But Justin and Rebecca really liked them. I think they would be better with some chocolate chips to balance the flavor 🙂

I accidentally used more coconut oil than the recipe calls for. So mine were extra moist!

I don’t have any peanuts in the house, so I topped them with crispy almonds.

These happen to be vegan. I’m not sure I’ve ever made a vegan recipe before…at least not knowingly 😛  If you aren’t looking for a vegan recipe you could replace the coconut oil with butter.

And back to the original topic of sourdough. These do not taste anything like sourdough.

Sourdough Peanut Butter Blondies

3/4 cup peanut butter
1 cup sourdough starter
1/6 cup oil (coconut oil works well)
1 cup brown cane sugar or sucanat
2 tsp. vanilla
1/2 cup whole wheat flour
1/2 tsp. baking powder
1/2 tsp. salt
1/3 cup nuts (for topping)

Preheat oven to 350. Grease an 8×8 baking pan or 8″ round cake pan.

In a large bowl, mix together peanut butter, oil and brown sugar. Mix well, until well incorporated. Add the sourdough starter and vanilla, and blend in thoroughly (kids are very good at this part:).

Stir in flour, baking powder, and salt. Mix the dough (using your hands if you need to) well. The batter is very thick, and doesn’t spread on it’s own. Transfer dough to baking tin, press into sides, and press the peanuts into the top.

Bake for 25-30 minutes, until set and lightly browned on top. Cool completely in tin before slicing

Soaked Breakfast Bar ("Cereal" Bar)

I’ve been doing lots of baking and experimenting this week. Today I came up with a soaked breakfast bar recipe. When I made a batch of soaked graham crackers earlier in the week I realized that the dough was pretty good before dehydrating it. It was soft and chewy. The best part? My 14 month old could eat it easily…and loved it!

I set aside a couple of the graham crackers to eat as-is instead of drying them. They reminded me of cereal bars. Lightbulb…use the same dough to make homemade breakfast bars!

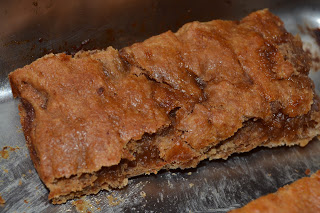
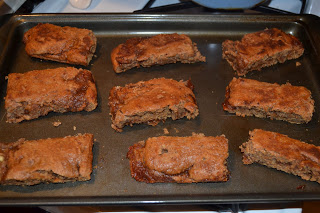
I used my soaked graham cracker recipe. I put half of the dough in the bottom of a 9×13 pan, baked it a little, then topped it with homemade apple butter and the rest of the dough. I baked it again and cut it into bars.

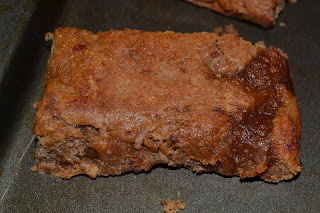
The verdict? Delicious!! A soft, chewy apple cinnamon breakfast bar. The grains are soaked, there are no vegetable oils, there is nothing processed. I feel good about giving these “cereal” bars to my whole family.

You can make them any flavor, depending on what kind of jam/butter you use. Or you can just make them plain bars without a filling. Either way they taste great. And they work really well for young children that are still learning how to chew. You can get really creative and fill them with things like nut butter, coconut, nuts, dried fruit or chocolate chips.

This is an easy grab-and-go breakfast. Make a batch. Freeze them. And you’ve got some on hand whenever you need something quick.

This post is linked to Fat Tuesday and Real Food Wednesday and Fresh Bites Friday.

Soaked Breakfast Bar

2 cups whole wheat flour
1 cup kefir, yogurt or buttermilk
1/2 cup coconut oil or butter, melted (I used coconut oil)
1/2 cup rapadura/cane sugar
1 tsp. cinnamon
1 tsp. baking powder
1/2 tsp. baking soda
1/2 tsp. salt
6 Tbsp. honey

1/3 – 1/2 cup jelly, jam or fruit butter

Mix flour, cultured dairy and oil. Cover and let soak 7 – 24 hours.

Mix in remaining dough ingredients until well combined. Spread half of the dough into the bottom of a greased 9×13 pan. Bake at 350 for 10 minutes.

Remove from oven. Spread an even layer of jam on top of dough. Spread remaining dough on top. Bake at 350 for another 25 minutes.

Cut into bars. Place bars on a separate baking sheet, with space in between bars. Bake another 5-10 minutes, until dough is baked through. Allow to cool.

A Berrylicious Cake

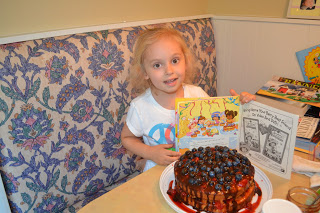
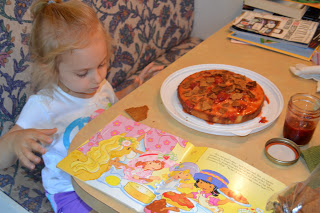
A couple years ago I got an old Strawberry Shortcake book at a second hand sale. It’s called The Berrylicious Bake-off. Rebecca has always enjoyed reading it. And every time we say we should try making a cake like the one in the book…someday.

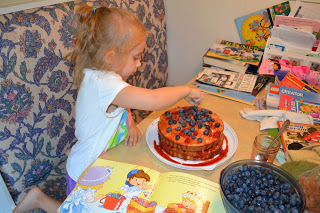
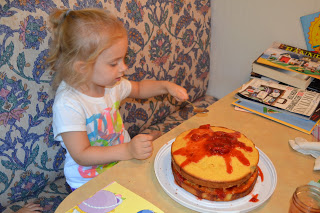
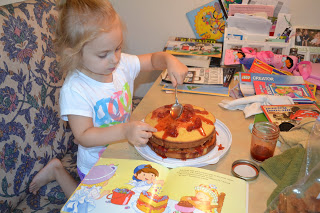
Well, yesterday we finally did it! We made “the berry best cake ever.” We followed the steps in the book using what we had on hand.

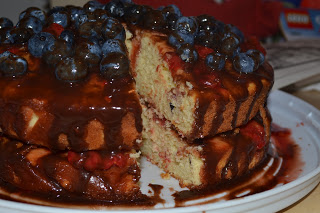
We started with my usual yellow cake, substituting orange juice for some of the milk to make orange cake. We topped it with homemade strawberry jam (from the freezer).

For our “crispy cookie layer” we used some of the sourdough graham crackers we just made. Instead of huckleberries we used fresh blueberries. Finally we topped it with our homemade fudge (good thing I made a fresh batch this week :).

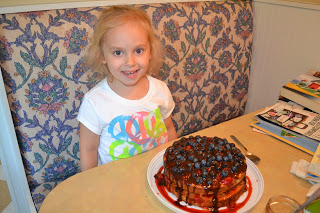
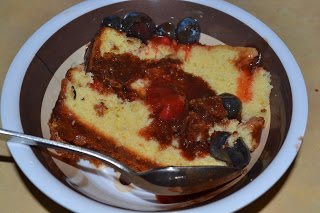
The end result? A berrylicious cake! It’s delicious. Plus Rebecca had so much fun following along with the book and making the layers/adding toppings. We also just happened to be making vanilla ice cream yesterday. They went very well together.

This isn’t so much a recipe post, but I wanted to share our fun experiment. If you want to make your own berrylicious cake, follow the steps below.

Berrylicious Cake

Orange Cake

2 1/4 cups organic AP flour
1 1/2 cup organic cane sugar
1/2 cup butter, softened
3 1/2 tsp. baking powder
1 tsp. sea salt
3/4 cups orange juice
1/4 cup milk
1 tsp. organic vanilla
3 eggs

1-2 cups crumbled sourdough graham crackers, soaked graham crackers, whole wheat graham crackers, vanilla wafers or any cookie you like (the book uses gingersnaps) (you could substitute chopped nuts for a crunchy layer)

1/2 pint homemade strawberry jam or crushed strawberries mixed with honey

1 cup fresh blueberries (or whatever berry you have on hand)

1/2 cup fudge sauce

Mix cake ingredients. Blend 30 seconds on low, then 3 minutes on high. Pour into 2 9″ round greased cake pans. Bake at 350 for about 30 minutes, until golden and baked all the way through. Allow the cake to cool completely.

Place bottom layer of cake on a dish. Spread half of the jam on top. Sprinkle crumbled cookies over jam. Place top layer of cake on top. Spread with remaining half of jam. Sprinkle blueberries over jam. Drizzle fudge over the whole cake. Enjoy! It tastes great with homemade vanilla ice cream too 🙂

Store cake in the refrigerator.