Home » Kid-friendly Recipes » Page 37

Category: Kid-friendly Recipes

It is so important to cook homemade, healthy food. But it’s not always easy to find kid-friendly recipes.

That’s where I come in. I’ve got hundreds of kid-tested and approved recipes that won’t keep you in the kitchen for hours or stretch your budget too thin.

I focus on allergy-friendly, whole foods. But I always cook with kids in mind. I take all sorts of feeding challenges into account too.

We’ve dealt with every allergy possible, so I’ve created recipes that are gluten free, nut free, dairy free, egg free, soy free, corn free, coconut free and more!

Kid-friendly recipes don’t have to be boring. And they are certainly not limited to chicken nuggets and pizza every night.

A nourished child will enjoy a wide variety of fruits, vegetables, proteins, carbohydrates and fats. Get your kids in the kitchen with you and start cooking! Have fun with food and your kids will learn to love eating.

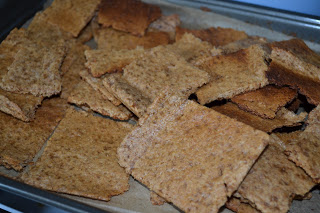
Sourdough Graham Crackers

As I was making a fresh batch of soaked graham crackers this week I thought it might be fun to try making sourdough graham crackers. Rebecca and I set to work right away 🙂  I used this recipe as my base and adjusted it to use my sourdough starter.

The graham crackers turned out quite well. I think I made them a little too thin, so they are quite crispy. But still delicious. I also used all coconut oil (out of convenience…it’s hot enough that it’s already liquid…so I didn’t have to add a step of melting anything 🙂 instead of all butter or a butter/coconut oil combo. I think using all coconut oil makes them a little more crumbly. Next time I’ll use some butter. But if you can’t have dairy using all coconut oil definitely works.

I love graham crackers. And this is another great, healthy variation. A perfect snack for kids or adults.

I wasn’t able to get many photos…I had a little boy in my arms that had just woken up from a short nap 😛

This post is linked to Fat Tuesday and Real Food Wednesday and Fresh Bites Friday.
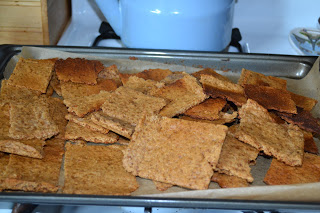
Sourdough Graham Crackers

1 1/2 cups whole wheat flour
3/4 cups sourdough starter

1/2 cup rapadura (dehydrated cane sugar)

1 tsp. baking powder
1/2 tsp. baking soda
1/2 tsp. salt
1 tsp. cinnamon
4 – 6 Tbsp. honey
1 tsp. vanilla
1 stick butter or 1/2 cup coconut oil, melted (Works very well to use half butter and half coconut oil)

Heat oven to 350. Melt butter/coconut oil in sauce pan. Set aside. In a mixing bowl, stir together flour, sugar, baking powder, baking soda, salt and cinnamon. Add the liquids: honey, sourdough, vanilla, butter. Stir well until a nice ball of dough is formed – not crumbly (if too dry add more butter/coconut oil or honey). Taste the dough for sweetness. Add a little rapadura or honey if the dough is too sour. It will get a little sweeter as you bake it.

Split dough into 2 equal parts. Cut 3 pieces of parchment paper the size of a cookie sheet. Lay one piece on table. Put 1/2 of dough on the paper. Lay a 2nd piece of parchment on top of dough. Squish the dough down a little with your hand. Use a rolling pin to roll the dough between the parchment paper. Roll until the dough until it is about 1/8 in. thick. Remove the top piece of parchment paper. Cut into squares (with pizza cutter). If the dough sticks to the pizza cutter wait until the crackers have been baking 5 – 8 minutes to cut them (pull them out, cut and put them back in). Place the dough on a baking sheet (on the parchment paper…just move the whole thing onto the baking sheet). Repeat for other half of dough.

Bake for 12-18 minutes, until the crackers are just barely turning golden. Let cool completely. Store in airtight container or in the freezer.
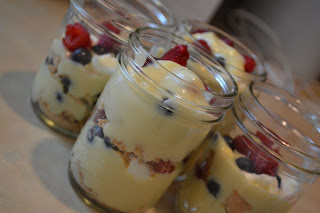
Red, White and Blue Parfait

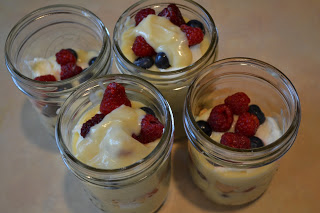
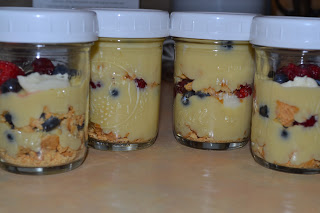
I made this dessert for the Fourth of July…but never got around to posting the recipe. Oops. This was a simple, fun treat that everyone enjoyed. Layers of vanilla pudding, graham crackers, sweetened cream cheese and fresh berries – delicious! A perfect holiday summer treat.

Red, White and Blue Parfait

Vanilla Pudding (from Heavenly Homemakers)

2 1/2 cups milk
3 egg yolks
1/2 cup real maple syrup (grade B is best for you) or honey
4 T. arrowroot powder (or organic corn starch)
1/4 tsp. sea salt
1 Tbsp. butter
1 tsp. vanilla

In a medium saucepan, whisk together milk, egg yolks, maple syrup, arrowroot powder and salt. Cook over medium heat, stirring CONSTANTLY until pudding begins to thicken. Stir over the heat for about 15 more seconds. Remove immediately from the heat, and continue to stir until pudding is creamy. Add butter and vanilla and continue to stir until mixed. Allow to cool at least 30 minutes. You can prep this ahead and keep it in the refrigerator.

Cream Cheese Filling

2 cups yogurt
3-5 Tbsp. sweetener (honey, maple syrup, sucanat)
1 tsp. vanilla (optional)

Strain yogurt in cheesecloth to make cream cheese (do this ahead of time). Stir sweetener into cream chhese until it is to your liking.

Parfait:

Crumble thin layer of graham crackers (organic store bought or whole wheat homemadesoaked homemade, sourdough or gluten free. Use gluten free grahams or cookies to make this gluten free.) into the bottom of small dishes or 1/2 pint mason jars. Layer pudding, then fruit, then cream cheese. Add another layer of graham crackers and repeat other layers. Repeat process until the jar is filled. Top with graham cracker crumbs and berries. Chill and serve.

I made a couple full jars, and I made a couple not quite so full for a kid’s portion.

Blueberry Bread Pudding

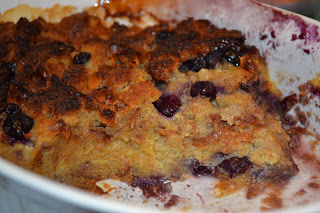
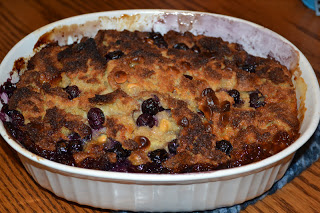
Last night I tried a new bread pudding recipe that I got from our local newspaper. It was submitted by Sharon Heethuis. It’s called Over the Top Blueberry Bread Pudding. If you make it exactly according to the recipe it would be quite over the top with a white chocolate sauce to pour over top! I scaled it back a little (no sauce, less chocolate). But it was still so good  (then again I’ve never met a bread pudding I didn’t like :P)! The main thing that makes it a bit more over the top is adding white chocolate chips. I know they aren’t healthy. But I did add a few. Blueberries are in season right now, so it’s the perfect time to make this. We all enjoyed it. I would definitely make it again. It would be great with some peaches added as well. Blueberries and peaches always go well together. You can absolutely make it without the chocolate chips…it just won’t be so over the top 🙂

I only made a half recipe. I’ll post the full recipe, with some healthier substitutes. You can make it gluten free by using gluten free bread. You could even try making it grain free using a nut butter, almond flour or coconut flour bread.

This makes a great breakfast, brunch, snack or dessert! I served it with scrambled eggs for dinner.

The pictures don’t really do it justice. I had to bake it in the toaster oven, so the top got a little dark.

Over The Top Blueberry Bread Pudding

3 eggs
4 cups cream (I used a combo of raw cream and milk)
1 cup cane sugar/sucanat (maple syrup or honey would probably work as well)
3 tsp. vanilla
2 cups fresh or frozen blueberries
1 (12 oz.) package of white chocolate chips (you can omit this or use less)
1 loaf bread, cut into 1″ cubes (use whatever bread you like…we used fermented wheat bread. This is a great job for little kids…Rebecca loves to rip up all the bread)

Sauce:
1 (12 oz.) pkg. white chocolate chips
1 cup cream

In a large bowl combine the eggs, cream, sugar and vanilla. Stir in blueberries and chips. Stir in bread. Let stand for 15 minutes. Pour into a greased 9×13 pan. Bake at 350 degrees for 50-60 minutes. Let stand 5-10 minutes before serving.

For the sauce, place chocolate chips in a small bowl. Heat the cream in saucepan just to a boil. Pour over the chocolate. Whisk until smooth. Serve with bread pudding.

You can add coconut and pineapple for variation. Drain pineapple before adding.

RR – Rice Balls

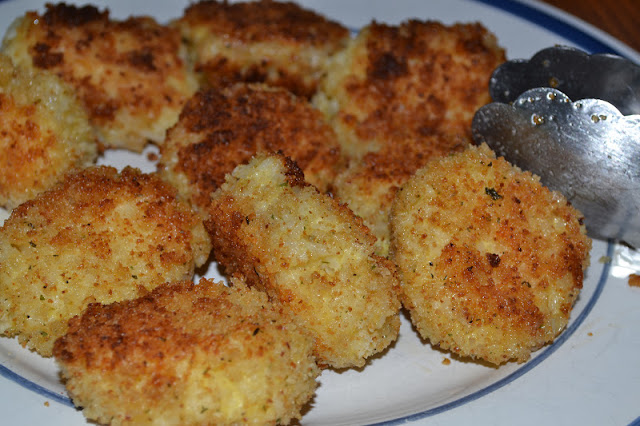
It’s time for this’s week’s Rebecca’s Recipe. Rebecca decided to have rice balls for dinner. I’ve never made or eaten a rice ball. But it sounded good. We came up with a very simple recipe that actually was really good! Even Justin really enjoyed them. They are basically a combination of rice, cheese, egg and seasoning. You can dip them in pretty much anything (salsa, spaghetti sauce, honey mustard, ketchup, pesto…whatever) or eat them plain. They are delicious either way. You can add variety by using different cheeses. I used garlic and onion last night. A sharp cheddar or parmesan would be great too. They reheat very well. I’ll make these again for sure! Another winning recipe from my little chef 🙂

Rice Balls

1 cup cooked rice (I used white rice since I’m experimenting with how my tummy handles it…you could use any kind of rice you like)
1 egg
1/2 cup finely grated cheese (I used garlic and onion)
seasoning of choice (I just used salt + the seasoning in my bread crumbs)
bread crumbs (use gluten free bread crumbs to make this gluten free)
oil for frying (I used coconut oil)

Cook rice and let cool partially (or cook the rice ahead of time/use leftovers and warm it slightly). Add egg, cheese and seasoning. Mix well. One at a time roll a small portion into a ball and cover with bread crumbs. They will be fragile, so I found it easiest to sprinkle the breadcrumbs over the rice ball in my hand and gently lay it in the pan.

Cook in hot oil (enough to cover the bottom of the pan) in large skillet. Cook over medium heat on all sides until golden brown, about 15 minutes total. Serve plain or with dipping sauce. They would also be good on a salad.

Strawberry Banana Ice Cream Sandwiches

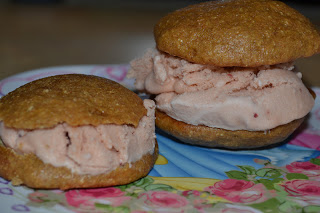
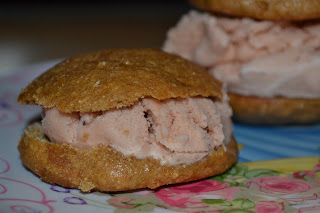
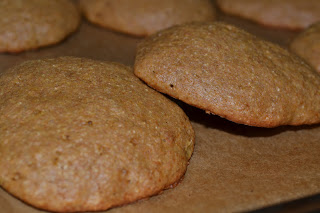
It’s summer…and it’s HOT. It might even be in the 100s today. It hasn’t been that hot in Michigan in a long time. When it’s hot the best thing to eat is ice cream 🙂  And sometimes it’s nice to have an ice cream treat…that isn’t filled with chemicals and vegetable oils. Yesterday Rebecca and I created a homemade ice cream sandwich. I used my basic vanilla cookie recipe and created a banana cookie. This cookie is ideal because it stays very soft. It’s even easy to eat when frozen. And it just so happens that we made a big batch of strawberry ice cream on Tuesday. Put them together and you’ve got a unique, healthy ice cream treat that you won’t find in any box.

The ice cream sandwiches turned out great! Rebecca scarfed one down for snack last night. I would even feel good about serving them for breakfast 🙂  They are perfect for adults, kids and even the littlest in the family. Abram (13m) loves homemade ice cream and really enjoyed these cookies as well. They are soft enough that he can easily chew them. This is just one variation of many I hope to try!

I also cut open a cookie and put peanut butter on it like a sandwich as part of Rebecca’s lunch yesterday. She really enjoyed it.

This post is linked to Fat Tuesday, Real Food Wednesday, Fight Back Friday and Fresh Bites Friday.

Strawberry Banana Ice Cream Sandwiches

Cookie:

1 cup whole wheat flour
3/8 cup rapadura
2 Tbsp. honey
1/2 cup mashed ripe banana
1 egg
1/4 tsp. baking soda
1/4 tsp. salt
1/2 tsp. vanilla
1/2 tsp. cinnamon (optional)

Ice Cream:

1 cup strawberries
2 1/2 cups cream
1/2 cup maple syrup or honey (or a combination)
1 tsp. vanilla
3 egg yolks

————————————————
Prepare the ice cream:

Blend all ingredients together. Process in ice cream maker (mine takes about 20 minutes in my Kitchen Aid attachment). Store in container in freezer.

Prepare the cookies:

Heat oven to 425. Stir all ingredients together. Drop by spoonful (big scoops if you want big ice cream sandwiches) onto baking sheet. Bake 8 minutes. Let cool completely.

Assemble sandwiches:

Let ice cream soften slightly. Cut open a cookie*. Place a scoop of ice cream on the bottom half. Top with other half of cookie. Place on a wax paper lined baking sheet. Repeat for remaining cookies. Place in freezer. Once ice cream is solid wrap each sandwich individually in plastc wrap, wax paper or parchment paper.

*If you want really big ice cream sandwiches you can do a full cookie on bottom and top. You can also make smaller cookies for mini ice cream sandwiches that are perfect for kids or a small treat for adults.

Ice cream sandwich variations:

Chocolate cookies (omit banana, reduce flour to 3/4 cups, add 3 Tbsp. cocoa and 1/8 cup milk) with peanut butter, chocolate, mint , cookie dough or vanilla ice cream.

Vanilla cookies with chocolate, vanilla, caramel, cookie dough or strawberry ice cream.

Cinnamon cookies with vanilla or pumpkin ice cream.

Banana cookies with chocolate or peanut butter ice cream.

"Dutch" Strawberry Rhubarb Pie

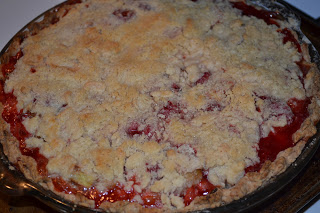
Last week I made one final strawberry rhubarb dessert. I made a pie to bring to a family gathering. Instead of a traditional pie I made it similar to Dutch Apple Pie with a crumble topping. It was a big hit with everyone. So good! I might have to make this every summer.

This post is linked to Real Food WednesdaysFat Tuesday, Fresh Bites Friday and Fight Back Friday.

Dutch Strawberry Rhubarb Pie

Pie Crust:

1 1/4 cups all purpose flour (or whole wheat)

1/2 tsp. salt
1/3 cup + 1 Tbsp. palm shortening or cold butter
1/8 cup + 2 Tbsp. water w/ 1/2 tsp. vinegar

Filling:

2 1/2 cups rhubarb, chopped
2 1/2 cups strawberries, chopped
4 Tbsp. organic cornstarch
3/4 cups organic cane sugar or sucanat
1/2 tsp. cinnamon

Topping:

1/2 cup organic cane sugar or sucanat

3/4 cup flour (AP or whole wheat)
1/3 cup butter, chilled

——————————
Prepare the crust:

In a food processor combine the flour and salt. Add half of the shortening. Pulse. Add the other half. Pulse. Add water + vinegar and pulse until a ball of dough forms. Roll out dough and place in 9″ pie pan.
(You could also do a soaked crust.)

Prepare the filling:

Mix the cornstarch, sugar and cinnamon. Sprinkle 2 Tbsp. of  over the bottom of the pie crust. Mix remaining mixture with the fruit. Pour into pie pan.

Prepare the topping:

Mix the sugar and flour. Cut in butter until crumbly. Sprinkle over top of pie.

Bake at 400 degrees for 50-55 minutes. Let cool completely before slicing.

RR – Cheese Chicken Nuggets

I’m starting a new recipe category – RR. It does not stand for Rachael Ray (especially since I rarely make her recipes). It stand for Rebecca’s Recipes! As Rebecca and I create and make her recipes I’ll share them…if they are worth sharing 🙂

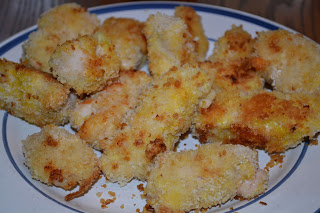
This week we made “cheese chicken nuggets.” It’s a chicken nugget (her favorite) filled with cheese. I made them using two methods. They both worked fine. I cut up some chicken chunks. Then I pounded some of them thin and rolled them up with cheese inside. Some I just cut a slit in the side and stuffed with a chunk of cheese. Then I breaded them all and baked them. They tasted great! I was pretty rushed when making dinner, so I didn’t do them as neatly as I would have liked and didn’t get in as much cheese as I would have liked. But they were still great. I’ll make them again for sure! I served them with homemade honey mustard.

Cheese Chicken Nuggets

2 large chicken breasts
cheese, cut into strips or chinks or shredded (I used parmesan in some and white cheddar in others)

organic AP flour
panko
egg
seasoning of choice

Cut chicken into large chunks.

Method 1:

Pound chicken pieces very thin. Place small amount of cheese at one end and roll.

Method 2:

Cut large slit into chicken chunks. Stuff cheese inside.

Bread:

Coat in flour, then beaten egg, then seasoned panko or homemade bread crumbs.

Cook:

Place on coconut oil greased baking sheet. Drizzle with coconut oil. Bake at 400 for 25-30 minutes.

OR

Fry in a cast iron skillet in coconut oil/palm shortening/lard until crispy on all sides.

Strawberry Cream Pops

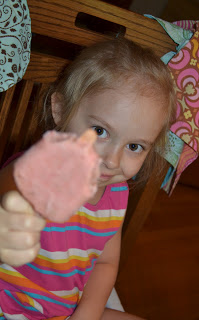
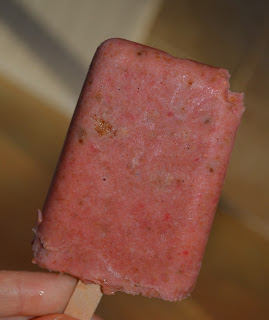
Rebecca and I spotted a delicous looking recipe in my Kiwi magazine this week. It sounded so easy that we decided to make it right away. It only has a few ingredients. It is so simple and so good!! Strawberry cream pops are a healthy, delicious treat. I gave one to Rebecca for breakfast yesterday! I always have homemade yogurt on hand. Strawberries are in season (and we have a ton that we just picked). And I happened to make a fresh batch of graham crackers this week. So it was the perfect time to try this recipe. I used a little bit of maple syrup and vanilla to flavor the yogurt. I also scaled back the recipe to just make four. These really are very good. It’s kind of like strawberry cheesecake in a popsicle.

I am so excited now for blueberries to be available in a few weeks…bring on the blueberry cheesecake pops!!! I plan to make a batch with soaked graham crackers and maybe a little raw sour cream mixed in. I think I’ll be having some popsicles for breakfast soon 🙂

This post is linked to Fight Back Friday and Fresh Bites Friday and Real Food Wednesdays.

Strawberry Cream Pops

1 1/2 cups vanilla yogurt (I used homemade full fat yogurt w/ maple syrup and vanilla extract)
3/4 cups fresh or frozen strawberries hulled
3/4 cups crushed graham crackers (preferably homemade…even better use soaked)

Crush graham crackers into pea size pieces (I did this by pulsing them in the food processor a few times).

Combine yogurt and strawberries in a food processor. Process until strawberries break down and mixture turns light pink.

Pour yogurt mixture over graham crackers and mix.

Pour the mixture into 10 popsicle molds and freeze until solid.

Chocolate Ganache Cake

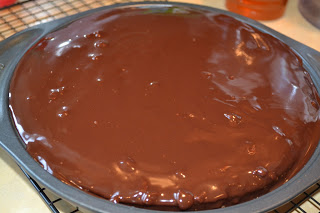
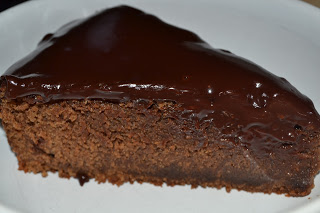
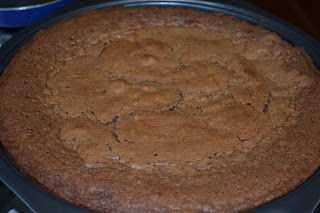
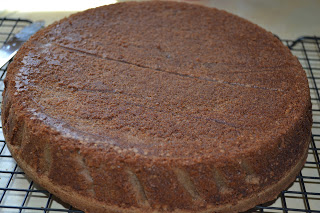
I finally tried my last recipe from my pile that has been on our breakfast nook for years. It’s a Barefoot Contessa recipe that my mom cut out for me. It’s a Valentine’s recipe that she calls Chocolate Ganache Heart Cake and makes in a heart shaped pan. I just used a 9″ round cake pan. I also modified the recipe to use real ingredients…instead of 2 cups of Hershey’s syrup! I used a combo of homemade hot fudge and cocoa powder and cane sugar as a substitute. I also just kept the cake in the pan when I poured the ganache on top to make it easier/less messy. Plus I didn’t want to waste any of the ganache 🙂

This turned out awesome!! I could not stop taking little tastes of it all afternoon/evening 😛  I think I’ll be paying for it today. But it is just so good. I can’t have this around me too often. Justin and Rebecca (and Abram 😉 gave it great reviews as well. It’s a dense, chocolaty, moist, gooey cake. Perfect topped with homemade chocolate and/or vanilla ice cream (Justin had his with both last night :). I’ll post the recipe the way I made it.

Chocolate Ganache Cake

1 stick unsalted butter at room temp
1 1/2 cups organic cane sugar
4 large eggs
8 oz. homemade chocolate sauce
1/2 cup cocoa powder
1 Tbsp. vanilla
1 cup organic AP flour

For the Ganache:
1/2 cup heavy cream
8 oz. good semi-sweet chocolate chips
1 tsp. instant coffee granules

Heat oven to 325. Butter and flour a 9″ cake pan (I always line mine with parchment paper to be sure the cake doesn’t stick).

Cream the butter and sugar until light and fluffy. Add the eggs one at a time, mixing after each addition. Mix in the hot fudge, cocoa powder  and vanilla. Add the flour. Mix until just combined. Don’t overbeat. Pour into the pan and bake about 45 minutes, until just set in the middle. Let cool thoroughly in the pan.

For the ganache, heat the cream, chocolate and coffee in a double boiler just until the chocolate melts and the ganache is smooth.

Place the cake upside down on a wire rack and pour the warm glaze evenly over the top. Transfer to a serving plate. Or just keep it in the pan and spread the ganache over top.

Do not refrigerate the cake after it’s glazed.

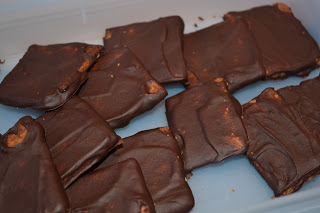
Homemade Deluxe Grahams

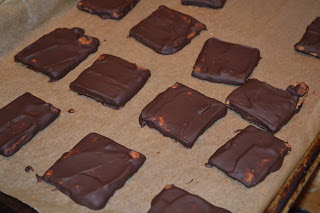
After making thin mint cookies last week I decided it would be fun to experiment with other cookie remakes. The chocolate mint reminded me of Keebler Grasshopper cookies. Before we started eating real food Justin ate those quite often. He also enjoyed the deluxe grahams. So yesterday I did a play on those. I made chocolate covered grahams and chocolate mint covered grahams. So delicous! And much healthier than something you’ll eat out of a box. No HFCS. No hydrogenated oils. No vegetable oils. No refined sugars. Love it!

Homemade Deluxe Grahams and Deluxe Minty Grahams

Graham Crackers

2 cups whole wheat flour
1/2 cup cane sugar or sucanat
1 tsp. baking powder
1/2 tsp. baking soda
1/2 tsp. salt
1 tsp. cinnamon (you can use less. I like it with a lot)
6 Tbsp. honey
1/4 cup water
1 tsp. vanilla
1/2 cup butter or coconut oil (I generally use 1/4 cup of each), melted
Chocolate Coating

12 oz. semi-sweet chocolate
1/3 cup cream
peppermint oil (optional)

————————
Graham Crackers:

Mix the dry ingredients. Add the wet and mix until a ball of dough forms. If the dough is too try add more honey or butter/oil.

Split dough in half. Roll each half on parchment paper. Cut into squares with a pizza cutter. Place parchment paper on two baking sheets. Bake at 350 for about 15 minutes. Turn off oven. Leave crackers in the oven about 10 minutes to crisp. Remove from the oven and let cool completely.

Chocolate Coating:

Melt the chocolate and cream in a double boiler. Add a few drops of peppermint oil if you want chocolate mint grahams. Dip graham crackers into the chocolate, coating both sides. Place on a parchment lined baking sheet (I just reuse the pans/paper the graham crackers baked on). Place in the refrigerator to harden.

Store in an airtight container. If your house is warm you should store them in the refrigerator or freezer.