Home » Kid-friendly Recipes » Page 38

Category: Kid-friendly Recipes

It is so important to cook homemade, healthy food. But it’s not always easy to find kid-friendly recipes.

That’s where I come in. I’ve got hundreds of kid-tested and approved recipes that won’t keep you in the kitchen for hours or stretch your budget too thin.

I focus on allergy-friendly, whole foods. But I always cook with kids in mind. I take all sorts of feeding challenges into account too.

We’ve dealt with every allergy possible, so I’ve created recipes that are gluten free, nut free, dairy free, egg free, soy free, corn free, coconut free and more!

Kid-friendly recipes don’t have to be boring. And they are certainly not limited to chicken nuggets and pizza every night.

A nourished child will enjoy a wide variety of fruits, vegetables, proteins, carbohydrates and fats. Get your kids in the kitchen with you and start cooking! Have fun with food and your kids will learn to love eating.

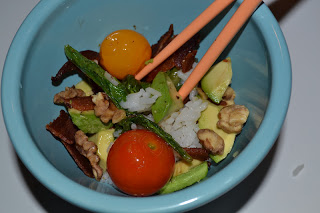
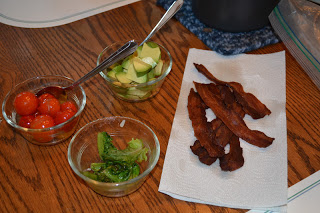
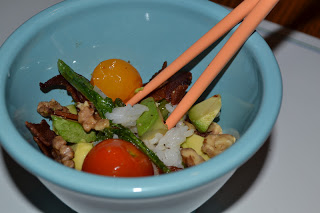
Cobb Style Rice Bowls

Last night I made my other Rachael Ray recipe that’s been sitting in my recipe pile for several years. It’s a very simple dish and really can be quite versatile depending on your tastes. I made it mostly according to the recipe. But I don’t have any kale. I just sauteed some leaf lettuce from our garden instead. And I used chopped walnuts instead of sunflower seeds. We all really enjoyed this. Justin and Rebecca would rather not have the tomatoes. They just don’t care for them. I think they are crazy 🙂  This is a great light summer meal. If I make it again I think I’ll increase the amount of dressing on the rice. We could hardly taste it, and I used a half recipe of dressing for 1/5 the amount of rice.

Cobb Style Rice Bowls
4 servings (RR servings…probably more for most people)

8 slices bacon
1 bunch kale, stemmed and thinly sliced (4 cups packed)
1 Tbsp. EVOO (I used coconut oil)
1 pt. grape tomatoes (I used cherry tomatoes)
2 tsp. salt
1 Tbsp. white wine vinegar (I used red wine…all I had)*
1 Tbsp. sugar
5 cups cooked brown rice (I used white rice)
1 avocado, thinly sliced (I cut it in chunks)
1/4 cup shelled sunflower seeds (I used chopped crispy walnuts)

In a large, heavy skillet, cook the bacon over medium heat until crisp, about 10 minutes; transfer to a paper towel and discard all but 1 tablespoon of the grease. Add the kale and 3 tablespoons water; cover and cook over medium to medium-low heat until tender, about 8 minutes.

Meanwhile, in a medium skillet, heat the olive oil. Add the tomatoes and 1 teaspoon salt and cook over medium heat, shaking the pan occasionally, until the tomatoes are softened, about 8 minutes. 

In a small bowl, mix the vinegar, sugar and remaining 1 teaspoon salt until dissolved; stir into the rice.* (I would make a lot more dressing for the rice to give it enough flavor)

To serve, divide the rice among 4 bowls and layer with the kale, tomatoes, avocado, bacon and sunflower seeds.

Strawberry Rhubarb Upside Down Cake

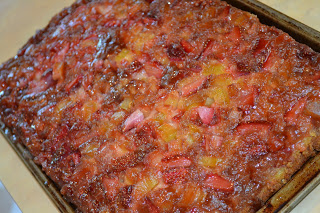
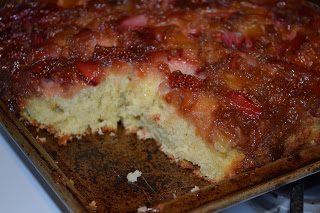
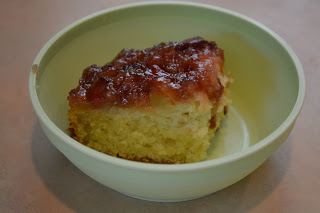
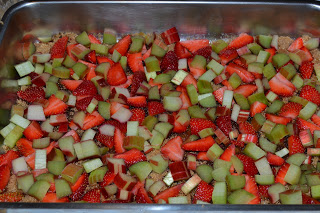
We got strawberries and rhubarb at the farmer’s market this week. A great combination for a spring dessert. Justin asked for a pie. But Rebecca insisted that we make a cake. She won 🙂  I did a quick search for a recipe yesterday morning and found one that looked good from Betty Crocker. It’s strawberry rhubarb upside down cake. I’ve never made any kind of upside down cake. But this looked good.

This turned out to be quite simple to make. And it tastes great!!! All four of us really enjoyed it. I modified the recipe since I don’t use boxed cake mixes. I made a modified version of my usual white cake (also a Betty Crocker recipe).

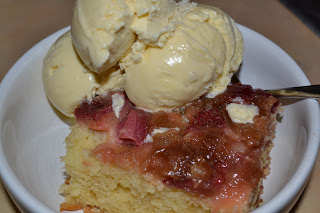
If you’re looking for a new way to use rhubarb and strawberries give this is a try! I know I’ll be making it again. Serve it with homemade vanilla ice cream, and it’s a perfect summer treat.

This post is linked to Fat Tuesday.

Strawberry Rhubarb Upside Down Cake

1/4  cup butter
1 cup packed organic brown cane sugar
2 cups sliced fresh strawberries
2 cups chopped fresh rhubarb

2 1/4 cups organic AP flour
1 2/3 cup organic cane sugar
2/3 cup palm shortening
3 1/2 tsp. baking powder
1 tsp. sea salt
1 tsp. organic vanilla
3 eggs

Whipped cream or homemade vanilla ice cream, if desired
Heat oven to 350°F (325°F for dark or nonstick pan). In 13×9-inch pan, melt butter in oven. Sprinkle brown sugar evenly over butter. Arrange strawberries on brown sugar; sprinkle evenly with rhubarb. Press strawberries and rhubarb gently into brown sugar.
In large bowl, beat cake ingredients with an electric mixer on low speed 30 seconds, then on high speed 2 minutes, scraping bowl occasionally. Pour batter over strawberries and rhubarb.
Bake 50 – 60 minutes or until toothpick inserted in center comes out clean. Immediately run knife around sides of pan to loosen cake. Place heatproof serving plate upside down on pan (I used a small baking sheet); turn plate and pan over. Leave pan over cake 1 minute so brown sugar topping can drizzle over cake. Cool 30 minutes. Serve warm or cool with whipped cream or ice cream. Store covered in refrigerator (I froze half and put half in a tupperware in the fridge).

Homemade Thin Mints

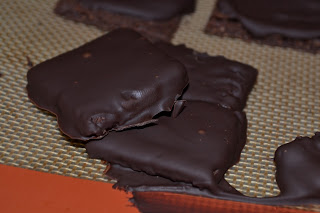
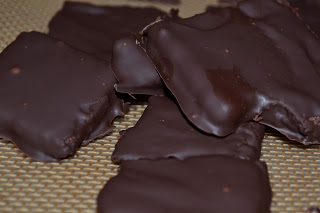
In June of 2009 I came across a recipe on 101 Cookbooks for homemade thin mints. I printed the recipe…and put it in a pile somewhere. And there it sat. Now three years later, I finally got around to making them yesterday.

The recipe is very simple. It’s a chocolate wafer that you dip in melted chocolate. It tastes very good. But I had some issues with the wafer dough. It was kind of crumbly. When I took the cookies out of the oven  they would fall apart if I touched them. After they cooled I could handle them ok. But when I started dipping them in the chocolate they sort of melted and crumbled (maybe I made them too thin?). So I only dipped a few of the cookies. For the rest I just spread the mint chocolate over the top. Not quite as good as a fully coated cookie, but they still taste fine. I was pressed for time so I went simple with the shape. I made squares (using a pizza cutter) instead of cutting out individual circles and trying to re-roll the dough.

Overall this is a really good cookie. It does taste like a thin minty chocolaty cookie. I can’t really compare it to the Girl Scout version since it’s been at least 15 years since I tasted one. If I make these again I’ll try to get the dough a bit more moist and see if that helps. I didn’t have pastry flour, so maybe that made a difference as well. Maybe I’ll try adding an egg next time. And adding a little heavy cream to the chocolate might make it thinner and easier to dip such a delicate cookie. It was pretty thick. I guess I’ll just have to make more soon to try. 🙂

Homemade Thin Mints

Chocolate Wafers:
8 ounces organic butter, room temperature
1 cup organic powdered sugar
1 tsp. natural vanilla extract
1 cup cocoa powder
3/4 tsp. fine grain sea salt
1 1/2 cups whole wheat pastry flour

Chocolate Peppermint Coating:
1 pound good quality semi-sweet chocolate, chopped
natural peppermint oil to taste

Preheat your oven to 350. Racks in the middle zone.

Make the cookie dough: In a mixer cream the butter until it is light and fluffy. Add the powdered sugar and cream some more, scraping the sides of the bowl a couple times if necessary. (Add egg??) Stir in the vanilla extract and then the salt and cocoa powder. Mix until the cocoa powder is integrated and the batter is smooth and creamy, sort of like a thick frosting. Add the whole wheat pastry flour and mix just until the batter is no longer dusty looking, it might still be a bit crumbly, and that’s o.k. You don’t want to over mix and end up with tough cookies.

Turn the dough out onto a counter, gather it into a ball, and kneed it just once or twice to bring it together into once nice, smooth mass. Place the ball of dough into a large plastic bag and flatten it into a disk roughly 3/4-inch thick. Place the dough in the freezer for 20 minutes to chill. (Might be easier to roll it in a log, freeze it and then just slice thin rounds…I’ll probably try that next time.)
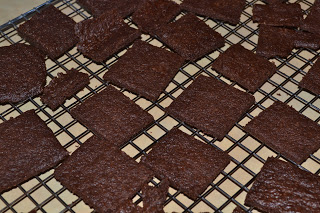
Roll out and bake: Remove the dough from the freezer and roll it out really thin, remember how thin Thin Mints are? That’s how thin you need your dough, about 1/8-inch. You can either roll it out between two sheets of plastic, or dust your counter and rolling pin with a bit of flour and do it that way. Stamp out cookies using a 1 1/2-inch cutter (this time I used one with a fluted edge, I’ve done hearts and other shapes in the past). (I used a pizza cutter to cut them into squares…much easier and no waste) Place cookies on a parchment-lined baking sheet and bake for 10 minutes. Remove the cookies from the oven and allow them to cool completely on a baking rack if you’ve got one.

Make the peppermint coating:

While the cookies are in the oven you can get the coating ready. Slowly melt the chocolate in a double boiler (or glass bowl over a pot of simmering water), stirring occasionally until it is glossy and smooth (add heavy cream to thin if necessary). Stir in the peppermint extract. If you think the chocolate needs a bit more peppermint kick, add more extract a drop or two at a time – but don’t go overboard (I used 4 or 5 drops for a half recipe).

Finishing the cookies: You are going to coat the cookies one at a time and then gently set them on a parchment-lined baking sheet to set. Drop one cookie into the chocolate and (using a fork) carefully make sure it gets fully coated. Lift the cookie out of the chocolate with the fork and bang the fork on the side of the pan to drain any extra chocolate off the cookie. You are after a thin, even coating of chocolate. Place on the aforementioned prepared baking sheet, and repeat for the rest of the cookies. Place the cookies in the refrigerator or freezer to set. They will set at room temperature, it just takes much longer, and I prefer them straight out of the freezer anyways 😉

Make 3 or 4 dozen cookies.

Sea Salt Caramel Ice Cream

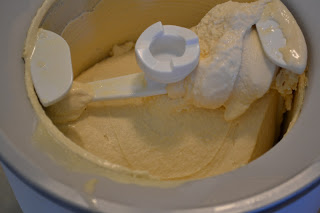
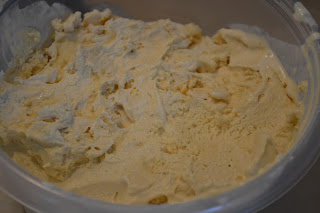
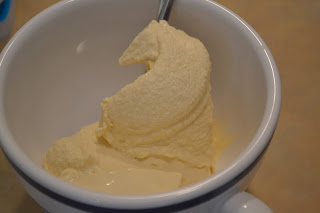
I love ice cream…if you hadn’t noticed. Rebecca and I make ice cream almost weekly with our fresh, raw cream. This week we decided to try a new flavor – sea salt caramel. Oh My Goodness…this is awesome! One of my favorite flavors we’ve made by far. I still used my usual base recipe of cream, egg yolks, vanilla and maple syrup. But I added our homemade caramel sauce and a bit of sea salt. This is truly heaven in a bowl 🙂

I never measure ingredients when I make ice cream. Rebecca and I prefer to taste as we go to get it just the way we want it 🙂  I’ll do my best to give quantities. If you try it be sure to taste your batter before putting it in the mixer to be sure it’s the way you want it. And a great tip I’ve learned with all of my ice cream experiments is to make the batter a little overly sweet. The ice cream loses some of its sweetness when it freezes.

I only took pictures right out of the mixer, before I put it in the freezer. So it looks a bit liquidy. Don’t let that fool you. It is amazing! Even Abram devoured it. I had to cut him off so he wouldn’t get a tummy ache 🙂  If you really want to go over the top drizzle some extra caramel sauce on top. It won’t take much of this ice cream to satisfy your sweet tooth.

This post is linked to Fresh Bites Friday and Fight Back Friday and Fat Tuesday.

Sea Salt Caramel Ice Cream

3 cups cream
3 egg yolks (optional)
2 tsp. vanilla
1/4 cup maple syrup
3 Tbsp. honey
1/3 cup caramel sauce
1/2 – 1 1/2 tsp. sea salt

In a blender combine all ingredients (I use my Vitamix to mix ice cream batter). Taste. Adjust caramel and salt quantities to taste. Pour into ice cream maker (I use a Kitchen Aid attachment) and process (mine takes about 20 minutes). Store in a plastic or glass container in the freezer.

Ham and Peas Casserole

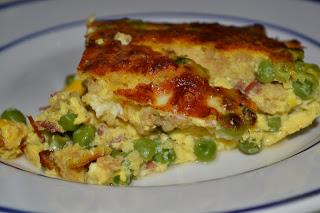
I subscribed to Every Day with Rachael Ray a while back…like years ago. I would often rip out recipes that looked good. I had a big pile of things I was going to try making…at some point. Well, last week I found that pile of recipes. I went through it and got rid of all but two of them 😛  I saved the two that I thought I would actually make and put them on the menu this week. I tried the first one last night. It’s a simple casserole. And it’s delicious!! Ham and peas casserole is like cornbread mixed into quiche. It almost reminds me of the flavor of creamed corn with the subtle sweetness from the cornbread. We all really enjoyed this casserole. It’s great for breakfast, lunch or dinner. And the leftovers are great too (I had a delicious breakfast today :). Plus it’s very easy to make (as long as you have ham and cornbread on hand…which we actually did this week!).

I didn’t actually measure anything. I just used 2 leftover corn muffins and about a half cup of ham we had left from Sunday’s dinner. I also used more eggs than the recipe called for. And in typical RR recipe fashion I had to modify the cooking time/temp. If I had cooked it at 350 for 40 minutes we would have been eating ham and pea soup for dinner 😛  I baked mine at 400 for about an hour. I’ll post the original recipe with a few of my mods. Overall this was a great recipe. I plan to make it again.

Ham and Peas Casserole

1 1/2 cups ham, cut into small pieces
7 oz. cornbread, cut into small cubes (about 2 cups)
1 cup frozen peas, thawed (I used more than this)
1 tsp. chopped fresh thyme (I used dried)
2 cups whole milk
3 eggs plus one yolk, lightly beaten (I used 3 whole eggs and 3 yolks)
salt

Heat oven to 350 (I baked mine at 400).

Butter a 9″ casserole dish. In a bowl toss the ham, cornbread, peas and thyme. Transfer to the baking dish.

In the same bowl combine the milk, eggs and salt. Pour into baking dish. Let stand 15 minutes.

Bake until the custard is just set in the center, 40-45 minutes (I baked mine for 1 hour).

Let stand 10 minutes before serving.

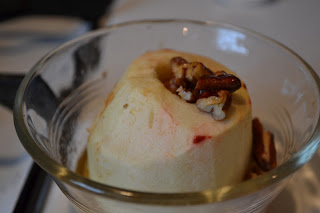
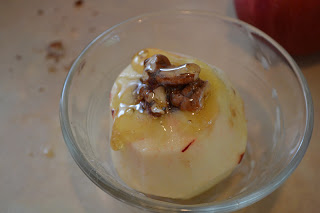
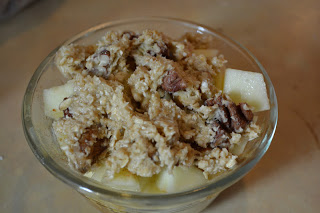
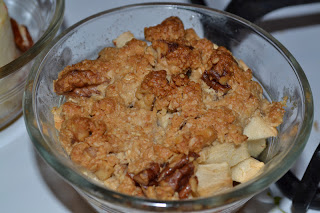
Apple Honey Crunch – Three Ways

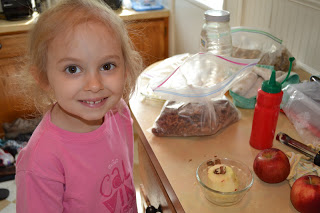
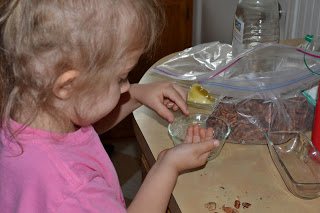
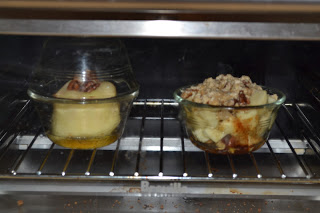
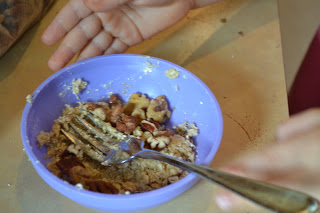
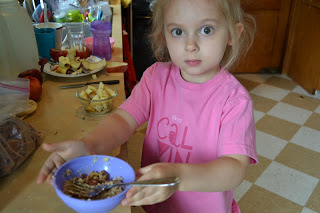
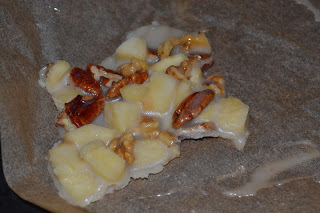
Rebecca has been helping me in the kitchen since before she was one. Now that she is four she is becoming quite a little chef! Rebecca often plays cooking and will come up with all kinds of meals/recipes/goodies. She actually has some really good ideas! When she does we try to make them. This week while she was playing she was making “apple honey crunch.” We brainstormed about how to make it…and gave it a try. We came up with three versions. They were all very simple to make and tasted great. One is kind of like a baked apple/apple dumpling. One is like apple cobbler. And one is like a brittle. They each only use a few ingredients and are very kid friendly. We just did small versions of each. They are great for individual servings. Or you can make them in larger quantities. Want to have some fun in the kitchen with your kids? Try Rebecca’s apple honey crunch recipes 🙂  Two of them are even grain free/gluten free/GAPS legal.

This post is linked to Fat Tuesday at Real Food Forager.

Apple Honey Crunch (dumpling style)
1 apple
1/8 cup chopped crispy nuts (we used pecans and walnuts)
1 Tbsp. honey

Peel and core apple. Place the apple in a small, buttered glass/oven safe dish (I used my small pyrex dishes). Sprinkle half of the nuts into the center of the apple. Pour honey into hole. Top with remaining nuts. You can add an extra little drizzle of honey over the apple if you like. Place another bowl over the apple (inverted) as a lid. Bake at 375 for 40 minutes (until the apple is soft). Let cool. Enjoy!

Apple Honey Crunch (cobbler style)

1 apple
1/8 cup chopped crispy nuts (we used pecans and walnuts)
2 Tbsp. honey
1/4 cup ground oats (or whole oats or whole wheat flour)
2 Tbsp. softened butter
1/2 tsp. cinnamon

Peel and chop apple. Sprinkle a few of the nuts in the bottom of a small, buttered glass/oven safe dish (I used my small pyrex dishes). Put apple chunks on top. Sprinkle on cinnamon.

Mix oats, butter and honey. Sprinkle over apples. (lick bowl 🙂

Bake at 375 for 35 minutes – until the top is golden and crunchy.

Apple Honey Crunch (brittle or ice cream topping)
*This didn’t get quite as solid as I would have liked. Some parts stayed a bit soft. But it was still very good. We will experiment with it to get it just right. As is it would make an awesome topping for ice cream (if you just chill it instead of freeze it).

1 apple
1/4 cup crispy nuts (broken into large pieces) (we used pecans and walnuts)
1/4 cup coconut oil
1/4 cup honey

Peel and chop apple. Cook the apple in coconut oil in small pan. When apple is tender stir in honey. Cook about 2 minutes. Remove from heat. Stir in nuts.*  Pour onto a parchment lined baking sheet. Place in freezer until solid. Break into chunks. Store in the freezer to remain solid.

*You can also pour this into a glass container and allow to cool (on the counter or in the fridge) and use it as a topping for ice cream, pancakes or waffles or as a mix in for yogurt.

Butterscotch Sauce

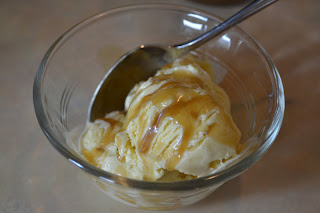
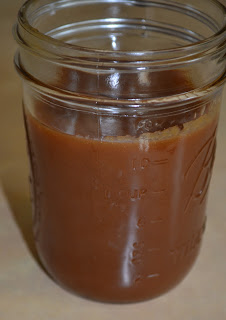
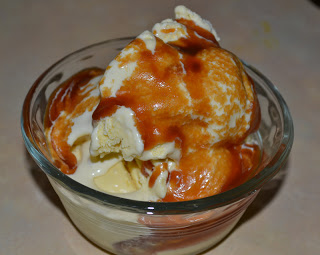
Tuesday we made some awesome caramel sauce with our extra cream. But I didn’t use all of the cream. So yesterday we used a little more and tried butterscotch. I got the recipe from Smitten Kitchen. It is so simple to make (only takes about 5 minutes) and is sooooo good. I like the butterscotch even better than the caramel. Rebecca and I sampled a little on homemade vanilla ice cream. A little piece of heaven 🙂  I think we might have homemade butterscotch sauce on hand more often now 🙂

Butterscotch

1/4 cup (1/2 stick) unsalted butter
1/2 cup packed organic brown cane sugar or sucanat
1/2 cup heavy cream
1/2 tsp. unrefined sea salt, plus more to taste
1 1/2 tsp. vanilla extract, plus more to taste

Melt butter in a medium heavy-bottomed saucepan over medium heat. Add the sugar, cream and salt and whisk until well blended. Bring to a very gentle boil and cook for about five minutes, whisking occasionally.

Remove from heat and add one teaspoon of the vanilla extract, stirring to combine. Dip a spoon in the sauce and carefully taste the sauce (without burning your tongue!) to see if you want to add additional pinches of salt or splashes of vanilla. Tweak it to your taste, whisking well after each addition (I used about 3/4 tsp. salt and 1 1/4 tsp. vanilla).

Serve cold or warm over vanilla ice cream. The sauce will thicken as it cools. It can be refrigerated in an airtight container and reheated in a toaster oven or small saucepan.

Caramel Sauce

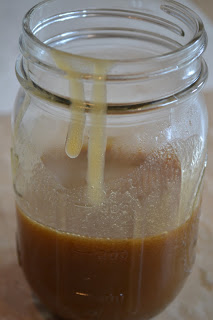
Every week I skim some cream from our fresh milk. Most weeks I have a purpose for it…and often wish there was more! This week I didn’t have an urgent need for it. I have plenty of sour cream. I think we are even good with homemade ice cream. So I decided to make caramel sauce…something to go with our fabulous homemade ice cream 🙂

I’ve made caramel before, but it never seemed to work properly. I followed the directions, but I would cook it and cook it and cook it and never get it up to temp. So I decided to try a new recipe. I found one that looked simple on Lick My Spoon for Salted Caramel Sauce. There are good step by step directions. And you don’t have to monitor the temperature.

I gave it a go yesterday. It turned out very well. And it was quite quick and simple. I just made regular caramel, not salted. But I’m sure that would be very good too. It tastes great right after making it. As it cools it gets a lot thicker. It would be great for dipping apples when it’s cold. You simply warm it a bit to soften it to use on ice cream. Homemade caramel is a simple and delicous treat.

Caramel Sauce

1 cup cane sugar
6 Tbsp. unsalted butter, cut into chunks
1/2 cup heavy cream
1/4 cup water
Heat the sugar and water in a 2-quart or 3-quart saucepan over medium-high heat. Stir to help the sugar dissolve, but stop stirring when the sugar comes to a boil. You can swirl the pan a bit if you want.

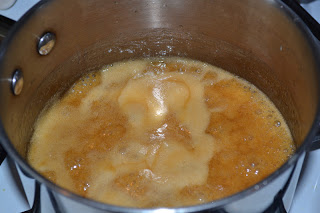
When the liquid sugar hits a dark amber color, add all the butter to the pan. The mixture will foam up and thicken. Whisk until the butter has melted. Once the butter has melted, take the pan off the heat.

Add the cream to the pan (the mixture will foam up again) and continue to whisk to incorporate.

Let cool in the pan for a couple minutes, then pour into a glass jar and let cool to room temperature. Don’t worry if the sauce seems a bit too thin at first, it will thicken as it cools. Store in the refrigerator. Warm before serving to loosen it up again.

Pesto Sausage Cakes (GAPS legal, grain free, dairy free, nut free)

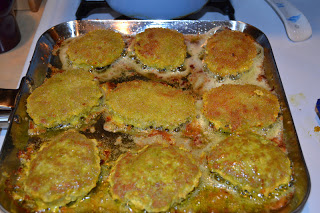
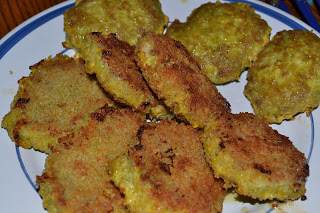
Last night for dinner I was going to make zucchini sausage muffins. But it was a HOT day. So I didn’t really want to turn on the oven. So I figured I’d make zucchini sausage cakes instead. I already had zucchini and sausage thawed. But the zucchini was not cooperating and was super stringy…which I knew Rebecca would not touch. So I came up with a new recipe for pesto sausage cakes. I happened to make a fresh batch of pesto yesterday morning. I also happened to make a fresh batch of mayo in the morning…which worked out well…I served these with pesto mayo. These cakes turned out very well! And they were really easy to throw together. I used ground pork. Ground chicken or turkey would work well too. I don’t measure ingredients when I make this kind of food, but I’ll try to give a rough estimate of quantities. If you want to make this grain free you can use coconut flour in place of the bread crumbs. I made 6 cakes with a bread crumb coating and 3 without. It works well either way. I like the crunchy coating, but it’s easier for the kids to eat without it.

I’m happy with how well these turned out. Even Abram kept saying “mmmm” as he was eating his. I liked them so much I had another one for bedtime snack and another one for breakfast today 🙂

This post is linked to Fat Tuesday at Real Food Forager.

Pesto Sausage Cakes

1 lb. ground pork, chicken or turkey
1/2 cup pesto (My pesto is nut and dairy free. It is just peas, evoo, salt and garlic blended together. Use whatever kind you like.)
1 egg
1 egg yolk
1/4 cup bread crumbs or coconut flour (optional, but it helps bind things together)
salt, garlic powder, cumin to taste

bread crumbs or coconut flour to coat (optional)
fat for cooking (palm shortening, coconut oil, lard, butter)

Mix meat, pesto, eggs, bread crumbs and seasoning. Form into 8-10 patties. Coat patties in bread crumbs or coconut flour. Heat fat in skillet over medium heat. Cook patties in fat until cooked through, about 8 minutes per side.

Serve with extra pesto or pesto mayo (mix equal parts pesto and mayo).

Crockpot Baked Potato Soup

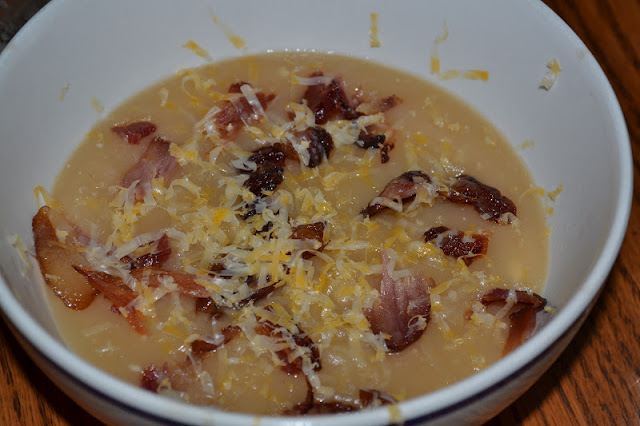
This week we need several prep ahead meals…which  usually means crockpot meals. By the third one I wanted to try something new. I decided to make potato soup. I’ve never made any kind of potato soup before. I checked A Year of Slow Cooking to see if Stephanie had a good one. I went with the first recipe I found for baked potato soup. It was super easy to make and tasted really good. I didn’t eat it for dinner since I can’t eat potatoes, but I did taste it…made me wish I could 🙂  Justin and Rebecca both really enjoyed it. I only made a half recipe. It still made quite a bit. I modified it slightly to our tastes/with what I had on hand. I also made a quick batch of homemade cream cheese to use in it instead of store bought. If you don’t have any cream cheese or want it to be dairy free this would be just fine without it. Or you could substitute sour cream. I served the soup with crumbled bacon and shredded cheese.

Crockpot Baked Potato Soup

2 lbs. potatoes, peeled and cut into chunks
1 small onion, roughly chopped
2 cups broth or water (if using water add extra seasoning)
sea salt and garlic powder to taste
1 cup homemade cream cheese (or 8 oz. pkg. of cream cheese)

Toppings: crumbled bacon, shredded cheese, sour cream, olives, chives

Place potatoes, onion, broth and seasoning in crockpot. Cook on low 8+ hours or on high 4+ hours (until potatoes are tender…cooking longer won’t hurt anything). Mash or blend potatoes to desired consistency (I made it smooth with my immersion blender).

Add cream cheese. Stir. Cook on high about 30 minutes.

Pour into bowls and add toppings.