Home » Kid-friendly Recipes » Page 39

Category: Kid-friendly Recipes

It is so important to cook homemade, healthy food. But it’s not always easy to find kid-friendly recipes.

That’s where I come in. I’ve got hundreds of kid-tested and approved recipes that won’t keep you in the kitchen for hours or stretch your budget too thin.

I focus on allergy-friendly, whole foods. But I always cook with kids in mind. I take all sorts of feeding challenges into account too.

We’ve dealt with every allergy possible, so I’ve created recipes that are gluten free, nut free, dairy free, egg free, soy free, corn free, coconut free and more!

Kid-friendly recipes don’t have to be boring. And they are certainly not limited to chicken nuggets and pizza every night.

A nourished child will enjoy a wide variety of fruits, vegetables, proteins, carbohydrates and fats. Get your kids in the kitchen with you and start cooking! Have fun with food and your kids will learn to love eating.

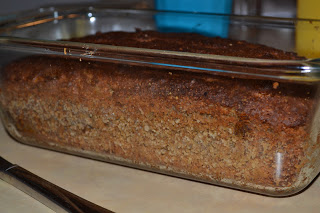
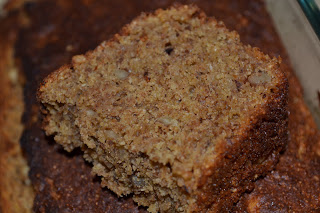
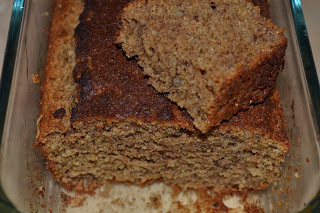
Honey Walnut Sourdough Bread


This morning I made a new flavor of sourdough bread. I used my sourdough muffin recipe as the base. I modified it slightly to make a bread and to change the flavor. 

The combination of walnuts and honey is very good together. And a hint of cinnamon adds just the right amount of spice. Delicious!

This post is linked to Fresh Bites Friday and Fat Tuesday.

Honey Walnut Sourdough Bread

1 cup whole wheat flour
1 tsp. baking soda
1/4 cup sucanat
1/4 cup honey
1/4 tsp. salt
1 tsp. cinnamon
1/2 cup chopped crispy walnuts
————–
1 egg
1 tsp. vanilla
1/4 cup oil (I use melted coconut oil. Butter would also work.)
1 cup sourdough starter

Preheat oven to 400F.

Combine wet ingredients in a medium bowl. Add dry ingredients. Mix quickly and spoon into buttered bread pan.

Bake 30 minutes.

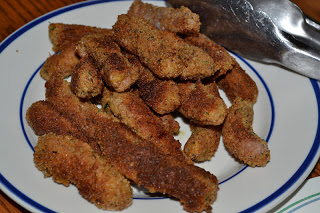
Hot Dog Fries

Last week I saw Rachael Ray making hot dog fries. I thought it sounded like a fun idea. So I tried it this week. Super easy! And we all enjoyed them. When we go to baseball games Rebecca loves to get chicken fries (not sure what’s in them…and I’m too scared to ever find out…it’s a good thing it’s only once or twice a summer :). These are similar, except I know what’s in them…and feel good about feeding them to my family. I mostly followed the recipe, but I didn’t add the mustard. We dipped them in ketchup, mustard and honey mustard. I cut the hot dogs into 8 pieces. I think that makes the “fries” a good size. I fried them in coconut oil and lard in my cast iron skillet. I only used 4 hot dogs (32 fries). It was plenty for our family with leftovers. I think Justin ate a full hot dog’s worth, but Rebecca and I didn’t. I’ll post the recipe the way I made it.

Hot Dog Fries

4 hot dogs (nitrite/nitrate free, grass fed if possible)
1/2 cup organic AP flour
1 egg

1 cup whole wheat breadcrumbs, seasoned to taste
coconut oil, lard, palm oil, butter or tallow to fry

Cut each hot dog into 8 pieces (in half, then each half into 4 strips).

Fill three separate shallow dishes with the flour, the egg (whisked) and the breadcrumbs. Coat the hot dog strips with the flour first, then the egg, then the breadcrumbs.
Heat oil of choice in a cast iron skillet (I usually start with about 1/4 cup and add more as needed). Add the breaded hot dog strips and cook over medium heat until golden on all sides, 3-4 minutes per side.
Serve with ketchup, mustard or honey mustard.

Pizza Balls (Rebecca’s Recipe)

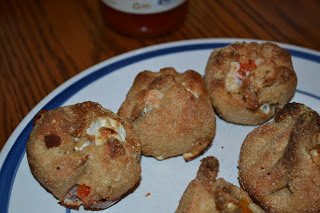
Growing up we always got to pick what was for dinner on our birthday. I always loved that. So this year I did it with Rebecca. But instead of requesting one of her favorite foods she came up with her own recipe!! She does that quite often. It gives me great inspiration to experiment 🙂  Rebecca asked for pizza balls. She had very specific directions on how they should be made. I did my best to follow her directions and create something edible 🙂  In the end we basically had pizza pockets (I had some other ideas of how to make pizza balls that I hope to try sometime). Rebecca wanted them to have bacon, red peppers, onion, sauce and cheese. I made them two ways. I think they both turned out well. Here’s my attempt at a recipe.

Pizza Balls

Pizza Dough:

1/2 Tbsp. active dry yeast
1/2 Tbsp. cane sugar
3/4 cups warm water

1 Tbsp. cane sugar
2 Tbsp. EVOO
1/2 Tbsp. salt
2 cups whole wheat flour

Sprinkle yeast and 1/2 Tbsp. sugar over water. Let bubble (about 5 min.). Add 1 more Tbsp. sugar, oil, salt and flour. Mix. Cover. Let rise about an hour.

Toppings/fillings:
sauce – tomato or pesto
cheese – we used fresh mozzarella and parmesan
meat/veggies cut in very small pieces

Assembly:

Roll pizza dough to about 1/4″ thickness. Cut into about 16 small squares. Fill each piece of dough with a small amount of sauce, cheese and meat/veggies. Pull up corners and seal opening. You can try to keep it in a round shape. Place each ball in the cup of a muffin pan. Sprinkle with grated parmesan cheese. Bake at 475 for 20 minutes. Serve with extra sauce for dipping.

OR

Add cheese, meat and veggies directly to the dough. Lightly mix. Shape into small balls. Place on a baking sheet or in a muffin pan. Sprinkle with grated parmesan cheese. Bake at 475 for 15 – 20 minutes. Serve with sauce for dipping.

Crockpot Sweet Mustard Roast

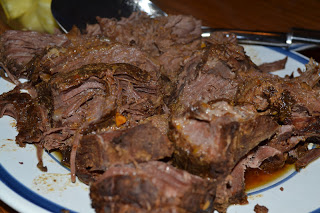
For lunch yesterday I tried a new recipe from A Year of Slow Cooking for sweet mustard roast. It was very easy and very good. I didn’t follow the recipe exactly. I just used the idea and what ingredients I had on hand. I used grass fed rump roast. The roast was super moist and tasted really good. I’ll post the recipe the way I made it. Check out Stephanie’s blog for the original recipe. I cooked the roast with sweet potatoes, carrots and red pepper slices.

Crockpot Sweet Mustard Roast

3 lbs. beef or pork roast (it can be frozen)
1/4 cup molasses
1/4 cup honey
1/4 cup mustard
2 Tbsp. apple cider vinegar (or white vinegar)
1 tsp. salt
1/3 cup chili sauce (this was my addition…my homemade chili sauce)
vegetables (optional – I used sweet potatoes, carrots and peppers)

Chop vegetables. Place in crockpot. Place roast on top of vegetbales. Pour 1/4 cup water in the crockpot. Season everything with salt. Mix remaining ingredients in a small dish. Pour over roast and vegetables. Cook on low 7+ hours or high 5+ hours, until the meat is tender. Flip the roast part way through cooking. To serve carve the roast and pour the liquid over top. Serve the vegetables on the side.

Grilled "Cheese"

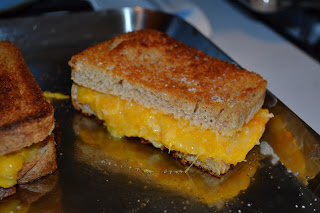
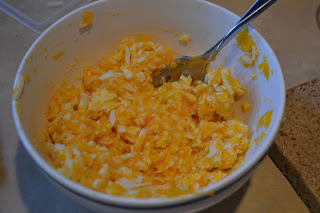
I wouldn’t normally post a recipe for grilled cheese. Most people know how to make grilled cheese. But this one is  a bit different. It’s from my Deceptively Delicious cookbook. I did some last minute change of meal plans yesterday. I had taken squash out of the freezer for risotto…but then didn’t feel like making it. So I was trying to think of what else to do with the squash. I found this recipe. It worked great! We all enjoyed it. A delicous grilled cheese…with some veggies added 🙂  The funny part is that it looks like they are made with American cheese. In reality all of the cheese I used was white. I didn’t follow the recipe exactly. I just shredded a mix of cheeses (cheddar, parm and mozzarella) and mixed in some squash and a little softened butter. I didn’t measure anything. I made a bit more than we really needed, so our sandwiches were pretty full. But still delicious! I will definitely try this again. You can probably do it with quite a few different veggies, depending on what color you want your cheese to be 🙂  The recipe says sweet potatoes or squash. I’ll post the original recipe…minus the reduced fat cheese and “trans fat free margarine spread”…shudder 😛

Grilled “Cheese”

1/2 cup shredded cheddar cheese (or any cheese you like)
1/2 cup sweet potato or butternut squash puree
1 Tbsp. softened butter
1/4 tsp. salt
4 slices whole wheat bread

Mix the cheese, puree, butter and salt.

Spread on two slices of bread. Top with the other two slices. Coat a griddle with butter. Cook sandwiches on both sides until golden and the filling is melted.

Lemon Bars

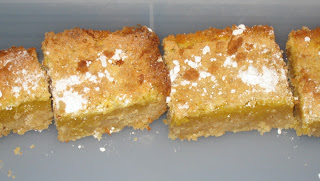
I also made a batch of lemon bars for Justin’s birthday treats. This is another recipe from my MIL. It’s a simple recipe. I’m generally not a huge fan of lemon bars, but these are good. Justin says they aren’t that sweet (not as sweet as some lemon bars). I think they are quite sweet. Just depends on your taste buds I guess 😛  Again, I subbed more natural ingredients for most of this. But I did still use the powdered sugar. These turned out well. The only issue I had was that they took way longer to bake than the recipe said. After 20 minutes the middle was still totally liquid. I ended up baking them for about 40 minutes.

Lemon Bars

1 3/4 cups flour (you can use whole wheat flour)
1 cup butter (cold)
1/2 cup powdered sugar (you could probably sub cane sugar and the crust would still taste fine)

4 eggs
2 cups cane sugar
1/4 cup lemon juice (juice of about 2 lemons)
4 Tbsp. flour (I would use AP flour for this since it is for thickening. You could also try corn starch or arrow root)
1 tsp. baking powder
1/4 tsp. salt

Cut butter through flour and powdered sugar (I did this in the food processor. Makes it very simple). Pat dough into a greased 9×13 pan. Bake at 350 for 20 minutes.

While dough is baking prepare lemon filling. Beat eggs. Add sugar, lemon juice, flour, baking powder and salt. Mix well. Pour over crust. Bake for about 40 minutes (until center is set). Sprinkle with powdered sugar. Let cool before cutting.

Peanut Butter Chocolate Bars

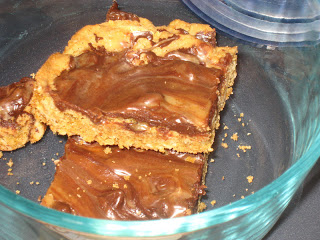
Justin’s birthday is this week. He requested some treats to bring to work. So yesterday Rebecca and I made two batches of bars. The first is peanut butter chocolate bars. This recipe is from my MIL. I definitely wouldn’t call this a “healthy” recipe. You can sub most ingredients for natural ones. The only one I didn’t really was the powdered sugar in the frosting. I know you can make your own powdered sugar, but I didn’t. I figured it wasn’t too critical since I was giving most of them away 😛  They sure taste good. But not something to indulge in often. I forgot to take pictures until they were all cut up. And I only had my small camera handy, so not the best shot.

Peanut Butter Chocolate Bars

1/2 cup brown cane sugar or sucanat
1/2 cup cane sugar
1/2 cup butter, softened
1 egg
1 tsp. vanilla
1/2 tsp. baking soda
1 cup flour (you can use whole wheat)
1 cup rolled oats

6 oz. chocolate chips
1/2 cup powdered sugar
1/4 cup natural peanut butter
1/2 tsp. vanilla
1-3 Tbsp. milk

Cream sugars and butter. Add egg and vanilla. Beat. Stir in flour and baking soda. Add oats. Stir. Spread in a greased 9×13 pan (this is kind of tough. It will be a very thin layer. I usualy have to use my hands to do it, lightly dusted with flour). Bake at 350 for 18 min. While it is baking mix the sugar, peanut butter, vanilla and milk to make a frosting. Take bars from the oven and sprinkle with chocolate chips. Drizzle frosting on top. Swirl chip and frosting over bars (the chips should melt). Let cool.

Cookie Dough Ice Cream

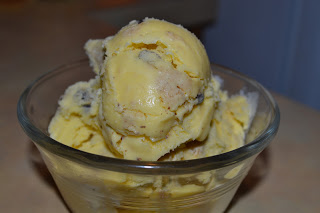
Since learning just how healthy ice cream is (homemade of course) I’ve been making it a lot lately. Which means experimenting with new flavors.

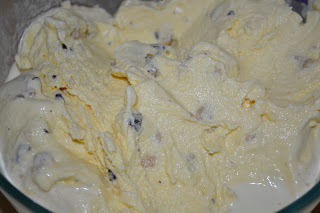
This week I made cookie dough ice cream. One of my favorites! And it turned out great!!! I had some for snack last night and for breakfast today 😛  It’s just a basic vanilla with homemade cookie dough chunks. Yum!!

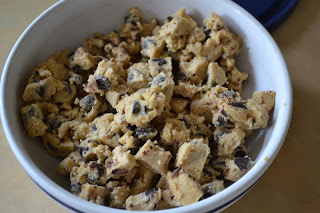
I baked cookies on Saturday. SoI made a full batch of dough and reserved about a cup of it for the ice cream. My son also got his first little taste of vanilla ice cream (his first taste of anything sweetened!). Just a couple little bites. He seemed to enjoy it.

This post is linked to Fat Tuesday at Real Food Forager.


Cookie Dough Ice Cream

Ice Cream

3 cups cream (preferably raw)
3 egg yolks
1 Tbsp. vanilla
1/2 cup maple syrup (or honey)

Cookie Dough (full recipe for cookies…scale down for just one batch of ice cream, freeze it in one cup portions for future use or make some cookies with the rest 🙂

2 1/4 cups whole wheat flour (or any combination of gluten free flours)
1 tsp. baking soda
1/2 tsp. salt
1/2 cup butter, softened
1/2 cup palm shortening (you can use all butter, but I like the combo of butter and shortening)
3/4 cups cane sugar
3/4 cups rapadura or brown cane sugar
1 tsp. vanilla
2 eggs
1 1/2 cups chcolate chips (optional…works well without chips for the ice cream)

Prepare the cookie dough:

Cream butter, shortening, sugars and vanilla. Add eggs, beat well.Add dry ingredients. Mix well. Stir in chocolate chips.

Place one cup of dough in plastic wrap. Flatten to about 1/2 inch. Freeze.

*You can make cookies with the remaining dough: Bake at 350 for ~ 10 minutes.
*You can freeze the remaining dough as one large batch to make cookies later or in one cup portions to make more ice cream later.

To make the ice cream:

Thaw dough for 5 minutes on counter. Cut/break into small chunks. Place in a bowl and return to freezer.

Mix cream, egg yolks, vanilla and syrup with a whisk until well combined. Process in an ice cream maker (takes about 20 minutes in my Kitchen Aid attachment). Add frozen cookie dough pieces during the last minute of processing. Store in an airtight container in the freezer.

Caesar Dressing

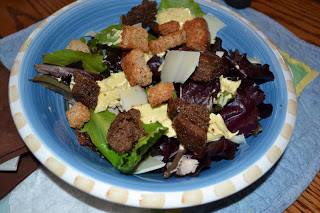
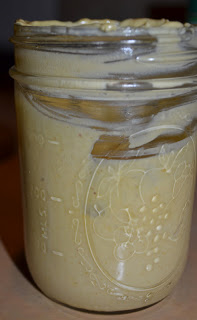
I’ve never really been a huge fan of caesar salads. I never really cared for the dressing. But my tastes have changed a lot in the last few years. So recently when I was looking through NT I saw a recipe for caesar dressing. I decided to give it a shot. It was super easy to make. And it tastes pretty good. Justin and I both like it. I wouldn’t want to eat it all the time, but definitely good once in a while to have something different. It did turn out quite thick. So I’d probably add a little more oil or vinegar next time. There was one other reason I wanted to try this…it has anchovies! I’ve never eaten one (that I know of). But I’ve wanted to try them for a long time. You can’t tell they are in the dressing. They just add a little nutty flavor to it. I have some left now. I hope to use them some other way soon. I want to cook with them. The NT recipe says to use a blender to make this. I used a glass jar and my immersion blender. So quick and less mess. The dressing stays in the jar you mix it in.

We used this last night for caesar salads with bacon, chicken, avocado, Parmesan and homemade garlic croutons. A very refreshing dinner for the last day of winter…that was in the 80’s 🙂

Caesar Dressing

1/2 – 1 tsp. dijon mustard (I just used yellow mustard)
1 Tbsp. raw wine vinegar (I used white vinegar)
1 Tbsp. lemon juice
1 Tbsp. finely grated parmesan cheese
1/2 cup EVOO
1 Tbsp. expeller-expressed flax oil (I didn’t add this)
1 egg yolk
2 anchovy filets
1 clove garlic, peeled and mashed

Place all ingredients in food processor and blend until smooth. Or place in a wide mouth pint jar and mix with an immersion blender.

Roasted Cauliflower Au Gratin

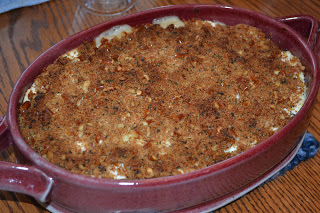
I don’t often make Rachael Ray recipes. In my opinion most of them have too many ingredients, require too many steps and generate too many dirty dishes. The food may be good, but it’s just not my style of cooking. I did, however, make one of her recipes for dinner last night – roasted cauliflower au gratin.  I saw her make it on her show recently and it looked so good! And it was. I think I could have eaten the whole thing myself 😛  The whole family enjoyed it. I served it as our main dish. It would make a great side dish. Or you could add bacon, chicken or ham to make it a more complete main dish. As always it did require some work and some clean up. But I prepped it in the morning and got the kitchen cleaned up. So when it was time for dinner all I had to do was pop it in the toaster oven. No time in the kitchen and no mess to clean up after dinner. Perfect for a summer-like winter day 🙂  This is definitely a keeper recipe! I didn’t follow the recipe exactly. I only used 1 head of cauliflower. I also used a combo of milk, kefir and chicken broth for the cream sauce and didn’t make a full batch since I was using less cauliflower. I’ll post the original recipe with my mods in ().
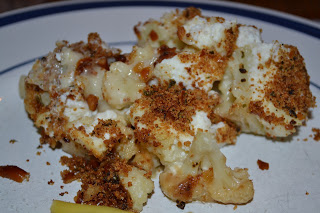
 

Roasted Cauliflower Au Gratin

2 large heads cauliflower
3 Tbsp. EVOO
Salt

For the Topping:
2 Tbsp. EVOO
3 Tbsp. butter
1 garlic clove, grated (I used about 2 tsp. minced garlic)
Zest of 1 lemon (I didn’t add this)
2 Tbsp. parsley, chopped (I used 1 Tbsp. dried parsley)
1 cup breadcrumbs (I used a combo of whole wheat bread crumbs and crushed pretzels)

For the Sauce:
2 Tbsp. butter
4 Tbsp. flour
2 cups milk (I used a combo of milk, kefir and chicken broth)
Salt and black pepper
Freshly grated nutmeg

1 cup ricotta cheese

Preheat oven to 400°F. Chop cauliflower into medium to large bite-size florets. Toss cauliflower with EVOO and salt. Roast on a baking sheet until just barely tender but slightly crispy, about 15 minutes.
*I roasted my cauliflower the way I always do – lots of EVOO and salt. I roast it for more like 40 minutes.

For the topping, in a large skillet over medium heat, add EVOO and butter. When butter melts, add the garlic, lemon zest and parsley, and cook for 1-2 minutes or until fragrant. Add breadcrumbs and toast until golden. Transfer to a bowl and reserve.
Meanwhile, make the sauce: Melt butter in a saucepot over medium heat. Stir in the flour and cook a few minutes, stirring constantly, until it starts to smell slightly nutty. Stir in milk, salt, pepper and nutmeg, and bring to a simmer. Remove from heat and reserve
Mix the cauliflower and sauce in a casserole dish, then dollop with ricotta.
*At this point I covered it and stuck it in the fridge. If you are baking it immediately:

 Bake 15 minutes at 375, until golden brown. Finish it with a sprinkling of the breadcrumb mixture and a squeeze of lemon juice over top.

If you are baking it later:
Bake, covered, at 350 for about 35 minutes. Remove cover. Top with breadcrumbs. Bake another 10 minutes.