Home » Kid-friendly Recipes » Page 40

Category: Kid-friendly Recipes

It is so important to cook homemade, healthy food. But it’s not always easy to find kid-friendly recipes.

That’s where I come in. I’ve got hundreds of kid-tested and approved recipes that won’t keep you in the kitchen for hours or stretch your budget too thin.

I focus on allergy-friendly, whole foods. But I always cook with kids in mind. I take all sorts of feeding challenges into account too.

We’ve dealt with every allergy possible, so I’ve created recipes that are gluten free, nut free, dairy free, egg free, soy free, corn free, coconut free and more!

Kid-friendly recipes don’t have to be boring. And they are certainly not limited to chicken nuggets and pizza every night.

A nourished child will enjoy a wide variety of fruits, vegetables, proteins, carbohydrates and fats. Get your kids in the kitchen with you and start cooking! Have fun with food and your kids will learn to love eating.

Blurple Moon Ice Cream (Blue Moon Take Two)

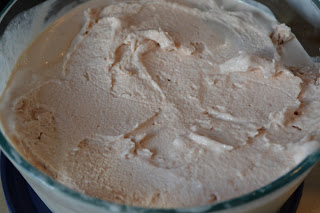
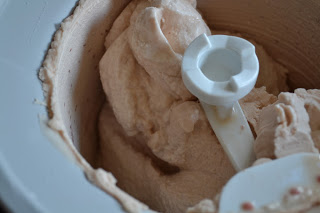
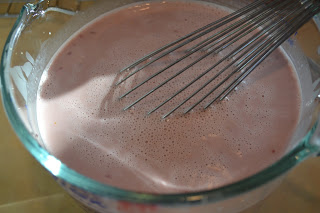
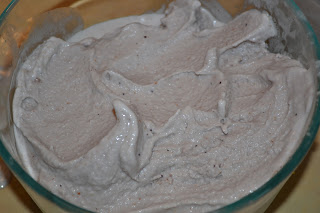
I tried making blue moon ice cream last week. The ice cream was good…but it didn’t really taste like blue moon. I decided to try again this week. I did some more research and asked for opinions on flavor. From what I’ve read the flavor of blue moon is actually nutmeg! I never would have guessed that. I think there are some variations of the flavor. Some say it also has a lot of almond. The most surprising thing is that there is no fruit flavor. The color really fools you. For this attempt I mostly went with nutmeg. But I also added a little bit of homemade almond butter for a hint of almond flavor. And I added some blueberry puree for a little color (it didn’t really impact the flavor). Rebecca insisted it had to have some color. It’s more of a purple than blue (“blurple” :), but at least it’s natural. I’ll have to keep experimenting with homemade/natural coloring to make it more blue. This was a pretty successful attempt at homemade blue moon. It really does taste like the blue moon flavor! “Cinderella” really enjoyed it. I didn’t measure anything when I made it. I just tasted as I went along until I got the flavor I wanted. So I’ll do my best to write down a recipe. If you try it please taste the batter and adjust the flavor as needed before putting it in the ice cream maker.
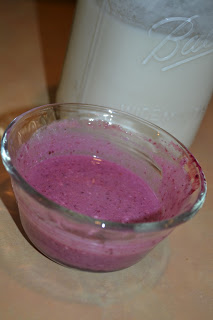
You can use this same flavor idea for other things besides ice cream. I made some blue moon yogurt for Rebecca’s lunch yesterday (plain yogurt with maple syrup, a little blueberry puree and a sprinkle of nutmeg). You could even try blue moon pudding or pudding pops (add some nutmeg to homemade vanilla pudding…freeze it in molds for pops).

Now that I’ve come up with a decent homemade blue moon maybe I’ll have to really challenge myself and try to make homemade superman ice cream. Anybody know what flavors the yellow and pink ice creams are?

This post is linked to Fat Tuesday at Real Food Forager, Real Food Wednesdays and Fight Back Friday.
Blurple Moon Ice Cream

3 cups cream (preferably raw)
3 egg yolks
1/2 cup maple syrup (adjust to your taste)
2 tsp. vanilla extract
2 tsp. lemon juice
1-3 tsp. nutmeg (adjust to your taste)
2 Tbsp. homemade almond butter or 1/4 cup crispy almonds
1-2 Tbsp. arrowroot powder (not necessary, but it does help texture)

blueberry puree (optional for color)
1/3 cup blueberries (fresh or frozen)
1 Tbsp. maple syrup

Cook blueberries and syrup on low heat until berries soften and release juice. Strain. Cool.

In blender or food processor (I used my Vitamix) combine all ingredients (including blueberry puree if using), making sure the almonds are totally blended. Taste. Adjust syrup, nutmeg and almond to taste. Process in ice cream maker (mine took 20 minutes in my Kitchen Aid attachment). Store in freezer.
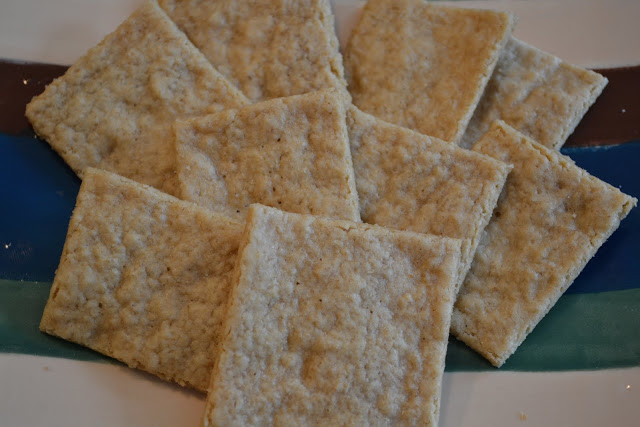
Soaked Graham Crackers

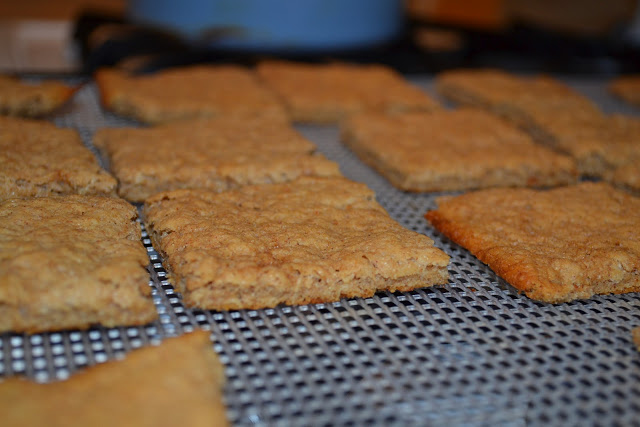
I’ve been making a lot of soaked baked goods lately. Through my recent experimenting I know that I handle them a lot better than unsoaked. One of my favorite foods is graham crackers. I used to live on them…the boughten, processed kind :\  But I haven’t been able to eat them in a long time, even my homemade grahams.

I have made them with sprouted flour in the past. That works ok, but the texture isn’t great. So I decided to experiment and see if I could make a soaked version. I used the graham cracker recipe I always use as a base and then added/adjusted ingredients.

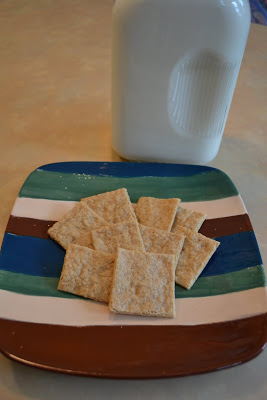
I was quite impressed with the outcome! Crispy and sweet. A perfect treat for me…and my family. Rebecca had one with almond butter for breakfast yesterday 🙂  I made a small batch since I was experimenting. And next time I’ll try to get them a little thinner I think. But overall a great first attempt! I’m so excited to have soaked graham crackers. Now I just have to keep myself from eating them all in one day 😛

This post is linked to Fat Tuesday at Real Food Forager, Real Food Wednesdays and Fight Back Friday.

Soaked Whole Wheat Graham Crackers

2 cups organic whole wheat flour, all purpose flour or a combination of the two

1 cup yogurt, kefir or buttermilk
1/2 cup melted butter or coconut oil (I sometimes use half of each)

1/2 – 2/3 cup rapadura or cane sugar (adjust to your taste)
1/2 tsp. baking soda (optional)
1/2 tsp. salt
1/4 tsp. cinnamon (optional)
6Tbsp. honey (you can substitute molasses for some of the honey for a stronger “graham” flavor)
1 tsp. vanilla

Mix flour, yogurt and butter/oil in a glass bowl. Cover and let sit 7-24 hours.

Heat oven to 350. Add remaining ingredients to flour mixture. Stir until well combined. The dough should be quite moist and sticky.

Split dough into 2 equal parts. Put 1/2 of dough on a parchment paper or silpat lined baking sheet. Spread with a spoon until you have a fairly even layer covering the baking sheet. It will be a bit lumpy, not smooth. Repeat with 2nd half of dough on another pan.

Bake for about 10 minutes. Remove from oven and cut into squares (with pizza cutter). If the dough sticks to the pizza cutter bake them another 5 minutes and try again. After cutting them into squares, return the pans to the oven and bake another 5 minutes.

Remove the crackers from the oven. Transfer them to a dehydrator tray (you can keep them on the parchment until they are dry enough to handle without breaking) and dry them for 2-6 hours (until they are crispy/dry). Let cool. Store in an airtight container. You can also freeze them for long term storage.

Soaked Soft Pretzels

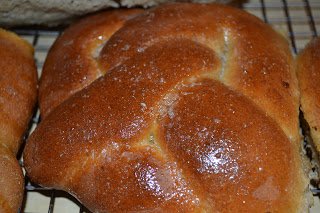
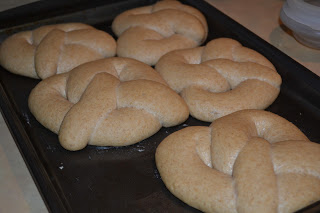
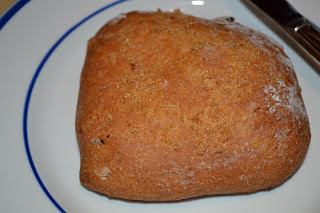
Between a sick baby and a power outage I haven’t had much computer time lately. So I’m trying to catch up on posts. Last week I made some soaked whole wheat bread again. But I made a bigger batch of dough and used half of it to make soft pretzels. It was an experiment…and it turned out great! Unfortunately right after I finished mixing the dough the power went out. So I had to roll/shape pretzels in the dark with a crying baby. Not exactly ideal conditions. So I had to be pretty quick and couldn’t see that well…and ended up with pretty large pretzels. If I make them again I’ll roll them a lot thinner. Regardless they taste great! Slather them with butter and salt right out of the oven. Yum! And they make great bread for a sandwich…a pretzel bun. This is a great snack for me to have on hand…soaked wheat with lots of salt. Exactly what my body needs.

Soaked Soft Pretzels

2 cups whole wheat flour
1/2 cup buttermilk, kefir or yogurt
3/4 cups very warm water
1 egg
1cup organic white unbleached flour
1/8 cup warm/hot water
1/8 cup coconut oil
1 Tbsp. yeast
1/4 cup local raw honey
1/2 Tbsp. sea salt

The day before, add wheat, buttermilk, and water to your stand mixer. Mix just until all the flour is wet. Cover and let set at least 7 hours but 12 or more is even better and you may even have a nice sourdough taste. I usually try to do 24 hours. Soak it one morning. Mix it the next morning.

The next day, or whenever you’re ready to finish your bread, add the egg and white flour. Add coconut oil to the hot water (so it melts). Once it’s melted, add it in, and start mixing on the lowest speed.

Add the yeast, keep mixing on lowest speed. Add honey and seal salt.

When the dough has cleaned up the sides and middle of the bowl, check how the dough feels and see if you need a bit more water or flour (you’ll know if it feels too dry or wet), and then set the timer for 14 minutes and continue mixing on the lowest speed.

Meanwhile, butter two baking pans. When the dough is done, use buttered hands to split it into 10 equal pieces. Roll each piece into a long string. Shape into pretzels. Place on baking sheets.

The rise time depends on the temp in your kitchen – usually 2-3 hours. Bake at 350 degrees for 20-25 min.

When you take them out of the oven, brush them with butter and sprinkle with sea salt. Be sure to add plenty of salt or you might be like me and have a three year old telling you “I desparately need more salt.” Place on a rack to cool…or devour immediately 🙂

Not-So-Blue Moon Ice Cream

I’ve been making a lot of ice cream lately. And now that my intense chocolate cravings have ended after adding lots of carbs back into my diet (thought that would never happen!) I’m finding that I actually really enjoy fruity ice creams. I don’t need overly sweet chocolatey/caramely ice cream flavors. Especially when I’m eating it for breakfast. Who knew 😛  This week we made another fruity ice cream. But it was inspired by Rebecca. She loves blue moon ice cream. What kid doesn’t? I had searched for recipes for it a long time ago. Mostly you see a typical ice cream recipe with some sort of special blue moon flavoring. Not what I want. I did finally come across a recipe for homemade blue moon ice cream on One Perfect Bite. I don’t really  know what the blue moon flavor is. Some form of raspberry I think. This recipe uses a combo of raspberry and lemon. I didn’t follow this recipe, I just used the flavoring idea. The ice cream turned out great!! Delicious! Does it taste like blue moon? Sort of, not totally. It mostly tastes like raspberry ice cream 🙂  And ours isn’t blue. It’s more of  a pale pink. You can add blue coloring. I didn’t want to ruin our healthy homemade ice cream with that. I don’t measure anything when I make ice cream, so I’ll do my best to write down the recipe. This was a fun experiment. I’ll have to keep trying to figure how to make that blue moon flavor…with real food.

As a side note, I didn’t realize blue moon isn’t a common ice cream flavor to everyone. How sad that some people grow up never tasting blue moon 😛

**Update – I have heard from some people that they think nutmeg is the mystery flavor. I’ll have to try that sometime.

This post is linked to Fat Tuesday at Real Food Forager, Real Food Wednesdays at Kelly the Kitchen Kop and Fresh Bites Friday.

Not-So-Blue Moon Ice Cream
1 1/2 cups fresh or frozen (thawed) raspberries
1/4 cup maple syrup
3 cups cream (preferably raw)
3 egg yolks
1/3 cup maple syrup
1 Tbsp. vanilla
1 Tbsp. lemon juice

Simmer raspberries and syrup in a small pan until raspberries are broken down. Strain out seeds. Chill the raspberry puree in the refrigerator.

Mix cream, yolks, syrup, vanilla, lemon juice and chilled raspberry puree. Adjust sweetness to taste (taste testing is a great job for kids…Rebecca loves this part :). Process in ice cream maker. I use my Kitchen Aid attachment. It takes about 20 minutes. Store in freezer.
Soaked Date Scones

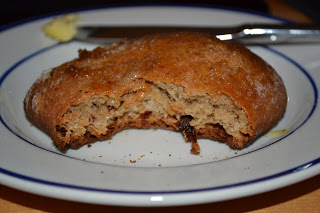
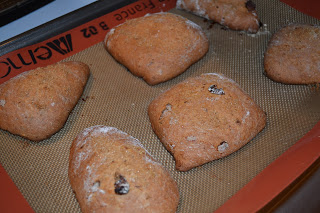
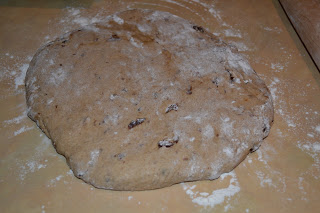
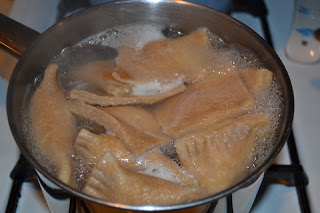
I tried a Nourishing Traditions recipe this morning for date scones. These were really easy to make since the food processor does most of the work. And they turned out great!! Mildly sweet. A nice crust. A definite keeper.

This recipe is a great base for any flavor scone. I used dates and raisins today. I’ll have to play around with other flavors.

This post is linked to Fat Tuesday at Real Food Forager.


Soaked Date Scones

3 1/2 cups whole wheat flour (or spelt or kamut)
1 cup buttermilk (I used a little over 1 cup of a combination of yogurt and kefir.)
4 Tbsp. melted butter or lard
1 1/2 tsp. sea salt
2 tsp. baking soda
3 Tbsp. rapadura or coconut sugar
1 cup chopped dates (or any dried fruit)

Mix flour with buttermilk (or yogurt) to form a thick dough. Cover. Let soak for 12-24 hours.

Place dough in a food processor. Process several minutes to knead. Melt butter with rapadura. Add butter mixture, salt and soda to dough. Process until mixed. Add dates and pulse a few times.

Remove dough to a well floured board. Roll dough to about 3/4 inch thickness. Cut into rounds with a glass or to any shape you like (I just cut odd shapes with a pastry cutter). Place on a buttered or parchment lined baking sheet. (I sprinkled a little extra sugar on top at this point.)  Bake at 350 for 35-40 min. Serve warm with butter.

Soaked Cold Cereal

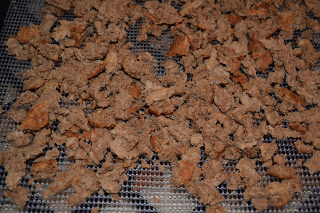
I finally got to the store and got some more wheat flour this week. So I can start trying more soaked recipes again 🙂  This week I made cereal. It is another recipe from the KS e-book. The original recipe is from Sarah at The Healthy Home Economist . This recipe is very simple, but it does take a couple days to make. So be sure you start in advance if you want to try it/have it planned for a specific day. There isn’t much hands on work. It just takes time to soak and dry. The final product…great!! This is so good. I have to keep myself from munching on it constantly 😛  You can use it like cold cereal/serve it with  milk. Or you can use it like granola – plain, as a topping for yogurt, etc. It makes a great snack for kids too! I’m so glad I tried this. We’ll see what Justin thinks when he has some for breakfast today. The flavor kind of reminds me of Wheaties. I might play around with the recipe a bit to see if I can make it more like flakes instead of crumbles. I only made a half recipe this time. I had to use more yogurt than the recipe calls for. And mine dried faster. I was surprised how quickly it dried.

Soaked Cold Cereal

6 cups flour
3 cups plain yogurt, kefir, buttermilk or clabbered milk (I would increase this to about 4 cups)
3/4 cups coconut or palm oil (melted)
1 cup maple syrup or honey (I used syrup this time)
1 tsp. sea salt
2 tsp. baking soda
1 tsp. vanilla
1 tsp. maple flavoring (I don’t have this, so I just skipped it)
1 Tbsp. ground cinnamon

Mix flour and soaking medium in a large glass bowl. Cover. Leave on the counter 24 hours.

Mix remaining ingredients well into the soaked batter. Pour into two 9×13 pans and bake at 350 for about 30 minutes (I think this would be good eaten as a cake too with some dried fruit or nuts added. Just stop at this point and enjoy :).

Let cool and crumble the cake into small pieces. Dehydrate at 200 degrees for 12-18 hours (I did about 150 for 9 hours in my dehydrator). Store in airtight containers in the refrigerator or freezer.

Soaked Whole Wheat Chocolate Chip Cookies

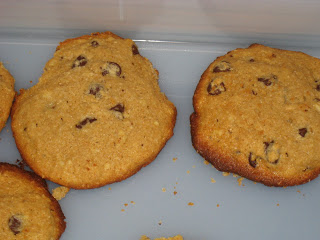
Rebecca and I had our Mommy/daughter date last night. And we had to pack a picnic dinner. When I asked her what she wanted to pack one of her requests was chocolate chip cookies. I decided to make a healthier version for us to make/take. I used the breakfast cookie recipe as a starting point and made a few modifications. The cookies turned out quite well. They are softer than a “normal” cookie. But they taste great! And I felt good about us eating them. We actually had some with lunch and dinner!

This post is linked to Fat Tuesday at Real Food Forager.

Soaked Cookies

1 1/2 cups whole wheat flour
1/2 cup rolled oats
3/4 cups butter, divided (1/2 cup melted, 1/4 cup softened)
1/2 cup buttermilk, yogurt or kefir (I used whole milk yogurt)
1/2 – 3/4 cup honey (sweetened to your liking)
1 egg
1/2 tsp. salt
1/2 tsp. baking soda
1 tsp. vanilla
1 cup chocolate chips (or any add in you like – nuts, raisins, etc.)

Combine flour, oats, yogurt and melted butter. Cover and let sit at least 7 hours.

Add softened butter and honey to flour. Blend with mixer until creamed. Add remaining ingredients (except chips). Blend well. Stir in chips.

Drop by spoonful onto ungreased cookie sheet. Bake at 350 for 20 minutes.

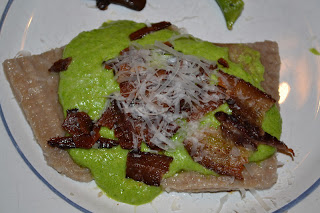
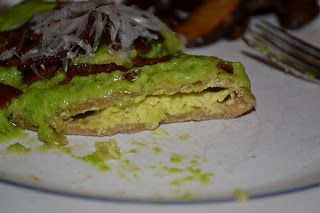
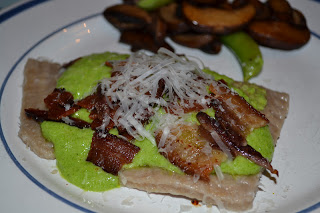
Homade Soaked Cheese Ravioli With Creamy Bacon Pesto

I saw a recipe the other day for soaked noodles and it mentioned using it for ravioli. I thought that sounded like fun. So last night I made ravioli for dinner. I didn’t actually use a recipe for any of it! I’ll try to remember what I did for each component. This turned out really well. And it made me feel good eating such a homemade meal. All three of us enjoyed it. I served it with sauteed mushrooms and sugar snap peas (in coconut oil and butter). I was in heaven last night 🙂  Plus I learned that Rebecca likes mushrooms…and Justin doesn’t think they are quite as bad as he had previously thought 😛  Maybe, just maybe he’d be ok with a few mushrooms in dishes once in a while. As a mushroom lover that NEVER cooks with mushrooms that is music to my ears.

This post is linked to Fresh Bites Friday and Real Food Wednesday.

Soaked Noodles

2 cups whole wheat flour
1/2 tsp. salt
1/3 – 1/2 cup yogurt (preferable raw, homemade)

Combine all ingredients, using enough yogurt to make a soft dough. Knead for a few minutes. Cover and let sit at least 7 hours.

When ready to use, roll out the dough on a floured surface as thin as you can. You can cut it into any size/shape you want or you can add ravioli filling and cut and seal raviolis. Cook for about 20 minutes in boiling water.

Cheese Ravioli Filling

1/2 cup homemade cream cheese
1 egg
1/4 cup grated parmesan cheese
seasoning to taste (I used garlic powder, salt and a little homemade pesto)

Combine all ingredients until smooth. Refrigerate until ready to use.

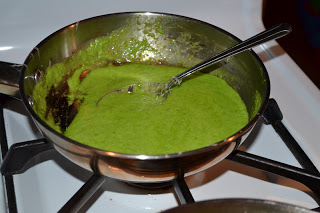
Creamy Pesto

1 cup peas
1/4 – 1/2 cup EVOO
salt, garlic powder to taste
(optional – crispy nuts)

1/4 cup grated parmesan cheese
1/4 cup heavy cream

cooked bacon (optional)

Blend peas, olive oil, seasoning and nuts until smooth (adjust consistency to taste with oil). When ready to use warm pesto in a pan with cheese and cream. You can add crumbled bacon to the sauce or just sprinkle the bacon on top of the ravioli after assembling.

Cheese Ravioli with Creamy Bacon Pesto

Roll out dough. Place 1 Tbsp. of filling on dough spaced about 2 in. apart. Fold dough over, press around filling. Cut out ravioli. Seal edges well with a fork. Cook in boiling water about 20 minutes.

Drain ravioli. Top with creamy pesto, grated parmesan and crumbled bacon.

Soaked Bread

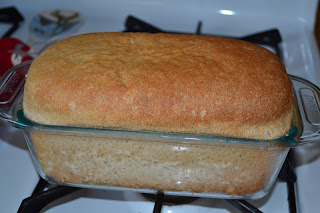
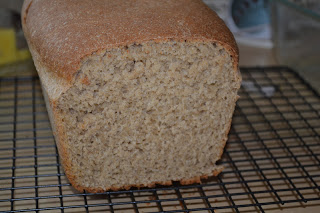
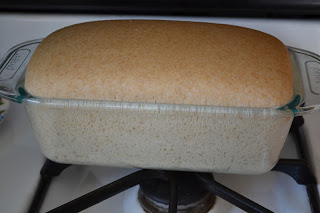
Yes, it is another soaked grain recipe from my Kitchen Stewardship e-book 🙂  This bread recipe comes from Kelly the Kitchen Kop (a fellow West MI blogger and WAPF chapter board member!). I’ve done quite a bit of experimenting with bread making over the last few years. Some hits. Some big misses. Considering I still haven’t perfected regular bread baking I wasn’t sure what would happen with a soaked version. Would it taste good? Would the texture be ok? Well, I’m glad I gave this a try. It’s great!! And it was super easy to make. As usual I scaled the recipe back to only make one loaf on my first attempt (I hate to make a big batch and then not have it turn out). I wish I would have made the full recipe now 😛  I don’t think this loaf will last long now that I can eat it 🙂  This bread is super soft and has great flavor. All three of us really enjoyed it with our soup last night. And I had some for breakfast today. Tastes great toasted with butter or nut butter.

This recipe does use some AP flour. I’m starting to think it’s pretty tough to make a really good loaf of bread without a little AP flour. I still like to use mostly freshly ground whole wheat. But just a little bit of organic AP flour really does wonders for the texture.

I really like that you can freeze this bread at the dough stage. Then you can have freshly baked bread ready in no time. I’ll have to try that the next time I make this…which might be very soon 🙂  Kelly’s recipe suggests using a Bosch mixer. I used my Kitchen Aid. It worked just fine.

My timing on this wasn’t the best since it was ready to be baked right at nap time. So I stuck it in the oven and started walking with Abram. When it was done I was able to get it out of the oven with him still asleep in the Moby. But I couldn’t take it out of the pan right away. It did get a little soft having to sit in the pan. But I just stuck the loaf back in the oven (not in the pan) for a few min. and it firmed back up.

Soaked Bread
makes 3 loaves

4 cups whole wheat flour

1 1/2 cups spelt (or you can just use more whole wheat) (I used whole wheat)
3/4 cups buttermilk (you could also use whole milk yogurt, or kefir. or use an equal
amount of water + 1 T. lemon juice, whey or vinegar) (I used yogurt)
2 cups very warm water
1 egg (when I did 1/3 of the recipe I just used the white of one egg…kept the yolk to use in our lunch 🙂
3 cups Bob’s Red Mill white unbleached flour
1/4 cup warm/hot water
1/4 cup coconut oil
2 1/2 Tbsp. yeast
1/2 cup local raw honey
1 Tbsp. sea salt

The night before, add wheat and spelt flour, buttermilk, and water to your Bosch Kitchen Mixer. Mix just until all the flour is wet. Put the lid on the Bosch, and let set at least 7 hours but 12 or more is even better and you may even have a nice sourdough taste.


The next day, or whenever you’re ready to finish your bread, add the egg and white flour to the Bosch. Measure a 1/4 c. hot water in a measuring cup…don’t put it in yet…but add to the hot water (so it melts) 1/4 c refined or unrefined coconut oil. (If it’s warm in your kitchen and the oil is already melted just add these two ingredients.)  Once it’s melted, add it in, and start mixing on the lowest speed.


Add yeast, keep mixing on lowest speed. Add honey and seal salt.


When the dough has cleaned up the sides and middle of the bowl, check how the dough feels and see if you need a bit more water or flour (you’ll know if it feels too dry or wet), and then set the timer for 14 minutes and continue mixing on the lowest speed.

Meanwhile, butter your bread pans. (Butter up and over the lip of the bread pan, so it will come out easily after baking.) When the dough is done, use buttered hands to split it into 3 equal pieces (some weigh it out, but I just guess), shape them into a loaf, and press into the pans. Be careful not to fold it over itself and leave big air pockets.

————————————————————

VARIATION FOR FREEZING THE DOUGH:

At this point you could shape the dough to fit in your pan (or shape into buns to use in the fugure), then freeze before letting it rise. When it’s frozen, transfer it to a freezer baggie. Now you have homeade bread all ready to thaw, rise adn bake someday when you feel like fresh-baked heaven right from the oven. Or keep reading if you plan to bake them all at once and then freeze.

————————————————————-

The rise time depends on the temp in your kitchen – usually 2-3 hours. When it’s the height you want (don’t wait too long or it will fall), carefully place the bread pans into a cool oven (if it is electric) and set it for 350 degrees. Bake 25 min. For a gas oven preheat to 350 and bake for 20 min.

When you take it out of the oven, immediately (carefully) take it out of the pan and cool on a wire rack, otherwise condensation builds up in the pan and makes the bread soggy.

Soaked Pie Crust

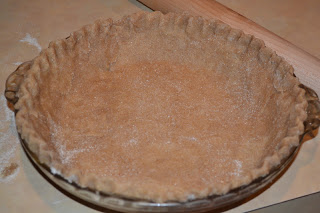
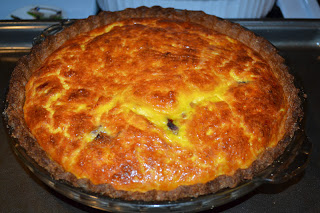
I am continuing to experiment with soaking grains and trying recipes from my Kitchen Stewardship e-book. Today I’m trying a soaked pie crust. The recipe is from Make a Home Mom. It is very easy to prep. I did it all in the food processor (same as I do for all of my pie crusts). I prepped it last night. This morning I rolled it out and put it in the pie pan and then in the refrigerator. Now it’s all set for our quiche tonight! So far it seems to be a great dough. Easy to prep. Easy to roll. I’ll update after we try it tonight.

This makes enough for a top and bottom crust. I only need a bottom. So I froze half of it to use another time. I also used a small amount for the ice cream we’re going to make today. I rolled it out, sprinkled on sugar and cinnamon and baked it. Once it was cool I crumbled it a bit. We’ll be adding this to our blueberry crumble ice cream today (Rebecca’s request). I tasted a piece of this…really good! So I expect our quiche crust tonight to be good as well.

**Update – the crust was great!! We all enjoyed it. I look forward to making a pie with it sometime.

Soaked Pie Crust

2 1/2 cups flour (I used freshly ground whole wheat)
3/4 tsp. salt
3/4 tsp. sugar
1/4 cup oil or melted butter (I used EVOO b/c it was what I had on hand that was convenient/quick)
1/2 cup cold butter, cut in chunks
2 Tbsp. yogurt
5 Tbsp. ice water

Mix flour, salt and sugar (I did this all in a food processor). Stir in oil. Cut in butter by pulsing the processor. Mix yogurt and water. Add into flour mixture until it makes a dough. Leave out for 8-12 hours (covered). Refrigerate 2 hours. Roll out on a well floured surface as you would any other pie dough. (I did not refrigerate mine before rolling it. I like it to be soft to work with it. I did refrigerate it before baking to keep it flaky).

*This makes enough for a top and bottom crust.
*You can freeze this for future use. Thaw in refrigerator when ready to use.