Home » dessert » Page 10

Tag: dessert

Russian Custard (grain free, dairy free, nut free, GAPS-legal)

I often read through the recipes in the GAPS book. There really aren’t many. And I don’t know that I’ve actually made any of them aside from the ferments and cultured products. But there are a couple simple recipes I’ve been wanting to try. I finally got around to one of them last night…Russian custard. Sounds fancy. But really it’s just egg yolks 😛  The recipe is for single servings, which is nice.

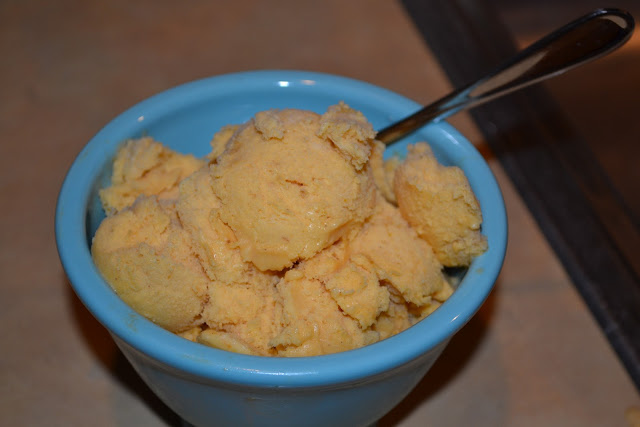
I made one serving for my snack last night. A nice little nourishing treat.

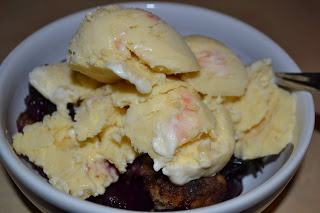
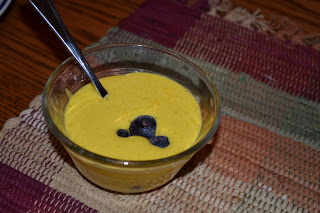
This is a great snack for those days where you want something just a little sweet. There is only a little bit of honey. And you can make it in minutes. You can serve it over fruit or mix things in. I added a few sweet cherries and some crispy almonds. It can also be used in recipes (*see note from GAPS below). I’m glad I finally tried this. Any way to get extra egg yolks down is good. By having a little treat I added 2 to my intake yesterday. Love it.

This is also a great substitute if you can’t have yogurt. I like to add fruit and homemade cereal for a little parfait.

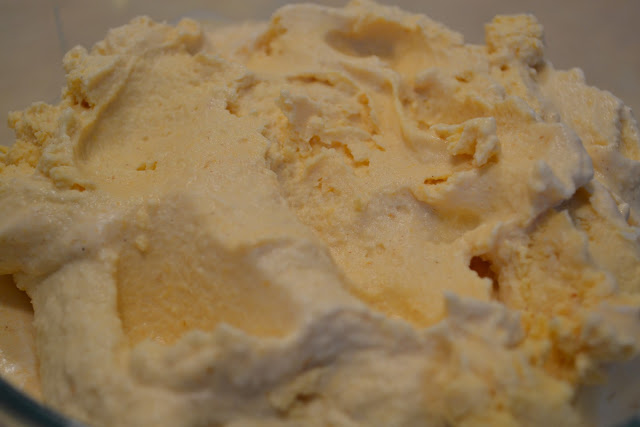
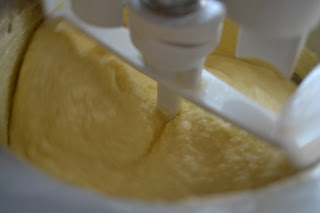
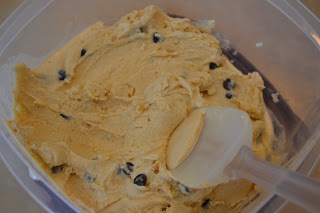
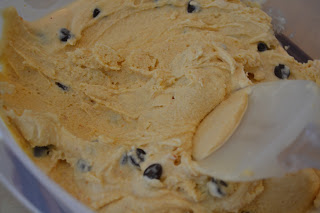
I use my hand mixer to make this. It gets thick and gooey. My whole family enjoys it. I have adjusted the recipe to my liking. This is how I make one serving for an easy breakfast or snack.

 
 Russian Custard

serves 1

3 egg yolks
1 Tbsp. honey

Whip egg yolks and honey until it gets thick and almost white, about 3-5 minutes with a hand mixer, depending on the speed of the mixer.

*”Russian custard can be used instead of cream on fruit or you can serve it on its own with some chopped nuts on the top or pieces of fruit. It can also be used instead of cream in making cakes.”

Pumpkin Ice Cream

We are finally getting raw milk again. We had our first pick up on Monday. So of course on Tuesday we had to make ice cream…in November 😛

I used the usual Nourishing Traditions recipe and tweaked it a little to make pumpkin ice cream. YUM!!! All three of us like it.

I used a combination of honey and syrup for the sweetener to give a neutral flavor.

Pumpkin ice cream made with fresh raw cream is the perfect fall treat. If you can’t have dairy coconut milk would work too.

Pumpkin Spice Ice Cream
Makes 1 quart

3 egg yolks (optional)
1/2 cup maple syrup, honey or cane sugar (or any combination)
2 tsp. vanilla extract
2 1/2 cups heavy cream (preferably raw, not ultrapasteurized)
1/2 cups whole milk (preferably raw, not ultrapasteurized)
1 cup pureed pumpkin
2 tsp. cinnamon
1 tsp. pumpkin pie spice

In a blender mix all of the ingredients. Taste. Make sure it is a little extra sweet (the sweetness decreases when it freezes).

Pour into an ice cream maker and process according to instructions (It took about 20 min. in my Kitchen Aid ice cream maker attachment).

Transfer to a shallow container, cover and store in freezer.

Peach Ice Cream


I haven’t made ice cream all summer! Even in this hot hot weather. I finally got around to it yesterday.

I decided to try peach ice cream this time since we have fresh peaches. I used my basic vanilla recipe from Nourishing Traditions. And added some peach juice and diced peaches. I also tried using a 2:1 cream to whole milk ratio instead of all cream (something I read from Nina Planck). This turned out really well.

It is very good! We enjoyed it on top of homemade blueberry peach cobbler. It doesn’t get much better than that.

I used 2 medium peaches. It could have used one more to make it a little more peachy.

Peach Ice Cream

3 egg yolks
1/3 cup maple syrup
1 Tbsp. vanilla extract
1 Tbsp. arrowroot
2 cups heavy cream, not ultrapasteurized
1 cup whole milk
2-3 medium peaches, diced, juice reserved

In large measureing cup whisk egg yolks and arrowroot. Add syrup, vanilla, cream, milk and peach juice. Mix to combine. Pour into an ice cream maker and process according to instructions (It took about 20 min. in my Kitchen Aid ice cream maker attachment). Add peach chunks during last minute or two. Transfer to a shallow container, cover and store in freezer.

These scotcheroos come together in about ten minutes, using real, allergen friendly ingredients. A simple, delicious dessert with no baking required!

Quick And Easy Scotcheroos {Gluten, Dairy, Egg and Nut Free!}


These scotcheroos come together in about ten minutes, using real, allergen friendly ingredients. A simple, delicious dessert with no baking required!

These scotcheroos come together in about ten minutes, using real, allergen friendly ingredients. A simple, delicious dessert with no baking required!

I grew up eating scotcheroos.

My mom still makes them all the time. She brings them to the neighbors, brings them for fellowship at church, etc.

But I haven’t made them or had one in years, though. Why? They are filled with not-so-good stuff. The main 3 things…Rice Krispies, corn syrup and regular peanut butter (hydrogenated oils and GMO nuts.

These scotcheroos come together in about ten minutes, using real, allergen friendly ingredients. A simple, delicious dessert with no baking required!

A Fresh Look.

I like to update classic recipes using real ingredients. So I gave these scotcheroos a makeover.

I use plain puffed brown rice, cane sugar, honey and sunbutter in the base. Then I simply melt allergen free chocolate chips for the topping.

Even with three kids trying to help these took about ten minutes from start to finish. There is no baking required. Just a few minutes at the stove. The mix and pour.

These scotcheroos come together in about ten minutes, using real, allergen friendly ingredients. A simple, delicious dessert with no baking required!

And, yes, they got a huge two thumbs up from everyone! Be forewarned…one batch may not be enough.

Scotcheroos also make a great party treat because they are free of gluten, corn, eggs, dairy, nuts and soy!

These scotcheroos come together in about ten minutes, using real, allergen friendly ingredients. A simple, delicious dessert with no baking required!

Kids In The Kitchen.

This may be one of our new favorite treats. And pretty soon my kids can make it without my help since they are learning to cook through the Kids Cook Real Food ecourse. My five and eight year olds can cook at the stove. Even my two year old can measure and pour quite well.

Ready for a special dessert with no allergens and very little effort? I’ve got you covered!
These scotcheroos come together in about ten minutes, using real, allergen friendly ingredients. A simple, delicious dessert with no baking required!

 
Quick And Easy Scotcheroos
Serves 16
A simple allergy friendly bar that requires no baking.
Write a review
Print
Ingredients
  1. 1/2 cup organic cane sugar or sucanat
  2. 1/2 cup honey
  3. 1/2 cup plain sunbutter
  4. 3 cups organic puffed brown rice
  5. 1/2 tsp, vanilla (optional)
  6. 1 1/2 cup chocolate chips
Instructions
  1. Mix sugar and honey in a large saucepan. Heat and boil until sugars are dissolved (about 2 minutes).
  2. Remove from heat. Stir in su butter, rice and vanilla.
  3. Spread in a greased 9" square pan.
  4. Melt the chocolate chips in a double boiler until smooth. Poor over rice mixture. Let cool completely before cutting (in the refrigerator works best).
Just Take A Bite https://justtakeabite.com/


These scotcheroos come together in about ten minutes, using real, allergen friendly ingredients. A simple, delicious dessert with no baking required!

Peanut Butter Ice Cream

Our winter cow share sadly comes to an end next week. So I figured I better squeeze in one more batch of ice cream while we have our wonderful raw cream.

I wanted to try a new flavor and decided on peanut butter. I love ice cream with peanut butter in it!

This turned out great. I added a few chocolate chips too. It’s almost like eating cookie dough in ice cream form. It even looks like it. Yum!!!

Peanut Butter Ice Cream

3 egg yolks (optional)
1/2 cup maple syrup, honey or cane sugar
1 Tbsp. vanilla extract
1 Tbsp. arrowroot
3 cups heavy cream, not ultrapasteurized
1/3 – 1/2 cup peanut butter (natural or homemade)
1/2 cup chocolate chips (optional)

Combine all of the ingredients (except chocolate chips) in a blender. Blend until well combined.

Pour the mixture into an ice cream maker and process according to instructions. During the last minute add the chocolate chips.

Transfer the ice cream to a freezer safe container. Freeze until firm.

Dutch Apple Pie

Finally, the long awaited homemade dutch apple pie! This is an amazing pie! I’m not much of a pie person, but I’ll eat this any time. It’s like apple pie and apple crisp combined.
 

 I got this recipe from my mom. I think she got it from one of my grandmas. A great recipe handed down through the generations!

If you like apple desserts you will LOVE Dutch apple pie.

Dutch Apple Pie

Filling:
 
5 large tart apples, pared, cored and cut into thin slices
1/2 cup light brown sugar (orgainc cane brown sugar or sucanat)
1 tsp. cinnamon
 
Topping:
 
1/2 cup organic cane sugar or sucanat
3/4 cup flour (all purpose, whole wheat or a combination of tapioca and white rice to make it gluten free)
1/3 cup butter, chilled (or lard, tallow or palm shortening)
 
Single pie crust:
 
1 1/4 cups all purpose flour (or whole wheat)
1/2 tsp. salt
1/3 cup + 1 Tbsp. palm shortening, cold butter, lard or tallow
1/8 cup + 2 Tbsp. water w/ 1/2 tsp. vinegar
 
Pie Crust:
 
Sift the flour and salt. Cut in half of the shortening until it resembles corn meal. Cut in other half until it looks like small peas.
 
Add the water + vinegar and mix well. (You can do this all in a food processor for a very quick dough).
 
Roll out the dough and place in 9″ pie plate.You can use a gluten free pie crust as well.

 
Pie:
Heat oven to 400*F.
 
Arrange the apple slices in the pastry lined 9″ pie pan.
 
Combine the brown sugar and cinnamon. Sprinkle over the apples.
 
Combine the white sugar and flour.
 
Cut in the butter until the mixture is crumbly. Sprinkle over the apples.
 
Bake 40-45 min.