Home » Archives for Mary | Just Take A Bite » Page 71

Author: Mary | Just Take A Bite

End of Month Recap and Links – January 2013

It sure has been a busy month! I think half of our time was spent at doctor visits or sick 😛  Thankfully most of the doctor visits were good ones. I actually did very well on my goals this month. It really is helping to keep them simple and concrete. Here’s how it went.

1. Writing – I finished all of my writing assignments. Here is a link to my latest GRNL post.
2. Photography – I updated some recipe photos. Still nothing amazing, but a step in the right direction 🙂  Soaked Graham Crackers, Golden Grahams, Whole Wheat Graham Crackers

3. Healing – I got all of my test results yesterday. I have so much information to process now. It’s very overwhelming. I’ll give a full update in a separate post.
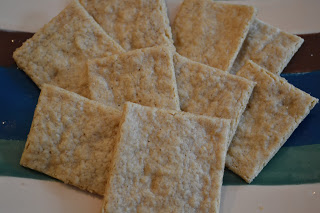
4. Homemade food – I had intended to work on crackers this month. I did make one batch of crackers that are kind of like saltines. But I spent a lot more time on cereal…even though we don’t actually buy cereal 😛  Oh well. It was so much fun! And so delicious.

5. Relationships – Justin and I got to go to Bible study together and have a baby-sitter put the kids to bed. We also went to a small group event with couples from our church. I talked to my sister. Rebecca and I saw a Little Mermaid show and went shopping together.

6. Rebecca – I have decided to not give any more updates on Rebecca for the time being. I will say that we are making good progress and getting some answers. We feel like we are on the right track and are so happy to see Rebecca grow and mature. She is so smart, funny and imaginative. She amazes her teachers with how quickly she is learning Spanish. And she is a constant crafter at home, always coming up with some new project to work on. Her most recent accomplishment has been reading Spanish…and understanding what she’s reading! Sometimes she truly amazes me. I started reading at the end of Kindergarten and was ahead of the game. Rebecca was reading English before preschool and is now reading Spanish part way through her first year of Spanish Immersion preschool. Crazy.

7. Crafts – I took a break from crafts this month.

8. Cakes – I am working on my nephew’s soccer cake. I am brainstorming ideas for cakes for my kids.

9. Declutter – I actually can’t believe how much of this I did in one month. I went through all of the toys in the living room (sort, put away, give away). I went through all of the toys in Rebecca’s room (sort, put away, give away). And I organized Abram’s drawers (put away clothes that are too small and restocked with current clothes). I also did a lot of random cleaning and organizing throughout the house. I’m not feeling quite so overwhelmed with “stuff” anymore 🙂

10. Acceptance – I’ve been reading Bittersweet when I have time. I still have a ways to go yet, though. I am enjoying this book so much!

I’ve also had some personal struggles with acceptance (of others and myself) that I’m learning to work through. God is really challenging me this year.

________________________________________________________________________________
January Links

I love this post about teaching children to be mindful and about meditation. I think this would be a great tool to use with Rebecca.

This is a very encouraging story about reversing asthma in a child with a real food diet.

I’ve been leery of stevia since I heard of it. Is it really a safe sugar substitute. Is stevia healthy? Holistic Squid gives some great information.

Washing your hair with only water? How frugal is that? Maybe some day I’ll be brave and at least try swapping my shampoo for something like baking soda and ACV.

10 awesome uses for coconut oil! I already use it for toothpaste and deodorant. I may have to try some of the others, though.

Of course I love any posts that talk about eating to restore health and heal metabolism. Eat for Heat 😉  Here are a few:
Cold Hands and Feet
Eat to Increase Your Metabolism
10 Reasons NOT to work out (guilty!)
Carbs are NOT evil

Here are my posts from January:

Salsa Bread
Homemade Cocoa Puffs
Lemon Poppy Seed Muffins
Quinoa Mac ‘n’ Cheese
Roasted Cauliflower and Cheddar Soup
Homemade Oat Squares
One Handed Honey Herb Chicken
Healing Hot Chocolate
Soaked Chocolate Covered Donuts
Sticks and Stones Ice Cream
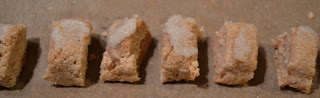
Homemade Frosted Mini Wheats
2013 Goals

Homemade Frosted Mini Wheats
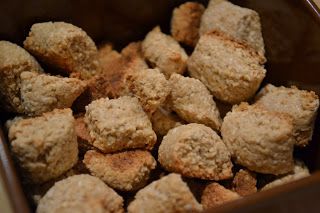
After making Oat Squares last week I had the idea to try Mini Wheats. Similar, but something I can tolerate 🙂  And always a personal favorite cereal.

I woke up about 45 minutes late today, so I had to throw this experiment together in about 10 minutes.

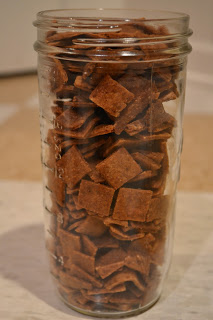
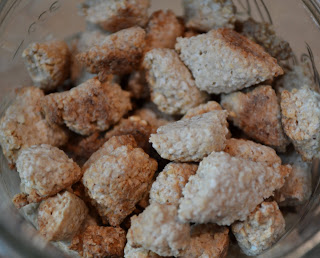
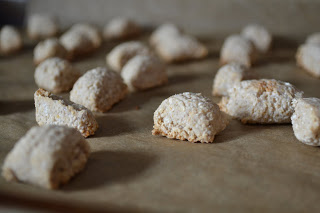
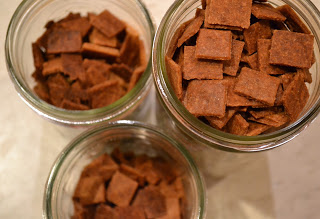
To my great surprise they turned out quite well. I’m sure I could make them look a bit prettier and be more uniform if I actually had the time. But on the whole they are good. They have the flavor of Frosted Mini Wheats. They are crunchy, but they aren’t too hard.

To help create these I looked at the actual ingredients in the cereal. There is no liquid. So I don’t know how they make them. I do know that whatever process they use makes the cereal not good for you.

I chose to use water to  hold the dough together. I also decided against adding synthetic vitamins to mine 😛

I only made a small batch to experiment. When I make them again I’ll do a larger quantity (and maybe take the time to take better pictures). And I want to try making them with part rice flour sometime.

Homemade Frosted Mini Wheats
makes 1 pint

1 cup whole wheat flour
1/4 cup organic cane sugar
1/3 cup water

1 Tbsp. organic palm shortening
2 tsp. organic cane sugar

Heat oven to 350 degrees F. Line a baking sheet with parchment paper.

Mix the shortening and sugar to form a paste (“frosting”).

Mix flour and sugar. Gradually add water until the mixture is barely wet enough to hold together. Use your hands to squeeze the dough/see if it will hold. You want it just past the crumbly stage.

Take a small handful of dough at a time and shape it into a log.

Spread some of the “frosting” on the log. Cut into squares. Place them on the baking sheet.

Repeat this process until the dough is used.

Bake at 350 for about 15 minutes. Turn off oven. Leave the cereal in the oven another 10 minutes to crisp. Allow to cool completely.

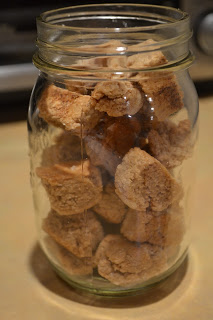
Store in an airtight container.

Meal Plans Week of 1-27-13

Sunday, Sunday. It’s here again. And I finally get to go to church again! I’ve had to stay home with sick kids for the past two weeks. Thankfully everyone is healthy again (well, almost…Justin is on the tail end of a cold). What a blessing to have a healthy family and everyone sleeping well. I’m crossing my fingers that Abram’s sleeping pattern over the last week isn’t temporary. Our early riser (from birth) has been sleeping until 8 am every morning! Amen to that. (Update…not so much today 😛  At least he made it past 7.)

Last week I was happy to be back in the kitchen. In case you couldn’t tell from all of my recipe posts 🙂  In addition to the new things (salsa bread, oat squares, lemon poppy seed muffins) I also made ice cream, soaked graham crackers, unsoaked graham crackers, golden grahams, kefir, yogurt and roasted beets.

We also had some family fun playing in the snow and sledding yesterday. Plus we had a baby-sitter put the kids to bed for the first time! I also did a little more clean up/organizing and got Abram’s drawers taken care of (small stuff out, current stuff in).

This week is pretty busy. Kindermusik starts this week. For the first time both kids will have class, back to back. I’m very excited for Abram to start his own activity. He has to come along to everything Rebecca does. He finally gets to do something himself. It’ll be fun to see how he interacts with the other kids. I’m sure it’ll be a lot different than Rebecca’s first time at KM 😉

The most exciting thing this week (for me) is getting my test results. Finally!! I’m excited and nervous. I’m just ready to have more answers and learn what is really going on inside my body. Then hopefully I’ll have a better idea of how to move forward.

I might meet up with some local bloggers on Thurs. We have MomBreak this week. I haven’t gotten to be at a meeting since early December. So I’m very excited. Finally we’ll be getting together with family on Saturday to celebrate my dad’s birthday (basketball game and dinner).

I have plenty of fun planned in the kitchen this week. I’d like to make a new batch of cocoa puffs and try another cereal (you’ll hear more details if it works). I want to make ice cream and scones (more specifics on those below). I’ll be making a new batch of chicken broth. I already made pudding this morning. Hopefully I’ll have time to make pesto and smoothies this afternoon. I didn’t have time for cheese crackers last week. Maybe this week I will.

No huge updates this week. I’ll have more after my test results. I do want to mention that I’m going to be experimenting with eating egg free this week 🙁  I’m  hoping it doesn’t help 😛  I’ve been suspicious about eggs bothering me for a long time now. I already cut out egg whites. But I’m wondering if the yolks aren’t working for me either. If they do, it will really cut a lot of options out of my diet. I LOVE eggs. And I think they are sooooooo healthy. Not to mention easy, cheap and so versatile. They are nutrient power houses. But…I’m wondering if I’ve built up an intolerance to them by eating them so often the last couple years.

Often times when I travel I feel better (lose a couple pounds, bloating/inflammation goes away, etc.). And when I think back through what I ate that was different than normal the only thing that stands out that I didn’t eat was eggs (I bring most of my food/eat very similar when I travel but I don’t bring eggs). There are also some foods I make that always confuse me about why they seem to bother me. They are made up of “safe” foods. Yet they just don’t seem to work well – homemade ice cream, salmon cakes, quiche, some baked goods (to name a few). The only common denominator/questionable ingredient? Eggs. It seems like I can eat graham crackers all day long without problems. But one muffin and my stomach is in knots. The only difference? Eggs.

I go in spurts with eggs. We’ve got a bunch to use up right now, so last week I ate a lot of egg yolks again (scrambled in my veggies, custard, baked goods). And by the end of the week my skin was awful (cystic acne all over), my headache is returning, my swelling is coming back, I have bloating, my eyes were painful and bloodshot, all kinds of stuff. So this week I’ll be doing at least a few days totally egg free. I started yesterday already. We’ll see if I notice a difference. I am going to try making some of my problem foods egg free to see if I tolerate them better that way. So I’ll be doing an egg free ice cream (sad) and some egg free baked goods. And we’ll see if my test results show an egg allergy. I’ll update next week with the results.

One final update – we get to continue our raw milk share!!!! God provided someone else looking to share the drive that lives just a few minutes from our house/in our neighborhood. God is good. We tried a new baby-sitter Friday (a girl from our church). And found out they get milk the same place we do too! So we still get raw milk. And we have a baby-sitter from a family with similar values/health practices as ours. What blessings.

On to the menu. Nothing fancy this week. Just some favorite meals that work into our busy schedule.
__________________________________________________________
S (prep lunch, make pudding, church, milk, make pesto, prep smoothies)
  L – cp meatballs, buttered noodles, broccoli
  D – leftover pizza, fresh fruit, pudding (J), crunchy kale, beet, snap peas and avocado salad w/ pesto (M)

M (skim cream, prep dinner, SP, PS, make broth)
  D – cp roast chicken, baked potatoes, roasted vegetables

T (strain/freeze broth, soak beans, KM)
  D – pesto topped salmon, cheesy pesto rice, beans

W (cook beans, prep scones, Meijer, PS, Dr. L.!!!)
  D (prep ahead) – ham and bean soup, tbd scones

Th (make cocoa puffs, baking project w/ kids, make ice cream, WMB?)
  D (easy clean up) – goulash, corn, garlic toast (J), misc. veggies (M)

F (clean, MB, PS)
  D – hashbrown egg bake w/ bacon, peas, custard w/ granola (J), misc. veggies (M)

S (make cheese crackers, swimming, bball game)
  D – out to eat – Panera Bread?

Lemon Poppy Seed Muffins

Last week I got a request from a friend for a lemon poppy seed muffin recipe. I’ve never made anything lemon poppy seed. Truth be told I’ve probably only tasted something lemon poppy seed once or twice in my life.

I’ve just never been a big fan of lemon flavored baked goods – bars, pies, muffins, cakes, anything.

At first I was just going to redirect my friend to another blog/recipe. But I quickly realized that none of the food blogs I read had lemon poppy seed recipes either!

So I had to come up with my own.

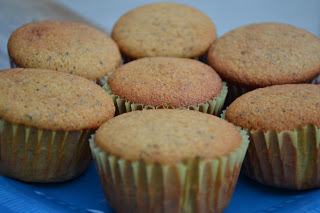
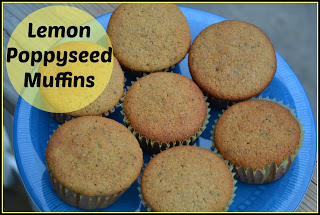
I did a little recipe searching and experimenting. Here is what I came up with. Moist. Slightly sweet. Lots of lemon flavor.

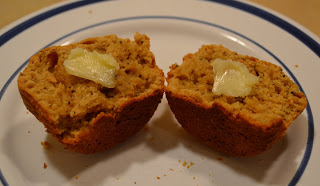
A real food recipe for lemon poppy seed muffins. I would actually eat these! Especially warm from the oven with lots of real butter.

Lemon Poppy Seed Muffins
makes 12 – 18 muffins

1/2 cup butter, room temperature
1 cup organic cane sugar
2 eggs
2 cups organic whole wheat or all purpose flour (or a combination)
1 tsp. baking powder
1/2 tsp. baking soda
1/2 tsp. salt
1 Tbsp. poppy seeds
6 Tbsp. lemon juice
1/2 cup milk
1/3 cup plain yogurt

Cream butter and sugar. Add eggs. Mix well. Add 1 cup flour, baking powder, baking soda and salt. Mix. Add milk + lemon juice. Mix. Add remaining 1 cup flour and poppy seeds. Mix. Add yogurt. Mix.

Fill paper lined muffin cups 3/4 full. Bake at 375 degrees for 25 – 30 minutes.

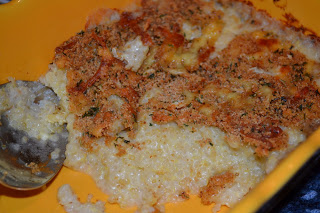
Quinoa Mac ‘n’ Cheese

We tried yet another new recipe for dinner last night. Quinoa Mac ‘n’ Cheese. This recipe comes from Tasty Kitchen.

The original recipe has spinach in it. I just used the concept of replacing noodles with quinoa and then made it the way I normally make macaroni and cheese.

This was quite good. It was a unique way to get my family to eat quinoa. So far they are not big fans (I really enjoy it myself…but the rest not so much). But Justin and Rebecca both finished their helpings. Since they normally only tolerate a few bites of quinoa I consider it a success :).

You could easily add any chopped, cooked vegetables to this dish. Or even add bacon or ham. That would make it even better!

I’ll post the recipe the way I made it. Very simple. And a nice change from the traditional macaroni and cheese. It’s also a great way to make a gluten free version of a classic dish. If you like your mac ‘n’ cheese to really hold together well you can mix in a couple of beaten eggs before pouring it into the pan.

This can be prepared in advance and then simply baked right before dinner. Or you can skip the topping/baking and serve it right out of the pan. This would also make a great, warming breakfast!

Quinoa “Macaroni” and Cheese
serves 3 – 4

1/2 cup dry quinoa (makes about 1 1/2 cups cooked quinoa)
1 cup water
1 tsp. evoo
1/2 tsp. sea salt

2 Tbsp. butter
2 Tbsp. flour
1 1/2 cups milk
1 – 2 cups grated cheese (depends how cheesy you like it. Any varieties will do. I used mozzarella, cheddar and parmesan.)
salt and garlic powder to taste

1/2 cup seasoned bread crumbs (optional – use gluten free or omit to keep it gluten free)
1/4 cup grated cheese (I used the same cheese mix as was in the casserole)

Rinse quinoa in a small mesh strainer for 1-2 minutes to remove bitter coating.

Toast quinoa in hot oil in a small saucepan for 1-2 minutes. Add water. Bring to a boil. Add salt. Cover. Reduce heat and simmer 15 minutes. Remove from heat. Let set covered 5 minutes. Pour quinoa into a bowl.

In the mean time melt butter in a saucepan. Add flour and mix. Cook for 1-2 minutes, stirring constantly.

Add milk very gradually, a couple Tbsp. at a time at first. Stir after each addition to incorporate into the butter/flour mixture. Add remaining milk. Bring to a boil. Reduce heat and add cheese. Stir until the cheese is melted. Season to taste.

Pour cheese sauce over quinoa and mix. Add extra seasoning if necessary. Add eggs if desired.

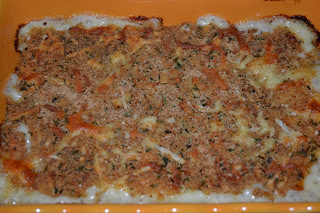
Pour into a greased casserole dish.

Sprinkle breadcrumbs and cheese over top.

Bake at 400 degrees for 25 – 30 minutes, until cheese on top is melted and golden. Let set for 5 minutes before serving.

Roasted Cauliflower Cheddar Soup

I’ve been in a recipe rut lately. So a couple weeks ago I did some recipe browsing. I found this recipe for roasted cauliflower cheddar soup on two peas and their pod. It was very easy to make and tasted great.

I modified it so that I could eat it. So it was basically roasted cauliflower, broth and cheddar cheese. That’s it.

Simple and healthy. It reminded me of potato soup…which is nice treat for someone that can’t eat potatoes 🙂

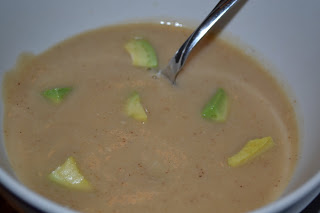
It isn’t exactly the most photogenic soup. But what it lacks in appearance it makes up for in taste. I added a little diced avocado for some texture. I also offered diced chicken and beef to mix in for a heartier soup.

Check out the link for the original recipe with things like onions and celery. Here is how I made it.

Roasted Cauliflower and Cheddar Soup
serves 3 – 4

1 head cauliflower
1 -2 Tbsp. EVOO
2 tsp. sea salt

2 – 3 cups chicken broth (or vegetable broth to make it vegetarian)
salt and garlic powder to taste
1/2 – 3/4 cup grated cheddar cheese

Wash and chop cauliflower. Mix cauliflower with EVOO and salt. Roast the coated cauliflower on a parchment lined baking sheet at 400 degrees for 35 minutes.

Simmer roasted cauliflower in the broth for about 15 minutes.

Remove from heat and puree with an immersion blender until smooth and creamy. Add seasoning to taste.

Return the pan to the stove over low heat. Add extra broth if the soup is too thick. Add the cheese and heat until it has melted.

Homemade Oat Squares

Earlier this week we had a long snowy day with nothing to do. And as usual Abram was begging to bake. So I brainstormed what new recipe we could try.

I was thinking a new cereal. I looked up the ingredients for Cheerios. There really isn’t much to them. So we tried to make something similar – taste and texture. I have no idea how you’d copy the shape 😛

It took about 3 minutes to mix the dough. And it tasted really good. Abram actually ate a bunch of it…and he NEVER eats the stuff we bake (either the dough or after it’s baked). He just doesn’t have a sweet tooth.

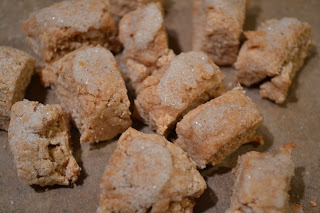
The end result? NOT Cheerios 😛  But to my surprise they taste and look a lot like Quaker Oat Squares. This used to be one of my favorite cereals. They are very easy to make.

They did end up a bit harder than I’d like. Maybe next time I’ll add some baking soda to help soften them just a bit. Otherwise these are actually really good. And they make a great portable snack.

Three ingredients is all you need to recreate a delicious cereal. Simple. As an added bonus they are dairy, gluten (if you tolerate oats), egg, nut, soy and corn free.

Homemade Oat Squares
makes about 2 cups

2 cups rolled oats
1/2 cup organic cane sugar
1/2 cup water
——————————————————————————————————–
1/2 tsp. baking soda
1/4 tsp. salt
(I have not tried it with these added yet, but I think it would improve the texture a bit.)
——————————————————————————————————–

Create oat flour by processing oats in a blender.

Mix oat flour, sugar and water until dough forms.

Using a scoop at a time, roll the dough into a small log. Cut into “squares.”

Place on a parchment lined baking sheet.

Bake at 350 for 15 minutes. Turn off oven. Leave the cereal in the oven to crisp for another 5-10 minutes.

Remove from oven. Let cool completely. Store in an airtight container.

eMeals

Do you struggle with planning meals? Would you like it if someone told you exactly what to make and what groceries you need to buy?

Check out eMeals! They now have options for diets like primal/paleo and natural/whole foods.

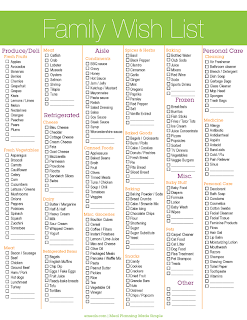
You can use tools like this handy grocery list so you aren’t going back and forth to the store all week. You’ll have your meals and your list and can make one trip. You’ll save time and money.

You can even get a 15% discount by using the code newyear.

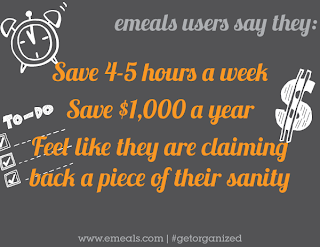
If you’ve never looked into eMeals you should check it out. You can get healthy meal plans and save money.

Salsa Bread

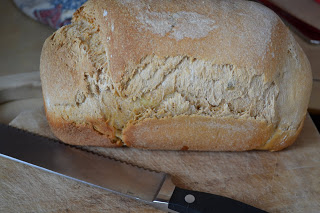
Now that we’re mostly over the flu we’re getting back in the kitchen. And we finally got to try making Rebecca’s salsa bread.

She came up with the idea last week when we were playing with the toy food/dishes.

I used a basic whole wheat bread recipe and adapted it to have salsa and cheese. Rebecca and Abram both helped make it.

I sometimes hesitate to post bread recipes since baking good yeast bread comes with experience. You have to adjust the flour/liquid ratio to get a good, elasticy dough. So I’ll give an approximate amount for each ingredient. But use your judgement to adjust if the dough doesn’t look right. I always err on the side of making the dough a little wetter. In my experience dry dough does not work.

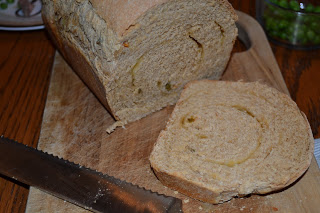
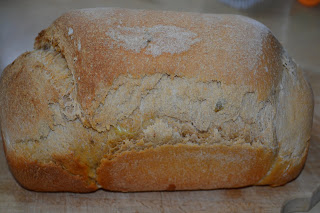
This was seriously sooooo good. Soft and light. It smelled like pizza when it was in the oven. We all really enjoyed it.

Thanks, Rebecca, for such a wonderful recipe idea!! She was so proud of her bread. She talked about it all day. And was so happy to serve it with dinner. She kept asking Justin if he liked it.

This is great plain or with butter. It pairs well with most soups. And it would also work very well for grilled cheese and paninis. So versatile.

And now we’ve already got the creative juices flowing about what other bread flavors to try. Stay tuned 🙂

This bread does take time (as does any yeast bread). But there is very little hands on time. Most of the time is kneading the dough in a mixer or letting it rise. Just be sure to plan ahead if you want it with a meal.

Salsa Bread
makes 1 loaf 
prep time: 65 minutes   rise time: 2 – 2 1/2 hours   total time: 3 1/2 – 4 hours

3 cups organic whole wheat and/or all purpose flour, divided (I used a combination)
3/4 + 1/8 cup warm water
1/4 cup honey
1 1/4 tsp. active dry yeast, room temperature
1 tsp. sea salt
1/2 tsp. garlic powder
1/3 – 1/2 cup salsa with liquid
1 1/2 Tbsp. melted butter (or coconut oil or palm shortening)
1/3 – 2/3 cup shredded cheddar cheese (or any cheese you like) (this is optional but it does add great flavor)

Mix 1 1/2 cups of flour with 3/4 cups of warm water in a stand mixer bowl. Allow this to sit for about 30 minutes. This will break down the gluten and help the bread to rise better.

In a small bowl mix together 1/8 cup water, yeast and honey. Allow this to sit for about 10 minutes, or until the yeast is activated and mixture becomes bubbly (I let it sit until the flour/water was done resting).

In the meantime, melt the butter in a small sauce pan. Remove from heat and allow to cool. You don’t want the hot butter to kill the yeast.

When the 30 minutes are up, add salt, melted butter, salsa and yeast mixture to the flour and water mixture. Add the remaining flour. Mix with a dough hook. Knead in the mixer for about 13 minutes. Add more flour if the dough is too wet. Add more salsa liquid if the dough is too try.

Once you’ve kneaded your dough, cover it with a cloth and let it rise for at least one hour or until it has risen to twice it’s starting size (be sure it’s in a warm place. I turn my oven to warm and place the bowl on top of the oven. Mine took about 1 1/2 hours to rise.).

While you’re waiting for your dough to rise, get your bread pan greased.
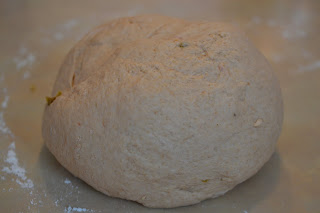
When the dough has doubled in size, give it a nice punch. Using a floured hand, pull the dough out of the bowl onto the counter. Knead for three or four minutes until the air bubbles are all gone.

 
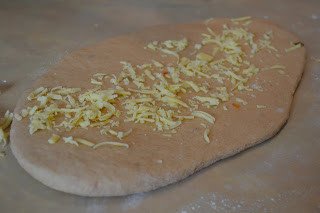
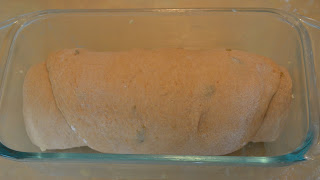
Roll out the dough about the width of your bread pan and as long as you like. Sprinkle the cheese all over the dough. Roll it up, tuck the ends under and place in the prepared bread pan. Cover and allow 30 minutes to one hour to rise again. The dough will continue to rise when it bakes, so don’t be alarmed if it doesn’t totally fill the pan after this rising.
 
Bake the bread uncovered in a 350 degree oven for 50 minutes, or until the bread sounds hollow when you thump the top of it.
Allow the bread to cool in the pan for 5 minutes, then remove it to finish cooling on a wire rack.

One Handed Honey Herb Chicken

My son and I stayed home from church on Sunday because he was sick. I still wanted to make a decent “Sunday dinner.” But he wanted to be held constantly.

I knew I was going to bake some chicken, but had no idea what kind. I knew it had to be simple…so simple that you can prepare it with one hand.

This is what I came up with. And it’s delicious!!

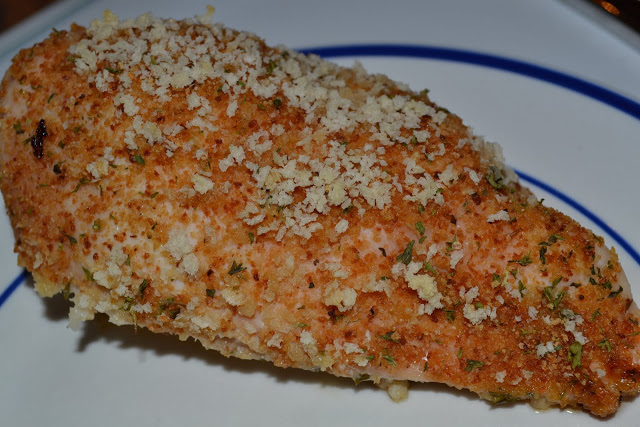
Put the chicken in the pan. Sprinkle a few things on top. And put it in the oven. In an hour you have moist, flavorful chicken. Perfect.

It’s a little sweet and a little savory. Just what I like.

One Handed Honey Herb Chicken

2 boneless skinless chicken breasts
1/2 tsp. sea salt
1/2 tsp. garlic powder
2 Tbsp. honey
1/4 – 1/2 cup seasoned bread crumbs of choice (can be gluten free or substitute with seasoned almond or coconut flour for grain free)

Heat oven to 350. Butter/grease a small baking dish.

Place chicken in baking dish. Sprinkle with salt and garlic powder. Drizzle eat breast with honey. Rub slightly to cover. Sprinkle bread crumbs on top.

Cover dish and bake for 40 minutes. Remove cover and turn heat up to 400. Bake another 20 minutes, until topping is crisp and chicken is cooked through.