Home » Kid-friendly Recipes » gluten free » Page 43

Category: gluten free

Soaked and Dehyrdated Oats

As I continue on my healthy eating journey I’m experimenting more and more. This week I tried soaking and dehydrating oats. I’m hopeful this will make them easier for me to to digest. Plus it will break down the phytates and make the nutrients more readily available. It is very simple to do. Hardly any active time at all. But the total time is over 24 hours. Still, not much to it. You just have to be sure you won’t need the oven for anything else (unless you’re using a dehydrator…mine is too small to do a big batch of oats). I should get another batch going soon so I have a good amount. I started small on my first try…just to see how it would go (5 cups). The end product is not like the oats you buy. They are quite hard. My plan is to use them in granola and granola bars. That way I can enjoy some of my favorite food and still have it be soaked. I’m anxious to see if they work well. I’m just about out of granola, so I’ll be trying them soon. There are quite a few variations out there about the oat to water ratio. I used the recipe from Just Making Noise that uses a 1:1 ratio. I’ve seen 1:2 and 1:3 as well. Also, some people say to rinse them and some don’t. Just depends if you want them to have a tanginess to them or not 🙂  I’ll post the 4 cup quantities and the per cup quantities so you can adjust however much you want to make.

Soaked and Dehydrated Oats

4 cups rolled oats (NOT instant)
4 cups filtered water
8 Tbsp. whey, lemon/lime juice, kefir or yohgurt (I used plain full fat yogurt)

————————————————————
PER CUP (adjust to however much you want to make)
1 cup rolled oats
1 cup water
2 Tbsp. whey, lemon juice, kefir or yogurt
————————————————————————

Warm the 4 cups of water in a saucepan (you don’t need a microwave) till warm to touch. Do not let it boil! (I didn’t warm mine. My water was room temp.)

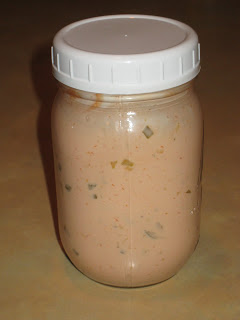
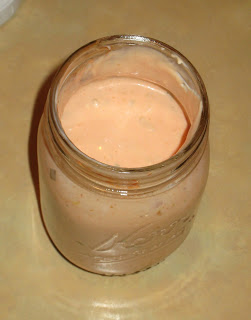
Pour the oats, water and acid medium (whey, etc..) into a large glass bowl and mix thoroughly. Cover the bowl with a towel or plate (I covered it loosely with plastic wrap.) and let it sit overnight in your oven or on your counter (wherever you have space).
Important: Let it sit for 8 – 24 hours… 12 hours is okay, but I always soak mine for 24 hours to reduce the phytic acid as much as possible. (I soaked mine for just under 24 hours).

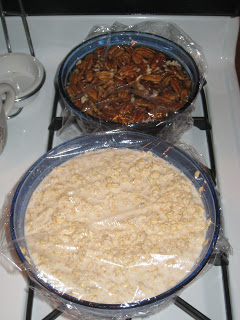
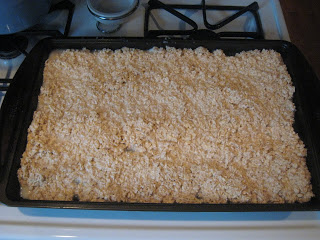
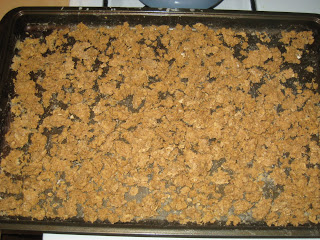
Spread the oats on parchment paper in your tray or cookie pan (for oven drying) or put in dehydrator set on the highest temp (if you have that option) until completely dry. It can take anywhere from 6 to 24 hours… depending on your dehydrator. You can dry the oats in your oven set on the lowest temperature. (I rinsed and drained the oats, then placed them on a baking pan (no parchment…worked fine). I dried them in the oven at the lowest temp (around 150) for about 15 hours. I stirred them periodcially to expose the moist areas.).

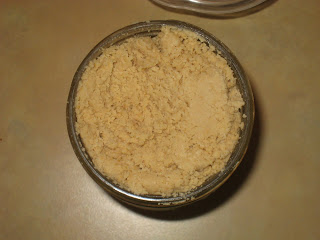
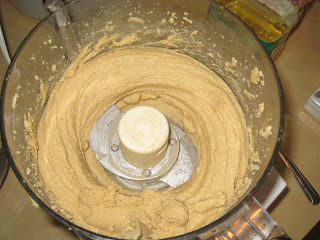
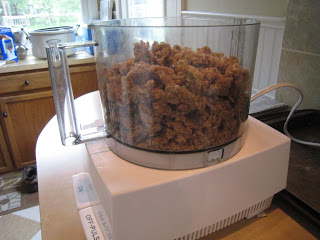
When the oats are dried, you will be able to break them into chunks. Put the chunks in your food processor or blender and pulse until coarsely ground (kinda like oatmeal flakes). Don’t grind it fine unless you want oat flour.

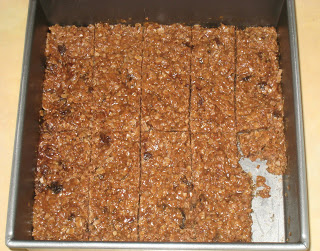
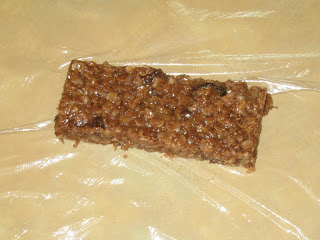
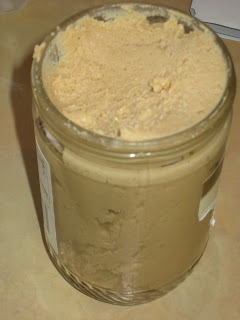
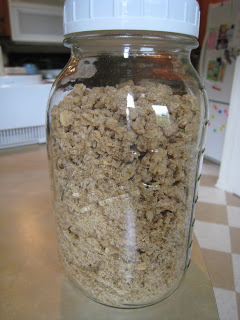
Pour the oats in a sealed container and store in your fridge or in a cool, dark place. Ta-daaa! There you go… you have ‘Soaked & Ready’ Oats for satisfying your urge to make cookies (or granola or granola bars)! Remember, you can make this however much you want.

Warm and Nutty Cinnamon Quinoa

For breakfast this morning I made a new recipe that I found on 101 Cookbooks a long time ago. I had never thought of eating quinoa for breakfast. But I’m so glad I tried it. This is really good! And super easy too. And…I soaked yet another grain! While I was thinking about what I had to get out/prep for meals yesterday it dawned on me that you might be able to soak quinoa. So I looked it up. Sure enough. Same idea as soaking flour, etc. I put the quinoa in a bowl with water and a little plain yogurt last night. Then rinsed it this morning and followed the recipe from there, using a little less liquid. Hardly any hands on work required to make this breakfast. You just have to wait a few minutes for the quinoa to cook. We added raw honey, blueberries, flax seed and a mix of almonds, walnuts and pecans. Such a healhty start to the day. It’ll be fun to try it with different toppings too. Anything you can do with oatmeal you can do with quinoa. I only made a half recipe. A perfect amount for Justin and me.

*Edited 2/9/11 to be NT compatible and adjusted to 2 serving recipe.

Warm and Nutty Cinnamon Quinoa
serves 2

1/2 cup milk
1/2 cup water
1/2 cup organic quinoa, (I soaked mine in water and yogurt over night – see directions below)
1 cup fresh blackberries, organic preferred (I used a cup of blueberries from our freezer, thawed)
1/2 tsp. ground cinnamon

Toppings:
pecans, walnuts or almonds (preferably soaked and dehydrate)
raw honey or real maple syrup
plain or vanilla yogurt
dried cranberries or raisins
butter

To soak quinoa:
Cover the quinoa in water (a couple inches over quinoa) and about 1-2 Tbsp. plain organic yogurt. Soak it over night and rinse it in the morning. Then proceed with recipe.

Combine milk, water and quinoa in a medium saucepan. Bring to a boil over high heat. Reduce heat to medium-low; cover and simmer 15 minutes or until most of the liquid is absorbed. Turn off heat; let stand covered 5 minutes. Stir in blackberries and cinnamon; transfer to two bowls and top with desired toppings.

Chewy Granola Bars

Last week I made crunchy granola bars and I was thinking I wanted to find a recipe for chewy granola bars. Wouldn’t you know it Laura posted a recipe for some yesterday on Heavenly Homemakers 🙂  I thought I would try them sometime. Then yesterday morning Rebecca and I came home from shopping and she said “time to bake!” And she climbed into the booth at the breakfast knook (our baking spot). So I figured I’d give them a try already since they sounded so easy. They were soooo easy to make. Took less than 10 min. (prep…they take a couple hours in the fridge to finish). These are good, but a bit on the gooey side. If I make them again I’ll have to modify things a bit. First, I used quick oats. I knew rolled oats would be better, but I was trying to be quick since Rebecca was ready to go. So I used the oats I had upstairs instead of having to go to the basement. And I think the ratio is a little off…there should be more oats or less liquid…maybe less peanut butter. I’m not sure. This is a good base recipe, but I’ll have to experiment a bit. They remind me a lot of chocolate no bake cookies (I put some chocolate chips in mine). So they taste a little more like a cookie to me than a granola bar. Again, I’ll have to experiment. I’m glad I tried them, though. And they do taste really good! Just a bit softer than I’d like. Ignore the missing piece in the pan. We tried them before taking a picture 🙂

**Edited 4/25/10 – I made another batch of these yesterday using rolled oats and coconut oil. So good!! And they hold together much better. I also used a combo of peanut butter and homemade cashew butter. The combo gives them a good flavor.

Chewy Granola Bars

1/2 cup peanut butter or sunbutter
1/3 cup honey
1/3 cup coconut oil (or butter)
2 cups rolled oats
1 cup total of any combination of: sesame seeds, coconut flakes, sunflower seeds, dried fruit, mini chocolate chips

In a medium sized saucepan, melt together peanut butter, honey and coconut oil.

Remove from heat and add the oats. Mix well. Add additional mix-ins and stir well.

Spread mixture into a parchment lined 8×8 or 9×4 pan.

Chill for two hours, then cut into bars.

Store in the refigerator or freezer.

Thousand Island Dressing

Thousand Island Dressing is my favorite salad dressing. I almost always use it when I have salads. I’ve never tried making it and always just assumed it was tough to make. But apparently not 😛  I’m sure there are lots of variations out there, but I found an easy recipe on Heavenly Homemakers. I didn’t even add all the ingredients…just 3! That’s it, 3 ingredients. And it tastes great! Who knew it was that easy? I made it in about 3 min. this morning. I can’t wait to try it on our cobb salad tonight!! I need to calculate the cost too. I bet it’s pretty cheap. I made the dressing in a pint jar. It makes almost a full pint. Maybe sometime I’ll try making the full recipe. But for today I did just the first 3 ingredients. Yum! The toughest part about this was attempting to take a decent picture 😛  And tasting salad dressing at 5:00 in the morning 😉

Thousand Island Dressing

1 cup mayonnaise
1/3 cup ketchup
1/4 cup pickle relish
1 Tbsp. minced onion (I didn’t add this…just didn’t feel like chopping onion this morning 😛  It tastes fine without it…but probably would be good with it too.)
1 hard boiled egg, chopped (optional…I didn’t add this.)

Mix ingredients, cover and chill.

Cashew Butter

I’ve been wanting to make homemade peanut butter, cashew butter, etc. for a long time. I finally got around to it yesterday. I decided to make cashew butter first. I’ve never actually had cashew butter, but cashews are my favorite nut. I knew you could make peanut butter by just grinding peanuts, so I figured cashews would work the same way. Well, kind of. I first did just cashews. But the butter was a little dry/crumbly. I thought it needed some moisture/oil, but I wasn’t sure what kind. So then I decided I should probably actually look up how to make cashew butter 😛  Every recipe I found was identical, so I’ll post that. I didn’t follow the recipe in terms of quantities. I just added, mixed and tasted to get it how I wanted it/get it smooth. This is soooo good. I’m so glad I tried it. And now we have a full jar (plus a little extra) of good quality cashew butter. I used just a pinch of salt and a drizzle of agave nectar to add flavor. Justin says he still likes peanut butter better. Me, I’m not sure. The cashew butter is really good. Maybe I’ll have to try adding in some other flavors sometime too…chocolate, cherry, vanilla,…we’ll see. It sure made a yummy breakfast on toasted homemade wheat bread (fresh baked last night) this morning!! Can’t wait to try our cashew butter and jelly sandwiches later this week. I’ll post the before and after pictures.

Before oil.
After oil.

Cashew Butter

2 cups unsalted roasted cashews (I used a combo of raw and roasted organic cashews)
2 to 3 Tbsp. vegetable oil (I used canola oil)
1/4 tsp. salt
1 tsp. sugar, optional (I used agave nectar. Honey would work too.)

In a food processor or blender, combine the nuts, 2 tablespoons of the oil, the salt, and the sugar, if desired. Process on high speed for 30 seconds. Scrape down the sides with a rubber spatula and process to desired smoothness, adding more oil, 1 teaspoon at a time, if a smoother butter is desired. Adjust the seasoning, to taste.
Transfer to a bowl to use as a dip, spread, or in other recipes, or place in an airtight container and refrigerate until ready to use.

Mexican Lasagna

Here is another recipe from my MIL. Also very good.

Mexican Lasagna

1/2 lb. ground beef
2 slices onion, choped
1/2 clove garlic, minced
3/4 cup cottage cheese
1/2 cup sour cream
1 tsp. cumin
1/8 tsp. salt
1 1/4 cups salsa
2 large whole wheat tortillas (use corn or other GF tortillas to make this GF)
3/4 cup shredded monterey jack or mozzarella cheese

Cook beef, onion and garlic in pan. Drain. Combine the cottage cheese, sour cream, cumin, and salt. Spread 1/2 cup of salsa across the bottom of an 8×8 baking dish. Place 1 tortilla over salsa. Spread half of cottage cheese mixture on top. Top with half of the beef. Top with 1/2 cup of salsa and 1/4 cup of cheese. Repeat layering – tortilla, cottage cheese, beef. Top with remaining salsa and cheese. Bake for 30 min. at 350.

*I think it would be good with some beans added to the cottage cheese mixture.
*It would probably work well to prep this ahead and either freeze it for later use or to bake later in the day.

Burritos

I got this recipe from my MIL. I think she said she got it from my SIL Shannon. Very good!!

Burritos

1 can black beans
1 can diced tomatoes with green chilies
1 tsp. cumin
1 tsp. chili powder
1 green pepper, diced
1 onion, diced
8 whole wheat tortillas (you could use corn or some kind of GF tortillas to make this GF)
1/4 cup sour cream
1 cup salsa
grated colby jack cheese

Saute pepper and onion in oil for 2-4 minutes (do not brown). Add beans, tomatoes, cumin, salsa, chili powder and sour cream. Heat through. Fill tortilla shells with mixutre, sprinkling inside filling with grated cheese. Roll up, place in a 9×13 pan seam side down. Sprinkle top with grated cheese. Bake at 350 for 10 min.

Crockpot Rice and Beans

For lunch yesterday I wanted light, simple, healthy (since I knew Super Bowl evening food wouldn’t be)…rice and beans fit all 3. I got this recipe from A Year of Slow Cooking. It’s so so simple to prep. Literally about 5 min. I’ve never actually made or even had rice and beans. This was really good. All 3 of us liked it. Especially Rebecca. I think she’d eat rice and beans (of any kind) every day 🙂  I replaced the black beans with chick peas for Rebecca’s sake. And I scaled back the rice a bit (I like a different ratio of rice to beans, and I didn’t want to make too much). Since this was cooking while we were at church I couldn’t monitor it. So the rice was pretty mushy, but still very good. Next time I won’t cook it quite as long. I had it on high for a little bit and then on low, total of about 6 hours. This is good on its own, but we added some toppings. I served it with diced green pepper, avocado, salsa, sour cream and cheddar cheese. I’m not a huge sour cream fan, but that really went well with this. A great, cheap, meatless, healthy meal. I’ll be making this again for sure! I bet it would be good with some veggies added in too.

Crockpot Rice and Beans

1 can of black beans, drained and rinsed (I substituted chick peas…any bean will do.)
1 can of pinto beans, drained and rinsed
1 cup of rice (I used organic brown rice. I used 3/4 cups of rice and 1 1/2 cups of liquid.)
1 can (14.5 oz) of diced tomatoes, drained, liquid reserved
1 Tbsp. olive oil
1/2 tsp. kosher salt
1 tsp. Italian seasoning
1/2 Tbsp. dried onion flakes (I don’t have onion flakes. I added garlic powder.)

Put the olive oil into the bottom of your crockpot, and add the rice. Swirl the rice around in the olive oil, until it is coated nicely. Add the beans and tomatoes. Add water to the reserved tomato juice to equal 2 cups of liquid. Add to crockpot. Add seasonings. Stir well. Cover and cook on low for about 6 hours, or on high for 3-4.

Black Bean Burrito Bake

We tried a recipe from my SIL last night for black bean burrito bake. This was super easy to make and really good!!! We all liked it. Rebecca helped me make it (that’s how easy it is) and she kept picking things out of the bowl to eat as we went. She LOVES beans…but they don’t always love her 😛  She absolutely loved the filling. She had that plain for dinner with her tortilla on the side instead of together. The filling would work well as a dip. I followed my SIL’s advice and added some of the cheese and salsa to the filling. And also added some chili powder, salt and garlic powder. I didn’t add the chile. We like flavor, but not heat. This comes together really quickly and is a filling, healthy, meatless meal (it would be good with shredded chicken too). I didn’t bother with the food processor. I just mashed the beans with a fork, so I could do everything in one bowl…mash, pour, mix. So easy and hardly any clean up. I easily got 5 burritos out of this. And had some extra for Rebecca to eat plain. I didn’t quite add a full can of black beans. I did add a few pinto beans (Rebecca handles those better). A great recipe! I’m looking forward to having the leftovers for dinner tonight! I served it with sour cream, salsa and avocado. These are quite filling. One burrito was enough for me for a meal.

Black Bean Burrito Bake

1 (7oz.) can chipotle chiles in adobo sauce (I didn’t add this)
1/2 cup reduced-fat sour cream
1 (15oz.) can black beans, rinsed, drained, and divided (I used 1/2 can for mashing and 1/4 can + 1/4 can pinto beans whole)
1 cup frozen whole-kernel corn, thawed
4 (8-inch) flour tortillas (I used 5 and could have probably done 6; I used whole wheat) (use corn tortillas or other GF tortillas to make this GF)
Cooking spray
1 cup bottled salsa (I added about 3/4 cup to the filling…some homemade (mild) and some organic corn and black bean (medium) and then served more on the side)
1/2 cup (2 oz.) shredded Monterey Jack cheese (I used some MJ and some reduced fat cheddar…I added some to the filling and some on top)
(I also added about 1 tsp. chili powder and a little sprinkle of garlic powder and salt)

Preheat oven to 350°. Remove one chile from can. Chop chile. Reserve remaining adobo sauce and chiles for another use. Combine sour cream and chile in a medium bowl; let stand 10 minutes. (I skipped this.)  Place half of beans in a food processor; process until finely chopped (I just mashed them with a fork). Add chopped beans, remaining beans, and corn to sour cream mixture (I added the whole beans, corn, salsa, cheese, seasoning and plain sour cream to the mashed beans…only used one bowl).

Spoon 1/2 cup bean mixture down the center of each tortilla. Roll up tortillas; place, seam side down, in an 11 x 7-inch baking dish coated with cooking spray. Spread salsa over tortillas (I didn’t do this…gets a bit messy); sprinkle with cheese. Cover and bake at 350° for 20 minutes or until thoroughly heated (I baked 20 min. covered and then about 10 min. uncovered).

Crockpot Cream of Tomato Soup

I’ve been wanting to make tomato soup for quite a while now. While searching for recipes I came across this one on Perfect Entertaining. It sounded simple and good. And it was! Justin and I both really liked it (and Justin has only had tomato soup once or twice in his life!). It went well with grilled cheese. I didn’t follow the directions completely. I didn’t saute the carrots and onions…they get plenty soft during cooking to puree them, so why waste the time? And I used canned tomatoes instead of fresh (a huge time saver…and much better quality tomatoes at this time of year). It still turned out great. This made a very big batch. I decided to remove some of the soup and put it in a sauce pan (enough for our dinner) and then add the cream to that. I froze the rest in smaller containers. Now I have 7 containers of homemade tomato soup on hand! No more boughten canned soup 🙂  I bet it would be good to can this, but I don’t have time right now. But maybe when I run out of my current stock I’ll try that. Overall a great recipe.

Crockpot Cream of Tomato Soup

(This cream of tomato soup is rich and hearty and very delicious. It can be used as a substitute for canned tomato soup with excellent results and cannot be beat when served with grilled cheese sandwiches. Mix and match any of the suggested herbs and spices for a marvelous soup. For a traditional blend we use 2 tablespoons Italian parsley, 1 tablespoon oregano, and 1 tablespoon basil.)

2 Tbsp. olive oil (I didn’t add this)
1 large chopped onion
3 crushed garlic cloves
2 minced carrots (I just did a rough chop into slices)
2 pounds peeled and diced tomatoes (reserve and add all juices) (I used 1 large can of diced tomatoes and 1 large can of crushed tomatoes)
4 cups chicken or vegetable stock or broth
3 Tbsp. tomato paste
2 Tbsp. sugar (I added a little more than this)
1 Tbsp. lemon juice
Salt
Pepper
2-4 Tbsp. freshly chopped herbs (basil, oregano, rosemary, thyme, marjoram, savory, chervil, Italian parsley, mint, lavender) or 1-2 tsp. dried herbs or spices (Italian spices, basil, oregano, marjoram, thyme, cumin, curry powder, nutmeg) (I used dried Italian seasoning and garlic powder)
1 cup heavy cream (I used whole milk…what we had on hand)

Combine the oil, onion, garlic, and carrot in the crockpot. Cook on high, stirring frequently, until the onion softens. (This can also be done in a skillet.) (I skipped this step.) Add the remaining ingredients except for the herbs and spices and cream. Cover and cook on low for 8-12 hours (I cooked mine on high for about 7 hours). Add the herbs and adjust seasoning. Cool slightly and puree in small batches (I used an immersion blender). Return to the crockpot and add the cream. Reheat until piping hot, or else cool and chill before serving.