Home » Kid-friendly Recipes » grain free » Page 13

Category: grain free

Soaked Garbanzo Flour Pancakes/English Muffins (gluten free, grain free, nut free, egg free, dairy free)

Sometimes it’s hard to make gluten free baked goods taste as good as their wheat counterparts. I made pancakes with rice flour a couple weeks ago. They were good…but not as fluffy and light as our usual pancakes.

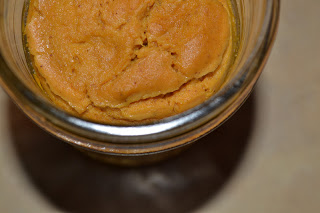
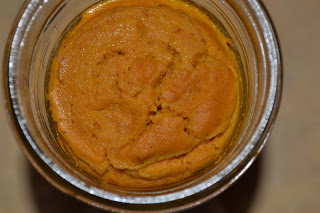
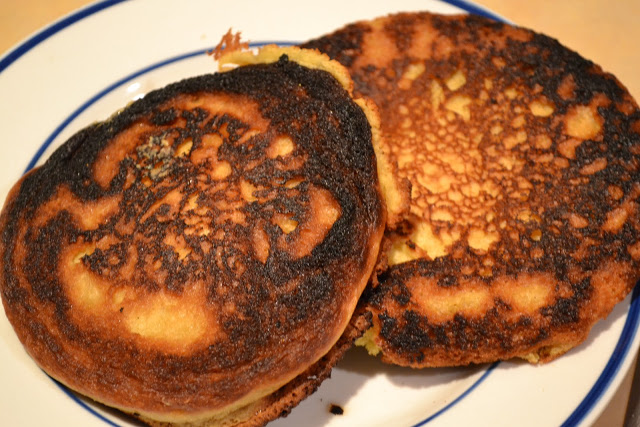
Then I tried using garbanzo bean flour. Totally different outcome. The batter begins to puff up as soon as you add the baking soda. And when it hits the hot pan the pancake instantly rises.

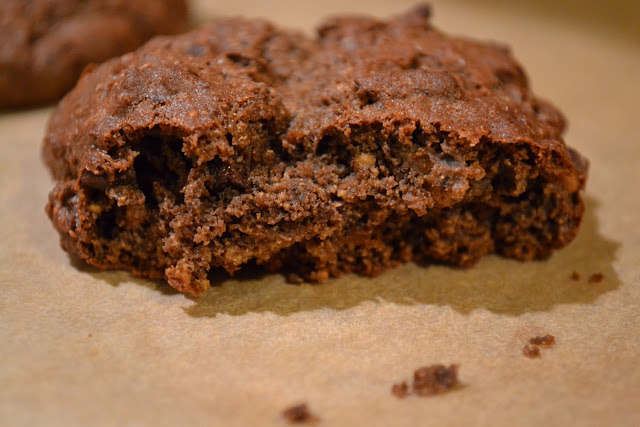
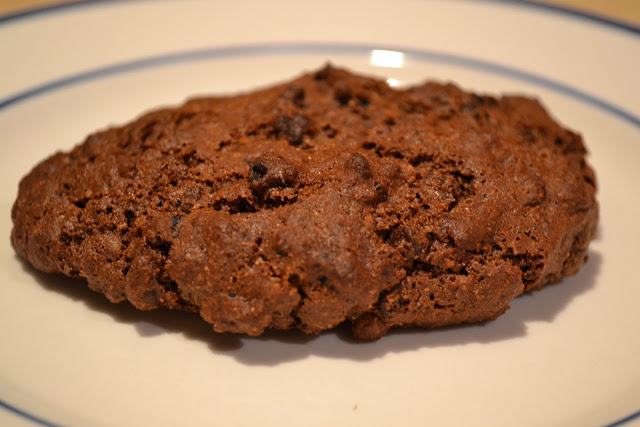
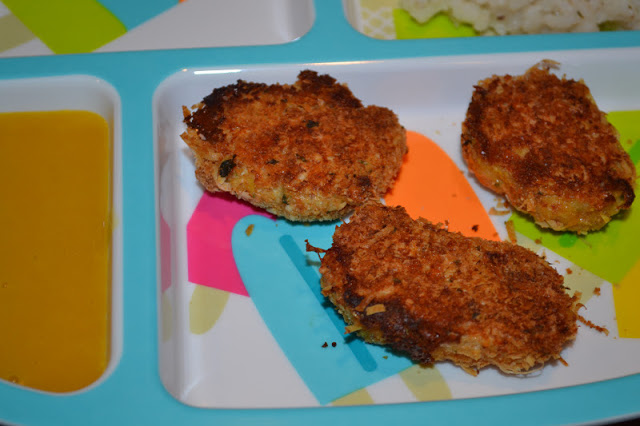
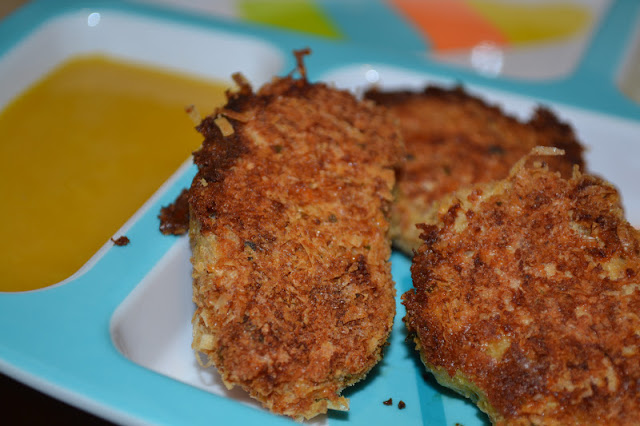
This recipe makes fluffy, slightly sweet pancakes. They are soaked for easier digestion. And they are so versatile. You can use them like an english muffin or like a bun. Or simply eat them plain. They are that good.

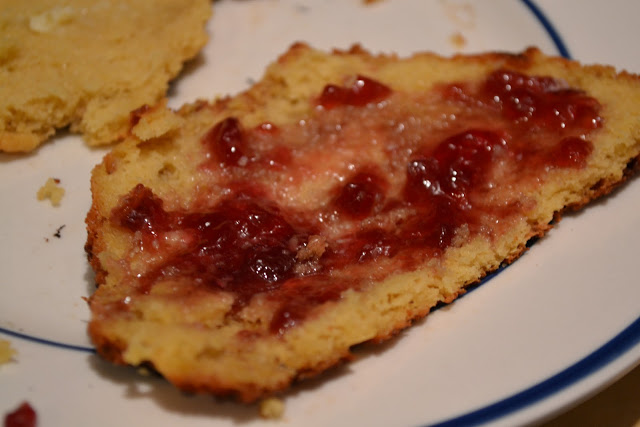
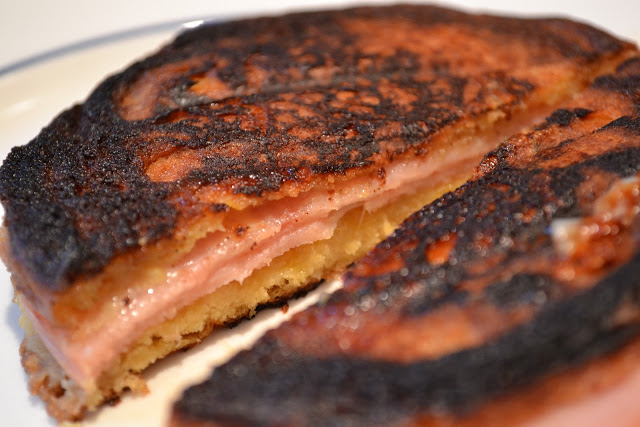
I haven’t had any kind of breakfast toast/english muffin/bagel in a long time. Needless to say this was quite a treat to split one open and spread it with butter and jam. I’m already looking forward to using the other bun tonight to make a panini!


Sick of your usual gluten free pancakes? Give these a try. Garbanzo flour is great for variety and the fluffy texture you’re looking for.

Garbanzo Flour Pancakes/English Muffins/Buns
makes 2

1/2 cup garbanzo bean flour
2 Tbsp. lemon juice + warm water to equal 1/2 cup

2 1/2 tsp. cane sugar
1/4 tsp. salt
1/2 tsp. cream of tartar
1 tsp. baking soda
1/2 tsp. olive oil

Coconut oil, lard, butter, tallow or palm shortening for cooking (I used coconut oil…use a generous amount since the pancake will absorb some)

Directions:

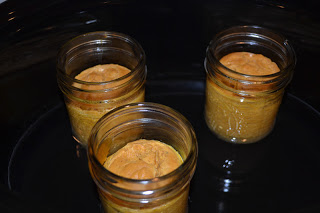
Mix flour and water + lemon juice. Cover and let sit 7-24 hours.

Add remaining ingredients and mix well.

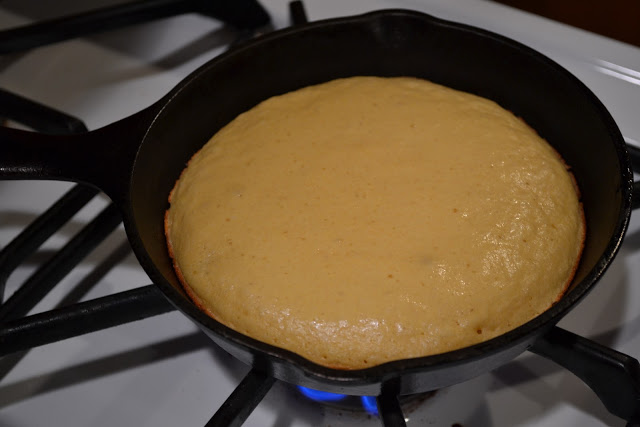
Heat enough oil to thoroughly cover the bottom of a skillet over low-medium heat. Pour the batter on to the skillet (in 2 circles). Cook until golden on the bottom (edges will get dry and bubbles will form on the top). Flip and cook 1-2 more minutes.

Serve as a pancake with syrup, honey or fruit topping. Split open and serve as an english muffin with butter, jam, nut butter. Split open and use as a bun for a sandwich or a burger. Or just eat it plain!

Soaked Garbanzo Flour Carob Scones (gluten free, egg free, dairy free, nut free)

I’m starting to experiment with alternative grains. And I want to try soaking them to make them easier to digest. Today was one of my first major experiments.

I’ve never used garbanzo bean flour before. I’ve never even heard much about it, let alone using it soaked. And I’ve always soaked my grains with a dairy-based product. This time I tried lemon water. So I was ready for a total flop with my baking today. I was already brainstorming alternative breakfasts 😛

I tasted the flour when I opened it yesterday. And I thought it was pretty gross. How could this turn into anything appetizing? But I gave it a go. I poured and mixed and tasted and poured and mixed some more. I didn’t really measure things, just eyeballed and tasted. Is that a recipe for disaster when baking? I stuck them in the oven…and lo and behold these scones are awesome!!! I need to put them away somewhere before I eat them all.

I did not expect them to taste this good. The combination of garbanzo, carob, cane sugar and vanilla gives them a wonderful chocolate flavor. And the texture is great too. Slightly crisp on the outside. Still a little soft on the inside.

These are really just big chocolate cookies 🙂  But I call them scones or breakfast cookies. That makes it more acceptable to eat them for breakfast, right?

Whether you want them for breakfast, lunch, dinner or a snack you should give these scones/cookies a try! A delicious alternative to traditional grain-based baked goods.

Soaked Garbanzo Flour Carob Scones
makes ~ 5 scones

1 cup garbanzo flour
1/4 cup warm water + 1 Tbsp. lemon juice

1/3 cup organic cane sugar
2 Tbsp. carob powder
1 tsp. baking soda
1/2 tsp. cream of tartar
1/2 tsp. sea salt
1 tsp. vanilla
2 Tbsp. palm shortening (or lard or butter)

1/4 cup mini chocolate chips (optional, use dairy free, egg free, nut free chips) (affiliate link)

Directions:

Mix flour and water/lemon juice. Cover and let soak 7-24 hours.

Heat oven to 400 degrees F.

Add sugar, carob, baking soda, cream of tartar, salt and vanilla. Mix well. Add shortening and mix.

Drop large spoonfuls onto a parchment lined baking sheet.

Bake 20 minutes. Serve warm or cooled.

Raw Cheesecake

Rebecca and I were browsing recipes this week. We came across these mini st(raw)berry cheesecakes from Lexie’s Kitchen. A simple recipe that looked perfect for a Valentine’s Day treat.

So we tried them. They are wonderful!! A big hit with the whole family. And they really are super easy to make. No baking required.


I substituted almonds for the other nuts since that’s what I had on hand. They still turned out very well.

Since they were so good I decided to try making a modified version that I can eat. So I came up with a nut free blueberry cheesecake. Equally as delicious!!

Here are both recipes. Mix and match fruits and crusts. A perfect little treat that is quite healthy.


Mini St(raw)berry Cheesecake
makes ~ 12 mini cakes

Crust:
3/4 cups crispy macadamia nuts or almonds
1/8 cup raw coconut flakes
1/2 cup pitted dates
pinch sea salt

Filling:
1 1/2 cups crispy cashew nuts or almonds
1/3 cup lime juice or lemon juice
1/3 cup honey
1/3 cup coconut oil
1/2 cup fruit (strawberry, blueberry, raspberry, etc.)
2 tsp. vanilla
pinch sea salt

In a food processor or high powered blender process the crust ingredients until a sticky dough forms.

Press into 12 paper muffin cups in a pan. Freeze or refrigerate while making the filling.

In a food processor or high powered blender process the filling ingredients until smooth. Pour into the muffin cups. Freeze or refrigerate until set.


Mini Blueberry Cheesecake
makes ~ 12 cakes

Crust:
3/4 cups white rice flour
1/8 cup raw coconut flakes
1 cup pitted dates
pinch sea salt

Filling:
1/2 cup white rice flour
1/3 cup lemon juice
1/3 cup honey
1/3 cup coconut oil
3/4 cups blueberries
pinch sea salt

In a food processor or high powered blender process the crust ingredients until a sticky dough forms.

Press into 12 paper muffin cups in a pan. Freeze or refrigerate while making the filling.

In a food processor or high powered blender process the filling ingredients until smooth. Pour into the muffin cups. Freeze or refrigerate until set.

Candy Bar Ice Cream (gluten free, egg free, nut free, dairy free option)

I had some raw cream to use up this week. Of course that means ice cream 🙂  So the kids and I made a fresh batch yesterday.

With all of my food restrictions I was wondering what flavor to make, besides plain old vanilla again. I had just made some crunchy crumble the day before. And we like ice creams that are fruit pie/cobbler/crumble flavors. So I thought we’d try a crumble ice cream…without the fruit.

I made a larger batch of the white rice crumble, using white rice flour, palm shortening and maple syrup. I added it to a batch of egg free vanilla ice cream. It was really good!

As I was scooping it out of the ice cream maker we all tasted it…and instead of tasting like a cobbler it tasted like a crunchy/nutty candy bar. So I added a few mini dairy free, egg free, gluten free chocolate chips to make candy bar ice cream! Amazing!!

I can only eat it once in a while (every four days at most). But what a treat!!

Do you like candy bars but have a lot of food restrictions? Give this candy bar ice cream a try. You can swap the cream for coconut milk to make it dairy free. You could even try making the crumble with coconut flour or almond flour to make it grain free. There is a version for almost everyone.

Candy Bar Ice Cream

Ingredients:

3 cups raw cream (or coconut milk)
1/3 – 1/2 cup maple syrup (or honey or a combination)
1 tsp. organic vanilla (optional)

1/2 cup white rice flour
2 Tbsp. palm shortening, lard or butter
2 Tbsp. maple syrup or honey

1/4 cup dairy free, egg free, gluten free mini chocolate chips (optional)

Directions:

Heat oven to 400 degrees F.

Combine the flour, shortening and syrup until crumbly. Spread on a baking sheet. Bake 10-15 minutes, until golden. Let cool completely.

Combine cream, syrup and vanilla in a blender. Adjust sweetness to taste (make it a little sweeter than seems right since the sweetness goes down as it processes).

Process ice cream in an ice cream maker according to directions (mine takes 15 – 20 minutes in a Kitchen Aid attachment). Add the crumble during the last minute or two of processing.

Transfer the ice cream to a freezer safe container. Stir in chocolate chips. Freeze until firm.

Let ice cream set at room temperature for 5 – 10 minutes before serving.

Roasted Cauliflower Cheddar Soup

I’ve been in a recipe rut lately. So a couple weeks ago I did some recipe browsing. I found this recipe for roasted cauliflower cheddar soup on two peas and their pod. It was very easy to make and tasted great.

I modified it so that I could eat it. So it was basically roasted cauliflower, broth and cheddar cheese. That’s it.

Simple and healthy. It reminded me of potato soup…which is nice treat for someone that can’t eat potatoes 🙂

It isn’t exactly the most photogenic soup. But what it lacks in appearance it makes up for in taste. I added a little diced avocado for some texture. I also offered diced chicken and beef to mix in for a heartier soup.

Check out the link for the original recipe with things like onions and celery. Here is how I made it.

Roasted Cauliflower and Cheddar Soup
serves 3 – 4

1 head cauliflower
1 -2 Tbsp. EVOO
2 tsp. sea salt

2 – 3 cups chicken broth (or vegetable broth to make it vegetarian)
salt and garlic powder to taste
1/2 – 3/4 cup grated cheddar cheese

Wash and chop cauliflower. Mix cauliflower with EVOO and salt. Roast the coated cauliflower on a parchment lined baking sheet at 400 degrees for 35 minutes.

Simmer roasted cauliflower in the broth for about 15 minutes.

Remove from heat and puree with an immersion blender until smooth and creamy. Add seasoning to taste.

Return the pan to the stove over low heat. Add extra broth if the soup is too thick. Add the cheese and heat until it has melted.

One Handed Honey Herb Chicken

My son and I stayed home from church on Sunday because he was sick. I still wanted to make a decent “Sunday dinner.” But he wanted to be held constantly.

I knew I was going to bake some chicken, but had no idea what kind. I knew it had to be simple…so simple that you can prepare it with one hand.

This is what I came up with. And it’s delicious!!

Put the chicken in the pan. Sprinkle a few things on top. And put it in the oven. In an hour you have moist, flavorful chicken. Perfect.

It’s a little sweet and a little savory. Just what I like.

One Handed Honey Herb Chicken

2 boneless skinless chicken breasts
1/2 tsp. sea salt
1/2 tsp. garlic powder
2 Tbsp. honey
1/4 – 1/2 cup seasoned bread crumbs of choice (can be gluten free or substitute with seasoned almond or coconut flour for grain free)

Heat oven to 350. Butter/grease a small baking dish.

Place chicken in baking dish. Sprinkle with salt and garlic powder. Drizzle eat breast with honey. Rub slightly to cover. Sprinkle bread crumbs on top.

Cover dish and bake for 40 minutes. Remove cover and turn heat up to 400. Bake another 20 minutes, until topping is crisp and chicken is cooked through.

Homemade Caramels

Last week I made an overnight french toast casserole. I’ve made it quite a few times now. The best part? The syrup you make to go in it. As I was making the syrup I thought it seemed a lot like caramel. Maybe I could use that same recipe (slightly tweaked) to just make caramel?

This week I gave it a try…success!! It really could not be any easier. No candy thermometer. No standing around with bubbling sugar and heavy cream. No artificial ingredients.

This caramel comes together in minutes and is so good. You can add extra salt to make it salted caramel. Or go with the traditional flavor. Either way you can’t go wrong.

Do you like caramels? Give this simple recipe a try. I promise, you’ll be glad you did.

Need an easy Christmas present? Wrap these individually in parchment paper or wax paper and bag them. Perfect.

Homemade Caramels

3 Tbsp. honey
1/4 cup butter
1/2 cup brown cane sugar or sucanat
1/4 – 1 tsp. sea salt (to taste)
In a pan on the stovetop, combine the honey, butter, salt and brown sugar. Simmer until all of the sugar is dissolved and the ingredients are well combined, about 5 minutes. Adjust salt to taste.

Pour into a parchment lined 8″ or 9″ pan. Allow caramel to cool in the refrigerator about 30 minutes.

Cut or break into small pieces. Return to the refrigerator to cool/harden completely (do not put pieces on top of each other or they will stick).

Store in a bag or glass jar in the refrigerator.

Caramelized Brussels Sprouts

After asking on facebook for some vegetable ideas I tried a new recipe for brussels sprouts from Eat, Live, Run. It’s so simple and so delicious! We all loved it.

Basically you saute brussels sprouts and add a little brown sugar at the end. Who knew that could make them taste so amazing? We already love brussels sprouts. This was a great way to change it up a bit.

I did not use the garlic or the nuts. But that would be good too. I will definitely be making these again. I might even turn them into a one dish meal by adding a starch and protein (quinoa and nuts?, rice and chicken?, couscous and salmon?). My mind is whirling with variations already 🙂

I’ll be trying this method of vegetable preparation with other vegetables as well. I already did broccoli and kohlrabi last week. Yum!! Cauliflower would be a great addition as well.

Do you like brussels sprouts? If not would a little brown sugar make you change your mind?

Caramelized Brussels Sprouts

12-14 large brussels sprouts
1 Tbsp olive oil (I used about 2 Tbsp. of butter and coconut oil)
1 clove garlic, minced (I just used a sprinkle of garlic powder)
pinch sea salt (or a lot if you’re like me:)
2 Tbsp brown cane sugar (or honey or maple syrup)
1/4 cup roughly chopped pecans or walnuts, toasted (I’d use crispy nuts)

Slice each brussels sprout very thin until you have a mound of feathery brussels sprout ribbons. Heat the olive oil/butter/coconut oil over medium high in a large skillet and saute the garlic for 30 seconds. Add the brussels sprouts and continue sauteing for another 4-5 minutes, until bright green and tender (I saute them a bit longer…my family likes them plenty soft). Add the sea salt and brown sugar and toss together. Finish by adding the toasted nuts.

Simple Chicken Nuggets

I’ve made chicken nuggets countless times. I’ve made them in a variety of ways. But I have always used chicken breast or roasted chicken.

Last week I put chicken nuggets on my menu…then went to the freezer to get chicken…and found I had no chicken breast. Hmmm.

I did have some ground chicken, so I figured I’d go with that. I had no recipe and not a lot of time to prepare dinner. And I had my usual little “helper” in the kitchen (Abram thinks he must be held whenever I’m cooking so he can watch and try to get his hands on whatever I’ll let him).

I came up with an easy, delicious chicken nugget recipe that we all loved.

This is a great recipe if you’re trying to get your kids to eat homemade chicken nuggets instead of a fast food version. By using ground chicken you can make them round…or whatever shape you want really 🙂  They look like the typical nugget, but they only have good stuff in them.

I used a combination of bread crumbs and freshly grated parmesan cheese for the breading. You can skip the cheese if you want. And you can sub wheat flour, coconut flour or almond flour for the bread crumbs.

I also used egg yolks for a binder. If you can’t eat eggs you can leave them out. They will still hold together.

One other bonus about this recipe – they are baked. Don’t get me wrong, I love to fry things in healthy fat like coconut oil, butter and lard. But it can be messy and you have to monitor the stove. I like it when I can prepare dinner, stick it in the oven and forget about it until it’s time to eat.

You can prepare a large batch and freeze them for quick lunches any time. They didn’t last long enough here to freeze any 🙂  Serve them with homemade ketchup, honey mustard or barbecue sauce.

This post is linked to Real Food Wednesday and Fat Tuesday.

Simple Chicken Nuggets
dairy free, nut free, grain free, gluten free, egg free options

1 lb. ground chicken (or turkey or pork)
2 egg yolks (optional)
seasoning (I used sea salt, garlic powder and seasoning salt)
1/4 cup grated parmesan cheese (optional)

3/4 cup bread crumbs, wheat flour, coconut flour or almond flour
1/3 cup grated parmesan cheese (optional)

Heat oven to 375 degrees F. Grease a large baking sheet.

Mix the chicken, eggs, seasoning and cheese. In a separate bowl mix the breadcrumbs or flour and cheese.

Take a small scoop of the chicken mixture. Drop it into the breadcrumb mixture. Roll it around until it is coated. Place it on the baking sheet and press down until desired thickness. Repeat until all of the chicken mixture is used.

Bake the chicken nuggets for 30-35 minutes, flipping them over after 20 minutes.

Crockpot Pumpkin Custard (GAPS-legal, nut free, egg white free)

Over the weekend I tried a new fall recipe for pumpkin custard. Another delicious recipe from Cara at Health, Home and Happiness. We all enjoyed it. Plus it’s grain and nut free.

I did modify it a bit. I only used egg yolks so I could eat it. I also used raw cream instead of coconut milk. And I mixed it by hand instead of in a blender. I also added more honey…and it still wasn’t very sweet. I had to drizzle extra honey over top for Rebecca to eat it. Else it almost tasted more savory (the pumpkin flavor was very strong). I didn’t make a full batch either.

Overall it was a great recipe. And I love that it cooks in the crockpot. I prepped it when I got up. Then it was ready for the family when they got up.

I’ll post the recipe the way I made it. Check out Cara’s site for the original.

Crockpot Pumpkin Custard
makes 4 1/2pt. jars

2 cups cooked pumpkin or butternut squash
5 egg yolks (or 3 whole eggs)
1/4 cup raw cream or coconut milk
1/3 – 1/2 cup maple syrup or honey
1/4 tsp. nutmeg
1/2 tsp. cinnamon
pinch of sea salt

Fill the crock pot with 1 inch of water and turn on high. Allow it to preheat for 30-45 minutes.

In a blender, puree all ingredients or simply mix by hand if your pumpkin is already pureed. Taste and adjust sweetness if needed.

Pour the mixture into oven/heat proof ramekins or mason jars, filling 2/3 full. Gently set the jars into the water. Cover. Allow to steam for 4-6 hours.

Turn the crock pot off, and it will continue to stay warm for another hour or so. Serve warm or cover with plastic wrap and store in the fridge to serve chilled.