Home » Kid-friendly Recipes » main dish » Page 10

Category: main dish

Alfredo/Pestofredo Sauce

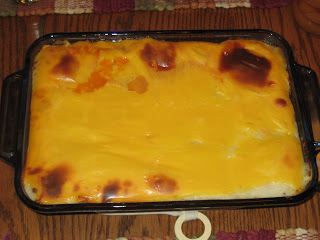
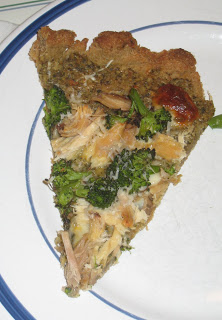
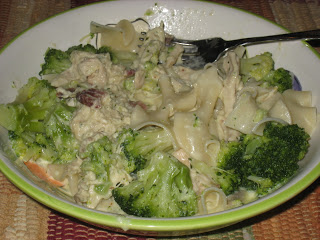
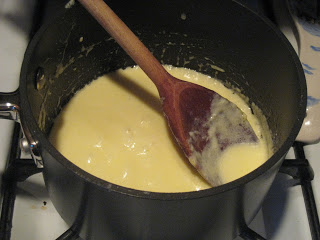
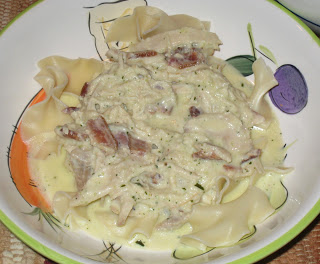
Recently I saw an easy recipe for alfredo sauce posted on Heavenly Homemakers. I haven’t made alfredo sauce in ages. And I have some fresh cream from our raw milk to use. So I thought I’d try it. But I added to it to make it my own recipe 🙂  I turned our alfredo into pestofredo…alfredo sauce with homemade pesto mixed in. And I added shredded chicken and crumbled bacon as well. Yum!!! I served it over egg noodles and added broccoli. We all liked it. The alfredo sauce is very good on its own. And super easy. With pesto added it’s good too. Either way you can’t go wrong. I only made a half batch since I only had 1 cup of cream. I ended up adding some milk to thin it out a little…it got very thick. It made enough for our dinner and a lunch for Justin. Maybe next time I’ll make the full batch…if I have 2 cups of cream handy. I’ll post pictures of all of the stages…alfredo, pestofredo, pestofredo w/ chicken and bacon, over pasta, with broccoli added.

Alfredo/Pestofredo Sauce

1/2 cup butter
One pint of cream (2 cups)
1 garlic clove (I just used some garlic powder)
2 Tbsp. cream cheese
1/2 cup grated parmesan cheese
(3-4 Tbsp. pesto)
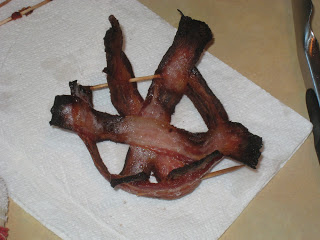
(shredded chicken, bacon)

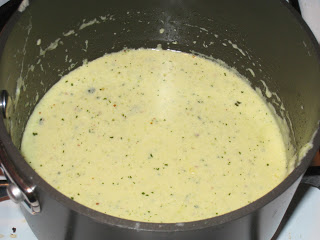
Bring the butter, cream, garlic and cream cheese to a boil. Turn down the heat, simmer and stir for about two minutes. Add the grated cheese and stir until melted. Simmer the sauce for 15-20 minutes until it becomes “thick and saucy”, stirring occasionally.

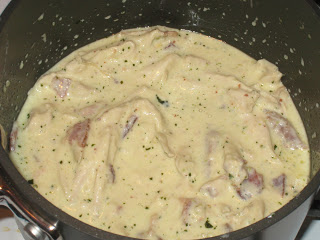
To make pesto fredo, stir in pesto during last minute of cooking.

Optional – add in chicken and/or bacon during last few minutes of coooking.

Sloppy Cornbread

Now that I’m starting to feel better I want to get back into the habit of trying new recipes. So last night I tried another Heavenly Homemakers recipe. It’s called Sloppy Cornbread. It’s basically sloppy joe meat topped with cornbread. Very simple. And very good! We all liked it. And I’m not even a huge sloppy joe fan…but I did like the taste of her sloppy joe recipe. Maybe I’ll use that the next time I make them…and maybe I’ll actually eat it then 🙂  We all really liked this. But the ratio of meat to cornbread was off for us. Way too much cornbread. I only made a half recipe (1 lb. of meat, 1/2 recipe of cornbread). Next time I’ll only do 1/4 recipe of cornbread or less. But definitely a keeper. This would work well with taco meat too…kind of tex mex. I’ll post the recipe with my ratios. You’ll see from the pictures…it mostly looks like cornbread 😛

Sloppy Joe (this is 1/2 recipe)

1 lb. ground meat (beef, turkey, venison or lamb)
1 Tbsp. minced onion (I just used onion powder)
1/2 cup ketchup
1/2 tsp. mustard (I used about 3 tsp.)
1/4 tsp. garlic powder
1/2 Tbsp. worchestershire sauce (I didn’t have any, so I just added extra salt)
sea salt to taste
Brown meat and onion together. Add remaining ingredients, stirring well. Allow mixture to simmer in the skillet for a few minutes.

Cornbread (this is 1/4 recipe)

1/4 cup cornmeal
1/4 cup whole wheat flour
1/4 tsp. baking powder
1/4 tsp. salt
1 egg
1 Tbsp. honey (I used more than this since we like our cornbread a little sweeter)
1 Tbsp. melted butter
1/4 – 1/2 cup buttermilk

Stir dry ingredients. Add wet ingredients and stir.

Sloppy Cornbread

Place sloppy joe meat in 9″ square pan. Top with cornbread batter. Bake for 20 min. at 400. You can sprinkle cheese on top before baking if desired.

Hamburger Pie ("Favorite Casserole")

Last night I made an old classic casserole that Justin grew up eating. His family called it favorite casserole, but it’s really hamburger pie. It’s a lot like shepherd’s pie…beef, potatoes and veggies. We haven’t had it in a long time, but Justin requested it. And it kind of sounded good to me 😛  As long as you have mashed potatoes it’s very easy to make.

I made mashed potatoes in the morning so that prep was easy at dinner time. As far as casseroles go this one is pretty good. I wouldn’t call it my “favorite” 😛  But maybe that’s because I didn’t grow up eating it.

Hamburger Pie

1 lb. ground beef
1/4 cup chopped onion
2 cups mashed potatoes (as much as you like, at least enough for a thin layer on top)
1 cup shredded cheese (leave out the cheese to make it dairy free. You can add a thin layer of pureed squash in place of the cheese to add flavor)
salt and peper to taste (I also added garlic powder)
1 cup tomato soup
2 cups cooked green beans (cut or french style)

Heat oven to 350.

Brown the meat with onion. Season. Stir in the beans and soup. Pour into ungreased 11×7 pan (you could use 9×13 if you want a thinner layer…just be sure to have enough potatoes to cover it).

Spread the potatoes over top. Top with cheese. Bake until hot and top is slightly brown (30-40 min.).

Spinach Pie

The other day Rebecca was talking about spinach pies. I have no idea where she even heard of them. We’ve never had them at home before. But it actually sounded good to me (rare these days that anything sounds good). And I remembered I had some puff pastry in the freezer (I know, not the healthiest, but not horrible when you eat it once or twice a year 😛  And right now I’ll eat anything that I can stomach.). So I decided to come up with a spinach pie. I did a search for recipes. Pretty much every recipe I saw uses phyllo dough. And almost all of them use feta…which does not appeal to me (and may not be safe?) right now. So I came up with my own recipe. And it turned out great!! All 3 of us loved them. I even managed to eat one for breakfast this morning! First day this week eating something besides toast and peanut butter. I didn’t measure anything while I was making them. Just added what looked/tasted right. So I’ll try to estimate quantities. Definitely something I’ll make again. Very easy and tasty. And a great way to get some spinach into our diets. You could prep them ahead and bake later. These were so easy to make that Rebecca could help me. I love that. While prepping the filling I was worried it would be kind of mushy. But the egg really holds everything together well. It firmed up nicely while baking. Almost like a quiche…but not nearly as eggy. You could easily add some cooked bacon or ham to get more protein in these. But they are plenty satisfying without meat.

Spinach Pie
makes 4 individual pastries

1 sheet puff pastry, thawed
1/3 cup red onion, chopped
10 oz. frozen chopped spinach, thawed, drained
1 cup ricotta cheese
1/2 cup shredded mont. jack cheese
salt and garlic powder to taste
1 egg

Saute onion in olive oil until soft, about 5 min. Add spinach. Cook until soft. Season to taste. Put mixture in bowl. Add cheese (enough to make a creamy mixture) and extra seasoning if necessary. Add egg. Mix.

Heat oven to 400. Roll puff pastry on floured surface until big enough to make 4 large squares. Use pizza cutter or knife to cut into 4 squares. Place 1/4 of filling in middle of each square. Fold in half to make triangle. Pinch edges with fingers. Seal well with edge of fork.

Place on parchment or silpat lined baking sheet. Bake for 35 min. Let cool about 5 min. before cutting into pastries.

Bacon Bowls

Last recipe post for a little bit. We’re heading out tomorrow morning. So today will be church and packing…no new baking/cooking. The last couple days I’ve been trying to do simple meals, use up a few things (like eggs) and not create a bunch of leftovers. I thought it was a perfect chance to try making bacon bowls 🙂  I saw this recipe a while back on The Coconut Mama and thought it sounded like a really fun idea. Especially since Rebecca LOVES bacon. Seriously. I can’t even put it on her plate because she wouldn’t touch her other food. I have to give her a couple little pieces at a time and then make sure she eats some other stuff before giving her more. The original recipe uses them as salad bowls. But I decided to use them for scrambled eggs. So fun! A little bowl made out of bacon to put your eggs in. And so good!! Especially when you have great bacon from a local farm. This is a great meal when you’re trying to get plenty of animal fat and protein in your diet. A great meal for fertility 🙂  Butter, whole milk and fresh eggs then bacan added to it! There are various ways you can arrange the bacon to create a bowl. Some people weave it. Some spiral it. Just do what you like. I laid mine over our 8 oz. pyrex bowls (turned upside down) and used toothpicks to hold it in place. I put them on a baking sheet to catch all the grease. They worked great for eggs. If you’re doing a salad you might want to weave it/use more bacon so there aren’t big holes. I used 4 slices each for the adult bowls and 3 slices for Rebecca’s. That’s all we had. And, yes, Rebecca ate every bite of hers and would have eaten more if there was any 😛  I bet these would be really good with chicken salad. Maybe that will be what I do next…my cashew avocado chicken salad in bacon bowls. Mmmm.

Bacon Bowls

bacon
mold – small bowls/cups/ramekins (upside down), muffin pan (upside down) or tinfoil balls (I personally don’t like to cook with foil, but this will work if it’s all you have or don’t want to have as much clean up afterwards.)
toothpicks
baking sheet

Arrange bacon around bowl/cup/foil and fasten with toothpicks. Place on baking sheet. Bake at 350 for 25 – 45 min.*  Remove with tongs and let cool/drain on paper towel. Fill and enjoy!

*You’ll have to check these once in a while. The cooking time will depend on the thickness of the bacon and how many layers you have. With 3 layers at one spot on my bowls they took about 40 min.

Sloppy Lentils

A couple weeks ago my SIL posted a recipe for sloppy lentils. It sounded so good. And it was a perfect meal for us since I’m trying to add more lentils into our diet (so healthy and great for fertility). I tried it last night. Yum!!! All 3 of us loved it. My original plan was to serve it over corn bread…but it’s just too hot to bake right now. I do want to try that sometime, but not this week. I debated about a few ways to serve this and ultimately decided to serve it over grilled yellow zucchini (since I had some fresh from the farmer’s market). Much healthier and much easier on my tummy. It was really good! I served it with shredded cheese and avocado. Justin and Rebecca also used some tortilla chips for scooping. This is a great recipe. Very easy. Very quick prep (as long as you plan ahead). It makes quite a bit, so there are lots of leftovers for lunches or another dinner. And it’s so versatile. You can serve it on buns, over cornbread, in tortillas, with chips, over veggies. So many options. I’m glad I tried this. Loved it.

Sloppy Lentils

3 cups water
1 cup lentils, rinsed (I used green)
salt to taste (optional)
1 cup chopped onion (I used about 1/3 cup)
3 tablespoons olive oil
15 oz can diced tomatoes
1/2-1 (6 ounce) can tomato paste (I used the full can)
2 cloves garlic, minced
1/2 cup ketchup
1 teaspoon mustard powder (I just used regular mustard)
1 tablespoon chili powder (I didn’t add quite this much…Rebecca doesn’t like spicy food)
3-5 tablespoons rapadura, molasses, or honey (I used about 4 Tbsp. brown cane sugar)
1 Tbsp white vinegar
salt and ground black pepper to taste
4 hamburger buns, split (or corn bread, tortillas, chips, veggies)

Soaking Step, optional (I did this): Allow lentils to soak overnight in warm filtered water with 2 Tablespoons acid medium (I used the liquid part of my kefir). Rinse and cook as described below.

Combine water and lentils in a saucepan. Season with salt and pepper, if desired. Bring to a boil over high heat, then reduce heat to medium-low, cover, and simmer until tender, about 30 minutes, stirring occasionally. The cook time may depend on the type of lentil you use, too… so keep that in mind so that you don’t overcook them. (I soaked my lentils the night before and then cooked them in the morning. I proceeded with the recipe at dinner time with a bowl full of already cooked lentils 🙂

Meanwhile, cook the onions in olive oil in a large skillet over medium heat until the onions have softened and are translucent. Add tomatoes, garlic, tomato paste, ketchup, mustard powder, chili powder, sweetener, vinegar, salt and pepper. Simmer 5 to 10 minutes until thickened.

Drain lentils and reserve cooking liquid. Stir lentils into sauce mixture, adding cooking liquid or water as needed to obtain the desired “sloppy joe” consistency. Serve on buns (or other bread or veggie).

Whole Wheat Pizza Dough

Last night for dinner I made pesto pizza with freshly made basil walnut pesto (our own basil and crispy walnuts). I love making pizza and have a good dough recipe. But last night I wanted to try something easier. I had seen a recipe on Heavenly Homemakers a while back for a no yeast/no rise crust that sounded interesting. So I gave it a try last night. Very good! It’s definitely different than what we’re used to. It’s not bready like most pizza crust. But it’s still very good. And it’s actually a lot easier for Rebecca to eat since it’s not so doughy. She ate almost as much as I did! Normally when we have pizza she doesn’t eat much of it or just eats the toppings. So I’m glad I tried this. I was experimenting since Laura didn’t say how many pizzas this would make. I made a half recipe and used it all for 1 pizza. It was a little more than I needed, but I still used it all. I made a “crust” around the edge like most pizzas have…but that isn’t necessary with this type of dough. Next time I think I’ll try to split it into 2 pizzas and not really have an outer crust. I used my bulgur flour for this, so I didn’t have to worry about the dough not being soaked. I’m guessing you could soak the dough since it’s made with butter and yogurt. I’ll have to try that sometime. This is a good recipe for sure. So quick and easy. And a great way to make pizza when you don’t have time to let dough rise. Or if you just want to avoid using yeast. I think my next experiment will be sourdough pizza dough. Guess I better plan another pizza night 🙂

Whole Wheat Pizza Dough
Makes ~ 6 personal pizzas or 3-4 medium size pizzas

Crust:

3 1/2 cups whole wheat flour (bulgur flour works well)
1 tsp. salt
1 cup plain yogurt
1 cup butter, melted on stove

1.Stir together flour and salt in mixing bowl.
2.Add yogurt and melted butter. Stir well until ball of dough is formed.

To make pizza:
1.Preheat oven to 400 degrees.
3.Sprinkle flour on baking pans to cover surface.
4.Pat dough on pan as thick as you prefer.

5.Spoon on sauce and spread around dough.
6.Top with cheese and favorite toppings.

Bake for 20-25 minutes until cheese is melted and turning golden brown.

Crockpot Meatloaf

This isn’t really a new recipe. I always use my mom’s recipe for meatloaf. And I posted it a long time ago. It’s definitely a family favorite here. But in the summer I don’t like to use the oven if I don’t have to at dinner time…especially for over an hour. So I wanted to find a new way to make it. And this week in particular I had to…at dinner time on Monday our oven wouldn’t turn on. It happened once a few weeks ago too. Justin is working on fixing it. In the mean time, I remembered seeing a post about crockpot meatloaf on A Year of Crockpotting a long time ago. So I thought I’d give that method a try. I made the meatloaf just like always. Then just stuck the pan right in my crockpot! Pretty neat. And it works. One more way to cook good food in the summer without heating up the house with the oven (we don’t have AC) and without using a microwave. It’s also nice if you need to prep dinner ahead of time. So, this is my usual meatloaf recipe…in the crockpot.

Crockpot Meatloaf

1 1/2 lb. ground beef
3/4 cup oatmeal (I soaked mine the night before)
1 1/2 tsp. salt
1/2 tsp. pepper
1 tsp. garlic powder
1 egg, slightly beaten
3/4 cup milk
1/4 cup diced onion
1/3 cup ketchup
2 Tbsp. brown sugar
1 Tbsp. mustard

Mix beef, oatmeal, salt, pepper, garlic powder, egg, milk and onion. Put in large loaf pan (that will fit in your crockpot). Mix ketchup, brown sugar and mustard. Put on top of meatloaf. Place pan in crockpot. Cook on high 4-5 hours or low 6-8 hours. You can drain some of the grease just by tipping the pan a bit in the crockpot and letting it run out (then you just have to clean the crockpot later).

Crockpot Salsa Chicken and Black Bean Soup

For dinner last night I tried a new soup recipe. I saw it on my SIL’s blog. It’s originally from A Year of Slowcooking. So easy and so good!!! Plus I got to try my sprouted black beans. This only took a couple minutes to throw together. Love that. I served it with avocado, cheddar cheese and tortilla chips. I had sour cream, but none of us used it. I only used about half the amount of liquid since I didn’t want a huge batch. Worked very well. Still plenty leftover for another meal.

Crockpot Salsa Chicken and Black Bean Soup

1 pound chicken (I used one large chicken breast)
1 cup dried black beans (or 2 cans, drained and rinsed) (I used about 1 1/2 cups sprouted and cooked beans)
4 cups chicken broth (I used 2 cups water plus some salt, garlic powder and chili powder)
1 cup sliced mushrooms (I didn’t add these)
1 cup frozen corn
1 jar prepared salsa (16 oz) (I used a pt. of homemade salsa)
1 1/2 tsp. cumin
1/2 cup sour cream (to stir in at the end) (we didn’t use this)
shredded cheddar cheese, avocado slices, cilantro (all optional)

I used a 6 quart crockpot. You will need a 4 quart or larger.

If you know you are going to make this the night before soak the black beans in enough water to cover and another 2 inches overnight. In the morning, drain the water and rinse the beans. (Or you can sprout your beans.)

If you don’t have super hard water or live in a super high altitude, you can quick soak the beans by pouring boiling water over them and let them sit for an hour or two.

Drain and rinse the beans. Add to the crockpot. Put in the chicken, and add the broth and salsa. Pour in the corn and mushrooms, and add the cumin. Stir, but don’t disturb the beans – let them stay at the bottom of the pot, closest to the heating element.

Cover and cook on high for 9 hours (if you are using dry, unsoaked beans…not recommended for anyone with digestive issues :).

If you are using beans you soaked overnight, canned beans, or pre-cooked beans, you can cook on low for 6-8 hours, or on high for 4-5 -similar to normal soup-cooking time. (I added my cooked beans during the last hour…I didn’t want them to cook any more than they already had.. I just wanted them warmed.)

If you’d like to thicken the broth, you can use your immersible blender to blend a bit of the beans and chicken. If you don’t have one, scoop out 2 cups of the soup and carefully blend in your traditional blender. Stir the mixture back into the crockpot.

Stir in the 1/2 cup of sour cream before serving (optional). Garnish with shredded cheese and avocado slices.

Soaked Pot Roast

On Monday I made a roast to use up more of our Voogt beef since we’ll be getting a new batch soon. I found a soaking method in Nourishing Traditions to make the meat more tender/easier to digest. So I used that suggestion and then made my roast in the crockpot. I didn’t follow the actual pot roast recipe. I’ll just post the recipe for preparing the meat. I also didn’t have several days to soak my meat. But I think any amount of soaking helps. This turned out great! Yummy tender meat.

Soaked Pot Roast

3 lb. roast (I used a round bone roast)
1 quart buttermilk (I just used enough to cover the roast)
2 Tbsp. butter
2 Tbsp. EVOO

Using a needle or skewer (I used a knife) stick the meat all over. Place in a bowl or glass loaf pan (I used an 11×7 glass baking pan). Pour buttermilk over top. Cover. Allow to marinate in the refrigerator, turning occasionally, for several days.

Remove from the buttermilk and dry off meat with paper towels. In a pan brown on all sides in butter and oil.

At this point I put the meat in the crockpot with some carrots, potatoes and onions. I removed any extra fat from the pan and then deglazed it a bit with water. I added that water to the crockpot. The roast cooked for about 12 hours.