Home » Kid-friendly Recipes » main dish » Page 9

Category: main dish

Beef, Bean and Cheese Burritos

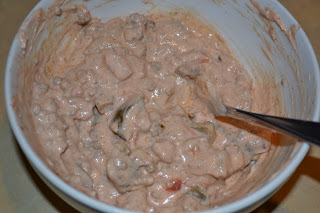
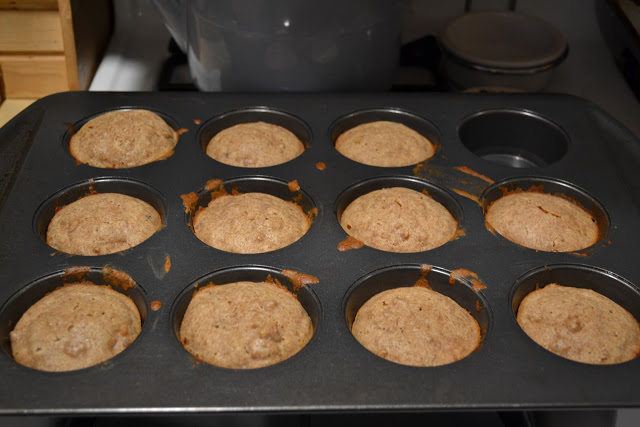
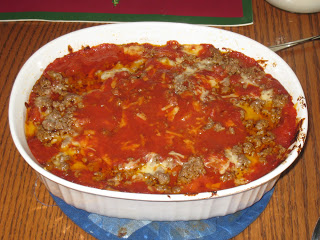
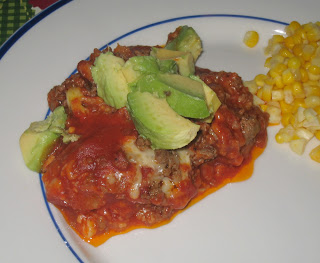
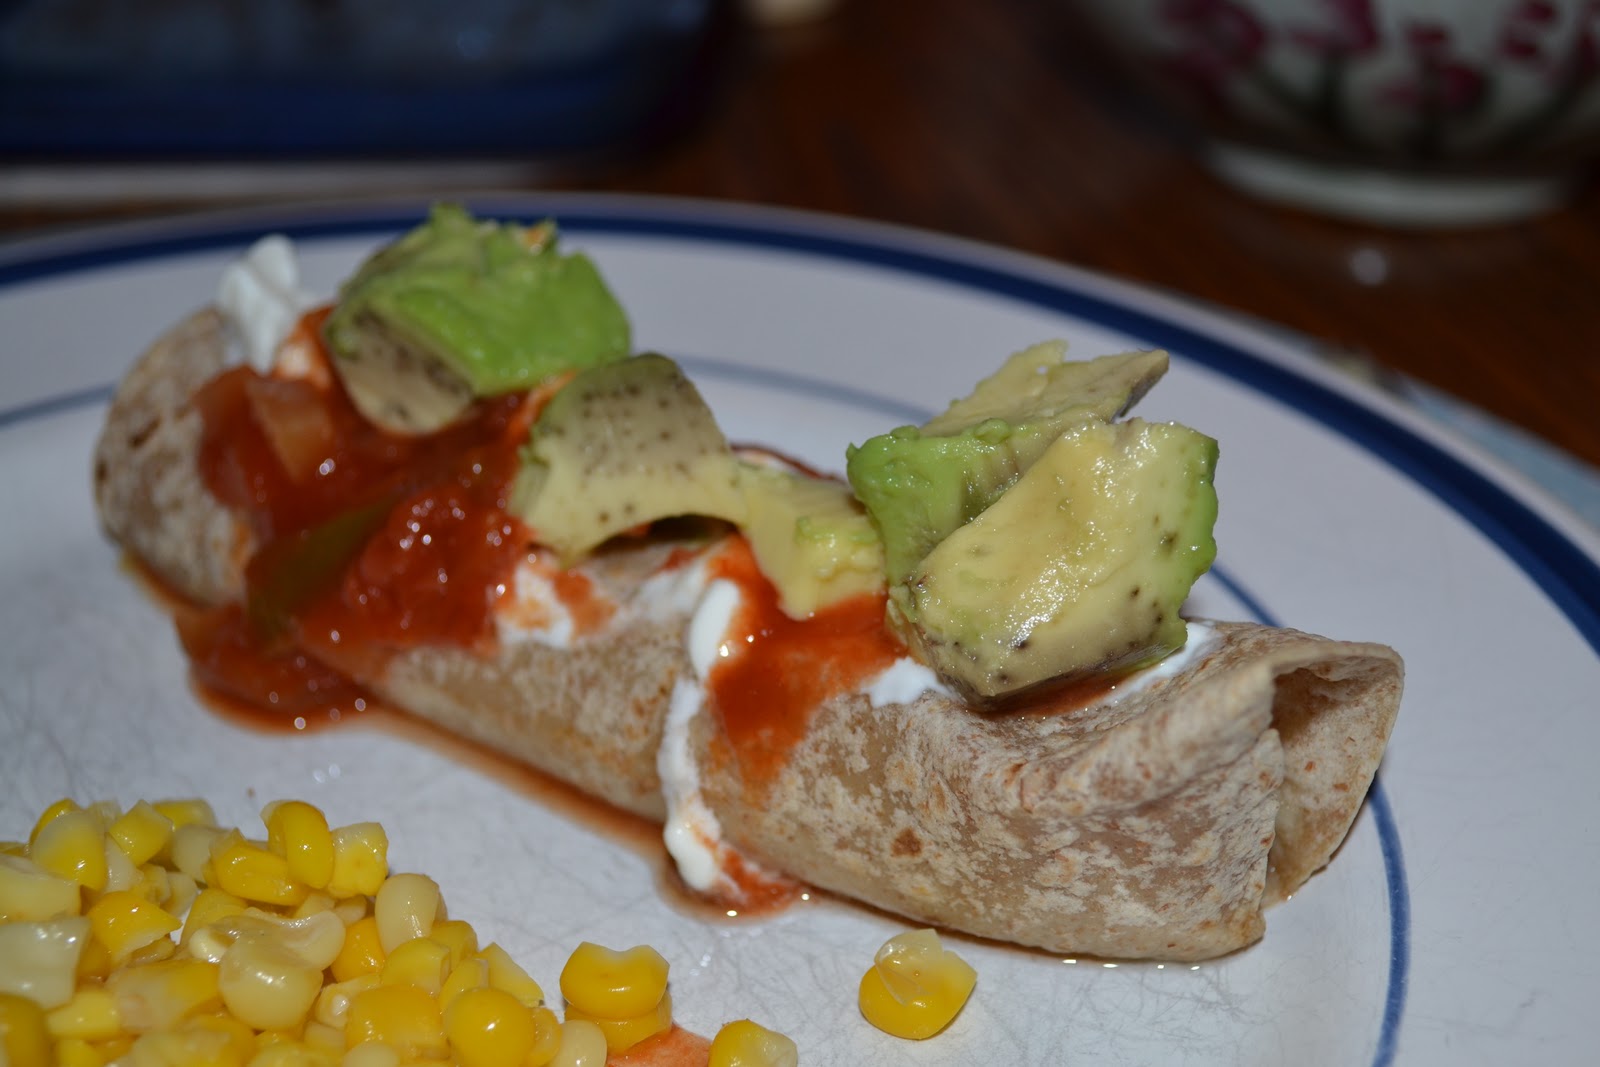
Now that we’re getting down to the last few weeks of pregnancy here I’m starting to make freezer meals. Last night I made a big batch of burritos. We had a few for dinner, and I froze a bunch. These are so simple it’s hardly a recipe. I got the “recipe” from Heavenly Homemakers. I combined her beef burritos and her bean burritos into one and modified it slightly. I used whole wheat tortillas, but you could easily use corn to make these gluten free. So simple and so good!! We all loved them. These will be great to have on hand. You can take out as many as you need at a time and bake them. It is also a great prep ahead meal if you are going to be busy around dinner time. It was a nice treat to just stick dinner in the oven a bit before dinner without having to do any work. These work well when you have to bring someone else a meal too. So versatile. With 1 lb. of meat and some beans I made 17 small burritos and 2 large. After rolling a few I found that it works better to fold in the sides as you roll so that no filling comes out. Use whatever toppings you like. We had salsa, sour cream and avocado. Yum!

Beef, Bean and Cheese Burritos

1 lb. ground beef, venison or turkey
sea salt to taste (I used taco seasoning)
1-2 cups beans (I used pinto and black…soaked and cooked ahead of time)
1 1/2 cups shredded cheese (I used mild white cheddar)
1 cup salsa (I used a 15 oz. can of diced tomatoes)
15-20 whole wheat or corn tortillas

Brown meat in a large pan. Season to taste. **Remove from heat and stir in salsa and shredded cheese. Spoon 2-3 tablespoons onto a tortilla and wrap.

**I poured the seasoned meat in a bowl. Then mixed in the beans and tomatoes. I put a couple Tbsp. of the filling onto each tortilla and sprinkled the cheese on top. Then rolled, folding in sides.

To cook fresh: Place in a baking dish. Bake immediately or cover and store in the refrigerator until ready to bake. Bake at 350 for 20 minutes.
To Freeze: Lay burritos barely touching in a 9×13 freezer safe dish (lined w/ wax paper if you want to remove them easily and store them in a freezer bag). If you are freezing more than one layer of burritos, place wax paper or parchment paper between the layers to prevent them from sticking together.
To Re-Heat: Place burritos on a baking sheet. If burritos are thawed, warm in the oven for about 15 minutes until heated through and through. If burritos are frozen, leave them in the oven for about 30 minutes. They might get a little crispy on the outside, but yum!

Avocado Cheddar Omelet

Last night I made our usual Friday night breakfast for dinner. I made something new and simple. I’ve wanted to try it for a few weeks, but it just didn’t fit into our menu. I saw a recipe similar to this on a blog a while back, which gave me the idea, but I don’t remember where now 😛  So I didn’t actually use a recipe. And it’s not really much of a recipe. But I still thought I’d share since we thought it was good. Eggs and avocado always go well in my opinion. If you can make an omelet, you can make this. It wasn’t my best execution of an omelet ever (as the picture shows), but it still tasted great 🙂  That’s what counts.

Avocado Cheddar Omelet

3 eggs
1/4 cup milk
1/2 cup shredded cheddar
1/4 avocado, diced
salt and pepper to taste
butter for cooking

Whisk eggs, milk and seasoning. Heat small skillet over low heat. Melt butter in pan. Add egg mixture. Let cook until mostly set. Add cheese and avocado to half of the eggs. Fold omelet in half. Let cook a few more minutes, until fully set.

Homemade Fish Sticks

In my quest to eat fish every week I’m having to come up with new ways to cook it. This week I decided to try fish sticks. I haven’t had them in years. And I don’t ever intend to eat them out of a box again (shudder…have you ever read the ingredient list in those?). I didn’t really have a recipe. And I debated about a couple ways to make them. I decided to just do a typical breading/frying method. And they turned out awesome!!! Far better than any fish sticks I’ve ever had. And so healthy. We all liked them. And some homemade tartar sauce (using homemade mayo) to dip them in made them that much better. I just used flour and egg for the breading. And palm shortening for frying. So simple and so good. Can’t wait for leftovers today 🙂  I used cod. I’m sure just about any kind of basic white fish would do. And yet another food that would work well to make a huge batch and freeze a bunch to have on hand. May have to do that before May 🙂  Love it.

Grain free version

Edited 3/15/11 – I made a batch last night using almond flour instead of wheat flour to make them grain/gluten free. Still taste awesome!!! A combo of almond flour and coconut flour is about the best…the coconut flour really gets a good coating. And I used a basic white fish. Worked just as well as the cod.


Homemade Fish Sticks

Cod filets (or any other mild white fish)
Whole wheat flour or almond flour/coconut flour (gluten/grain free if using almond flour and/or coconut flour)
Seasoning to taste (I just used sea salt)
Palm shortening (or another healthy oil for frying – coconut, EVOO, lard)
Egg

Place flour and seasoning in one bowl and beaten egg(s) in another. Cut fish into chunks or strips. Dip fish in flour, then egg, then again in flour. Place on plate.

When all of the fish is breaded heat oil in large skillet (I used my cast iron skillet). Heat over medium heat. Cook fish sticks in oil about 7 min. on each side.

Chicken Nuggets

Last night for dinner I made chicken nuggets. This isn’t a new recipe for me. And I’ve actually posted this recipe before as fried chicken. But the last time I made chicken nuggets I made them this way (instead of just a simple breading and baking them) and we all LOVED them. And it’s super easy. So I thought I’d repost as chicken nuggets. I served them with homemade honey mustard. SOOOO good. The next time I make these I might try to make a really big batch and freeze a bunch so I have frozen chicken nuggets on hand. Healthy convenience food.

Homemade Chicken Nuggets

boneless skinless chicken breasts or tenders, cut into chunks of your size (can do nuggets or strips)
whole wheat flour
oil for frying (I use EVOO, lard and/or palm shortening)

Heat enough oil in large pan to cover bottom over medium heat. Coat chicken pieces in flour. Place in hot oil. Brown on one side (about 5 minutes). Flip over, reduce heat to low and cover. Cook for 50 minutes. Remove cover. Flip over and cook over medium heat for a couple minutes to crisp other side of nuggets.

Goulash

Last night I made an old classic for dinner. It’s one of those recipes that’s not really much of a recipe…just beef, sauce and noodles. But it’s my mom’s recipe for goulash. We ate this a lot growing up. I haven’t made it in a long time. But it’s always good and easy. I prepped it in the morning. Then at dinner time all I had to do was stick it in the oven (handy since I was going out for dinner and Justin was home/feeding Rebecca). I took the picture before I actually baked the casserole.

Goulash

2 cups elbow noodles, cooked and drained
1 lb. ground beef, cooked and drained
1 jar spaghetti sauce (preferably homemade)
salt to taste
garlic powder to taste
grated parmesan cheese for serving

Mix noodles, beef, sauce and seasoning in 2 qt. casserole. Bake at 350 degrees for 45 min. – 1 hr. Served topped with parmesan cheese.

Grain Free Salmon Cakes

Yesterday I wanted something light for lunch since I knew we’d have a bigger, snacky dinner. And I’m trying to get more seafood into my diet right now. So I decided to make salmon cakes. I’ve made them before…but a recipe that takes some extra work and prep ahead. I wanted something easy. So I threw these together using what I had on hand. Simple, quick, healthy. And delicious!! All 3 of us liked them. And I’m excited to eat the leftovers. I cooked a couple salmon filets to use in these. You could used canned salmon. I didn’t measure anything. But I’ll try to give rough estimates of what I added.

My daughter LOVES these (and she can be picky about fish). So if you are trying to get your kids to eat more healthy seafood give these a try.

Salmon Cakes
makes ~ 7 cakes

2 (6 oz.) salmon filets, cooked OR 1 (14 oz.) can salmon
1 egg (optional)
1/4 cup mayo (preferably homemade)
1/2 – 1 tsp. Old Bay seasoning
1/2 – 1 tsp. sea salt

1/4 cup – 1/2 cup almond flour and/or coconut flour

Crumble salmon in a bowl. Add egg, mayo and seasoning. Mix well. Form into balls. Roll in flour and flatten slightly. At this point you can cover and refrigerate them (helps to firm them up/hold them together before cooking. and allows you to prep them ahead) or cook them immediately.

To cook, heat a large skillet and add butter, coconut oil, palm shortening and/or lard. Cook salmon cakes in oil/butter for about 5-7 min. per side.

Serve plain or with tartar sauce (homemade mayo mixed with a little sweet pickle relish).

Beefy Cream Cheese Salsa Dip (Taco Dip/Topping)

I wanted to try one of the dip recipes from Heavenly Homemakers last night. I was debating between the cream cheese salsa dip and the simple chip dip. When I looked at the recipes I realized I couldn’t do the chip dip because I don’t have any sour cream. But I did have leftover taco meat to use up. So I kind of combined the recipes/made it my own and made beefy cream cheese salsa dip. Or taco dip. It’s Laura’s cream cheese salsa dip with taco meat mixed in. Turned out great!!! A very easy and fun food. It only took a few minutes to make (since I already had the meat cooked, just had to warm it a little). And it’s filling enough (meat, cheese, veggies) to make it part of a main dish. You can use it as a dip with chips or veggies. Or even put it over rice or pasta. It’s also very healthy. I used homemade cream cheese, homemade salsa and taco meat with homemade taco seasoning. I didn’t actually measure anything. I just added what looked right. Note that the top picture is just the cream cheese salsa dip. The bottom picture has the meat added.

Beefy Cream Cheese Salsa Dip (Taco Dip/Topping)

1 (8 oz.) package cream cheese (or homemade)
1 ¼ cups salsa
1/2 – 1 lb. taco meat (adjust to your taste)
Tortilla chips, veggies, rice or pasta

Lay cream cheese out on counter for 1-2 hours to soften. Put softened cream cheese and salsa in a bowl and mix with beaters (I just used a spoon.) until thoroughly combined. Warm meat. Stir into cream cheese mix. Serve with tortilla chips (or fresh veggies or over rice or pasta).

Pancake and Sausage Muffins

For dinner last night I tried another Heavenly Homemaker recipe (and there are more to come:). Ever since Laura posted her pancake and sausage muffin recipe I’ve wanted to try them. Pancakes and sausage are great on their own, but mixed together? Awesome! All three of us loved these. And they are very easy to make. Plus they make a lot so you can freeze some for a quick breakfast. I only made a half batch and got 11 muffins. I also doubled the amount of meat (used a 1/2 lb. for a half batch). We like ours meaty 🙂  Another great thing about them is that you can soak the grains. Always a plus for me. I didn’t have buttermilk on hand, so I used a combo of sour milk (milk + vinegar) and plain yogurt.

This recipe would also work well if you want to serve pancakes to a large group but don’t want to stand at the stove forever. They would be great without the meat. Just make the muffin part and then you have a ton of pancakes done at once 🙂

I think this will be one of our new favorites. Pancakes and sausage covered in butter and real maple syrup. Mmm 🙂  I’m still trying to figure out how to take decent pictures with our new camera. So bear with me.

Pancake and Sausage Muffins

2 cups whole wheat flour
1 tsp. baking powder
1/2 tsp. sea salt
1 1/2 cups milk or buttermilk (I used a little more than this.)
2 eggs
1/3 cup melted butter
1/2 pound cooked (and at least partially cooled) turkey sausage (or nine sausage links, cut in half) (I used pork breakfast sausage…1 lb. per full recipe)
Real grade B maple syrup

To soak grains:
If you want to soak your flour overnight to break down the phytates to aid in digestion, mix the flour and cultured buttermilk in a glass bowl, cover and let it sit on your countertop for 12 hours or so. The next morning, mix the remaining ingredients in and bake as directed below.

To make w/o soaking grains:
If you don’t soak the flour ahead of time: Mix dry ingredients together. Add milk or buttermilk, eggs and melted butter. Stir in browned turkey sausage.

Pour batter into 18 buttered muffin tins. (I don’t recommend paper muffin liners for this as it will stick.) (A full recipe for me would make 20 – 22 muffins). Bake at 350° for 15-20 minutes (mine took about 25 min.) or until the muffins are lightly browned. Serve with butter and maple syrup.

Beefy Enchilada Bake

Last night for dinner I tried yet another Heavenly Homemaker recipe. I love Laura’s recipes because they are easy to make, healthy and use a few simple ingredients. This enchilada bake was no exception. Very easy and very good. I almost thought it sounded too simple…that it might be bland. But it was very good! All three of us loved it. And it was very easy to make. Laura didn’t mention what size pan to use, so I just used a 1 1/2 qt. casserole. And I scaled back on the sauce a bit…and had plenty. I don’t have much cheese in the house (our milk farm was out this week!), so I only used 1 cup. But it was still very good. I used up a few old corn tortillas that have been in the freezer for a while and some homemade whole wheat tortillas. Both worked well. This is also a great prep ahead meal. You can prep it in the morning and bake it for dinner. Or you can prep it and freeze it for later. I’ll have to keep this one in mind when I’m prepping freezer meals before baby #2 arrives 🙂  I served it with avocado and homemade salsa. Sour cream would be very good on it too.

Beefy Enchilada Bake

1 lb. ground hamburger meat
3 Tbsp. arrowroot powder or flour (I used 2 Tbsp.)
1/2 cup water (I used 1/4 cup)
1-2 tsp. chili powder (depending on your taste)
salt
3 cups tomato sauce (I used about 2 cups)
8 oz. shredded cheddar cheese
12 corn tortillas (I used 4 corn and 4 whole wheat. This is gluten free if you use just corn.)

Brown hamburger meat. Do not drain grease! Put cooked hamburger meat in separate bowl, salt and set aside. Sprinkle arrowroot powder into the grease and stir (if you do not have enough grease to absorb the arrowroot powder, add 2 Tbps. butter). Keep your burner on medium to high heat. Pour in water and “smoosh” the clumps of arrowroot powder/grease around while you stir the water in. This will thicken and make a gravy. Pour in tomato sauce and chili powder. Stir well until bubbly. This is now your enchilada sauce! (I added some salt and garlic powder to the sauce in addition to the chili powder.)

Cut corn tortillas into one inch strips. Dip tortilla strips in enchilada sauce and coat thoroughly. (I just ripped the tortillas into big chunks and threw them all in the pan and stirred. then I spooned out sauce and tortilla for each layer.) Cover bottom of baking dish with enchilada sauce coated tortilla strips. (I used a 1 1/2 qt. casserole with my quantities listed above. You might need a bigger pan for the full recipe.) Sprinkle 1/3 of the cooked ground beef over the tortillas…then a little cheese. Repeat layers twice more: enchilada sauce coated tortilla strips, meat, cheese. If you have any leftover enchilada sauce, drizzle it over the top.

Cover and bake at 350° for 30 – 40 minutes or until bubbly. (I baked it for about 45 min., then removed the cover and baked another 5 min.)

*I think adding some veggies right into the casserole layers would be good (corn, peppers, onions, etc.). Then it could be an all-in-one meal.

Poached Eggs

Along with our new potatoes last night we tried a new form of egg – poached. I had never made them before. And Justin and I had never actually even had one. I’ve always been a little scared to try making one…cooking an egg in a pan of water sounds tricky. But in one of my recent issues of Cooking Light there was a little tutorial on how to make poached eggs. It sounded really easy. So I gave it a try. It really was very easy. And quick! And they taste great. Very similar to a soft boiled egg. These days I try to eat at least one egg a day. And the runnier the yolk the better (the less it’s cooked the more nutrients it retains). So this was perfect. And even more perfect with our fresh eggs from Lubbers Farm. Do you see the color of that yolk? Amazing. Rebecca is hit and miss with eggs. Just depends what mood she’s in and how her gag reflexes are working 😛  So I just made her scrambled eggs last night. But she did try a bite of mine and said she liked it. Maybe next time I’ll make one for her too. Now that I’m eating eggs so much it’s fun to experiment with different ways to make them. This one is a winner for sure. It would be very good served right on top of hasbrowns or a piece of toast to soak up all that rich, creamy golden yolk.

Poached Eggs

Fill shallow pan with about 2 inches of water. Bring to a boil, then turn down to a simmer. Add a few tsp. of vinegar. Crack each egg into a small dish. Gently pour egg into water (it will sink to the bottom at first). Let cook for about 3 min. Remove from water with slotted spoon to drain. Place on plate, potatoes or toast. Sprinkle with sea salt. Enjoy!