Home » Kid-friendly Recipes » Page 42

Category: Kid-friendly Recipes

It is so important to cook homemade, healthy food. But it’s not always easy to find kid-friendly recipes.

That’s where I come in. I’ve got hundreds of kid-tested and approved recipes that won’t keep you in the kitchen for hours or stretch your budget too thin.

I focus on allergy-friendly, whole foods. But I always cook with kids in mind. I take all sorts of feeding challenges into account too.

We’ve dealt with every allergy possible, so I’ve created recipes that are gluten free, nut free, dairy free, egg free, soy free, corn free, coconut free and more!

Kid-friendly recipes don’t have to be boring. And they are certainly not limited to chicken nuggets and pizza every night.

A nourished child will enjoy a wide variety of fruits, vegetables, proteins, carbohydrates and fats. Get your kids in the kitchen with you and start cooking! Have fun with food and your kids will learn to love eating.

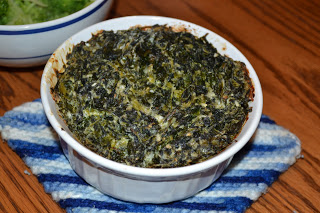
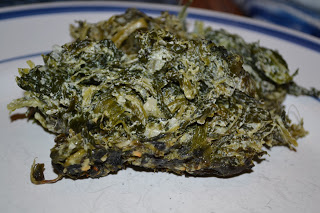
Baked Spinach (grain free, egg free, nut free, GAPS-legal)

I made quite a spread for our Christmas brunch this week. But I did take one item off the menu because I just didn’t have time to prepare it. So I made it for dinner last night – baked spinach. I found the recipe on Breakfast and Brunch Recipes. It is super easy. I really liked it. I think I ate half the pan last night 😛  Justin thought it would be better as a dip than as a side dish, but still thought it was good. This can be GAPS legal if you use homemade raw sour cream. It’s a great way to get more veggies in your diet. As expected Rebecca didn’t eat much…too stringy. But she did really like the flavor. Preparing this was even easier for me last night. I had a bunch of leftover ranch veggie dip (just a mix of sour cream and homemade ranch mix). So I just mixed that into the spinach instead of sour cream and separate seasoning. For cheese I used a mix of parmesan, sharp cheddar and mont. jack. I only made a half recipe.

This post is linked to Fat Tuesday at Real Food Forager.

Baked Spinach

3 packages, frozen, chopped spinach (10-ounce package size)
2 cups sour cream
1 package dried onion soup mix (I used homemade ranch dressing mix)
1/4 cup Parmesan cheese, or more (I used more than this. Any kind of cheese will work)

Take the spinach out of the freezer the night before. When it has been thawed, place it between layers of paper towels and squeeze the water out of it until dry.

Mix together the spinach, sour cream and soup mix. Add the grated Parmesan cheese and stir until well combined.

Grease a 9″ x 9″ square baking dish. Press the spinach mixture flat with a spoon or spatula.

Bake for 45 minutes at 350 degrees.

Serves 6.

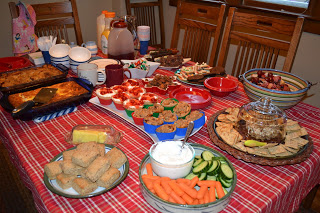
Christmas Menu

Yesterday we had our final Christmas party. It was a brunch at our house. This was our menu. Quite a spread. I made everything except the fudge. Doing a brunch for Christmas is a lot of fun. So much yummy food 🙂

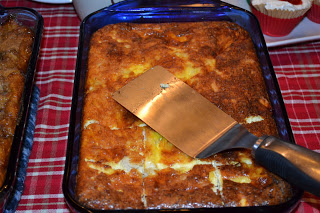
Egg and sausage casserole
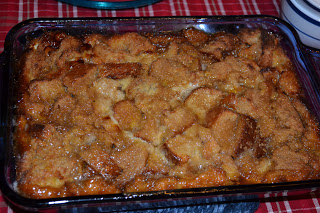
Overnight french toast bake
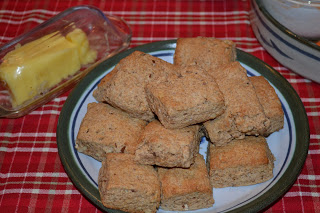
maple pecan scones
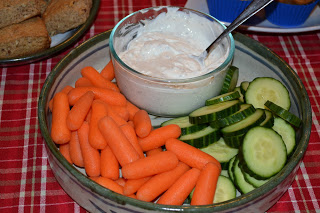
carrots and cucumbers with ranch dip
mini dutch apple pies, cherry jubilee cups
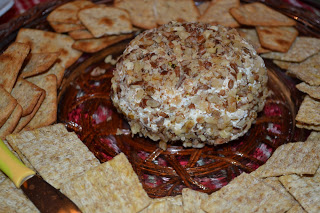
ranch cheese ball with crackers
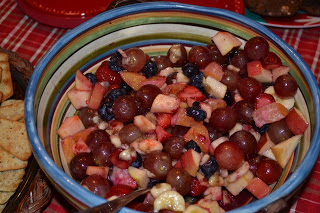
fruit salad
Christmas cookies, chocolate mint cookies
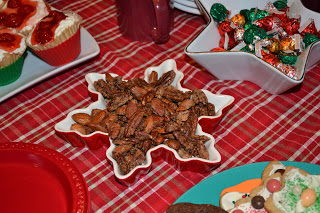
sugared nuts
fudge, chocolate covered pretzels
egg nog, coffee, juice, water

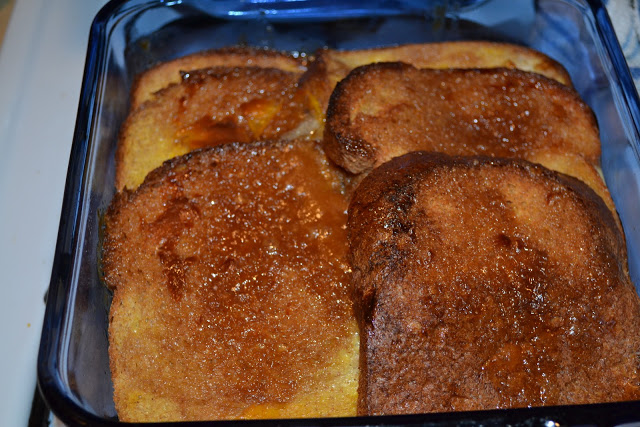
Overnight French Toast Bake

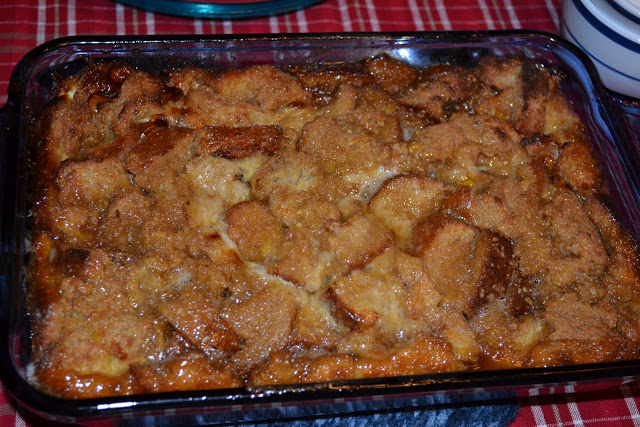
I found this recipe on my SIL’s blog and thought it would be a great addition to our Christmas brunch menu. I tried it last week to test it before making it for guests. It is easy and good!! And will be on the table Tuesday morning 🙂  Justin and Rebecca both really enjoyed it. I love that you don’t need to add syrup. It’s already plenty sweet and syrupy. Thanks for the recipe, Sara. I replaced the corn syrup with honey to make it healthier. I only made a half recipe when I was trying it. I’ll make the full version for our party.

Edited 12/28/11 – I made the full version yesterday. Instead of doing slices of bread I broke it all into chunks. I think that worked a lot better to absorb the eggs/milk evenly. And it was much easier to dish up.

Overnight French Toast Bake

2 Tbsp. honey
1/2 cup butter
1 cup brown cane sugar or sucanat
1 16oz. loaf whole wheat bread, gluten free bread or grain free bread
1 1/2 cups milk
5 eggs
1/2 tsp. salt
1 tsp. vanilla

In a pan on the stovetop, combine the honey, butter, and brown sugar. Simmer until syrup-like, about 7 minutes. Pour half of the mixture in the bottom of a 13×9 inch pan. Slice bread into 1-inch slices and place on top of mixture in pan. Pour remaining syrup mixture over top of bread slices.

Combine eggs, milk, salt, and vanilla. Beat until mixed well. Pour over bread.

Cover and refrigerate overnight. In the morning, uncover pan and bake at 350 for 40 minutes or until brown.

Meal Plans Week of 12-25-11

Merry Christmas!!! For unto us a child is born, unto us a son is given.

It’s Christmas…day and week for us. We’ve got 4 days in a row of celebrations/family time, starting today. So I am going to be crazy busy. I hope I can get everything done and still enjoy the parties.

Last week we were able to spend lots of time together as a family. It’s been so nice to have Justin home. The kids have loved having Daddy around to play with. We celebrated Christmas on Friday. Rebecca is having a blast with her new toys and doll. Abram is enjoying his little Noah’s Ark. And he’s really taking off in terms of sitting/crawling/standing. It seems like overnight he is starting to crawl normally (not just army crawl). And he gets grumpy if he’s not standing or propped up on something. If he is on his tummy it’s not long before he’s sitting up. And if something taller is near by he’s trying to pull himself up. He is also developing his verbal skills. He kind of makes horse and lion sounds. His horse sound is like a silly laugh. And he loves to growl at us.

The kitchen was definitely a busy place last week as I was trying to do as much prep work as possible. I think I got everything done that I could.

This week is all about family and Christmas parties. Until everyone is gone…then we get to relax 🙂  Today is church. Then we are headed to my parents’ house for our extended family party. Monday I have to pick up milk in the morning. Then we have a brunch with some of my extended family that lives in town (grandparents, cousins, etc.). After the party it’s back home for naps…then my in-laws will be here. They’ll be staying a couple days. Tuesday  morning is our Christmas brunch/party with Justin’s family. Our house guests leave on Wednesday. I think we might go out for dinner on Wednesday evening…give me a break after 4 days of Christmas baking and cooking. We might go shopping later in the week. Saturday we are going to a hockey game. It’ll be the first time for both kids. Rebecca is very excited.

I won’t list all of the things I need to get done in the kitchen this week. But there is a lot. And I have to squeeze it in between parties, travel and milk pick up. So my plans will be fairly detailed this week. I don’t want to forget anything.

I’m doing pretty well overall. I’ve been making sure that I eat lots of healing, nourishing foods lately. That really helps. I just need to be better about staying away from all of the goodies around the house 😛  I know my anxiety/stress levels over the next few days will take a toll on my gut. But I’m trying to do what I can to keep it under control. Hopefully I can still enjoy all of the parties and be sane by the end of the week.

Here’s what’s on the menu.
———————-
S (prep salad and dressing, prep lunch, church, Christmas party)
  L – light/quick – chicken salad sandwich, chips, strawberry shake (Justin), chicken salad, veggies (me)
  D – party (I’m bringing salad w/ cranberries, walnuts, parm cheese, cucumbers and croutons; poppy seed dressing and homemade honey mustard dressing)

M (prep dinner, prep veggies and dip, milk pick up, make yogurt, make kefir, Christmas party, guests, prep casseroles, make dip, thaw/drain spinach, make cheeseball, make jubilee cups, make fruit salad)
  Brunch – party (I’m bringing veggies w/ dip and grain free breakfast bars)
  D – pea soup w/ carrots and ham, pumpernickel bread, pesto rolls, applesauce

T (prep brunch – bake casseroles, slice veggies, bake scones, bake pies, Christmas party, guests)
  Brunch – party: egg and sausage casserole, french toast casserole, carrots and cucumbers w/ ranch dip, maple pecan scones, fruit salad, baked spinach, crackers w/ cheese ball, Christmas cookies, sugared nuts, chocolate covered pretzels, mini apple pies, egg nog, chocolate mint cookies, fudge, cherry jubilee cups, candy
  D – meatloaf, baked potatoes w/ butter and sour cream, beans


W (guests, skim cream, make yogurt, make sour cream, make ice cream, make butter)
  B – leftovers
  L – leftovers
  D – out to eat

Th (shopping?)
  D – TBD w/ spaghetti squash (lasagna?, casserole?, spaghetti?)

F ()
  D – fish sticks or salmon

S (NYE, hockey game)
  D – at the game

Baked Peanut Butter Oatmeal

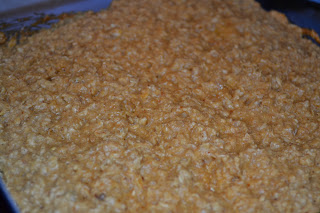
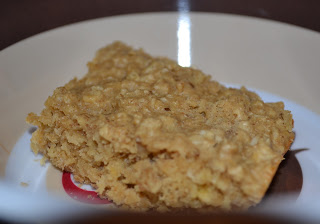
We celebrated Christmas as a family yesterday. So I decided to make something new for breakfast. I tried baked peanut butter oatmeal. I got the recipe from Lynn’s Kitchen Adventures. I’ve never made baked oatmeal before. To be honest it’s very rare that I make oatmeal of any kind at all. But this sounded good. And very simple! Justin and Rebecca both liked it. Although Rebecca had her usual chewing issues with oats. A small piece took her an hour and some tantrums to get through. She just won’t chew oats. So she won’t be eating the leftovers today 😛  I served it with homemade vanilla yogurt (poured on top). That worked well. You could pour milk on too. Or just eat it plain. It can be served warm or cold. It’s actually firm enough that you could eat it as a bar for an on the go breakfast or snack. For the first attempt I made the recipe as is. Next time maybe I’ll try soaking the oats and using rolled oats instead of instant. This is a filling quick prep breakfast. I think I’ll be making baked oatmeal more often. There are so many flavors you could make. Today Justin gets it with homemade banana yogurt. Peanut butter and bananas…yum 🙂  I’m guessing you can prep this the night before to make it even easier. I made a half recipe in a 9″ pan.

Baked Peanut Butter Oatmeal

3 cups quick cooking oats
1/2 cup brown sugar
1 cup milk
2 Tbsp. butter, melted
2 eggs
2 tsp. baking powder
3/4 tsp. salt
2 tsp. vanilla
1/2 cup peanut butter

Mix all ingredients together and stir well. Spread in a greased 9×13 pan. Bake at 350 for 20-25 minutes. If you like it a little crunchy on top cook for a few minutes longer. Serve with warm milk or yogurt poured over top.

Crockpot Pork and Beans (grain free, dairy free, nut free, egg free, GAPS-legal)

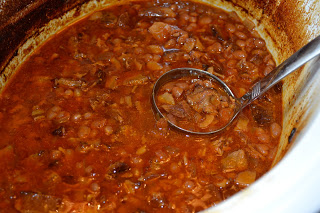
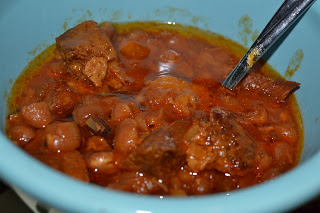
For lunch yesterday we had another new recipe for pork and beans from Cheeseslave. This is a very easy crockpot meal. And it is so good!! All three of us loved it. Although Abram wasn’t too happy about me eating so many beans. He’s not a happy camper right now. I guess I won’t be eating this again for a while. Aside from that it’s a great recipe. I didn’t follow the directions completely. I simplified it a bit and made less. For meat I used cut up bacon and cut pieces of leftover pork chops. I’ll post it the way I made it. This is a great, healthy recipe for baked beans. You could use just the bacon or probably even leave the meat out. I love that you use broth to add extra nutrition. I also stirred some coconut oil into my dish for more healthy fat. This would be great served with corn bread or over rice. You could even add in other vegetables for a more complete meal.

Crockpot Pork and Beans

2 cups dried navy beans
1/2 small onion, diced
1 Tbsp. butter
1 Tbsp. coconut oil
2 cups chicken broth or stock
meat – ham hock, diced bacon, cut up pork, grass-fed hot dogs (whatever you have on hand)
1/4 cup ketchup (I used homemade fermented ketchup…GAPS legal)
2 Tbsp. mustard
2 Tbsp. apple cider vinegar
1/3 cup total sweetener (honey, maple syrup, molasses…any combo…I used honey…GAPS-legal)
sea salt to taste

Soak beans in water and whey for 7-24 hours. Drain. Rinse. Cook beans in water for about 30 minutes, until just starting to soften (skim foam from water when it comes to a boil). Drain.

Add butter, coconut oil and onion to crockpot. Turn to high. Let fat melt. Add beans and remaining ingredients (except hot dogs). Cook on high 6-10 hours. Add more stock if it gets too dry. Add sliced hot dogs (if using) about an hour before serving. Remove ham hock if using.

Bacon Wrapped Dates (grain free, nut free, dairy free, egg free, GAPS-legal)

If you are a fan of sweet and salty foods you’ll love bacon wrapped dates! Add in some cheese for the perfect appetizer or snack.

I remember when I first tried a date about six years ago. I was blown away by the taste. It’s like a perfect little dessert. No need to bake or add sugar. Bonus that dates have minerals for a little nutritional boost.

How to Use Dates

But you can go a step beyond simply eating dates. Stuff them with cheese and wrap them with bacon. A quick run through the oven and you have an amazing snack or appetizer.

Bacon wrapped dates are so easy to make. And SO delicious. Salty and sweet together.

You can eat these fresh from the oven or right out of the fridge. I prepped these a couple hours before dinner and then just put them in the oven later. Very handy.

Allergy Friendly Stuffed Dates

If you can’t do dairy just skip the cheese or replace it with sunbutter. My kids love to snack on dates filled with sunbutter.

You can also add chopped dates to granola or try this sweet and salty snack mix. When you bake dates they taste even sweeter! My kids think they are candy.

Bacon wrapped dates make the perfect appetizer for any holiday or big game day. And they really couldn’t be any easier. Your kids can help make them too (check out the Kids Cook Real Food eCourse if you want to teach your kids to cook).

How do you like to eat dates?

Prepped Dates
 
Baked Dates

Bacon Wrapped Dates

Ingredients:

  • Nitrate-free bacon
  • Dates, organic if possible
  • Any type of cheese, cubed (optional)

Instructions:

  1. Preheat the oven to 350F.
  2. Cut the bacon slices in half.
  3. Pit the dates and cut them in half. Stuff with cheese if desired.
  4. Wrap each date with a half a slice of bacon. Use toothpicks if necessary. Set on a baking dish.
  5. Bake for 15-20 minutes, or until the bacon gets crispy and the cheese is melted. Remove the dates from the oven and transfer them serving dish.
  6. You can store the unused dates in the refrigerator. They are even good cold!

Sour Cream Ice Cream (grain free, nut free, GAPS-legal)

Now that I’ve been eating raw sour cream for a few weeks I figured it was safe to finally make sour cream ice cream!! I’ve been anxious to make it for some time now. A dairy ice cream I can actually eat? I haven’t had that since before Abram was born. And anyone that knows how much I love ice cream knows that 7 months without ice cream is like pure torture for me. The basic recipe comes from the GAPS book. This particular version and quantities are from Hanah at Gapalicious. I only made a half batch yesterday and mostly eyeballed quantities. It doesn’t have to be exact. I made vanilla. Then I reserved a small amount and added some cocoa to try making chocolate.

Overall verdict…good! But after several tries now at making ice cream sweetened with honey I’m just not crazy about the flavor it gives vanilla ice cream. I may have to go non-GAPS and use maple syrup next time. Or maybe try using date paste. I am happy with the texture of the ice cream. And I like how safe/healthy it is. It’s basically the same ingredients I use to make smoothies and russian custard…just in a frozen version. I’ll have to play around with flavors. I really like the chocolate version I made (at the moment I allow myself a little cocoa). Crispy nuts would be a nice addition too.

This post is linked to Fat Tuesday on Real Food Forager.

Sour Cream Ice Cream

4 cups sour cream
4 farm fresh eggs, separated
1/2 cup raw honey
1/4 cup vanilla extract

In a small bowl whip the eggs whites until stiff. In a separate bowl whip egg yolks until pale yellow and thickened.

In a large bowl whip together sour cream and honey until well combined and fluffy. Add the yolks and vanilla to the whipped cream and mix well. Then gently fold in the egg whites. Transfer the ice cream to a freezable container and freeze until solid.
If you want to make any variations just add your favorite combination in place of the vanilla.

Salted Caramel Dip (grain free, dairy free, egg free, GAPS-legal)

One of the moms at my MOPS table posted a link for a caramel dip from My New Roots on FB recently. It looked super easy and sounded good. Plus it’s sugar free and GAPS legal!! Last week I finally got around to buying dates so I could try it. I made it yesterday morning. It was very easy to make. And it’s good!! Honestly I like it better plain than using it for an apple dip. Although I did really enjoy it last night as a dip for dried apple chips. It’s a great way to get your sugar fix without actually eating sugar. I’m glad I tried this. It’s a healthy, delicious treat. Plus I discovered that I love dates!! And they are great natural sweeteners. I will be using dates more often for sure. I even reserved the soaking liquid and have been using it to sweeten smoothies and drinks.

Unfortunately Rebecca doesn’t like it. I think it’s a texture issue with her. I’m guessing if I made it a bit thicker (increased the ratio of nuts to dates) she’d like it. Maybe I’ll try that next time.

This is a great treat for breakfast, a snack or a dessert.

This post is linked to Fat Tuesday at Real Food Forager.

Salted Caramel Dip
Makes 2 cups

2 cups pitted Medjool dates
¼ cup raw nut or seed butter (almond, cashew, sesame tahini, sunflower) (I used some whole crispy almonds and some natural crunchy peanut butter…I used more than 1/4 cup)
4 tsp. fresh lemon juice
½ tsp. sea salt (or more to taste)
1 vanilla bean, seeds scraped (I used a little splash of homemade vanilla)
soaking water as needed

1. Soak dates for at least 4 hours in water.
2. Drain dates, reserving the soak water**.
3. Add dates to a food processor along with all other ingredients, except for soaking water. Blend on high until dates are smooth. Add soaking water, 1 tablespoon at a time until the desired consistency is reached (for a sauce to pour or drizzle, add more water).
4. Store in an airtight glass container in the fridge for up to a week.

**Reserve remaining soaking water to use as a simple syrup/sweetener.

Fat-filled Vegetables/GAPS Gravy

I started this post yesterday, but didn’t have time to finish it. I wanted to share how I’ve been eating my vegetbales lately and trying to get more fat in my diet. Then when I was making dinner last night I thought…I guess this will work for more than just vegetables. This is kind of a recipe for gravy…that does not contain grains! I used it for our leftover turkey…yum! It was an accidental recipe…just happened to try something last week since I was trying to increase my fat and vegetable intake. I figured I’d make vegetables in broth and have kind of a soup. I let my veggies cook longer than usual because I was busy with the kids. I returned to the pan pleasantly surprised. I ended up with something very delicious and nutritious. Love it when that happens. Here’s the rest of the post I started yesterday…
————————
This isn’t much of a recipe, but I wanted to share a method I’ve been using lately to easily get lots of healthy fat, broth and well cooked veggies in my diet…without feeling like I’m floating away from drinking tons of broth, etc. I add a couple Tbsp. of lard, butter, coconut oil to a pan (anywhere from 2 – 6 Tbsp. total). And some homemade stock or broth. I also add some frozen (could be fresh too) vegetables and seasoning. I let it simmer for a while until the vegggies absorb some of the liquid and it reduces until it’s almost like a gravy. So flavorful! And so nutritious.
———————–
You can use this method without the veggies as well and just let the sauce reduce then serve it over anything you like or even stir it into soup. Adjust quantities for more people.

This stems from some information I read on the GAPS site. Dr. CMB says that to get rid of constipation you need to activate the parasympathetic nervous system. To do this “we need more animal fat with meals, and we need to change the ratio of vegetables to meats in our meals (less muscle meats and more vegetables with gelatinous meats.” So I am working on it. But then I also read that ” many cases of persistent constipation are due to poor bile production. When there is not enough bile, the fats in the food do not digest well; instead they react with salts and form soap in the gut, causing constipation.” So I have to find the right balance. To help with the bile production Dr. CMB suggests you “introduce freshly pressed juices earlier in the diet, from stage 2: start from carrot juice first thing in the morning and take your cod liver oil at the same time. The juice will stimulate bile production.”

It’s all about experimenting and learning what works for your body and finding the right balance. I’m still working on it. I think I need to add some foods to increase my bile production so I can handle fats better. But at least I have a great recipe for a healthy, safe gravy now. This is also great for kids if you have a hard time getting them to drink broth. The broth gets super concentrated…but it’s still there.

This post is linked to Fat Tuesday at Real Food Forager.

Fattened Veggies/GAPS Gravy
1 serving

2-6 Tbsp. fat of choice (I like to use a combo of butter, lard and coconut oil)
1/2 – 3/4 cup broth or stock
1 cup favorite frozen or fresh veggies
seasoning (I use sea salt and garlic powder)

Combine all ingredients in a small pan. Simmer for about 20 minutes, or until all the liquid reduces to a gravy.