Home » Kid-friendly Recipes » Page 43

Category: Kid-friendly Recipes

It is so important to cook homemade, healthy food. But it’s not always easy to find kid-friendly recipes.

That’s where I come in. I’ve got hundreds of kid-tested and approved recipes that won’t keep you in the kitchen for hours or stretch your budget too thin.

I focus on allergy-friendly, whole foods. But I always cook with kids in mind. I take all sorts of feeding challenges into account too.

We’ve dealt with every allergy possible, so I’ve created recipes that are gluten free, nut free, dairy free, egg free, soy free, corn free, coconut free and more!

Kid-friendly recipes don’t have to be boring. And they are certainly not limited to chicken nuggets and pizza every night.

A nourished child will enjoy a wide variety of fruits, vegetables, proteins, carbohydrates and fats. Get your kids in the kitchen with you and start cooking! Have fun with food and your kids will learn to love eating.

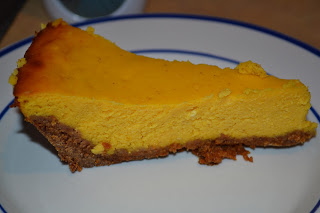
Pumpkin Cheese Pie/Cake (Updated Version)

A while back I made a dessert called pumpkin cheese pie. It was pretty simple. Mostly buy a few things, mix them and bake them.

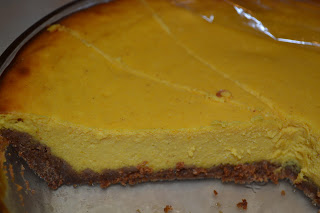
I decided to make it again for Thanksgiving this year…but revamp it to make it a lot healthier. My husband says I should call it pumpkin cheesecake to sound a bit more appetizing. And since I did a graham cracker crust instead of a pie crust that seems more fitting. 

Since I was hosting Thanksgiving and only had so much time I did have to buy one canned ingredient…sweetened condensed milk. I would have liked to make my own, but I just didn’t have time. I did find a great recipe for it, though, at Kitchen Stewardship. You could also replace the sweetened condensed milk with a little milk and honey.

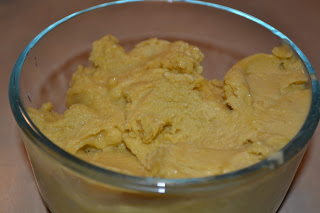
The crust was made of homemade graham crackers, and the filling was made with homemade cream cheese (from our homemade yogurt) and freshly baked pumpkin. Topped with a dollop of homemade raw whipped cream. Perfect.

Since this makes a lot of filling I used the extra to make a mini crustless version. It’s perfect if you are grain free.

This is a cross between pumpkin pie and cheesecake. It’s the perfect holiday dessert!

Pumpkin Cheesecake

2 cups graham cracker crumbs (I make the crumbs in the food processor)
1/2 cup melted butter or coconut oil (or a combination)
3 Tbsp. honey or cane sugar (optional…depends how sweet you like your crust)

1 cup cream cheese
2 cups pureed pumpkin
1 (14 oz.) can sweetened condensed milk (or make your own!) OR 1 cup whole milk + 2 Tbsp. honey
3 eggs
1 tsp. pumpkin pie spice

Prep ahead:

whole wheat graham crackers or gluten free graham crackers then make into crumbs
yogurt…then turn into cream cheese
pureed pumpkin

When ready to bake:

Combine graham cracker crumbs with butter/oil and sugar. Pat into pie dish. Put in refrigerator to get firm (this can be done well in advance).

Preheat oven to 350

Mix cream cheese and condensed milk until smooth (with mixer). Stir in the pumpkin, spice and eggs. Mix until well combined.

Pour into crust (this makes a lot…if you have extra pour it into a small baking dish to make a mini version).

Bake for 1 hour, or until knife inserted 1″ from the edge comes out clean. Refrigerate until ready to serve. Serve plain or with whipped cream.

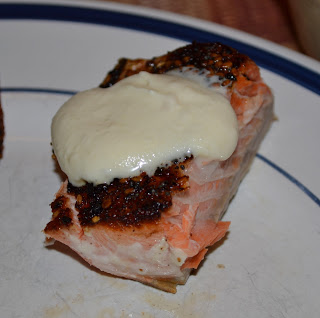
Everything Salmon (grain free, dairy free, egg free, nut free, GAPS-legal)

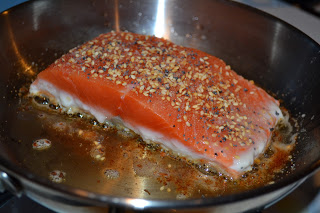
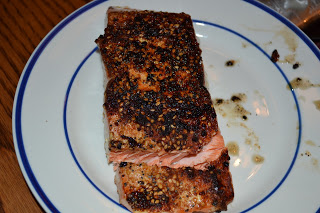
On Rachael Ray recently I saw her make a recipe called everything salmon. It’s a play on an everything bagel…same flavors, different medium. It sounded good, so I made it for dinner last night. It was super simple. And Justin and I both really liked it. Rebecca wouldn’t eat it…”it’s too spicy!” For her spice means any strong flavor. I didn’t have the ingredients for the sauce, so I made my own. Basically a sour cream and onion sauce (the “cream cheese” component). I think it paired really well with the salmon. Plus I got to eat lots of yummy, healthy raw sour cream with my dinner. Definitely a very healthy dish with fatty fish and cultured raw dairy. A keeper. The measurements are in Racheal Ray terms (“palmful”). Just season to your taste.

This post is linked to Fat Tuesday at Real Food Forager.

Everything Salmon

A palmful dehydrated onion

A palmful poppy seed
A palmful sesame seeds
A palmful garlic flakes
Sea salt and pepper
1 Tbsp. EVOO (I used lard and butter)
2 salmon fillets
——————————
3 scallions
1/2 cup low-fat sour cream or low-fat Greek yogurt
(I used raw sour cream and salt, garlic powder and dried minced onion)

Sprinkle salmon fillets with onion, poppy seeds, sesame seeds, garlic flakes, salt and pepper. In a small skillet, heat EVOO, one turn of the pan. Place salmon skin-side down and cook for about 2-3 minutes. Flip and finish cooking another 2-3 minutes, until cooked to your desired doneness.

While salmon is cooking, mix sour cream with scallions in a small bowl.

Avocado Bird’s Nest (grain free, dairy free, nut free, GAPS-legal)

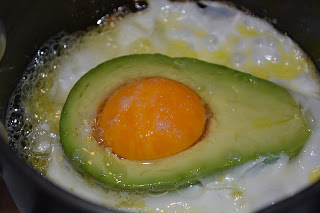
I’ve been watching The Next Iron Chef on Food Network. And on this week’s episode someone made a bird’s nest using avocado. I’ve seen it done with bread, zucchini, various things. But never avocado. I thought it sounded like a neat idea since one of my absolute favorite things to eat with egg is avocado. So I made one for lunch yesterday. Yum!! I don’t think I’ve ever actually cooked an avocado. But they are quite good when they get warmed. This is a quick, nutritious breakfast, lunch or dinner. I let the yolk sit in the hole and the whites run over the edges to cook. I’ll definitely make this again! I added a little extra butter and another egg yolk to mine for extra nutrition just before taking it out of the pan.

This post is linked to Fat Tuesday at Real Food Forager.

Avocado Bird’s Nest

1/2 avocado
1 egg
butter, coconut oil or lard for cooking

Remove pit from avocado. Slice a little piece off the back of the avocado so it can sit flat. Make the hole large enough for an egg yolk all the way through. Heat butter in skillet. Add avocado. Crack egg over avacado so the yolk sits in the hole. Push the whites over the edge/onto the pan surface to cook. Sprinkle with salt. When the whites are cooked remove the bird’s nest.

Creme Caramel (grain free, dairy free, nut free, GAPS-legal)

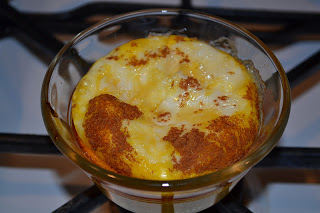
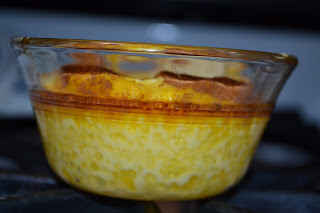
Last night I tried another GAPS book recipe. It’s another single serving, nourishing dessert. This one does require baking, so you have to plan ahead. But the preparation takes about 30 seconds. This creme caramel turned out well. It’s kind of custard-like in the middle. Slightly sweet. I enjoyed it. And it was good to get another egg in my diet at the end of the day. I’m sure I’ll make this again. I bet it would be good with a little sweetened sour cream on top. If you’re looking for ways to get your kids to eat eggs give this a try. I ate this right out of the oven. Next time I’ll let it cool a while first I think.

Creme Caramel
serves 1

1 egg
3 Tbsp. water
1 tsp. honey
cinnamon to taste

Mix egg, water and honey in small oven safe dish. Sprinkle with cinnamon. Bake at 300 degrees for 30-40 minutes. Let cool slightly before serving.

Russian Custard (grain free, dairy free, nut free, GAPS-legal)

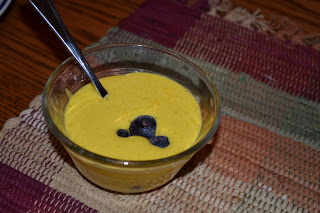
I often read through the recipes in the GAPS book. There really aren’t many. And I don’t know that I’ve actually made any of them aside from the ferments and cultured products. But there are a couple simple recipes I’ve been wanting to try. I finally got around to one of them last night…Russian custard. Sounds fancy. But really it’s just egg yolks 😛  The recipe is for single servings, which is nice.

I made one serving for my snack last night. A nice little nourishing treat.

This is a great snack for those days where you want something just a little sweet. There is only a little bit of honey. And you can make it in minutes. You can serve it over fruit or mix things in. I added a few sweet cherries and some crispy almonds. It can also be used in recipes (*see note from GAPS below). I’m glad I finally tried this. Any way to get extra egg yolks down is good. By having a little treat I added 2 to my intake yesterday. Love it.

This is also a great substitute if you can’t have yogurt. I like to add fruit and homemade cereal for a little parfait.

I use my hand mixer to make this. It gets thick and gooey. My whole family enjoys it. I have adjusted the recipe to my liking. This is how I make one serving for an easy breakfast or snack.

 
 Russian Custard

serves 1

3 egg yolks
1 Tbsp. honey

Whip egg yolks and honey until it gets thick and almost white, about 3-5 minutes with a hand mixer, depending on the speed of the mixer.

*”Russian custard can be used instead of cream on fruit or you can serve it on its own with some chopped nuts on the top or pieces of fruit. It can also be used instead of cream in making cakes.”

Cooked Yogurt

After making raw yogurt I decided to try a cooked version. At first it looks hard. It seems like there are a lot of steps. But in reality it’s very easy. You’re basically doing 4 things – heat the milk, let it cool a little, add the culture and let it sit. So it’s really not much more work than making raw yogurt. You just have to heat it and let it cool a little first. I followed my SIL’s directions at Today’s Menu Take It Or Leave It. Very easy to follow.

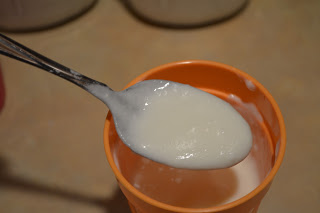
And the outcome…great! This produced a very smooth, creamy, flavorful yogurt. I made some vanilla yogurt with it for Justin this morning. He thought it tasted great. I’m sure Rebecca will like it too. This will definitely be my go-to method for making yogurt. I still want to play around a little with how long I let it culture. This batch was very mild…not much of the tang of normal plain yogurt. But that’s not a bad thing.

I’m so glad I FINALLY got around to making my own yogurt (I’ve been wanting to for about a year now…don’t know why I never did). There are several reasons I’m glad to be making this now. First…it’s healthy! Lots of healthy bacteria. Second…it will save a lot of money! That’s a big one. I buy yogurt every week. It’s one of the biggest expenses. I hate spending so much for so little. This will be a huge money saver…especially since we’ve got all this great raw milk to use up anyway. Third, it will save me trips to the store 🙂  I don’t have to worry about running out of yogurt. If we’re getting low I can just make more. This will really help me with my goal of only going to the grocery store every other week instead of every week. Finally, you can make any flavor you want 🙂  If I want to buy organic full fat yogurt at the store I can get plain, vanilla, strawberry or chocolate. That’s it. Now I can make whatever flavors we want. I made vanilla this morning. But we can make any kind of fruit flavor, peanut butter, chocolate, apple cinnamon, whatever. And I don’t have to worry about feeding my family unhealthy sugar. I can use honey or maple syrup to sweeten it…and I’m sure less of it than the boughten variety.

Now that we have this great yogurt I am so anxious for me to be able to eat it!! Yogurt is one of the foods I miss the most from going dairy free. I used to eat it daily. Hopefully in a week or two I can add it back in. That will be a happy day 🙂

If you have never made your own yogurt I encourage you to try it! It really is very easy. It does not require much hands on time at all. And if you get it going in the morning you can have some ready by the afternoon. I thought it was easy the first time I made it. So I’m sure it will be even easier now that I know how. Even if you don’t have raw milk, you can make your own yogurt. It will still be healthy and much cheaper.

I didn’t take step-by-step photos like my SIL did. If you want a really detailed description check out her blog. Here’s the slightly condensed version of her recipe.

Homemade Cooked Yogurt

Ingredients and Equipment:

milk (preferably raw, but pasteurized willwork…NOT ultra-pasteurized)
yogurt starter (I used some plain, boughten yogurt for my first batch and I’ll use my homemade yogurt from now on)

quart sized jars with lids
large stockpot with lid
water for boiling
a dish rag
a thermometer, either candy or meat will work
a large cooler or incubator
a large towel

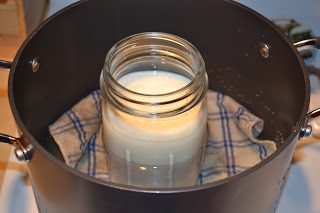
Put your dish rag in the bottom of your stockpot. This helps stabilize the jar(s). Then pour milk into your quart sized jars. Make sure you leave about an inch or so of room from the top of the jar. Place the jar in the pot and fill the stockpot with water at least half-way up side of jar. You’ll want to bring this to a boil. I place my thermometer in the water so that it sterilizes.

Once your water is boiling, turn the heat down a little, to around medium to medium-high… enough to maintain a good simmer. Move your thermometer to a jar of milk… having it in the water till boiling sterilized it. You’ll want to keep it going until it reaches 180-185 degrees (this only took a few minutes for me once the water was boiling).

Once the milk has reached 180-185 degrees, turn the burner off. Lift the jar out of the water and onto the counter. Put a cap on the jar. Do not pour the water out of the pot. Put a lid on the pot and place it inside your cooler, making sure the towel surrounds the pot so that it doesn’t melt your cooler. Leave the lid on the pot and put the lid on your cooler.

Now you wait for your milk to come down to between 90 – 120 degrees. I’ve found that between 100 – 105 is optimal for me… this makes a nice, thick, creamy yogurt. This takes about an hour and a half. You can either check the temperature with your thermometer once you think it could be reaching the proper temperature. Or you can just feel the outside of the jar. Remember that our body temperature is 98.6 degrees, so you want it to be slightly warmer than your hands. If its too hot to hold, its not there yet. I checked the temperature with the thermometer the first time I made yogurt, but haven’t checked it since. I just go by feeling the heat on the outside of the jar.

Once your milk is at the proper incubation temperature, you will need to stir in about 2 Tablespoons of yogurt starter into each quart of milk. Be sure to stir gently, as you are stirring in living organisms and don’t want to jostle them too much.

Next, place the lid back on the jar tightly. Open up your cooler and place the jar(s) into your cooler next to the warm pot of water. Remove the lid from the pot and be sure the towel is nestled around your jar(s). Place the lid back on the cooler and let it incubate for 4-24 hours.

The longer it sits, the more tart it will get. I’ve incubated my yogurt for anywhere from 6 hours to 14 hours. I found that at 6 hours, it wasn’t quite thick enough for my liking. 8 hours seemed to produce a good, thick, creamy yogurt with a hint of sweetness. I didn’t notice much change in thickness by increasing the time, just a more tart taste. I try to only let mine go 8-10 hours normally (I did 8 hours…it was good!)

Once your incubation time is up, transfer your jar(s) to the freezer for about an hour. Don’t open them before you do, just put them right in there. After that time is up, transfer them to the refrigerator. You’ll get a true sense of the consistency of the yogurt at this point. Don’t be alarmed if there is some whey on top of the yogurt, this is totally normal. Just stir it into the yogurt.

Before you start enjoying your new batch of yogurt, be sure to reserve a couple tablespoons of your fresh yogurt in a small glass jar in the fridge. This will be your yogurt starter for your next batch. And remember to reserve more than a couple tablespoons if you make more than a quart at a time.

———————-
That is a lot of wording for a simple process. Here is the shortened version:

1. Heat milk in a quart jar in a pot of boiling water to 180 -185 degrees.
2. Remove from water, cover and let milk cool on counter to 90 – 120 degrees.
3. Stir in yogurt culture.
4. Cover and keep in a warm spot for 4-24 hours to culture.
5. Chill.

Flavored Yogurt

You can mix in anything you like to flavor your homemade yogurt. To add extra nutrition stir in egg yolks and coconut oil. Here are some ideas:

Vanilla – stir in homemade vanilla extract and maple syrup or honey
Fruit – blueberry, strawberry, cherry, raspberry, peach, banana (you can mush up whole fruit, mix in pureed fruit or use homemade fruit preserves/jams) with honey or maple syrup for sweetness if needed
Apple Cinnamon – stir in homemade apple butter and honey
Pumpkin Pie – stir in pumpkin puree, honey and cinnamon (we’ve even added a little crumbled pie crust for a real treat)
Peanut Butter – stir in smooth, natural peanut butter and honey (or any kind of homemade nut butter) (add a few chocolate chips for a real treat/dessert)

Raw Yogurt

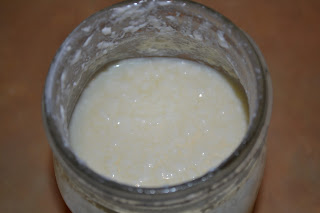
Last week I made my first batch of yogurt. I decided to start with the easiest method. After all, if the easiest method produces good yogurt it makes sense to make it that way. Plus the easiest method keeps the milk raw and unheated. So you don’t lose anything. I followed the method in the GAPS book. You basically put some yogurt into milk and let it sit. That’s it.

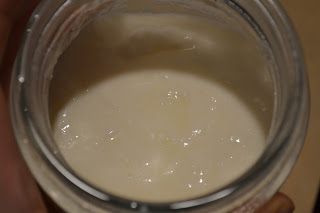
Did it work? Yes, it did. But it doesn’t produce quite the texture we like. It was quite lumpy/loose (you can tell in the picture). It doesn’t get smooth when you stir it. It tastes fine. And honestly I’d be ok eating it. But I think Justin and Rebecca weren’t crazy about it. They have more of a texture issue than I do. So this will not be my regular method of making yogurt. But I might do it once in a while for myself or if I’m really in a rush and don’t have time to make the cooked version. From what I understand this method is more unpredictable…meaning it will turn out differently every time. I bet this yogurt would work well for making cottage cheese.

I’m glad I tried this. Who knew making yogurt could be so easy?

Raw Yogurt

1 quart raw milk
1/4 cup plain, live yogurt

Mix yogurt into milk. Cover. Place jar in a warm, dark spot to culture for 24 hours. Transfer to fridge.

Guest Post – Pumpkin Smoothie…Plus GAPS-legal Pumpkin Ice Cream!

Today I have a guest post at Gapalicious! My first guest post. Go check it out. Thanks, Hannah for asking me!

A little add on to my smoothie post…you can turn it into ice cream! Yesterday morning I made my usual smoothie. Then I put half of it in my ice cream maker. 15 minutes later…GAPS-legal, nourishing pumpkin pie ice cream 🙂  If you don’t have an ice cream maker you can just freeze it as is. I’ve done that too. Still a tasty cold treat 🙂  And you can freeze it in single servings so it’s all set to go when you want it…and so you don’t go overboard 😉  Ice cream is my absolute favorite food…and the hardest thing I had to give up. But I’m finding ways to get my fix again…the healthy way.

Pumpkin Pie Pudding Parfait

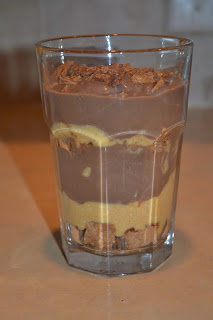
We are currently getting 3 gallons of milk a week. And since I can’t drink milk yet, that is a fair amount to use. So I was trying to think of things to make with it last week and decided to make a batch of creamy chocolate pudding. Then as I was thinking about what dessert to make when we have guests this weekend I thought it would be fun to do a parfait. So I came up with the idea of a pumpkin pie pudding parfait. I didn’t want my first experiment to be on guests, so I made some last night. I made a slightly sweetened pie crust and a pumpkin cream cheese mixture. And layered that with the pudding. Turned out great! When I make it for real I’ll use vanilla pudding. But it was good with chocolate too. And I love that this uses all (well, mostly all…I did use some powdered sugar) good, homemade ingredients…even the cream cheese was from our homemade raw yogurt. I didn’t measure anything when I made the pumpkin filling. And I only made a small batch. So I’ll have to guess on that. This is a fun, healthy, fall dessert.

This post is linked to Fat Tuesday at Real Food Forager.

Pumpkin Pie Pudding Parfait
serves 2

Pie Crust:
1 cup whole wheat flour
1/2 cup palm shortening or butter
1 tsp. salt
1/4 cup cane sugar
1/4 cup water

Mix flour, salt and sugar. Blend in shortening until crumbly. Add water until soft dough forms. Roll onto parchment paper and bake at 375 for about 25-30 minutes…until golden. Let cool.

Pumpkin Filling:
1/2 cup pumpkin
1 cup cream cheese (preferably homemade)
1/2 cup powdered sugar
2 Tbsp. honey or maple syrup

Mix all ingredients together. Adjust sweetness to taste. Chill.

Creamy Vanilla Pudding (Heavenly Homemakers recipe):
(this is a full recipe of pudding…you don’t need this much for 2 parfaits)

2 1/2 cups milk
3 egg yolks
1/2 cup real maple syrup (grade B is best for you) or honey
4 Tbsp. arrowroot powder (or organic corn starch)
1/4 tsp. sea salt
1 Tbsp. butter
1 tsp. vanilla

In a medium saucepan, whisk together milk, egg yolks, maple syrup, arrowroot powder and salt. Cook over medium heat, stirring CONSTANTLY until pudding begins to thicken. Stir over the heat for about 15 more seconds. Remove immediately from the heat, and continue to stir until pudding is creamy. (I use my whisk the whole time for stirring and find this works great!) Add butter and vanilla and continue to stir until mixed. Pour into a glass container, cover and chill.

Parfait:

Just before ready to serve assemble the parfait. Layer chunks of pie crust, pumpkin filling and pudding. Then repeat. End with pie crust.

Sour Cream (GAPS-legal)

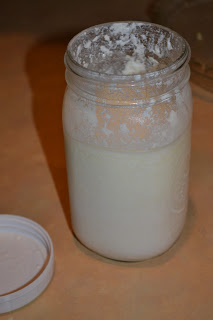
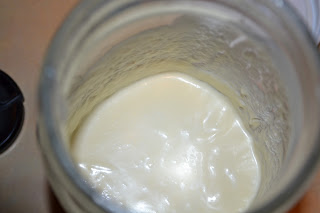
I mentioned before that we started our cow share on Monday. So my dairy adventures continue this week. I made ice cream on Tuesday. Yesterday I made sour cream. I have read various methods on how to do it/what ingredients to use. So I just started experimenting and using what I have on hand. I used a little bit of cream that was left after making ice cream and some plain yogurt for the culture. I was very happy to see that it thickened nicely and has great flavor. I really enjoyed it in my soup this morning. I’ll have to experiment with times and ratios. I was just using a little leftover cream to give it a try this time. I think I used about a pint of cream and a couple Tbsp. of yogurt. It cultured for about 24 hours. Now I understand why it was so hard to find a “recipe” for sour cream. There isn’t really one. Just mix cream with a live culture and let it sour in a warm place. I’ll have to update this post when I figure out our ideal ratios. But I’m thankful that my first attempt went well. Maybe I’ll trying making it with kefir sometime to get even more good bacteria in it. It was almost impossible to take a picture of it. But you get the idea. Today’s adventure…yogurt. Post(s) to come 🙂  Homemade sour cream is allowed already on GAPS intro. So this is a great dairy product to make right away when doing GAPS.

Sour Cream

Cream (preferably raw) (1 pt – 1 qt)
live culture (yogurt, kefir, buttermilk) (2-5 Tbsp.)

Mix cream and yogurt in a glass jar. Cover and place in a warm, dark spot for about 24 hours to culture. Transfer to the refrigerator.