Home » Kid-friendly Recipes » Page 44

Category: Kid-friendly Recipes

It is so important to cook homemade, healthy food. But it’s not always easy to find kid-friendly recipes.

That’s where I come in. I’ve got hundreds of kid-tested and approved recipes that won’t keep you in the kitchen for hours or stretch your budget too thin.

I focus on allergy-friendly, whole foods. But I always cook with kids in mind. I take all sorts of feeding challenges into account too.

We’ve dealt with every allergy possible, so I’ve created recipes that are gluten free, nut free, dairy free, egg free, soy free, corn free, coconut free and more!

Kid-friendly recipes don’t have to be boring. And they are certainly not limited to chicken nuggets and pizza every night.

A nourished child will enjoy a wide variety of fruits, vegetables, proteins, carbohydrates and fats. Get your kids in the kitchen with you and start cooking! Have fun with food and your kids will learn to love eating.

Pepper Steak (Grain Free, Dairy Free, GAPS-legal)

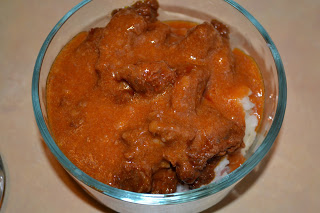
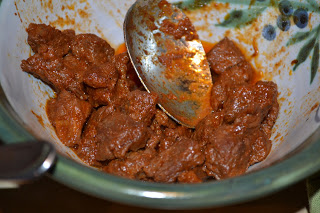
Once in a while I ask Justin if he has any specific requests for dinner. This week he asked for pepper steak and mashed potatoes. So that’s what I made last night. It’s a recipe from my MIL. It’s very simple and very good. I adjusted the ingredients to make it healthier (since I don’t use soy sauce or bouillion). The full recipe is not GAPS legal. But just the steak part is (minus the gravy). The gravy uses flour, so that part is not grain free. But the meat is great without the gravy. There is plenty of sauce in the pan that you can use as gravy even if you don’t thicken it. I put mine on top of squash. Justin had his over mashed potatoes. We all enjoyed it. The one thing I have never understood is why it’s called pepper steak…there is no pepper in it 😛  The recipe calls for round steak. Use whatever you have. I used sirloin because that’s what I could find first buried under all of our pork 😛  This is a great recipe to use with grassfed beef since it simmers a long time and the meat gets very tender. I hadn’t intended to post this recipe at first, but after serving it I realized I should. So I had to take pictures of what was left after dinner and what I packed for Justin’s lunch.

Pepper Steak

1 large steak (round or sirloin work well), cut into chunks
olive oil, coconut oil, lard or palm shortening
1 cup beef broth, chicken broth or water (may need more as it cooks)
1/4 cup ketchup (I used homemade fermented ketchup)
salt and garlic powder to taste

1 Tbsp. flour
1/4 cup cold water

Brown meat in oil in skillet. Add water/broth, ketchup and seasoning. Cover and simmer over low heat 1 1/2 hours. Stir periodically and add extra liquid if it gets too dry. You can serve it like this over veggies, rice or potatoes.

To make gravy: Remove meat from pan. Mix flour and water until the lumps are gone. Gradually add the flour mixture to the sauce in the pan, stirring over low heat. Add more water until desired consistency and quantity of gravy. Serve gravy on the side or add the meat back to the pan for serving.


Pumpkin Ice Cream

We are finally getting raw milk again. We had our first pick up on Monday. So of course on Tuesday we had to make ice cream…in November 😛

I used the usual Nourishing Traditions recipe and tweaked it a little to make pumpkin ice cream. YUM!!! All three of us like it.

I used a combination of honey and syrup for the sweetener to give a neutral flavor.

Pumpkin ice cream made with fresh raw cream is the perfect fall treat. If you can’t have dairy coconut milk would work too.

Pumpkin Spice Ice Cream
Makes 1 quart

3 egg yolks (optional)
1/2 cup maple syrup, honey or cane sugar (or any combination)
2 tsp. vanilla extract
2 1/2 cups heavy cream (preferably raw, not ultrapasteurized)
1/2 cups whole milk (preferably raw, not ultrapasteurized)
1 cup pureed pumpkin
2 tsp. cinnamon
1 tsp. pumpkin pie spice

In a blender mix all of the ingredients. Taste. Make sure it is a little extra sweet (the sweetness decreases when it freezes).

Pour into an ice cream maker and process according to instructions (It took about 20 min. in my Kitchen Aid ice cream maker attachment).

Transfer to a shallow container, cover and store in freezer.

GAPS Dairy Introduction

I cut dairy out of my diet after Abram was born because it seemed to impact his reflux (which has cleared up now) and tummy. But also because it is hard to digest and was causing me problems as well. I would like to try adding it back into my diet now. It is GAPS-legal…depending on the form. And the GAPS book outlines how to gradually introduce dairy…starting with the easiest forms to digest. And it gives advice about which forms are best for those that deal with diarrhea and those that deal with constipation. Since I’d like to start introducing dairy I thought it would be helpful to myself to write down how to go about doing it. Here is the suggested order of introducing dairy products.

1. Ghee
2. Butter
3. Homemade Sour Cream (made with yogurt culture), Homemade Yogurt
4. Homemade Sour Cream (made with kefir culture), Homemade Kefir
5. Cheese (only certain hard varieties. no soft cheeses except for the ones you make from straining homemade yogurt and kefir)
6. Store bought plain yogurt and sour cream
7. Milk (only raw milk…and only tolerated by some people after being on GAPS for quite a while…some people have to just stick to fermented dairy products for life)

This is strictly a dairy introduction method…it’s not exactly the same as the order if you are going through GAPS starting with intro. On intro some people can have whey, yogurt, kefir and sour cream from day 1. This tends to work well for those prone to diarrhea (high protein dairy). For those prone to constipation it is best to hold off on dairy right at the beginning. And then start with high fat dairy (like sour cream, ghee and butter). Ghee is added in stage 2 of intro. Then butter. But whey, yogurt, sour cream and kefir are all options already in stage 1 if you’re doing intro. The method I’m mentioning is for those introducing dairy while on full GAPS. I’m kind of doing a combo. I’m partially doing intro. But I think I’m going to follow the dairy introduction guide instead of the GAPS intro guide.

Why start now? I have been holding off since we currently don’t have access to raw milk. But we are hopefully starting our cow share next week. Once that happens I will be able to make good quality, raw dairy products…that are safe for me! And I think it will be very beneficial for Abram as well. Sometimes I wonder if I’m missing some things in my diet by not eating any dairy. And considering how much he eats and how thin I’ve gotten already it can’t hurt to have some extra fat, vitamins, minerals and calcium in my diet 😛

So I think this is my plan. I have started using ghee this week. After doing that for a bit I’ll try butter. Next will be homemade sour cream. Those three are high fat dairy products that I will hopefully tolerate well. Then I will move on to homemade yogurt. Since I am prone to constipation this will be the real test. Hopefully it will go well. Of course yogurt, kefir and cheese are my favorite dairy products…the ones I tolerate the least 😛  Hopefully following this introduction I will be able to enjoy them again at some point. If yogurt goes well then I’ll move on to kefir and cheese. And hopefully someday be able to drink plain raw milk. I sure miss that! I want to mention that when introducing dairy you should start very small. Like a few teaspoons at a time to see if you react to it.

I’m very excited to try making butter, sour cream and yogurt soon since I’ve never done that before. And very excited to have Rebecca back on raw milk and milk products. Plus it will be saving us money to not have to buy so many dairy products. For now I’m just happy to at least have ghee to spread on things 🙂  After being dairy free for a while even that is a huge treat. It was great on my nut butter bread yesterday and added a real richness to my soup. I’m hoping to try making sour cream ice cream in the near future too when I can have sour cream. I got a great recipe from a fellow GAPS blogger that I’m anxious to try. So happy to have dairy again. I hope Abram and I both handle it well.

Pumpkin Spice Cake

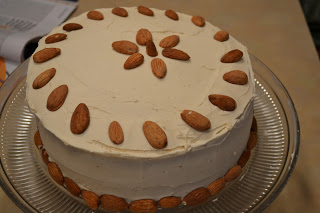
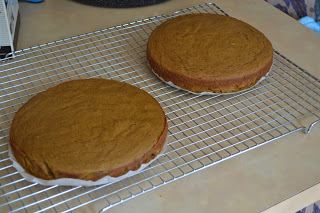
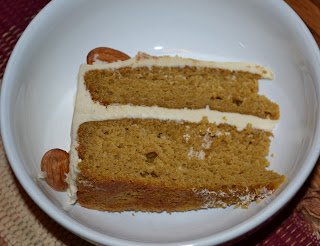
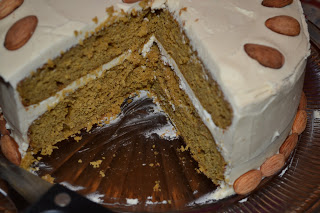
My in-laws are here this weekend, and today happens to be my father-in-law’s birthday. So I wanted to make a cake. I had thought about doing carrot cake. Then I wondered if I could add pumpkin and make a pumpkin carrot cake. I did some searching and found a recipe for pumpkin spice cake on Joy of Baking. So I went with that. And I’m glad I did. It turned out great!! Very easy to make. Rebecca helped me with it. Everyone enjoyed it last night. The original recipe uses a cream cheese frosting. I forgot to buy cream cheese this week 😛  So I made a maple buttercream. It worked very well with the pumpkin cake. I went for a simple decoration with crispy almonds (mostly due to time constraints…i.e. a fussy baby and a 3 year old trying to help :P). I had to have a taste too of course. I can’t make a new cake and not taste it 😛  It’s times like this that I wish I could eat grains 🙂  Yum!!! This is a perfect fall treat. Not the best frosting job…but I had a little helper 🙂  Since we are doing letter F this week Rebecca got to Frost Grandpa’s cake. We still need to work on her technique a bit 😉

Pumpkin Spice Cake

1/2 cup unsalted butter, room temperature
1 1/4 cups light brown sugar
2 large eggs
1 cup fresh or canned pure pumpkin (about 1/2 of a 15 ounce can)
1 tsp. pure vanilla extract
2 cups sifted cake flour
1/4 tsp. baking powder
1 tsp. baking soda
1/2 tsp. salt
1/2 tsp. ground cinnamon
1/4 tsp. ground ginger
1/8 tsp. ground cloves
1/2 cup buttermilk, room temperature

Note: To make your own buttermilk combine 1/2 cup of milk with 1/2 tablespoon vinegar or lemon juice. Stir and let stand for 10 minutes before using.

For Garnish:

1/2 cup toasted and chopped walnuts or pecans

1 recipe maple buttercream (see recipe below) or cream cheese frosting

Preheat the oven to 350 degrees F and place rack in center of oven. Butter and flour (or spray with Baker’s Joy) two – 8 inch (20 cm) cake pans (I use palm shortening and parchment paper…cake comes out perfectly every single time)

In the bowl of your electric mixer (or with a hand mixer), beat the butter and sugar until light and fluffy (about 2-3 minutes). Add the eggs, one at a time, mixing well after each addition. Scrape down the sides of the bowl as needed. Add the pumpkin puree and vanilla extract and beat until incorporated.

In a separate bowl, whisk together the flour, baking soda, baking powder, salt and spices. Add the flour mixture and buttermilk alternately to the pumpkin batter, in three additions, beginning and ending with the flour mixture. Divide the batter in half and then pour the batter into the prepared pans. Bake for approximately 25 – 30 minutes, or until a toothpick inserted in the center of the cake comes out clean. Cool on a wire rack for 10 minutes and then invert and remove the cakes from their pans. Cool completely before frosting.

Place one of the cake layers, top side down, on a serving plate. Frost with a layer of icing. Place the second cake, top side down, onto the first layer and frost the top and sides of the cake. Garnish with chopped nuts, if desired. Refrigerate but bring to room temperature before serving.

Maple Buttercream

1/2 cup butter, softened
1/2 cup palm shortening
3 cups powdered sugar
1/4 cup pure maple syrup
2 – 4 Tbsp. milk

Cream butter and shortening. Add sugar and maple syrup. Mix well. Add milk a little at a time until desired consistency. Use immediately or store in refrigerator.

Pumpkin Nut Butter Bread

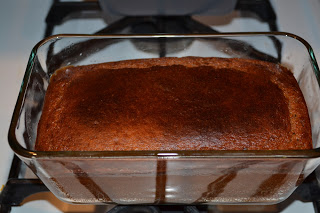
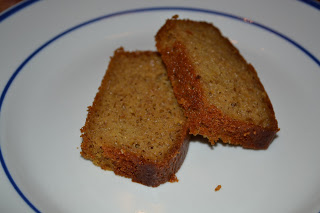
Yesterday I made a pumpkin version of nut butter bread to go with our chicken apple chili. I just kind of guessed on quantities, lowering the pb to add the pumpkin. So I wasn’t sure how it would turn out. But it worked great! Rebecca loves it. We’ll see if our guests like it tonight 🙂

Pumpkin Nut Butter Bread

3/4 cup peanut butter (or any nut butter)
3/4 cups pumpkin
3 eggs
pinch salt
1/2 tsp. baking soda
1 tsp. cinnamon
1/4 tsp. pumpkin pie spice
1/3 – 1/2 cup honey

Blend all ingredients in a bowl (I do it by hand). Pour into a greased loaf pan (1 large or 2 smaller). Bake at 350 for 45-70 minutes (depends on the size of pan you’re using…just keep an eye on it that it doesn’t get too dark on top).

Crockpot Stuffed Peppers (Grain Free, Dairy Free, Nut Free, GAPS-legal)

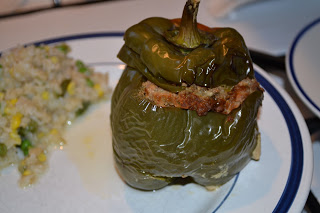
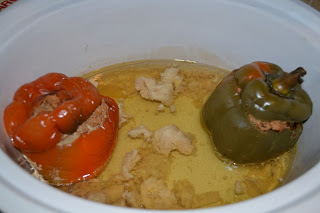
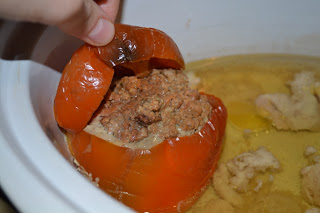
Yesterday I had a doctor appt. in the afternoon, so I needed a prep ahead dinner. I decided to try making stuffed peppers in the crockpot. I didn’t really use a recipe. I just made a simple meat mixture and stuffed it into a couple peppers. 

It cooked all day in the crockp0t. What a super easy, super tasty dinner! I just ate the meat since peppers bother my little one. But it was still good. Even my daughter ate all of hers.

The peppers get super tender. You can peel the skins right off (a big bonus for kids). You can mix just about anything into the meat…rice, veggies, beans, cheese. I kept it very simple so that I could eat it. I used one pound of meat for 2 large peppers…that could easily serve 4 people.

Crockpot Stuffed Peppers

2 large bell peppers, top cut off, seeds/insides removed
1 lb. ground beef
1 egg
1/3 cup ketchup
2 Tbsp. mustard
salt and garlic powder to taste
(any other fillings you like)

Prepare the peppers.

Mix the meat with the remaining ingredients. Stuff the meat mixture into the peppers.

Put the tops on the peppers.

Put a small amount of water in the bottom of the crockpot. Place the peppers inside (I found it worked well to have them against the sides since they get soft and can tip while cooking).

Cover and cook on high 4-8 hours or low 6-12 hours (I think I had mine on high for a few hours then switched it to low for the rest of the day…about 9 hours total).

Dutch Letter Cookies

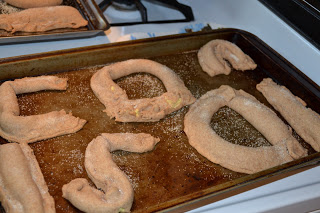
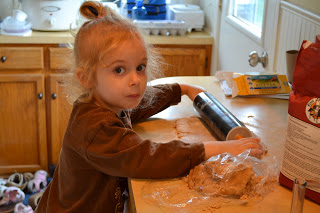
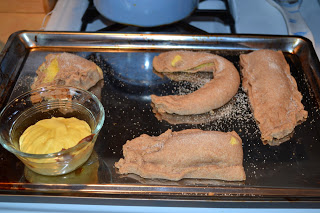
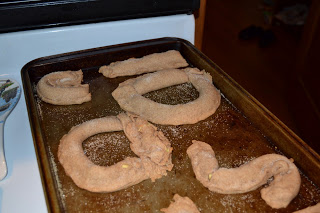
This week we are learning the letter D. So what’s more fitting for a Dutch girl than Dutch letter cookies? 🙂  I had actually never heard of these before. I just did a search for Dutch desserts and found this recipe on All Recipes.  So Rebecca and I made them yesterday. They turned out pretty well. I can’t say they are the easiest cookie to make with a small child. But still a fun one. The dough and filling are super easy to make. Rebecca liked helping with that. The assembly was a bit tougher. I think I should have made my dough a tiny bit wetter and rolled it a bit thinner. But the phone was ringing, baby crying, little hands trying to help and eat all the dough, etc. So I had to just do what I could. I didn’t end up making many actual letters. But we managed a couple. In the end they turned out ok and taste pretty good (this coming from someone who doesn’t really like almond/almond paste). I forgot to do the milk/sugar topping until after I had them in the oven already. So I quick took them out and just sprinkled a little sugar on. No milk. I had some filling leftover, so I just put that in a little dish and baked it with the cookies. That’s the grain free version of this dessert 😛  A fun experiment. Maybe we’ll try it again when Rebecca is a little older. And we have more time to roll and shape the cookies properly. I didn’t take any good pics since I was dealing with a baby that just woke up, trying to finish the cookies and get Rebecca to eat lunch.

Dutch Letter Cookies

2 cups all-purpose flour (I used organic whole wheat flour)
1/4 tsp. salt
1 cup butter, chilled
1/3 cup ice water
8 ounces almond paste
1 egg
1/4 cup white sugar (I used organic cane sugar)
2 Tbsp. milk
1/3 cup granulated sugar for decoration (I used organic cane sugar)

In a medium bowl, stir together flour and salt. Cut in chilled butter until the texture of the mix is mealy with pea sized lumps (I made the dough in my food processor). Add ice water gradually while stirring with a wooden spoon until dough forms a ball. Cover your dough and chill for 1/2 hour.

To make filling, in a small bowl, mix together the almond paste and sugar. Add the egg and mix well.

Preheat oven to 375 degrees F (190 degrees C ). On a lightly floured surface, roll out the dough to 1/4 to 1/8 inch thickness, making as square as possible (I did this in two batches). Cut the dough into strips 6 inches long and 1 1/2 inches wide (about the width of a ruler) (I made my strips much longer, else you’d never be able to shape it into a letter). Using a pastry bag or a strong plastic bag with a small hole cut from the corner, pipe almond filling down the center of the strip starting halfway down. Fold the top half of the strip down over the almond filling to match the bottom (I experimented with lengths/folds. And I made sure to seal the edges well).

Shape strips into desired letters, brush with milk and sprinkle with sugar. Bake in preheated oven for about 20 minutes or until golden brown. Remove from the oven and cool on a wire rack.

Easy Chicken Nuggets…Another Way to Use a Roasted Chicken (grain free, dairy free, GAPS-legal)

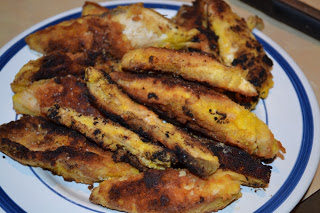
On Sunday I roasted a chicken. I love having all the leftover meat to use in other meals. I had planned to make chicken nuggets this week. I usually use boneless skinless chicken breasts for that. Cut them, bread them, fry them. But when I deboned my chicken this week I had very limited time so most of the meat was still in large chunks. Then I thought, wouldn’t it be easier to use that to make my chicken nuggets? So I tried it last night…AWESOME!! Best chicken nuggets I’ve ever made I think. The meat is already cooked, so you just have to fry it until you have a nice crust. So quick and easy…and much less messy…no raw chicken to deal with. I broke the meat into the size of strips/nuggets I thought looked right. Then I dipped them in egg, rolled them in coconut flour and pan fried them in a combo of lard and palm shortening. Delicious!! I served them with homemade honey mustard. It reminded me of eating chicken strips at Fudruckers when I was younger…the flavor anyway…this meat was far superior 🙂  Rebecca absolutely loved them as well. I don’t know that I’ve seen her eat/chew her food that quickly in a long time 🙂  I can’t wait to have leftovers for lunch today. Dip them in honey mustard with extra egg yolk mixed in…tons of nutrition. I think I know what I’ll be making with leftover roasted chicken in the future 🙂  You could even make a huge batch and freeze them for even easier meals on busy nights. Just warm and serve.

This post is linked to Grain Free Real Food Linky Carnival at Real Food Forager.

Easy Chicken Nuggets

Leftover roasted chicken in large chunks
1 egg, beaten
1/4 – 1/2 cup coconut flour
salt to taste
lard, palm shortening, coconut oil, tallow or butter for frying

Break chicken into strips/chunks. Coat chicken in egg. Then in flour/salt mixture. Fry in hot grease/oil in cast iron skillet, a few minutes on each side until golden and crispy. Serve with honey mustard or fermented ketchup.

Easy GAPS Snack Ideas

At the beginning of the month I said I wanted to make a snack list so that I wouldn’t run out of ideas (meals are easy…snacks are tough). It seems I’m always wondering what to eat between meals when I just need a little something. So here are some GAPS legal snacks. I can’t eat all of them at the moment (the ones with dairy). But they are still good options for a healthy snack for our family. I’ll keep adding to the list as I think of things. And I’ll add links to recipes as I have time.

GAPS Snacks

pesto
navy bean hummus
crispy nuts
hard boiled eggs
leftover roasted veggies
raw veggies
coconut milk ice cream
kefir smoothies
nut milk smoothies
zucchini cakes
nut butter pancakes
nut butter w/ fruit or on pancakes
gf granola
frozen fruit
fresh fruit
honey butter or honey coconut oil
roasted beets
olives
cheese crisps
leftovers
gf baked goods – scones, breakfast cookies, muffins, bread
chicken, salmon, tuna or egg salad
salmon cakes
broth
apple raisin bars

Stuffed Squash (egg free, dairy free, grain free, GAPS-legal)

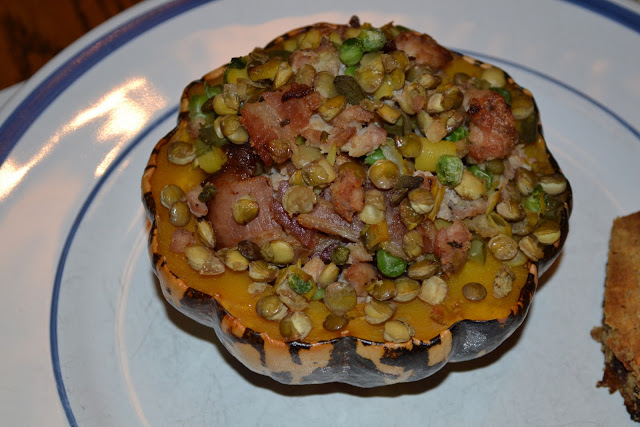
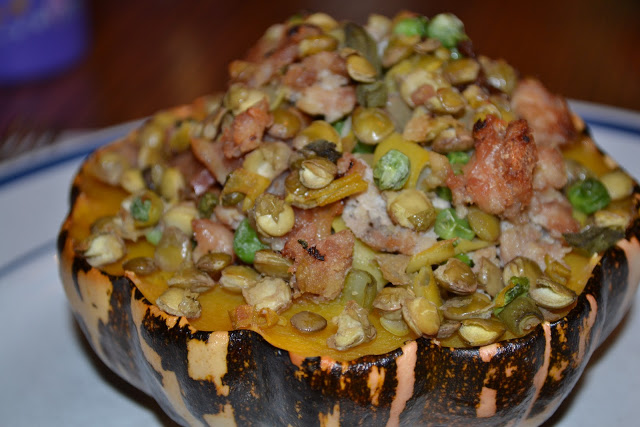
Last night for dinner I made stuffed squash. This isn’t totally a new recipe. I made stuffed squash before (and it was awesome!). But I made a grain free version yesterday. So I figured I’d do a new post for it. Same concept, though. Just bake the squash and stuff it with what you like, really. I made ours very filling with lentils, cut up green beans, peas, homemade chicken sausage and bacon. And I topped Justin’s with parmesan cheese. I love that these are a whole meal in one (although I did serve other stuff with them). They do take a bit of work to prep all of the components before assembling. But it’s worth the effort 🙂  I did not add any nuts this time, but pine nuts, pistachios or some other chopped nuts add a nice crunch to it.

This post is linked to Grain Free Real Food Linky Carnival at Real Food Forager.

Stuffed Squash

1 small squash of choice (Buttercup works well)
3 slices bacon, cooked
1/3 cup cooked sausage
1/2 cup cooked lentils
cooked, chopped veggies (I just used some leftovers we had in the fridge. If you are using fresh you can saute them first. Peppers, onions, carrots, mushrooms and celery would all be good).
Seasoning to taste (I used sea salt and garlic powder)
cheese (optional…you can mix it into the fill and/or grate it on top)
nuts (optional)

Cut squash in half. Scoop out seeds. Place on baking sheet. Sprinkle with salt. Cover with foil. Fill bottom of pan with water. Bake at 400 until fully cooked (1 – 11/2 hours). Mix remaining ingredients. Stuff each half of the squash with the filling. Top with cheese if desired. Bake at 350 for 20 minutes.