Home » Kid-friendly Recipes » Page 55

Category: Kid-friendly Recipes

It is so important to cook homemade, healthy food. But it’s not always easy to find kid-friendly recipes.

That’s where I come in. I’ve got hundreds of kid-tested and approved recipes that won’t keep you in the kitchen for hours or stretch your budget too thin.

I focus on allergy-friendly, whole foods. But I always cook with kids in mind. I take all sorts of feeding challenges into account too.

We’ve dealt with every allergy possible, so I’ve created recipes that are gluten free, nut free, dairy free, egg free, soy free, corn free, coconut free and more!

Kid-friendly recipes don’t have to be boring. And they are certainly not limited to chicken nuggets and pizza every night.

A nourished child will enjoy a wide variety of fruits, vegetables, proteins, carbohydrates and fats. Get your kids in the kitchen with you and start cooking! Have fun with food and your kids will learn to love eating.

Real Fruit Popsicles

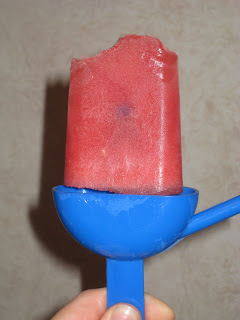
This isn’t much of a recipe, but I thought I’d share it anyway. Just a fun, healthy summer treat. I cut up a whole watermelon the other day. And realized we could never eat that much watermelon before it goes bad. Sometimes when I have a lot I freeze it. I love to eat it frozen. And Rebecca and I will both eat it when it has thawed. But we already have some in the freezer. So I thought about what else I could do with extra watermelon. And I decided to try making popsicles with it. And it worked! All I did was puree some watermelon and freeze it. That’s it. Nothing added, no extra sugar. Just pure watermelon. And they are so good! Rebecca devoured one last night. I wish I had more strawberries now. They would be even better with strawberry puree mixed in. I have a little more watermelon to use up. I think I’ll make a few more popsicles. And I might see if I can make some watermelon fruit leather too. Just thought I’d pass along this simple idea for a healthy summer treat. It’s especially good for kids or for anyone trying to cut down on added sugar. I think this would work for a lot of fruits. And you can mix them too. I’ll have to try different flavors. Excuse the picture…Rebecca had already taken a couple bites 🙂

Watermelon (Fruit) Popsicles

watermelon

Puree watermelon in a blender. Pour into popsicle molds or cups w/ popsicle sticks. Freeze. Enjoy 🙂

Fermented Pickled Cucumbers

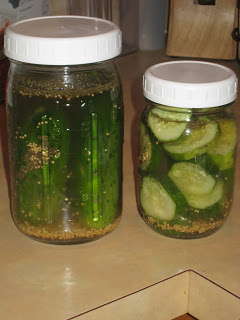
My latest experiment in fermentation is pickled cucumbers. These sound pretty safe 🙂  I assume they’ll just taste like dill pickles. They are very easy to make. I got 6 pickling cucumbers at the farmer’s market this week. 4 whole cucmbers fit in a quart jar. I sliced the other 2 and put them in a pint jar. I’ll update in a few days with the verdict. This is another Nourishing Traditions recipe.

*Edited 7-6-10: I tried one of the pickle slices on Sunday. Pretty good. Definitely tastes like a dill pickle! I still have to try the whole pickle…when I’m in the mood for a lot more pickle 😛
Pickled Cucumbers

4-5 pickling cucumbers or 15-20 gherkins
1 Tbsp. mustard seeds
2 Tbsp. fresh dill, snipped (I used dried dill since that what I have)
1 Tbsp. sea salt
4 Tbsp. whey (use an additional 1 Tbsp. salt if you don’t have any whey)
1 cup filtered water

Wash cucumbers well and place in a quart-sized, wide-mouth mason jar. Combine remaining ingredients and pour over cucumbers, adding more water if necessary to cover the cucumbers. The top of the liquid should be at least 1″ below the top of the jar. Cover tightly and keep at room temp for about 3 days before transferring to cold storage.

Variation: Pickled Cucmber Slices
Wash cucumbers well and slice at 1/4″ intervals. Proceed with recipe. Pickles will be ready for cold storage after about 2 days at room temp.

Vanilla Ice Cream

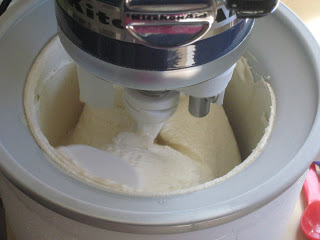
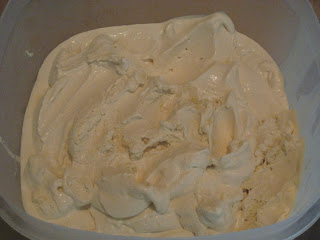
This morning Rebecca and I made a batch of vanilla ice cream. It is the Nourishing Traditions recipe. I never knew making good ice cream could be this easy. I mixed all the ingredients by hand in a large measuring cup and poured it into my ice cream maker. It took about 20 min. from start to finish (with Rebecca helping) to have yummy ice cream. I haven’t gotten a chance to shop for arrowroot yet, so I added about a tsp. of cornstarch. But it’s probably not necessary. And I also haven’t had a chance to pick up really good cream. But even without that I know this is still way better for us than just about any ice cream I can buy. It doesn’t even have sugar in it, just maple syrup. And it tastes unbelievable! I can’t wait to try some when it’s totally firm. I didn’t end up adding any carob chips to it, but I will when I make it again sometime. Now I just need to make some carob sauce to pour over top 🙂  The homemade chocolate sauce (using good ingredients) I have in the fridge will have to do for now 🙂  Hopefully once I get all the good/correct ingredients I’ll calculate the cost to see how this compares to buying ice cream. I didn’t end up taking any pictures after it had firmed up and then we scooped some out. It scooped very nicely. And is so so good!

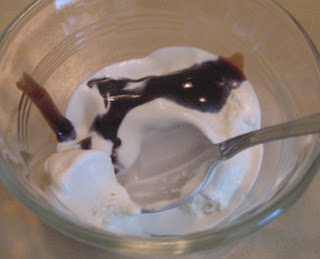
Right after making the ice cream…Rebecca had to try some “with chocolate” as always.

Vanilla Ice Cream
Makes 1 quart

3 egg yolks
1/2 cup maple syrup
1 Tbsp. vanilla extract
1 Tbsp. arrowroot
3 cups heavy cream, not ultrapasteurized

Beat egg yolks and blend in remaining ingrdients (I just did this all by hand with a whisk). Pour into an ice cream maker and process according to instructions (It took about 15 min. in my Kitchen Aid ice cream maker attachment). Transfer to a shallow plastic container, cover and store in freezer.

Kishk

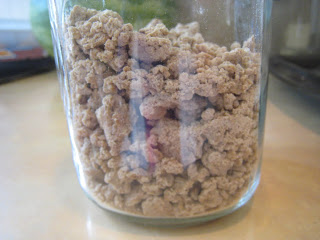
Nourishing Traditions uses kishk in multiple recipes. And it is the only cold cereal it recommends. Plus it’s an alternative to my soaked/dried oats that I use for granola. So I thought I’d give it a try. You are supposed to make it with bulgur or cracked wheat. I made bulgur…flour. I forgot to do a course grind after I sprouted and dried my wheat. I did a fine grind as always. But I used it anyway. This tastes pretty much the same as soaked/dried oats. It has a pretty strong sour taste from the yogurt. I don’t know that I could eat this plain with milk on it. But I am excited to try using it to make granola. And I hope to try it again using both bulgur and cracked wheat. See how it turns out. It will probably just change the texture a bit. This is quite hard. My food processor had a tough time breaking it up. But at least it does’t break your teeth 😛  And making granola with it (all the liquid) will help soften it a bit too I think.

Just a side note that you need to oil your pan VERY well. I used EVOO spread over the whole pan. But I didn’t use parchment paper…I should have. This really stuck to the pan.

I only made a half recipe to try it out.

Here is what NT has to say about kishk:
“This fermented dish comes from the Middle East. It is traditionally added to soups but can also be eaten with milk or cream as a cold breakfast cereal. In fact, it is the only cold breakfast cereal that we can recommend.”

Kishk
Makes 1 quart

4 cups cracked wheat or bulgur
4 cups yogurt

Mix ingredients together in a bowl. Cover and soak at room temp for 24 hours in a dark place. Spread as thinly as possible on oiled cookie sheet and bake at 150 degrees until dry. Place in batches in food processor and pulse until coursely crumbled. Do not overprocess. Store in airtight container in the refrigerator.

Whole Wheat Sourdough English Muffins

My husband is a big fan of english muffins, but I stopped buying them a while ago since they aren’t healthy. Since then I’ve been looking for good recipes for healthy english muffins. I’ve made a couple kinds in the past. One turned out very well…but it was made with white flour.

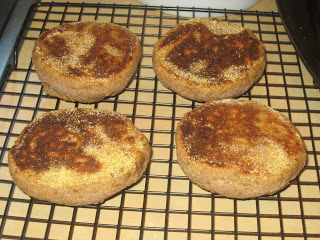
A couple weeks ago when I was searching for new sourdough recipes I found a lot of sourdough english muffin recipes. I’d never thought of that. So I did a search for whole wheat sourdough english muffins. And the first good one I came across was from GNOWFGLINS. I tried it yesterday. The verdict…awesome!!!

My daughter and I shared one with dinner last night, and we had them for breakfast this morning. Yum!! If you don’t like sourdough, you won’t like these. But if you do (like I do…can’t believe how much I love it now), you will definitely like these. And they are quite simple to make.

When I first read the directions it seemed like a long process. But really each step goes very quickly. The first day you just mix a few ingredients together. The second day you add a few more ingredients, shape the muffins, let them rest a bit and cook them. Not much hands on time at all. 

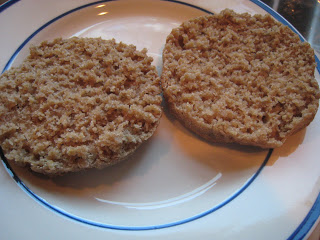
This is a keeper recipe for sure! They are light and moist. Perfect. I used bulgur flour for this batch. Any flour will do…and will produce a slightly different texture. I also added a little ground flax seed. And I used kefir for my liquid…made them even healthier! If you’re looking for a way to use your sourdough starter (or use up some kefir :), give these a try!

Whole Wheat Sourdough English Muffins

1/2 cup sourdough starter (thick or thin)
1 cup liquid (water*, milk, fermented dairy, coconut milk…)
2 cups flour (your choice – bulgur flour, splet, kamut, einkorn, whole wheat)
Add-ins like seeds, dried fruit, or chopped nuts
1 Tbsp. raw honey (or any other sweetener)
3/4 to 1 tsp. sea salt of choice
1 tsp. baking soda

*Note: The English muffins will turn out if you use water instead of full fat or fermented dairy and if you add more flour initially for easier kneading. However, the results will not be as soft on the outside or as tender on the inside once you’ve finished the cooking.

Day 1:

Place 1/2 cup sourdough starter (thick or thin) into a medium size bowl. Pour onto that the 1 cup of liquid. This is the first place where the recipe is very flexible. Your liquid could be water, milk, any fermented dairy, coconut milk… Stir to combine starter and liquid. If your sourdough starter is very stiff, you might need an extra 1/4 cup of liquid.

Once combined, add 2 cups of flour to the mixture. This is the second place where the recipe is very flexible. Use any combination of flours. Stir well to combine. Along with the flour, I often add in a couple Tbsp. of ground flax seed or poppy and caraway seeds (when I make delicious rye sourdough english muffins). The soaking affects the seeds as well as the flour. So, great! Cover and let your dough sit overnight, even up to 24 hours.
 
Day 2:
 
On top of your soaked dough, sprinkle 1 tsp. unrefined sea salt, 1 tsp. baking soda, and 1 Tbsp. honey. Use a wooden spoon to push/cut/stir in your newly added ingredients. Don’t worry about incorporating it perfectly; you will be kneading it in just a moment.

This next part of the directions might feel a little strange, because you are kneading something that could be quite wet. Pour about 1 tablespoon of olive oil onto the counter and spread it around with your hand and then rub hands together. Dump out the dough onto the oiled spot and knead the dough for 2 to 3 minutes. The purpose of this kneading is to incorporate the honey, baking soda, and salt. After this, take a pizza cutter and separate the dough into 8 equal portions. (Be sure you use plenty of oil…the dough is wet and sticky.)

The dough is quite wet. At this time, it is helpful to dust hands with flour before shaping each muffin. You might prefer to use all-purpose flour for this dusting, or sprouted flour where the sprouting has done the work of soaking.

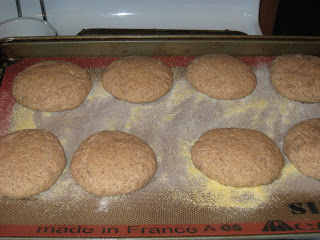
With dusted hands, pick up a portion and gently shape it into your muffin – about 1 finger thick and maybe 2-1/2 inches wide. Size and shape are not important here. Place your muffins on a lightly floured or cornmealed (greased might work if you want to stay away from newly added flour) sheet of wax paper or parchment paper. Cover with a dish towel and let rest for 45 minutes to 1 hour.

About 5 minutes before you want to griddle/skillet your muffins, set the heat to medium. You don’t want the muffins to brown too quickly because the insides need a chance to cook. You do not need to grease the skillet/griddle.

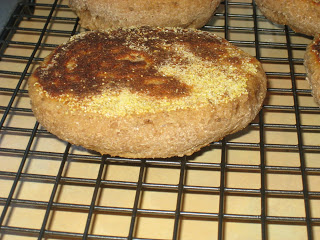
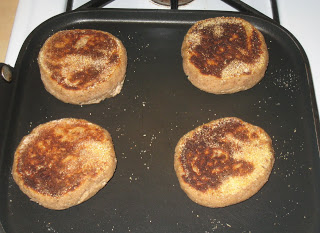
Carefully transfer the muffins onto your heat source. Cook the muffins for about five minutes on each side. You can take a little peek every now and again to make sure the bottoms are not getting too brown. When it is time to flip, do this carefully. Your muffins will plump up beautifully, and you do not want to deflate them by being too rough. Cook for the second five minutes. Now, if you find that the outside edge of your muffin is not as done as you like, feel free to pop these into a 350 degree oven for 5-10 minutes.

They last for at least a week in a sealed container on the counter. They also freeze beautifully. Might want to slice them first. And it most definitely works to double or triple the recipe.

Fruit Leather/Fruit Roll-ups

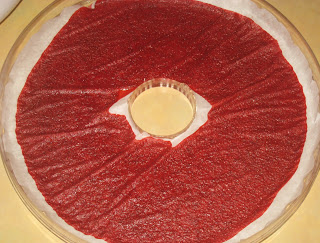
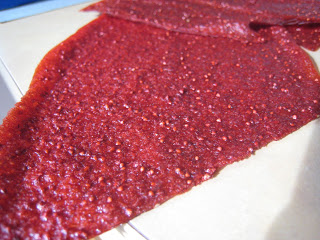
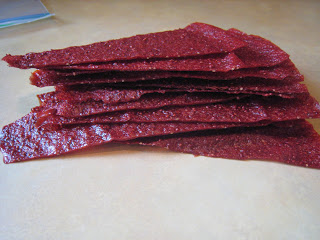
I’ve been brainstorming ways to use up strawberries. Yesterday I came across a “recipe” for fruit roll-ups  on Kat’s food blog (just found her site yesterday…an old friend from an IBS message board we both used for a while). This could not be any easier. And it turns out great!!! Honestly, I think it tastes exactly like the fruit roll-ups I ate growing up…and they were not healthy by any means. This is just strawberries and a drizzle of honey. That’s it! And it doesn’t taste like you’re missing out on anything. A wonderful way to use up my last few strawberries. The best part…Rebecca loves them! I’m planning to make more…when I get more strawberries 🙂  And I can’t wait to try it with other fruit too. I’ll post Kat’s directions. But you really just make it to taste. I didn’t measure anything. Just pureed what I had and added honey to my liking.

Fruit Leather/Fruit Roll-ups

1 1/2 cups strawberries, pureed (I’m assuming this would work just fine with frozen berries too…so we can make them year round…especially since I’m freezing some strawberry puree. Other berries would work too. For some (raspberries, blueberries) you might want to strain them after pureeing.)
1 Tbsp. raw honey

Mix fruit and honey. Poor onto a fruit leather lined tray and dry at 150 for about 10 hours.

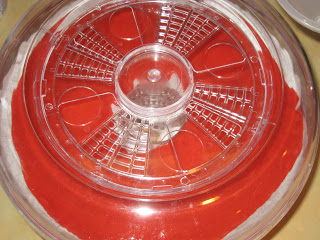
I have a very basic dehydrator…no temp settings, I don’t have any special screens or trays. I just cut a piece of parchment paper to fit a regular tray. Worked just fine. Mine took around 13 hours.

Strawberry Ice Cream

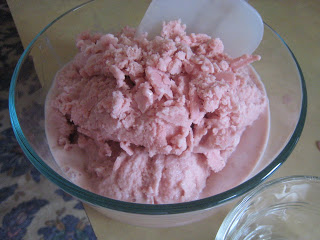
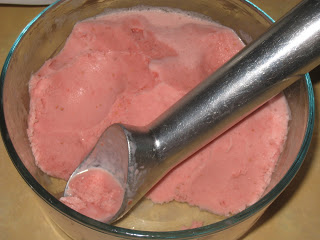
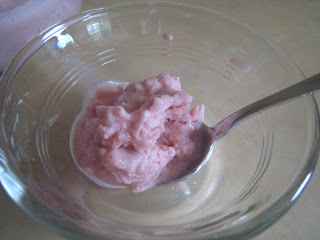
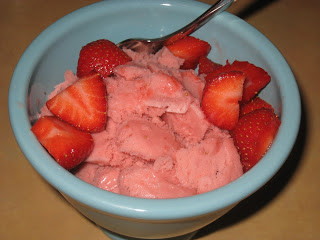
I have a bunch of fresh strawberries in my fridge. And I’ve been debating about what to do with them. For some reason on Wed. strawberry ice cream sounded good. I don’t normally like fruity ice creams. And if I did pick one strawberry would not be my first choice. I am a chocolate girl all the way. But I figured it was worth a try with all of these strawberries. I wanted to make something with what I have in the house. And to make something easy/qiuck. I checked my Nourishing Traditions cookbook. It has several ice cream recipes…that you don’t have to cook!! Love that. If you’re afraid of raw eggs, then the recipes are not for you. I trust the eggs we buy, so I don’t worry about it. Plus, if they are good eggs, raw eggs (the yolks at least…not sure about the whites) are actually good for you. I also wanted to make ice cream using just whole milk, no cream…since I don’t have any cream on hand. So I used the NT recipe as my base and modified it a bit. Turned out pretty good. Not quite as creamy as some ice cream…but I didn’t use cream, remember? 🙂  And I didn’t add any chemicals to make it taste creamy when it’s not 😛  But still good. It’s kind of like a sorbet. It’s a treat that I’ll feel good about eating. Only a few ingredients and all good ones. I did have to use a couple tsp. of corn starch since I don’t have any arrowroot. But it’s such a small amount I’m not worried about that. I’ll have to get arrowroot the next time I grocery shop. I only made a half recipe since I didn’t know if this would work or not. If I make it again maybe I’ll double the recipe to get a decent amount. And I’d like to try it with other berries. Blueberry ice cream sounds great! That’ll be on my list in July. And I want to try making this using the NT vanilla recipe and then adding chopped strawberries at the end too. Justin had some last night with fresh strawberries on top. He thought it was ok…but not really like ice cream. It is for sure a healthy, cool summer treat. But it’s not my final attempt at making a quicky, easy, healthy homemade ice cream. NT calls this berry ice cream and suggests raspberries, boysenberries or blackberries.

And just to give you a little nudge to make homemade ice cream or at least think twice about which kind you buy, here is what NT has to say about some of the ingredients many ice cream manufacturers use. They are not required by law to list the additives used in manufacturing. So most ice cream is synthetic from start to finish. And I personally don’t consider a mixture of antifreeze, oil paint, mitrate solvent and lice killer much of a treat 😛

DIETHYLGLYCOL: A cheap chemical used as an emulsifier instead of eggs is the same chemical used in antifreeze and paint removers.

PIPERONAL: Used in place of vanilla. This chemical is used to kill lice.

ALDEHYDE C-17: Used to flavor cherry ice cream. It is inflammable liquid also used in aniline dyes, plastic and rubber.

ETHYL ACETATE: Used to give ice cream a pineapple flavor – and as a cleaner for leather and textiles; its vapors have been known to cause chronic lung, liver and heart damage.

BUTYRALDEHYDE: Used in nut flavored ice cream. It is one of the ingredients of rubber cement.

AMYL ACETATE: Used for its banana flavor. It is also used as an oil paint solvent.

BENZYL ACETATE: Used for its strawberry flavor. It is a nitrate solvent.

Strawberry Ice Cream/Sorbet

2 cups fresh berries or 10 oz. frozen berries, partially thawed (I used fresh strawberries)
2 egg yolks
1 Tbsp. arrowroot (I substitued corn starch)
2 cups heavy cream, not ultrapasteurized (I used whole milk)
1/2 – 3/4 cup maple syrup

Process berries in food processor (I used a blender) for several minutes. Add egg yolks, cream and arrowroot. Process until well blended. Gradually add maple syrup until desired sweetness is obtained. Pour into an ice cream maker and process according to instructions. Transfer to storage container and store in freezer.

Crockpot Meatloaf

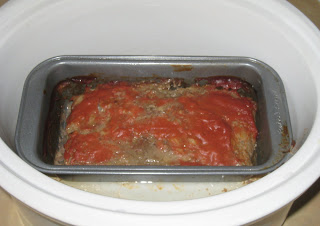
This isn’t really a new recipe. I always use my mom’s recipe for meatloaf. And I posted it a long time ago. It’s definitely a family favorite here. But in the summer I don’t like to use the oven if I don’t have to at dinner time…especially for over an hour. So I wanted to find a new way to make it. And this week in particular I had to…at dinner time on Monday our oven wouldn’t turn on. It happened once a few weeks ago too. Justin is working on fixing it. In the mean time, I remembered seeing a post about crockpot meatloaf on A Year of Crockpotting a long time ago. So I thought I’d give that method a try. I made the meatloaf just like always. Then just stuck the pan right in my crockpot! Pretty neat. And it works. One more way to cook good food in the summer without heating up the house with the oven (we don’t have AC) and without using a microwave. It’s also nice if you need to prep dinner ahead of time. So, this is my usual meatloaf recipe…in the crockpot.

Crockpot Meatloaf

1 1/2 lb. ground beef
3/4 cup oatmeal (I soaked mine the night before)
1 1/2 tsp. salt
1/2 tsp. pepper
1 tsp. garlic powder
1 egg, slightly beaten
3/4 cup milk
1/4 cup diced onion
1/3 cup ketchup
2 Tbsp. brown sugar
1 Tbsp. mustard

Mix beef, oatmeal, salt, pepper, garlic powder, egg, milk and onion. Put in large loaf pan (that will fit in your crockpot). Mix ketchup, brown sugar and mustard. Put on top of meatloaf. Place pan in crockpot. Cook on high 4-5 hours or low 6-8 hours. You can drain some of the grease just by tipping the pan a bit in the crockpot and letting it run out (then you just have to clean the crockpot later).

Crispy Cashews

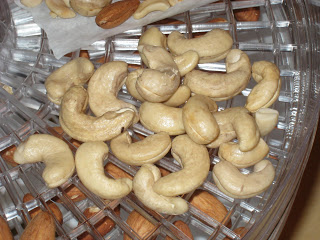
I also made a batch of crispy cashews this week. The method for soaking/drying cashews is slightly different than most nuts  They shouldn’t be soaked for more than 6 hours, and they can be dried at a higher temp. I still did mine in a dehydrator. But I think I’ll try to do them in the oven next time. It took a while for them to dry, and some of them ended up developing a gross taste since they stayed moist too long. I did both whole cashews and cashew pieces. The pieces are cheaper, so I got those to use for cashew butter (I’ll be grinding them anyway, might as well save some money :). The whole cashews will be great for snacks or in salads.

Crispy Cashews

4 cups raw cashews (cashews don’t come truly raw)
1 Tbsp. unrefined sea salt
filtered water

Soak cashews in salt and filtered water for 6 hours (no longer). Drain in a colander. Spread on a baking pan and place in a warm oven (200 – 250 degrees) for 12 – 24 hours, turning occasionally, until completely dry and crisp. Store in an airtight container.

Crispy Almonds

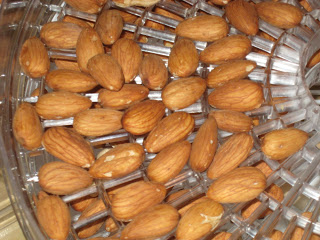
I just finished making my first batch of crispy almonds. It’s pretty much the same recipe for making crispy walnuts, cripsy peanuts and crispy pecans. Yum!!! These are great to eat plain, and I can’t wait to use some to make almond butter. I used almonds with the skins on since that’s what I found at the store. Skinless almonds are easier to digest, though. I’ll have to try them sometime.

Crispy Almonds

4 cups almonds
1 Tbsp. unrefined sea salt
filtered water

Mix almonds, salt and water and leave in a warm place for at least 7 hours (I did about 24 hours). Drain in a colander. Spread on a baking pan and place in warm oven (150 degrees) for 12 – 24 hours, stirring occasionally, until completely dry and crisp. Or you can dry them in a dehydrator. Store in an airtight container.