Home » Kid-friendly Recipes » Page 54

Category: Kid-friendly Recipes

It is so important to cook homemade, healthy food. But it’s not always easy to find kid-friendly recipes.

That’s where I come in. I’ve got hundreds of kid-tested and approved recipes that won’t keep you in the kitchen for hours or stretch your budget too thin.

I focus on allergy-friendly, whole foods. But I always cook with kids in mind. I take all sorts of feeding challenges into account too.

We’ve dealt with every allergy possible, so I’ve created recipes that are gluten free, nut free, dairy free, egg free, soy free, corn free, coconut free and more!

Kid-friendly recipes don’t have to be boring. And they are certainly not limited to chicken nuggets and pizza every night.

A nourished child will enjoy a wide variety of fruits, vegetables, proteins, carbohydrates and fats. Get your kids in the kitchen with you and start cooking! Have fun with food and your kids will learn to love eating.

Bacon Bowls

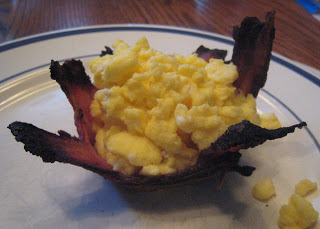
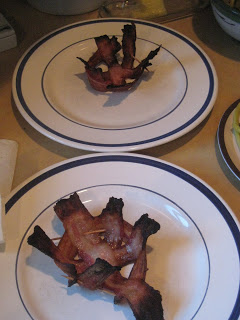
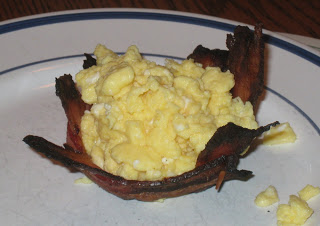
Last recipe post for a little bit. We’re heading out tomorrow morning. So today will be church and packing…no new baking/cooking. The last couple days I’ve been trying to do simple meals, use up a few things (like eggs) and not create a bunch of leftovers. I thought it was a perfect chance to try making bacon bowls 🙂  I saw this recipe a while back on The Coconut Mama and thought it sounded like a really fun idea. Especially since Rebecca LOVES bacon. Seriously. I can’t even put it on her plate because she wouldn’t touch her other food. I have to give her a couple little pieces at a time and then make sure she eats some other stuff before giving her more. The original recipe uses them as salad bowls. But I decided to use them for scrambled eggs. So fun! A little bowl made out of bacon to put your eggs in. And so good!! Especially when you have great bacon from a local farm. This is a great meal when you’re trying to get plenty of animal fat and protein in your diet. A great meal for fertility 🙂  Butter, whole milk and fresh eggs then bacan added to it! There are various ways you can arrange the bacon to create a bowl. Some people weave it. Some spiral it. Just do what you like. I laid mine over our 8 oz. pyrex bowls (turned upside down) and used toothpicks to hold it in place. I put them on a baking sheet to catch all the grease. They worked great for eggs. If you’re doing a salad you might want to weave it/use more bacon so there aren’t big holes. I used 4 slices each for the adult bowls and 3 slices for Rebecca’s. That’s all we had. And, yes, Rebecca ate every bite of hers and would have eaten more if there was any 😛  I bet these would be really good with chicken salad. Maybe that will be what I do next…my cashew avocado chicken salad in bacon bowls. Mmmm.
Bacon Bowls

bacon
mold – small bowls/cups/ramekins (upside down), muffin pan (upside down) or tinfoil balls (I personally don’t like to cook with foil, but this will work if it’s all you have or don’t want to have as much clean up afterwards.)
toothpicks
baking sheet
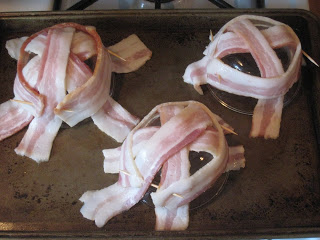
Arrange bacon around bowl/cup/foil and fasten with toothpicks. Place on baking sheet. Bake at 350 for 25 – 45 min.*  Remove with tongs and let cool/drain on paper towel. Fill and enjoy!
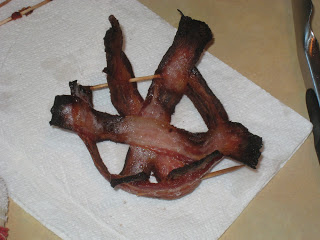
*You’ll have to check these once in a while. The cooking time will depend on the thickness of the bacon and how many layers you have. With 3 layers at one spot on my bowls they took about 40 min.


Whole Wheat Blueberry Muffins

I’m trying to use up the perishable food in our fridge before we leave for vacation. And that includes some plain yogurt. Yesterday morning I made a batch of blueberry sourdough muffins. And Justin asked if I was going to make “regular” blueberry muffins. So I did a search for blueberry muffins that use yogurt and found a great recipe from Simply Recipes. I used whole wheat flour instead of AP. They turned out great! So moist. Rebecca and I had one yesterday morning after baking them…even though we had just had some of the sourdough muffins 😉  A great recipe. A great way to use fresh blueberries. And a great way to use up plain yogurt. I’m assuming the original recipe intends you to use fat free or low fat. I use whole 🙂  The original recipe says it makes 12-16 muffins. I got 22 regular size muffins out of this…filling each muffin cup to the top. Some crispy walnuts would be really good in these. You could also add a cinnamon-sugar topping if you like a really sweet muffin.

Whole Wheat Blueberry Muffins
makes 18 – 22 muffins

3 cups flour (I used whole wheat. You can use all purpose.)
1 Tbsp. baking powder
1/2 tsp. baking soda
1/2 tsp. salt
10 Tbsp. butter, softened (this was impromptu baking, so my butter was cold. I had to warm the butter on the stove. It was partly melted, partly soft. Still worked fine.)
1 cup sugar
2 large eggs
1 tsp. vanilla (This isn’t in the original recipe, but I added it to mine.)
1 1/2 cups plain yogurt (I used whole)
1 tsp. lemon zest
1 1/2 cups blueberries (fresh or frozen, thawed)
1 Tbsp. flour (if using frozen blueberries)

Heat oven to 375. Whisk together the flour, baking powder, baking soda and salt. Set aside. In large bowl cream butter and sugar. Add eggs one at a time, beating after each one. Beat in lemon zest (and vanilla). Add flour mixture and yogurt alternately, 1/3 at a time, beating after each addition, just until blended. Do not over mix. Fold in berries (if using frozen, defrost, drain, and coat with a light dusting of flour.)

Pour batter into greased muffin pan or muffin cups. Bake 25-30 min., until golden brown on top and toothpick comes out clean. Let cool 5 min. and remove from pan.

Sweet Potaote (Veggie) Chips

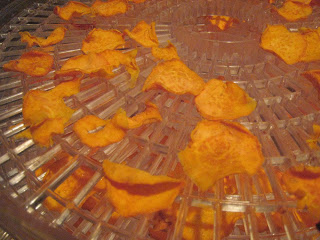
I’ve been wanting to make some healthier non-sweet snacks. And continue to increase my veggie intake. So I decided to start experimenting with veggie chips. So far I’ve only tried making them in my dehydrator. I made zucchini chips earlier this week (which I forgot to take a picture of). They turned out well. Yesterday I made sweet potato chips. Those are really good too! And both are raw, so they still have most of their nutrients. I’m still experimenting and want to try other veggies too. I had some boughten carrot chips recently that I love, so I want to try that for sure. For the zucchini chips I didn’t add anything besides sea salt. For the sweet potato chips I added a little olive oil. I think that worked well. My only issue is figuring out how to keep them crisp. They are crisp right out of the dehydrator, but then they get a little soft. So I’ll have to keep experimenting. And try other ways of making them. I want to try cooking them in coconut oil or palm shortening. I’m excited to have these to take on our trip. A tastey, healthy treat!

Sweet Potato (Veggie*) Chips

Sweet potato, peeled, sliced very thinly (I used my mandolin/food slicer on its lowest setting)
Olive oil
Sea salt

Toss potato slices with oil and salt. Place in single layers on dehydrator trays. Cook until completly dry and crisp.

*The thickness of the veggie depends on the moisture content. So you’ll have to experiment. For sweet potatoes very thin slices work well (low moisture content veggie). For zucchini you need much thicker slices – 1/4 – 1/2″ (high moisture content veggie).

No Bake Carob Cashew Cookies

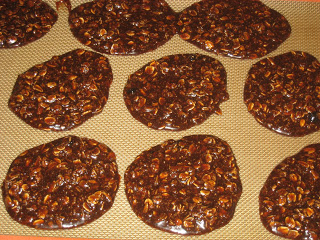
It’s been a while since I’ve actually posted a recipe. Things have been slightly crazy here lately. So there hasn’t been much new…or much of anything at all going on in my kitchen. But I’m getting back into the swing of things now that I’m not stuck on the couch all day. This is actually something I made last week, but I haven’t been able to be at the computer much since then. Last week I decided to experiment with some no bake cookies. I figured it was a good way to get a few cookies in the house without using the oven. And it’s easy for Rebecca to help. I just used my basic no bake cookie recipe. But I used carob instead of cocoa and homemade cashew butter instead of peanut butter. The result…they taste great…but they are so gooey. I have to store them in the freezer to keep them hard. Something about this combo just didn’t quite work right. I’m guessing it’s the cashew butter. Anyway, they look normal and taste fine. And it was a fun experiment. I’ll post my regular cookie recipe. I got it in 6th grade in home economics class 🙂  I’ve made it a million times with no problems…these are generally pretty fool proof. You just have to use the right ingredients.

Chocolate No Bake Cookies

1 cup sugar
1/4 tsp. salt
2 Tbsp. cocoa (or carob)
2 Tbsp. butter
1/4 cup milk
1 cup oatmeal (I used rolled oats this time…just realized I’ve used instant in the past…that may have been part of the problem)
1/4 cup peanut butter
1/2 tsp. vanilla

Mix sugar, salt and cocoa in a medium sauce pan.

Add butter and milk. Bring to a boil, stirring constantly. Continue to cook and stir about 1 1/2 minutes.

Remove from heat. Add remaining ingredients and mix well. Drop by spoonfuls onto wax paper lined baking pan. Chill.

Water Kefir

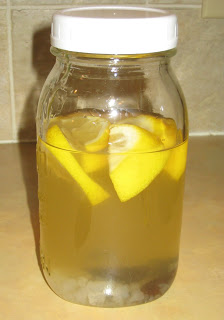
A little while back I started making my own dairy kefir. I’m doing whatever I can to get my gut healthy and repopulated with good bacteria. Kefir is a great way to do that. A wonderful probiotic. I eat dairy kefir every day. Then my SIL tried water kefir. I had heard of that, but hadn’t thought about trying it. Last weekend my SIL and I swapped grains 🙂  I gave her some dairy to try, she gave me some water to try. I made my first batch yesterday. I haven’t tried it yet. But will today. I’m very excited. I love having something to drink that is actually good for you that isn’t just plain water. That’s pretty much all I drink. But it’s nice to have something else sometimes. And I’m hoping this will be a great alternative for Justin. He stopped drinking pop (most of the time) a little while ago in order to get healthier (in general and for our IVF cycle). But sometimes he likes it with things like pizza or when he wants a treat. It’ll be nice to have something to offer. For my first attempt I used the method my SIL posted. I can tell it’s working…lots of bubbles/foaming 🙂  I can’t wait to try adding new flavors to it. I want to try blueberries while they are in season. It’ll be great to be able to have dairy kefir and water kefir every day. So good for your gut.

Water Kefir

Equipment:
*1 large broad opening glass container with lid – exact size depending on the amount of liquid per batch you want to make. If you make the basic recipe exactly as listed below, probably a 1.5 liter capacity container will suffice. If your glass container does not have a lid, you can simply cover it by placing a plate on top or with some plastic wrap or cloth tied with a rubber band around the opening. (I used a quart mason jar… just make sure whatever kind of container you are using, you only fill it 3/4 of the way full!)

*1 strainer and/or pouch – depending on method used (I used a strainer this time, but will be making a pouch eventually)

*1 spoon, non-metallic

*1 glass jar

There are 2 known methods of dealing with the grains: the “loose grains” method and the pouch method. In the first one, you just toss the grains in the glass container along with all the other ingredients, so you will need to use a strainer for pouring each batch and washing the grains afterwards. The pouch method seems easier and better to keep your grains separate from other stuff you may want to add to the recipes and to manage the grains for washing purposes. You can easily make your own pouch with some porous cloth, like gauze or cheesecloth, folding and sewing the sides together, and using a string to tie up the top. Just make sure there’s more than enough room in it for the new grains to grow in there, as they multiply.

Ingredients:

3 Tbsp. water kefir grains
1/4 cup brown sugar or 3 Tbsp. honey (I used honey this time)
1 or 2 dried figs – or any other dried fruit you prefer like dried prunes, apricots, dates, raisins, etc. (I used 2 prunes)
1/2 lemon
1 quart filtered water – only water without any chlorine should be used (it will kill your grains), so tap water is not suitable unless it’s filtered

Mix in the glass container and stir.

There are 3 different brews you can make: 24, 48, and 72 hour fermentations. 72 hours is the maximum a batch should be let to ferment. The longer it is allowed to ferment, the stronger it becomes. Note that the carbonic acid increases each day, so if your container is air-tight sealed, it could explode. (I only filled my jar up 3/4 of the way and did not tighten the lid all the way.) Covering prevent flies or bugs from getting into it. Keep out of direct sunlight and at room temperature.

It is said that 24-hour kefir acts as a laxative…and that 48-hour kefir regulates and re-establishes intestinal function. Once the fermenting time has passed, strain the liquid, squeeze the juice of the half lemon used in it, and it’s ready to drink(you can chill it first).

Wash the grains under running water. You can store them in a small jar of water in the fridge for about a week (add a small amount of sugar to feed them), or else you should dehydrate them. Or if you use them regularly you don’t have to worry about storing them 🙂
 
We’ll see if I can keep up with both kinds of kefir 😛  I’ll update later when I’ve tried this/tried some flavors.

Sourdough Crackers

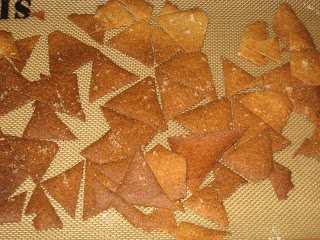
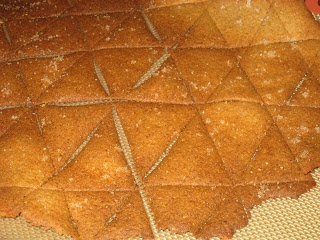
I’m always looking for new ways to use my sourdough starter. A while back I came across a recipe for sourdough crackers that I knew I had to try. We are out of homemade crackers right now. And I need some for our dinner tonight. So I finally gave these a try. I got the recipe from Kitchen Stewardship. They are super easy and taste great! One of the best parts is that the work is split up (so not much active time at one time) and you get a lot for a little work. The dough can make 4 batches of crackers. I made one batch this morning and froze 3 more balls of dough for whenever I need to make a new batch. It only took a few minutes to prep the dough yesterday evening. Then I made the crackers first thing this morning (before the house got hot :). I can’t wait to have them with dinner tonight!

Whole Wheat Sourdough Crackers

1 cup “discarded” sourdough starter (I just used 1 cup of my starter…some people periodcially discard some (which this is referring to), but I don’t)
1/4 cup room temperature lard from pastured pork (or coconut oil or softened butter) (I used coconut oil)
1 cup whole wheat or spelt flour, or as much as you need to make a stiff dough (I used freshly ground bulgur flour)
1/2 tsp. sea salt
Olive oil for brushing
Coarse salt (such as kosher salt) for sprinkling on top (I used fine sea salt and some dried rosemary and garlic powder on some of it)

Step One:
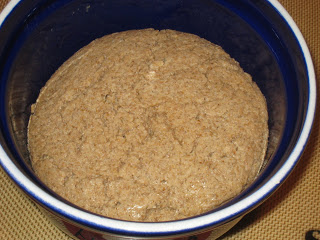
In a large bowl, combine the sourdough and the lard and mix thoroughly. Mix the salt in with 1/4 cup flour and add to the sourdough mixture. Knead it all together in the bowl, adding as much flour as necessary to make a stiff dough. Cover the dough with plastic wrap or put a lid on the bowl to prevent it from drying out. Leave the dough at room temperature for at least seven hours.
Step Two:

Seven or more hours later, preheat the oven to 350 degrees Fahrenheit .

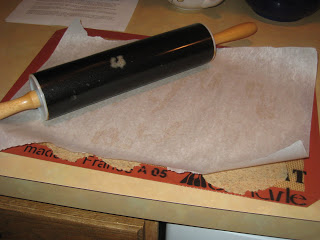
Take a small portion of the dough (about 1/4 cup) and roll it out on a Silpat or other nonstick baking mat using a rolling pin, until it is very thin. (I cut the dough into 4 parts…froze 3 and used one to make the crackers. I used the parchment paper on top method to roll the crackers so they wouldn’t stick to the rolling pin. Worked really well.)

Pour a little bit of olive oil on the rolled out dough and spread it to the edges of the dough with a pastry brush or your hand. Sprinkle liberally with coarse salt. (or any other seasoning you like)

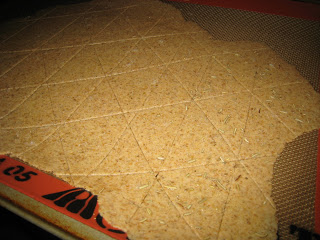
Cut the dough vertically and horizontally into quadrangles with a pizza cutter. Transfer the Silpat onto your baking sheet and bake for 15-20 minutes or until just golden brown. Repeat in batches. The crackers shrink a little bit in the oven, so when you pull out your baking sheet, they will already be separated and you don’t have to try and transfer the delicate dough from one surface to another. (I baked mine for about 14 min., turned off the oven and let them crisp for another 5 min. or so.)
Additional notes: This dough freezes well and you can easily defrost one or two batches at a time so that you can have fresh crackers every day! Divide the dough into four equal portions, shape into balls and then freeze. It takes 1-2 hours for the dough to defrost. Then place it on your Silpat or baking stone and continue with the recipe.

Carob Peanut Butter

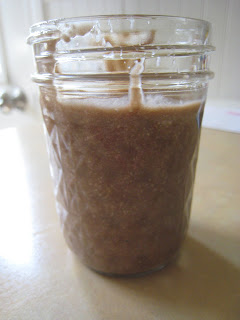
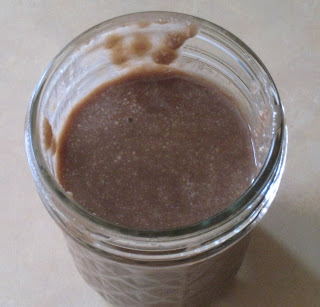
Ever since we went to Traverse City last summer and tasted a variety of nut butters I’ve wanted to experiment with making my own. Now that I’ve gotten good at all the basic nut butters I decided to try something new. Yesterday I made carob peanut butter. I just used the carob sauce I made the other day and added it to ground crispy peanuts. And a little extra carob powder. Simple! It’s pretty good. But the consistency is a little off. But I don’t think that has anything to do with the carob. I used my mini processor to make this instead of my big one…and it doesn’t work as well. So it’s kind of grainy instead of smooth. But it’s still good. Definitely not a strong carob flavor, just subtle. I’ll keep experimenting, but this was pretty good for my first try. I didn’t actually measure anything. But I’ll try to give rough quantities. I made a small batch since I was just using up what crispy peanuts I had left.

Carob Nut Butter
Makes ~ 1 pint

1 cup crispy nuts (peanuts, cashews, almonds)
1/2 tsp. sea salt
2 Tbsp. carob sauce
2 tsp. carob powder (optional)
1/3 cup coconut oil (may need more or less…enough to make it smooth)
honey (to taste…if there isn’t enough sweetness from the carob sauce…I didn’t add any)

Process nuts and salt in food processor until a fine powder forms. Add remaining ingredients and blend until smooth. Add coconut oil, carob powder and honey to taste/to desired consistency. Store in the refrigerator. It will harden due to the coconut oil and butter. Let it come to room temp before serving.

Sloppy Lentils

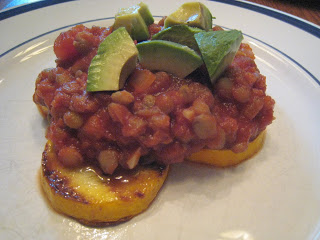
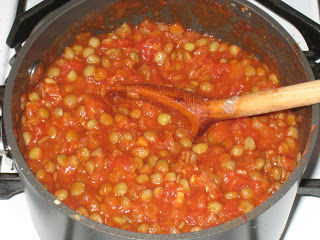
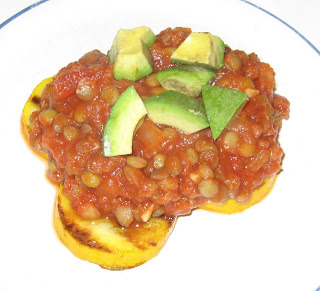
A couple weeks ago my SIL posted a recipe for sloppy lentils. It sounded so good. And it was a perfect meal for us since I’m trying to add more lentils into our diet (so healthy and great for fertility). I tried it last night. Yum!!! All 3 of us loved it. My original plan was to serve it over corn bread…but it’s just too hot to bake right now. I do want to try that sometime, but not this week. I debated about a few ways to serve this and ultimately decided to serve it over grilled yellow zucchini (since I had some fresh from the farmer’s market). Much healthier and much easier on my tummy. It was really good! I served it with shredded cheese and avocado. Justin and Rebecca also used some tortilla chips for scooping. This is a great recipe. Very easy. Very quick prep (as long as you plan ahead). It makes quite a bit, so there are lots of leftovers for lunches or another dinner. And it’s so versatile. You can serve it on buns, over cornbread, in tortillas, with chips, over veggies. So many options. I’m glad I tried this. Loved it.

Sloppy Lentils

3 cups water
1 cup lentils, rinsed (I used green)
salt to taste (optional)
1 cup chopped onion (I used about 1/3 cup)
3 tablespoons olive oil
15 oz can diced tomatoes
1/2-1 (6 ounce) can tomato paste (I used the full can)
2 cloves garlic, minced
1/2 cup ketchup
1 teaspoon mustard powder (I just used regular mustard)
1 tablespoon chili powder (I didn’t add quite this much…Rebecca doesn’t like spicy food)
3-5 tablespoons rapadura, molasses, or honey (I used about 4 Tbsp. brown cane sugar)
1 Tbsp white vinegar
salt and ground black pepper to taste
4 hamburger buns, split (or corn bread, tortillas, chips, veggies)

Soaking Step, optional (I did this): Allow lentils to soak overnight in warm filtered water with 2 Tablespoons acid medium (I used the liquid part of my kefir). Rinse and cook as described below.

Combine water and lentils in a saucepan. Season with salt and pepper, if desired. Bring to a boil over high heat, then reduce heat to medium-low, cover, and simmer until tender, about 30 minutes, stirring occasionally. The cook time may depend on the type of lentil you use, too… so keep that in mind so that you don’t overcook them. (I soaked my lentils the night before and then cooked them in the morning. I proceeded with the recipe at dinner time with a bowl full of already cooked lentils 🙂

Meanwhile, cook the onions in olive oil in a large skillet over medium heat until the onions have softened and are translucent. Add tomatoes, garlic, tomato paste, ketchup, mustard powder, chili powder, sweetener, vinegar, salt and pepper. Simmer 5 to 10 minutes until thickened.

Drain lentils and reserve cooking liquid. Stir lentils into sauce mixture, adding cooking liquid or water as needed to obtain the desired “sloppy joe” consistency. Serve on buns (or other bread or veggie).

Carob Sauce

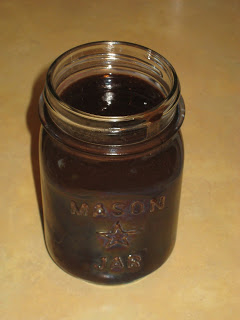
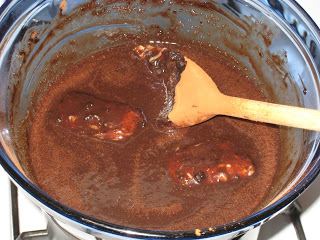
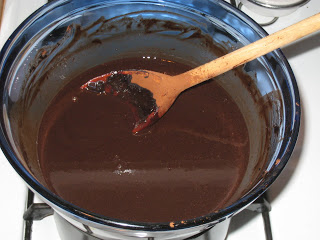
I made my 2nd carob recipe yesterday…carob sauce. With all of this good homemade ice cream and some good cream to use up it was the perfect fit. Plus it was something simple for Rebecca to help with. This was very easy to make. And tastes so good!!! We all had some on ice cream last night for a special 4th of July dessert. Yum! This is another Nourishing Traditions recipe. And a great way to swap carob for cocoa in your diet. A healthy, tastey treat.

Carob Sauce
Makes 2 1/2 cups

2/3 cup carob powder
1/2 cup butter
1/3 cup maple syrup
1 Tbsp. vanilla extract
1 Tbsp. chocolate extract (optional) (I didn’t add this…still tastes plenty chocolatey)
pinch of salt
1 cup cream, not ultrapasteurized

Place all ingredients in the top half of a double boiler.

Cook gently, stirring occasionally with a wooden spoon, until well amalgamated (all blended well :).

Whole Wheat Pizza Dough

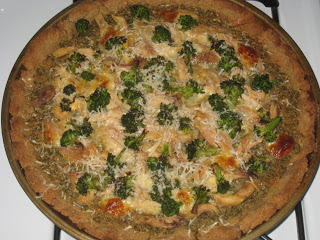
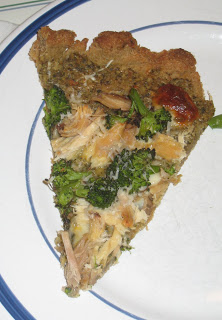
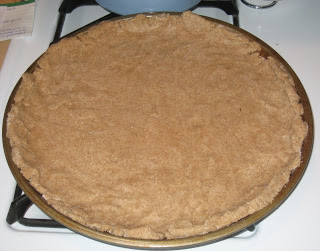
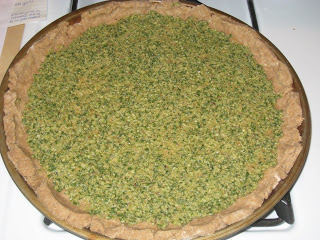
Last night for dinner I made pesto pizza with freshly made basil walnut pesto (our own basil and crispy walnuts). I love making pizza and have a good dough recipe. But last night I wanted to try something easier. I had seen a recipe on Heavenly Homemakers a while back for a no yeast/no rise crust that sounded interesting. So I gave it a try last night. Very good! It’s definitely different than what we’re used to. It’s not bready like most pizza crust. But it’s still very good. And it’s actually a lot easier for Rebecca to eat since it’s not so doughy. She ate almost as much as I did! Normally when we have pizza she doesn’t eat much of it or just eats the toppings. So I’m glad I tried this. I was experimenting since Laura didn’t say how many pizzas this would make. I made a half recipe and used it all for 1 pizza. It was a little more than I needed, but I still used it all. I made a “crust” around the edge like most pizzas have…but that isn’t necessary with this type of dough. Next time I think I’ll try to split it into 2 pizzas and not really have an outer crust. I used my bulgur flour for this, so I didn’t have to worry about the dough not being soaked. I’m guessing you could soak the dough since it’s made with butter and yogurt. I’ll have to try that sometime. This is a good recipe for sure. So quick and easy. And a great way to make pizza when you don’t have time to let dough rise. Or if you just want to avoid using yeast. I think my next experiment will be sourdough pizza dough. Guess I better plan another pizza night 🙂

Whole Wheat Pizza Dough
Makes ~ 6 personal pizzas or 3-4 medium size pizzas

Crust:

3 1/2 cups whole wheat flour (bulgur flour works well)
1 tsp. salt
1 cup plain yogurt
1 cup butter, melted on stove

1.Stir together flour and salt in mixing bowl.
2.Add yogurt and melted butter. Stir well until ball of dough is formed.

To make pizza:
1.Preheat oven to 400 degrees.
3.Sprinkle flour on baking pans to cover surface.
4.Pat dough on pan as thick as you prefer.

5.Spoon on sauce and spread around dough.
6.Top with cheese and favorite toppings.

Bake for 20-25 minutes until cheese is melted and turning golden brown.