Home » Kid-friendly Recipes » Page 53

Category: Kid-friendly Recipes

It is so important to cook homemade, healthy food. But it’s not always easy to find kid-friendly recipes.

That’s where I come in. I’ve got hundreds of kid-tested and approved recipes that won’t keep you in the kitchen for hours or stretch your budget too thin.

I focus on allergy-friendly, whole foods. But I always cook with kids in mind. I take all sorts of feeding challenges into account too.

We’ve dealt with every allergy possible, so I’ve created recipes that are gluten free, nut free, dairy free, egg free, soy free, corn free, coconut free and more!

Kid-friendly recipes don’t have to be boring. And they are certainly not limited to chicken nuggets and pizza every night.

A nourished child will enjoy a wide variety of fruits, vegetables, proteins, carbohydrates and fats. Get your kids in the kitchen with you and start cooking! Have fun with food and your kids will learn to love eating.

Alfredo/Pestofredo Sauce

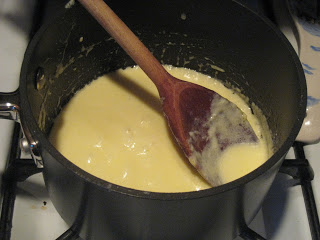
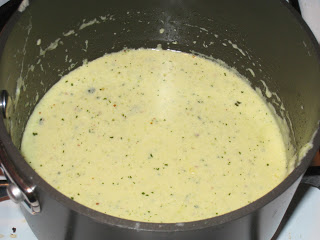
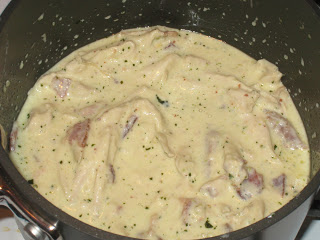
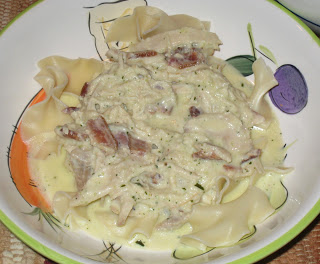
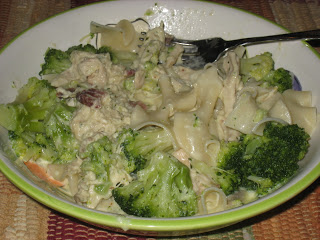
Recently I saw an easy recipe for alfredo sauce posted on Heavenly Homemakers. I haven’t made alfredo sauce in ages. And I have some fresh cream from our raw milk to use. So I thought I’d try it. But I added to it to make it my own recipe 🙂  I turned our alfredo into pestofredo…alfredo sauce with homemade pesto mixed in. And I added shredded chicken and crumbled bacon as well. Yum!!! I served it over egg noodles and added broccoli. We all liked it. The alfredo sauce is very good on its own. And super easy. With pesto added it’s good too. Either way you can’t go wrong. I only made a half batch since I only had 1 cup of cream. I ended up adding some milk to thin it out a little…it got very thick. It made enough for our dinner and a lunch for Justin. Maybe next time I’ll make the full batch…if I have 2 cups of cream handy. I’ll post pictures of all of the stages…alfredo, pestofredo, pestofredo w/ chicken and bacon, over pasta, with broccoli added.

Alfredo/Pestofredo Sauce

1/2 cup butter
One pint of cream (2 cups)
1 garlic clove (I just used some garlic powder)
2 Tbsp. cream cheese
1/2 cup grated parmesan cheese
(3-4 Tbsp. pesto)
(shredded chicken, bacon)

Bring the butter, cream, garlic and cream cheese to a boil. Turn down the heat, simmer and stir for about two minutes. Add the grated cheese and stir until melted. Simmer the sauce for 15-20 minutes until it becomes “thick and saucy”, stirring occasionally.

To make pesto fredo, stir in pesto during last minute of cooking.

Optional – add in chicken and/or bacon during last few minutes of coooking.

Sloppy Cornbread

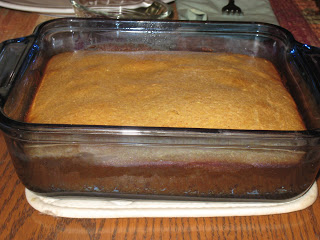
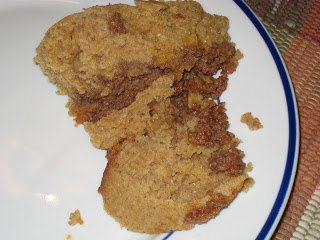
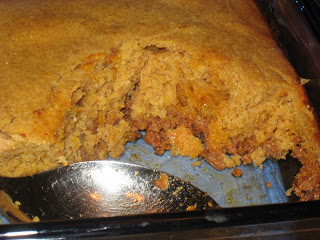
Now that I’m starting to feel better I want to get back into the habit of trying new recipes. So last night I tried another Heavenly Homemakers recipe. It’s called Sloppy Cornbread. It’s basically sloppy joe meat topped with cornbread. Very simple. And very good! We all liked it. And I’m not even a huge sloppy joe fan…but I did like the taste of her sloppy joe recipe. Maybe I’ll use that the next time I make them…and maybe I’ll actually eat it then 🙂  We all really liked this. But the ratio of meat to cornbread was off for us. Way too much cornbread. I only made a half recipe (1 lb. of meat, 1/2 recipe of cornbread). Next time I’ll only do 1/4 recipe of cornbread or less. But definitely a keeper. This would work well with taco meat too…kind of tex mex. I’ll post the recipe with my ratios. You’ll see from the pictures…it mostly looks like cornbread 😛

Sloppy Joe (this is 1/2 recipe)

1 lb. ground meat (beef, turkey, venison or lamb)
1 Tbsp. minced onion (I just used onion powder)
1/2 cup ketchup
1/2 tsp. mustard (I used about 3 tsp.)
1/4 tsp. garlic powder
1/2 Tbsp. worchestershire sauce (I didn’t have any, so I just added extra salt)
sea salt to taste
Brown meat and onion together. Add remaining ingredients, stirring well. Allow mixture to simmer in the skillet for a few minutes.

Cornbread (this is 1/4 recipe)

1/4 cup cornmeal
1/4 cup whole wheat flour
1/4 tsp. baking powder
1/4 tsp. salt
1 egg
1 Tbsp. honey (I used more than this since we like our cornbread a little sweeter)
1 Tbsp. melted butter
1/4 – 1/2 cup buttermilk

Stir dry ingredients. Add wet ingredients and stir.

Sloppy Cornbread

Place sloppy joe meat in 9″ square pan. Top with cornbread batter. Bake for 20 min. at 400. You can sprinkle cheese on top before baking if desired.

Hamburger Pie ("Favorite Casserole")

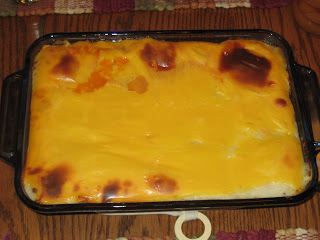
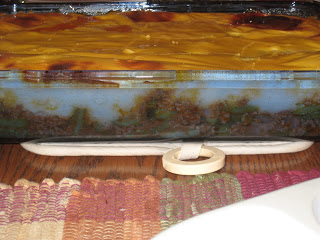
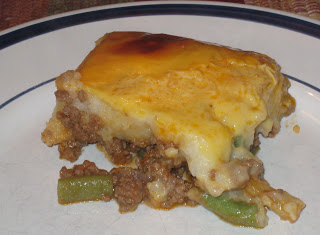
Last night I made an old classic casserole that Justin grew up eating. His family called it favorite casserole, but it’s really hamburger pie. It’s a lot like shepherd’s pie…beef, potatoes and veggies. We haven’t had it in a long time, but Justin requested it. And it kind of sounded good to me 😛  As long as you have mashed potatoes it’s very easy to make.

I made mashed potatoes in the morning so that prep was easy at dinner time. As far as casseroles go this one is pretty good. I wouldn’t call it my “favorite” 😛  But maybe that’s because I didn’t grow up eating it.

Hamburger Pie

1 lb. ground beef
1/4 cup chopped onion
2 cups mashed potatoes (as much as you like, at least enough for a thin layer on top)
1 cup shredded cheese (leave out the cheese to make it dairy free. You can add a thin layer of pureed squash in place of the cheese to add flavor)
salt and peper to taste (I also added garlic powder)
1 cup tomato soup
2 cups cooked green beans (cut or french style)

Heat oven to 350.

Brown the meat with onion. Season. Stir in the beans and soup. Pour into ungreased 11×7 pan (you could use 9×13 if you want a thinner layer…just be sure to have enough potatoes to cover it).

Spread the potatoes over top. Top with cheese. Bake until hot and top is slightly brown (30-40 min.).

Spinach Pie

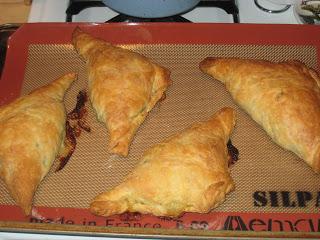
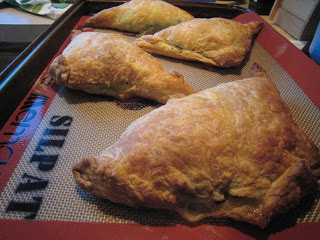
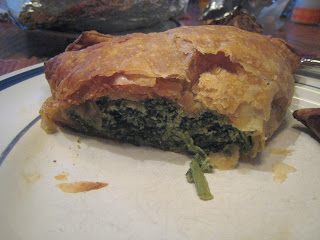
The other day Rebecca was talking about spinach pies. I have no idea where she even heard of them. We’ve never had them at home before. But it actually sounded good to me (rare these days that anything sounds good). And I remembered I had some puff pastry in the freezer (I know, not the healthiest, but not horrible when you eat it once or twice a year 😛  And right now I’ll eat anything that I can stomach.). So I decided to come up with a spinach pie. I did a search for recipes. Pretty much every recipe I saw uses phyllo dough. And almost all of them use feta…which does not appeal to me (and may not be safe?) right now. So I came up with my own recipe. And it turned out great!! All 3 of us loved them. I even managed to eat one for breakfast this morning! First day this week eating something besides toast and peanut butter. I didn’t measure anything while I was making them. Just added what looked/tasted right. So I’ll try to estimate quantities. Definitely something I’ll make again. Very easy and tasty. And a great way to get some spinach into our diets. You could prep them ahead and bake later. These were so easy to make that Rebecca could help me. I love that. While prepping the filling I was worried it would be kind of mushy. But the egg really holds everything together well. It firmed up nicely while baking. Almost like a quiche…but not nearly as eggy. You could easily add some cooked bacon or ham to get more protein in these. But they are plenty satisfying without meat.

Spinach Pie
makes 4 individual pastries

1 sheet puff pastry, thawed
1/3 cup red onion, chopped
10 oz. frozen chopped spinach, thawed, drained
1 cup ricotta cheese
1/2 cup shredded mont. jack cheese
salt and garlic powder to taste
1 egg

Saute onion in olive oil until soft, about 5 min. Add spinach. Cook until soft. Season to taste. Put mixture in bowl. Add cheese (enough to make a creamy mixture) and extra seasoning if necessary. Add egg. Mix.

Heat oven to 400. Roll puff pastry on floured surface until big enough to make 4 large squares. Use pizza cutter or knife to cut into 4 squares. Place 1/4 of filling in middle of each square. Fold in half to make triangle. Pinch edges with fingers. Seal well with edge of fork.

Place on parchment or silpat lined baking sheet. Bake for 35 min. Let cool about 5 min. before cutting into pastries.

Cereal…Why It’s Not As Healthy As You Think…Actually Not Healthy At All

Time to kick off my healthy lifestyle series. I’ll start with something near and dear to me…my beloved cereal 😛  I used to be the cereal queen. I ate it EVERY day for breakfast for years. From college to just a few months ago I’d say there were only a few days I didn’t have cereal for breakfast. And that was either on vacation (and even then I usually had cereal) or if I was too sick. In addition to my daily breakfast I snacked on it pretty much every day. I thought, like most people, that cereal was healthy. Low fat. Lots of vitamins. High fiber (the kind I ate was). But sadly that is not the case.

Cereal is quite unhealthy for multiple reasons.

*The obvious is that some cereals are full of sugar. Especially white processed sugar…which is like an anti-nutrient for your body.

*Then there is the white flour. Again, very processed and hard on your body.

*Most cereals are full of artifical ingredients…colors, sweeteners, flavorings, etc. Anything artifical is foreign to your body and hard to digest…putting more strain on your system.

*All big brand cereals contain GMOs (genetically modified organisms). Another unnatural ingredient that we don’t know the full effects of. GM foods have not been proven safe to eat. They increase the use of pesticides. I personally choose to avoid them at all costs. I want to know exactly what I’m eating…not some mutated, altered food with hidden ingredients. Corn is one of the  most widely used GM food. And it’s in just about every cereal. For example, take a look at the ingredients in a box of Kix (supposedly a great cereal for kids)…whole grain corn, corn meal, sugar, corn bran, salt, brown sugar syrup, trisodium phosphate, vitamin E (and some other added vitamins). It’s all GM corn and processed sugar. How is that good for a growing child?

*Most cereals are fortified with vitamins and minerals. Sounds healthy. But in reality they are synthetic versions that your body can’t really absorb. So they don’t do you much good. Maybe some harm actually.

*Finally, cereal (even the organic “healthy” kind) is toxic. Here is some great information from The Healthy Home Economist:

“To make boxed breakfast cereal in the factory, the grains first have to be subjected to such intense pressure and heat that they actually liquify into a slurry. This slurry allows the grains to be quickly and easily shaped into the puffs, flakes, and other shapes that make each cereal distinct. The manufacturing process used to make boxed cereal is called “extrusion” and it is so violent and denaturing that the proteins in the grains are actually rendered toxic by the process. This is why organic boxed breakfast cereal is more toxic than nonorganic – because organic boxed cereal is whole grain and thereby has more protein in it! The more protein, the more toxic the boxed cereal.”

It saddens me that something so bad for you is marketed as being so healthy…and that so many people (myself included for a long time) buy into it. When in reality it can make you sick and is very hard on your body. It especially saddens me that I ate Fiber One (mixed with various other cereals) almost every single day of my pregnancy with Rebecca. Artifical sweeteners, fake fiber, syntheic vitamins, GMOs, toxic substances. I hope it did not harm her development. I don’t like that cereal is one of the first things most people feed their children…baby cereal, Cheerios, etc. I’ll definitely be taking a different route with any future children. I don’t know for sure, but I’m guessing all of that cereal had an impact on my digestive issues and my infertility. I wish I would have known sooner how bad it was.

I am happy to say I have not eaten cereal for breakfast for a couple months now. It feels good to be cereal free 🙂  My whole body is thanking me. And I’m glad to start my daughter off on a good path eating real food for breakfast from an early age.

It’s tough to make the switch if you’re a die-hard cereal fan like I was. It’s convenient. It tastes good. But it’s worth it to stop eating it. Honestly, now I think most cereal tastes like fake cardboard. It grosses me out. The skim milk I used to pour on my cereal does too 😛  There are so many other healthy things to eat for breakfast. Here are some of our favorite quick breakfasts. You can make them ahead of time or prep things ahead so breakfast only takes minutes to prepare in the morning.

chewy granola bars
crunchy granola bars
homemade granola
grain free granola
giant breakfast cookies
soaked coffee cake
oatmeal muffins
blueberry muffins
strawberry bread
fresh fruit w/ cream cheese dip
kefir smoothie

Scrambled, fried or hard boiled eggs are always good too.

Enjoy a healthy breakfast every day…that does not include boxed cereal 🙂

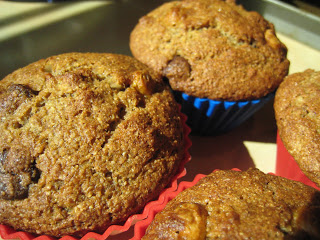
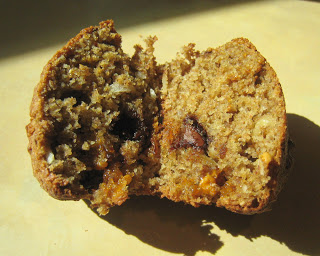
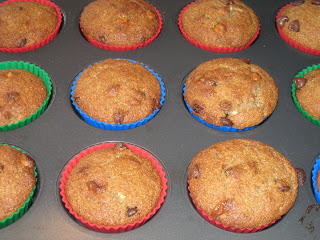
Sourdough Granola Muffins

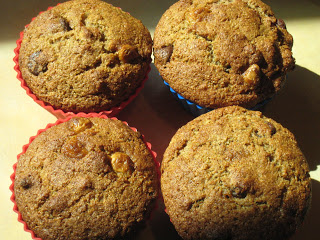
I haven’t used my sourdough in a few weeks, and I’ve been trying to figure out what to make with it before it grew too much. Today I was trying to come up with an easy baking project that my daughter and I could do that would also use up a really ripe banana I had.

I thought sourdough muffins with banana. I’ve done that before in combination with both strawberries and blueberries. But I don’t have fresh berries to use up. So I thought I could do banana chocolate chip muffins.

As I gathered ingredients I also took out an open bag of butterscotch chips. Then my daughter said she wanted to use her “granola bowl” (the bowl she usually uses for “her granola” when we make it together). So I got out a little coconut to put in her bowl (she LOVES coconut).

Then I thought I guess I could add some coconut to our muffins. Then Rebecca came over to help me get out our mixing bowls and grabbed the nut chopper. I thought I guess I could add nuts too. So my muffins evovled into granola muffins!

I LOVE granola. I could eat it every day. So I figured a granola muffin must be good too. And it is!!! So good! My daughter scarfed down a whole one with lunch.

Sourdough Granola Muffins
Makes 12 muffins

1 cup whole wheat flour (I used sprouted wheat flour…really helps keep them moist)
1 tsp. baking soda
1/4 – 1/2 cup cane sugar
1/4 tsp. salt
1 egg
1 tsp. vanilla
1/4 cup oil (I used coconut)
1 cup sourdough starter
1 1/2 cups total of granola add-ins (I used raisins, chopped crispy walnuts, chocolate chips, butterscotch chips and coconut.)
1 small very ripe banana, mashed (optional)

Preheat oven to 425F.

Combine dry ingredients in small bowl. Stir in granola add-ins. Combine wet ingredients (and mashed banana) in medium bowl. Add dry ingredients to wet ones.

Mix quickly and spoon into muffin cups (I used silicon muffin cups…the muffins popped right out.).

Bake at 425 for 18-20 minutes.

Grain Free Granola (dairy free, egg free, GAPS-legal)

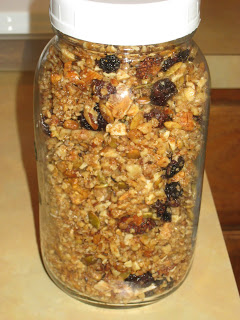
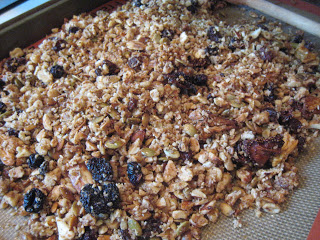
I’ve been cutting back on grains lately to see how that impacts my gut and my fertility. And I recently came across a recipe on Heartland Renaissance for grain free granola. I just finished off my last batch of granola the other day, so it’s time to restock. It helped that I have crispy pecans, walnuts, almonds and pumpkin seeds on hand. So everything was all set to go. I didn’t follow this recipe completely. I never measure anything when I make granola. And I didn’t heat the oil/sugar. My coconut oil is always liquid these days from the heat 😛  I just chopped the nuts together (instread of separately). Then stirred in seeds, dried fruit, coconut oil and maple syrup. Very quick prep! The verdict…awesome! It’s actually better than the versions I’ve been making lately with soaked/dried oats. I’ll just have to remember not to eat too much at once now so I don’t go totally overboard on nuts in one sitting 😛

*Edited 4/7/11 – I tried making an unbaked version of this today. Worked great!! I keep the granola in the fridge, and it’s always hard anyway from the coconut oil. So I figured it wouldn’t change much if I didn’t bake it. I was right. Plus it makes less mess (no pan to clean up) and makes sure you’re not doing any harm to the wonderful crispy nuts 🙂  I only used honey to sweeten it today to make it GAPS legal. I’ll add to the recipe below to reflect this update.

This post is linked to Wheatless Wednesday at Naturally Knocked Up.
This post is linked to the Gluten Free Recipe Parade at Heavenly Homemakers.
This post is linked to Grain Free Tuesdays at Hella Delicious.

Grain Free Granola

2 cups almonds (I used a combo of crispy almonds, walnuts and pecans)
2 cups walnuts
1 cup pumpkin or sunflower seeds
1 cup dried fruit of your choice, chopped into bite size pieces (I used a mix of homemade dried fruit – strawberries, pineapple, blueberries, cherries and raisins.)
1 cup unsweetened shredded coconut
1/3 cup sesame seeds, optional (I didn’t add these.)
1/2 stick butter or coconut oil or combination of both (I have used both. A combo works very well)
1/2 cup brown cane sugar, sucanat, muscovado sugar, honey or maple syrup (I have used maple syrup and honey. A combo of sweeteners works well.)
1-1/2 tsp. vanilla (I didn’t add this, but it would be good)

Preheat oven to 300 degrees Fahrenheit.

In a food processor, place the 2 cups of almonds and pulse a few times until they are chopped up. Some pieces will be much finer than others, which is what you want. Those little, fine pieces will remind you more of what granola is supposed to feel like (i.e. mimics a cereal grain in texture) while the big chunks are welcome as well. Pour almonds into a large mixing bowl. Do the same thing with the walnuts. (I did all the nuts at the same time.) Add the remaining seeds, fruit and coconut to the bowl and mix well.

In the meantime, combine butter/oil, sugar and honey over heat until combined. Take off heat and stir in vanilla.

Pour the hot liquid into the nut mixture and stir well until evenly combined and all pieces are coated.

Pour the granola out onto a greased (I use silpat), walled cookie sheet and spread out to an even layer. Bake in the oven for 15-20 minutes until you can smell the nuts roasting. When done, remove and allow to briefly cool on the cookie sheet before decanting into your preferred storage jar while still warm, taking care not to allow it to cool completely on the cookie sheet as it can stick.

GAPS-legal Granola (modified, unbaked version)

4 cups any combination of crispy nuts (I have used walnuts, pecans, almonds, hazelnuts, macadamia nuts, brazil nuts and peanuts)
1 cup crispy pumpkin or sunflower seeds
1 cup dried fruit of your choice, chopped into bite size pieces or raisins
1 cup unsweetened shredded coconut
1/3 – 1/2 cup coconut oil or butter or combination of both (dairy free w/o butter)
1/2 cup honey

In a food processor, place the nuts and pulse a few times until they are chopped up. Some pieces will be much finer than others, which is what you want. Those little, fine pieces will remind you more of what granola is supposed to feel like (i.e. mimics a cereal grain in texture) while the big chunks are welcome as well. Pour  into a large mixing bowl. Add the remaining seeds, fruit and coconut to the bowl and mix well.
In the meantime, combine butter/oil and honey over heat until combined.
Pour the hot liquid into the nut mixture and stir well until evenly combined and all pieces are coated.

Scoop granola into glass jars and let cool. Store in the refrigerator or freezer (for long term storage). Serve right from the fridge or let sit at room temp for a bit to soften. Serve in yogurt/kefir, with milk or plain.

Whole Wheat Crackers

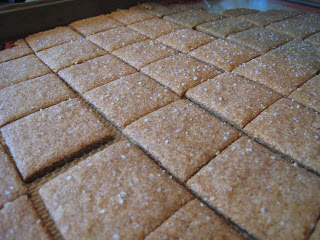
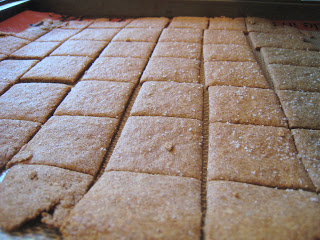
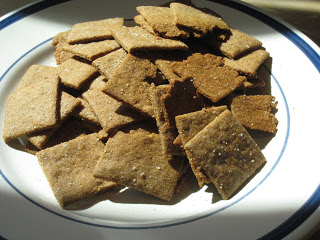
Since we’re “taking it easy” around here I decided to do some baking with Rebecca today. Making crackers was one of my monthly goals, so I went with that. Laura on Heavenly Homemakers has a super simple recipe. Only a few ingredients, easy to do with kids, quick, not much mess. Just what I like. And they taste great! I’m sure mine have a little different texture since I use sprouted flour. But they are still very good. I only made a half recipe. That was enough for one full baking sheet of crackers. I had to increase the water and oil a bit to get a ball of dough. That could be due to the flour. They kind of remind me of saltines. But MUCH healthier. Maybe I’ll be glad I have them around in a few weeks 😉

Whole Wheat Crackers

2 cups whole wheat flour (I used bulgur flour)
1/2 tsp. salt
1/2 tsp. baking soda
1/2 tsp. baking powder
1/4 cup oil (I used coconut oil)
1/2 cup water

Mix flour, salt, baking soda and baking powder. Stir in oil and water until a ball of dough has formed. Roll dough very thin, about 1/16 inch thickness on a cookie sheet. (I find it’s easiest to roll dough between two pieces of parchment paper.) Use small heart cookie cutter to shape crackers. Bake in a 350 degree oven for 12 minutes. Turn off the oven, but allow crackers to sit inside while it cools. This will dry out the crackers so that they become crispy.

For square crackers, use a pizza cutter to cut the dough into 1 inch squares after rolling it onto a cookie sheet.

Sauerkraut

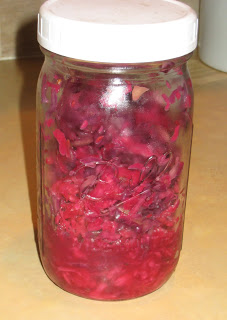
Last week I made my first batch of sauerkraut. I finally got around to tasting it today 🙂  Very good! It tastes like pickles to me. I just used the basic recipe in Nourishing Traditions. I used purple cabbage. Very simple (aside from a good arm workout pounding cabbage for 10 min.). Very good. And so great for your gut!! Plus it gets better with age. So it should taste really good in a few months 🙂

Sauerkraut
Makes 1 quart

1 medium cabbage, cored and shredded (I used my food processor for this)
1 Tbsp. caraway seeds
1 Tbsp. sea salt
4 Tbsp. whey, if not available use an additional 1 Tbsp. salt

In a bowl, mix cabbage with caraway seeds, sea salt and whey. Pound with a wooden pounder or a meat hammer for about 10 minutes to release juices. Place in a quart-sized, wide-mouth mason jar and press down firmly with a pounder or meat hammer until juices come to the top of the cabbage. The top of the cabbage should be at least 1 inch (2,5cm) below the top of the jar. Cover tightly and keep at room temperature for about 3 days before transferring to cold storage. The sauerkraut may be eaten immediately, but it improves with age.

Crispy Pumpkin Seeds

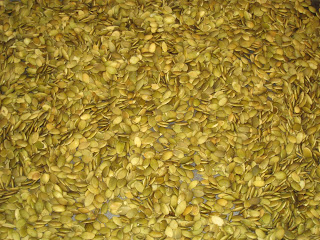
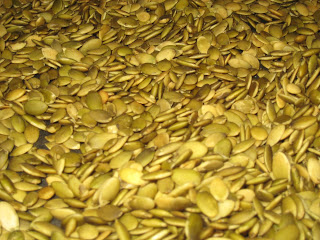
I’ve made plenty of crispy nuts, but yesterday I did my first batch of seeds. I did pumpkin seeds. Yum!!! So salty and crunchy. A great, healthy snack. And a great add in for homemade granola. Same process for making crispy nuts, just different ratios.

Crispy Pumpkin Seeds

4 cups of raw, hulled pumpkin seeds
2 Tbsp. sea salt
filtered water

Mix water, salt and seeds. Soak at least 7 hours (I soaked mine for close to 24 hours). Dry in dehydrator or oven at lowest setting (150) until completely dry and crisp.