Home » Kid-friendly Recipes » Page 52

Category: Kid-friendly Recipes

It is so important to cook homemade, healthy food. But it’s not always easy to find kid-friendly recipes.

That’s where I come in. I’ve got hundreds of kid-tested and approved recipes that won’t keep you in the kitchen for hours or stretch your budget too thin.

I focus on allergy-friendly, whole foods. But I always cook with kids in mind. I take all sorts of feeding challenges into account too.

We’ve dealt with every allergy possible, so I’ve created recipes that are gluten free, nut free, dairy free, egg free, soy free, corn free, coconut free and more!

Kid-friendly recipes don’t have to be boring. And they are certainly not limited to chicken nuggets and pizza every night.

A nourished child will enjoy a wide variety of fruits, vegetables, proteins, carbohydrates and fats. Get your kids in the kitchen with you and start cooking! Have fun with food and your kids will learn to love eating.

Pancake and Sausage Muffins

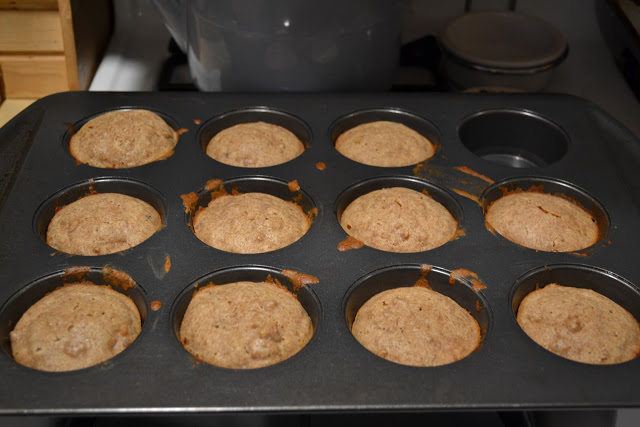
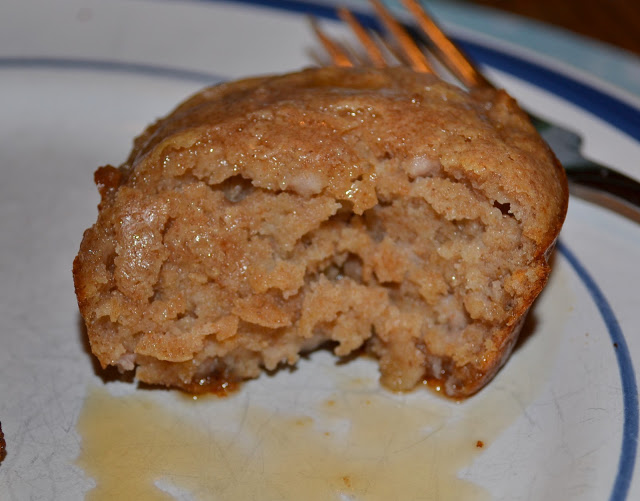
For dinner last night I tried another Heavenly Homemaker recipe (and there are more to come:). Ever since Laura posted her pancake and sausage muffin recipe I’ve wanted to try them. Pancakes and sausage are great on their own, but mixed together? Awesome! All three of us loved these. And they are very easy to make. Plus they make a lot so you can freeze some for a quick breakfast. I only made a half batch and got 11 muffins. I also doubled the amount of meat (used a 1/2 lb. for a half batch). We like ours meaty 🙂  Another great thing about them is that you can soak the grains. Always a plus for me. I didn’t have buttermilk on hand, so I used a combo of sour milk (milk + vinegar) and plain yogurt.
This recipe would also work well if you want to serve pancakes to a large group but don’t want to stand at the stove forever. They would be great without the meat. Just make the muffin part and then you have a ton of pancakes done at once 🙂

I think this will be one of our new favorites. Pancakes and sausage covered in butter and real maple syrup. Mmm 🙂  I’m still trying to figure out how to take decent pictures with our new camera. So bear with me.
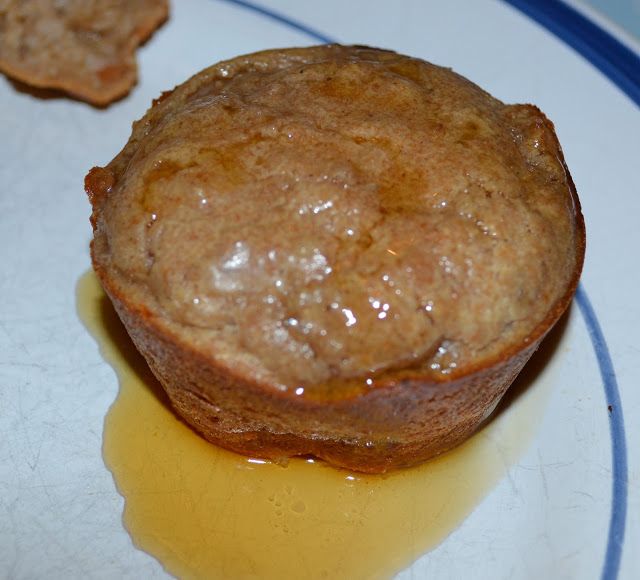
Pancake and Sausage Muffins

2 cups whole wheat flour
1 tsp. baking powder
1/2 tsp. sea salt
1 1/2 cups milk or buttermilk (I used a little more than this.)
2 eggs
1/3 cup melted butter
1/2 pound cooked (and at least partially cooled) turkey sausage (or nine sausage links, cut in half) (I used pork breakfast sausage…1 lb. per full recipe)
Real grade B maple syrup

To soak grains:
If you want to soak your flour overnight to break down the phytates to aid in digestion, mix the flour and cultured buttermilk in a glass bowl, cover and let it sit on your countertop for 12 hours or so. The next morning, mix the remaining ingredients in and bake as directed below.

To make w/o soaking grains:
If you don’t soak the flour ahead of time: Mix dry ingredients together. Add milk or buttermilk, eggs and melted butter. Stir in browned turkey sausage.

Pour batter into 18 buttered muffin tins. (I don’t recommend paper muffin liners for this as it will stick.) (A full recipe for me would make 20 – 22 muffins). Bake at 350° for 15-20 minutes (mine took about 25 min.) or until the muffins are lightly browned. Serve with butter and maple syrup.
Cinnamon Vanilla Cookies

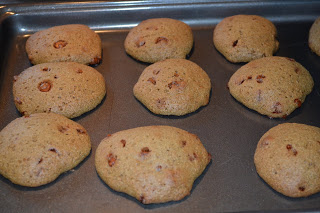
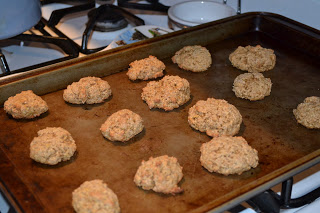
Yesterday Rebecca said she wanted to bake. And since we had been looking at her new Strawberry Shortcake coloring book she told me she wanted to make strawberry cookies and vanilla cookies. When she got up from her nap the first thing on her agenda was to make the cookies. I quickly started searching for strawberry cookie recipes. Then she said she just wanted vanilla. So I did a quick search for “vanilla cookies” with nothing really in mind. This is the first recipe I came across. It had no comments, no pictures, nothing. But it sounded very easy and quick. And that’s what we needed. I had no idea if these would turn out at all. There isn’t even any fat (butter/oil) added to the cookies. But I figured I’m an experienced baker and might be able to make it work. So I decided to just go for it.

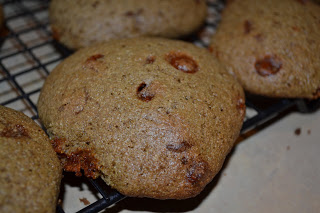
I have to say this is the fastest cookie I’ve ever made. And Rebecca could help with all of it. I only made a half recipe since I thought it might be a flop. After mixing the dough there was not nearly enough moisture (as I expected with only 1 egg as the liquid). So I debated about what to add and decided to add a little milk. That gave a soft dough. I dropped them onto the cookie sheet and went for it. They’re not bad. Very mildly sweet. A soft cookie. Rebecca seemed to really like them. It would actually be a good cookie for a young child/toddler because it’s not too sweet or crispy. And it uses all good ingredients. A half batch made about 15 cookies. I think if I make them again (which is likely on those days where Rebecca decides she wants to bake all of a sudden…and this recipe doesn’t require any softened butter, special ingredients, planning ahead) I might try adding cinnamon. Or some kind of chips (chocolate or butterscotch).

I’ll post the recipe the way I made it…using whole wheat flour and adding milk. I also adjusted the sugar since my brown sugar is like one big block. So I had to use regular cane sugar. Overall a decent cookie. Great recipe for baking with young kids. And Rebecca got her “vanilla cookies.” 🙂  She seemed very satisfied with what we came up with.

**Edited 9/4/11 – I made a batch of cinnamon vanilla cookies yesterday. They turned out great! I added cinnamon to the dough. And mixed in cinnamon chips. The cinnamon really improves the taste of these cookies. I bet they would be really good with a little cinnamon glaze. Then they would be triple cinnamon cookies. Maybe we’ll try that next time. I made a double batch this time and made the cookies a little bigger. I got 20 good sized cookies. I’ll update the recipe.

Cinnamon Vanilla Cookies
makes 10 cookies

3/4 cups whole wheat flour
3/8 cups sucanat
1/4 tsp. baking soda
1/4 tsp. salt
1 tsp. vanilla extract
1 egg
1/8 – 1/4 cup milk (enough to moisten dough)
2 tsp. cinnamon
1/2 cup cinnamon chips

Mix all ingredients (except chips) in one bowl (I just mixed it with a wooden spoon). Stir in cinnamon chips. Drop by spoonfuls onto ungreased cookie sheet and bake at 425 degrees for 8-10 minutes (I did 8 min.).

Muesli

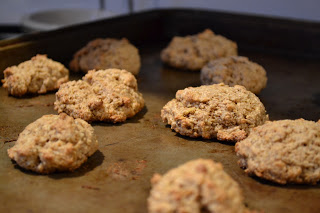
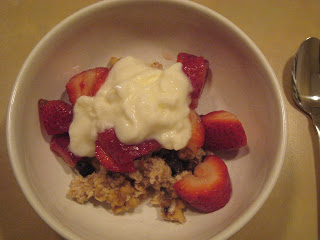
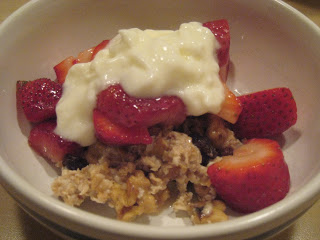
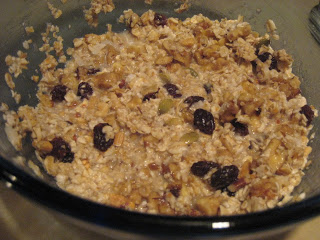
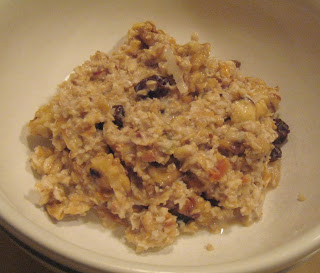
In my search through my Barefoot Contessa cookbooks this month I came across a recipe for muesli that sounded good and easy. I’m always looking for new breakfast ideas to give us a little variety. This was super easy and really good. It’s a lot like granola, just softer. And I LOVE granola. Unfortunately oats don’t agree with my tummy too well. So I know I have to limit my intake. But this is a tasty breakfast option once in a while. I love how easy it is too. I’ve seen other versions of muesli that are soaked a lot longer…and probably better for you because of that. So I’ll have to try other recipes sometime. But this was a great first attempt at muesli. And I actually used one of my cookbooks this month 🙂  The recipe calls for strawberries and raspberries. I just used strawberries. Any berry would work really well. I also added a few extra raisins. If you are trying to find breakfast options to replace cold cereal this is a good one. And it’s pretty versatile. You could add in other things besides nuts and raisins, like coconut and seeds.

Muesli with Red Berries
serves 2 (fairly small servings)

1/3 cup quick cooking oatmeal
1 1/2 Tbsp. coarsely chopped toasted hazelnuts (I used crispy walnuts)
2 Tbsp. granola with raisins (I used homemade)
pinch of salt
1/3 cup hottest tap water
1 Tbsp. honey (raw is best)
4 large ripe strawberries, hulled and sliced
6 to 8 fresh raspberries
2 tsp. cane sugar
greek yogurt (I used full fat plain yogurt)

Mix oatmeal, nuts, granola and salt in a bowl. Pour the water and honey over the mixture, stir and set aside to soak for 12 – 15 minutes.

Meanwhile, toss the berries and sugar in a bowl and allow to macerate. (If you want to cut back on sugar you could skip this step and just use fresh fruit. It would still taste very good.)

When ready to eat, divide the muesli between 2 bowls. Top with berries and yogurt.

Baked Onion Rings

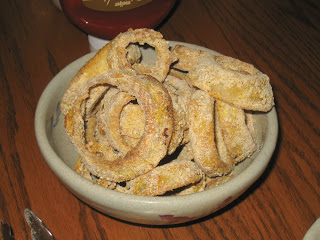
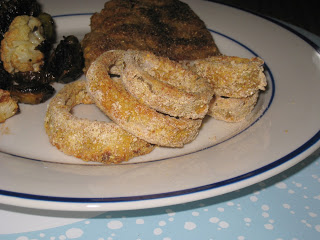
I haven’t made onion rings in a long time, but they sounded good this week. So I pulled out my old recipe. It’s fairly simple and pretty good. I think I got the recipe from an IBS message board years ago. So it’s not a fattening version of onion rings. The next time I make onion rings I want to try another recipe and actually fry them. But this one works well. Even Rebecca ate some after some initial hesitation 🙂  I don’t have any actual amounts for the ingredients on my recipe. But I’ll try to come up with some approximations.

Onion Rings

1 large onion
1 cup whole wheat flour
2 eggs
1 cup cornmeal
1/2 cup bread crumbs
salt and pepper to taste

Slice onion in 1/4″ – 1/2″ thick rings. Place flour in shallow bowl. Beat eggs in a shallow bowl. Mix cornmeal and bread crumbs in shallow bowl. Dip onions in flour, then egg (be sure it’s fully coated), then cornmeal (make more cornmeal mixture if it gets too clumpy or is running out). Place on cookie sheet. Spray/mist with olive oil. Sprinkle with salt and pepper to taste. Bake at 400 degrees for 25 – 30 minutes. Serve plain or with ketchup.

Chocolate Ice Cream…Homemade Frosty

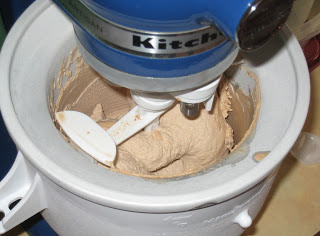
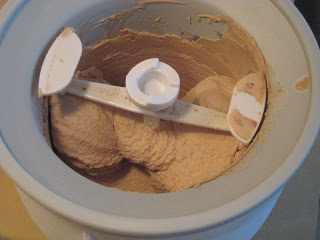
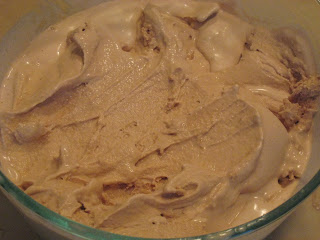
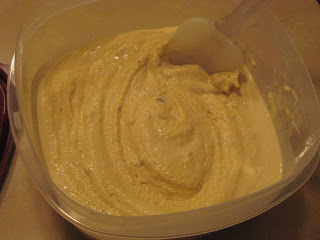
I’ve made homemade ice cream quite a few times now. Especially now that we have raw milk and good cream (that I don’t have to pay an arm and a leg for). But I’ve never tried chocolate. So yesterday afternoon I experimented and came up with a recipe. I didn’t make a huge batch since I didn’t have a full 3 cups of cream, but Rebecca really wanted to make ice cream 😛  So we used what we had. I’ll try to adjust quantities for a full recipe. It turned out really well! I intentionally didn’t make it super chocolatey. It’s kind of a light chocolate…and tastes just like a Wendy’s Frosty 🙂  All 3 of us love it. I used cocoa and chocolate extract for the chocolate flavor. You could probably use carob in place of the cocoa…and adjust the extract to get the flavor you like.

Chocolate Ice Cream (Healthy Frosty)

3 egg yolks
1/2 cup maple syrup
2 tsp. vanilla extract
1 – 2 Tbsp. cocoa or carob powder
2 tsp. chocolate extract (adjust to your taste)
1 Tbsp. arrowroot
3 cups heavy cream, not ultrapasteurized, preferably raw

Beat egg yolks in 4 cup measuring cup. Mix in arrowroot until lumps are gone. Whisk in remaining ingrdients. Pour into an ice cream maker and process according to instructions (about 15 – 20 min. in my Kitchen Aid ice cream maker attachment). Transfer to a shallow plastic container, cover and store in freezer.

This is awesome served immediately. It’s like soft serve/like a Frosty. It’s great after it’s been in the freezer for a while too.

Peppermint Stick Buster Bars

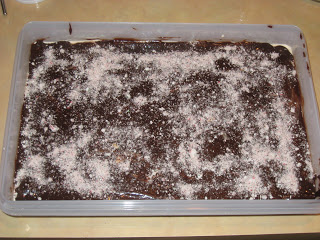
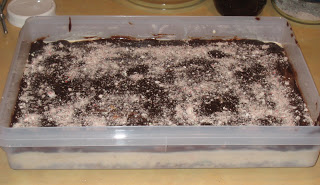
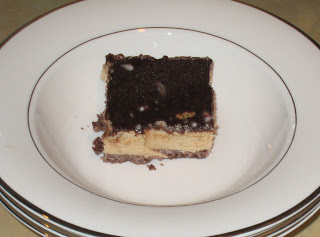
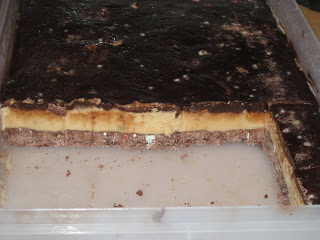
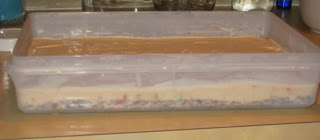
Every year we buy peppermint stick ice cream around Christmas. And eat it with homemade hot fudge. Mmmm. So a few weeks ago I decided to try making my own peppermint stick ice cream…since homemade ice cream is so much better 🙂  It turned out great. Then as I was thinking of desserts for our Christmas parties next week I thought it would be fun to make a version of buster bars with peppermint stick ice cream. I made it yesterday. Looks sooooo good!! Too bad I can’t taste it until next week 😛  But I’m sure it will be good. I used the idea of my MIL’s buster bars, but really the final product/ingredients are very different. I used organic cookies, homemade ice cream, and my recipe for chocolate sauce. So this is my healthy holiday version of buster bars. You have to make it in steps. But each step is pretty easy. I make the chocolate sauce a day ahead. Then the next day I can assemble the rest.

Edited 12/23/10 – These are awesome!!!!!!!!!

Peppermint Stick Buster Bars

Chocolate Sauce:

1 cup pure cane sugar
1/3 cup cocoa
2 Tbsp. flour or arrowroot powder (I tried 1 Tbsp. of each for this. Seemed to work well. Gets thick much faster and stays thicker. I do use whole wheat flour for this…works just fine.)
1/4 tsp. unrefined sea salt
1 cup boiling water
1 Tbsp. butter
3/4 tsp. vanilla

Peppermint Stick Ice Cream:

3 egg yolks
1/2 cup maple syrup
2 tsp. vanilla extract
2 tsp. peppermint extract
1 Tbsp. arrowroot powder
3 cups heavy cream (preferabley raw, not ultrapasteurized)
1/2 cup crushed candy canes (I use my food processor to crush them.)

Bars:

1 lb. chocolate cookies, crushed (I used organic creme filled cookies. I would like to try using my homemade chocolate graham crackers sometime. I use my food processor to crush them.)
1/2 cup butter, melted
1 recipe peppermint stick ice cream
1 recipe chocolate sauce
Crushed candy canes (optional) (I use  my food processor to crush them.)

————————————-
To make the chocolate sauce:

Blend sugar, cocoa, flour and salt in sauce pan. Turn on heat and add boiling water. Bring to a boil. Cook, stirring constantly, until thick, about 10-12 minutes (for just flour) or 5 min. (for arrowroot powder). Remove from heat. Stir in butter and vanilla. Store in refrigerator.

To make the ice cream:

Beat egg yolks and blend in remaining ingrdients (except candy canes) (I do this all by hand with a whisk in a large measuring cup). Pour into an ice cream maker and process according to instructions (about 20 min. in my Kitchen Aid ice cream maker attachment). Add candy canes during the last minute of processing.

To make the bars:
Mix cookies and melted butter (I also added a little bit of crushed candy canes to the crust.). Pat into 9×13 pan (I use a 9×13 tupperware)  Put in refrigerator to harden while you make the ice cream. Make ice cream. Immediately spread on top of crust. Let freeze until firm (at least several hours). Spread chocolate sauce over top. Sprinkle with candy cane pieces. Freeze.

Beefy Enchilada Bake

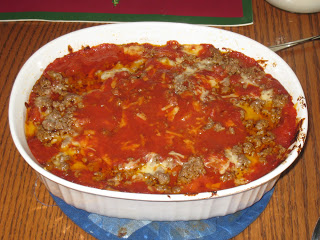
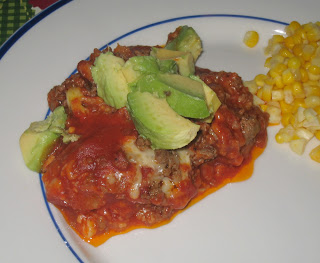
Last night for dinner I tried yet another Heavenly Homemaker recipe. I love Laura’s recipes because they are easy to make, healthy and use a few simple ingredients. This enchilada bake was no exception. Very easy and very good. I almost thought it sounded too simple…that it might be bland. But it was very good! All three of us loved it. And it was very easy to make. Laura didn’t mention what size pan to use, so I just used a 1 1/2 qt. casserole. And I scaled back on the sauce a bit…and had plenty. I don’t have much cheese in the house (our milk farm was out this week!), so I only used 1 cup. But it was still very good. I used up a few old corn tortillas that have been in the freezer for a while and some homemade whole wheat tortillas. Both worked well. This is also a great prep ahead meal. You can prep it in the morning and bake it for dinner. Or you can prep it and freeze it for later. I’ll have to keep this one in mind when I’m prepping freezer meals before baby #2 arrives 🙂  I served it with avocado and homemade salsa. Sour cream would be very good on it too.

Beefy Enchilada Bake

1 lb. ground hamburger meat
3 Tbsp. arrowroot powder or flour (I used 2 Tbsp.)
1/2 cup water (I used 1/4 cup)
1-2 tsp. chili powder (depending on your taste)
salt
3 cups tomato sauce (I used about 2 cups)
8 oz. shredded cheddar cheese
12 corn tortillas (I used 4 corn and 4 whole wheat. This is gluten free if you use just corn.)

Brown hamburger meat. Do not drain grease! Put cooked hamburger meat in separate bowl, salt and set aside. Sprinkle arrowroot powder into the grease and stir (if you do not have enough grease to absorb the arrowroot powder, add 2 Tbps. butter). Keep your burner on medium to high heat. Pour in water and “smoosh” the clumps of arrowroot powder/grease around while you stir the water in. This will thicken and make a gravy. Pour in tomato sauce and chili powder. Stir well until bubbly. This is now your enchilada sauce! (I added some salt and garlic powder to the sauce in addition to the chili powder.)

Cut corn tortillas into one inch strips. Dip tortilla strips in enchilada sauce and coat thoroughly. (I just ripped the tortillas into big chunks and threw them all in the pan and stirred. then I spooned out sauce and tortilla for each layer.) Cover bottom of baking dish with enchilada sauce coated tortilla strips. (I used a 1 1/2 qt. casserole with my quantities listed above. You might need a bigger pan for the full recipe.) Sprinkle 1/3 of the cooked ground beef over the tortillas…then a little cheese. Repeat layers twice more: enchilada sauce coated tortilla strips, meat, cheese. If you have any leftover enchilada sauce, drizzle it over the top.

Cover and bake at 350° for 30 – 40 minutes or until bubbly. (I baked it for about 45 min., then removed the cover and baked another 5 min.)

*I think adding some veggies right into the casserole layers would be good (corn, peppers, onions, etc.). Then it could be an all-in-one meal.

Creamy Chocolate Pudding

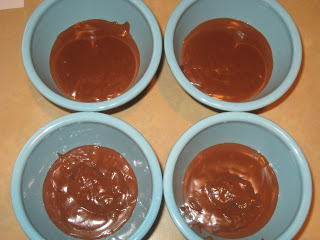
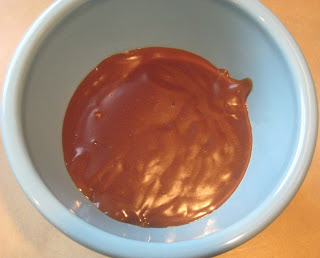
I am not a big fan of pudding. But I’ve been wanting to try making REAL pudding for a while. And now that we have lots of raw milk and Christmas is coming I figured it was a good time to try. I used the Heavenly Homemaker recipe. It turned out really well. So easy to make…and so fast. Rebecca liked helping mix everything and then watching me stir it on the stove. This is definitely not like the stuff you get out of box. This is rich and thick. I actually kind of like it. Not sure I could eat a large amount, but it is good. And I love how healthy it is…raw milk, fresh egg yolks, real butter. What a great treat. I’ll definitely be making this again. I need to try the vanilla and butterscotch too.
Creamy Chocolate Pudding
2 1/2 cups milk
3 egg yolks
2/3 cup rapadura or 1/2 cup real maple syrup (I used cane sugar)
1/4 cup cocoa powder
4 Tbsp. arrowroot powder
1/4 tsp. sea salt
3 Tbsp. butter
1 tsp. vanilla

In a medium saucepan, whisk together milk, egg yolks, rapadura or maple syrup, cocoa, arrowroot powder and salt. Cook over medium heat, stirring CONSTANTLY until pudding begins to thicken. Remove immediately from the heat, and continue to stir until pudding is creamy. Add butter and vanilla and continue to stir until mixed. Pour into serving dishes and serve warm, or chill for two hours and serve cold.

Whole Wheat Gingerbread Cookies

My goal this year is to make healthy holiday treats. I’ve never made gingerbread cookies before…and have never even had one! My mom never made them growing up because she doesn’t like them. I’m not a fan of ginger, so I didn’t know if I’d like them. But I wanted to try. I found a recipe for whole wheat cookies on englightened cooking. They were very easy to make. And they turned out really well. They are a bit on the gingery side for me, but I can still eat them. Rebecca really likes them. Justin does too. And they are not overly sweet.

For the deocrating I was trying to also go the healthy route. I had seen on Heavenly Homemakers how to make your own powdered sugar. But when it was time to make the icing my blender was dirty. So I tried using my food processor…didn’t work. So I had to just grab the regular, white, processed stuff. I’ll try making powdered sugar some other time. At least that’s the only bad thing on them. And really there isn’t much icing per cookie. I still used raw milk for the icing. And we decrated with chocolate covered raisins, yogurt covered raisins, gum drops, sprinkles and chocolate candies…all from the health food store. Rebecca enjoyed helping with these. But she only made it part way through decorating because she wanted to lick every piece of candy before putting it on the cookie :p  I guess she figured out how to get the treats.

Overall a great recipe. It would work well for making a gingerbread house too. The dough was really nice to work with. I only made a half recipe since it was my first try. And it made quite a few cookies. A full recipe would make a LOT.

Please note that my photos are unedited right now. So they may not be the best.

Whole Wheat Gingerbread Cookies

2/3 cup molasses (not robust)
2/3 cup packed dark brown sugar (I used organic brown cane sugar)
2 Tbsp. ground ginger
1 Tbsp. ground cinnamon
1 tsp. ground cardamom (optional, you can use allspice) (I skipped this)
1/2 tsp. ground cloves
2 tsp. baking soda
2 sticks (1 cup) unsalted butter, cut into tablespoon pieces
1 large egg, lightly beaten
3 and 3/4 cups white whole wheat flour (I used freshly ground hard winter wheat)
1/2 tsp. salt
1/4 cup all-purpose flour (I used my freshly ground wheat flour for this too)

Preheat oven to 325°F. Line 2 large cookie sheets with parchment paper.

Bring molasses, brown sugar, and spices to a boil in a 4- to 5-quart heavy saucepan over moderate heat, stirring occasionally, and remove from heat. Stir in baking soda (mixture will foam up), then stir in butter a few pieces at a time, letting each addition melt before adding next, until all butter is melted. Stir in the egg until combined; stir in white whole wheat flour and salt.

Transfer dough to a lightly floured surface and knead, dusting with as much of the 1/4 cup all-purpose flour as needed to prevent sticking, until soft and easy to handle, 30 seconds to 1 minute. Halve dough, then wrap 1 half in plastic wrap and keep at room temperature.

Roll out remaining dough to 1/4 inch thickness on a lightly floured board.

Cut out cookies with cutters; transfer to prepared sheets, arranging them about 1 inch apart.

Bake cookies in upper and lower thirds of oven; switching position of sheets halfway through baking, until edges are slightly darker, 11-13 minutes total (do not overbake—watch carefully!). Transfer cookies to racks. Cool completely. Repeat with remaining dough and scraps (re-roll once). Makes about 3 dozen medium cookies, Decorate, or eat straight up.

Poached Eggs

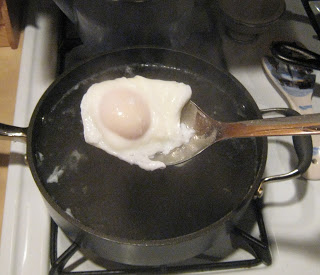
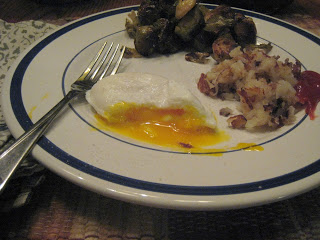
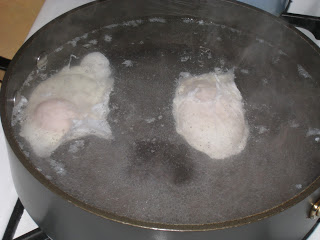
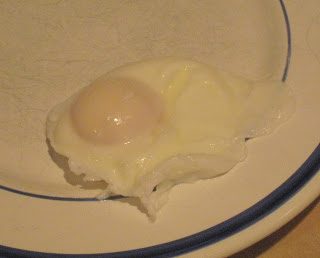
Along with our new potatoes last night we tried a new form of egg – poached. I had never made them before. And Justin and I had never actually even had one. I’ve always been a little scared to try making one…cooking an egg in a pan of water sounds tricky. But in one of my recent issues of Cooking Light there was a little tutorial on how to make poached eggs. It sounded really easy. So I gave it a try. It really was very easy. And quick! And they taste great. Very similar to a soft boiled egg. These days I try to eat at least one egg a day. And the runnier the yolk the better (the less it’s cooked the more nutrients it retains). So this was perfect. And even more perfect with our fresh eggs from Lubbers Farm. Do you see the color of that yolk? Amazing. Rebecca is hit and miss with eggs. Just depends what mood she’s in and how her gag reflexes are working 😛  So I just made her scrambled eggs last night. But she did try a bite of mine and said she liked it. Maybe next time I’ll make one for her too. Now that I’m eating eggs so much it’s fun to experiment with different ways to make them. This one is a winner for sure. It would be very good served right on top of hasbrowns or a piece of toast to soak up all that rich, creamy golden yolk.

Poached Eggs

Fill shallow pan with about 2 inches of water. Bring to a boil, then turn down to a simmer. Add a few tsp. of vinegar. Crack each egg into a small dish. Gently pour egg into water (it will sink to the bottom at first). Let cook for about 3 min. Remove from water with slotted spoon to drain. Place on plate, potatoes or toast. Sprinkle with sea salt. Enjoy!