Home » Kid-friendly Recipes » Page 51

Category: Kid-friendly Recipes

It is so important to cook homemade, healthy food. But it’s not always easy to find kid-friendly recipes.

That’s where I come in. I’ve got hundreds of kid-tested and approved recipes that won’t keep you in the kitchen for hours or stretch your budget too thin.

I focus on allergy-friendly, whole foods. But I always cook with kids in mind. I take all sorts of feeding challenges into account too.

We’ve dealt with every allergy possible, so I’ve created recipes that are gluten free, nut free, dairy free, egg free, soy free, corn free, coconut free and more!

Kid-friendly recipes don’t have to be boring. And they are certainly not limited to chicken nuggets and pizza every night.

A nourished child will enjoy a wide variety of fruits, vegetables, proteins, carbohydrates and fats. Get your kids in the kitchen with you and start cooking! Have fun with food and your kids will learn to love eating.

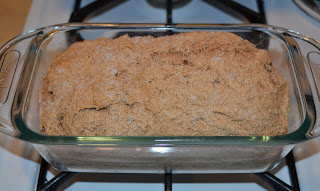
Whole Wheat Beer Bread

One of the first recipes I “posted” on my blog was beer bread. I guess I never actually posted the recipe…just a picture and a link to my cousin’s wife’s blog. Her blog is now by invite only, so that doesn’t do much good 😛  I haven’t made this bread in a long time because it uses white self rising flour. Not something I use anymore. Then the other day I thought it sounded good and wondered if I could modify it to make it healthier. So last night I gave it a shot. And it worked!! All 3 of us loved it. It is one of the easiest breads you can make. Rebecca practically made it by herself…and she’s 2. So glad I gave it a try. It tastes great and it’s nice to have a recipe on hand for bread that you can throw together in 5 minutes. I’ll post both versions of the recipe. I’ll definitely be using the whole wheat version from now on. The dough is very sticky and takes a little work to stir. I also sprinkle some sea salt on top of the dough before I bake it. I love that little salty bite of the crust. Any kind of beer will do…but it will alter the flavor. When we have beer in the house it’s usually a dark beer. We’ve also used Woodchuck cider before. That was good. I have yet to attempt making it with root beer. Not sure if that works or not. And maybe at some point I’ll experiment with soaking the dough or using sourdough. But for now at least I have a whole wheat version.
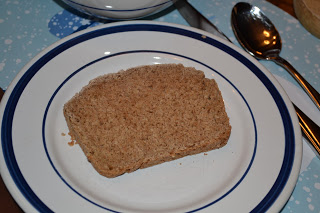
Whole Wheat Beer Bread

(white flour/non-NT version)
3 cups self-rising flour
3 Tbsp. sugar
1 bottle/can any flavor beer
——————————————
(whole wheat version…the one I use)
3 cups whole wheat flour
1 1/2 tsp. salt
4 1/2 tsp. aluminum free baking powder
3 Tbsp. cane sugar or sucanat
1 bottle/can any flavor beer

Mix all ingredients until dough forms. Add dough to a buttered medium loaf pan. Bake for 40-45 min. at 350 degrees until golden brown and baked through.
Crispy Hazel Nuts

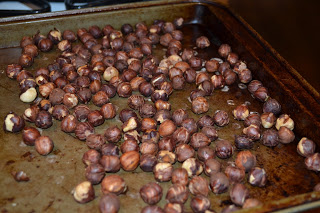
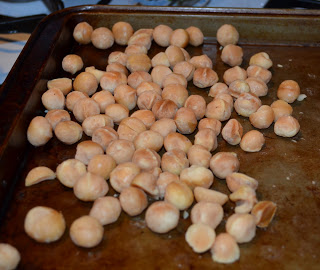
In addition to macadamia nuts I soaked/dried some hazel nuts. I’m not sure I’ve ever even had a hazel nut. But I wanted to try it. Same process. And another yummy snack 🙂  I’m having fun experimenting with different nuts (since I LOVE nuts). Maybe next I’ll try Brazil. I hear those are quite healthy too.

Crispy Hazel Nuts

4 cups of raw nuts
1 Tbsp. unrefined sea salt
filtered water

Mix nuts with salt and water and leave in a warm place for at least 7 hours or overnight (I generally soak them for 24 hours.). Drain. Spread nuts on baking pan. Place in oven on lowest setting (150 degrees) for 12 to 24 hours (or in a dehydrator), stirring once in a while, until completely dry and crisp. Store in an airtight container. The nuts will keep longer in the refrigerator or freezer.

Crispy Macadamia Nuts

This week I tried soaking a couple new kinds of nuts. One was macadamia. After doing my post on nuts and reading about how healthy they are I wanted to try some right away. I don’t think I’ve eaten one in years. Boy are they good! I only did a small batch to try them out. I’ll have to stock up on more for sure. Same process as most nuts. Soak with water and salt. Dry.

Crispy Macadamia Nuts

4 cups raw macadamia nuts
1 Tbsp. unrefined sea salt
filtered water

Mix nuts with salt and water and leave in a warm place for at least 7 hours or overnight (I generally soak them for 24 hours.). Drain. Spread nuts on baking pan. Place in oven on lowest setting (150 degrees) for 12 to 24 hours (or in a dehydrator), stirring once in a while, until completely dry and crisp. The macadamia nuts absorb a lot of water. It took over 24 hours to get mine completely dry. Store in an airtight container in the refrigerator or freezer. Macadamia nuts don’t last long at room temp.

Grain Free Muesli

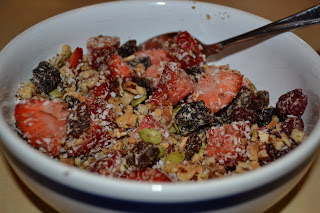
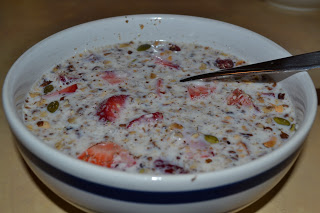
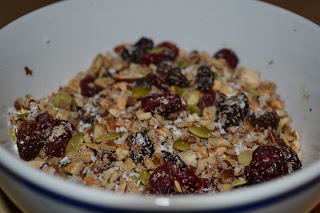
I recently made muesli for the first time. And it was really good! But my tummy doesn’t handle oats very well. So I can’t eat that. Then I came across this recipe on Gluten Free Diva for a grain free version of muesli. I tried it this morning. Awesome!! It’s basically the same ingredients I use for my grain free granola, except you don’t add fat/sugar and bake it. So it’s super easy to make. Only takes a few minutes. Plus this uses fresh fruit. You can add whatever you like to this recipe…as long as it’s not grains 🙂  And you can make a big batch to have on hand and just add fresh fruit when you eat it. It will freeze very well. This is a great option for quick breakfasts, summer breakfasts (when you don’t want anything hot) or if you’re a long time cereal lover (like me:) but don’t want to eat that junk anymore. This was the closest thing I’ve had to a bowl of cereal in a LONG time (I think I might be going on a year now!). What a treat! And I don’t have to worry about it killing my stomach. Love it. I didn’t actually measure anything. I just added what looked good. Adjust to your taste. I’ll post the original recipe (for 1 serving) with some of my adjustments in ().

Grain Free Muesli

3 strips of dried banana AND/OR 3 – 6 chopped dates (I used prunes)
one small handful dark raisins (I used golden raisins)
7 raw almonds, chopped (I used a combo of crispy almonds, crispy pecans and crispy walnuts)
7 raw pecan halves, chopped
handful raw sunflower seeds (not roasted or salted) (I used crispy pumpkin seeds)
1 – 2 tablespoons grated unsweeted coconut
one chopped apple (I gave Justin some apple chunks in his. I left them out of mine.)
about 6 – 8 blackberries or the berry of your choice (I used strawberries. Blueberries would be very good…great option in the summer.)

Mix all ingredients (except fresh fruit). Store in a closed container (freeze for long term storage or keep at room temp for shorter term). When ready to serve mix in fresh fruit. Top with milk or stir into yogurt.

Goulash

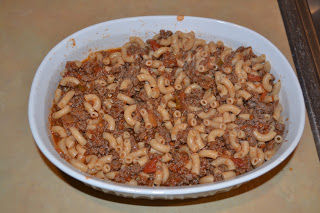
Last night I made an old classic for dinner. It’s one of those recipes that’s not really much of a recipe…just beef, sauce and noodles. But it’s my mom’s recipe for goulash. We ate this a lot growing up. I haven’t made it in a long time. But it’s always good and easy. I prepped it in the morning. Then at dinner time all I had to do was stick it in the oven (handy since I was going out for dinner and Justin was home/feeding Rebecca). I took the picture before I actually baked the casserole.

Goulash

2 cups elbow noodles, cooked and drained
1 lb. ground beef, cooked and drained
1 jar spaghetti sauce (preferably homemade)
salt to taste
garlic powder to taste
grated parmesan cheese for serving

Mix noodles, beef, sauce and seasoning in 2 qt. casserole. Bake at 350 degrees for 45 min. – 1 hr. Served topped with parmesan cheese.

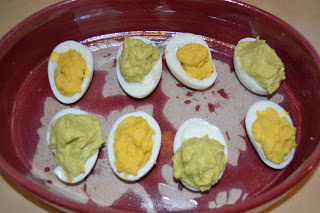
Green and Yellow Deviled Eggs (Packers Eggs)

Since my husband is from WI and is a huge GB Packers fan…and they were in (and won!) the Super Bowl  yesterday I wanted to make something fun for the occasion. I decided to make yellow and green deviled eggs. I made regular deviled eggs for the yellow. And I added avocado for green. Again, I didn’t really measure anything. I’ll try to give a rough estimate. I only made 4 eggs total. You can increase the recipe for a large group. I ate leftovers for breakfast this morning. Yum! Deviled eggs are good any time of day 🙂

Green Deviled Eggs

2 hardboiled eggs
1/4 – 1/2 ripe avocado
1 Tbsp. mayo (preferable homemade)
salt to taste

Yellow Deviled Eggs

2 hardboiled eggs
2 Tbsp. mayo (preferably homemade)
1 – 2 tsp. mustard
salt to taste

Split eggs in half. Put whites in a serving dish. Put yolks in a food processor (I use a mini processor for such small quantities). Process for a few seconds. Add remaining ingredients. Blend. Adjust to taste. Fill egg whites with yolk mixture. Chill.

*Note – the green eggs will turn color after a while because of the avocado. So don’t make them too far in advance.

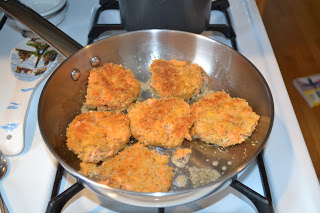
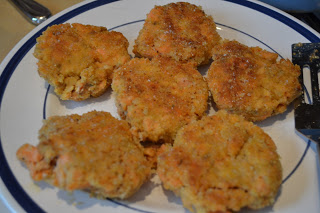
Grain Free Salmon Cakes

Yesterday I wanted something light for lunch since I knew we’d have a bigger, snacky dinner. And I’m trying to get more seafood into my diet right now. So I decided to make salmon cakes. I’ve made them before…but a recipe that takes some extra work and prep ahead. I wanted something easy. So I threw these together using what I had on hand. Simple, quick, healthy. And delicious!! All 3 of us liked them. And I’m excited to eat the leftovers. I cooked a couple salmon filets to use in these. You could used canned salmon. I didn’t measure anything. But I’ll try to give rough estimates of what I added.

My daughter LOVES these (and she can be picky about fish). So if you are trying to get your kids to eat more healthy seafood give these a try.

Salmon Cakes
makes ~ 7 cakes

2 (6 oz.) salmon filets, cooked OR 1 (14 oz.) can salmon
1 egg (optional)
1/4 cup mayo (preferably homemade)
1/2 – 1 tsp. Old Bay seasoning
1/2 – 1 tsp. sea salt

1/4 cup – 1/2 cup almond flour and/or coconut flour

Crumble salmon in a bowl. Add egg, mayo and seasoning. Mix well. Form into balls. Roll in flour and flatten slightly. At this point you can cover and refrigerate them (helps to firm them up/hold them together before cooking. and allows you to prep them ahead) or cook them immediately.

To cook, heat a large skillet and add butter, coconut oil, palm shortening and/or lard. Cook salmon cakes in oil/butter for about 5-7 min. per side.

Serve plain or with tartar sauce (homemade mayo mixed with a little sweet pickle relish).

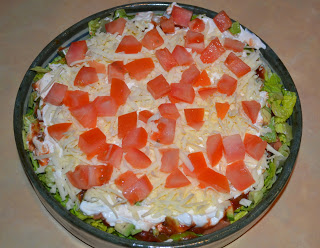
Mexican Layer Dip

I’m sure everyone has their own version of “7 layer dip.” I got a recipe many years ago from my sister called Mexican 8 Layer Dip. I haven’t made it in a long time. But I made some this morning for our Super Bowl dinner tonight. I think I ended up with 7 layers. I’ll post it as I made it. I love this recipe/idea because you can basically add whatever you/your family likes. I was also happy to finally have a chance to use one of my new serving dishes I got for Christmas. It was perfect for this!

Mexican Layer Dip

2 cups shredded lettuce
1 can refried beans
1/2 cup salsa
8 oz. sour cream
1 avocado, diced or guacamole or avocado dip
1 cup shredded cheddar cheese
1/2 cup diced tomatoes
(other possible toppings – sliced olives, diced onion, taco sauce, sliced green onions, sliced mushrooms, diced green chiles, corn)

Layer on platter in order listed. Cover and chill 4-24 hours. Serve with tortilla chips, crackers or raw veggies.

Peanut Butter Ice Cream

Our winter cow share sadly comes to an end next week. So I figured I better squeeze in one more batch of ice cream while we have our wonderful raw cream.

I wanted to try a new flavor and decided on peanut butter. I love ice cream with peanut butter in it!

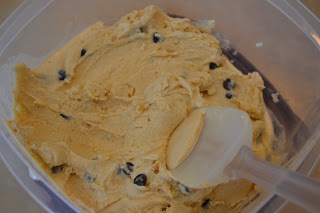
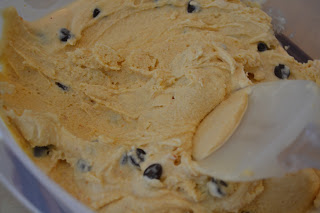
This turned out great. I added a few chocolate chips too. It’s almost like eating cookie dough in ice cream form. It even looks like it. Yum!!!

Peanut Butter Ice Cream

3 egg yolks (optional)
1/2 cup maple syrup, honey or cane sugar
1 Tbsp. vanilla extract
1 Tbsp. arrowroot
3 cups heavy cream, not ultrapasteurized
1/3 – 1/2 cup peanut butter (natural or homemade)
1/2 cup chocolate chips (optional)

Combine all of the ingredients (except chocolate chips) in a blender. Blend until well combined.

Pour the mixture into an ice cream maker and process according to instructions. During the last minute add the chocolate chips.

Transfer the ice cream to a freezer safe container. Freeze until firm.

Beefy Cream Cheese Salsa Dip (Taco Dip/Topping)

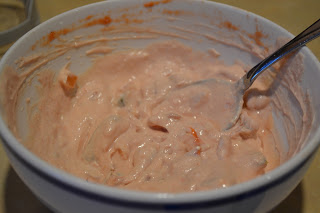
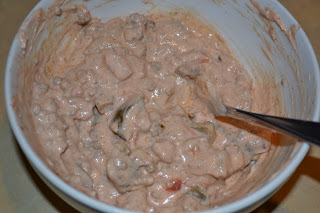
I wanted to try one of the dip recipes from Heavenly Homemakers last night. I was debating between the cream cheese salsa dip and the simple chip dip. When I looked at the recipes I realized I couldn’t do the chip dip because I don’t have any sour cream. But I did have leftover taco meat to use up. So I kind of combined the recipes/made it my own and made beefy cream cheese salsa dip. Or taco dip. It’s Laura’s cream cheese salsa dip with taco meat mixed in. Turned out great!!! A very easy and fun food. It only took a few minutes to make (since I already had the meat cooked, just had to warm it a little). And it’s filling enough (meat, cheese, veggies) to make it part of a main dish. You can use it as a dip with chips or veggies. Or even put it over rice or pasta. It’s also very healthy. I used homemade cream cheese, homemade salsa and taco meat with homemade taco seasoning. I didn’t actually measure anything. I just added what looked right. Note that the top picture is just the cream cheese salsa dip. The bottom picture has the meat added.

Beefy Cream Cheese Salsa Dip (Taco Dip/Topping)

1 (8 oz.) package cream cheese (or homemade)
1 ¼ cups salsa
1/2 – 1 lb. taco meat (adjust to your taste)
Tortilla chips, veggies, rice or pasta

Lay cream cheese out on counter for 1-2 hours to soften. Put softened cream cheese and salsa in a bowl and mix with beaters (I just used a spoon.) until thoroughly combined. Warm meat. Stir into cream cheese mix. Serve with tortilla chips (or fresh veggies or over rice or pasta).