Home » Kid-friendly Recipes » Page 56

Category: Kid-friendly Recipes

It is so important to cook homemade, healthy food. But it’s not always easy to find kid-friendly recipes.

That’s where I come in. I’ve got hundreds of kid-tested and approved recipes that won’t keep you in the kitchen for hours or stretch your budget too thin.

I focus on allergy-friendly, whole foods. But I always cook with kids in mind. I take all sorts of feeding challenges into account too.

We’ve dealt with every allergy possible, so I’ve created recipes that are gluten free, nut free, dairy free, egg free, soy free, corn free, coconut free and more!

Kid-friendly recipes don’t have to be boring. And they are certainly not limited to chicken nuggets and pizza every night.

A nourished child will enjoy a wide variety of fruits, vegetables, proteins, carbohydrates and fats. Get your kids in the kitchen with you and start cooking! Have fun with food and your kids will learn to love eating.

Dairy Kefir – Take 2

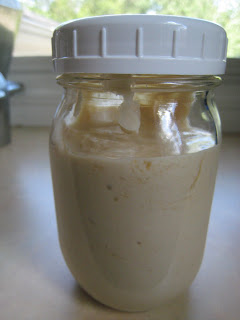
Last week I got some kefir grains and made my first attempt at making some. I wasn’t really sure what I was doing or what it was supposed to look like/taste like. And it didn’t seem to work that well. So I did a little more research, watched a few videos and tried again this week. Well, I think it worked this time 🙂  And it really wasn’t hard at all. I think I just hadn’t given my grains enough time to adjust/grow before. My first batch of kefir is still probably on the thin side. But it’s way thicker than the stuff I made last week. I mixed kefir and yogurt together yesterday for lunch. That worked well. The kefir does have a pretty strong sour taste. I love the tangy taste of plain yogurt. But kefir is different. I haven’t accquired the taste for eating it plain yet. But maybe I will over time. I’m excited to have kefir and to try in various recipes. And mostly excited about its impact on my gut 🙂

In addition to dairy kefir there is also water kefir. Which also is great for your digestive system. I’ve read about it many places. Maybe I’ll try that next (thanks for the suggestions Sara and Donielle!).

Here’s the basic idea of how to make dairy kefir:
Kefir

1. Put kefir grains in a clean container (a mason jar works well)
2. Poor milk into the jar (how much milk you use depends on how many grains you have and how much kefir you want to make. To start out I’m only using about a cup of milk.) and stir with non-metallic spoon.
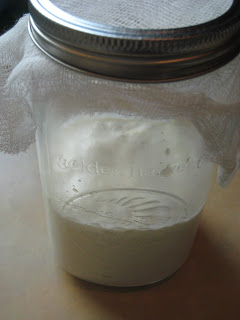
3. Cover jar loosely (I use cheesecloth secured with a ring)
4. Set in a warm spot, away from sunlight (I put mine in a kitchen cupboard…above my oven)
5. In 12 – 48 hours you should have kefir (The time depends on your grains and how strong you like the kefir)
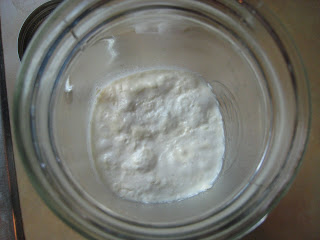
6. Strain the kefir into another jar. (I pour it through a strainer)
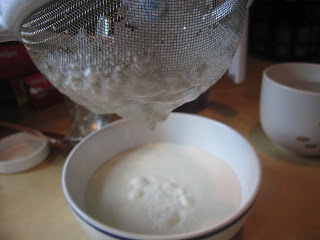
7. Put the grains back into the old jar and pour milk on top. Repeat steps 3 – 6 for more kefir. Or store in the refrigerator if you want a break from making kefir.
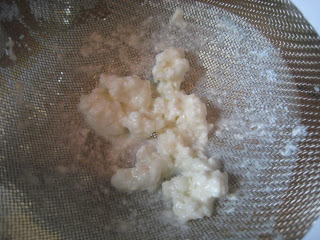
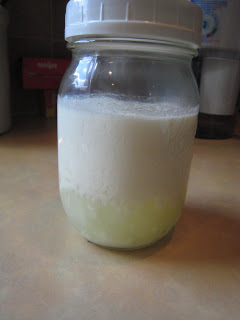
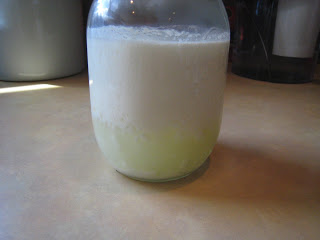
8. Cover the kefir you just  made. You can put it right in the refrigerator. Or you can let it set out a while to continue to thicken and separate. If it separates the top portion will be thicker, like yogurt. The bottom will be whey. You can use them together or separate, just like you do with yogurt.
Strawberry Banana Sourdough Muffins

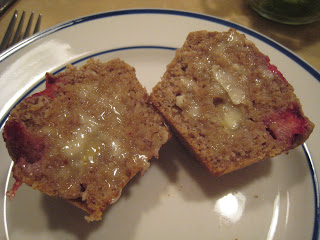
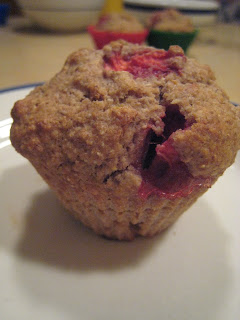
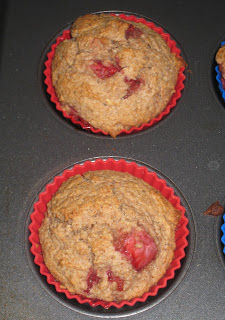
It’s strawberry season, and we have a bunch in the fridge. And my sourdough starter is getting big. So I figured I’d use them up together. While searching for sourdough muffin recipes I mostly found recipe for blueberry muffins. And most of them are very similar. So I just picked one as my base. Then I used strawberries and bananas (I have some bananas to use up too) instead of blueberries. Any berry would work. I bet diced apples would even be good. I made these yesterday morning for breakfast. Yum!!! Very good. All 3 of us really like them. They taste great warm with a healthy spread of butter 🙂  Butter and sourdough are such a great match. These are mildly sweet and still have a hint of the sourdough flavor. I used the recipe from Sourdough Home. I’ll post the original recipe and add my adjustments. This said it made 6 muffins, so I doubled the recipe…and got 21 muffins! I filled the muffin cups to the top too. Maybe it makes 6 jumbo muffins. I fed my sourdough starter the night before and let it sit on the counter so it was ready in the morning. I don’t know if this step is necessary, but most recipes suggest it (although this one didn’t). Some chopped crispy walnuts would be really good in these.

*Edited 8/5/10 – I made another batch of these today with a little mashed banana and some blueberries. So good!!! And more moist than with the strawberries. I used about 1 cup of berries instead of 1/2 cup. I got 12 muffins out of it.

Strawberry Banana Sourdough Muffins
make 10-12 muffins

1 cup whole wheat flour
1 tsp. baking soda
1/4 cup sugar or fructose (You can double this if you want them sweeter. For a double batch I used 3/4 cups…worked well.)
1/4 tsp. salt
1 egg
1 tsp. vanilla
1/4 cup oil (I used coconut)
1 cup sourdough starter
1/2 cup blueberries (I added diced strawberries. I also added some mashed banana and some small banana chunks.) (I think they’re better with 1 cup of berries…blueberries work very well.)

Preheat oven to 425F.

Combine dry ingredients in small bowl. Stir in blueberries (strawberries and banana chunks). Combine wet ingredients (and mashed banana) in medium bowl. Add dry ingredients to wet ones.

Mix quickly and spoon into muffin cups (I used silicon muffin cups…the muffins popped right out.).

Bake at 425 for 18-20 minutes.

Strawberry Shortcake

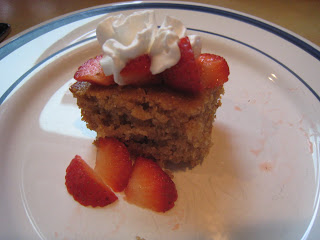
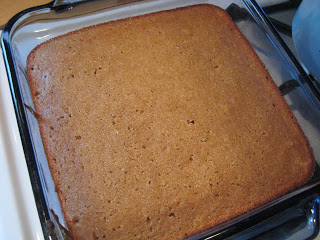
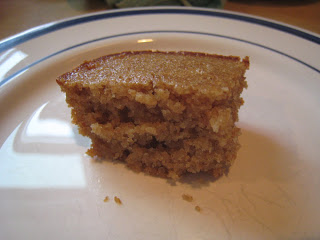
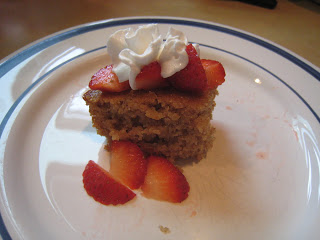
I’ve never really been a fan of strawberry shortcake. I don’t like biscuit-type things or the sponge cake kind either. And I don’t like whipped cream. So that leaves the strawberries 😛  And that is what I would eat growing up when my mom made it…just the sweetened strawberries (sometimes on ice cream) while everyone else ate the shortcake. It’s strawberry season right now. And I decided I’d try making shortcake…never have before. Laura on Heavenly Homemakers posted a simple, healthy recipe the other day…that looked good to me…because it’s not a biscuit or a sponge 😛  Rebecca and I made it yesterday. So easy! And really good. It is very mildly sweet. And goes really well with strawberries. I still have mine with ice cream instead of whipped cream, but at least this time I actually ate the shortcake 🙂  All 3 of us love it. Of course Rebecca is a girl after my own heart…I got her a little dish…but she wouldn’t eat it until I added ice cream and chocolate 😛

Whole Wheat Strawberry Shortcake

1 1/3 cups whole wheat flour (I use some freshly ground sprouted whole wheat and some freshly ground whole wheat flour)
1 tsp. baking powder
2 eggs
1/2 cup honey
1/3 cup oil (I use coconut oil)
1 tsp. vanilla extract
1/2 cup milk (I used my mild kefir)

4-5 cups of fresh, sliced strawberries (I gave it to Rebecca with fresh strawberries. I mashed some strawberries with cane sugar for ours 🙂  It’s good both ways.)

Whipped cream (fresh cream whipped to form soft peaks, with a bit of stevia added for sweetness) (Justin had readi-whip on his…have some on hand to use up from a dessert I made for church last week. I had ice cream on mine.)
—————————-
Mix together flour and baking powder. Add in eggs, honey, oil, vanilla and milk. Stir well (or mix well with hand mixer). Pour into a well buttered 8×8 inch baking pan. Bake at 350° for 20-25 minutes (Mine took about 30 minutes).

Allow cake to cool completely. Top with fresh strawberries and whipped cream. (9 servings)

Sourdough Pancakes

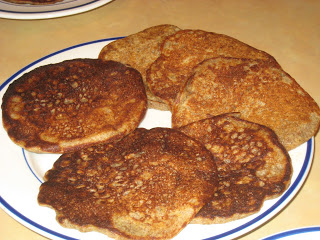
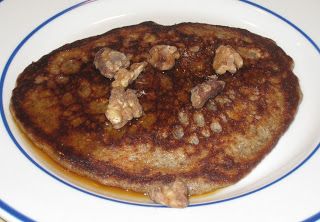
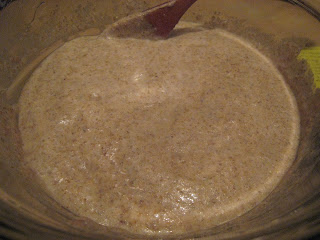
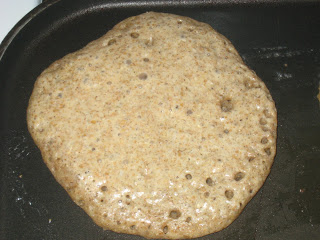
Now that I have a sourdough starter I’m trying to find ways to use it. This morning I made sourdough pancakes for breakfast. YUM!!! They were so good. And so easy. I served them with real butter and local maple syrup and a sprinkling of crispy walnuts. What a great way to start the day. I’ll be making these again for sure. And I’ve got a few in the freezer now. I got 10 pancakes out of 1 batch. In addition to tasting good it is fun to make these pancakes…to watch them come alive as you mix the batter and add the baking soda. Very cool. I got the recipe from Naturally Knocked Up.

Sourdough Pancakes
makes ~ 10 pancakes

2 cups sourdough starter
1 Tbsp. maple syrup (or equivalent sweetener) (I used honey because it was convenient)
1 beaten egg
3 Tbsp. coconut oil (or melted butter)
1/2 tsp. sea salt
1 tsp. baking soda
1 Tbsp. water

The night before:
Start by feeding and setting your starter out the night before (make sure you have at least 3 cups starter). You want it at room temp in the morning.

In the morning:
Preheat pan to a medium heat. Mix the baking soda in the water and set aside. Mix starter, egg, oil, and salt until well combined. Add water mixture right before your ready to place on pan and stir gently.

Pour about 1/4 cup of batter for each pancake (I did about 1/3 cup). Cook until the bottom is a nice golden brown and the bubbles have popped on top (watch for the popping and the holes staying open).

Flip, cook a bit more, top with butter and syrup (or nuts, fresh fruit, or fruit topping), and enjoy!

Fermented Punch

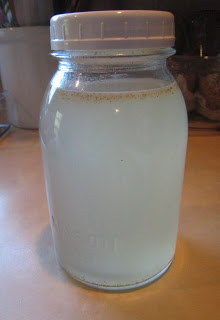
Keeping with my June goals I’m trying some fermented drinks. These can be more beneficial to your digestive system and overall health than only drinking water. And some of them are so easy to make. So I’m giving it a shot. I’m starting with punch. It’s a Nourishing Traditions recipe. It’s kind of like lemonade (basically lemon juice, water and sugar). Not sure how the fermenting will impact the taste. It’s still in the fermenting process. I’ll have to update once I’ve tried it (tonight or tomorrow). I hope it turns out well. It was simple to make. And a perfect way to use up some of the organic lemons I have. I only made a half recipe to try it. If it’s good it’ll be a very cheap, healthy and easy drink to have on hand in place of things like juice.

**Edited 6/2/10 – This is very good! Tastes like lemonade. Now I have a great replacement for my grape juice. I was wondering how I was going to be able to cut out juice. This is it! Cheap, easy and good for my tummy.

Fermented Punch
Makes 2 quarts

juice of 6-8 lemons
1/2 cup Rapadura (I used organic cane sugar)
1/2 cup whey
1/2 tsp. grated nutmeg
2 quarts filtered water

Place all ingredients in a 2 quart glass container (I used a 1 quart mason jar to make a half batch). Cover tightly and leave at room temperature for 2-3 days (I shook it up a bit when I first put it in the jar). Skim off any foam that may have risen to the top. Cover tightly and refrigerate. The punch will develop more flavor over time.

Kishk Granola

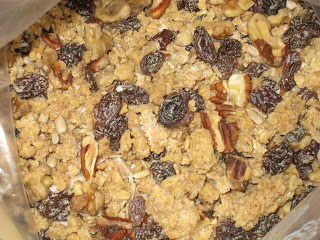
This morning I made a new batch of granola. Last week I made a batch of soaked granola. I made it the same way I always make granola. But it got a bit overdone. Today I decided to try a “raw” granola…meaning unbaked. I got this recipe from Nourishing Traditions. The main ingredient is kishk (a fermented dish made with cracked wheat that is soaked and dried). I substituted my soaked and dried oats. I also added some flax seed and a few sunflower seeds. It’s kind of strange to just have it all mixed together unbaked, kind of loose. We’ll see how it works. I’ll try some later today. I only made a small batch to try it out. I think my next experiment will be somwhere inbetween…only bake it for 5 or 10 minutes. Maybe that will be the perfect balance. It will hold together, but not be overdone.


Kishk Granola
Makes 6 cups

4 cups kishk (I used soaked oats) (this can be gluten free if you use gf oats)
1 cup crispy pecans, almonds or cashews, chopped (I used pecans and walnuts…if using walnuts be sure to store the granola in the refrigerator since walnuts can easily get rancid)
1 cup dried sweetened coconut meat (I just used some organic, unsweetened coconut flakes and added a little extra sugar to compensate)
1 cup dried fruit (I used raisins)
1/2 cup Rapadura (I used organic cane sugar)

Mix all ingredients together. Store in zip-lock bags or airtight containers in refrigerator. Eat like granola with milk or cream.

This cereal will actually keep well for several weeks at room temp and is a good provision to take when one is traveling and wants to avoid hotel breakfasts.

Nut Butter

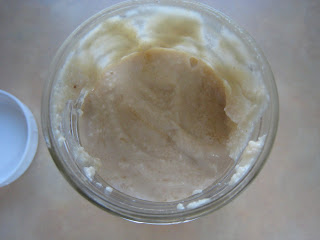
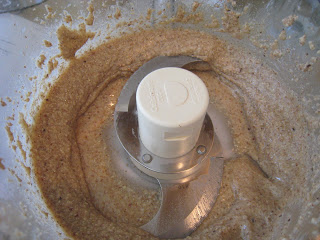
I made crispy peanuts this week and used them to make peanut butter. This recipe is from Nourishing Traditions. This is a very healthy treat! Soaked nuts, coconut oil, unrefined sea salt and raw honey…what could be better? I had some on my toasted sourdough bread this morning…YUM!!!! It’s actually quite sweet…you could cut back on the honey. Either way it is so delicious. I can’t wait to try this recipe using other types of nuts.

Nut Butter
Makes 2 cups

2 cups crispy nuts, such as peanuts, almonds or cashews
3/4 cup coconut oil
2 Tbsp. raw honey
1 tsp. sea salt

Place nuts and sea salt in food processor and grind to a fine powder. Add honey and coconut oil and process until “butter” becomes smooth. It will be somewhat liquid but will harden when chilled. Store in an airtight container in the refrigerator. Serve at room temp.

almond butter
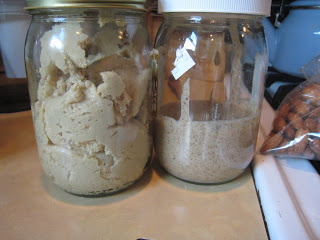
Edited 6/26/10 – I made cashew butter and almond butter using this recipe yesterday. Both so delicious!! Rebecca kept asking for more 🙂  She had toast with cashew butter and a tortilla with almond butter yesterday. I only put a drizzle of honey in this time. Still plenty sweet.
cashew butter (left), almond butter (right)

Crispy Peanuts

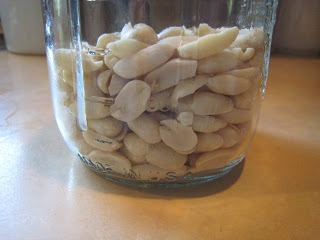
I made a batch of crispy peanuts this week. Similar method to the pecans and walnuts I’ve made. I used my dehydrator this time since it’s too hot to use the oven. It took a little longer but worked just fine. These are really good. And they’re even better in homemade peanut butter 🙂

Crispy peanuts

4 cups raw peanuts, preferably skinless
1 Tbsp. sea salt
filtered water

Mix peanuts with salt and water and leave in a warm place for at least 7 hours. Drain in a colander. Spread on stainless steel baking pan and place in 150 degree oven for 12 to 24 hours, turning occasionally, until completely dry and crisp. Store in an airtight container.

Fermented Fruit Chutney

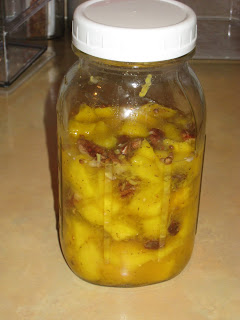
Last night I made another lacto-fermented recipe – fruit chutney. I used mangos, but you can use a variety of fruits. I don’t know if I’ve ever had chutney. But it sounded interesting. You generally eat it with meat. This smelled so good when I made it. Kind of like fresh lemonade 🙂  It looks a little odd because you see nuts and raisins floating around. But I bet it will taste very good. I only made a half recipe. This also comes from Nourishing Traditions

**Updated 5/30/10 – This turned out pretty well. We had it with beef brisket. They paired nicely. Justin said it tasted like something from a fancy restaurant 🙂  Neither Justin nor I are huge mango fans, so I think next time I try this I’ll use a different fruit. I bet apples or pears would be really good. And I think a little less salt would be good too.
Fruit chutney
Makes 1 quart

3 cups fresh peaches, pears, apples, mango or papaya
1/2 cup flitered water
grated rind of 2 lemons (preferably organic since you’re using the rind)
juice of 2 lemons
1/8 cup Rapadura (or cane sugar)
2 tsp. sea salt (unrefined)
1/4 cup whey
1/2 cup crispy pecans, chopped
1/2 cup dark raisins
1 tsp. ground cumin
1/2 tsp. red pepper flakes (I skipped this)
1/2 tsp. dried green peppercorns, crushed (I used some fresh ground black pepper)
1/2 tsp. dried thyme
1 tsp. fennel seeds (I skipped these)
1 tsp. coriander seeds

Mix water, lemon juice, lemond rind, Rapadura, salt and whey. Peel fruit and cut up into lemon juice mixture. Mix with nuts, raisins, herbs and spices and place in a quart-sized wide-mouth mason jar. Press down lightly with a wooden pounder or meat hammer (I used the end of a wooden spoon), adding more water if necessary to cover the fruit. The mixture should be at least 1 inch below the top of the jar. Cover tightly and keep at room temperature for 2 days before transferring to refrigerator. This should be eaten within 2 months.

Fermented Ketchup

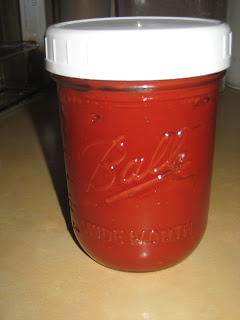
Another lacto-fermented food that sounded easy…and like something we would use regularly is ketchup! I’ve been wanting to make ketchup for a long time. And this sounded so easy and so good for my tummy. Perfect! It really was so simple to make. I can’t wait to try it later this week. I did have a little taste when I mixed it…yum! Ketchup that helps you dgiest your food…genius 🙂  I only made a half recipe. This is from Nourishing Traditions. I like the quote from the author:

“A return to ancient preservation methods would transform America’s favorite condiment from a health liability (produced in huge factories) to a beneficial digestive aid (produced as an artisinal product in farming communities).”

**Updated 5/30/10 – We tried this with beef brisket and french fries last night. Yum!!! It has a little different taste than the ketchup we normally use. But it’s still very good. It reminds me a little of pizza sauce. Rebecca didn’t even notice it wasn’t what we usually eat. Or if she did she liked this one better. She was easting it plain…scooping it with her fork and eating it 🙂  There wasn’t any left on her plate at the end of the meal. Definitely a keeper and a very easy way to eat fermented foods.

Feremented Ketchup
Makes 1 quart

3 cups canned tomato paste
1/4 cup whey
1 Tbsp. sea salt (be sure it’s unrefined)
1/2 cup maple syrup
1/4 tsp. cayenne pepper (I left this out)
3 cloves garlic, peeled and mashed
1/2 cup homemade fish sauce or commercial fish sauce (I used commercial…maybe someday I’ll make my own)

Mix all ingredients until well blended. Place in a quart-sized wide-mouth mason jar. The top of the ketchup should be at least 1 inch below the top of the jar. Leave at room temp for about 2 days before transferring to the refrigerator.