Home » Kid-friendly Recipes » Page 57

Category: Kid-friendly Recipes

It is so important to cook homemade, healthy food. But it’s not always easy to find kid-friendly recipes.

That’s where I come in. I’ve got hundreds of kid-tested and approved recipes that won’t keep you in the kitchen for hours or stretch your budget too thin.

I focus on allergy-friendly, whole foods. But I always cook with kids in mind. I take all sorts of feeding challenges into account too.

We’ve dealt with every allergy possible, so I’ve created recipes that are gluten free, nut free, dairy free, egg free, soy free, corn free, coconut free and more!

Kid-friendly recipes don’t have to be boring. And they are certainly not limited to chicken nuggets and pizza every night.

A nourished child will enjoy a wide variety of fruits, vegetables, proteins, carbohydrates and fats. Get your kids in the kitchen with you and start cooking! Have fun with food and your kids will learn to love eating.

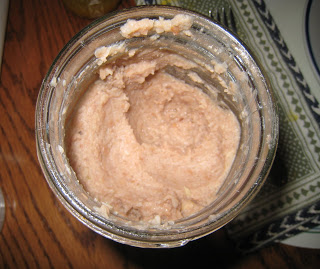
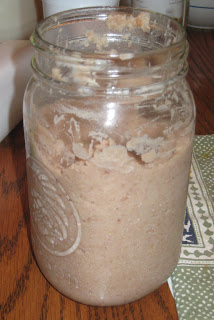
Fermented Bean Paste

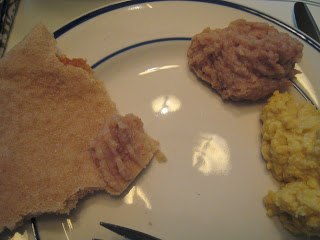
I’m trying out some recipes of lacto-fermented foods. Why? Because it’s good for digestion, of course 🙂  It enhances the food’s digestibility and increases the vitamin level. It also produces helpful enzymes and antibiotic and anticarcinogenic substances. And it promotes the growth of healthy flora in the intestines. To top it off…it’s easy! So I say, why not? And especially now that it’s hot it’s nice to be able to make food that you don’t have to cook. My first recipe is fermented bean paste. It sounded easy and delicious…kind of like hummus or refried beans. We haven’t used it yet, so I’ll have to update later with the verdict. I did taste just a little when I made it. It was quite strong, but good. I think part of the strong flavor comes from the onions I used…my FIL grows very strong onions. Maybe next time I’ll use a milder onion. I forgot to take a picture when I made it, so I’ll have to update later after we try it. You do need whey to make this (and most fermented fruits/veggies). You can make whey by straining yogurt. Very simple  I got this recipe from Nourishing Traditions.

*Updated 5/29/10 – We tried this last night. It’s quite good. Justin and I both liked it. Like I said before, it’s very strong. The next time I make it I’ll use a milder onion. But it’s still good. I served it with homemade pita bread (along with some hummus). Great combo. And it’s good enough that I sometimes eat a spoonful before a meal (even if I’m not serving it with the meal) just to help my tummy. That’s what it’s for 🙂  It’s kind of a condiment…like having pickles with a meal. You just have a little with your meal.

Fermented Bean Paste
makes 1 quart

3 cups beans, cooked and drained (I used pinto beans…soaked for about 24 hours then cooked  for an hour or two)
1 onion, peeled and coursely chopped (I didn’t use this much onion and it was still very strong)
3 cloves garlic, peeled
1 Tbsp. sea salt (make sure it’s unrefined sea salt)
4 Tbsp. whey

Place the onion and garlic in food processor and process until well chopped. Add remaining ingredients and process until smooth. Place in quart-sized wide-mouth jar, leaving 1 inch of space between the top of the beans and the top of the jar. Cover tightly and leave at room temp for about 3 days before transferring to the refrigerator (it might take less time if your house is hot or longer if it’s cold). Serve as a dip with pita chips or tortilla chips.

Whole Wheat Soaked Tortillas

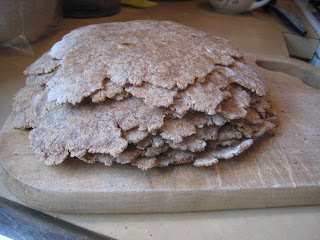
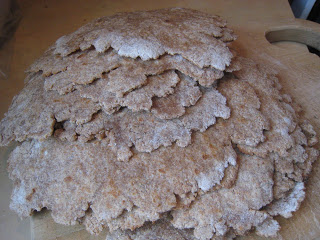
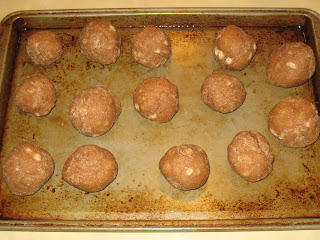
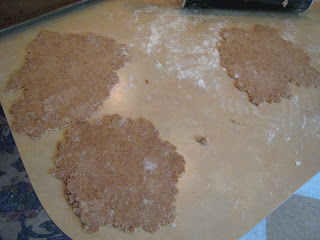
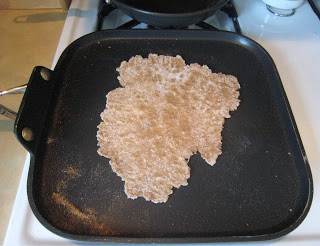
I’ve had tortillas on my list of things to try making for a long time now. I recently found a soaked recipe that sounded super simple on Naturally Knocked Up. So I had to try them. These really are soooo easy to make. And they’re good! As usual Rebecca ate a whole one as soon as it came off the pan 🙂  She’s my taste-tester. She definitely approved. And they were great wtih our tacos last night (more on that later). Of course with any first attempt they weren’t perfect. I only made a half batch for my first try. I got around 15 tortillas out of it. They were a little dryer and a little thicker than we’d ideally like, but still very good. The recipe says the dough can sit for 1 to 8 hours. Mine actually sat for a little over 8 hours. And the tops of the dough balls got dried out a little. I think next time I’ll make the dough slightly more moist. And I’ll cover the balls better or not let them sit as long. I’ll also try to roll them a little thinner next time. I did get them farily thin, but they could still be thinner. I love that these are soaked (I used yogurt this time. Maybe next time I’ll try whey) and that they are whole wheat. And now I have supply of homemade tortillas in the freezer! These didn’t take long to make. I prepped the dough in about 10 min. in the morning. Then making them took a half hour or less. I could roll one or two while one was cooking. And I had most of the mess cleaned up before the last one was done cooking.

Whole Wheat Soaked Tortillas

5 cups of flour (I used whole wheat)
2 teaspoons salt (I used sea salt)
1/2 cup oil (I used EVOO)
1 1/2 – 1 3/4 cup boiling water
2 Tbsp whey, kefir, yogurt, etc. (I used yogurt)

Mix the flours and salt together and then hand mix in the oil and whey. Mix and rub together until it kinda looks like oatmeal. Make a well in the center and pour the boiling water in. Stir together until dough forms and is neither sticky or crumbly. Then roll into golf ball sized balls. For burritos, make them a bit bigger, for smaller tacos make just a tad smaller. Let sit, covered, for at least an hour or up to 8 hours.

Then start rolling. (get your non stick pan started on a fairly high heat for about 5 minutes before you throw one on).

Plop it down on a hot naked pan (no grease!) for about 10 seconds until you see it just start to bubble around the edges.

Flip over and let set for about 30 seconds. (Sometimes they puff up and I’ll either just leave ‘em or hold them down with a spatula, either way they turn out fine)

Flip over to the first side and cook for another 30 seconds. After doing a couple you’ll begin to see exactly how high your stovetop should be set. You want them to cook quick, but not burn. Leave them undercooked and they can get dense.

Sourdough Bread


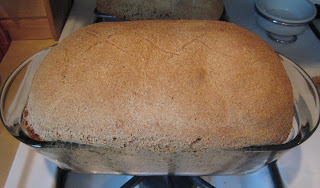
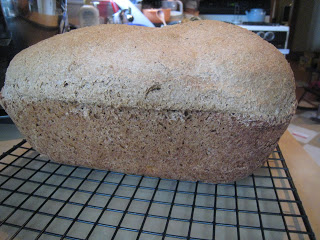
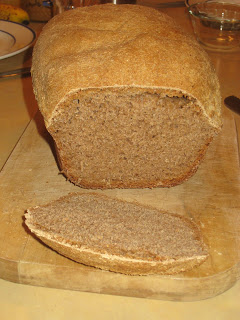
Sourdough Bread | Homemade Dutch Apple PieNow that I have a sourdough starter, I need to use it! My first experiment was the obvious…sourdough bread. I got the recipe from Nourishing Traditions.

The recipe makes a LOT of bread. I only did a half recipe to try it out. Especially since I had no idea if my starter was even good. I didn’t want to waste 13 cups of flour on something that might not work 😛  Plus I didn’t have 8 cups of starter.

After making quite a few loaves of sourdough bread now I have adjusted the recipe for making one loaf.

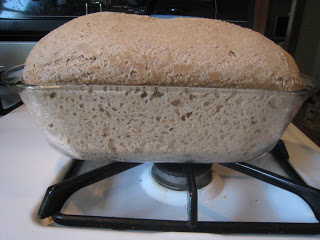
This is another plan ahead baking project. Sourdough bread has to rise for a long time. I mixed the dough in the morning (got the dough in the bread pans around 6:30 am). I didn’t end up baking it until about 6 pm! This works well if you want fresh bread for dinner.

Prepare the dough in the morning. Then pop it in the oven about 90 minutes before dinner.

For many people making traditional sourdough sounds intimidating. But it is actually so much easier than making a yeast bread.  You don’t have to worry about whether or not the yeast is working. You don’t have to get water temperatures just right. Sourdough is very forgiving. Plus it only takes three ingredients – flour, water and salt. Just mix, knead and bake.

Sourdough bread has a wonderful, mildly sour taste. It goes well with scrambled eggs or a bowl of soup. In my opinion the best way to eat it is plain with lots and lots of butter!

Sourdough bread is also great if you are pregnant or nursing.  The fermentation breaks down most of the gluten, if that is a concern (you must still avoid it if you have celiac). And sourdough bread helps with milk production. It is a great source of carbohydrates for a nursing mom.

Traditional sourdough is healthy and easy on your tummy. My whole family enjoys it even with our allergies and sensitivities. We seem to tolerate sourdough fine.

You can use a variety of flours when making sourdough. I always use rye for my starter. Then I usually use spelt for my baking. You can also use kamut or einkorn. Whole wheat works as well, but it may be harder to digest.

If you’ve never tried traditional sourdough bread you’re missing out! Get your sourdough starter going and whip up a loaf of fresh bread. Your whole family will enjoy it.

Once you’ve mastered sourdough bread you can try other delicious recipes like english muffins, honey walnut bread, granola muffins, crackers, breakfast cookies, pizza dough and even graham crackers!

Do you enjoy sourdough bread? What is your favorite way to use sourdough?

Sourdough Bread
makes 1 large loaf

2 cups sourdough starter (at room temp)
3 cups spelt, kamut, einkorn or hard winter wheat flour
1/2 Tbsp. course sea salt
3/8 cup cold filtered water

The day before making the bread feed your sourdough starter (be sure you have at least 3 cups total) and leave it at room temperature.

Place the starter, salt and water in a large bowl (a stand mixer bowl works well) and mix with a wooden spoon until the salt has dissolved. Slowly mix in the flour (with a dough hook in a stand mixer). Add extra flour if the dough is too wet. Let it knead for 15 minutes.

Without pressing down the dough, cut or shape loaf into the desired shape and place it in a greased loaf pan. Cut a few slits in the top of the dough, cover and let rise from 4 to 12 hours.

Bake at 350 for about an hour. Allow to cool before slicing.

The bread will keep for up to a week without refrigeration.

Crockpot Salsa Chicken and Black Bean Soup

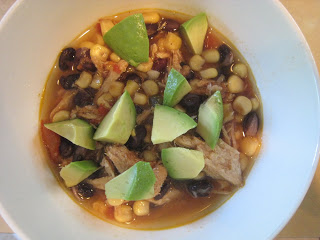
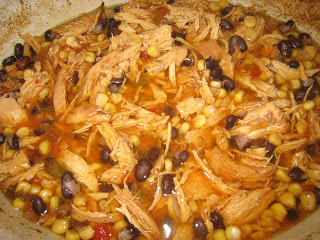
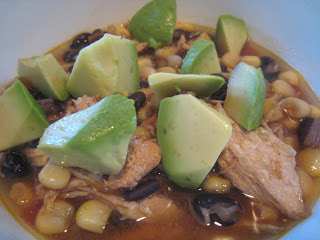
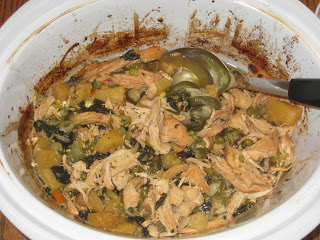
For dinner last night I tried a new soup recipe. I saw it on my SIL’s blog. It’s originally from A Year of Slowcooking. So easy and so good!!! Plus I got to try my sprouted black beans. This only took a couple minutes to throw together. Love that. I served it with avocado, cheddar cheese and tortilla chips. I had sour cream, but none of us used it. I only used about half the amount of liquid since I didn’t want a huge batch. Worked very well. Still plenty leftover for another meal.

Crockpot Salsa Chicken and Black Bean Soup

1 pound chicken (I used one large chicken breast)
1 cup dried black beans (or 2 cans, drained and rinsed) (I used about 1 1/2 cups sprouted and cooked beans)
4 cups chicken broth (I used 2 cups water plus some salt, garlic powder and chili powder)
1 cup sliced mushrooms (I didn’t add these)
1 cup frozen corn
1 jar prepared salsa (16 oz) (I used a pt. of homemade salsa)
1 1/2 tsp. cumin
1/2 cup sour cream (to stir in at the end) (we didn’t use this)
shredded cheddar cheese, avocado slices, cilantro (all optional)

I used a 6 quart crockpot. You will need a 4 quart or larger.

If you know you are going to make this the night before soak the black beans in enough water to cover and another 2 inches overnight. In the morning, drain the water and rinse the beans. (Or you can sprout your beans.)

If you don’t have super hard water or live in a super high altitude, you can quick soak the beans by pouring boiling water over them and let them sit for an hour or two.

Drain and rinse the beans. Add to the crockpot. Put in the chicken, and add the broth and salsa. Pour in the corn and mushrooms, and add the cumin. Stir, but don’t disturb the beans – let them stay at the bottom of the pot, closest to the heating element.

Cover and cook on high for 9 hours (if you are using dry, unsoaked beans…not recommended for anyone with digestive issues :).

If you are using beans you soaked overnight, canned beans, or pre-cooked beans, you can cook on low for 6-8 hours, or on high for 4-5 -similar to normal soup-cooking time. (I added my cooked beans during the last hour…I didn’t want them to cook any more than they already had.. I just wanted them warmed.)

If you’d like to thicken the broth, you can use your immersible blender to blend a bit of the beans and chicken. If you don’t have one, scoop out 2 cups of the soup and carefully blend in your traditional blender. Stir the mixture back into the crockpot.

Stir in the 1/2 cup of sour cream before serving (optional). Garnish with shredded cheese and avocado slices.

Crispy Walnuts

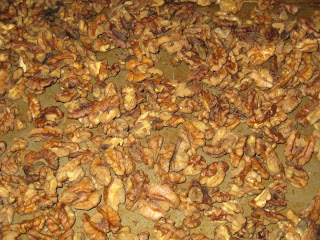
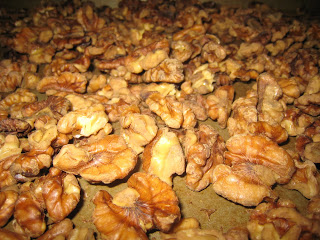
I made a batch of crispy walnuts this week. Yum!!! And so simple. It’s the exact same method I used for the crispy pecans. Just note that walnuts can go rancid faster than pecans. So they should be stored in the refrigerator or freezer.

Crispy Walnuts

4 cups (1 lb.) walnuts
2 tsp. sea salt
water

Mix walnuts with salt and water (I covered them loosely with plastic wrap.) and leave in a warm place for at least 7 hours or overnight (I soaked them for close to 24 hours.). Drain. Spread walnuts on baking pan. Place in oven on lowest setting (150 degrees) for 12 to 24 hours, stirring once in a while, until completely dry and crisp. Store in an airtight container in the refigerator or freezer.

Soaked Granola

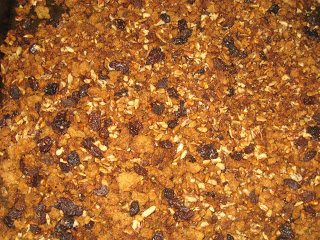
Last week I made a batch of soaked oats and crispy pecans. Then I used them to make homemade granola. I used my usual granola recipe. But I added coconut oil instead of another kind of fat. Maybe next time I’ll try butter too. This turned out really well. Although I did let it bake a bit longer than I would have liked since I was busy with other things. It is crunchier than the granola you make with unsoaked oats. But I like that. I’ll be making my granola like this from now on to make it easier on my tummy. I’ll repost my granola recipe here.

Mary’s Soaked Granola
*this can be gluten free if you don’t use wheat bran and if you tolerate/use GF oats

12 cups soaked and dried rolled oats
2 cups dried fruit (any mix or just raisins)
2 tsp. cinnamon

optional mix ins:
1 1/2 cups ground flax seed
1 1/2 cups wheat bran or wheat germ
1 cup chopped nuts (crispy pecans, walnuts or almondsl)
1 cup seeds (pumpkin, sesame, sunflower, etc.)
1 cup coconut (sweetened or unsweetened…whatever you prefer, I used organic unsweetened)
1/2 cup honey
1/2 cup maple syrup
1/2 cup coconut oil, melted butter or EVOO (or a combo)

Heat oven to 325. Mix all dry ingredients, except fruit and crispy nuts, in one or two large bowls (however it is easiest to stir). (Mix a small amount of safe (oats, coconut, wheat bran, coconut, rasisins), dry ingredients in a smaller bowl for a toddler to mix and eat:) Pour honey, syrup and oil over dry ingredients. Mix well. Spread granola onto baking sheets (you can do all of it on 2 sheets…they’ll be very full. Or you can do it on 4 sheets (2 batches) so that it bakes a little more evenly. You may have to cut the baking time down a bit if you do it on 4 pans). Bake 20 – 30 min., stirring 2 or 3 times throughout. Add fruit and nuts during the last 5 min. or after granola is done baking. Let cool. Store in sealed container or bag. Freezes well. I generally freeze it in gallon freezer bags then just take out a little at a time as we need it. It can even be eaten directly from the freezer. You can scale the recipe down if you don’t want to make a large batch. I make a ton and freeze it so that I don’t have to make it all the time.

Soaked Pot Roast

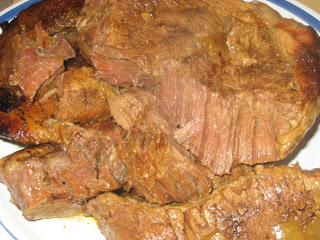
On Monday I made a roast to use up more of our Voogt beef since we’ll be getting a new batch soon. I found a soaking method in Nourishing Traditions to make the meat more tender/easier to digest. So I used that suggestion and then made my roast in the crockpot. I didn’t follow the actual pot roast recipe. I’ll just post the recipe for preparing the meat. I also didn’t have several days to soak my meat. But I think any amount of soaking helps. This turned out great! Yummy tender meat.

Soaked Pot Roast

3 lb. roast (I used a round bone roast)
1 quart buttermilk (I just used enough to cover the roast)
2 Tbsp. butter
2 Tbsp. EVOO

Using a needle or skewer (I used a knife) stick the meat all over. Place in a bowl or glass loaf pan (I used an 11×7 glass baking pan). Pour buttermilk over top. Cover. Allow to marinate in the refrigerator, turning occasionally, for several days.

Remove from the buttermilk and dry off meat with paper towels. In a pan brown on all sides in butter and oil.

At this point I put the meat in the crockpot with some carrots, potatoes and onions. I removed any extra fat from the pan and then deglazed it a bit with water. I added that water to the crockpot. The roast cooked for about 12 hours.

Crockpot Hawaiian Chicken

For lunch on Sunday I made crockpot Hawaiian chicken. I’ve made it before, but I guess I haven’t posted it. It’s a super simple recipe from A Year of Slowcooking. I modified it a bit this time to make it a little more like sweet and sour chicken. Either way it’s very good! And so easy to make. Just toss a few ingredients in, mix and turn it on. I usually serve it over rice. I sprinkled some crispy pecans over mine for a little crunch.

Crockpot Hawaiian Chicken

enough chicken for 4 (I used 2 large chicken breasts…they were frozen when I put them in. I shredded the meat part way through cooking)
20 oz can of pineapple chunks, drained (I added some of the juice to the crockpot)
1/4 cup soy sauce (I didni’t use much soy sauce this time…not a big fan of soy)
1 tsp. red pepper flakes (I skipped this this time, but it is good in here)
(I added some organic maple syrup to sweeten it a bit. Honey would work well too, but I was out of honey.)
(I added some mixed frozen veggies.)

Place the chicken into the crockpot. Drain the pineapple, and add the chunks with the soy sauce and the red pepper flakes. (Add veggies and honey/syrup.)

Cook on low for 4-6 hours, or on high for 3-4 (I had mine on high for longer.)  Shred chicken or break into smaller chunks if desired.

Serve over rice, quinoa, or on a bed of fresh spinach.

Homemade Poptarts

cinnamon brown sugar

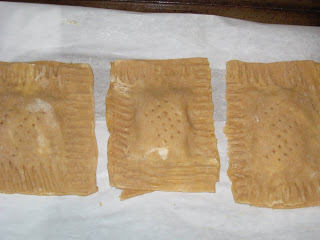
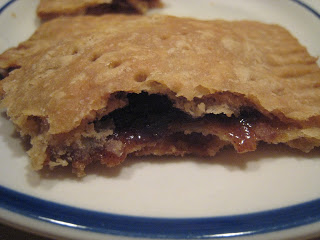
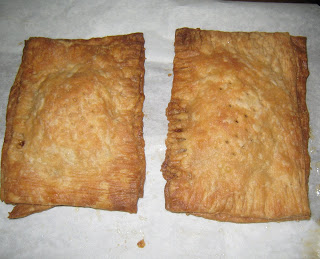
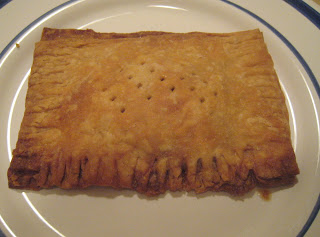
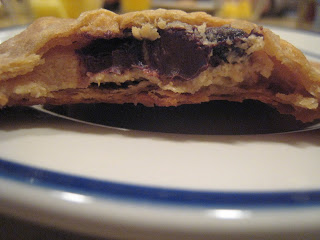
I recently found a recipe for homemade poptarts (my MOPS group posted a link to the recipe…from Smitten Kitchen). I had to give it a try! So I made them for breakfast today. I made the dough last night and assembled and baked them this morning. In hindsight I think it’d be easier to do all the assembly the night before and then just bake them in the morning. There was still a fair amount of work to do this morning and I was quite rushed. They were fun, though. And taste great!! I made a few with a brown sugar cinnamon filling, a couple with peanut butter and chocolate and a couple with cashew butter and chocolate. I’d like to try them with my homemade cherry jam sometime too. We tried the cinnamon sugar today. Mmmm. That was always my favorite flavor poptart. (Side note…I now can’t believe I used to eat them…so bad for you…all chemicals and processed junk). Of course I couldn’t make them totally according to the recipe…I wanted to up the nutrition. I compromised for my first attempt…I didn’t soak the grains, but I did use whole wheat flour (white whole wheat). Next time I’ll experiment with soaking the flour first. I’m so glad I tried these! A fun breakfast to have once in a while. And so many filling possibilities. And it just dawned on me that I’ve been wanting to replace Justin’s Saturday morning toaster strudel with something homemade for a long time…and this is exactly it! So you could call them homemade poptarts or homemade toaster strudels. Justin says they are breakfast pastries 🙂  Either way they are so much better for you than anything you buy in a box. We’ll be trying the peanut butter chocolate ones tomorrow. And I have a couple packs of homemade poptarts in the freezer now for easy breakfasts. I didn’t use any glaze, but you could. I just haven’t figured out a healthy way to do it yet (need to replace powdered sugar somehow).

cashew butter chocolate

Homemade Poptarts (or Toaster Strudels or Breakfast Pastries)

Pastry

2 cups (8 1/2 oz.) all-purpose flour (I used white whole wheat)
1 Tbsp. sugar (I used organic cane sugar)
1 tsp. salt (I used sea salt)
1 cup (2 sticks or 8 oz.) unsalted butter, cut into pats
1 large egg
2 Tbsp. (1 oz.) milk (I used whole milk)
1 additional large egg (to brush on pastry)

Cinnamon Filling (enough for 9 tarts)

1/2 cup (3 3/4 oz.) brown sugar (I used orgainc brown cane sugar)
1 to 1 1/2 tsp. ground cinnamon, to taste
4 tsp. all-purpose flour (I used white whole wheat)

Jam Filling

3/4 cup (8 oz.) jam
1 Tbsp. cornstarch mixed with 1 Tbsp. cold water

Alternate fillings: 9 Tbsp. chocolate chips, 9 Tbsp. Nutella or other chocolate-hazelnut paste or 9 Tbsp. of a delight of your choice, such as salted caramel or a nut paste

To make cinnamon filling: Whisk together the sugar, cinnamon, and flour.

To make jam filling: Mix the jam with the cornstarch/water in a small saucepan. Bring the mixture to a boil, and simmer, stirring, for 2 minutes. Remove from the heat, and set aside to cool. Use to fill the pastry tarts.

Make the dough: Whisk together the flour, sugar, and salt. Work in the butter with your fingers, pastry blender or food processor until pea-sized lumps of butter are still visible, and the mixture holds together when you squeeze it. If you’ve used a food processor, transfer the mixture to a large bowl. Whisk one egg and milk together and stir them into the dough, mixing just until everything is cohesive, kneading briefly on a well-floured counter if necessary.

Divide the dough in half (approximately 8 1/4 oz. each), shape each half into a smooth rectangle, about 3×5 inches. You can roll this out immediately or wrap each half in plastic and refrigerate for up to 2 days.

Assemble the tarts: If the dough has been chilled, remove it from the refrigerator and allow it to soften and become workable, about 15 to 30 minutes. Place one piece on a lightly floured work surface, and roll it into a rectangle about 1/8″ thick, large enough that you can trim it to an even 9″ x 12″. [You can use a 9″ x 13″ pan, laid on top, as guidance.] Repeat with the second piece of dough. Set trimmings aside. Cut each piece of dough into thirds – you’ll form nine 3″ x 4″ rectangles.

Beat the additional egg and brush it over the entire surface of the first dough. This will be the “inside” of the tart; the egg is to help glue the lid on. Place a heaping tablespoon of filling into the center of each rectangle, keeping a bare 1/2-inch perimeter around it. Place a second rectangle of dough atop the first, using your fingertips to press firmly around the pocket of filling, sealing the dough well on all sides. Press the tines of a fork all around the edge of the rectangle. Repeat with remaining tarts.

Gently place the tarts on a lightly greased or parchment-lined baking sheet. Prick the top of each tart multiple times with a fork; you want to make sure steam can escape, or the tarts will become billowy pillows rather than flat toaster pastries. Refrigerate the tarts (they don’t need to be covered) for 30 minutes, while you preheat your oven to 350°F. (You can refrigerate them at this point and bake them later (i.e. the next morning). Or you can freeze them at this point…wrap in plastic wrap, parchment paper or wax paper and place in freezer bag. Thaw in fridge slightly before baking. Follow same baking instructions.)

Bake the tarts: Remove the tarts form the fridge, and bake them for 20 to 25 minutes, until they’re a light golden brown. Cool in pan on rack.

Charming tip from King Arthur: Sprinkle the dough trimmings with cinnamon-sugar; these have nothing to do with your toaster pastries, but it’s a shame to discard them, and they make a wonderful snack. While the tarts are chilling, bake these trimmings for 13 to 15 minutes, till they’re golden brown.

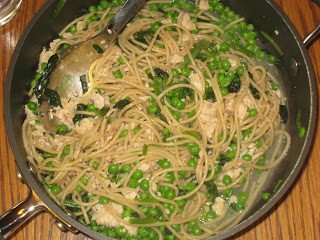
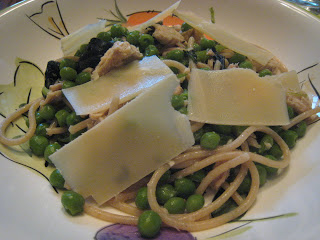
Salmon, Pea and Spinach Pasta

Last night for dinner I made a new pasta recipe. I based it on a recipe from the May 2010 issue of Cooking Light – spring linguine with basil. But then modified it (quite a bit) to use what I had on hand/for our tastes. I knew I wanted to make a pasta with salmon and this looked so simple…and like something I could easily add seafood to. And it was! And very good!! We all liked it. A light, healthy, quick prep meal. I’ll post the original recipe and my mods.

Spring Linguine with Basil
Salmon, Pea and Spinach Pasta

9 oz. uncooked fresh linguine (I used about 8oz. organic whole wheat spaghetti)
1 cup shelled fresh green peas (I used about 1 1/2 cups frozen organic peas)
(I also added some frozen organic chopped spinach)
4 tsp. EVOO
1 Tbsp. unsalted butter
2 Tbsp. fresh lemon juice (I skipped this)
1/2 tsp. salt (I used more than this)
1/4 tsp. pepper (I skipped this)
(I added garlic powder)
(I added 1 small can of salmon, broken up)
1/4 cup thinly sliced fresh basil (I used dried since I don’t have my fresh basil yet)
2 oz. shaved fresh Paremigiano-Reggiano cheese (I used fresh parmesan)
(I added some chopped crispy pecans)

Cook pasta. Add peas (and spinach) to pasta during the last 2 minutes of cooking time. Drain, reserving 1/4 cup pasta liquid.

Heat oil and butter in pan over medium heat 1 min. Remove from heat (I didn’t do this…I let it keep cooking with the pasta in the pan for a few min.); stir in pasta mixture, pasta water, juice, salt and pepper (and garlic powder, dried basil and salmon). Toss well.

Divide into 4 bowls. Top each with 1 Tbsp. basil and 2 Tbsp. cheese (and 1 oz. pecans).